Showing posts with label Candy. Show all posts

Thursday, October 22, 2015

Double Dipped Peanut Butter Balls


Feelings of nostalgia seem to intensify once October arrives and remain until shortly after the Thanksgiving holiday. No longer can I tell you how long it has been since my father has passed, as it simultaneously feels like a life time ago and only yesterday. Had fate not intervened, he would have turned 85 this month. In retrospect he was the first and quite possibly the most favorite, heroic figure in my life. To this day, his character, kindness, unconditional (and mostly unspoken) love, and work ethic remain the standards to which I have often compared the other men who have or have had a place of significance in my life. I have sought to internalize his best qualities as a way of ensuring he remains a presence in my life. As I may have shared before, he was the one who cooked all of the Sunday and holiday dinners. Because he had a bit of a sweet tooth, there would often be dessert. Sometimes cookies, sometimes cake. Sometimes store-bought, sometimes homemade.


Sometimes there was a discernible visual difference between the store-bought and homemade desserts. But there was always another, more signification distinction between the two. Growing up I didn't really understand why I preferred the homemade poppy seed cake (the one with not enough frosting) to the store-bought chocolate cake with chocolate frosting (and I loved chocolate). As I got older I realized there was an intangible quality I tasted in the first bite. Love is felt in many ways, but almost nothing compares to the taste of homemade love. And I have my father to thank for helping me to learn early on that there is a nuance to food that cannot be bought. 


In an effort to try to bring some order to the two large bins filled with recipes, I re-discovered the Peanut Butter Balls handwritten recipe card. One given to me more than thirty years ago and one I probably haven't made in about the same amount of time. There was a time, believe it or not, when candies dipped in chocolate called for the use of paraffin. Yes, paraffin, otherwise known as candle wax. I haven't quite figured out why this particular recipe card caught my attention, but it immediately went into the 'must make, with revisions' pile. And as if you hadn't guessed already, this time they would made without any paraffin.

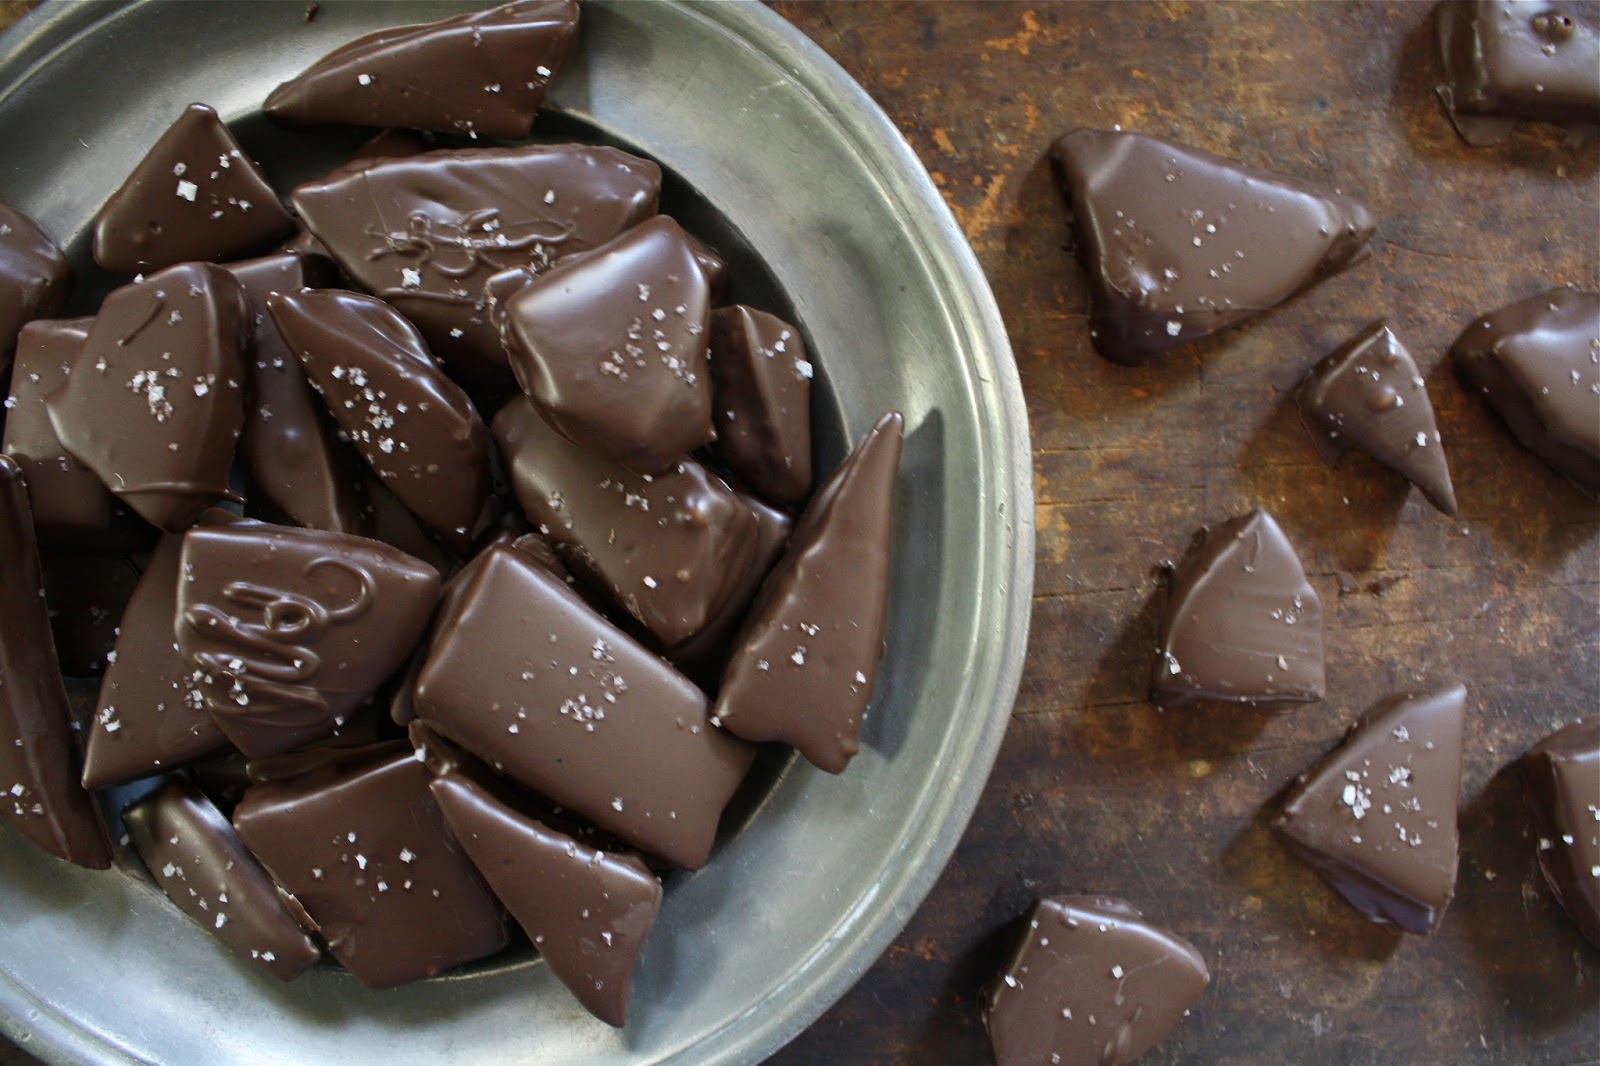
Other than using some of my favorite melting chocolates (the ones from a local chocolatier as well from Ghiradelli), I made only two other ingredient changes. The addition of some sea salt and sprinkles. Who knows, maybe thirty years from now sprinkles will be considered passé. But I hope not!


Maybe thirty years ago stand mixers weren't as common of a kitchen tool as they are these days. But for thick dough confections, like these Double Dipped Peanut Butter Balls, they are lifesavers.


There may have been some ahead of their time home cooks out there using ice cream scoops to get uniform balls of dough, but early on in my 'cooking life' I wasn't one of them. Next to my kitchen aid, I think I couldn't live without them. 


The original recipe did not call for chilling the balls of dough or double dipping them. This version does. Chilling the dough allows the chocolate to set up faster in the first dip, making it easy to do the second dip while the bowl of melted chocolate remains tempered enough. 


Once I made the decision to add sprinkles to these Double Dipped Peanut Butter Balls, I realized it would have been easier if their were four hands instead of two making them. But I managed.


After the second dipping, I like to dip a fork into the remaining melted chocolate and swipe over the dipped chocolates to create what I call that 'candy store' finish. This is optional, but it is the step that enabled me to get the sprinkles to stick.


Once the chocolate sets, remove the Double Dipped Peanut Butter Balls from the parchment paper and place in paper cups.


I brought them to my running group last Saturday. While I was certainly hoping everyone was going to like them, they received higher rave reviews than I anticipated. And they weren't just being nice!


Yes, these are way better than those peanut butter and chocolate store bought confections you find in the candy aisle. I could give you a list of reasons why, but I think I will give you only one. They have that added intangible quality of containing that essential ingredient called 'homemade' love. And really, could it possibly get any better than that? 

Recipe
Double Dipped Peanut Butter Balls (inspired by Barb Wayne's Peanut Butter Ball recipe)
Makes approximately 52-56 one inch sized candies

Ingredients
2 1/2 cups confectionary sugar
3 cups Rice Krispie cereal
16 ounces chunky or extra crunchy peanut butter (recommend JIF)
8 Tablespoons unsalted butter, melted and cooled slightly
1/4 teaspoon fine sea salt
1 1/2 - 1 3/4 pounds of chocolate (milk, dark or mixture of milk and dark)
Optional: An assortment of sprinkles

Directions
1. Line a large baking pan with parchment paper. Set aside.
2. In a standing mixer fitted with a paddle attachment, mix together confectionary sugar, salt, and peanut butter until you can no longer see the confectionary sugar.
3. Add slightly cooled butter and Rice Krispie Cereal. Mix until well blended.
4. Form peanut butter balls using a 1" in diameter ice cream scoop. Alternately use a tablespoon and roll into a ball shape. Place peanut butter balls on prepared baking sheet. Chill peanut butter balls for 15 minutes in the refrigerator.
5. Melt chocolate in either a double boiler or in the microwave.
6. Remove peanut balls from the refrigerator and dip (one at a time) into the melted chocolate using a fork. Note: The chocolate will harden relatively quickly if the balls are chilled.
7. After first dipping, turn peanut butter balls upside down and dip again, this time using your hands.
8. If using sprinkles, sprinkle on lightly before chocolate dries. 
9. Allow peanut butter balls to set completely.
10. Place in small paper cups and serve. Store in a sealed box or container.


Fish in the ponds at the Dallas Arboretum and Botanical Gardens.


Thursday, July 16, 2015

Honeycomb Toffee, Sea Salted and Dark Chocolate Dipped aka Sponge Candy


"After eating chocolate you feel godlike, as though you can conquer enemies, lead armies, entice lovers."(Pastry chef Emily Luchetti) It would seem quite incomprehensible that one could simultaneously be intoxicated and in control of one's emotions and actions. Yet the allegedly well-researched, documented magical powers of chocolate have been known to do just that. Sometimes things are just worth believing. After weeks of eating fresh strawberries, blueberries, blackberries, and cherries, my sweet tooth wanted something more than fruit. The number of options to feed the chocolate craving border on endless, but after thumbing through Nancy Silverton's Pastries from the La Brea Bakery cookbook I came across a recipe that took me on a trip down memory lane. If given the chance, who does not want the chance to relive a happy, memorable moment, especially if it has the added benefit of involving some form of chocolate?

Whether you call it Honeycomb Toffee, Sponge Toffee, Fairy Food Candy, Sea Foam Candy or Cinder Toffee, there is nothing quite like the caramelized sugar, slightly molasses-like, crispy, melt-away taste and texture of this confection. Cover it in a rich dark, semi-sweet, or milk chocolate and it is transformed into nothing short of a heavenly melt-in-your-mouth bite-sized confection. Sprinkle some sea salt on top and you might be inclined to keep it out of reach of anyone under the age of 21.


If you have ever shuffled over to Buffalo, you are well aware Sponge Candy is claimed as one of its' signature foods. And you thought their only food claim to fame are those fiery hot, spicy wings! Considered by some to be a regional candy, it was on a trip to Buffalo where I learned firsthand why so much fuss had been made around the golden, light, airy, crunchy bites, otherwise known as Honeycomb Toffee. In three whirlwind days we managed to attend the wedding of one of my staff members, do a 17 mile marathon training run, take side trips to Niagara Falls and Niagara on the Lake (loved the Canadian side of the falls) and have our first ever tastes of Beef on Weck, Anderson's Frozen Custard, and Chocolate Covered Honeycomb Toffee. Had taking photos of food been in vogue all of those years ago, it would be hard to say whether I would have taken more food or more Niagara falls photos. 


Normally one would not make Honeycomb Toffee on a hot, humid summer day, but the humidity had dropped, providing one of those must-take opportunities to make some. Humidity and honeycomb toffee are not friends.The honeycomb-like texture of the candy is achieved when baking soda is added to a mixture made of granulated sugar, corn syrup and water and cooked until reaching 300 degrees (F), the hard crack stage, on a candy thermometer. Note: When the baking soda is whisked in to the coked sugar mixture, it becomes foamy and dramatically increases in volume.


Working quickly after the baking soda is incorporated into the sugar mixture, pour onto a Silpat or baking sheet lined with parchment paper. (Note: The silicone non-stick liner not only aids in the honeycomb setting up, but makes removal very easy.) If the honeycomb remains slightly puffed up and has a shiny surface after its' poured and set for twenty minutes, you more than likely have achieved success.


It twenty (20) minutes, the Honeycomb is ready to be broken up into pieces or cut with a serrated knife. 


Once the Honeycomb has cooled and broken into pieces it needs to be immediately placed in a tightly sealed container or dipped in chocolate to prevent the candy from absorbing any moisture in the air and turning into a softened, sticky mess. In other words, once you start making the Honeycomb you need to finish it. But before dipping the pieces of Honeycomb into the melted chocolate, taste it. If for some reason the honeycomb is too dark, dense or hard it is best to make another batch. 

Taking this chocolatey, airy-crunchy, melt in your mouth confection to another level of additive, deliciousness was lightly sprinkling with a flaky, French sea salt. 

Deciding whether to dip the Honeycomb Toffee in dark, semi-sweet, or milk chocolate has everything to do with personal preference. At the moment I am on a dark chocolate kick. 

The odd-sized shapes to the Honeycomb Toffee may be a bit deceiving, especially for those who believe any chocolates and/or candies worth the calories must be perfectly shaped. Although randomly shaped pieces of Honeycomb Toffee seem to have their own kind of artisanal quality to them.


The Honeycomb Toffee, Sea Salted and Dark Chocolate Dipped could last for weeks stored in an airtight container, but probably won't, particularly if you make the location of the container known to anyone having a sweet tooth in your household. Admit it, you have hiding places and not just for those bags from your favorite stores. 

Recipe
Honeycomb Toffee, Sea Salted and Dark Chocolate Dipped aka Sponge Candy (inspired by a Nancy Silverton recipe in her cookbook Pastries from the La Brea Bakery)

Ingredients
1/4 cup water
1 1/2 cups granulated sugar
1/4 cup light corn syrup
1 Tablespoon baking soda, sifted
1 pound dark, semi-sweet or milk chocolate, melted
Flaky French sea salt

Directions
1. Line a baking sheet with a silpat or parchment paper. Set aside.
2. Measure and sift baking soda. Set aside.
3. In a heavy-duty, medium sized saucepan, stir together the water, sugar and corn syrup until combined. 
4. Over high heat bring the mixture to a bowl without stirring. Continue to cook until it reaches 300 degrees (F) on a candy thermometer. Immediately remove from heat. Note: The mixture will have a very pale straw-like color.
5. Working quickly, add the baking soda and whisk for a few seconds until the baking soda is incorporated. The mixture will bubble up and become foamy.
6. Immediately pour over prepared baking pan allowing it spread out on its' own. Do not spread with any utensil.
7. Allow to hard and cool completely (approximately 20 minutes).
8. Remove honeycomb from silpat and transfer to a cutting board. Using the tip of a sharp knife break the honeycomb into uneven chunks.
9. Dip pieces of the honeycomb into the melted chocolate and set on a parchment paper lined cutting board. Sprinkle lightly with sea salt while chocolate is still 'wet'. Allow chocolate to completely harden before transferring honeycomb to an airtight container in a cool place or in the refrigerator.
Note: If not dipping the honeycomb pieces in chocolate, transfer to an airtight container. Undipped toffee will soften in the refrigerator.


The sun setting in Ludington, Michigan.


The 'Badger' ferry leaving Ludington (MI) and returning to Manitowoc (WI).

Wednesday, March 4, 2015

Sea Salted Dark Chocolate and Sunflower Seed Bars


"To think too long about doing a thing often becomes its' undoing." At one time or another, most of us are guilty of putting off a decision choosing instead to stay in that 'thinking about it' place. The longer we stay in that 'thinking' place, the harder it can be to get to the 'doing' place. Over the past several years I have had more than my share of false return to running starts. Each time kicking myself for ever needing to have to 'restart' something that had given me a great deal of pleasure (and a little bit of pain). Not wanting to keep looking in the mirror seeing someone who was 'all thinking, all talk and no action', I decided it was time to focus less on the obstacles and excuses and get my aging, much slower body back to running. This time it would be with the understanding this was NOT going to be another 'restart', but rather it was to be a 'return'. You might not think there is much difference between those two concepts, but there is. One allows for an 'out' while the other signifies a 'commitment'. Had I not made this 'commitment' to myself, I am pretty sure I wouldn't have finished a 'brutal' training run this past weekend (three miles felt like 26.2 miles uphill), let alone survive the run recovery. Whining aside, I had forgotten how good exhaustion and exhilaration feels (as crazy as that sounds). This past weekend's run brought it all back and then some. And it didn't seem to matter that I ran so much slower than I used to.


My post running cravings used to be gummi worms, gummi fish, gummi bears, anything gummi-like. Seems they still are. Following the Saturday group run I had some errands to do. First stop was picking up a few things from the grocery store. And yes, gummi worms were on the list. While standing in line I saw a package of sea salted chocolate covered sunflower seeds. For a moment I thought maybe chocolate and seeds would be a more healthy reward (haven't we all been lulled into believing how some chocolates may actually be good for you?). And then I looked at the price and had a temporary, unusual moment of sticker shock along with a very audible 'yikes'. The chocolates didn't make it into my bag, however, I left thinking 'why didn't I ever think of making the ultimate nutty, healthier version of the Nestle Crunch Bar before?'.


For awhile now I have been melting my chocolate in the microwave versus over simmering water on the stove. However, I have not been tempering the chocolate to ensure it retains that finished glossy shine one seeks to have when the making of or dipping chocolates. David Lebovitz has explained how to temper chocolate using a thermometer while the The Kitchn has described how a home cook can achieve perfectly tempered chocolate without one. You won't go wrong either way, but I went with process not requiring a thermometer. This also meant returning back to melting the chocolate over simmering water.

It was luck on the first try as the one pound of dark chocolate to one cup of roasted sunflower seeds turned out to be the perfect ratio in creating these bars. An additional two tablespoons of the sunflower seeds along with some sea salt were sprinkled over the top were the finishing touch. There is just something about the combination of chocolate, particularly dark or semi-sweet chocolate, and sea salt that works to enhance the overall flavor (of the chocolate).

Before the chocolate and sunflower seed mixture was fully set in the pan, I cut it into bars. To speed up the 'setting up' process I put the pan of pre-cut bars into the refrigerator for about ten minutes. The chilling process made it rather easy to break up the chocolate into bars. Note: If you want a more random look, you could easily forego the pre-cutting process and break it all up after it has chilled.

Seriously these Sea Salted Dark Chocolate and Sunflower Seed Bars were incredibly delicious and 's-crunch-ous'! Who knew that simply standing in line at the grocery store would lead to their creation! I suppose I could and I will rationalize this 'new' discovery was made possible as a result of my return to running. Isn't funny how when you return to the things that made you happy, made you feel good, gave you that skip in your step, and even at times caused you a little bit of angst, you begin to see the world and everything in it just a little bit differently. Think the word for this collection of feelings is bliss.

Recipe
Sea Salted Dark Chocolate and Sunflower Seed Bars

Ingredients
1 pound dark or semi-sweet chocolate, chopped and divided
1 cup dry roasted sunflower seeds, plus an additional 2 Tablespoons for sprinkling on top
Sea salt for finishing

Directions
1. Line a 10"x14" baking pan with parchment paper. Set aside.
2. Melt 13 ounces of the chocolate over simmering water.
3. Stir in remaining 3 ounces of the chocolate until mixture is smooth.
4. Gently stir in the dry roasted sunflower seeds.
5. Pour mixture into prepared pan. Smooth top with an offset spatula. Sprinkle lightly with sea salt and two tablespoons of sunflower seeds.
6. Allow the chocolate to set for approximately 8-10 minutes or until semi-firm but not completely hardened. Using a long, thin knife, cut into bars or squares. Note: Number of bars or squares will depend on size. My yield was 24 bars. 
7. Chill entire pan of chocolate in the refrigerator for 10 minutes. 
8. Remove pan from the refrigerate and carefully break into bars. Arrange on platter or package in cellophane bags.


Trying to find nature's beauty on another sunny winter day at the Morton Arboretum.

Sunday, January 25, 2015

Homemade Fluffy Vanilla Marshmallows


The winter landscape can be a little harsh here in the midwest. For one of my photography class assignments we were supposed to take a photo of something representing a randomly picked 'Zen' word. I picked 'soft'. Call it a temporary lack of creative imagination but I couldn't find anything 'soft' out in nature at this time of the year. Beyond having my fill of taking snow photos, my ability to capture the 'white' of the snow seems to have been adversely affected by my inability to consistently figure out how to make the necessary adjustments to my camera settings (if only we could just shoot in auto and the camera would make all of those decisions for me) to take a 'good' crisp, white photo (or at least one that wouldn't be subject to too much constructive feedback during class). I thought the photo of a 'soft', fluffy food would give me a better chance of 'nailing' the assignment (a far better outcome than being nailed to the cross). And rather than take a photo needing 'a thousand words' to explain 'a single word', I decided I should go with taking one barely needing an explanation. For me nothing more obviously represents 'soft' than Fluffy Vanilla Marshmallows (homemade, of course).


'There are no rules for good photographs, there are only good photographs.' (Ansel Adams)  Bolding borrowing on this thinking, it would be safe to say there are no rules for making good marshmallows, there are only good marshmallows. This discovery came not as a result of making, but rather from looking at dozens of marshmallow recipes. Admittedly, the idea of making marshmallows from scratch can initially seem a little intimidating. However, once you have had the taste of a (really) good homemade, fluffy, springy marshmallow you will be forever spoiled and finding yourself becoming a fearless maker of marshmallows. Your mug of hot chocolate topped with homemade marshmallows will never taste better, your s'mores made with fluffy, springy marshmallows will become legendary, and, your rice krispie treats using melted homemade marshmallows will be worth their weight in gold. Are you ready to put your marshmallow making cape on yet?


Can making marshmallows be a little messy? Judging from the amount of confectionary sugar swirling in and covering almost everything in the kitchen in sugar dust, the answer is yes, but with a partial caveat. With my focus on taking 'the' photo, I wasn't paying attention to where the sifter was. And as a result I inadvertently knocked the sifter filled with confectionary sugar and corn starch onto the floor. Fortunately while actually making the marshmallows I didn't end up with marshmallow sticking all over my hands or in my hair or on every counter in close proximity to the mixer. Had I obsessed about getting every last bit of marshmallow out of the mixing bowl and into the pan, more than likely I would have made a 'sticky' mess. So don't obsess about trying to get every last bit of the marshmallow mixture out of the bowl. Unless of course you feel like making a mess.


The use of a standing mixer is definitely what I would call an added advantage when making these Homemade Fluffy Vanilla Marshmallows. In addition to being able to walk away from the mixer beating on high for 8-12 minutes, the whisk attachment on the standing mixer helps to create the smooth, thick, tripled in volume mixture needed before the whipped egg whites and vanilla are added.

This recipe calls for the use of 3 1/2 packages of (1/4 ounce) unflavored gelatin or 7/8 ounce of unflavored gelatin. If you don't have a digital scale, this equates to 2 Tablespoons plus 2 1/2 teaspoons (thank you Smitten Kitchen for measuring this out!). In addition to replacing the salt with sea salt in Gourmet's recipe, I increased the amount of light corn syrup from 1/2 cup to 2/3 cup.


As I was pouring the marshmallow mixture into the prepared 9"x13"x2" pan, I wished I had prepared a 9"x9"x2" pan instead as I wanted the finished marshmallows to be cut into the 'thickest' squares possible. But in the end it all worked out because I decided to cut the marshmallows into larger squares. The 1" thick squares ended up being a more perfect size for s'mores.  Your choice of pan will depend on whether you want really thick marshmallows or you want to cut your finished marshmallows into shapes (other than squares). If for Valentine's Day you want to make marshmallow hearts or you want to make bunnies for Easter, definitely use a 9"x13"x2" pan. 


I let the marshmallows set up overnight at room temperature (uncovered). If I were making these marshmallows in the heat of the summer I have them set up in the refrigerator (again uncovered) for at least 3 hours before cutting them. If you have never made marshmallows before, you can find more tips on making and cutting them here.

Before turning out the pan of marshmallows onto the cutting board, lightly dust it with the confectionary/cornstarch. Many marshmallow recipes call for dusting the finished marshmallows in confectionary sugar only. Note: The use of confectionary sugar only can dissolve and make the marshmallows a bit damp (thank you David Lebovitz for sharing this tip!). But whatever you do, do not use cornstarch-only!


Once cut, the marshmallows are tossed in the sifted confectionary sugar/cornstarch mixture ensuring all sides are coated. In addition to adding another layer of flavor to marshmallows, it keeps them from sticking to one another.


I ended up with 24 large marshmallows, however, the number of marshmallows you end up with will depend on the size you decide to cut them. For s'mores these large marshmallows were the perfect size. For hot cocoa, the larger marshmallow will be cut into four smaller squares.


These were the springiest, fluffiest marshmallows I had ever made. As much as I thought the addition of egg whites (as recommended in recipes from David Lebovitz and in one from Gourmet) was just one more, possibly unnecessary step, they were most likely responsible for the creating these incredibly light, fluffy and just the right amount of 'soft' marshmallows. 

Whether you use these marshmallows to make s'mores, to add them to your hot cocoa, to use in another recipe, or to snack on, they make a great gift when packaged in cellophone bags and tied with a beautiful ribbon or bakery twine. Happy marshmallow making.

Recipe
Homemade Fluffy Vanilla Marshmallows (Slightly adapted from Gourmet, December 1988)

Ingredients
About 1 cup confectionary sugar (or a mixture of cornstarch and confectionary sugar)
3 1/2 envelopes (2 Tablespoons plus 2 1/2 teaspoons OR 7/8 ounces) unflavored Knox gelatin
1 cup cold water, divided
2 cups granulated sugar
2/3 cup light corn syrup
1/4 teaspoon sea or kosher salt
2 large egg whites (beaten until they just hold stiff peaks)
1 Tablespoon vanilla or vanilla bean paste

Directions
1. Lightly spray bottom and sides of a 13"x 9"x 2" rectangular metal baking pan. Dust bottom and sides with confectionary sugar.
2. In a bowl of standing mixer, sprinkle gelatin over 1/2 cup cold water. Let stand to soften.
3. In a heavy 3 quart saucepan, combine granulated sugar, corn syrup, salt, and 1/2 cup cold water. Over low heat stir until sugar is dissolved.
4. Increase heat to moderate and boil mixture, without stirring, until a candy thermometer registers 240 degrees (F), approximately 10-12 minutes.
5. Remove pan from heat and pour sugar mixture over gelatin mixture, beating mixture on high speed until white, thick and nearly tripled in volume, approximately 10-12 minutes.
6. Beat in egg whites and vanilla.
7. Pour mixture into prepared pan. Sift 1/4 cup confectionary sugar evenly over the top.
8. Allow the marshmallows to set overnight (uncovered). In very hot weather, chill marshmallows (uncovered) in the refrigerator.
9. Run a thin knife around edges of pan. Invert pan onto large cutting board. Trim edges of marshmallows and cut into 1 inch squares. Toss cut marshmallows in additional confectionary sugar to ensure all sides are coated. Shake off excess.
10. Store marshmallows in an airtight container at cool room temperature for up to 1 week.

Winter 'snow' photo taken in Telluride, Colorado.