Showing posts with label Cookies. Show all posts

Thursday, December 22, 2016

White Chocolate Dipped Cranberry and Pistachio Biscotti


"It's not how much we give, but how much love we put into giving." (Mother Teresa) I have been known to agonize over choosing the 'right' gifts for friends and family. Getting it right sometimes means getting them what they really want. Unless, as is sometimes the case, they don't really know. Over the years I have learned it's not really the thought that counts, but rather it's the thoughtfulness behind the gift that matters most. To truly be thoughtful requires one to listen, observe, and/or pay close attention. For years I used to give my brother-in-law the white the chocolate Santa or white chocolate Easter Rabbit because I thought he loved white chocolate. How or where I came to think this I honestly don't remember. But then one year, I learned what I had believed to be true wasn't. In a single moment my thoughtfulness turned into thoughtlessness. Recently a group of my friends were reminiscing about the gifts they had received in recent years and as far back as their childhoods. In almost every case, the gifts most cherished weren't necessarily the most expensive ones. In a few cases had very little monetary value. What made them 'heartwarming' memorable was the fact they were the things they had wished for, had talked about, or had seen, but for various reasons didn't buy for themselves. Someone in their lives was paying very close attention.


If there are people in your life who love to drink coffee and have a bit of a sweet tooth, these White Chocolate Dipped Cranberry and Pistachio Biscotti may be a perfect aka most thoughtful gift. And beyond being incredibly delicious, they just happen to be relatively easy and quick to make.


Today's modern version of biscotti are generally associated with the Tuscan region of Italy. Although the biscotti's origin can be traced back to Roman times. There are essentially two types of biscotti: ones containing butter and often dipped in coffee and ones made without butter for dipping into wine (i.e., vin santo). Biscotti or 'biscotto' derives from the medieval Latin word 'biscoctus': 'bis' (meaning twice) and 'coctum' (meaning baked). While there is a fair amount of variability in their ingredients (nuts, spices, dried fruit, chocolate), they must be twice-baked to be called biscotti. For more history on biscotti, click here.

Bring your unsalted butter and eggs to room temperature before making the biscotti dough. Here in the midwest at this time of the year, I generally take butter and eggs out of the refrigerator the night before.


Use either a knife or food processor to coarsely chop the pistachios.


The dried cranberries and chopped pistachios are stirred in the biscotti dough by hand.


The original recipe called for shaping the dough into a 13 inch long by 3 inch wide log and I complied. By making some slight adjustments to the length and width of the shaped dough (a tad longer, a tad thinner) the yield of biscotti will increase. More biscotti is better than less biscotti.

To give the baked biscotti a beautiful golden finish, the dough was brushed with an egg white wash before being placed in the oven.


In a preheated 350 degree (F) oven, the first baking of the biscotti is approximately 40 minutes (or until it has a beautiful golden finish).


Before cutting the biscotti for the second baking, it needs to rests for 20 to 30 minutes. Although most recipes call for cutting the biscotti on a slight diagonal using a serrated knife to cut the biscotti, I found using a really sharp knife created cleaner cuts and didn't crumble the ends of the slices.


The cut slices are returned to the baking sheet and baked for 15-20 minutes (or until they are crisp and golden). My baking time was closer to 20 minutes. Midway through the baking process, flip the biscotti to ensure they have their signature crispy texture.


After the biscotti slices have completely cooled, dip in the melted white chocolate and sprinkle with white sanding sugar. Personally I like the elegant white on white finished look of these biscotti, but if you want a more festive look sprinkle with red and/or green sanding sugar.


Allow the chocolate to set before serving, plating, and/or packaging. 


The flavor of the lemon zest is subtle but an absolutely necessary ingredient as it perfectly compliments the dried cranberries, pistachios, and white chocolate. These White Chocolate Dipped Cranberry and Pistachio Biscotti are crunchy but not 'hard' due to the use of butter in the dough. Dipping them in a cup of hot coffee is optional. So I encourage you to first take a bite to savor the biscotti's lusciousness before deciding whether or not to dunk in your favorite cup of coffee.

Although these White Chocolate Dipped Cranberry and Pistachio Biscotti will retain their freshness for a couple of weeks (if stored well), I seriously doubt they will. More than likely they will be devoured long before their freshness 'expiration' date. Of all of the baked goods you make as gifts this holiday season or serve to friends/family, these biscotti may be the most memorable.

Recipe
White Chocolate Dipped Cranberry and Pistachio Biscotti (slight adaption to Giada De Laurentiis's Holiday Biscotti recipe)

Ingredients
2 cups all-purpose flour
1 1/2 teaspoons baking powder
3/4 cup granulated sugar
1/2 cup (1 stick) unsalted butter, room temperature
1 teaspoon grated lemon zest
1/4 teaspoon kosher salt
2 large eggs, room temperature
3/4 cup pistachios, coarsely chopped
2/3 cup dried cranberries (or dried cherries)
1 egg white, lightly beaten
12 ounces good quality white chocolate
White sanding sugar

Directions
1. Preheat oven to 350 degrees (F). Line a baking sheet with parchment paper and set aside.
2. In a medium sized bowl, combine flour and baking powder. Whisk to blend.
3. In a medium-large bowl, beat butter, sugar, lemon zest, and salt until light and fluffy (approximately 3-4 minutes) in a standing mixer fitted with a paddle attachment or with a handheld mixer.
4. Beat in eggs, one at a time.
5. Add the flour mixture, beating just until blended.
6. Stir in the pistachios and cranberries.
7. Form the dough into a 13 inch long-3 inches wide log on the prepared baking sheet. Note: Consider shaping the dough into a 15 inch long-2 1/2 inch wide log to increase the yield on the number of biscotti. 
8. Brush the dough with the lightly beaten egg white.
9. Bake until lightly golden, approximately 40 minutes. Remove from oven and allow to cool for 20-30 minutes.
10. Using a sharp knife, cut the log on the diagonal into 1/2 inch to 3/4 inch thick slices. 
11. Arrange the biscotti, cut side up on the baking sheet.
12. Bake the biscotti for approximately 20 minutes or until they biscotti are crisp and pale golden. Note: Turn the biscotti over at the midway baking point.
13. Transfer the biscotti to a cooling rack. Allow to cool completely.
14. Melt chocolate in a bowl set over a saucepan of simmering water.
15. Dip top half of the biscotti into the melted chocolate.
16. Sprinkle with sanding sugar before chocolate sets.
17. Allow chocolate to set before serving. 
18. Store biscotti in a tightly sealed container and/or wrap in cellophane bags.

Notes: (1) I dipped half of the biscotti in the melted white chocolate, but you can dip the entire top/flat side of the biscotti for a different look. (2) During the second bake, I placed the biscotti directly on the baking sheet (no parchment paper) to get an even golden crisp. (2) Cooling time between the first and second bakes is recommended to be 20 to 30 minutes. Would recommend cutting closer to 20 than to 30 minutes to get the cleanest cuts.

Monday, November 28, 2016

Swedish Butter Cookies


"The first fall of snow is not only an event, but it is a magical event. You go to bed in one kind of world and wake up to find yourself in another quite different, and if this is not enchantment, 'where is it to be found?' J.B.Priestley Wreaths are on the house windows, cedar roping is draped around the front door, urns are filled with greens, Christmas stockings hung by the fireplace, and holiday pillows scattered in rooms throughout the house. The extent of my holiday decorating efforts this past weekend. The trees, lights, ornaments, chalkware Santa collection, indoor wreaths, and goodness knows how many other holiday items are still up in the attic waiting. Waiting for me to get in the decorating spirit. Not yet sure when that will happen. Quite possibly I am waiting for the first snowfall. While I may not yet be inspired to get the house dressed in all of its' Christmas finery, I have had an overwhelming urge to begin making an assortment of cookies, chocolate covered caramels, marshmallows, chocolate covered coconut balls, toffee, chocolate bark, orangettes, and of course, candied walnuts and pecans. There is only one problem with all of this unbridled enthusiasm. I need to reign my baking desires in as its' still too early and too dangerous (at least in my world) to begin putting the boxes of homemade confections together.


Sometime next week I will put together a recipe recap of some of my favorite cookies and candies while interspersing my blog posts with a couple of new holiday cookie recipes. Like this one. On Thanksgiving, my sister had made these Swedish Butter Cookies (Vaniljkakor), only she called them her version of a Kolachke. I suppose it's because these Swedish Butter Cookies closely resembled a Kolachke. Like the apricot and/or poppy seed filled ones my Polish father lovingly made every Christmas. The Kolachke is usually made with a cream cheese or yeast rolled out dough and filled with either a jam/preserve or cream cheese filling. These cookies are made with butter. While I am calling these bites of deliciousness Swedish Butter Cookies (Vaniljkakor) they are actually missing an ingredient found in the genuine, bona fide, official ones. My apologies to those of you who treasure your grandmother's Swedish Butter Cookie recipe, the family heirloom passed down through the generations, and are a little concerned this derivation lacks some authenticity due to the missing egg yolk. But whether I named these cookies Swedish Butter Cookies or Kolachkes I would be a little bit right and little bit wrong, invariably upsetting someone. Although less wrong on one of them. Seriously though, I am not convinced anyone would notice the missing egg yolk. Heck, if their centers weren't filled with jam, they might easily pass as Scottish or Irish Shortbread cookies.


We all need these cookies in our lives.

The cookie batter has only five ingredients: unsalted butter, confectionary sugar, vanilla, kosher salt and sifted all-purpose flour. Having room temperature butter is key when assembling the batter.

While I usually prefer to make a cookie dough in my standing mixer (with paddle attachment), the dense cookie batter came together perfectly using a hand held mixer.

I used a 1 1/4" ice cream scoop to form the dough balls, although once scooped I didn't roll them into balls. If I had, the finished edges of my cookies would have been smoother. Personally I wanted a more 'rustic, ragged edge, homemade' versus 'bakery finish' look to my cookies. I used a glass to flatten them to approximately 1/3" thickness and a shot glass (instead of my thumb or a spoon) to make the indentations to hold the preserves.


I used apricot and raspberry jams for these cookies. But feel free to use any of your favorite preserve flavors. The Bonne Maman preserves are my store-bought go-tos. Crane's Orchard's preserves are my new favorite small batch go-tos. The well of each cookie will hold about 1 to 1 1/2 teaspoons of preserves.

In a preheated 325 degree (F) oven, the cookies bake for 18-22 minutes or until set and very lightly brown on the bottom.


The Swedish Butter Cookies are sprinkled with confectionary sugar once they have cooled to room temperature. If sprinkled while still warm, the sugar will melt.

The melt in mouth buttery richness of these crisp, vanilla and preserve flavored cookies is what makes them addictively delicious. They are destined to be your new favorite cookie! How good are these cookies? Well if cookie maven Dorie Greenspan, cooking goddess Ina Garten, or pastry chef extraordinaire Mindy Segal read my blog, I would secretly be wishing they would invite me to bake with them someday after they make and taste these cookies. They are that kind of good.

Of all of the cookies I make for the holidays, these by far are one of the easiest. Additionally, I would rank them really high on the best tasting cookie list. If you are looking for one of those 'gets rave reviews' cookies, make a batch of these Swedish Butter Cookies. Like now. Then make another batch or two when you are putting your cookie exchange or holiday cookie platter/packages together. You need these Christmukkah cookies in your life sooner rather than later. Just like I need a little snow, sooner rather than later, to get me started on decorating the house for the holidays.

Recipe
Swedish Butter Cookies 
Makes about 18 cookies

Ingredients
1 cup unsalted butter, room temperature
1/2 cup confectionary sugar
2 to 2 1/2 teaspoons vanilla
2 cups all-purpose flour, sifted
1/4 teaspoon kosher salt
Approximately 1/2 cup of Apricot, Cherry, Mixed Berry, Peach, and/or Raspberry Preserves, divided
Additional sifted confectionary sugar for dusting

Directions
1. Preheat oven to 325 degrees (F). Line two baking sheets with parchment paper and set aside.
2. In a standing mixer fitted with a paddle attachment or with a hand mixer, beat butter, confectionary sugar and vanilla at medium speed until light and fluffy. 
3. Beat in flour and salt on low speed. Mix until blended.
4. Using an ice cream scoop, create generous 1" balls of dough. Flatten to about 1/3" thick. Using the bottom of a flat bottomed shot glass, press dough down in center to make a well. Note: If you want a more finished edge to your cookies, roll the balls of dough before pressing down with the glass.
5. Fill each well with 1 to 1 1/2 teaspoons of preserves.
6. Bake 18-22 minutes until set, but not browned. Remove cookies from pan and transfer to a cooling rack. Allow cookies to cool. Note: Rotate cookie sheet halfway through baking.
7. When cool, sift with confectionary sugar. Serve immediately.
8. Store in a tightly covered container. Note: May need to re-sprinkle with confectionary sugar to refresh if covered for more than 24 hours.


Barager Pines, a Christmas Tree Farm in Fennville, Michigan (November 2016)


Monday, November 21, 2016

Oatmeal Raisin Cookies


"Some of the most beautiful places in the world, your true soulmate, or obvious answers are staring you right in the face, and you don't even notice them." On a gorgeous unseasonably warm day in November, a friend and I went hiking in Starved Rock State Park. A first for me, a second return trip for her. With no knowledge of the terrain or trail conditions, we embarked on an ambitious 5 mile "catch your breath, break a sweat, took only one wrong turn" hike. Not sure if we felt more accomplished or ravenous when we finished. How or why it took me so long to discover the incredible canyons, bluffs, rock formations, waterfalls, views of the Illinois River, and multi-layered landscapes of a place only the eight-four miles away from my home is the proverbial '$64,000 question'. If I hadn't spent all but about three years of my semi-long life in Illinois, maybe I could come up with a credible answer. If I was someone who didn't drive hundreds of miles to hike through parks in surrounding states, maybe I would be able to put forth a plausible reason why I overlooked the one located in my own backyard. If I didn't own two pairs of hiking shoes, a set of hiking poles, and more outdoor running/hiking gear currently in inventory in any number of athletic stores, I could hide behind having a lack of gear. Well, the simplest answer is I wasn't able to see what was almost right in front of me. With my 'virtual' blinders now off, I am already planning a return trip as well as an overnight stay in one of the rustic cabins. I need to make up for all of the years of lost opportunities of embracing all of the park's wonders. Although I could do without another getting lost experience.


Which brings me to talking about this "on a scale of 1 to 10, it's a 38" Oatmeal Raisin Cookie. With my nephew returning home for an extended Thanksgiving visit, I texted him to ask if there was a cookie he wanted me to make. I thought or was rather pretty certain he would request 
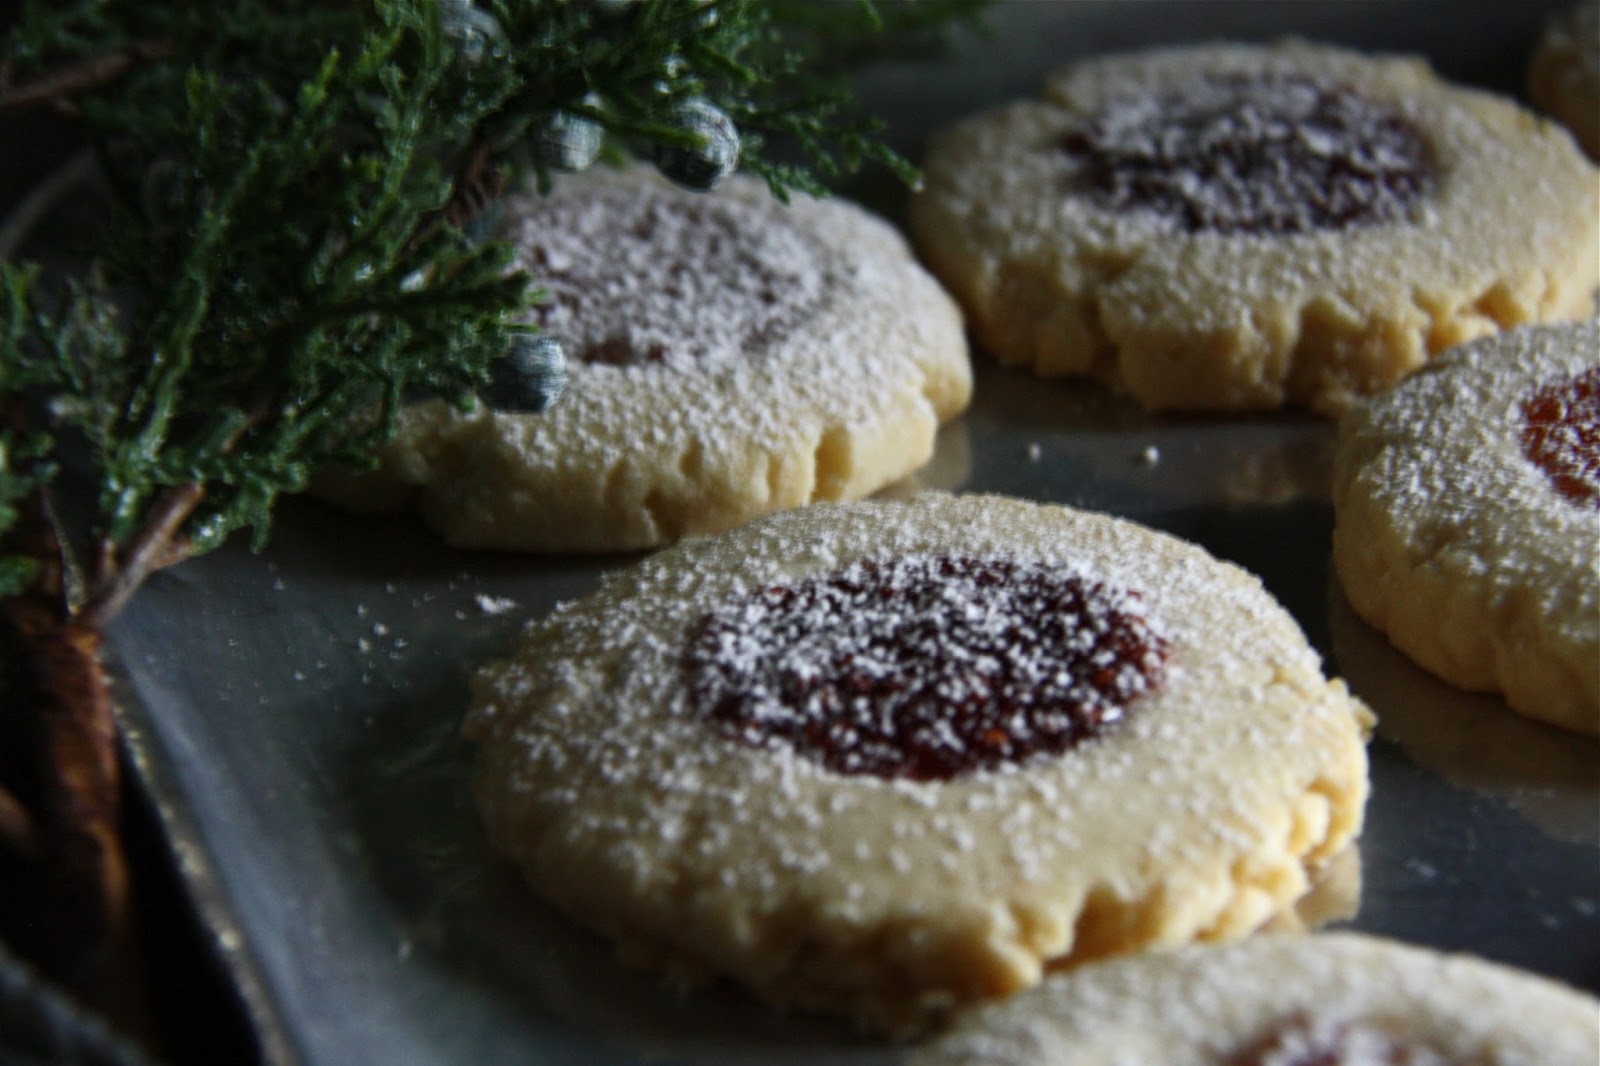
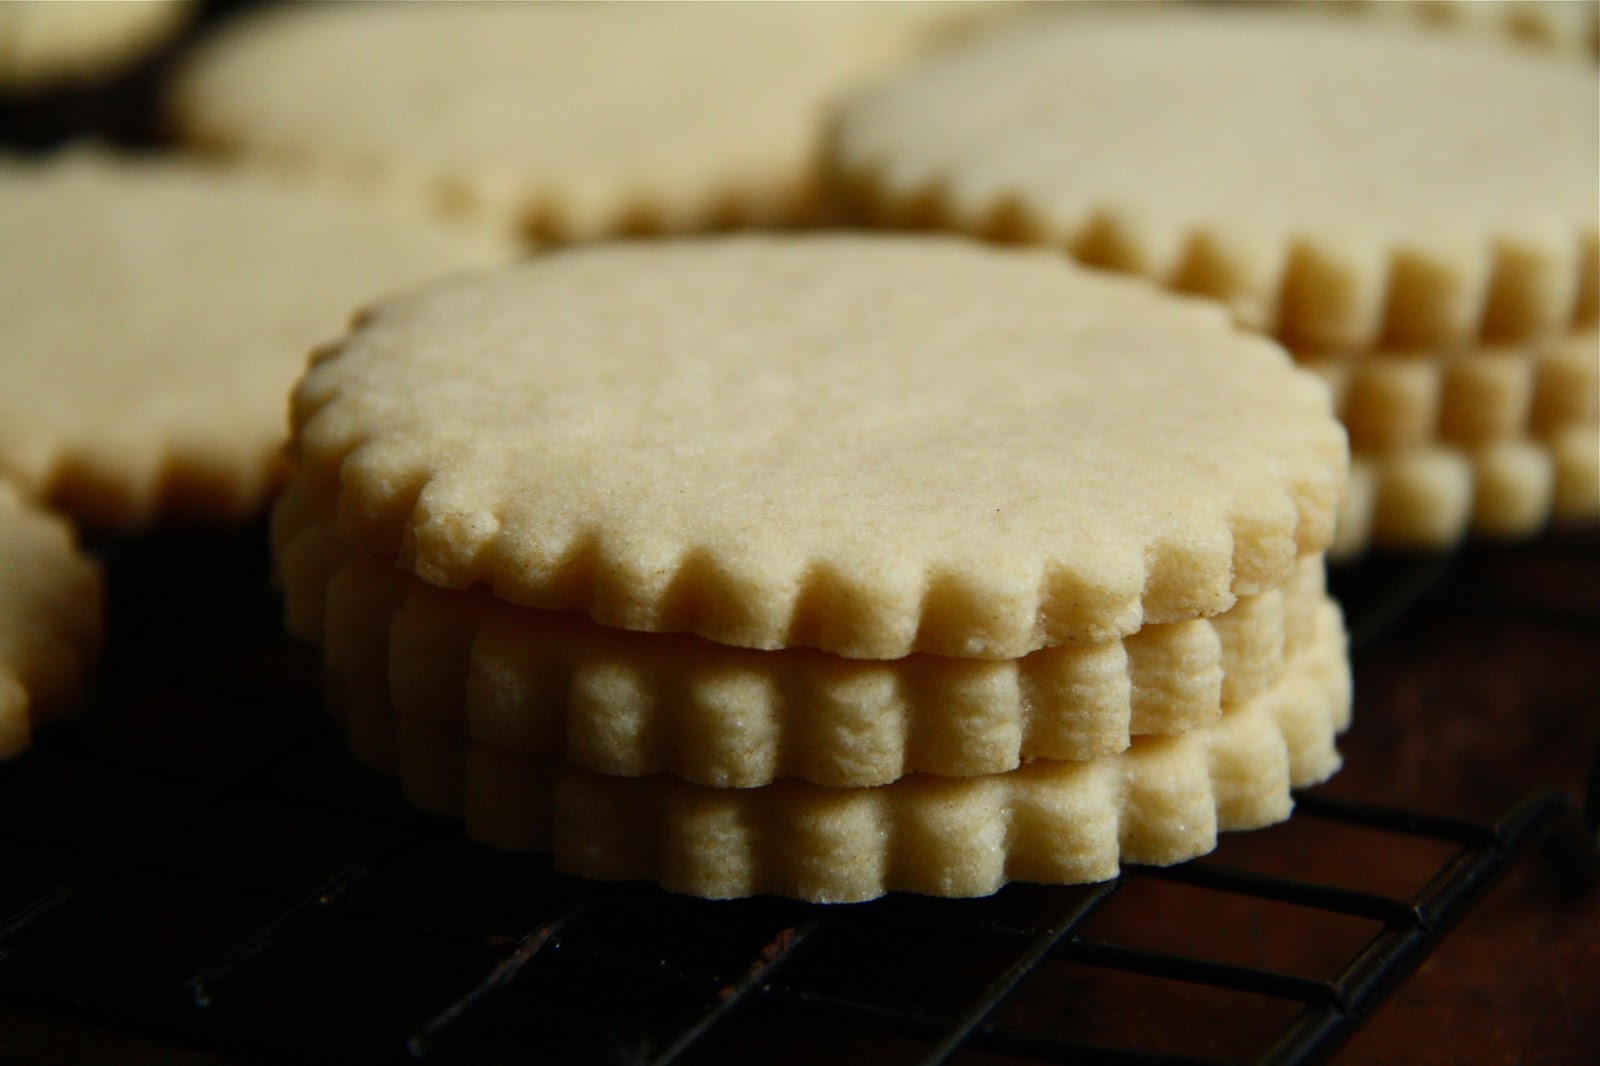
Irish Shortbread. What he texted back was 'oatmeal raisin'. My first thought was 'yikes, I don't think I have a really great oatmeal raisin cookie recipe'. Seriously. With his plane set to land twelve hours after the text exchange, I didn't have time to go on a down the rabbit hole Oatmeal Cookie recipe hunt. But I did have one for a killer Oatmeal Currant Cookie. Which meant the over the top Oatmeal Raisin Cookie recipe was almost staring me right in the face. Cookie crisis and failure to live up to the best aunt in the universe reputation averted!


All I needed to do was to gather up the ingredients and make a few minor tweaks to a cookie recipe where, fortunately the dough didn't need to chill for several hours or overnight. It's also one of those recipes where all of the ingredients are almost always in your refrigerator and cabinets. 


A simple cookie needs simple ingredients. Save the fancy raisins and imported steel cut oats for something else. These Oatmeal Raisin cookies want, need, must, have to be made only with Thompson Seedless Raisins and Quaker Old-Fashioned Oats.

If you are seeking Oatmeal Raisin Cookie perfection, use pastry flour. This high starch, low protein flour creates a fluffy, meltingly tender, crumbly texture in cookies. Most bakeries use either cake flour or pastry flour which may explain in part why bakery cookies usually are nothing short of beautiful deliciousness. With whole wheat pastry flour now readily available, we all can now create our own bakery perfect cookie confections! 


After sifting the dry ingredients (pastry flour, baking soda, cinnamon and kosher salt), the butter and sugars are beat until light and fluffy. This usually takes at least 5 minutes. Don't be tempted to shorten the sugars-butter beating time. Eggs are added one at a time. After adding the vanilla, the sifted dry ingredients are added in eight additions until just incorporated. With the mixer on low, the oats and raisins are added. Be careful to not over beat the really, really thick batter. 

There is almost a 2 to 1 brown sugar to white sugar ratio in these cookies. However, dark brown sugar accounts for the majority of the 'brown sugar' used. Dark brown sugar has a slightly more complex flavor than light brown sugar resulting in a toffee or caramel like finish to a baked good. I might even go so far as to say the molasses in the dark brown sugar adds a kind of nutty flavor to this Oatmeal Raisin cookie.


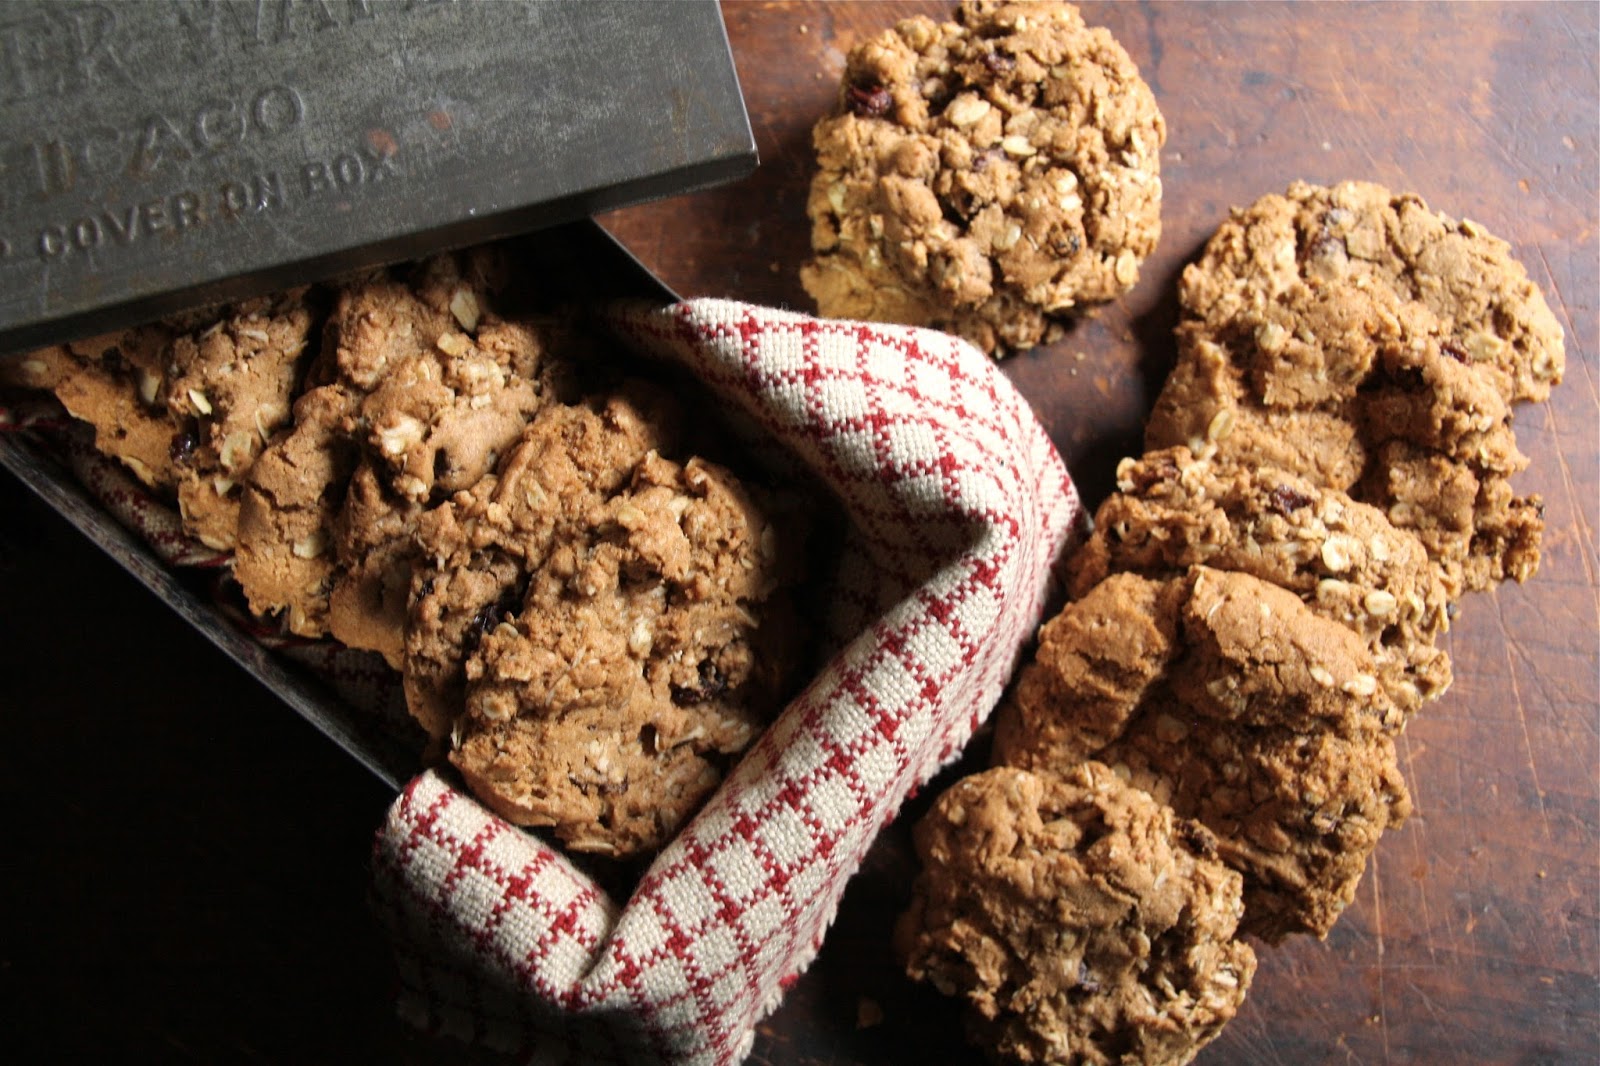
Like a bakery cookie these Oatmeal Raisin Cookies are ginormous (approximately 3" to 4" in diameter). Containing slightly more than two tablespoons of dough, the cookie dough balls are golf ball sized. Before putting the baking sheet in a preheated 350 degree (F) oven, the cookies are slightly flattened. You will slightly flatten them again when you rotate the cookie sheet after they have baked for 7 minutes. Total baking time for the Oatmeal Raisin Cookies ranges from 17-20 minutes.


If you love a crunchy, slightly chewy in the center Oatmeal Raisin Cookies, cookie delirium awaits you. Allowing the baked cookie to cool on the baking sheet for about 2-3 minutes before transferring to a cooling rack further contributes to their crunchy texture. For a slightly less crispy texture, transfer the baked cookies to a cooling rack immediately after they come out of the oven. 


Another dominant flavor in these Oatmeal Raisin Cookies is cinnamon. If I tell you there are three tablespoons of cinnamon in these cookies, you might think I be sending you down the wrong cinnamon path. But I wouldn't do that to you. I am reluctant to suggest backing down the amount of cinnamon to two tablespoons (if you aren't the biggest fan of cinnamon in your oatmeal cookies) as the three tablespoons is what further differentiates these Oatmeal Raisin Cookies from all others. 

You can reduce the amount of cinnamon if you want to, but would encourage you to stay the course on this recipe and use the three tablespoons. It's what a '38 on a scale of 1 to 10' Oatmeal Raisin Cooking needs.


The next time I want to bring a batch of cookies to a gathering, make a welcome home treat, assemble a gift for friends, put life sustaining snacks in a hiking backpack, the decision to make either Tara's Chocolate Chip Cookies or these Oatmeal Raisin Cookies is going to be a really difficult one. Although, if I had to make that decision today, these throw down worthy Oatmeal Raisin Cookies would win out. 


If there is room for only one bold, spicy, crispy, soul satisfying, addictive Oatmeal Raisin Cookie recipe in your life, it should be this one. Quite possibly after one bite of these cookies, they may be the only ones you will ever want. With this amazing recipe now staring you in the face, what will you do?

Recipe
Oatmeal Raisin Cookies (slight adaptation to the Corner Bakery Cafe Oatmeal Raisin Cookie recipe)
Makes 40-46 large 3" to 4" sized cookies.

Ingredients
3 1/2 cups whole wheat pastry flour
4 teaspoons baking soda
3 Tablespoons cinnamon
1 1/2 teaspoons kosher salt
3/4 pound (3 sticks) unsalted butter, room temperature
1 1/4 cups plus 1 teaspoon granulated sugar
2 cups dark brown sugar, firmly packed
1/3 cup light brown sugar, firmly packed
2 large eggs, room temperature
2 teaspoons vanilla
Scant 4 1/2 cups old fashioned rolled oats (Recommend Old-Fashioned Quaker Oats)
2 to 2 1/2 cups Thompson dark seedless raisins

Directions
1. Preheat oven to 350 degrees (F). Line two  baking sheets with parchment paper and set aside.
2. Sift flour, baking soda, cinnamon, and kosher salt in a medium bowl. Set aside.
3. In a standing mixer fitted with a paddle attachment, beat butter and sugars together until light and fluffy (at least 5 minutes). Do not rush this step.
4. Add eggs in one at a time, beating until fully incorporated.
5. Beat in vanilla.
6. Add sifted flour mixture in 8 batches, just until incorporated.
7. Slowly mix in oats and raisins.
8. Using an ice cream scoop, scoop up the equivalent of 2 generous tablespoons (approximately the side of a golf ball). Place on prepared baking sheet (no more than 9 dough balls to a tray). Flatten balls slightly.
9. Bake for 17-20 minutes, rotating the sheet after 7 minutes and slightly flattening again, to ensure even making. Bake until cookies are golden and set.
10. For a crunchier cookie, allow the cookies to cool on baking sheet for at least 2-3 minutes before transferring to a cooling rack. For a slightly softer cookie, immediately transfer baked cookies to the cooling rack.
11. Store cooled cookies in a tightly covered container or package in cellophane bags tightly tied.

Notes: (1) For a less molasses flavored cookie, use 1 cup dark brown sugar and 1 1/3 cups light brown sugar, firmly packed. (2) I used 2 generous cups of Thompson seedless raisins, but may want to increase to 2 1/2 cups to ensure each cookie has a greater raisin presence. (3) These cookies have a great cinnamon flavor. If you desire a more subtle cinnamon flavor, reduce cinnamon to 2 Tablespoons. But you may be sorry for making that decision. (4) Recommend placing baking tray in the center of the oven and baking one tray at a time.


Views of the Illinois River and changing/falling leaves seen from the trails at Starved Rock State Park in Utica, Illinois (November 2016)


Monday, October 31, 2016

Iced Sugar Cookies


When one of my friends put out a platter of Halloween inspired Iced Sugar Cookies, I immediately asked 'where did you get them?'. Turns out she was the one who made those absolutely gorgeous, incredibly delicious, almost too pretty to eat cookies. My envy was apparent as I couldn't stop gushing over her cookie works of art. A week later I had the recipe. While her cookies were decorated with all of the finesse of professionally trained pastry chef, it turned out I was able to successfully channel my inner 10 year old for my first time at bat making and decorating cookies with royal icing. Yes, first time. Which explains in part why the cookies intended to pay homage to the Chicago Cubs (that hometown team currently playing in the World Series) had more than a little bit of a whimsical look to them.

My initial cookie decorating plan was a little on the ambitious or rather overly ambitious side. Clearly I had overestimated my 10 year old artistic abilities when I embarked on this cookie making endeavor. Although the mess I made in the kitchen lived up to or possibly exceeded the work of any 10 year old. So instead I thought I would take some inspiration from one of Cubs Manager Joe Maddon's maddonisms. 'Do simple better.' As it turns out, simple can be a pretty good thing in both baseball and the making of iced sugar cookies.


In spite of taking some photos of the baked and iced cookies, I wasn't sure I was going to post these recipes to the blog as the finished cookies seemed to be in a 'league of their own'. But then the more I thought about why I created this blog in the first place I decided I would. Unless we take some risks with our baking and cooking, we won't ever know what we might be able to create, what we are capable of, what we might learn along the way, or what pleasure might be derived from making and eating them. In other words, playing it safe (at least in the culinary world) isn't always a good thing.


With two other sugar cookie recipes on the blog (Randee's Iced Sugar Cookies and the Sugar Saucers inspired by Rebecca Rather) why would I share a third one? Partly because each one is different. But mostly because this cookie was too good not to share.


If there was ever a cookie dough that rolled out perfectly, this may be the one. For those of you having a cut-out cookie phobia, these may be the cure you have waited your whole life for. And the best part? No chilling is required. One of the keys to these awesome sugar cookies is rolling out the dough to a 1/4 inch up to a 1/3 inch thickness. The result is a sugar cookie that feels and tastes sort of a like a shortbread cookie. 


I made a couple of ingredient changes to the inspiration recipe. I increased the amount of vanilla from 1 teaspoon to 1 1/2 teaspoons and I added 1 teaspoon of kosher salt. My baking time was closer to 13 minutes (for an almost 3 inch in diameter cookie) instead of the recommended 6 o 8 minutes. Personally I like the hint of almond flavor in these sugar cookies, however, if you aren't an almond flavor fan, I would recommend increasing the amount of vanilla to 2 teaspoons. 

Admittedly I am not a royal icing expert. So before I made the icing I found it helpful to read a few postings (one from Sweetambs and one from Annie's Eats and watch a couple of videos online. The video posted by Julia Usher was really helpful.

My royal icing was initially on the too thick side. Adding a little bit of water was all it needed to get it to the desired consistency. I used #3 and #4 tip sizes in the making of these cookies. For this sized cookie, next time I would use #2 and #3 tip sizes. Numbers 2 or 3 for outlining and number 2 for the detail work. For smaller cookies or finer designs #1 tip may work best. My icing was colored with either a gel or paste. The liquid food coloring used in the making of cupcakes and cakes does not work well with royal icing.

Allow the iced cookies to get before packaging or storing in a container. While the cookies may look dry on the surface, they still retain some moisture. I learned that the hard way when I put a layer of parchment paper between the cookies. Some of the cookies 'bled' and lost some of their whimsical prettiness. Some cookie experts out there recommend waiting 24 hours before packaging them (I must have skimmed over that recommendation). 


Even if you don't want to make the royal icing, make THESE sugar cookies. For the sake of simplicity, ice them using the icing recipe in Randee's Sugar Cookies. But who knows, you might hit a home run out of the park on your first try at making and decorating cookies with royal icing!

For years I would look at those large over-sized cookie cutters and think 'why?'. Having now made these sugar cookies, I am now thinking 'why not!' Decorated, as fancy or simple as one's cookie-loving heart desires, they would make beautiful gifts, be great place cards, make for fun favors, serve at a party, and/or make to celebrate an event. Like the World Series. Although with the outcome of the World Series yet to be decided, I will share another Maddonism. "I'm not superstitious. I'm just a littlestitious." So I will just end this post by saying Go Cubbies! 

Recipe
Iced Sugar Cookies (sugar cookie recipe adapted from The Best Sugar Cookie Recipe shared by In Katrina's Kitchen and icing recipe adapted from the royal icing recipe shared by Moms and Munchkins)
Makes approximately 30-33 cookies (2 1/2 inch sized)
Updated April 2022

Ingredients
Sugar Cookies
1 cup (226g) unsalted butter, room temperature
1 cup (200g) granulated sugar
1 1/2 teaspoons vanilla (or 2 teaspoons in not using the almond extract)
1/2 teaspoon almond extract
1 large egg, room temperature
2 teaspoons baking powder
3 cups (390g) all-purpose flour
1 teaspoon kosher salt

Royal Icing
2 pounds (906g) confectionary sugar
1/2 teaspoon cream of tartar
5 large egg whites (look for eggs labeled pasteurized)
1 Tablespoon clear vanilla extract
Food gels and/or pastes in colors of your choice

Directions
Sugar Cookies
1. Preheat oven to 350 degrees (F). Line two baking sheets with parchment paper and set aside.
2. In a medium sized bowl, combine flour, baking powder and salt. Set aside.
3. In the bowl of a standing mixer fitted with a paddle attachment, cream butter and sugar until light and fluffy (approximately 4-5 minutes).
4. Beat in egg and extracts.
5. Add in dry ingredients in three batches. Mix until incorporated and dough is smooth. Note: Dough will be stiff, but pliable. 
6. Remove half of dough from the bowl. Form into a disk and roll out dough to 1/4" to 1/3" thickness on a lightly floured surface. Note: You do not want your cookies to be thin, but rather be on the thicker side.
7. Cut into desired shapes and transfer to parchment paper lined baking sheets. Space cookies about an inch apart. Note: Cookies should not spread.
8. Bake cookies for 10-14 minutes or until lightly browned on the underside. Note: Baking time may increase or decrease based on the size of the cookies.
9. Allow cookies to cool on cookie sheet for 5 minutes before transferring to a cooling rack.
10. Cool cookies completely before icing.

Royal Icing
1. Place powdered sugar and cream of tartar in the bowl of standing mixer. Stir to blend.
2. Add in egg whites, stirring by hand until sugar is moistened. Note: If mixture is too dry, add another egg white.
3. Place whisk attachment on mixer. Begin beating on low speed until egg whites are thoroughly mixed in.
4. Increase speed to high  and beat for approximately 3 minutes our until icing is silky, smooth and light.
5. Beat in vanilla. Note: Using a clear vanilla extract helps to keep the color of the icing a purer white.
6. If icing is too thick, thin with water. Icing should have a thick but not stiff consistency.
7. Divide icing into bowls to add food gel and/or paste in colors of your choice. 
8. Place icing in icing bags fitted with pastry tips (sizes 2, 3, 4 or 5). Keep unused icing tightly covered so it does not dry out.

Notes: (1) Un-colored Royal icing can be stored in the refrigerator for 5-7 days. Bring to room temperature before using and mixing in food paste and/or gel. (2) Instead of using egg whites can use meringue powder but eliminate use of cream of tartar. Follow directions on meringue powder container to determine how much to use. (3) If you don't like the flavor of almond in your sugar cookies, increase the amount of vanilla to 2 teaspoons. (4) When storing these cookies, do not stack them on top of one another or put a layer of paper between them. Although the cookies appear to be dry after several hours, the retain some moisture so they may bleed if covered in paper. (5) Recommend using the plastic disposable pastry bags for use with the icing.


 Morton Arboretum on a cloudy day in October (2016)