Showing posts with label Main Dish. Show all posts

Monday, October 17, 2016

Sloppy Joe Sliders with Avocado Crema and Jalapeños


Early on many of us learned there are some unwritten, somewhat ambiguous, riddled with exceptions rules in life. Depending on where you grew up, where you live now, how attentive you were in your early adult life, or whether or not the mere thought of a rule sends you spiraling downward, the customs and etiquette around food and social gatherings is a bazillion shades of gray. Living in the Midwest for approximately 95% of my life, being brainwashed by Martha Stewart while in my still impressionable early twenties, and suffering from the vice known as 'perfection', has significantly influenced my food and social gathering set of maxims. In my world, all social gatherings must involve some kind of food, semi- or full out homemade, as well as beverages, preferably alcoholic in nature. Whether it's simply serving a big bowl of microwaved popcorn and ice cold bottled beer or a four-course dinner accompanied by some great bottles of wine, my so-called book of social gathering and food rules has undergone a myriad of nuanced changes over the years. However, one thing hasn't changed. Doctoring up a packaged mix or can of Manwich Sloppy Joes would be nothing short of committing a sacrilegious act along with reliving a bad childhood memory. Sloppy Joes must be made from scratch Well, sort of. Bottled ketchup, sweet chili sauce, Worcestershire sauce, and hot sauce are amongst the list of ingredients one might put into the semi-homemade category.

\

For years my recipe for homemade Sloppy Joes came from a fellow co-worker. Amongst the gifts my childhood best friend gave me for my birthday this year was the Foster's Market Favorites, the 25th Anniversary Collection cookbook. One of Sara Foster's recipes immediately catching my attention was the Sloppy Joes Topped with Cheddar Cornbread, a kind of Sloppy Joe casserole. For a moment I considered making this casserole version. Then I came across a Cornbread Muffin recipe while looking through an old Cook's Illustrated magazine. Abruptly I switched gears and decided to make the Sloppy Joes sans the cornbread topping as well as try the new muffin recipe. Using Sara's Sloppy Joe recipe and being inspired by the use of Avocado Crema as an accompaniment, I hoped these Sloppy Joe Sliders with Avocado Crema and Jalapeños would be the new, next best, homemade Sloppy Joes in my life.


Before you scroll down to the list of ingredients listed in the recipe below, let me take a Johnny Carson mind-reading Karnack moment and tell you not to be dissuaded by what may seem like a long list. In order to achieve thicker than soup Sloppy Joes, ones having a spicy-sweet tang, each and every one of these ingredients is needed to build their deep, layered savory flavor.

The original recipe called for two (2) pounds of ground beef. With so many ground beef options, I decided to use a combination of Ground Round (85% lean) and Ground Chuck (80% lean). There is flavor in fat, but too much or too little fat results in either a too fatty or too dry taste to a Sloppy Joe. The Ground Round, Ground Chuck mixture worked better than well (See Notes below). Additionally I increased the amount of the beef to almost two and a half pounds (2.34 pounds to be exact) in order to achieve a meatier Sloppy Joe consistency.


To achieve the maximum flavor possible and an uber thick hearty texture, the Sloppy Joes were cooked over low heat for almost 45 minutes after all of the ingredients had been added.


One taste of these Sloppy Joes and your taste buds will be tantalized in ways you never imagined Sloppy Joes were capable of doing.


While it may seem like a slightly non-traditional combination, I beg you to fully embrace the concept of topping these Sloppy Joe Sliders with Avocado Crema and Jalapeños. The sweet-spicy tang of the meat mixture, the cool creamy taste of the crema, the crunch of the sliced (jarred) mild jalapeños, and richness of the bread will completely transform all perceptions one may have on these 'messy to eat' sandwiches. They might also have you wondering how this much awesomeness had been missing in your life.


This Avocado Crema recipe is easy to make. A cup of sour cream (or Mexican Crema), a whole ripe, diced avocado, juice from half of a small lime (about a teaspoon) and a pinch of kosher salt whirled together in the food processor until creamy takes less than a couple of minutes to come together. When assembling the sliders, top the meat mixture with a tablespoon of the crema and several jalapeño slices. Note: I used the mild-deli instead of the hot jalapeños, but if you like added heat, go for it!


As much as I had loved the Sloppy Joe recipe I had been using for years, these call into the over the moon category. Whatever preconceptions you have about Sloppy Joes, be prepared to have your mind-blown and food rules changed. These are the kind of rule changing, throwdown worthy Sloppy Joes one gladly put up against anyone claiming to have their 'best' sloppy joe version.

To round out a meal where the Sloppy Joe Sliders with Avocado Crema and Jalapeños are the main course, serve with Calico Coleslaw, ridged potato chips, domestic/imported bottled beer and/or margaritas. These sliders would be also be memorably great served as a hearty appetizer.

Recipe
Sloppy Joe Sliders with Avocado Crema and Jalapeños (slight adaptation to Sara Foster's Sloppy Joes Topped with Cheddar Cornbread recipe shared in her cookbook Foster's Market Favorites)

Ingredients
Sloppy Joes
1 Tablespoon vegetable or canola oil
1 large onion, diced
2 1/4 - 2 1/3 pounds of ground beef - equal parts Ground Round (85% Lean) and Ground Chuck (80% Lean)
1 teaspoon chili powder
1/2 teaspoon garlic powder
1 1/2 teaspoons kosher salt
1/2 teaspoon black pepper
1 jalapeño, cored, seeded, and diced
2-3 garlic cloves, minced
1 cup ketchup 
1 cup sweet chili sauce
2 Tablespoons Worcestershire sauce
2 Tablespoons balsamic vinegar
1 teaspoon hot sauce
1/2 teaspoon crushed red pepper flakes
1/4 to 1/2 cup water

Avocado Crema
1 cup sour cream or Mexican Crema
1 ripe avocado, diced
Freshly squeezed lime juice from half of a small lime, about a teaspoon
Pinch of kosher salt

Slider buns (store bought or homemade)
Jarred jalapeño slices (recommend mild/tame or deli style)

Directions
Sloppy Joes
1. Heat oil in a large skillet over medium heat. Add diced onions and cook until softened (approximately 5 minutes).
2. Add ground beef to the skillet, breaking it up as it cooks. Season with the chili powder, garlic powder, salt and pepper. Continue to cook, stirring frequently, until the beef is cooked through (approximately 10 minutes). Drain off any fat from the skillet.
3. Stir in diced jalapeño and minced garlic. Continue cooking for an additional 2 minutes.
4. Add ketchup, chili sauce, Worcestershire sauce, balsamic vinegar, hot sauce and red pepper flakes. Stir in 1/4 cup of water (if too thick add the remaining 1/4 cup). Reduce heat to low and cook for 40-45 minutes to allow flavors to fully develop. Note: Mixture should have a thick consistency.

Avocado Crema
1. In a food processor, combine sour cream, avocado, lime juice and salt. Process until smooth.
2. Store any remaining avocado crema covered in the refrigerator.

Assembly
1. Top the slider bun with the sloppy joe mixture, a Tablespoon of the avocado crema and several mild (jarred) jalapeño slices. Cover with top of bun.
2. Place a skewer in the center of the sloppy joe. Serve immediately

Notes: (1) Instead of using a combination of Ground Round and Ground Chuck, consider using all Ground Round. (2) Whichever ground beef combination you use, drain any fat before adding in the garlic and jalapeños. (3) Use softer slider rolls (I used Martin's Potato Rolls) so the sloppy joe sauce can soak into the bread yet still be hand held eatable. (4) A twelve ounce bottle of Bennett's Chili Sauce yields one measured cup of the chili sauce. (5) To ensure the sloppy joes are not too sloppy, start by adding only 1/4 cup of water into the mixture. If too thick, add the additional quarter cup (or more if necessary). (6) Can be made the day before and reheated. If necessary, add a little water to achieve a not too thick consistency.


Garden of the Gods, Colorado Springs. Three Graces, Balanced Rock and Siamese Twins rock formations. (September 2016)


Monday, October 3, 2016

Pappardelle with Pork Ragu and Burrata


After spending six days in as close to perfect Colorado weather as possible, it's back to the reality of living in the midwestern flatlands. Had anyone other than my traveling partner been listening to my constant ramblings about the sheer beauty of the mountains, they may have wondered if I had spent my entire life in an underground cave, lived a very sheltered life, or if there was actually a six year old living in an adult body. For whatever reason or reasons, I continue to be enthralled with and awestruck by the majesty of mountains. All mountains, even the same mountains seen again and again. And despite my familiarity with Rocky Mountain National Park, it feels as if I am taking in the breathtaking mountain landscape for the first time on each return trip. Although the visual tears have now been replaced by a current of raging emotions running through body. Having loved living near the ocean for several years, the pull of the mountains on my soul seems stronger. If I had to choose between living near one or the other, I would, not surprisingly, want both. Well, maybe not both the ocean and mountains. Just the mountains and any body of water. Lakes, streams, ponds, or rivers with mountains in the backdrop would be my version of nirvana. So why don't I move? Good question. Will let you know when I have a good answer. 


Just as I shall never tire of the mountains, I shall never tire of a great red sauce and pasta. And unlike where I live, there are no obstacles preventing me from enjoying Italian food. Everyday if I wanted. Although maybe I would need to have a lobster roll every now and then. There are at least a half dozen different red sauces posted to this blog, but up until now there hasn't been a pork ragu. When I came across the recipe for Pappardelle with Pork Ragu and Burrata, there was only one decision to be made. Well, maybe two. How long after I found the recipe would it take me to make it? The answer: 24 hours.


Having cleaned out the refrigerator before leaving for the trip out west, I didn't really need a reason to go to the grocery store. Living on peanut butter, oatmeal, eggs, or popcorn was an option, but not one I was excited about. Seeing a photo of the Pappardelle with Pork Ragu and Burrata was almost (but not quite) as exciting as seeing the mountains. I hadn't even finished unpacking before heading out to get the ingredients. It seemed silly to let a little unpacking and laundry get in the way of making this pork ragu. 


I almost decided to make some homemade pasta to go with the pork ragu and burrata, but picked up a package of imported pappardelle instead. Maybe next time when I am not in such a hurry I will make some fresh pappardelle. Had the grocery store had fresh (refrigerated) pappardelle, I would have bought it (but they didn't). Whether you make your own, buy fresh, or buy dried packaged pappardelle, just use pappardelle pasta the first time you make this pork ragu. I would venture to guess you won't pair this ragu with any other pasta.


Fresh herbs, red wine, chicken stock, a carrot, an onion, garlic, salt/pepper, balsamic vinegar, extra-virgin olive oil, and boneless pork shoulder are the only ingredients you need for this incredibly delicious, soul satisfying pork ragu. Now having made it, next time I would double the ingredients and either have a larger dinner party or freeze half of it. Not just because the ragu itself is insanely delicious, it's difficult to find a good piece of pork shoulder weighing only 1 1/4 pounds.

Instead of using dried rosemary to season the pork, I used freshly chopped rosemary. Because dried herbs are generally stronger than fresh herbs, you typically use three times as much fresh as dried. In this case, 1 teaspoon of dried rosemary has a fresh equivalent of 1 Tablespoon. To further deepen the flavor of the salt, pepper and rosemary with the pork, I recommend preparing the pork before dicing and/or mincing the vegetables. 


If you have a Dutch oven, use it for making the pork ragu. If you don't, use a heavy bottomed frying pan. After searing/browning the pork in the extra-virgin olive oil (done in two batches), remove and set aside on a plate. Immediately add the diced/minced carrot, onion and garlic, sautéing until they have softened (approximately three minutes). Be sure to scrape up the brown bits of meat when sautéing the vegetables as this is where some of the deep flavor of the ragu comes from. Once the vegetables have softened, the meat along with the chicken stock, wine, and crushed tomatoes are added to the pot and cooked, uncovered on medium heat for 25-30 minutes (longer is better). Note: The pieces of pork must be fully immersed in the sauce. If not, add enough chicken stock to cover.

After the 25-30 minutes, add the sprigs of fresh herbs and balsamic vinegar. Reduce the heat to medium-low, cover and continue cooking for an additional 35 minutes (or until the pork is fork tender). Tear the pork into bite sized pieces, remove the sprigs of herbs, stir in one Tablespoon unsalted butter, and continue cooking for an additional 5 minutes. Note: You can make the ragu a day ahead. Reheat when ready to toss in the cooked pasta. 


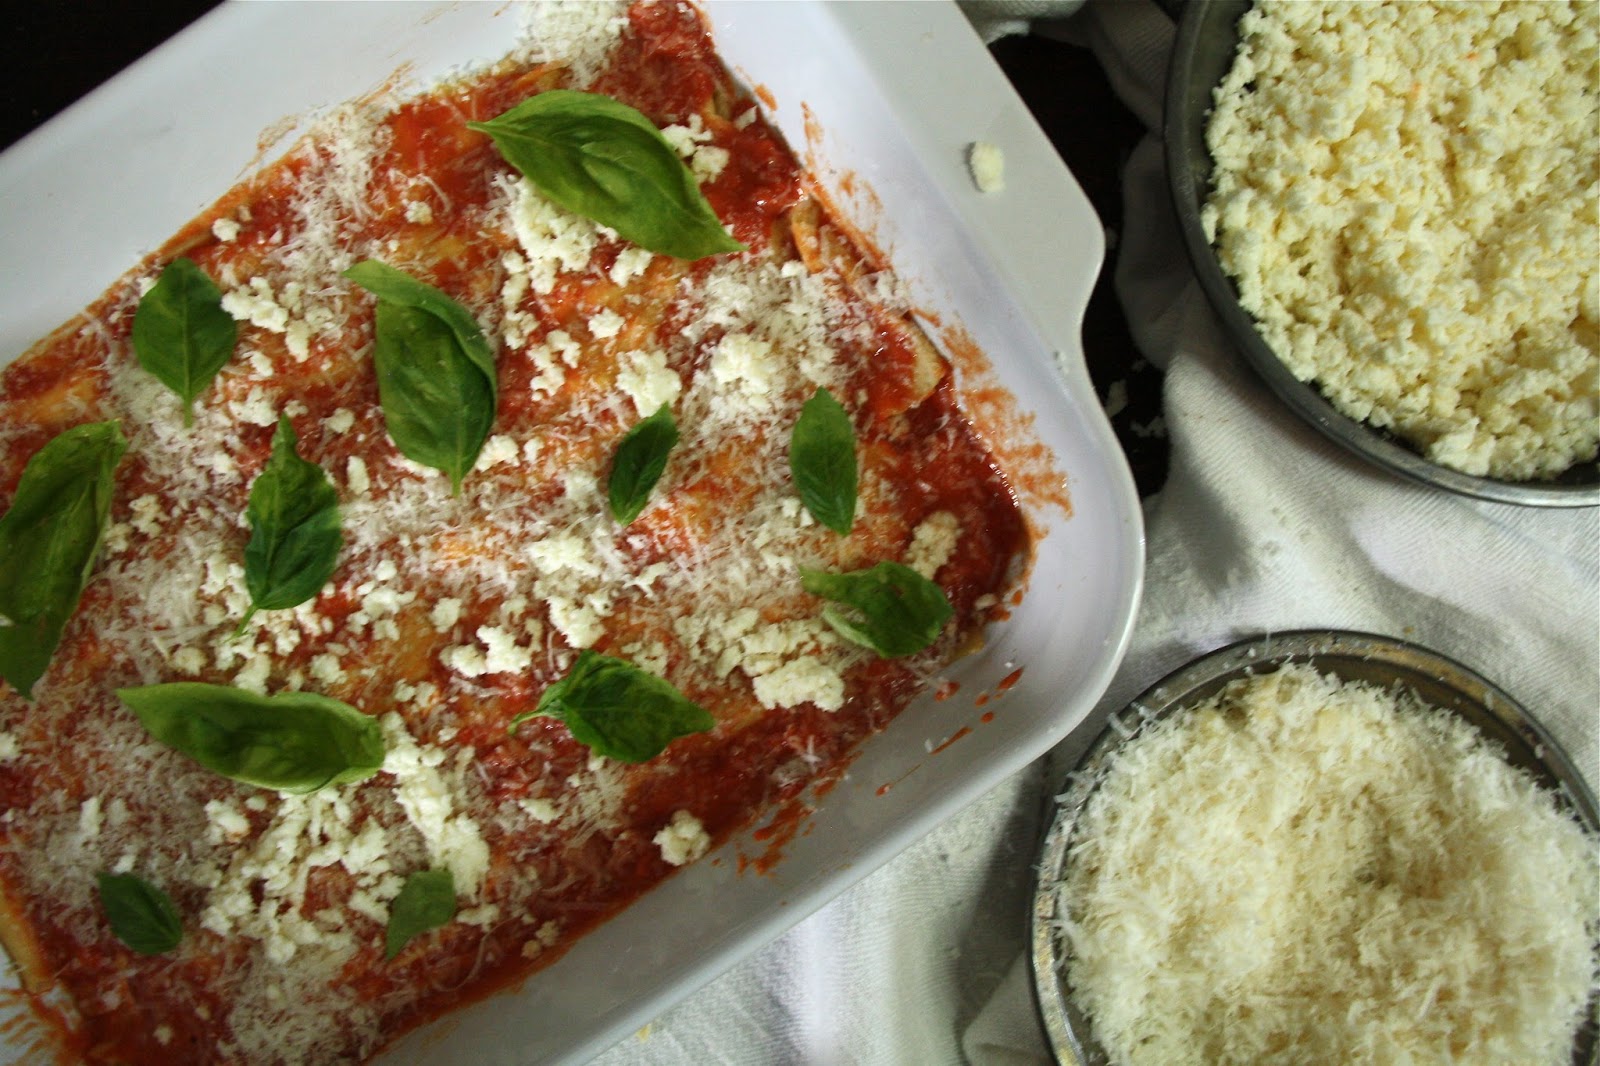
Along with the al dente cooked pappardelle and fresh basil for garnish, the finished dish is topped with burrata cheese and a drizzle of extra-virgin olive oil.


The drained pappardelle is mixed in with the ragu before, not after it is transferred to a platter. According to Serious Eats, pasta heated in a pan with sauce/ragu has a significantly different along with a far superior flavor and texture as compared to a pasta sauced when plated. And who knows better than Serious Eats? No one. Seriously, adding the cooked (al dente) pasta to the heated sauce can take a pasta dish from ordinary to extraordinary.


Forget the Parmigiano-Reggiano cheese, at least with this dish. Top it with the burrata cheese. A few years ago, it was challenging to find it in the grocery stores. Nowadays, burrata cheese can be found in some local grocery stores, Whole Foods and even Trader Joe's. If, for whatever reason, you haven't ever tasted it before, this Pappardelle with Pork Ragu is the reason why you should. Because this Pappardelle with Pork Ragu and Burrata is akin to simultaneously experiencing both a mountain and water view. Let me know if you cry the first time you taste this dish. P.S. October happens to be National Italian Heritage Month. Just thought you should know.

Recipe
Pappardelle with Pork Ragu and Burrata (slight adaptation to Williams-Sonoma's Pappardelle with Pork Ragu and Burrata recipe)
Serves 4 to 6

Ingredients
1 1/4 pound (625 g) boneless pork shoulder, cut into 2 inch cubes
1 Tablespoon fresh rosemary, finely chopped or 1 teaspoon dried rosemary
Kosher salt and black pepper
3 Tablespoons extra-virgin olive oil, plus more for finishing the dish
1 small yellow onion, diced
1 large carrot, peeled and diced
3-4 garlic cloves, minced
1/4 cup red wine (recommend a Zinfandel)
1 can (28 ounces) crushed plum tomatoes
1/2 cup chicken broth
1 Tablespoon balsamic vinegar
2 fresh rosemary sprigs
2 fresh thyme sprigs
12 ounces (375 g) pappardelle
1 ball (10 ounces) burrata cheese (Recommend BelGioioso Burrata)
1 Tablespoon unsalted butter
Fresh basil leaves for garnish

Directions
1. In a large bowl, toss the pork with rosemary. Season with salt and pepper. Set aside.
2. In a large Dutch oven, heat olive oil over medium-high heat. Add pieces of pork in batches (at least 2 batches are necessary), searing pork until browned on all sides (approximately 8 minutes). Transfer cooked pork to a plate.
3. Add onion, carrot and garlic to pan and sauté until softened (approximately 3 minutes). Scrape up all browned bits of meat when sautéing the vegetables. Season with salt and pepper.
4. Return cooked pork to pan along with wine, crushed tomatoes, and chicken broth. Stir to combine. Note: Pork should be fully emerged in sauce. If not, add a little more chicken broth.
5. Reduce heat to medium and cook, uncovered, until the liquid has slightly reduced and the pork is starting to turn tender (approximately 25-30 minutes).
6. Stir in balsamic vinegar and rosemary/thyme sprigs.
7. Lower heat to medium-low and cover Dutch oven. Cook covered for 35 additional minutes (or until the pork has become very tender).
8. Remove the lid, and shred the pork into bite sized pieces using two forks. Discard rosemary/thyme sprigs. Stir in one Tablespoon unsalted butter. Cook for an additional 5 minutes.
9. Cook pappardelle according to al dente instructions. Drain pasta and add to the ragu. Stir to coat the pasta with the sauce.
10. Transfer pasta and ragu to a large platter. Tear the burrata into pieces and arrange over pasta. Lightly drizzle with extra-virgin olive oil and garnish with basil leaves. Serve immediately.

Notes: (1) Make the ragu the night before and refrigerate to allow the flavors to further develop as well make serving it to family and friends easier. Reheat the sauce, cook the pasta, make a salad, cut the bread, open the wine and you will have the perfect meal. (2) Consider doubling the recipe and freeze half of the ragu if only serving 4-6 people). (3) Use fresh or homemade pappardelle if it is available. (4) If ragu has thickened in the refrigerator, add a small amount of wine or chicken broth. (5) Use only 12 ounces of pappardelle. The ratio of pasta to ragu is as close to perfect as possible.


Views of Nymph Lake in Rocky Mountain National Park (September 2016)


Thursday, September 15, 2016

A Nice "Vegetarian" Lasagna


A couple of weeks ago, one of my friends said 'wouldn't it be fun to make homemade pasta together?'. I think I may have responded with a non-committal 'sure'. It had been so long since I had made homemade pasta, I vaguely remembered where I last saw my Atlas pasta maker. As it turned out it was gathering dust sitting on a shelf in the garage (I know, why would anyone store a pasta maker in the garage?). And then last week I read about a new cookbook, "Small Victories: Recipes, Advice & Hundreds of Ideas for Home-Cooking Triumphs", written by Julia Turshen. Intrigued by the comments made by some of her peers, I drove over to Barnes and Noble to check it out. After spending more than a half hour going through the book, I needed to buy it. Not only because it was one of the most inspiring cookbooks to come out since Tasting Rome and Florentine, but it was covered in my fingerprints and some of my drool (proverbially speaking of course). So many of her recipes leaped from the pages screaming 'make me first'. With the idea of making homemade pasta still resonating somewhere in my subconscious along with needing to find a great vegetarian 'pasta' recipe to make for an upcoming dinner party, her recipe for 'A Nice Lasagna' won out. And quite the winner it turned out to be. 


Any trepidation I had about trying my hand (again) at making homemade pasta dissipated as I read through the recipe. For some unexplainable reason it seemed much simpler than I had remembered. And as it turned out, it was. Okay, before you decide not to make this recipe (and God forbid stop reading this post) because (1) you don't have a pasta maker, (2) you have a pasta maker and have no idea where it is, (3) you tried making pasta before and well it wasn't worth all the effort, or (4) you have no interest in making homemade pasta, let me just say a couple of things about this recipe.


First, while the homemade pasta makes this dish feel as if it came out of a five star Italian restaurant, you can still make it using store bought fresh pasta (obstacle one removed). Second, the tomato sauce is unlike anything you have ever tasted. And lastly, it can be made early in the day or a day ahead, covered and refrigerated. Which means all you need to do is open the wine, make a salad, cut some bread, and put it in the oven to bake. After tasting this lasagna, it is quite possible you will never order lasagna in a restaurant again, either here in the states or in Italy. Yes, I am being completely serious.


So let's first talk about the tomato sauce. A sauce with only five ingredients: whole plum canned tomatoes, sliced garlic cloves, kosher salt, extra-virgin olive oil, and creme fraiche. Yes, creme fraiche. It adds a creaminess and richness to the sauce unlike any other 'tomato sauce' ingredient. And I would venture to bet you will never make a lasagna with ricotta cheese again. 


The original recipe called for four cloves of garlic. I used five because I love the flavor garlic imparts to a sauce. Five cloves was not at all overpowering. A great quality extra-virgin olive oil imparts incredible flavor to a tomato sauce. A bottle of the good stuff is well worth the money. 


In a large, heavy saucepan the garlic is first sautéed in the extra-virgin oil (this takes about a minute as long as you get your oil hot before adding the garlic). The whole canned plum tomatoes (that you first break up with your hands) and a teaspoon of salt go in next. After bringing the sauce to a boil, it needs to simmer for 30 to 45 minutes. In the spirit of 'more than be better', I simmered my sauce for 45 minutes before removing from heat and whisking in the creme fraiche. While the sauce cools to room temperature, you can begin making the homemade pasta.


The pasta is made with only three ingredients: all-purpose flour, three large (room temperature) eggs, and a teaspoon of kosher salt. 


A food processor does all of the work. This is a no-knead pasta dough! After the dough comes together, it is wrapped in cellophane and allowed to sit at room temperature for an hour before being put through the pasta maker. If you have never made homemade pasta before, consider giving it a try. 


There are only two cheeses in this lasagna: Parmigiano-Reggiano and fresh, whole milk mozzarella (versus the slightly rubbery mozzarella, sometimes called low-moisture mozzarella). Although grating fresh, whole-milk mozzarella is a little messier, it's softer, buttery texture gives a more delicate flavor to the finished dish. Like a high quality extra-virgin olive oil, great ingredients make great dishes. So splurge on and grate your own Parmigiano-Reggiano and fresh, whole milk mozzarella.


There is no need to cook the sheets of homemade pasta as the sauce does all of the work. Beginning with a layer of sauce on the bottom of 9"x12" pan comes a layer of pasta, a thin layer of sauce, a sprinkling of the grated cheeses, basil leaves (torn into pieces if large), and another thin layer of sauce. This assembly is repeated until all of the pasta is used. The final, top layers are sauce and the grated cheeses.


In a 400 degree preheated oven, the lasagna bakes for 35-40 minutes (my baking time was 40 minutes). Allowing the lasagna to rest for 15-30 minutes before cutting is critical and will ensure the cut squares of lasagna remain intact when plated. Note: I waited 30 minutes. To keep warm, you can tent a piece of aluminum foil over the resting lasagna before cutting, however, it retained its' heat without it. 


I had considered adding layers of roasted vegetables to the lasagna, but honestly it was as close to lasagna perfection without them. Before you decide whether to add them or not, first make this lasagna without them. The beauty of this deceptively light lasagna is in its' simplicity.


If anyone ever asked me to participate in a lasagna throw down, I would win it with this lasagna!  Of course, it would be a shared win with the majority of the credit going to Julia Turshen. Her recipe is not just a small victory, it is pure genius. Yes, it is really that good. This is the kind of 'forget your table manners and lick the plate clean' dish you will want to guiltlessly gorge yourself on.

Recipe
A Nice "Vegetarian" Lasagna (slight adaptations to Julia Turshen's A Nice Lasagna recipe shared in her recently published cookbook "Small Victories: Recipes, Advice & Hundreds of Ideas for Home-Cooking Triumphs")

Ingredients
Sauce
Two 28 ounce (794 g) cans whole peeled plum tomatoes (I used Delallo Organic Italian Whole Peeled Plum Tomatoes in heavy juice, but any good whole peeled Italian tomatoes should work.)
3 Tablespoons extra-virgin olive oil
4-5 cloves of garlic, thinly sliced
1 teaspoon kosher salt, plus more for taste, if needed
8 ounces creme fraiche (recommend Vermont Creamery's Creme Fraiche)

Pasta
2 1/4 cups (270 g) all-purpose flour, plus more as needed
3 large eggs, room temperature
1 teaspoon kosher salt

Assembly
1 generous cup (120-140 g) finely grated Parmigiano-Reggiano cheese
12 ounces coarsely grated fresh, whole-milk mozzarella cheese
1 to 2 large handful fresh basil leaves, torn into small pieces if large (Note: Original recipe called for 2 large handfuls)

Directions
Sauce
1. In a medium to large sized bowl, crush the tomatoes with your hands until they are in bite sized pieces.
2. In a heavy bottomed, large saucepan, heat the extra-virgin olive oil over medium-high heat. Add sliced garlic and cook until it begins to sizzle (approximately 1 minutes). Add the hand crushed tomatoes and one teaspoon of kosher salt. 
3. Bring to a boil, then lower heat and simmer for 30-45 minutes, stirring every so often. Note: The sauce should be slightly reduced. 
4. Remove from the heat and whisk in the creme fraiche. Season with additional salt, if needed. Allow sauce to cool to room temperature.

Pasta
1. Combine the flour, eggs and salt in the bowl of a food processor. Run the machine until the dough forms around the blade and cleans the side of the bowl. Notes: The dough should not stick to your fingers when you touch it. If the dough is too dry, add water 1 teaspoon at a time. If it is too sticky, add a little flour 1 teaspoon at a time until the dough comes together. The size of your eggs (even large eggs have some variability) and the humidity in the air may affect your dough.
2. Remove dough from the food processor, form into a flat disk, lightly flour, and tightly wrap in plastic wrap. Let the dough rest at room temperature for an hour.
3. Line a baking sheet with parchment paper and have additional sheets of parchment paper cut.
4. Cut the rested dough into 6 pieces. Work with one piece at a time, keeping other pieces covered in plastic wrap.
5. Run the dough through the pasta machine beginning with the widest setting (this was a 1 on my Atlas) rolling it twice on this setting. Continue working the dough through the narrower settings until the pasta reaches a thickness of an envelope. It should be thin, but not transparent. Note: I ended on setting 5.
6. Lay the pasta sheets on the parchment paper lined baking pan. Cover with a piece of parchment paper. Note: I cut each sheet into three pieces before covering with the parchment paper. 
7. Repeat the process with the rest of the dough.
Assembly
1. Preheat oven to 400 degrees (F). 
2. Ladle a thin layer of the pasta sauce on the bottom of the pan. Spread to cover the surface of the baking dish.
3. Add a layer of pasta (first brushing off any excess flour) to form a single layer. Spoon sauce over the pasta, just enough to cover. Sprinkle grated cheeses and basil. 
4. Repeat process beginning with a thin layer of sauce until you have used up all of the pasta. Note: I ended up with six layers of pasta.
5. The final, top layer should be sauce and the cheeses.
6. Bake uncovered until it has browned beautifully and the edges are bubbling. Approximately 35-40 minutes.
7. Allow the lasagna to rest for 15 to 30 minutes before slicing and serving. The rest time allows the pasta to fully absorb the hot, bubbling sauce. Note: A wait time of 30 minutes resulted in perfectly cut slices.

Notes: (1) Make the sauce first as it needs to cool before assembling the lasagna. (2) If you don't make the homemade pasta, use fresh sheets of store-bought pasta. (3) I was conservative with the amount of fresh basil. Next time I would increase how much I used. The original recipe called for 2 handfuls, I probably used 1 handful. (4) Use the best ingredients available. (5) I increased the amount of cheeses slightly. Original recipe called for 1 cup (100 g) of grated parmesan and mozzarella cheeses. (6) Make this lasagna sooner rather than later.


Weekend Farmer's Market finds.


Thursday, August 18, 2016

Pollo Alla Romana


Almost ten years ago when I moved from one house to another, I witnessed seeing more than 25 years of cooking magazines being thrown into the dumpster. Not because there wasn't any room in the two super-sized moving trucks, but because the person who shall remain nameless said it was time for me to let go of a few things. At the time, it felt like I was having a limb removed without the benefit of any anesthesia. Needless to say I survived. My collection of more than two hundred cookbooks contained more recipes than I could possibly make in several lifetimes. Now ten years later, I have amassed a new collection of cooking magazines and probably another hundred cookbooks. Each time I go into one of the shrinking storage rooms in the basement or look at the sagging bookshelves, I began to wonder if I should get rid of some of these magazines. It's always easier, yet not necessarily less painful, when you make this decision yourself. Even though I have long since given up remembering which of the magazines contained recipes I loved or wanted to make (there is only so much space in my memory bank for such things), I am (slowly) coming around to the realization that I don't need to save every magazine I buy. And tearing out pages from them isn't a sacrilegious act or heinous crime. So this past week I began the process of going through this new ten year cooking magazine collection. Deciding which ones to keep or which recipes to save. It's a different kind of pain this time, but at least it's not one requiring any medical intervention or the intake of massive quantities of painkillers. As long as no one asks me to get rid of any of my cookbooks, I think I will be just fine.

Pollo Alla Romana is an old, traditional summer dish originating from the Castelli Romani in Lazio, a collection of towns once inhabited by noble Roman families in the 14th century. 'Alla Romana' simply means 'Roman Style'. This classic rustic dish was typically prepared for Ferragosto, the August 15th holiday, celebrating the Assumption of the Virgin Mary. Prepared early in the morning and served later in the day may have been a way for Italian cooks to avoid having to cook a meal during the hottest time of the day. However, in actuality there is a greater benefit of the the cook early-serve later approach. The flavors further deepen as the dish rests. But for an even deeper flavor, making it the day before and reheating to 'warm' before serving is how it should be made. While it's incredibly delicious served on the same day it's made, the overnight mellowing of the flavors transforms the Polla Alla Romana into one causing you to never want to leave the dinner table. 


Tasting Rome: Fresh Flavors and Forgotten Recipes From an Ancient City by Katie Parla and Kristina Gill is turning into one of my new favorite cookbooks. The recipe for this version of Pollo Alla Romana was inspired by theirs. Other than using chicken breasts and thighs (instead of a whole chicken cut up) and increasing the amount of diced tomatoes, I tried to stay true to all of the recommended ingredients.


Even though using bone-in chicken (versus deboned chicken) is known to add more flavor to any recipe, I decided to use a combination of boneless, skinless chicken breasts and thighs. Although the next time (and there will be next time) I make it, it will be with using skin-on (but still boneless) chicken breasts and thighs. So the dish at least gets the benefit of the flavor from the skin's fat.


Salting and refrigerating the chicken for at least six hours or overnight was one of the recommendations in the recipe. They should have made it a requirement. So instead I am.

The chicken and peppers/onions are initially cooked separately before ultimately being combined. This type of cooking process allows each of ingredients to absorb something from the other. The result is a savory rich dish having very distinctive flavors.


Some recipes for Polla Alla Romana call for the use of both red and green peppers. However, this version of the recipe recommended using red and yellow peppers. And not because yellow peppers have a sweeter flavor than the more bitter green peppers. Rather because the combination of yellow and red in this dish represents the colors of the city's flag and AS Roma, one of Rome's two professional soccer teams. Apparently the Roman's show allegiance to their favorite soccer team has influenced the making of ancient Roman recipes.


Instead of cutting the seeded peppers into one inch strips, mine were cut into half-inch strips. Once the chicken has been browned on all sides and removed from the pan, the peppers, onions, and garlic were sautéed until tender. The addition of dry white wine helped to lift up the brown bits of chicken as well as added even more flavor. After the diced tomatoes and marjoram were added, the browned chicken was returned to the pan. Then the magic started to happen.

Adding just enough water (which really shouldn't be very much) to ensure the chicken is at least halfway submerged, the chicken is cooked to a point of perfect tenderness while the sauce thickens and develops a deep red color. Cooking time may range from 30 to 45 minutes (or longer depending on the heat setting of your stove). Note: My cooking time was somewhere between 45 and 50 minutes.


Instead of serving the chicken on the same day it is made, I would strongly encourage you to shred the cooked chicken, return to the sauce, and refrigerate overnight. I am not sure I can put into words the taste difference between the same day and next day versions. So all I will say is I heard an almost window shattering 'wow' immediately after someone took a bite of the next day Pollo Alla Romana. 


Served with a salad, some great crusty bread and a great bottle (or two) of wine, the Pollo Alla Romana becomes an undeniably perfect summer and year round meal. If made the day before, it becomes one of those seemingly effortless meals. With peppers coming into the height of their season, there may be no better time to make this dish for the first time. It is perfect meal to serve at a casual or intimate gathering of family and/or friends. Everyone will feel as if they have been transported to Rome and maybe no one will leave the table until the last morsel has been eaten.

Recipe
Pollo Alla Romana (slight adaptation to the Pollo Alla Romano recipe from Tasting Rome: Fresh Flavors and Forgotten Recipes From an Ancient City by Katie Parla and Kristina Gill)

Ingredients
3 3-1/2 pounds of a combination of boneless/skin-on chicken breasts and thighs
Kosher salt
3 Tablespoons extra virgin olive oil
2 large red peppers, seeded and cut into 1/2 strips
1 large yellow or orange pepper, seeded cut into 1/2 strips
2-3 large cloves of garlic, coarsely chopped
2 yellow onions, cut into 1/4" rings
1/2 cup dry white wine (I used a Pinot Grigio)
1 Tablespoon freshly chopped marjoram
16-20 ounces canned diced tomatoes
Great crusty bread (for serving)

Directions
1. Season chicken with salt. Cover and refrigerate for 6 hours or overnight.
2. In a large skillet, heat olive oil over medium heat. When oil begins to simmer, add chicken, skin side down and cook until browned on all sides (about 7-10 minutes). Remove chicken from pan and set aside.
3. Add the onions, peppers, and garlic to the pan and cook over medium heat until the onions and peppers have softened (about 10 minutes). 
4. Add wine, increase heat to high and scrape up any of the brown bits on the bottom of the pan. After the alcohol aroma dissipates, add the tomatoes and marjoram. 
5. Return chicken to the pan and cook stirring occasionally for 30-45 minutes or until chicken is tender and sauce has a thick consistency and color is a deep red. Note: Add a small amount of water to pan to ensure chicken is partially submerged when cooking. If the sauce becomes dry while cooking add either some additional diced tomatoes or some water. 
6. Remove pan from stove and transfer to a large platter. Serve hot or at room temperature.
7. OR allow the chicken to come to room temperature. Remove chicken and shred. Return chicken to tomato/pepper sauce. Cover and refrigerate overnight. Reheat before serving. Note: Highly recommend waiting overnight before serving.

Notes: The original recipe called for the use of a whole chicken cut into 8 pieces. Instead of using deboned chicken breasts and thighs, could use bone-in chicken breasts and thighs.

Benches in the Chicago Botanic Garden, Glencoe, Illinois (2016)