Showing posts with label Main Dish. Show all posts

Wednesday, July 12, 2017

Herbed Parmesan Dutch Baby with Cherry Tomato Jam


Up until just recently I had put the Dutch Baby into the sweet for breakfast or brunch category. And the only thing causing me to vacillate between ordering and not ordering one in a restaurant is the wait time. Twenty to twenty-five minutes feels like a lifetime, particularly if you are in a hurry or hangry. But if time is not an issue and you aren't falling over the edge of starvation, the deliciousness factor of a Dutch Baby is always off the charts. If Rotten Tomatoes rated Dutch Babies instead of movies, it would probably give it a rating of 97%. I have yet to meet a version of a breakfast Dutch Baby I didn't like. The Apple Dutch Baby may be my most favorite, but I wouldn't turn my nose at a Dutch Baby simply dusted with confectionary sugar or piled high with blueberries

The world of savory Dutch Babies was unfamiliar to me until I discovered Melissa Clark's recipe for the Herbed Parmesan Dutch Baby in her new cookbook Dinner: Changing the Game. Serving a savory Dutch Baby for lunch, dinner, or as an appetizer sounded intriguing. But then I would be game for making any dish destined to pair well with wine. In the case of this Herbed Parmesan Dutch Baby, think chilled chardonnay or sparkling wine.


My contribution to this recipe was pairing it with some homemade Cherry Tomato Jam instead of sriracha. I may be the only person on the planet not a fan of sriracha. I had a strong hunch the fruity, nutty taste of Parmigiano-Reggiano Cheese would go well with the slightly caramelized sweetness of the jam. And it must have been my lucky day as my hunch turned out to be right. If you have never made or had Cherry Tomato Jam before, you really should. Seriously, you should. Not only does it compliment the flavor of this Herbed Parmesan Dutch Baby, it is a game changer on cheese platters.


Unlike most of the other Dutch Babies I have made, this one is made with almost double or triple the number of eggs used most other of my Dutch Baby recipes. Making it a slightly denser, heartier version of this classic dish. 


When looking at Dutch Baby recipes, there seems to be two approaches to making the batter. Whisking the dry and wet ingredients together until blended or processing in a blender/food processor until smooth and frothy. I prefer the later method. In the direction below I give you both options.


Whenever an ingredient list specifies the amount of grated cheese in cups versus weight, I always convert to weight (grams or ounces). Unlike measuring brown sugar (lightly or firmly packed), there don't seem to be any clearly specified guidelines for measuring grated cheese. The lack of these guidelines more than likely often means a higher probability of erring on the side of not using the amount of cheese called for in a recipe. If you don't have a scale, try to buy a chunk of cheese in the amount you need. And don't even think of substituting packaged grated cheese for freshly grated. Nothing comes close to or tastes better than a high quality Parmigiano-Reggiano cheese.


Oven temperature is another one of the variations noted in Dutch Baby recipes. While all are baked at high temperatures, the recommended ranges are somewhere between 400 to 450 degrees (F). The only exception to these temperatures are found in some German Pancake recipes. This one calls for baking the Dutch Baby at 425 degrees (F). Cast iron pans not only handle the high heat well, their surfaces are inherently non-stick. Make your Dutch Baby in a 12" round or 9"x 12" pan, but make certain it's cast iron or one that can handle the high heat. Note: Most non-stick pans are not designed to perform at very high oven temperatures.

You can either melt the butter by placing it the pan and putting in the oven or melting it on the stovetop. It is critically important be hot when you pour in the batter.

In 20 to 25 minutes, the sides of your Dutch Baby will rise and turn the most beautiful golden brown. Garnish the baked Herbed Parmesan Dutch Baby with some additional chopped thyme and chives and immediately bring to the table. Not just for the wow factor, but like most Dutch Babies, this one is best enjoyed while still hot. Although I found picking at the room temperature leftovers was still an incredibly pleasurable eating experience.


Don't forget to make some Tomato Jam ahead of time.


The batter for this Dutch Baby comes together rather quickly. In less than an hour, you can have dinner (or lunch) on the table. However, you can also have everything prepped in advance. The batter and grated cheese can remain refrigerated until you are ready to assemble, bake, and serve.

But this savory Dutch Baby shouldn't be pigeon-holed in the Herbed Parmesan Dutch Baby category. As Melissa Clark suggested, it would also make for a great appetizer. What about the 20-25 minutes it takes for it to bake in the oven? Well depending on your timing, it won't seem long for your guests. But even if you decided to put in the oven once they arrive, this Herbed Dutch Baby is well worth the wait. And maybe I need to reconsider how and when I think about the sweet versions of this 'love child to the pancake'. 

Recipe
Herbed Parmesan Dutch Baby with Cherry Tomato Jam (A slight adaptation to Melissa Clark's Herbed Parmesan Dutch Baby recipe as shared in her cookbook Dinner: Changing the Gamea slightly revised version of the Cherry Tomato Jam for Cheese recipe as shared in the cookbook: The Cheesemonger's Kitchen: Celebrating Cheese in 90 recipes)

Ingredients for the Dutch Baby
1 cup (120 g or 4 1/4 oz) plus 2 Tablespoons all-purpose flour
1/2 teaspoon kosher salt
1/2 teaspoon black pepper
8 large eggs
3/4 cup whole milk
2 Tablespoons finely chopped fresh thyme, plus more for garnish
2 Tablespoons finely chopped chives, plus more for garnish
6 Tablespoons unsalted butter, room temperature
3/4 cup (75 grams or 2 1/2 ounces) freshly grated Parmigiano-Reggiano Cheese
Flaky Sea Salt

Directions for the Dutch Baby
1. Preheat oven to 425 degrees (F).
2. In a large bowl, whisk together the flour, salt and pepper. Set aside.
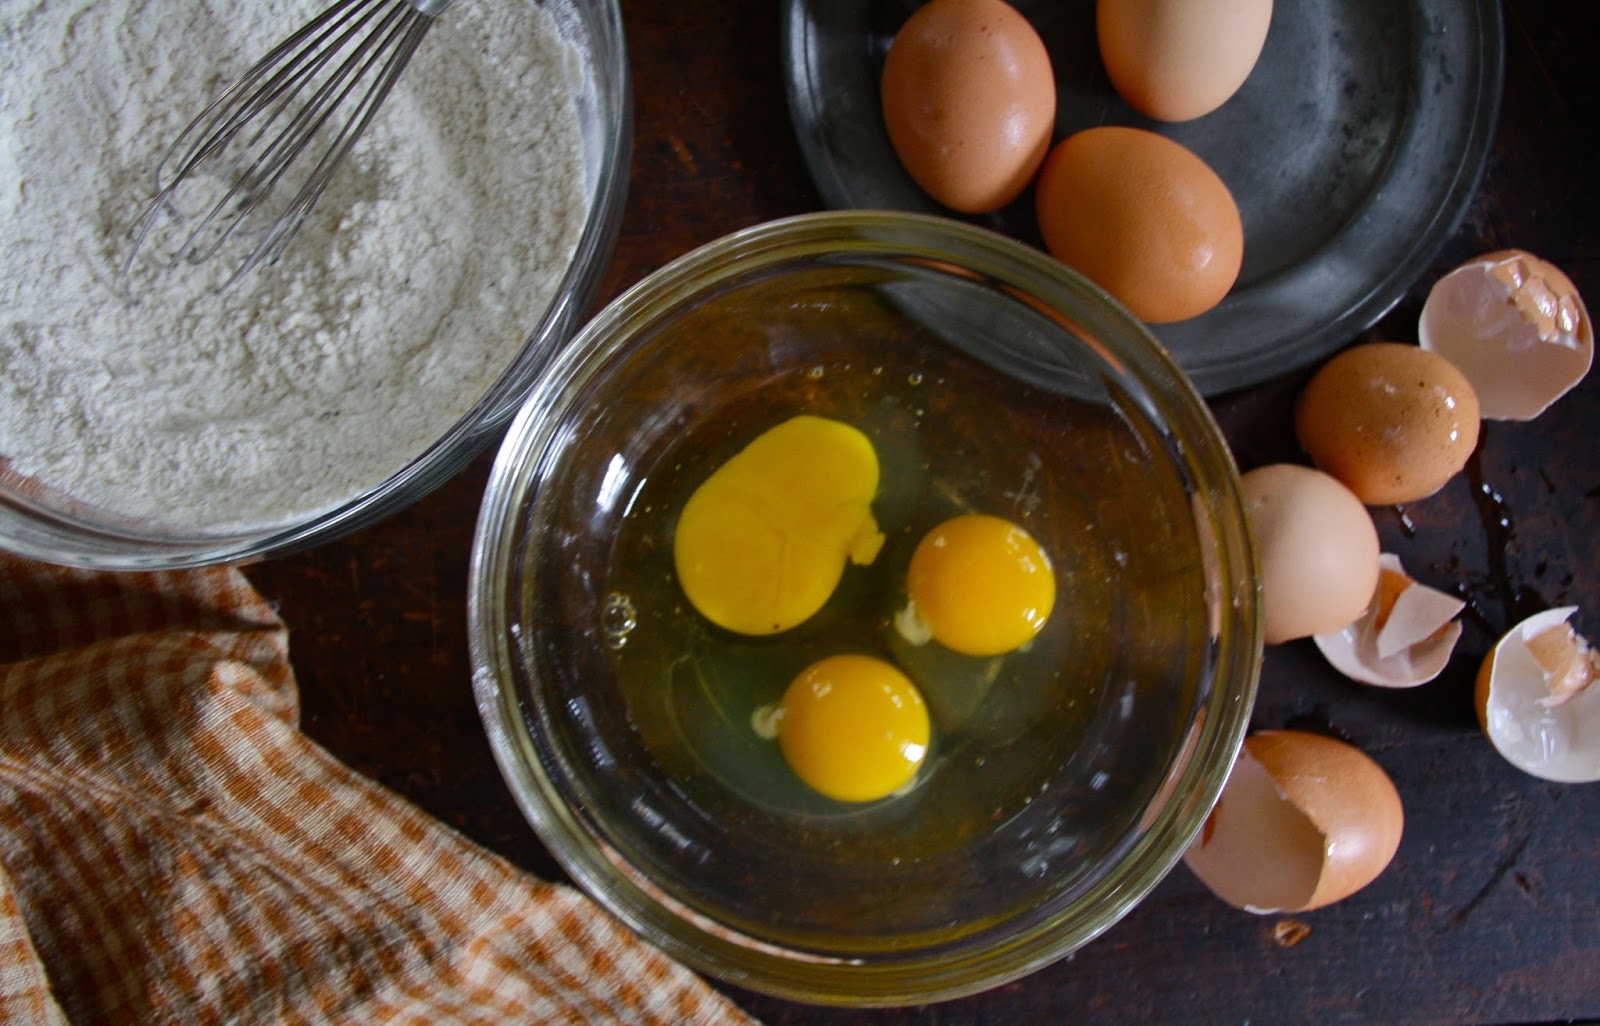
3. In a medium sized bowl, whisk the eggs and milk until well blended.
4. Add eggs to the flour mixture and whisk until well blended and frothy. (Note: Alternately put the flour and egg mixture in a blender and mix until well blended or whip using a hand mixer.)
5. Stir in chopped thyme, chives and a heaping tablespoon of the grated Parmigiano-Reggiano Cheese.
6. Place butter in a 12" or 9"x12" cast iron pan. Place in oven until butter melts and begins to slightly brown (approximately 3-5 minutes). Note: Check on butter after 2 minutes and every minute thereafter.
7. Remove pan from oven. Pour in egg mixture. Top with grated parmesan cheese.
8. Return to oven and bake for 20-22 minutes or until the Dutch Baby is puffed and golden.
9. Remove from oven, garnish with additional thyme and chives. Serve immediately with Cherry Tomato Jam.

Ingredients for the Tomato Jam
2 cups (340 g) cherry or grape tomatoes (or a mix of the two), cut in half
3/4 cup (150 g) granulated sugar
2 -3 Tablespoons freshly squeezed lemon juice
Zest of 1 lemon
generous 1/2 teaspoon finely chopped fresh rosemary

Directions for the Tomato Jam
1. Preheat oven to 350 degrees (F). Line a rimmed baking sheet with aluminum foil.
2. Place the cut tomatoes halves on the prepared baking sheet. Bake for 15 minutes to loose the skins.
3. Remove tomatoes from oven and place in a heavy bottomed saucepan. Add sugar.
4. Over medium heat gently melt sugar, then bring to a boil and cook (boiling rapidly) for 5 to 7 minutes, or until thick and syrupy. Notes: Stir frequently. My cooking time was 7 minutes.
5. Remove from heat and add lemon zest, freshly squeezed lemon juice and chopped rosemary.
6. Transfer tomato jam to clean, sterilized jars. Seal well. When cool, place jam in the refrigerator.
7. The tomato jam can be kept refrigerated for up to 2 weeks, if it lasts that long!

Notes: (1) Instead of melting butter in the cast iron pan in the oven, can melt on the stovetop over medium high heat; (2) Instead of using thyme and chives, could use thyme and tarragon or thyme (2 T), tarragon (1 T) and chives (1 T); (3) Instead of serving with the Tomato Jam, could serve with Sriracha and/or lemon wedges; (4) Definitely serve with a good quality white or sparkling wine; (5) If using a round cast iron pan, cut into wedges for serving; (6) The Dutch Baby is great hot out of the oven, but was equally delicious when it came to room temperature; (7) The batter and grated cheese can be prepared ahead of time and kept refrigerated until ready to use, making it a slightly make-ahead appetizer or luncheon/dinner entree. 


Fishing on the Snoqualmie River (June 2017)


Twin Falls, Snoqualmie Region, North Bend, Washington (June 2017)


Tuesday, May 30, 2017

Mixed Greens Pasta Salad


Memorial Day is the unofficial start to the summer. Depending on where you live or how old you are, there are any number of tell tale signs of its glorious onset. Beaches and public pools officially open whether we are bathing suit ready or not; the population of beach towns swells with the arrival of the summer people; the aroma of food being cooked on outdoor grills permeates the air; piled high on tables at the farmer's markets are a wide array of fresh fruits and vegetables; pitchers of fruit filled sangria have a greater presence at gatherings; and, rule followers can freely wear white without fear of the ghosts of former etiquette matrons haunting them. Around here it also means the gardner (aka the person who shall remain nameless) has finished planting all of this season's annuals and herbs into the urns and hanging baskets; the mileage on my bicycle's odometer starts to see dramatic increases; the frequency of my whining escalates in anticipation of my long runs being on the hottest days; some of my favorite recipes (e.g., chocolate covered caramels) go on hiatus until cooler, less humid temperatures return while others return with a vengeance (e.g., blueberry crisp); and, I start to crave salads. And if this year's Memorial Day weekend weather is an omen of some sort, we should be having a wondrous summer here in the midwest. 


As soon as I came across the recipe for the Mixed Greens Salad in the June (2017) issue of Food and Wine I knew I would be making it. Sooner rather than later. Salads with pasta in them, especially ones with cone shaped fluted petal-like frilly edged pastas, are even harder to resist. With fresh asparagus still available at the farmer's market all of the salad making stars were aligned.


If there is one salad you want to be the stand-out at your next summer barbecue or gathering, this Mixed Greens Pasta Salad is a serious contender. Crisp vegetables and al dente campanelle (or gigli) pasta tossed with a creamy, light, tangy, mildly garlicy dressing are the epitome of what a flavorful, satisfying, crave worthy summer salad should be. It's a salad substantial enough to stand up as a main course as well as being the perfect accompaniment to grilled chicken, steak, fish, and even pizza.


At least in terms of its' size, this Mixed Greens Pasta Salad might be the kind of salad worthy of living up to Elaine's definition of a 'big salad' (click here for a Seinfeld episode clip). Because the recipe makes a really, really BIG salad. Enough to serve at least 10-12 people (as a side) or 6-8 (as a main course).


As far as salads go, this one comes together easily. And in spite the simplicity of the ingredients, it delivers as one seemingly much more complex.


Two cups of peas and a pound of trimmed asparagus cut into 1" or so pieces are blanched in boiling water until tender crisp. Two minutes is all it takes to get them salad ready.

Plunging the quick boiled vegetables into a bowl of ice water will ensure they retain their color vibrancy and crisp-tender texture.


The dressing is made with buttermilk, mayonnaise, champagne vinegar, minced garlic, and some kosher salt and pepper to taste. It can be made as you are assembling the salad or in advance (covered and refrigerated).


For the volume of pasta (original F&W recipe recommended using one pound of cooked pasta) and vegetables, the amount of dressing seemed to be slightly disproportional. While I am not at all suggesting this salad be drenched in dressing, having all of the vegetables lightly coated in it would make for an even more satisfying salad eating experience. So next time, I will make the the entire pound of pasta but initially use only 3/4 of it. If by chance, this reduction is 'too much' and the salad seems cloyingly overdressed, I will add a little bit more of the cooked pasta to get it to the still light, but having a slightly more discernible dressing presence.


The first step in assembling the salad is mixing half of the salad dressing (about 3/4 cup) with the drained, still warm al dente campanelle (or gigli) pasta. Once mixed together, the pasta needs to rest (cool) for about 30 minutes before the asparagus, peas, and remaining dressing are added in. The arugula is folded in to the salad at the end or right before serving. 


Once this 'big' Mixed Greens Pasta Salad is all mixed together, transfer to really big platter and serve. 


I couldn't stop eating this salad. Or rather, I didn't want to. The sweetness of the peas, the slight peppery taste of the arugula, the crunch of the asparagus, the texture of the pasta, and the just right amount of garlic in the dressing put it in the addictive salad category.


Aesthetically this is truly one of the most beautiful salads to ever grace a table. Part of its' visual allure is due to use of campanelle (or gigli) pasta. So whatever you do, I 'pretty please' beg you not to make a pasta substitution for this salad. It would be like wearing white before Memorial Day. You could do it, but it just wouldn't look right. I know what you may be thinking. Some rules are made to be broken or even a bit outdated. However, when it comes to this Mixed Greens Pasta Salad, there really should be a pasta rule. One with penalties for breaking.

If you are looking to change up your salad offerings for your summer gatherings or secretly seek to be the center of attention at the next barbecue, make this 'crazy good' Mixed Greens Pasta Salad. I almost guarantee it will get rave reviews. Don't be surprised if any of your family or friends claiming to have an aversion to peas take a second helping. Odds are it will be destined to make repeat appearances throughout the summer. 

Recipe
Mixed Greens Pasta Salad (Inspired by the Mixed Greens Salad recipe in Food & Wine, June 2017)
Serves 10-12 as a side dish, Serves 6-8 as a main dish

Ingredients
Dressing
1 cup buttermilk
1/2 cup mayonnaise
3 Tablespoons Champagne vinegar
1 large garlic clove, minced or grated
Kosher salt and black pepper to taste

Salad
1 pound fresh asparagus, trimmed and cut into 1" pieces
2 cups peas, fresh or frozen (Note: A 10 ounce bag of organic peas yielded two cups.)
3/4 - 1 pound campanelle or gigli pasta, cooked al dente 
4-6 ounces arugula, thick stems discarded and leaves coarsely chopped. See Note.
Kosher salt and black pepper

Directions
Dressing
1. In a medium sized bowl, whisk together the buttermilk, mayonnaise, vinegar, and garlic. Season with salt and pepper. Cover and store in the refrigerator until ready to use.
Note: Dressing can be made several hours or a day ahead.

Salad and Assembly
1. Set up an ice bath in large bowl.
2. Bring a saucepan of water to boiling. Add the peas and asparagus. Cook until crisp tender (approximately 2 minutes). Drain and transfer to ice bath to cool completely. Drain well.
3. Refill saucepan with water and return to a boil. Season water generously with sat. Add pasta and cook until al dente. Drain well and transfer to a large bowl.
4. Toss half (approximately 3/4 cup) of the dressing with the warm pasta. Let cool for 30 minutes.
5. Stir in asparagus, peas and remaining dressing. Season with salt and pepper.
6. Fold in arugula and serve.

Notes: (1) This was a very lightly coated salad. Would recommend using only 3/4 pound of the pasta to ensure all of the pasta and vegetables are evenly coated. (2) While the F&W recipe called for using regular sized arugula, I used an arugula slightly larger than baby, one without heavy stems. Instead of using 1/2 pound of arugula, used only 4 ounces and felt it was more than enough. However, after mixing your salad, add more to your liking. (3) If fresh peas are not available, use large sized frozen organic peas. They worked well. (4) The salad is best enjoyed immediately after fully assembled although it was still genuinely delicious after being chilled in the refrigerator overnight in spite of not having the freshly made creamy dressing finish (but this may have been due to the use of the full pound of pasta).


Memorial Day Weekend in Wilder Park 2017 (Elmhurst, IL)


Thursday, May 11, 2017

Amatriciana Estiva (Summer Amatriciana)


Time flies much too fast. In less than two weeks Laura, my favorite niece, will be graduating from college. And we will all be making the trek out east to witness and celebrate her milestone moment. There are still days when I look at her and clearly see her three year old, five year, and eighteen year old faces, to name just a few. I feel fortunate to have been able to watch her grow into a beautiful, kind, smart, funny, accomplished young woman. And to this day, I remain more than grateful to God she didn't break her three year old neck landing hard as she flew off a swing while under my watch. Laura has so many admirable, enviable qualities I don't know where to begin listing them all. The one making the earliest appearance in her life was her fiercely determined spirit. As a preschooler she had very strong feelings about how to comb (or not comb) her hair or what she wanted to wear (or rather not wear). Thankfully she possesses a strong forgiving spirit. Or we may not have as close as a relationship we share today. To say that I am proud of the person Laura has become would be an understatement. If the world gave her back only some of what she has given it already, she will have a blessed, happy, successful life. But, of course, as her aunt, I want the world to give her more. 


Her graduation weekend will include meals filled great food and amazing wine. It is fitting we are having a celebratory dinner at the Italian restaurant in Boston my sister has raved about as Laura spent a study abroad semester in Florence. As much as I am looking forward to what will undoubtedly be an amazing dinner, I am also looking forward to making her this Amatriciana Estiva when she comes back home for a couple of weeks. 


Amatriciana, one of the better known sauces in Rome, means "in the style of Amatrice" (a town in the province of Rieti located in central Italy). This traditional, classic tomato sauce is prepared with guanciale (cured pork cheek), tomatoes, and grated pecorino romano cheese. Garlic, onions, and olive oil have worked their way into variations of Amatriciana, however, onion is the least favored ingredient. This version, shared in the cookbook 'Tasting Rome: Fresh Flavors & Forgotten Recipes from an Ancient City" adheres very closely to the early 19th and 20th century recipes as there is an almost negligible amount of extra-virgin olive oil and only clove of garlic.


Simple, fresh ingredients are the hallmarks of the Amatriciana. Fresh cherry tomatoes, garlic, basil, pecorino romano cheese, and guanicale. Considered by some to be a delicacy, guanciale is an unsmoked Italian bacon made from the pig's cheek. Nothing else adds the same kind of luxurious flavor to a sauce. In other words, there are no substitutions for it in an Amatriciana sauce.


The original recipe called for the use of bomboletti pasta. Translated it means short ribbed pasta. If by some chance you don't find a pound bag of pasta labeled as bomboletti, look for a mezzi rigatoni. Mezzi rigatoni comes in varying sizes. For this recipe you want to find one, preferably imported, about an inch long and about a half inch wide. I used this one, a Mezzi Rigatoni 18 made by Divella. 


Cut into matchstick pieces, the guanciale is cooked in one teaspoon, yes only one teaspoon, of extra-virgin olive oil until it is a beautiful golden brown and crispy. Using a heavy bottomed cast iron pan the guanciale took almost ten (10) minutes to be cooked to perfection. After removing and placing the pieces of guanciale on a plate lined with a paper towel, the rendered fat is poured into a heat proof glass measuring cup. Making it easier to return only half of it back into the pan before adding the garlic. As a self-professed garlic lover, I wanted to use more than one clove of garlic. But instead had a feeling this was a sauce calling for garlic restraint. For all of you garlic lover kindred spirits out there, one clove was all this sauce needed. Any more and it would have been an unfortunate distraction.

There are one and a half pounds of cherry tomatoes in this sauce. While cherry tomatoes are not yet in abundance at the farmer's markets, the cherry tomatoes on the vine found in many grocery stores worked well. I happened to find some San Marzano tomatoes at one of my local ethnic grocery stores. They are about the same size as a cherry tomato although they have an oblong shape. I decided to use a combination of the two tomatoes. While I can't compare sauces made with only one tomato variety or two, I can tell you I absolutely loved the depth of tomato flavor from the use of both the cherry and San Marzano tomatoes. So if you can find them near where you live, try this variation. 


In less than ten minutes over medium heat, the tomatoes fall apart, creating a thick, velvety sauce. Some fresh basil, sea salt, grated pecorino romano cheese, and the cooked guanciale all add to the complexity of this rather seemingly simple sauce. 

If you are planning on serving this dish immediately, start bringing a large pot of water to a rolling boil while you begin making the sauce. By time the sauce is almost finished, you should be ready to put the pasta in the water. Cook only until very al dente. Not al dente, very al dente. Note: The pasta will continue to cook in the sauce. After adding the very al dente pasta to the tomato sauce, add about one cup of the pasta water or enough to barely cover the top of the pasta. Some of the water will evaporate as well as be absorbed by the pasta. If one cup of pasta water is not enough, you can always add more. If you add too much at the start, you risk having a runny sauce or very overcooked pasta.


The one half cup of freshly, finely grated Pecorino Romano cheese used in this dish is divided equally. Half is mixed into the sauce itself, the other half is used to finish off the plated pasta. I don't know about you, but measuring grated cheese in a measuring cup had been a challenge. A half cup of grated Pecorino Romano cheese weighs two (2) ounces. To overcome this challenge as well as to avoid turning beautiful finely grated cheese into an ugly clump, I use a scale. It's one of those kitchen tools I can't live without. After using a scale for awhile you begin to get a sense of what a half-cup of grated Pecorino Romano looks like (and it doesn't look like it would fit into into a half measuring cup). If you don't have one, consider getting one. They are worth their weight in gold.

Before plating the pasta on a platter, I had added all of the cooked guanciale. The original recipe called for adding only half to the sauce and using the other half to sprinkle over the top of the dish. I suppose one reason was to make sure everyone gets a few pieces on their plate. Glossing over that little detail, I added all of the cooked guanciale to the sauce. Having tasted the Amatriciana Estiva, I would do the same thing again.


Have a bowl of some additional freshly grated cheese available on the table for those who love their pasta heavily draped. Whatever you do, don't buy the pre-grated, pre-packaged pecorino romano cheese. It doesn't taste the same as freshly grated. Really, seriously, it doesn't. 

I could, but probably shouldn't, eat this Amatriciana Estiva weekly for the rest of my life. I don't even know where to begin in describing this Amatriciana Estiva. If I used even half of the adjectives that came to mind when I took my first bite, I wouldn't come close to doing justice to this deceivingly simple, intensely flavorful and deeply satisfying dish. I could not think of a more fitting pasta dish to serve at a celebratory dinner.

With summer cherry tomato season just around the corner, I am predicting Amatriciana Estiva will be making regular appearances on the dinner table here. 

Recipe
Amatriciana Estiva (Summer Amatriciana) - an ever so slight adaptation to Katie Perla's and Kristina Gill's Amatriciana Estiva recipe shared in their 'Tasting Rome: Fresh Flavors & Forgotten Recipes from an Ancient City" cookbook

Ingredients
1 teaspoon good quality extra-virgin olive oil
3 to 3 1/2 ounces Guanciale, cut into matchsticks
1 large garlic clove, smashed
1 pound cherry tomatoes and 1/2 pound of San Marzano tomatoes (or 1 1/2 pounds cherry tomatoes), cut in half
6-8 fresh basil leaves, torn into pieces
1/2 cup (2 ounces) Pecorino Romano, finely grated, divided
Sea Salt
1 pound bomboletti style pasta (short, ridged, tubular shaped)
Additional grated Pecorino Romano for serving

Directions
1. Begin to bring a large pot of water to a rolling boil while you make the sauce.
2. Heat olive oil in a heavy bottomed pan over low heat. When oil begins to shimmer, add the guanciale. Cook, stirring, until golden brown and crisp (approximately 10 minutes).
3. Using a slotted spoon, transfer guanciale to a plate lined with a paper towel. Set aside.
4. Pour rendered fat into a measuring. Return half of the rendered fat back to the pan. 
5. Over medium-low heat, add garlic. Cook until it turns golden (approximately 4-6 minutes).
6. Add tomatoes. Increase heat to medium and cook until the tomatoes lose their shape (approximately 10 minutes). Stir in basil.
7. When water reaches a rolling boil, add at least 1 tablespoon of sea salt. When salt had dissolved, add the pasta. Cook until very al dente
8. Remove pasta from the pot using a skimmer (reserve pasta water) and add to sauce. Stir to coat.
9. Add enough pasta water (approximately 1 cup) to barely cover the pasta. Add more water as needed.
10. When pasta is al dente, remove pan from the heat.
11. Add 1/4 cup of the grated Pecorino Romano. Stir until cheese has melted. Add all of the cooked guanciale (or alternately add only half of the guanciale, reserving it for sprinkling over the top of the plated pasta).
12. Season to taste with sea salt.
13. Transfer to a serving platter. Top with remaining 1/4 cup grated Pecorino Romano cheese and, if not already mixed in, the remaining guanciale. Serve immediately. 
14. Optional: Serve with some additional grated cheese.

Notes: (1) This dish is best served warm, but even at room temperature it remained delicious. (2) The first time you make this, use only one clove of garlic. I would bet you won't be tempted to increase the amount the garlic the next time you make it. (3) Use the ripest cherry tomatoes you can find.


Cantigny Park, Wheaton, Illinois (May 2017)


Friday, May 5, 2017

Cinco de Mayo Round-Up

Happy Cinco de Mayo! However you decide to celebrate, I hope it includes some great food and beverages. And it goes without saying, a really good tequila! One of the great things about the foods typically enjoyed on Cinco de Mayo is they are all great year round. I mean, can you imagine if we waited to eat guacamole and drink margaritas once a year? The mere thought of this is almost unfathomable. So here are some recipes to include in your fiesta as well as in any of your upcoming gatherings.


Amy's Shortbread Cookies - Cinco de Mayo Style