Thursday, December 12, 2013

Meltaways

While I was on the treadmill at the fitness center this morning, trying hard to not pay too much attention to the distance gauge (so I didn't sabotage myself), I decided to focus my eyes on the television instead (a great distraction in keeping me from constantly checking how much further I was from my goal for the day). Somewhat serendipitously I caught the tail end of a segment about simplifying the holidays. Most of us fall somewhere along the two camp continuum, the too-much-have-to-do-it-all-perfectly camp and the relax-and-actually-enjoy-the-holidays camp. I haven't yet fully incorporated the concept of relax into my operational vocabulary, so I am one of with try do it all tendencies (shifting this pendulum remains a life goal). After my workout I had intended to bake some holiday cookies (one rather easy but with a myriad of steps). However, the simplification segment changed all of that. Instead I remembered I had a recipe for probably one of the simplest of all holiday cookies, the Meltaways, and that would be the one I would bake instead.


They are a 1 on an easy scale of 1 to 10, but a 9 on the deliciousness scale of 1 to 10. The only reason I am not giving them a 10 is that they do not contain chocolate (chocolate has a way of tipping the deliciousness scale for me). Meltaways are so aptly named, for the obvious reason, they literally melt in your mouth. They are a dense, yet not dry shortbread-like cookie containing toasted pecans and dusted with confectionary sugar. These would definitely fall into the visions of sugar plums cookie category.

It is a wonder I even found this recipe even thought I had probably written it for the tenth time on a piece of paper. I don't commit any recipes to memory and seem to often lose or rather temporarily misplace recipes (probably because they are not well organized). But it wasn't just getting my hands on the Meltaway recipe, it was being able to read it. Thankfully I must have written it when my handwriting was a little more legible (I have caused more than my fair share of administrative assistants to go temporarily insane trying to read my handwriting).


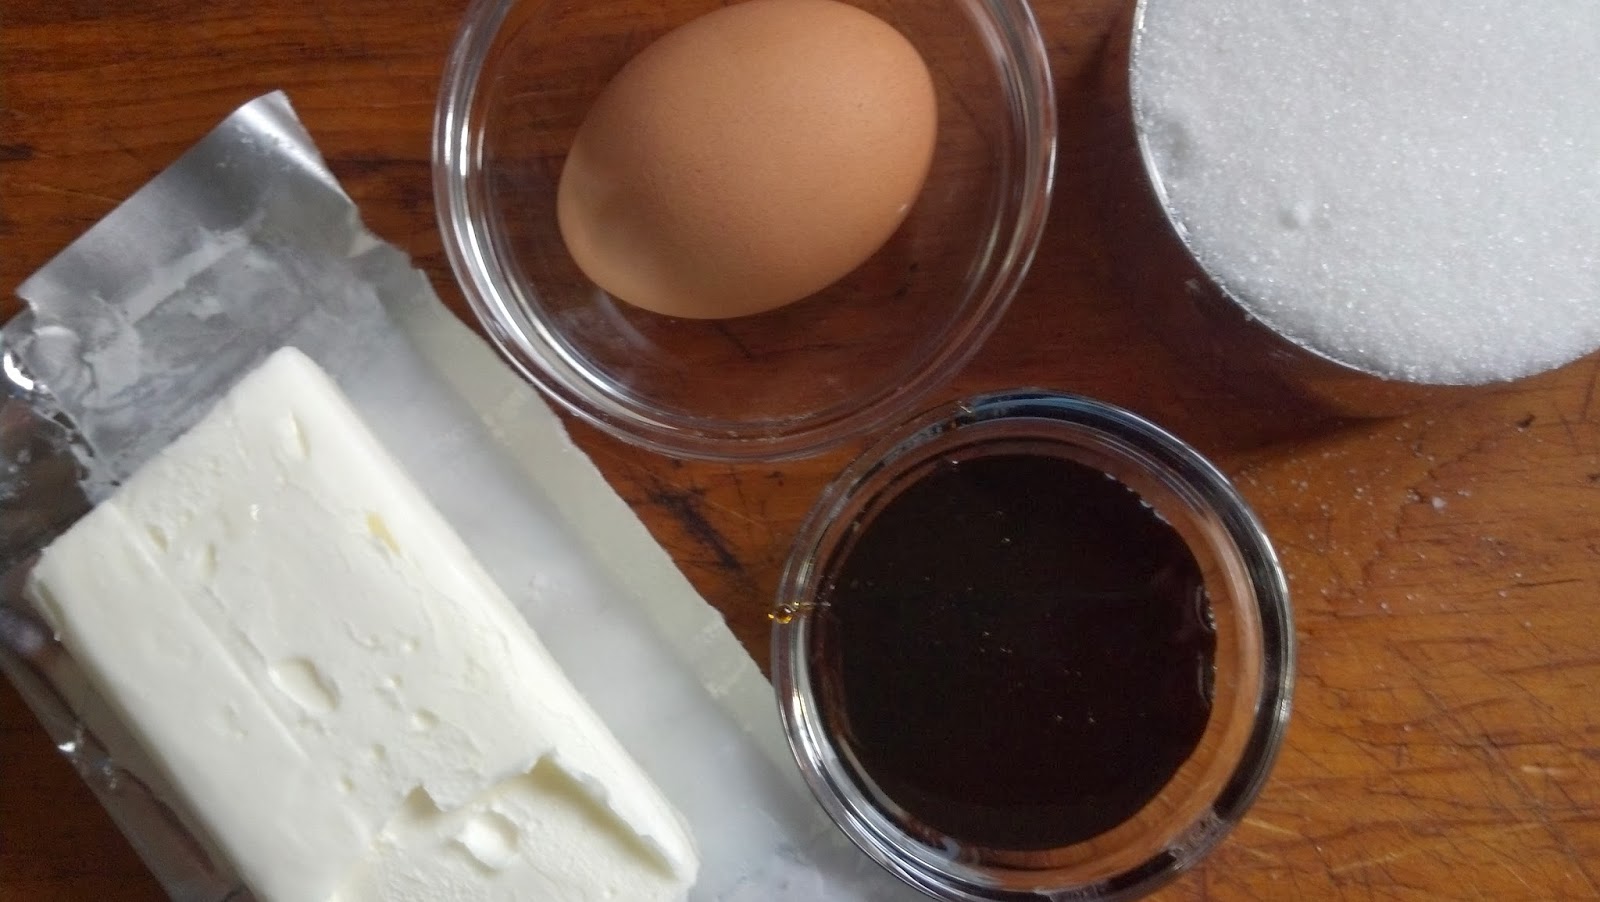
The simplicity of the Meltaways comes in its' ingredients as well as its' assembly process. Cake flour, unsalted butter, vanilla, toasted pecans, salt and confectionary are all you need to make these mouthwatering cookies. With the exception of cake flour, you probably have all of these ingredients in your pantry and refrigerator.

I will go on only a short rant about toasting your nuts before using them in any cookie dough. Toasting brings out the flavor of the nut and really does transform how your finished cookie will taste. The pecans in the Meltaways are first toasted and then finely chopped. When the amounts of nuts of relatively small, like 3/4 cup in this case, I like chopping them myself rather than using a food processor. One less thing to clean and then you don't miss out on the incredible aroma that comes from chopping them. There are a million recommendations for toasting pecans. I bake them at 350 degrees for about 8 minutes, which is long enough to bring out their flavor without burning or drying them out.


In most recipes calling for sifted flour, you sift after you measure the flour. But for this cookie, you sift first then measure. The use of cake flour makes for a very tender cookie. If you don't use cake flour on a regular basis, this cookie is worth adding it to your pantry.

Now for the super easy assembly part. Cream the unsalted butter, vanilla and one half cup of confectionary sugar. Gradually mix in the (sifted first, measured second) cake flour and salt. Mix or stir in the finely chopped toasted pecans. Your cookie dough is now finished. How simple is that? Because this dough is on the dense side, the cookies do not spread when baking. I generally prepare two parchment paper lined baking sheets but bake each baking sheet separately.

You can drop the dough by the teaspoonful on a parchment paper lined baking sheet or you can use a small ice cream scoop. If you use a spoon to drop the cookies, they will look like little mountains and when you use an ice cream scoop they will resemble little snowballs. Today I went for the snowball look.

These cookies are baked in a preheated 450 degree oven for approximately 7 minutes. I check for the light brown doneness on the bottoms of the cookies at 6 1/2 minutes. Then I decide how much longer I want to return them to the oven (which is anywhere from 30 to 60 seconds). The bottoms of these cookies brown up faster than the tops of the cookies, so always, always check the bottom to test for doneness. Baking at such a high temperature means your baking time isn't long and sometimes 30 seconds too long is enough to burn them.


While the cookies are baking have a strainer or sifter ready with confectionary sugar. As soon as the cookies are finished baking, transfer them to a cooling rack and then lightly dust with the confectionary sugar. You want to dust these cookies while they are still warm. Due to their size, they will cool relatively quickly.

Allow the confectionary sugared cookies to cool to room temperature before plating or transferring to a tin. I would suggest you make these cookies on a day when you don't have too many cookie stealing fingers hovering near the kitchen as this recipe makes approximately three dozen cookies. However, after you sample one or two of them while they are still warm, you will have slightly less than that amount (such a small reward for creating these delectable little bites of goodness and for shifting the holiday cooking baking needle in the direction of simplifying!).

Recipe
Meltaways (makes approximately 3 dozen little bites of deliciousness)

Ingredients
1 cup (2 sticks) unsalted butter room temperature
1/2 cup sifted confectionary sugar, plus more for dusting
1 teaspoon Vanilla
2 1/4 cups cake flour (measured after sifting)
1/4 teaspoon Kosher salt
3/4 cup chopped toasted pecans

Directions
1. Preheat oven to 450 degrees. Line baking sheet with parchment paper and set aside.
2. In a standing mixer or using a hand held mixer, cream together the butter, vanilla and confectionary sugar.
3. Add the salt and sifted flour into the butter mixture (add in gradually).
4. Stir in chopped toasted pecans.
5. Drop by teaspoonfuls or scoop into balls using a small ice-cream scoop. Place baking sheet in center of oven. Bake for approximately 7 minutes, checking at 6 1/2 minutes. The bottoms of the cookies should be lightly browned.
6. Transfer cookies to a cooling rack and dust with confectionary sugar.
7. Allow to cool and plate or store in a covered tin or container.


The weather here has turned wickedly cold. I am not dreaming for a white Christmas (snow is already on the ground), but a slightly warmer holiday. I would be happy with temperatures in the 40s which isn't really warm, but at a certain point the perception of warmth is all relative. And a 40 degree day in the winter can feel downright balmy, except for those of you who grew up in or live in the warmer climates. Somehow I am thinking 40 degrees and balmy would not be words you would use in the same sentence.

Just like weather our perceptions of many things is all relative, usually based on our past experiences or expectations. How each of us views or approaches the holidays also changes as we get older or wiser (with age not a factor). Some of us move away from wanting gifts for ourselves toward having gifts given to others on our behalf. Sometimes I wish the ethic of humanitarianism came into my life at a much younger age. I have a friend who began teaching and emulating this value to her children when they were very young. It wasn't just when she started this, it was her year over year consistency. As a result, this importance of humanitarianism is one that remained with them. Yet beyond instilling a philanthropic ethic in her children, she permanently altered their perception of the concept of receiving to include not just tangible, but the equally important intangible gift of knowing you made a difference in the life of someone else. Whether or not we had role models in our life that shaped our perception of receiving, it is never too late to start shifting either ours or those of family members.

Wednesday, December 11, 2013

A Savory and Hearty Frittata

The first time I made the Hearty Frittata was when I was having a friend visit for the weekend. I wanted to make something different or I should say a memorable, amazing flavor, beautiful dish. The frittata made with challah bread, eggs, sharp cheddar cheese, mild Italian sausage, caramelized onions, sautéed mushrooms, green onions and a little bit of half and half seemed to have it all and all in one dish! Not only did it turn out to be memorable and beautiful, it was a frittata that went beyond my delciousness expectations. Finding the perfect recipe to replace that same old, same old breakfast casserole or the incredibly delicious but insanely rich custard based french toast casserole was like finding the proverbial pot of gold at the end of the rainbow.


I am probably the first person (okay maybe second or third) to run out and buy a new kitchen tool or gadget if it is called for in a recipe. Yet, for some reason when I found this frittata recipe (it called for a frittata pan) I showed restraint (something that happens a little too infrequently). Instead, I thought the recipe was easily adaptable to being baked in a cast iron pan. Okay, there are probably some of you don't have a cast iron pan, but I would urge you to run out, show no restraint, and get one! Why? Because it meets the 'rule of three'. The cast iron pan can withstand high temperatures, can be used for more than just making frittatas, and makes any dish presentation worthy. Convinced yet?


Whether served hot out of the oven, warm or at room temperature, the frittata was both filling and slightly addictive. The kind of addictiveness that happens when your stomach feels full but your mouth says 'I am not finished yet'.


The original recipe called for brioche. However, more often than not, finding it is a bit of a challenge. Unless of course I want to drive to three or four stores. I can be a little ingredient obsessive, but I have my limits. Challah is so much more readily available (usually found in the first grocery store I go to) and it works perfectly in this frittata. On the other hand, fresh eggs (my recently acquired ingredient obsession) are no longer readily available in the midwest where I now live. So while visiting friends in Rhode Island this past weekend I was over the top giddy to have scored fresh eggs (the ones with the deepest of yellow almost orange yolks) from my favorite chicken farmer. Of all of the purchases made over the course of several days, the eggs were hands down my most favorite (this wasn't the first time I brought back two dozen fresh eggs on the plane with me and it won't be the last). No, you don't need fresh eggs for this frittata, you only need ten large ones.


There are three cups of toasted bread cubes in the frittata. The loaf of Challah will yield almost double this. Any unused toasted bread cubes can be stored for use at a later time or you can just toast as much of the bread as you need.


Once the toasted bread cubes have cooled, they are mixed into with the eggs, half and half, cheese and green onions. The bread cubes need to be completely submerged as it is important for the bread be able to absorb the liquid. The entire mixture is covered and refrigerated for an hour.


Eight ounces of mild Italian sausage are sautéed in one tablespoon of extra virgin olive oil until browned. Once browned the sausage is removed and placed on a paper towel to drain.


There are layers and layers of flavor in this frittata. A Spanish onion is thinly sliced and caramelized while mushrooms are sautéed until lightly browned and tender. When getting ready to assemble the frittata, the cooked vegetables are mixed with the sautéed Italian sausage, returned back to the pan and cooked until just heated through (about 1 to 2 minutes).

Remove the pan from the heat before mixing in the egg/cheese/bread mixture. Working quickly, stir until the sausage and vegetables are well distributed. In the preheated 350 degree oven the frittata is baked for 30 to 35 minutes or until it is puffed and lightly browned. I used a 10 inch cast iron pan to make this frittata. Baking time might change if you use a larger pan.


What I love about this frittata is that it can be served hot or warm and is still rather tasty at room temperature. So if you have never made a frittata before, let this be the one you make for your family and friends. This is one savory, satisfying and beautiful dish. And it might just make you give up your standard breakfast casserole recipe.

Recipe
Savory and Hearty Frittata (slight adaption to the Lodge Brunch Frittata recipe shared by Williams-Sonoma)

Ingredients
3 cups of brioche or challah bread with crust removed cut into 1 inch cubes 
10 large eggs, room temperature
1/4 cup half and half
1/2 cup thinly sliced green onion, both green and white parts (about 2-3 green onions)
6 ounces freshly grated sharp cheddar cheese 
8 ounces mild Italian sausage
1 medium sized spanish onion, thinly sliced
8 ounces Baby Bella mushrooms, thinly sliced
3 Tablespoons and 1 teaspoon extra-virgin olive oil (divided)
Kosher salt and black pepper

Directions
1. Preheat oven to 350 degrees.
2. Spread bread cubes on baking sheet and bake for approximately 15 minutes or until the bread cubes are lightly golden. Allow to cool. (Note: Can be made a day ahead. Put cooled bread cubes in a sealed plastic bag.)
3. Lightly beat the eggs. Add half and half along with a pinch of Kosher salt and pepper. Mix until blended.
4.  Add cooled bread cubes, cheese and green onions to egg mixture mixing to ensure the bread cubes are fully coated. Cover with plastic wrap and chill in the refrigerator for at least 1 hour.
5. Add 1 Tablespoon of extra-virgin olive to the skillet turning the heat to medium high. Add mild pork sausage and cook until sausage is lightly browned (about 8 to 10 minutes). Remove sausage and place on a paper towel lined plate. Set aside.
6. Add a Tablespoon of olive oil to the skillet turning heat to medium high. Add onions and cook until onions are caramelized (stirring frequently). Takes 12-15 minutes. Remove onions and set aside.
7. Add a Tablespoon of olive oil to the skillet turning heat to medium high. Add mushroom and cook until lightly browned and tender. About 8-10 minutes. Remove from pan and set aside.
8. Mix together the cooked sausage, caramelized onions and sautéed mushrooms in the skillet. Cook until heated through (about 1 to 2 minutes).
9. Pour in egg/bread mixture and stir until sausage/vegetable mixture is evenly distributed.
10. Place in the preheated 350 degree oven and bake for approximately 30-35 minutes or until top is lightly browned and puffed. Note: Another sign of doneness - the center of the frittata should bounce back.
11. Remove from oven and serve. Can be served hot, warm or at room temperature.
Note: Sausage, onions and mushrooms can be made a day ahead. Cover and place in refrigerator. Reheating may take slightly longer than 1 to 2 minutes.


Years back when I was first began buying antiques I became friends with someone who imparted her years of buying and collecting wisdom with me. Wisdom which ultimately guided most of my furniture purchases. We were at an antique show in Maryland (a whirlwind antique buying weekend trip) when I found a painted blanket chest. I was on the hunt for one and was bound and determined to come home with one. So when I found a blanket chest in original paint I was ecstatic. That is until my friend Randi said 'so where are you going to put that orange painted blanket chest?' I shared I wanted for the family room (but really I just wanted it). Then she said 'where else could you use it?'  Taken back a little by the question, I responded to her question with a question 'Why would I have to think about where else to use it?'. 

And that's when she imparted her 'rule of three' wisdom with me. 'If you can't think of three different uses or places in your home for a piece of antique furniture (beds don't fit this rule), think long and hard before buying it, especially if it comes with a large price tag. But if there are three different uses or places for it, don't even think twice, it is something you should buy', she said. 

Needless to say I didn't come home with the orange painted blanket chest that weekend (thankfully in retrospect) but rather I came home with the 'rule of three' wisdom that guided many of my subsequent antique furniture purchases. I have since tried to generalize this wisdom to other things, things even as small as buying a cast iron pan or in hiring a staff member. I don't follow it religiously (you know the old exception to the rule rationalization), but when I do, I have never regretted the purchase or the decision. 

Wednesday, December 4, 2013

Fruit and Nut Chocolate Bark with Sea Salt

Remember the adage 'Don't judge a book by its' cover'? Well over the years, it has become one of those maxims we modify and use to fit a myriad of contexts. So I feel compelled to say 'Don't judge a recipe by its' name'. Why? Because for some of you when you hear the words fruit and nut together it conjures up foods you are not particularly fond of. Things like fruit and nut eggs (those last to be eaten candy confections in an Easter basket) and fruitcake (a cake having an almost legendary bad rap). So I ask (kindly, of course) for you to momentarily suspend your preconceptions about the taste of any 'fruit and nut' foods ever eaten (or dismissed) and allow me to change how you think about those two words. Because I am going to put them in a very different context for you. The context of cashews, pistachios, dried cherries, chocolate and sea salt.


If chocolate has the same seductive qualities as the little black dress, then the Fruit and Nut Chocolate Bark with Sea Salt is akin to the wearing the low cut black dress and four inch heels. Other than having you take a taste of this bark, I know of no other way to explain to you how amazing it is or how you will be affected by it. Believe it or not, there is also an element of simplicity in this chocolate bark, in the making of the bark that is. However, there is nothing simple about being taken in by something so beautiful and so delicious.


What could be easier than melting chocolate and spreading it onto a parchment paper lined baking sheet and then sprinkling with nuts, dried fruit, and sea salt? If your answer was 'pretty much nothing', you would be right.


Making the chocolate bark means you have to temporarily ignore your phone, texts, emails, Facebook alerts, tweets, and all other forms of social media. Why? Because if the nuts, dried fruit, and sea salt are not sprinkled over the warm melted chocolate before the chocolate sets up, you will end up with a slab of chocolate.

There is no required order of sprinkling the nuts, however, I like to start first with the cashews and then the pistachios as it is important that these large nuts have the time to become embedded in the melted chocolate.


Once the nuts are spread, the dried cherries and sea salt are sprinkled as evenly as possible. The amounts of nuts and dried fruit you spread over the bark is all about personal preference, but I have shared with you the quantities I use when making it.


It takes several hours for the chocolate to set. Once set, you simply break into pieces. I like the look of random sized pieces, however, you can certainly use a knife to create more uniform ones. If some of the nuts fall off during the breaking process, just enjoy them or throw them on the platter of bark.


I like to package up the Fruit and Nut Chocolate Bark with Sea Salt in cellophane bags tied with a ribbon and give as gifts during the holiday season. If not giving it away but keeping to serve, I generally store the bark in a sealed tin (to keep it fresh) until I am ready to put it on a platter. This bark can be a dessert all unto itself (it is center stage worthy) or it can be added to a tray of other confections and baked goods. It will definitely be one of the more memorable confections you make, during the holidays or throughout the year.

Recipe
Fruit and Nut Chocolate Bark with Sea Salt

Ingredients
2 pounds of chocolate (recommend Ghiradelli Dark Melting Wafers) Note: Could use white chocolate instead of dark chocolate)
1/2 cup dried cherries (or other dried fruit of your choice. Options include dried apricots, dried blueberries, dried cranberries)
3/4 cup chopped pistachios
1 1/2  cups whole cashews
Maldon sea salt (less than 1/2 teaspoon)

Directions
1. Line an 11 x 15 baking pan with parchment paper. Set aside.
2. Melt chocolate in a bowl set over simmering water.
3. Carefully pour the melted chocolate onto the parchment paper. Using an offset spatula or spoon, spread the chocolate to the edges of the parchment paper.
4. Immediately sprinkle the cashews, pistachios and dried cherries over the chocolate. Lightly tap the baking sheet onto the counter to ensure all of the nuts and fruits adhere to the chocolate.
5. Lightly sprinkle sea salt over the top.
6. Allow the chocolate bark to set up. Break into pieces. 
7. Store in covered container or package in cellophane bags.


Second chances. How many times have we heard or even said the truism 'Just give it a second chance'? As parents you may have said this more than a few times, as a member of team you may have said this when discussing a strategy, or as a friend you may have said it to provide encouragement. Sometimes we think were giving something or someone a second chance, when really all we are doing is going through the motions without doing or seeing anything differently ourselves. When this happens we sometimes look for faults or differences rather than looking for strengths, celebrating the differences or even dealing with our own fears (of the unknown, of failure). A second chance isn't supposed to be doing the same thing again (or again and again), it supposed to be doing it differently.

Years ago when I was training for my first marathon I had days of really good runs and really bad runs. On those good run days, I felt like I could conquer the world and could hardly keep from smiling all day long. The bad runs were on those days when my head just wasn't in it, when I felt exhausted, when I felt outside of my comfort zone, or when I was running with a little bit of pain. On those days I never felt the addiction to or the exhilaration that comes with running. And if running with someone else who I wasn't keeping up with, I was quick to blame them for making me run too fast or on routes with inclines (those darn inclines).

On those bad days, it would have been easy to walk away and say 'I tried' without ever knowing what it would feel like to actually finish a marathon. Or I could have sabotaged myself by not running for a few days or keeping my runs short. I learned the hard way that in the end those strategies not only were keeping me from that marathon goal, but from experiencing the euphoria felt when I was 'in the zone' as well as from benefitting from the changes that come from the running. Over the course of that first marathon training, it took more than a few second chances for me to achieve my goal. It meant seeing myself and running differently, facing my fears, accepting my own vulnerabilities (running was something that put me way out of my comfort zone) and being courageous (yes second chances and courage go hand in hand). So whether it is giving yourself, someone else or even any confection containing fruits and nuts a second chance, just remember it is mostly up to (and about) you as to what the outcome may be.

As a post script, I did finish that first marathon and stayed with running regularly for several more years, even running a second marathon. But I have not run regularly in quite awhile and could just kick myself for letting go of something that had so many benefits. Fortunately though, I am back to giving it a second chance. The goal this time isn't a marathon, it is simply feeling that euphoria again.

Monday, December 2, 2013

White Chocolate Dipped Ginger Molasses Cookies

'Tis the season of the indulging oneself in candy confections and cookies with either reckless abandon or slight moderation. What is it about the holiday season that makes our eyes widen at the mere sight of a platter of cookies? For some unexplainable reason it seems the same cookies made from January through November become even more delicious during the month of December. Then there is a kind of euphoria one experiences when taking a bite into those cookies made only around the holidays, cookies which seem to have some sort of magical, spell casting effect on one's mood as well as one's ability to show cookie eating restraint. Could it be we are readying ourselves for the deprivation that comes with those 'I am going to eat only healthy food' new year resolutions? Or could it just be that holiday cookies bring out the best of our childlike qualities and memories? Whatever the reason or reasons, let the cookie season begin!

With less than 23 days before Christmas, I am not certain there will be enough time for me to share with you all of my favorite cookies, both the ones made year round as well as the ones made in December (I suppose I want you to have something to look forward to in the months ahead, just in case you fall off the eating healthy wagon!). So as not to over promise and under deliver, during the month ahead there were be more than one cookie or candy confection recipe posted to the blog (those of you with commitment issues are probably okay with this, the rest of you will probably consider this a tease).


For me cookies are not just about how they taste but how they look. Ginger Molasses cookies are one of those year round delicious, pretty cookies that become slightly transformed in December. Once dipped in white chocolate they turn into what I will call those 'even more delicious, beautiful, almost bakery looking perfect, decadent, cannot eat just one' cookies. The combination of the flavors of the ginger and white chocolate have an almost magical quality about them. Using some of the new vocabulary I picked up while living on the east coast, these White Chocolate Dipped Ginger Molasses cookies are 'wicked' (the best kind of wicked)!

I found a ginger cookie recipe in a Midwest Living magazine a very, very long time ago. Making a few changes, it has remained my favorite ginger molasses cookie. The inspiration for dipping them in white chocolate happened less than two years ago. What gives these cookies their wonderful spicy flavor are three spices: ground ginger, cinnamon, and ground cloves. Mixed in with the flour, baking soda and salt, the dry ingredients are set aside.


This is a cookie that uses shortening instead of butter. Yes, I am sharing with you a recipe that uses shortening, not butter (consider it an exception to the rule, an exception that just seems to work with this cookie). Rather than using 'light' molasses I have found that the 'dark' or 'robust' molasses adds both greater flavor and color to the cookie.The making of the cookie dough begins with lightly beating the shortening in a standing mixer (with a paddle attachment) or an electric mixer for about 30 seconds. The one cup of sugar is slowly added, the speed is increased to medium, and the mixture is beat until fluffy. The egg and molasses are added and mixed in until well blended.


The flour/spice mixture is added all at once. Reducing the speed on the mixer, the wet and dry ingredients are beat until well blended.


There are two options for rolling these cookies. The first option is dipping a 1 1/2 inch rolled ball into a bowl of water and then into a bowl of sugar. The second option is just dipping the 1 1/2 inch rolled ball into the bowl of sugar. The amount of sugar as well as the look of the cookie will be different depending on which rolling option you choose, but both cookies will have that beautiful crackled top.


If first rolled in water and then in the sugar, the cookies look like they are capped in snow. If rolled only in sugar, they have the sugar dusted look. My preference is the first water, then sugar rolling option as I love how these baked cookies look. The cookies are baked on a parchment paper lined baking sheet in a pre-heated 350 degree oven for 12 to 15 minutes or until the bottoms of the cookies are lightly browned. Be careful not to over bake these cookies as they will lose some of their chewiness. If you slightly over bake them, they will still be delicious, but the texture will be a little firmer.


Once the baked cookies have cooled on a rack, they are dipped into the melted white chocolate. When dipping the cookies, try to make certain both the top and bottom of the cookie are covered in the white chocolate before you place the cookies on a sheet of parchment paper. The chocolate on these cookies does not take that long to set up. You can speed up the setting time by placing the cookies in a cooler place in your house. The finished cookies should be immediately placed into a tin or jar to ensure their freshness. Note: This recipe makes anywhere from 24 to 28 cookies when using a 1 1/2 inch ice cream scoop to form the cookie balls.

Recipe
White Chocolate Dipped Ginger Molasses Cookies (more than a slight adaptation to Joe Carson's Ginger Cookie Recipe)

Ingredients
2 cups all purpose flour
1 teaspoon baking soda
1 teaspoon Saigon cinnamon
1 teaspoon ground ginger
1/2 teaspoon ground cloves
1/2 teaspoon Kosher salt
3/4 cup shortening, room temperature
1 cup granulated sugar, plus more for rolling cookies (Note: For a more sparkling finish to the cookies, roll in a mixture of granulated sugar and white sugar crystals.)
2 Tablespoons dark molasses
1 large egg, room temperature
Water
8 to 10 ounces white chocolate (recommend Ghiradelli White Melting Wafers)
Update 12-14-15: For an even deeper ginger flavor to these cookies, add 1 Tablespoon of finely chopped crystalized ginger to the dry ingredients.

Directions
1. In a medium sized bowl, combine flour, baking soda, spices and salt. Set aside.
2. Beat shortening in a stand mixer (with paddle attachment) or electric mixer on medium speed for 30 seconds. Slowly add in one cup of granulated sugar and beat until fluffy.
3. Add the egg and molasses. Beat until combined.
4. Add flour mixture and mix on low speed until well combined.
5. Shape into 1 1/2 inch balls. Dip into a small bowl of water and then into the bowl of additional sugar. (If you want a lighter sugar coating, just roll cookie balls into the sugar.)
6. Arrange cookie balls at least three inches apart on a parchment paper lined cookie sheet .
7. Bake in a pre-heated 350 degree oven for 12 to 15 minutes or until light brown on bottoms. 
8. Transfer baked cookies to a cooling rack.
9. Melt white chocolate. Dip the cooled cookies into the chocolate so that half of the cookie is coated in chocolate. 
10. Place dipped cookies on a piece of parchment paper and allow to set. When chocolate has set, store in a covered tin or container to keep fresh.


The holidays are such a great time to pay it forward, to engage in random acts of kindness, or to show your appreciation to those who made a difference to you. Not that we shouldn't do this all year long, but as the year comes to a close, we get a second chance to follow through on all of our good intentions (the ones we allowed our busy lives to get in the way of and distract us). As much as I love seeing someone open a gift or platter of cookies, I really do love the act of giving. There is something about sharing a part of yourself with either someone you care about or a total stranger, that for me, is what the holidays were meant to be. And the older and more reflective I get, I sometimes see things from perspectives different than my own.

For me differences are a good thing, they always have been. Professionally, I would have never grown if I did not take in all of the different perspectives of my peers along the way or the classmates in my doctoral program. Personally, I would like to think I am capable of continued growth (and yes, there are some things I think I shall always hold dear) and change (even if it means I need to be pushed). Have you ever asked yourself what great change in your life has not been accompanied by a little bit of fear? I can think of many times in my life when I felt more than a little bit of fear. The kind of fear that can temporarily paralyze you or make you say things you wish you hadn't. Although I can't take back those moments, I can (given the chance) try to make the moments going forward so much better. While it may not be as simple as delivering the proverbial olive branch in the form of a platter cookies, at least it might bring someone a moment of (cookie) bliss.

Sunday, December 1, 2013

A Hearty Minestrone

Soup is the epitome of comfort food and has, as some believe, the power to soothe one's soul. Whether it is the prelude to a meal or it is the meal itself, it never, ever fails to satisfy (unless of course the soup isn't to your liking). If the taste of the soup wasn't enough, there is the added benefit of the aroma created while it is simmering. This aroma can be simply intoxicating. A cold fall or winter day is great weather for making most soups and perfect weather for making this hearty minestrone. It can made early in the day and served for lunch or dinner. Or if you can or have to wait, it can be served the next day. Either way, this hearty minestrone is one of those soups that really does soothe one's soul.


Like a great bolognese, a great soup can also be a labor of love. And this hearty minestrone soup is just that, a labor love. Like all great loves, it is one well worth the effort and investment of time. It was not until I made this minestrone did I truly understand all that went into making it. So weeks after my childhood best friend had this minestrone made and ready for me when I returned from the two day drive back to the midwest from the east coast, I told her I should have 'kissed the ground she walked on' for making it. Not only because it was insanely delicious, but because I knew she had made it after a long day of work (which meant she was on her feet for another couple of hours). In retrospect my simple 'thank you' expressed on the day we all enjoyed the soup did not seem to be enough.


Sautéed pancetta and a rind of Parmigiano-Regianno cheese elevate this minestrone from ordinary to extraordinary as the depth of flavor is further enhanced by these two ingredients. Leaving them out of the soup would be akin to leaving out the pecans in a pecan pie, the cocoa in hot chocolate, mozzarella cheese on a margherita pizza. In other words, it is not a hearty minestrone or even a minestrone if you leave out the pancetta and Parmigiano-Regianno cheese. Pancetta has become so readily available that you can almost always find it in the deli section of the grocery store. For this recipe you want really thick slices of pancetta so it can be cut into a 1/2 inch dice. One cut pancetta is cooked over medium-low heat for 6 to 8 minutes (stirred occasionally) in two tablespoons of extra-virgin olive oil or until lightly browned.


In addition to the usual suspects of celery, garlic, onions, carrots and spinach, there is a vegetable you may not always associate with minestrone. That would be butternut squash. Like the pancetta and Parmigiano-Regianno cheese, the butternut squash sets this minestrone recipe apart from most others and adds to its' delicious hardiness (and heart healthiness).

So where does the labor of love come in? Well it comes first in the preparation stage and second in the cooking and simmering stages. So if (no when) you plan to make this soup, make sure you aren't making it at the end of a really long day (like I was) as it takes some time to cut up all of those vegetables into a half-inch dice. But don't let all of this cutting be a deterrent, think of it as an opportunity to work on your knife skills, or a time to let your mind just wander, or a time to let your mind race with all sorts of thoughts (just make sure to pay attention when you are cutting). The chopped vegetables along with the chopped thyme and garlic are added to the sautéed pancetta and cooked for 8 to 10 minutes or until they begin to soften (but still retain their shape).


Once the vegetables are sautéed, you add the can of diced tomatoes, 6 cups of chicken stock, 1 Tablespoon Kosher salt, 1 1/2 teaspoons pepper, a bay leaf or two and a 2 to 3 inch Parmigiano-Regianno rind (still having some cheese on it). The minestrone is brought to a boil and then the heat is reduced to a simmer. Continue cooking uncovered for at least 30 minutes or until the vegetables are tender.


While the soup is simmering (about 30 minutes) you bring salted water to boil and add two cups of pasta. If you do not want your pasta to 'overtake' the minestrone, use the tubetti pasta (it is an even smaller version of the digitali pasta). The pasta is cooked al dente according to package directions and drained before adding to the minestrone.

In addition to the drained pasta, a can of drained and rinsed cannellini beans and a half cup of a dry white wine (Sauvignon Blanc works incredibly well) are added to the simmering vegetables (remove the bay leaves at this stage) and cooked for about 10 minutes. And if I have made you think the making of this soup is a little 'too much' for you (there are some of you thinking this), you can be enjoying a glass of white wine while you make this minestrone. No matter how much we may love to cook, we sometimes we need to reward ourselves with something tangible. And a glass of wine could not be a better example of something tangible!


The spinach is added and cooked until the leaves have wilted. If the soup is too thick add one to two cups of additional chicken stock. The final ingredients added to the soup are a 1/2 cup of dry white wine and two tablespoons of pesto. These are stirred in and allowed to simmer in the minestrone for 5 to 10 minutes. The hearty minestrone can be served immediately or the next day. When serving, finish the bowls of the minestrone with a drizzle of olive oil and some shredded Parmigiano-Regianno cheese. Note: The flavors of this minestrone further develop overnight, so it easily lends itself to being reheated.


Recipe
A Hearty Minestrone (slight adaptation to Ina Garten's Winter Minestrone recipe)

Ingredients
2 Tablespoons Extra Virgin olive oil, plus more when serving
4 - 5 ounces pancetta, 1/2 inch diced
1 1/2 cups chopped yellow onions 
2 cups diced carrots, about 3 to 4 large carrots or 4 to 6 smaller carrots (1/2 inch dice)
2 cups diced celery, about 3 large stalks or 4 to 6 smaller stalks (1/2 inch dice)
2 1/2 cups diced peeled butternut squash (1/2 inch dice)
4 to 5 cloves of garlic, minced
2 teaspoons fresh thyme, minced
1 (2 to 3 inch) rind of Parmigiano-Reggiano cheese (rind should have some cheese remaining on it)
26 ounce can of diced tomatoes (recommend San Marzano)
6 to 8 cups chicken stock
1 or 2 bay leaves
1 Tablespoon Kosher salt 
1 1/2 teaspoons black pepper
1 (15 ounce) can cannellini beans, drained and rinsed
2 cups cooked small pasta (recommend tubetti) cooked al dente according to package directions
10-12 ounces baby spinach leaves or rough chopped standard sized spinach leaves
1/2 cup good dry white wine (recommend Sauvignon Blanc)
2 Tablespoons pesto (store-bought or homemade)
Parmigiano-Reggiano cheese (for serving)
Bread or Bruschetta for serving with soup

Directions
1. Heat 2 tablespoons of extra-virgin oil in a large, heavy pot (think wide). Add the pancetta and cook over medium-low heat until it is lightly browned (about 6 to 8 minutes).
2. Add the onions, celery, butternut squash, garlic and thyme and cook over medium heat until the vegetables begin to soften (about 8-10 minutes). The vegetables will soften but will retain their shape.
3. Add the can of tomatoes, 6 cups of chicken stock, one or two bay leaves, 1 Tablespoon salt, 1 1/2 teaspoons black pepper and a 2- 3 inch rind of Parmigiano-Reggiano. Bring to a boil, then lower heat to simmer and continue cooking (pot uncovered) for 30 minutes, or until the vegetables are tender.
4. Discard the bay leaf.
5. Add the cannellini beans and cooked pasta. Cook on low heat until beans are heated through (about 5 to 10 minutes). If the soup is too thick at this point add up to 1 or 2 cups of the remaining chicken stock.
6. Add the chopped spinach, cooking until the spinach leaves are wilted.
7. Add the 1/2 cup of dry white wine and two tablespoons of pesto, simmering for an additional 5 to 10 minutes.
8. Check for saltiness, if needed add salt to taste.
9. The bowls of soup should be drizzled with some extra-virgin olive oil and some freshly shredded Parmigiano-Reggiano cheese. Serve with either chunks of thickly cut bread or bruschetta.


With Thanksgiving now (unfortunately) over, I suppose it is time for me to begin thinking about the Christmas holidays. Only I don't want to just yet. I would rather just spend a few more days savoring this year's Thanksgiving experience before moving on to making lists, planning, baking, decorating, cooking, entertaining and wrapping (it is exhausting, in a sort of good way, to think about all of the energy that goes into (only one of the aspects of) Christmas).

We spent this Thanksgiving in the back country, the hinterlands of Kentucky with some very good friends. While we (literally) ate Thanksgiving dinner outside under the stars, we enjoyed the comforts of a heated wooden cabin complete with a fireplace, hot tub, and a spectacular view of the Red River Gorge. Getting to this beautiful, somewhat remote cabin meant having to walk down 80 stairs. But getting out meant walking up (ugh) 80 stairs. Yet, in addition to the climbs to and from the cabin (yes there were multiple ones in a day), we also went on some relatively short, steep, at times a little slippery (less than 2 mile round trip) hikes. My calves and quads have never had such a workout!

I can be a bit of a wimp when it comes to hiking on surfaces where there are more inclines than flat surfaces (meaning I whine through some of it as well as make the hikes a little longer for everyone while I catch my breath). But no matter how hard (I think) the hike is, the rewards are always well worth the effort (and overcoming of some irrational fear of falling). Hikes hard for some may be easy for others. The making of minestrone soup might fall into this category too (okay this could be a stretch, but not too far of stretch). The perception of easy and hard is all relative (something we all know, but at times can have difficulty acknowledging, particularly when we find something easy).

I sought to capture some of the views experienced during the hikes with my camera, but only looking at photos would have not been a replacement for having had the experience itself. So yes, for me, the breathlessness was worth taking in the breathtaking views. Needless to say I am thankful I didn't talk myself out of any of these hikes, but even more thankful to have spent this holiday so differently (meaning abandoning tradition and being open to possibility) as it just might be one of those experiences that forever changes how I look at my favorite holiday again.