Wednesday, February 12, 2014

Pretzel Style Pigs in the Blanket

Suspend reality for a moment and think of the world as black and white and less fifty shades of gray. This world is divided into only two kinds of people: first food responders and first food followers. First food responders would be those individuals who are on the cutting edge of trends and willing to take a new concept or food to see where it goes. In other words they are the kind of risk taker who tries to figure out early what works and what doesn't. On the other hand the first food followers are a little more conservative and have the benefit of observing the lessons learned (or mistakes made) by the first responders before jumping in. In other words, they are okay with not having to be part of every food trend out there.


I am in the first food followers group, which isn't necessarily a bad group to be in. I haven't yet jumped on the quinoa and kale bandwagons (I know you might be thinking what kind of foodie am I?). And up until this week have only consumed Pigs in the Blanket once (now you must be thinking in what food dimension do I live in?) Yes, I know Pigs in the Blanket have been around for quite some time so I can also be a really, really, really slow first food follower. Just remember every once in a while, good things come to those who wait.


Pigs in the Blanket always seems to get a significant amount of air and print time around the holidays and sports tournaments (particularly during the Super Bowl). Some claim they are the most popular food item on a game day buffet. In spite of all of the accolades given to hotdogs wrapped in dough, I still wasn't lulled into doing the popular thing (which is a bit out of character for me). And then one day my childhood best friend made them. Only not with pre-made refrigerated dough, but with a homemade pretzel-like dough. Waiting finally had its' benefits. Believe it or not, I waited a little while longer before I made them myself. 

The dough for the 'Blanket' is a pretzel-like dough, but it is one a little different than most of the pretzel dough recipes out there. Instead of melted butter, this recipe calls for room temperature butter; includes one egg; and uses one half cup of sugar in addition to the yeast and salt. The amount of flour ranges from 6 to 7 cups of flour (I used 6 cups) depending on the humidity.


I am not sure why I used the paddle attachment instead of the dough hook in making this dough. For some reason I thought the recipe called for a paddle attachment. Whether this was an error or not, the dough came together pretty well (maybe it was my lucky day).  However, the next time I make this recipe, I will most likely use a dough hook. This will eliminate the need to knead the dough after all of the flour has been added.


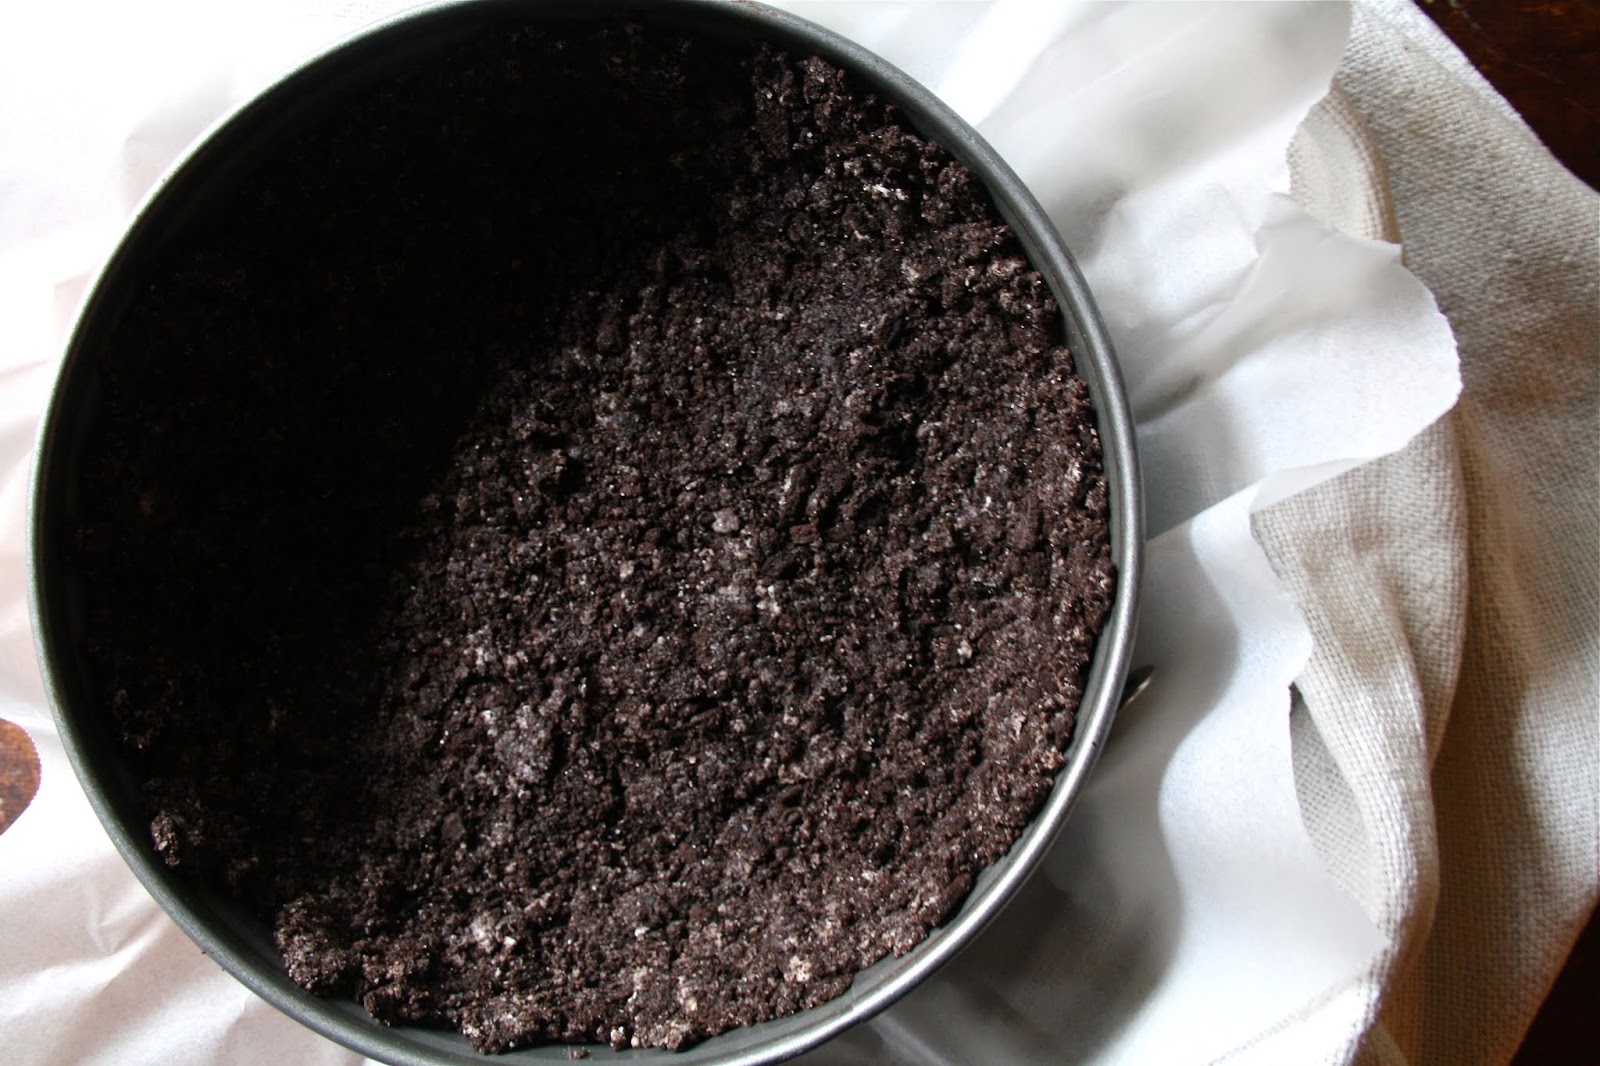
Once the dough is fully mixed it is kneaded for several minutes until smooth. The ball of dough is placed in lightly buttered bowl, covered with plastic wrap and then placed in the refrigerator. Yes, the refrigerator is the place where this dough proofs (another difference from other pretzel doughs). The dough remains in the refrigerator for at least 2 hours or up to 24 hours (I waited almost 22 hours before using the dough). The dough rises but not to a double in size rise.

Taking inspiration from some of the other Pigs in the Blanket recipes I had found, I rolled out the dough into long strands (about 24 inches in length) to wrap the hot dogs. While I cut the dough into 8 even wedges, next time I might cut them into 10 even wedges and roll out the dough to a slightly thinner strand.

When comparing the recipe I had with others I had found, I also discovered almost all of them boiled the dough wrapped hot dogs in a baking soda and water solution before baking them. While immersed in the boiling mixture for only 30 seconds, the baking soda changes the alkalinity of the dough's outer surface. The result is intended to give the finished dough a golden color and chewier crunch. Note: I learned something else after making these Pigs in the Blanket. In order to give the dough the pretzel like finish all over, turn the simmered dough wrapped pretzels over and simmer for additional 30 seconds. Remove and place on a parchment paper lined baking sheet.


In keeping with the black and white theme, I just had to use both kosher salt and poppy seeds. I suppose this made them a little less pretzel like, but hot dogs without the added flavor of poppy seeds on the bun?


After the wrapped hot dogs have been boiled, brush with an egg wash and sprinkle on Kosher salt and poppy seeds. If you can find pretzel salt by all means use it. And if you aren't a fan of poppy seeds feel free to leave them off.

The Pigs in the Blanket are baked in a pre-heated 425 degree oven for 15 to 18 minutes or until they are a golden brown. Mine baked for the full 18 minutes. I attributed the longer baking time to the thickness of the dough wrapping the hot dogs as well as the temperature of the chilled dough. If I had let the wrapped hot dogs rest for 25 minutes before boiling them in the baking soda/water mixture, my baking time might have changed (reduced) slightly. In learning from this experience, I will follow the original recipe and let the wrapped hot dogs rest for 25 minutes.


Serve them whole or cut them into halves or quarters with a bowl of yellow mustard. Dipping a pretzel-like dough wrapped hot dog in ketchup isn't for me, but for your family and friends who are ketchup lovers they might be disappointed if you didn't serve these bites of goodness with a bowl of it. 

Whether you are having friends and family over to watch a sporting event on television or having a barbeque or any other kind of gathering, Pigs in the Blanket can be an appetizer (a slightly hearty one), the main course or one of the main course choices. Don't worry about leftovers, I am pretty certain they will quickly disappear. 

Making these Pigs in the Blanket may seem like it might be a lot of work, but it really isn't. Really it isn't. The dough can be made the day before and the hot dogs wrapped in dough hours before they are simmered in the water/baking soda bath (just keep the wrapped hot dogs in the refrigerator). Once you taste these you may never want to take a bite of the 'pre-made refrigerated in the can dough' wrapped hot dogs again. Just sayin.

Recipe
Pretzel Style Pigs in the Blanket (inspired by my childhood BFF's recipe)

Ingredients
Dough
2 cups warm water (110-115 degrees)
2 packages of active dry yeast
1/2 cup granulated sugar
2 teaspoons Kosher salt
1/4 cup unsalted butter, room temperature
1 large egg, room temperature
6 to 7 cups all-purpose flour
Kosher salt and poppy seeds for sprinkling on top

Water Bath
8 cups flour
2/3 cup baking soda

Egg Wash
1 large egg and up to a tablespoon of water (for a darker finish use only the egg yolk and up to a tablespoon of water)

8 to 10 large/jumbo sized all beef hot dogs (buy the best ones you can find)

Directions (for use with a dough hook)
1. Combine warm water and yeast in the bowl of stand mixer. Allow to sit for five minutes. It should become foamy and frothy.
2. Add in sugar, salt, butter, egg and 3 cups of flour. Mix on low to medium speed until combined.
3. Add in 3 additional cups of flour. Increase speed to medium for approximately 4 minutes or until the dough is smooth and pulls away from the sides of the bowl.
4. Form dough into a ball and place dough in a large buttered bowl. Cover with plastic wrap and refrigerate for at least 2 hours or up to 24 hours.
5. Cut dough into 8 to 10 wedges. Roll out dough to lengths of approximately 24 inches (to wrap large/jumbo sized hotdogs)
6. Wrap each hot dog pinching the ends of the dough to seal. Allow wrapped hot dogs to rest for 25 minutes.
7. Preheat oven to 425 degrees.
8. Bring water and baking soda to boil. Submerge each dough wrapped hot dog for 30 seconds. Turn dough wrapped dogs over and simmer another 30 seconds. Place on parchment paper lined baking sheet.
8. Brush dough with egg wash mixture. Sprinkle on Kosher salt and poppy seeds.
9. Bake for 15 to 18 minutes or until dough is golden in color. 
10. Allow the baked hot dogs to rest for a few minutes before serving or cutting.
11. Serve with a bowl of yellow mustard (and, if you must a bowl of ketchup).
Note: If not using a dough hook but a paddle attachment on your mixer, knead mixed dough for 4 to 5 minutes until smooth. Place kneaded dough in the buttered bowl, cover with plastic wrap and refrigerate.

Monday, February 10, 2014

Mocha White Russian

Several years ago we traveled to Telluride for a family ski trip. In spite of the fact that I was the only non-skier in the group, I was looking forward to spending time taking in views of the beautiful snow capped mountains against the deep blue Colorado sky. While everyone else went skiing on the slopes, I went on a snowshoe hike for the experience and to take photos. Unbeknownst to me the hike turned out to be more physically rigorous than skiing. The wind cutting into your face gondola ride should have been my first clue that this was going to be an adventure.

Having never hiked in snowshoes before as well as having spent less than 24 hours acclimating to the elevation, I thanked my lucky stars I was in a hiking group of one. I genuinely felt sorry for my guide as I made the hike longer (and probably more challenging) by stopping every few minutes to pull out my camera to capture the views. In actuality photographing the mesmerizing mountain images was just the excuse to enable me to catch my breath (I am certain my guide figured this out pretty quickly as this  was probably not the first time he had someone like me in his group) and keep the whining from becoming audible. Why I didn't just stay back, sit by a warm fire and enjoy a beverage or two instead of having what felt like a near death experience is anyone's guess. Every now and then I take a pretty good landscape photo but I am no Ansel Adams.


The White Russian and Blind Russian cocktails are all variations of the Black Russian. While not a Russian in origin cocktail, all versions of the Russian cocktail are made with vodka. If you believe everything you read on Wikipedia (the not written by scholars only internet version of the Encyclopedia Britannica) Vodka either originated in Poland or in Russia. While being primarily of Polish descent, I am happy someone had the wisdom to defer the name of this cocktail to the Russians. Even the Dude in The Big Lebowski may not have been so obsessed with a cocktail by any other name.


A White Russian is made with Vodka, Kahlua and either cream or half and half. It can be hard to resist the taste of cream and this may not be the time to cut out a few calories. Simply by adding a frozen coffee ice cube to the mixture, the White Russian is transformed into a Mocha White Russian.


What better way to use any leftover coffee than to make coffee ice cubes. And hey what better way to use coffee ice cubes than to make a Mocha White Russian. Any ice cube tray will do but these two inch square silicone ice cube trays (I found these at Williams-Sonoma) make the most prefect two-inch square ice cubes.


In an old-fashioned glass, add one coffee ice cube. Pour in 2 ounces of vodka followed by 2 ounces of Kahlua. Top the cocktail with 2 ounces of the cream or half and half. Before stirring this cocktail just take in how beautiful this cocktail looks. It sort of resembles a snowcapped mountain. Once stirred the black and white cocktail becomes one resembling fifty shades of brown.


So whether you are watching the Winter Olympics, sitting by a warm fire, or looking for that great after-dinner or end of the day cocktail, one sip of a Mocha White Russian will have you temporarily forgetting what seems like the most wicked, coldest, snowiest winter ever. And if you happen to be someone enjoying and living in a much warmer, sunnier climate (lucky you), this cocktail will remind you how wise you were for making the decision to live somewhere other than the frozen tundra.

Just the resist the urge to drink this quickly. It is definitely one of those sip slowly and savor cocktails.

Recipe
Mocha White Russian (inspired by Giada De Laurentiis's Black and White Italian Cocktail)

Ingredients
1 coffee ice cube
2 ounces Vodka
2 ounces Kahlua
2 ounces cream or half and half

Directions
1. Place a coffee ice cube in an old fashioned cocktail glass.
2. Add Vodka and Kahlua
3. Pour cream or half and half over. Enjoy the black/white visual before stirring.


Saturday, February 8, 2014

White Chocolate Raspberry Linzer Cookies

After making raspberry sauce last week I have been craving the taste of raspberries. Of course not in their healthy fruit form, but in their almost as healthy preserve form. To satisfy this craving I needed to bake something. I debated as to whether to make a Raspberry Linzer Torte or Raspberry Linzer cookies as traditionally each has a raspberry preserve filling. In looking at the 'have not been used in awhile' collection of both antique and new heart cookie cutters, there seemed to be little choice of what I would bake. Cookies it would be. But that wasn't the only reason I decided to make Linzer cookies. I have been wanting to make a recipe out of the recently published Napa Valley Model Bakery cookbook for some time now. Their Raspberry Linzer cookie seemed like the perfect one to make first. And with Valentine's Day less than a week away I thought I too would jump on the 'make something heart shaped confection' bandwagon.

I noticed the Raspberry Linzer cookie recipe in Model Bakery's cookbook was different than one they had apparently published several years ago (one I found online). The newer version used all-purpose flour and two teaspoons of vanilla while the older one used pastry flour and one tablespoon of vanilla. Decisions, decisions. The all-purpose flour version might create a firmer cookie but the pastry flour might create an ever so slightly tastier cookie. The pastry flour version won the debate I was having with myself. More vanilla is always a good thing, so why not stay with a tablespoon was my thinking.


Traditional Linzer cookies are dusted with confectionary sugar, however, I thought maybe it was time to mess with tradition just a bit (a moment of conservative rebellion). What better way to further enhance this classic cookie than by dipping the tops of the cookies in white chocolate. I only had to wonder how ambitious of an endeavor this change in tradition would be.


I channeled my inner Thomas Keller today when making these cookies. What this means is that I decided to measure out the ingredients using a scale.


The Linzer Torte has Austrian origins, however, the Linzer Cookie is a North American adaption of the  lattice topped pastry. Hazelnuts are the more traditional nut used in the torte, however, almonds and walnuts can also be used. With hazelnuts being one of those acquired taste nuts (in spite the recent surge in popularity of Nutella) this Linzer cookie would have almonds.

The almonds need to be ground into a fine meal. In a food processor fitted with a steel blade the almonds and one-half cup of the flour are processed together to get this desired consistency. The flour helps to prevent the almonds from turning into a paste. Using skins on sliced almonds give the dough and finished cookie a look that says 'there are nuts in here'.


This dough came together really well. Beginning with beating the butter until a light consistency, followed by gradually adding the granulated sugar, lemon zest and vanilla, you are almost done making the dough. The ground almond/flour mixture is then added in three batches and mixed until dough is smooth.


 The first step in deciding whether or not I like a cookie is tasting the dough. Good dough, good cookie, great dough, great cookie. This was great dough. Once the dough is divided in half, it is flattened to a disk and refrigerated for 2 hours or overnight. If the dough becomes too firm, allow to set out for 15 minutes before rolling out.

On a lightly floured surface, the dough is rolled out to about an 1/8-1/4 inch thickness. This dough rolled out perfectly. 


Using either a heart or round cookie cutter you cut out both the bottoms and tops for the cookies. Many use a crimped edge cookie cutter to make Linzer cookies, however, since I was using one of my antique cookie cutters (one without a crimped edge and one without a corresponding smaller crimped edge one) my cookies would be having a flat edge.

In a preheated 350 degree oven the cookies bake for 15-16 minutes. The parchment paper lined cookie sheet is placed in the upper third of the oven and rotated mid-way through the baking process. Allow the cookies to cool on the baking sheet for at least five minutes before transferring to a cooling rack to finish the cooling process. Whether you are coating these cookies in chocolate or not, they need to cool completely before the raspberry preserves are spread on them.

Before dipping the cookie tops in white chocolate, they need to cool completely. To be honest, the dipping process wasn't hard, just a little more time consuming than dusting with confectionary sugar. As long as you are careful, you won't break any cookie tops. After tasting the finished white chocolate dipped Raspberry Linzer Cookie, I would definitely dip them again and not just for the finished look. The flavors of the almonds, lemon zest, white chocolate and raspberry preserves were amazing together.

The confectionary sugar topped Raspberry Linzer cookies are equally delicious. If you are not a fan of white chocolate, make the confectionary sugar topped version. But regardless of your finished Linzer cookie top preference, this is a cookie so worth all of the time and love that goes into making them.  Just don't make them only for Valentine's Day or any other holiday because life is short to deny yourself such divine deliciousness.

Recipe
White Chocolate Raspberry Linzer Cookies (inspired by Model Bakery's Raspberry Linzer Cookie recipe)
Makes about 24 2 1/2-3 inch cookies

Ingredients
2 cups/230 g sliced almonds (with skins on)
2 1/4 cups/325 g pastry flour, plus additional flour for rolling out the dough
1 1/4 cups (2 1/2 sticks)/280 g unsalted butter, room temperature
2/3 cup/130 g granulated sugar
1 Tablespoon vanilla
Grated zest of one lemon
12-13 ounce jar of raspberry preserves (seeded or seedless)
1 1/2 cups white chocolate for dipping or confectionary sugar for dusting

Directions
1. In a food processor fitted with a steel blade, process the almonds and 1/2 cup of the flour until nuts are finely ground. Be careful not to process to much or a paste will form. Transfer ground almonds/flour mixture to the remaining flour. Set aside.
2. In a stand mixer fitted with a paddle blade, beat butter until smooth (about 1 minute).
3. Gradually add in granulated sugar and continue beating until light and fluffy (about 1-2 minutes).
4. Mix in vanilla and lemon zest.
5. Add flour mixture in three batches. Mix until smooth.
6. Divide dough in half, forming two disks. Wrap in plastic wrap and refrigerate until chilled (2 hours to 1 day). Note: If dough is too hard to roll out, let sit for approximately 15 minutes to soften slightly.
7. Preheat oven to 350 degrees. Line baking sheets with parchment paper. Set aside.
8. Lightly flour work surface and roll out one dough disk until 1/8 to 1/4 inch thick. Using a round or heart shaped cookie cutter, cut out shapes. Place half of cut dough on a cookie sheet.
9. With remaining half of cut dough, cut centers (this will form the tops of the cookie).
10. Bake cookies for 15-20 minutes or until cookies are lightly browned.
11. Remove cookies from oven and allow to cool on pan for 5 minutes before transferring to cooking racks. Cool completely.
12. Melt 1 cup of white chocolate over hot water. Carefully dip tops of cookies (cut in the center). Allow chocolate to set.
13. Spread raspberry preserves on each whole (uncut in the center) cookie.
14. Place chocolate covered cookie on top of each whole cookie. Press dough slightly to form cookie sandwich.
15. Store cookies in an airtight container at room temperature.
Note: If using confectionary sugar instead of white chocolate, dust confectionary sugar over cookie tops before finishing the cookie assembly.


As soon as February arrives there always seems to be an increase in the number of articles, stories and surveys related to relationships of all kinds. Most likely prompted by the holiday of month (Valentine's Day), the reminders and redundant messages that come from these sources are usually received differently, depending mostly on which side of the relationship world you live in as well as your level of skepticism over articles on relationships (particularly when they espouse ideas different than your own). For reasons too complicated to explain, I experience an endorphin rush when I read things with redundant ideas that resonate with some of the things I believe. Multiple sources of validation can sometimes make you feel less of an outlier.

Some say the secret to every relationship (every successful, satisfying relationship that is) is honesty. And that if honesty is a constant presence it can be so powerful it masks all of those little imperfections (our neurosis, fears, struggles with perfectionism). So if this is really true, don't you wonder why anyone would allow honesty to erode in a relationship they value? If for whatever reason(s) you are in a relationship where you can't be honest (and we aren't just talking lying here), the other person often may find it more difficult to talk to you because they won't know which 'who' they are talking to. Particularly if the who you are today and the who you were yesterday are not always the same person (we are talking selective memory here). If more time is being spent discussing imperfections, honesty might just be the underlying (sometimes unspoken) real issue causing havoc in the relationship. If you have ever been lucky enough to be in a relationship where honesty really mattered then you know those little imperfections (either yours or theirs) really didn't. And you didn't have to read that anywhere.

Sunday, February 2, 2014

Chocolate Mousse Cake with Raspberry Sauce

The bright spot of this 'the snow does not want to stop winter' weekend was the birthday dinner for my childhood best friend. What I love more than celebrating the birthday of a friend (not just because she happens to be seven months older than me) is being able to make the birthday dinner. Maybe it's because there is an intimacy to a celebratory dinner at home, the kind of intimacy that deepens, strengthens a friendship and the kind that can be a little more relaxing than dinner in a restaurant. Although we have been friends for decades (we met when we were 10 and in the fifth grade) I don't think either of us has ever stopped finding ways to nurture and grow this friendship. There are many qualities between us that are similar, but we are different, the kind of yin-yang different where seemingly opposite forces create an interconnectedness and interdependence not found in friendships dominated more by similarities than differences. Maybe this is why we have had such an enduring friendship.


While we usually ask one another for ideas for birthday or holiday presents (her request this year has made me a little anxious because I am so superstitious), birthday dinners are by their very nature supposed to have element of surprise to them. With the exception of revealing the main course and hinting that the dessert had something to do with chocolate, I didn't share any other part of the birthday dinner menu with her, particularly what the something to do with chocolate birthday 'dessert' would be. Because it has been (a rather long) while since I had made the Chocolate Mousse Cake with Raspberry Sauce it would be unexpected and what I hoped would be the perfect, memorable ending to her birthday dinner.


I haven't quite figured out how to take great photos at night yet. So the visual images I wanted to share with you, well I can't. If I was a little more organized and less busy I would have had the Chocolate Mousse Cake made the day before (in the light of day), I may have been able to take better photos. So please forgive me.

When shopping for the ingredients for the cake I almost decided to replace the Oreos with those Famous Chocolate Wafers. My ongoing struggle with homemade versus a semi-homemade recipes. Taking a deep breath, I decided to go with Oreos because sometimes every now and then semi-homemade isn't such a crime. Besides the Oreos make for a really delicious crust (and hey you end up with a few extra Oreos to munch on while you are making this cake). You can use either pecans or walnuts for the crust, just remember to toast them. I was in a pecan mood so pecans it was.


The Oreos, toasted nuts and the unsalted butter are put into a food processor fitted with a steel blade. The ingredients are processed until crumbly (meaning there should not be any recognizable chunks of Oreos left). In a 9 inch springform pan lined with parchment paper, press the crust into the pan. You will have enough to have the crust come up about an inch on the sides of the pan. After you finish the crust set aside.


When assembling the filling you will need to whip the cream until light peaks form and temper the chocolate. The chocolate can be tempered in a bowl over steaming water or in the microwave. If you choose the microwave method, you will microwave on high in 30 second intervals. After each 30 seconds give the chocolate a stir. It took me four 30 second intervals to melt this 1 1/4 cups of chocolate. In the final interval there were a few bits of morsels left, however, when continuing to stir the chocolate completely melts. Melting the chocolate before you begin combining ingredients in the mixer you will prevent the chocolate from clumping in the batter (if the chocolate is too hot or too cold it will not blend in well).

In a standing mixer fitted with a blade, cream the sugar and cream cheese together until light and fluffy (approximately 2-3 minutes). Add the eggs in one at a time and beat until each is fully incorporated.

Mix in the baking soda, salt, and vanilla, then blend in the melted chocolate. Remove mixing bowl from stand and gently fold in the lightly whipped cream until no white streaks remain.


After pouring the batter into the crust smooth the top using an off set spatula. Place in a preheated 325 degree oven and bake for 1 hour 20 minutes. My original recipe recommended 1 hour 15 minutes but the center of the cake jiggled more than I wanted it to, so I added 5 minutes to the baking time. This cake will have some play in it when finished baking. Don't worry, it will all set up when chilled.


After the cake comes out of the oven the top will fall. Again not to worry this is what is supposed to happen. Cool the cake to room temperature and then chill up to eight hours or overnight before removing from the pan and finishing with whipped cream. So unless you are baking very early in the morning, you might want to consider making the cake the night before you are serving it. It is easier to remove from the springform pan when it is completely chilled. Remember to run your knife along the edge of the pan and cake before unlatching the springform pan.


No one makes a better raspberry sauce than Ina Garten. Her recipe is raspberry sauce perfection. A half-pint of fresh raspberries, a half cup of granulated sugar and a quarter cup of water are added to a small saucepan. The mixture is brought to a boil and then simmered for four minutes. The raspberry mixture, 12 ounces of raspberry preserves (seeded or seedless) and 1 Tablespoon of Chambord are processed in a food processor fitted with a steel blade until the mixture is fully blended. Personally I like seeded raspberry preserves, but a seedless jam works well here too. When the sauce is finished, chill until ready to use.

The Chocolate Mousse Cake is rich, decadent and unbelievably delicious all on its' own. The raspberry sauce just takes it to a completely different level. Serving the sauce on the side gives everyone the choice of enjoying the cake with or without it.

The cake turned out to be a perfect ending to the birthday dinner. But how could chocolate, whipped cream and raspberries not be?

Recipe
Chocolate Mousse Cake with Raspberry Sauce (updated January 2019)

Ingredients
Crust
30 oreos
6 Tablespoons unsalted butter, room temperature
1/2 cup pecans (or walnuts), toasted

Filling
3 large eggs, room temperature
1 cup (200g) granulated sugar
8 ounces (226g) cream cheese, room temperature
8 ounces heavy whipping cream, whipped to light peaks
1/4 teaspoon baking soda
1/4 teaspoon Kosher salt
1 teaspoon vanilla
1 1/4 cups (8 1/4 oz/234g) chocolate chips up to 60% cocoa  - I used Ghiradelli 60% Bittersweet Cocoa

2 cups heavy whipping cream
1/2 cup (60g)confectionary sugar
4 Tablespoons sour cream
1 teaspoon vanilla
pinch of kosher salt

Raspberry Sauce (inspired by Ina Garten's Raspberry Sauce recipe)
1 half pint fresh raspberries
1/2 cup (100g)granulated sugar
1/4 cup water
12 ounces raspberry preserves or jam (seeded or seedless)
1 Tablespoon Chambord

Directions
Preheat oven to 325 degrees (F). Line a 9 inch springform pan with parchment paper. Set aside.

Crust
1. Place Oreos, toasted pecans and unsalted butter in a food processor. Process until crumbly and well mixed.
2. Press crust into prepared 9" springform pan. Set aside.

Filling
1. Melt chocolate chips and set aside.
2. Beat sugar and cream cheese in a stand mixer fitted with a paddle attachment. Beat until light and fluffy (about 3 minutes).
3. Add eggs in one at a time beating until well incorporated.
4. Mix in baking soda, vanilla, and kosher salt.
5. Blend in melted chocolate.
6. Fold in lightly whipped cream with a spatula until no white streaks remain.
7. Pour filling into pan prepared with the crust. Smooth top with an off set spatula.
8. Bake 1 hour 20 minutes. Remove from oven and allow to come to room temperature.
9. Chill chocolate mousse cake in refrigerator for at least 8 hours or overnight. Note: Center of cake will slightly collapse after it has chilled.
10. Unmold cake and place on platter or cake stand.
11. In a standing mixer fitted with a whisk attachment, beat whipping cream, confectionary sugar, sour cream, vanilla, and pinch of sea salt until stiff peaks form. Using a pastry bag, pipe design of choice onto the cake. If a pastry bag is unavailable, spread whipping cream over cake with a spoon or spatula. Return to refrigerator.
12. Remove cake from the refrigerator 15 to 30 minutes before serving. Cut into thin slivers as this is a very rich cake!

Raspberry Sauce
1. Place raspberries, sugar and water into small saucepan. Bring to a boil over high heat and then simmer for 4 minutes.
2. Place raspberry jam, Chambord and raspberry mixture into a food process fitted with a steel blade. Process until smooth.
3. Chill sauce until ready to serve.

Notes: (1) Alternately instead of serving with a fresh raspberry sauce, decorate top of the cake with freshly whipped cream and fresh berries. (2) In the event you want to avoid using nuts, make the Oreo crust with the 30 Oreos, 6 Tablespoons unsalted butter, and 2 Tablespoons of granulated sugar.


Have you ever met someone who is a little different than you? Differences that you find intriguing, maybe even endearing. But definitely differences that give you the opportunity to see the world through a different lens, where you experience the added benefit of growing personally and maybe even professionally from spending time with someone not exactly like you. This sort of chemistry can lead to great friendships, ones that endure over time, and quite possibly ones that are strengthened and continue to grow.

But every now and then, the differences versus the interconnectedness become the focus for one or both of you. And everything that was good, that was great about the friendship becomes not so good, no longer great. When this happens, how we are viewed or how we view, shifts not from the sum of our parts, but to our parts (the first clue that this is happening is that you or they start to list them out). And the yin-yang qualities that gave rise to great energy, great synergy are ones that no longer are seen as opposite but equal qualities, but as opposite and unequal qualities. If by chance, the pendulum swings in that direction you either take it in stride and move on or you work at finding ways for those complimentary forces to continue to make a difference in you, in the friendship. And if that doesn't work maybe you hope for some divine cosmic intervention or some higher power that gives you (or them) the proverbial wake-up call. Because who I am and the quality of my life today is due in part to those friends who have made an immeasurable difference to and in my life because they were different from me.