Monday, November 10, 2014

Golden 'Egg' Cinnamon Sugared Donuts


I wasn't planning on making donuts this week. But that all changed after spending a couple of hours at a wine tasting with my sister, brother-in-law and childhood best friend this past weekend. Normally one would not associate donuts with wine, but in the 'new' normal world anything is possible. So here is the back story. More than a year ago my sister suggested I post the Golden Egg recipe. She and most everyone who has eaten them raves about them, and I mean really raves about them. But for a myriad of not so great reasons, except for the fact I did not have an 'egg' mold pan (quite possibly this may be the only pan I don't have), I didn't make them. The subject of the Golden Eggs happened to come up midway through the wine tasting (by this time we had all consumed a sum total of less than two glasses of wine, not enough to cause anyone not to think clearly, but enough for everyone to speak without a filter, if you know what I mean). These golden eggs are actually a season-less confection, but (in my defense) I have long associated them with Easter (it was the first time my sister made them). However, sometime during the wine tasting, let's just say I figured I should make the Golden Eggs, sooner rather than later.


Only I wasn't going to make them in shape of eggs. Not only because I didn't have the egg  pan, but somehow eggs and the fall and eggs and Thanksgiving didn't seem to make much sense. But I had an epiphany Sunday night (the effects of the wine were long gone so I was thinking with a fair degree of clarity and creativity). Why not make Golden Egg donuts? Someone who shall remain nameless wondered if this change would work (or in other words threw down the proverbial gauntlet). Without ever having worked with the batter before, I left a tiny bit of room for the possibility this paradigm shift from golden eggs to golden donuts might not work. You have probably figured out by now the Golden 'Egg' Cinnamon Sugared Donuts worked.


I haven't made donuts in decades and now I have made them twice in the past several weeks. And honestly, I am starting to develop an affinity for baked, cake-like mini-donuts, especially the 'hard to resist eating just one kind'. Am already wondering what donut I will be making in December. Any suggestions? Any challenges?

One of the secrets to the 'deliciousness' factor of these Golden 'egg' donuts is in the making of the batter. Room temperature (unsalted) butter and granulated sugar are whisked until light and fluffy, a process that can take upwards of ten minutes to achieve this consistency. The length of whipping time will be somewhat dependent on how 'room temperature' your butter is. Since I usually take my butter out of the refrigerator the night before I bake, my whipping time was somewhere between five and six minutes. The richness of the donut comes from the five large eggs, added in one at a time and whipped until fully incorporated. And after the buttermilk and flour are added in alternately with the mixer on low speed, the vanilla and freshly grated nutmeg at gently stirred in with a spatula. The resulting batter is both thick and fluffy. Oh, did I forget to mention the importance of using the whisk attachment in achieving the batter's consistency?

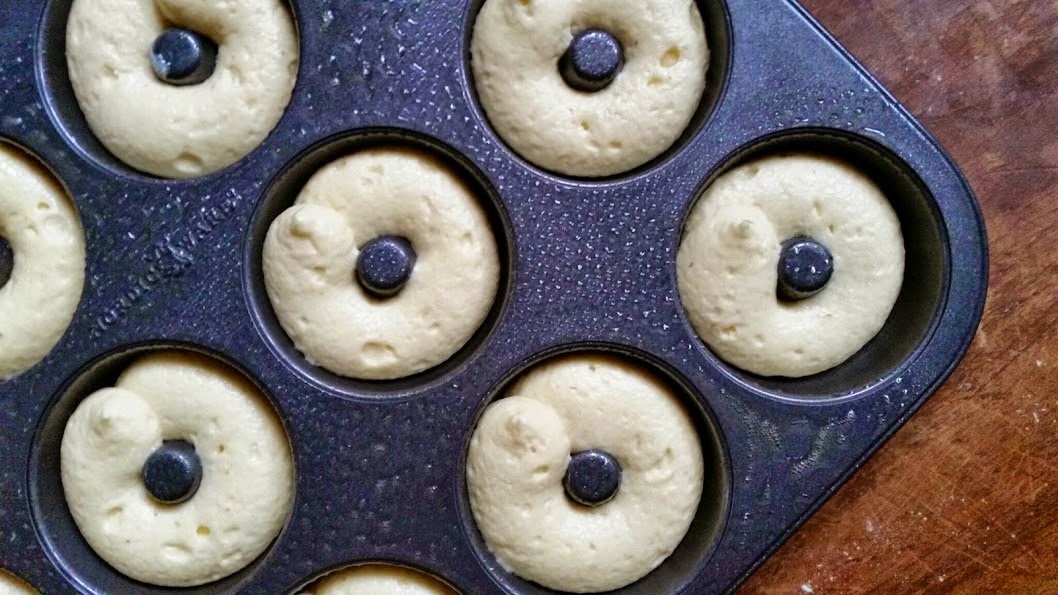
Using a pastry bag, I piped the luscious batter into the mini-nonstick donut mold, sprayed liberally with vegetable spray). With each donut filled about 3/4 full, the pan is baked for somewhere between 15 and 16 minutes in a preheated 325 degree oven.


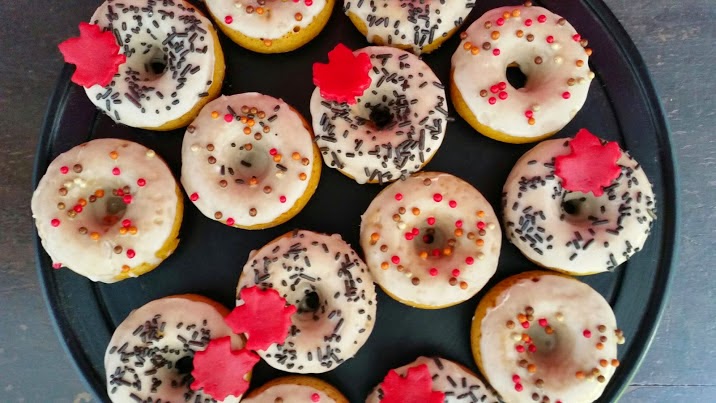
The Golden 'egg' donuts unmolded perfectly (non-stick pans work even better when sprayed with vegetable spray). One of things learned in the process of making these donuts was to allow the donuts to rest/cool briefly (about 5 minutes) before dipping into melted butter and then dredging in cinnamon sugar. If they are dipped while they are still 'too hot' you risk having them break and conversely if dipped when they are 'too cool' the butter will not absorb as well into them. The combination of the 'yellow' batter and butter not creates their 'golden' look, but creates a 'magical' taste. No one will believe you baked these donuts, heck they may not even believe you made them!


For those of you making Thanksgiving dinner these donuts are the perfect bites to keep your family at bay (and out of the kitchen) while you are cooking. And if you are not the one making the holiday dinner, they are the perfect bites to keep your family content until you reach your dinner destination. You are probably wondering who has time to make donuts while making a turkey and all of the trimmings. However, if you prefer to keep your sanity while making the Thanksgiving dinner, you can make them the night before. The Golden 'Egg' Cinnamon Sugared Donuts are equally delicious warm or at room temperature although I kind of think their flavor improves as they 'rest'. 


Now that I have finally taken the advice of my sister and made the Golden 'egg' recipe (and most importantly conceded they really are bites of pure deliciousness), I know there is at least one less thing (trust me it's a long list) I will be 'gently' teased about at the next wine tasting. And now I can turn my energies towards what will be on the Thanksgiving menu (it is changing daily). But hey, at least I know what wine we will be drinking!

If you happen to believe there is a time and place for everything, wine tastings might just be one of those perfect settings to tease someone you care about (make certain they are tasting more than enough wine before you venture down that slippery slope). With the next wine tasting scheduled for the spring, I suppose I can relax until then (maybe, but probably not). 

Recipe
Golden Egg Cinnamon Sugared Donuts (ever so slight adaption to the Gesine Bullock-Prado's Golden Egg recipe)
Yield: 3 dozen mini-donuts

Ingredients
Batter
3 cups all-purpose flour
1 Tablespoon baking powder
1 teaspoon kosher salt
2 sticks (1/2 pound) unsalted butter, room temperature
2 cups granulated sugar
5 large eggs, room temperature
1 1/4 cups low-fat buttermilk
1 teaspoon vanilla
1 teaspoon freshly grated nutmeg

Cinnamon Sugar
2 sticks (1/2 pound) unsalted butter, melted
1 1/2 cups granulated sugar and 1 1/2 teaspoons Saigon cinnamon (mixed together)

Directions
1. Preheat oven to 325 degrees. Spray non-stick mini-donut molds with a vegetable spray. Set aside.
2. Sift together flour, baking powder and salt. Set aside.
3. In a standing mixer with a whisk attachment, whip butter and sugar together until light and fluffy (this will take anywhere from 5 to 10 minutes, scraping bowl periodically during the whipping).
4. Add eggs one at a time, whipping until each egg is fully incorporated.
5. With mixer on low, add flour and buttermilk in alternately, beginning and ending with the flour (F-B-F-B-F).
6. Stir in vanilla and nutmeg with a spatula until evenly distributed in batter.
7. Transfer 1/3 of the batter to a pastry bag fitted with a round tube. 
8. Fill each donut mold 2/3 full.
9. Bake 15 to 16 minutes or until the donuts are very light in color and/or the cake springs back when lightly pressed.
10. Unmold cakes onto a cooling rack. Allow to sit at least 5 minutes before dipping into melted butter and dredging in cinnamon sugar.
11. Place dipped and dredged donuts back on cooling rack. 
12. Continue with steps 8 through 11 until all batter is used.
13. Serve immediately. Store Golden Egg Cinnamon Sugared Donuts in a sealed container.


Teasing is one of those things that are relationship dependent. In a great relationship, teasing can actually be a little endearing, playful, flirty, and quite funny. In not so great or strained relationships, teasing, no matter how clever the person tries to be or how insignificant the teasing topic may be, is often anything but funny. There can sometimes be a fine line between the teasing that moves from playful to educative to hurtful even in the best of relationships (remember we can all be having bad days, bad moments).

But no matter how the teasing is framed or intended, how it is received by the recipient matters most. Something as the teaser we may not always be sensitive to, especially when a playful intention is perceived as mean-spirited or when an educative intention is perceived as judgmental. Often the disconnect lies in the assumptions made about the current relationship (versus what it used to be or one would like it to be). If I have learned one thing (the hard way) about teasing, it is that the teaser always owns the outcome and is always responsible for making the repair (as hard as that can sometimes be). Because in making the repair you night just show the other person how much you really do care.


(Photos taken on Martha's Vineyard this past September.) 

Wednesday, November 5, 2014

Apple Galette


The month of November has barely begun and already infringing on it are those 'I am determined to keep them nameless' December holidays. With life already moving at what seems like warp speed, I can't seem to understand how anyone would want to rush the autumnal season or not savor every day where there is still some color in the landscape (and not just browns and greens). How the fall became one of those seasons I look forward to may have something to do with my birthday (no matter how old I get my birthday is cause for favoritism) and Thanksgiving, my most beloved of all holidays. From as far back as I can remember, the significance of Thanksgiving has never been lost on me. What is not to love about a day created to enable us to count our blessings, to reflect on what and who matters most to us, to embrace traditions (and create new ones), and last but not least, to share a memorable meal with family and friends?

Cesar Chavez may have unintentionally captured the spirit of thanksgiving when he said 'If you really want to make a friend, go to someone's house and eat with him...the people who give you their food, give you their heart.'  This is so true. The time, energy, and love that go into the planning and preparation of the Thanksgiving meal is no more or less than what goes into creating a meal for friends. The scale may be different (or it may not be) but there is an intimacy to sitting around the dinner table sharing a home cooked meal with friends. It almost always is a memorable experience as well. How the table is set or how the food tastes doesn't matter as much as how everyone feels during and long after the meal is over.


When I saw the recipe for the Apple Galette in the November (2014) issue of Bon Appetit I knew I was destined to make it. Although I have been known to make something for the 'first' time when having family or friends for dinner, I couldn't wait for either my next dinner party or Thanksgiving to make this galette. Not because I didn't think it wasn't going to be delicious or turn out on the first try, but because I was anxious to see how baked Pink Lady apples tasted in this galette. Additionally, I wanted to figure out what adjustments (if any) I needed or wanted to make to it.


I have a tendency (or rather a bias) toward using Granny Smith apples in most 'baked' apple dishes, frequently ignoring the apples recommended (as if I 'always' know better). But this time, I put my affinity for Granny Smith apples aside (subliminally maybe I didn't want the Pink Lady apples to work) and made the galette with these 'unfamiliar' to my taste buds apples. Let's just say I have not only been depriving my taste buds but also the taste buds of those who I love having at my dining room table. But that is all about to change.


A galette is nothing more than a free-form pastry. It is rustic simplicity at its' best (and in making this galette the first time I managed to epitomize its' rustic-ness as evidenced by the photos in this blog posting). A galette is easier to make than a pie or a tart, but it is no less delicious. After one bite of this Apple Galette, I decided it needed to be added to my 'last meal' short list. I also discovered the addictive sweet-tart flavor of baked Pink Lady apples.


Whether savory or sweet the deliciousness of a galette relies on both the topping ingredients and the choice of crust. Hearty crusts or those made with whole-wheat or rye flours or cornmeal form the base of most savory galettes, while slightly sweeter or more sugary crusts are the foundation of sweet ones. Making the tart dough in the food processor instead of by hand did not seem to affect its' tenderness or roll-ability (is that even a word?). However, when making this galette again (and it can't be soon enough) I will double the tart dough ingredients as I felt there was barely enough dough. By doubling it, I will have more than enough dough for a thin crust galette. Any remaining dough can be saved for a smaller galette or used to make some tart dough cookies. 

Browned butter infused with vanilla is brushed over the thinly sliced Pink Lady apples before they are sprinkled with light brown sugar. Bon Appetit's recipe called for using half of a vanilla bean split lengthwise, but I decided to substitute 1 1/2 teaspoons of vanilla paste instead. It worked.


Before baking the apple galette in a preheated 375 degree oven, the sides of the dough are brought up over the apples, then brushed with an egg wash and sprinkled with sugar. Instead of granulated sugar I used India Tree's white sparkling sugar. That worked too.

The galette bakes for 40 to 50 minutes or until the crust is golden brown. My baking time was 45 minutes. This galette is best enjoyed while warm, however, if made earlier in the day, it can be reheated in a low temperature oven or in the microwave. Be prepared for this galette to be completely devoured. The sweet/tart apples and crisp/sweet crust makes for an incredible taste combination.


A maple whipped cream was recommended to be served with the galette (I didn't make it in the trial run of the recipe). But I thought this apple galette needed to be served with ice cream. Not just any ice cream, but ice cream made in the gelato style from Rococo's in Kennebunkport, Maine (sometimes you just need to go all out for a dinner party). Rococo, an artisan ice cream shop, is not just my personal favorite, it also just happens to be ranked as one of the top ten ice cream parlors in the country. While I was at Rococo's in mid-September, I learned they had recently begun shipping their ice cream. This was music to 'my living in the midwest' ears (although this ice cream is so phenomenally 'shut the front door' insanely delicious it would be worth considering a plane ride or even a road trip to Maine. Okay that may be frivolously ridiculous, but how else can I convince you of why you need to experience this ice cream?)

The stars were aligned the day I called to order the ice cream as it was the last day they were taking shipping orders (so make plans now to call them or visit them in May). The ice cream arrived today (perfectly packaged and still froze). I can hardly wait to serve this apple galette with Rococo's salty sweet cream ice cream and watch everyone's first taste reactions. I am thinking it will be better than watching someone open a hoped for gift on one of those upcoming 'shall remain nameless' holidays. Once my coveted supply of Rococo ice cream is gone (that will be a sad day), I guess I will serve the apple galette with the maple whipped cream as it would a genuine hardship to have to wait five months to make this apple galette in the cold, colorless months ahead. Just like it would be a travesty to rush the month of November.

Recipe
Apple Galette (slight modifications to Bon Appetit's Apple Galette recipe)

Ingredients
Tart Dough
1 Tablespoon granulated sugar
1/2 teaspoon Kosher salt
1 cup all-purpose flour, plus additional for rolling out dough
6 Tablespoons chilled unsalted butter, cut into pieces 
1 large egg, lightly beaten
Note: Strongly recommend doubling the tart dough ingredients.

Galette
1/4 cup salted butter
1 1/2 teaspoons vanilla paste (or 1/2 vanilla bean, split lengthwise
1 to 1 1/2 pounds Pink Lady apples (3 to 4 apples), peeled, cored and cut into 1/8 inch thick slices (or use any other baking apple of your choice)
3 Tablespoons of dark brown sugar (or dark muscovado)
1 large egg
1 teaspoon half-and-half, water or whipping cream
1 generous Tablespoon of sparkling sugar (or granulated sugar)

2 cups heavy whipping cream and 2 Tablespoons of pure maple syrup (for maple cream, beat cream to medium-soft peaks, fold in maple syrup)

Directions
Tart Dough
1. In a food processor, pulse together the sugar, salt and flour until combined.
2. Add butter and pulse until the mixture is crumbly.
3. Add egg and process until dough begins to come together and forms a loose ball.
4. Form dough into a disk, wrap in plastic wrap and chill until firm (at least 2 hours or overnight). Note: Allow to sit at room temperature for at least five minutes before rolling out to prevent cracking.

Galette
1. Preheat oven to 375 degrees.
2. In a small saucepan place butter and vanilla paste. Cook over medium heat, stirring often, until the butter browns (approximately 5-8 minutes). Set aside. Note: If using a half of a vanilla bean, scrape seeds into the butter and add pod. When butter has browned, remove the pod. 
3. On a lightly floured surface, roll out tart dough to a 14 inch by 10 inch rectangle slightly less than a 1/4 inch thick. Note: If doubling the tart dough, roll out to a 16 inch by 12 inch rectangle.
4. Transfer dough to a parchment paper lined baking sheet.
5. Leaving a 1 1/2 inch border, arrange apples in 3 to 4 rows on top (overlapping slices).
6. Brush apples with browned butter.
7. Evenly sprinkle brown sugar over apples.
8. Lift edges of dough over apples, tucking and overlapping to create a rectangular shape.
9. Brush edges of dough with egg wash, sprinkle with sparkling sugar (or granulated sugar).
10. Make in center of oven, rotating baking pan once, for 40 to 50 minutes or until crust is a golden brown.
11. Let cool slightly before slicing and serving with side of Maple cream (or Rococo ice cream)


Bicycles on Martha's Vineyard (photos taken in September 2014)

Monday, November 3, 2014

Beef Chili


I have been accused by a certain someone of having 'so much' stuff that I wouldn't know if some of my things were to 'disappear' (not in the magical or thievery sense but in the throw away/give away sense). My response to this insanity is usually in the form of a slight protest ('that would not happen') along with a veiled threat ('one could be punished by some higher power'). While recently living out east for several years I would sometimes wonder if that certain someone would really throw away/give away my things (while the cat is away, the mouse will reorganize everything). None of my fears came to fruition but a discovery was made upon my return. I will start by saying I am finally relented in believing there is some truth to the 'out of sight, out of mind' adage. While looking for some brown tortoise glassware I thought I had, I (re)discovered an unopened LeCreuset box containing a 7 1/4 quart cast iron Dutch oven in the most beautiful shade of cream (how many other things were hidden from view by a certain someone while I was away?). Upon (re)discovering the box I remembered I had bought it shortly after buying one for my sister one Christmas several years ago. Uncharacteristically I didn't put the pan to use right away. I wonder what other 'out of sight, out of mind' things are waiting to be found?


My Tucson friend recently shared a beef chili recipe with me, one her husband received from one of his customers years ago (story has it this chili had once won a contest somewhere in Ohio). With the rediscovery of the Dutch oven and receipt of the chili recipe all happening within 24 hours of each other, it seemed as if the universe was telling me to 'christen' the dutch oven with the beef chili recipe. It was also time for me to make the 'from sweet to savory' shift (at least momentarily).

When I looked at the ingredients in the recipe I wondered if it was going to be a 'thin, more saucy chili or a rich, thicker chili?'. I was still hoping the answer was going to be a rich, thick chili as I opened up all of the cans of tomatoes and tomato sauces. I won't completely admit to how much I like to get the answers I hope for (but who doesn't?), so I won't go on endlessly describing how beyond thrilled I was when I got the answer I wanted. I will simply say this is a hearty, soul satisfying, wickedly divine, bound to get you rave reviews from family and friends kind of chili. Someone in Ohio knew what they were doing when they created this beef chili recipe. My apologies to all Texans.


The base layer of this chili begins with sautĂ©ing a diced, large sweet onion in two tablespoons of vegetable oil on low heat until is has softened (cooking time ranges from 5 to 10 minutes). Increasing the heat to medium-high, the ground beef (I used ground chuck) is added to the onions. Cooking time is approximately ten minutes or until the meat is no longer pink. The recipe called for one and one-half pounds of ground beef, however, for an even meatier chili, I would (strongly) recommend increasing the ground chuck to anywhere between 1 3/4 to 2 pounds.


After the onion and beef layers comes the spice layer. The chili powder, Aleppo pepper, taco seasoning, brown sugar, salt and pepper are added and the entire mixture is cooked over medium-high heat for another 1 to 2 minutes. I used a pre-packed taco seasoning mix but you could make your own.


Reducing the heat to low-simmer, the crushed tomatoes, diced tomatoes, stewed tomatoes, tomato sauce, crushed tomatoes, and tomato paste are layered on next. Covering the pot the onion/meat/spice/tomatoes are simmered for 50 to 60 minutes (stir occasionally). Originally thinking two 28 ounce cans of tomato sauce would create a 'thinner' chili, I decided to use one 28 ounce can of diced tomatoes and one 28 ounce can of tomato sauce. Because I liked, no let me reframe, because I LOVED the outcome of the texture of the chili, I would definitely repeat this alteration to the recipe again. Lastly, the kidney beans (rinsed and drained), black beans (rinsed and drained), chili beans and diced jalapeños are mixed in. The chili continues to cook on low-simmering heat for an additional 15 to 20 minutes or until the jalapeños are tender.


The heat in this chili comes from both the spices and jalapeños. Not having tasted the chili before, I went conservative on the 'heat' factor using only three of jalapeños and not using any of its' seeds. Now that I have tasted the chili, I would use four jalapeños and 'some' of the seeds. What do I mean by some? At least half of the seeds from one of the jalapeños. If that doesn't increase the 'heat' factor enough, I would use all of the seeds from just one of the jalapeños or I would increase the amount of Aleppo pepper. The combination of increasing the jalapeño seeds and Aleppo pepper would definitely ramp up the 'spiciness' to the chili. (Note: I generally used Aleppo pepper in lieu of red pepper flakes as I like the flavor it imparts.)


After making the beef chili I called my Tucson friend saying I wish I had a drone to send her a delivery so she could tell me how it compared (or didn't) to how she has made it. You see the recipe she shared with me contained only the ingredients. So I used what I know about building layers of flavor and made the chili using this knowledge. It is quite possible when she reads this blog she will be wondering what happened to the recipe she had sent me. I suppose we should have a beef chili throwdown the next time I come out to visit (if I am invited back!). My hope is that there is no discernible difference (other than 'heat') between the two. You probably have guessed by now I like when I get what I hope for. (When I make a friend's sugar cookies in a couple of weeks, I should probably make the 75 minute drive up to her house so she can weigh in on them after I take some liberties with her recipe too.)


A certain someone here declared this beef chili 'a winner'. Not only was he unaware of its' origins as a chili cook-off winner, he doesn't always give everything I make such a resounding endorsement (go figure). Often I am too 'close' to making a dish to be its' best 'rater'. Given I can be fairly hyper-critical (of myself), the feedback helps me gauge how close (or far off) my own assessment of the dish was. 

For family and friends who aren't big fans of a chili with too much spice, remember it can always be cooled down with the sides of Mexican Crema (or sour cream), freshly grated aged Cheddar cheese, mild green onions, and some corn bread or corn muffins. And oh, don't forget the Dos Equis. 

Recipe
Beef Chili (slight liberties taken with the recipe shared by friends Sue and John Workman)
Serves 8 to 12 or more (this makes alot of chili!)

Ingredients
1 large sweet onion, diced
2 Tablespoons vegetable oil
1 1/2 pounds ground chuck (if you like an even meatier chili, use 2 pounds of ground chuck)
4 Tablespoons Taco Seasoning (I used a one ounce package of Old El Paso Original Taco Seasoning Mix which was just slightly short of 4 Tablespoons. You can also make your own taco seasoning.)
2 Tablespoons Chili Powder
1 teaspoon Aleppo pepper (or crushed red pepper. If you like your chili hotter, increase the amount the Aleppo or red pepper up to one Tablespoon)
3 Tablespoons light brown sugar
1 teaspoon kosher salt (plus more to taste)
1/2 teaspoon black pepper
1 (14.5 ounce) can of diced tomatoes with Zesty Jalapeños 
1 (28 ounce) can of stewed tomatoes
1 (28 to 29 ounce) can of tomato sauce
1 (28 ounce) can of crushed tomatoes (or use two (28-29 ounce) cans of tomato sauce)
1 (15.5 ounce) can of red kidney beans, drained and rinsed
1 (15.5 ounce) can of black beans, drained and rinsed
1 (15 ounce) can of mild or spicy chili beans (do not drain or rinse)
2 (6 ounce size) cans of tomato paste
4 jalapeño peppers, seeded and diced (for a chili with some heat, use all 4 jalapeño peppers; for a milder chili use 2 jalapeño peppers; I was a spice wimp and used only 3 jalapeño peppers) Note: For added heat, add some of the jalapeño seeds to the chili.

Mexican Crema or Sour Cream
Grated aged cheddar cheese 
Sliced Green onions
Cornbread

Directions
1. In a large, heavy 6 to 7 quart pot (use cast iron if possible), heat the vegetable oil over moderately low heat, cooking until the onions have softened (about 5 to 10 minutes).
2. Increase heat to medium, add the ground chuck for about 10 minutes or until it is no longer pink (stir occasionally breaking up any large lumps).
3. Add chili powder, Aleppo pepper, taco seasoning, brown sugar, salt and pepper. Cook for another 1 to 2 minutes.
4. Reduce heat to simmer, add crushed tomatoes, diced tomatoes, stewed tomatoes, tomato sauce, crushed tomatoes, and tomato paste. Simmer, covered for 50 to 60 minutes (stir occasionally).
5. Add kidney beans, black beans, chili beans and diced jalapeños. Simmer for additional 15 to 20 minutes or until the jalapeños are tender.
6. Serve in bowls and top with Mexican Crema (or sour cream), grated cheese and sliced green onions. Serve with cornbread.
Note: Can be made the day before. Reheat on simmer until hot.


 Concord grapes growing in Little Compton, Rhode Island (early September 2014)

Friday, October 31, 2014

Sea Salted Peanut Brittle


The pre-packaged Halloween cookies and candy are ready and waiting for the tricker or treaters. And hopefully they will be out braving the wintery weather tonight (a most terrible trick played by Mother Nature this year). A part of me that wishes these were 'Little House on the Prairie Days' where the Halloween treats were homemade instead of store bought (although back then a store bought treat may have been more coveted and treasured than one homemade). Years ago in the neighborhood I lived in my treats for the kids in my immediate neighborhood were actually homemade. The year I did not have the warm chocolate chip cookies waiting for them when they came to door and instead had a tray of pre-packaged cookies and candy was one where I think at least one of them considered egging the house. Needless to say, the homemade chocolate chip cookies returned the following year. Had I been making candies back then, the adult neighbors accompanying their children on this annual candy collecting trek would be given a bag of peanut brittle.


Peanut brittle is an American confection originating in the South or so some would like to believe. One legend attributes its' creation to a Southern woman who in 1890 mistakenly added baking soda instead of cream of tartar to a batch of taffy. Instead of a chewy taffy, the mixture became a crunchy brittle. Another version of its' origin is grounded in Southern folklore. The fabled hero Tony Beaver (a cousin of Paul Bunyan) is alleged to have saved a town from a flood by pouring peanuts and molasses into the river (it must have been a hot, raging river). This ingenuity not only prevented widespread damage to the town but resulted in the creation of brittle. Whether or not peanut brittle was actually created as a result of a mistake or a legendary save of a fictional town, this is one delicious sweet-salty-crunchy confection.


There is something rather addictive about peanut brittle. A sweet salty combination, made very slightly more salty with the finishing touch of sea salt isn't as hard to make as I had thought. Being more of a visual learner, watching someone make peanut brittle at a cooking demonstration one day had me thinking 'and why did I think was so hard'. Isn't it funny how we sometimes make things more difficult than they really are? 


When shopping for the ingredients I couldn't remember if I needed raw Spanish peanuts or roasted salted Spanish peanuts (this is why I shouldn't be trying new recipes without having a list with me). I ended up buying the roasted salted Spanish peanuts and fortunately still had pretty good results with the brittle. Reading Fine Cooking's article on Putting the Buttery Crunch in Peanut Brittle I learned raw peanuts not only contribute to enhancing the flavor of the peanut brittle, but they can be added in early in the cooking process. Roasted nuts should be added in at the end of the cooking time as they are subject to burning and giving the brittle a bitter taste. If using any other nuts (cashews, walnuts, pecans) when making the brittle, they should too should be added near the cooking process or when the candy thermometer reaches 290 degrees.


The brittle fairies must have been watching over me because I added the the Roasted Salted Peanuts at the beginning and not at the end of the cooking process. Not wanting to take any chances these fairies won't be around the next time I make this brittle, I will make two changes: Buying and using the raw Spanish peanuts or adding the roasted salted Spanish peanuts at the end of the cooking process.


When the butter, vanilla and baking soda are added when the candy thermometer reaches 300 degrees, the entire mixture will foam up. The entire mixture remains on the heat until all the butter has melted (another lesson learned in this brittle making process). If you don't have a heavy saucepan (am a big All-Clad fan), the brittle and the caramel recipes are just two reasons why you should have (at least) one.


This recipe calls for using not one, but three baking sheets (buttered or sprayed with Pam). The brittle poured into narrow (about 4 inches) lines and divided equally between the three baking sheets. This results in a thinner versus thicker brittle. Once cooled the brittle is broken into pieces. To keep the brittle fresh store in a tightly sealed container or package in cellophane bags. A warning to my friends: Expect to see peanut brittle on the holiday cookie/candy trays this year!
Recipe
Sea Salted Peanut Brittle (slight adaptations to a recipe shared by Sharon Wussow)

Ingredients
2 cups granulated sugar
1 cup light corn syrup
1 cup water
1/2 teaspoon Kosher salt
2 cups raw Spanish peanuts (or roasted salted Spanish peanuts)
1 teaspoon baking soda
1 teaspoon vanilla
1 Tablespoon unsalted butter, room temperature
Sea salt for sprinkling
Butter and/or Pam spray for cookie sheets

Directions
1. Butter or spray three bakings sheets. Set aside.
2. In a medium-sized, heavy saucepan, combine sugar, corn syrup, water and salt. Heat until sugar dissolves.
3. Add raw Spanish peanuts and cook over medium-high heat stirring frequently until candy thermometer reaches 300 degrees. Notes: (1) Cooking time will range from 20 to 30 minutes and (2) if using Roasted Salted Spanish peanuts add at the end of the process or if using cashews add when candy thermometer reaches 290 degrees.
4. Immediately add in baking soda, vanilla and butter. Stir until butter has melted. Note: Mixture will initially foam up.
5. Remove from heat and pour brittle in narrow (4 inch) lines or a U-shape design (with 4 inch sides) on the prepared baking pans. Immediately sprinkle with sea salt.
6. Using a fork, gently pull down any piles of peanuts in the brittle. Note: when edge of brittle is slightly firm, gently pull edges with a fork to thin out the brittle.
7. Carefully turn brittle over on pan and allow to cool to room temperature.
8. When cooled, break into pieces. Store in an airtight container.


Wild turkeys in the woods in Rockford, Illinois and along the Salt Creek Trail in Oak Brook, Illinois.

Monday, October 27, 2014

Maple Glazed Mini-Pumpkin Doughnuts


With the bathroom remodeling project now behind me, the desire for rearranging rooms, shifting furniture, and reorganizing collections has reared its' ugly head. Not at all ugly for me mind you, just for a certain someone who doesn't always view these 'projects' of mine as fun and as exciting as I do. Mostly because one change leads to another to another, and more often than not they end up being far from just simple changes. To further add to someone's angst, I often make adjustments and changes to my 'preliminary' plan as what it looks like doesn't always match with what I thought it would. The process of doing and undoing may be energizing for me, however, it's a process of coming slightly, temporarily unglued for someone else. Since it is highly unlikely I will ever stop coming up with rearranging, shifting, and reorganizing ideas, I have learned the value of timing. Bribes are good things too.


As I was looking for and comparing baked pumpkin doughnut recipes, all I kept hearing in my head were the words from a childhood game, 'One potato, two potato, three potato..' Most of the ingredients listed in the recipes for pumpkin doughnuts were the same with the only significant difference being in their amounts. I wanted to make a doughnut that was both moist and dense. So I focused on the ratio of liquid to dry ingredients in each of the recipes. Some had one egg, some had two eggs, and some had three eggs (hence why the childhood song was resurrected from my memory). After a process of elimination, I settled on the recipe calling for two eggs. Having no basis of comparison, the Maple Glazed Pumpkin Doughnutss (a two egg version) were everything I wanted them to be and then some.


After I finished making the Maple Glazed Mini-Pumpkin Doughnuts, my first thought was they were almost too pretty to eat. My second though was, no, these doughnuts are the kind of 'too hard to resist' pretty. It is almost impossible to eat only just one of them (even for those who pride themselves on self-control). Not because of their size, but because of their flavor and texture. If you are someone who loves the flavor of pumpkin and spices as well as prefers a doughnut with a cake-like texture, you will be delirious after tasting this doughnut (almost the kind of delirious that if someone asked you rearrange, shift or reorganize somethings, you might not even be phased by the requests). Is there anyone who does not like cake? I prefer to live in the fantasy world of 'everyone loves cake', so please don't burst this bubble for me. I don't think I could comprehend someone not liking cake.


If there was another reason to hoard canned pumpkin (besides for making pumpkin pies, pumpkin squares and pumpkin bread), this doughnut would be that reason. But these doughnuts shouldn't have 'another' hoarding reason status, they are so insanely delicious they could be the 'only' reason. Eggs, dark brown sugar, buttermilk, granulated sugar, melted butter, spices, salt, baking powder, salt and canned pumpkin mixed together create a beautiful thick, delicious batter (I am all about predicting the outcome of a baked good based on the taste of the batter). Note: The inspiration recipe called for using both pumpkin spice and cinnamon. Rather than buy pumpkin spice, you can make your own. The recipe for making pumpkin spice is provided in the ingredients list below.)

Whether you use a stand mixer or hand mixer, the batter comes together quickly and easily. These are kind of doughnuts you could make on a Saturday or Sunday morning and not feel you have just lost several hours of your life to baking in the kitchen when you have a full day of errands, activities, and events planned.

Whether you use a pastry bag or a ziplock bag to pipe the batter into the lightly oiled doughnut mold won't really matter. Just don't use a spoon (it is just too tedious and this is supposed to be easy). In a preheated 350 degree oven the doughnuts bake for 13 to 15 minutes (my baking time was 14 minutes) or until the doughnuts spring back when pressed on lightly. This recipe made 18 mini-pumpkin doughnuts.


Once baked the doughnuts remain in the pan for 2 to 3 minutes before unmolded and placed on a cooling rack. They need to be cooled completely if icing them with confectionary sugar. Note: You can choose a cinnamon-sugar finishing option for these doughnuts.


Confectionary sugar, whole milk, maple syrup and cinnamon create a scrumptious glaze. The marzipan leaves are optional, but the sprinkles create the visual 'wow' factor to these doughnuts. India Tree is just one of the companies offering a wide variety of sprinkle shapes and colors (or if you are really ambitious you can make your own) which can make it hard to choose (which is why you will be making these doughnuts more than once).


The cooled doughnuts are dipped in the glaze and placed on rack to set. The glaze sets up quickly so be ready to add your sprinkles as you go (a lesson learned making them).

These are the kind of doughnuts everyone will think you bought at a bakery or the farmer's market or that you slaved hours over making them. They are the perfect start to a fall or winter morning (as well as a great mid-afternoon or late night snack). Not only are these doughnuts 'mini' size, they are also baked. Both factors which might lesson any guilt you feel over consuming them. Besides, there are more important things to feel guilty about. Have I told you how addictive these doughnuts are yet?

I had baked these doughnuts the morning the marble guy and plumber were here to do the installations of the counter, sink, faucet and toilet in my bathroom remodeling project. Installing the toilet wasn't part of their original plan (it was part of my plan), so it may have helped to have the fragrance of cinnamon on a cool autumn day hit them as they walked in the door (I waited for them to be in the house for a few minutes before asking if they could do me the favor of installing one more thing). The platter of doughnuts was waiting for them when they finished. If they were experiencing any angst over the change in plans for their morning, you wouldn't have been able to tell once they tasted the Maple Glazed Mini-Pumpkin Doughnuts. I am beginning to develop a theory about these doughnuts. Will have to test it again next weekend when I need some help moving furniture.

Recipe
Maple Glazed Mini-Pumpkin Doughnuts (slight adaptation to a recipe found on All Recipes)
Makes 18 mini-donuts

Ingredients
Doughnuts
2 cups all-purpose flour (recommend King Arthur)
2 teaspoons baking powder
1/2 teaspoon Saigon cinnamon
2 teaspoons of pumpkin pie spice (you can make your own: 1 teaspoon Saigon cinnamon, 1/4 teaspoon ground cloves, 1/2 teaspoon ground ginger, 1/4 teaspoon ground nutmeg)
1/2 teaspoon sea salt (recommend Maldon)
2/3 cup dark brown sugar, packed
1/4 cup granulated sugar
2 large eggs, room temperature
1 cup canned pumpkin
1/4 cup buttermilk, room temperature
1/4 cup unsalted butter, melted, cooled slightly

Maple Glaze
1 1/2 cups confectionary sugar, sifted
1/4 teaspoon Saigon cinnamon
1 Tablespoon of pure maple syrup (Grade A or Grade B)
At least 2 Tablespoons of whole milk (if too thick add additional milk, 1 teaspoon at a time) - I used 2 additional teaspoons

Directions
Doughnuts
1. Preheat oven to 350 degrees. Lightly spray mini-doughnut pan with oil.
2. Sift flour, baking powder, spices, and salt in a medium sized bowl. Set aside.
3. Whisk buttermilk and melted butter in a small bowl. Set aside.
4. Using either a stand mixer or hand mixer, combine brown sugar, sugar, pumpkin, and egg. Mix on low speed until combined.
5. Alternating between the flour and buttermilk mixture, add each to pumpkin batter in 5 additions (beginning and ending with dry ingredients) until well combined.
6. Fill a pastry bag fitted with a round tube or a ziplock bag with a corner cut, pipe batter into the prepared doughnut pan (each mold will be slightly more than half-full).
7. Bake 13 to 15 minutes or until they spring back to the touch (my baking time was 14 minutes).
8. Allow doughnuts to rest in pan 2-3 minutes before unmolding and cooling on a cooling rack.

Glaze
1. Whisk together the confectionary sugar, maple syrup, milk and cinnamon until mixture is smooth, creamy, good dipping consistency. If glaze is to thin, add more confectionary sugar. If too thick, add additional milk one teaspoon at a time.
2. Dip each doughnut into the glaze, returning to the wire cooling rack. Add sprinkles to glazed doughnuts before the glaze sets (dip 2 or 3, then sprinkle).
3. Allow glaze to fully set up (approximately 10-15 minutes). Transfer doughnuts to a platter and serve.