Tuesday, August 16, 2016

Espresso Chocolate Chunk Ice Cream


Once upon a time there was a girl who came to a new town to start a new job. At the end of the first day she asked herself 'what in the world was I thinking?' She probably should have just relaxed and taken a deep breath, but there was so much to do and so many 'land mines' to discover she barely even had time to breathe. The concept of relaxing was and would always be an illusive one for her. So when a boy came by and said 'I'm glad you're here', she understood for the first time what it felt like to be valued and validated for simply being her. And on those days when she began to doubt or question herself, it was the boy who could always see through the image, the facade she tried to project. And then he would say those words 'I'm glad you're here' and suddenly, as if by some sort of magic, all would again be right with the world. For all of the years she remained in that town and well after she left to work in other towns, those words were never lost on her. While she never really did learn how to take a deep breath, she always remembered how it felt to be genuinely accepted for all of her gifts along with some of her eccentric quirks and complexities. Those four words didn't just energize her spirit and warm her soul (more than a shot (or two) of espresso and/or a dark chocolate candy bar ever could) they tugged at her heartstrings too. Somedays the girl wonders if the boy really ever knew just how much she was affected by as well as how thankful she was and would always be for the priceless gift of those four simple words.

As much as I derive a great deal of pleasure from making some of those time and labor intensive foods and meals, what hasn't got lost on me is how much greater pleasure my friends get from making some of the 'simpler' recipes posted to this blog. Don't get me wrong, I am not at all inferring my friends don't or can't or won't make anything having a long list of sometimes obscure ingredients or those requiring long hours of cooking. What I am trying to say is they are the ones who realized long ago that some of the simplest recipes, the ones requiring the least investment of time (and money) yield the biggest, greatest wow factor results. Yes, my friends are sometimes smarter than I am (okay, there I said it!). And maybe I should have pursued a doctorate in common sense rather than one in educational organization and leadership. But that would have meant being practical, another one of those fleeting concepts.

In my basement sits a very expensive ice cream machine that hasn't seen the light of day in too many years to count. As much as I love ice cream, one would think it would be one of those used often kitchen tools. But having discovered a few years ago how sinfully delicious no churn ice creams can be, the ice cream maker will wait until I someday learn the secret behind the artisan ice cream sold at Rococo, one of my favorite ice cream stores on the planet. And since that won't be happening anytime soon, finding amazing recipes for over-the-top, hard to believe it's not hand-churned ice cream recipes is how I really need to be spending my time and energy.


After seeing a recent post for an espresso ice cream, I immediately embarked on the quest to discover how many and how different the recipes for a no churn espresso ice cream could be.


What I learned was they were not all that different. Everyone used a heavy whipping cream and sweetened condensed milk. Some used espresso or cold brew, some used espresso powder. Some used a liqueur, some used only vanilla. Some added a pinch a salt, some left it out. Some added chopped chocolate, some remained espresso ice cream purists. So all I had to decide was how much and which of the 'somes' to use. Call it beginner's luck, but I think I came up with a winning combination of ingredients for this Espresso Chocolate Chunk Ice Cream, the no churn version.


When buying heavy whipping cream for making ice cream, whether you churn it or not, is to use one with a high fat content. The higher the fat content the more stable the cream when whipped (and ultimately frozen) and the smoother the texture of the finished ice cream will be. Look for whipping cream having at least 18 or 19% fat. This version Espresso Chocolate Chunk Ice Cream used an 18% fat whipping cream. The reason some commercially sold ice creams get away with having a lower fat content is because their big heavy ice cream making machines whip more 'air' into them. If you have ever tasted a less-expensive brand of ice cream and then asked yourself 'what was I thinking buying it?', you more than likely unhappily discovered what flavored air tastes like.

Instead of some fresh espresso or cold brew, I used espresso powder. This Espresso Chocolate Chunk Ice Cream was also made with a Godiva Dark Chocolate Liqueur. But you could easily replace it with some Bailey's Irish Cream, Kahlua or an espresso liqueur. Somewhere between 7 and 8 ounces of dark chocolate was coarsely chopped for this ice cream, however, you could also chop up some chocolate covered espresso beans. Or use a combination of both. Note: Next time I would increase the amount of chocolate to 9-10 ounces because there is no such thing as too much chocolate in espresso ice cream.

Using a stand mixer with a whisk attachment makes whipping the cream easier. Although if you are looking for an upper body workout and wanting arms as sculpted as the ones you have been seeing on all of the Olympic athletes, feel free to use a whisk. Not that I want to discourage you from using a whisk, but the recipe for this Espresso Chocolate Chunk Ice Cream is intended to be easy to make.


When I started making no churn ice creams last year I invested in a couple of ice cream containers. The Tovolo insulated ice-cream containers are my favorites. The ones I found came from Williams-Sonoma, but you can find them in other places or you can use a plastic container with tight fitting lid. As a side note, always handwash your ice cream container versus putting it in the dishwasher (or risk having the lid never fitting tightly again).


Many no churn ice cream recipes say your ice cream will be ready in as little as four hours after being placed in the freezer. Maybe they were using commercial freezers. For best results, I would recommend you wait overnight (or 24 hours) before scooping out and serving this ice cream. 


And then be prepared to enjoy the most incredibly homemade Espresso Chocolate Chunk Ice Cream ever. Seriously, this ice cream is that good. It's definitely one of the things I would put on my short 'last meal' worthy list.


If you are someone who loves ice cream, really loves ice cream, especially Espresso Chocolate Chunk Ice Cream you will definitely want a bowl of this ice cream filled with ginormous scoops of it. Or if you prefer to pace yourself (now there's an interesting concept), start with a couple of smaller scoops. It would not surprise me if you or anyone you are serving it to asks for seconds though. And one of the best parts of this rich, creamy ice cream? It's one of those simple, easy to make recipes that tastes as good as, if not better (because it's homemade) any of those expensive ice cream store confections.

Recipe
Espresso Chocolate Chunk Ice Cream - no churn (inspired by several sources)

Ingredients
2 cups (1 pint) heavy whipping cream (at least 18% fat)
14 ounce can of sweetened condensed milk
2 - 3 Tablespoons of espresso powder (I used 2 Tablespoons) Recommend King Arthur Flour's Espresso Powder
1 teaspoon vanilla
2 Tablespoons Godiva Dark Chocolate Liqueur (could also use Bailey's Irish Cream, Kahlua or any espresso liqueur)
9-10 ounces coarsely chopped dark or semi-sweet chocolate (if you like slightly less chocolate, use 7-8 ounces) Note: Could also use chopped chocolate covered espresso beans or a combination of both chocolate and the chocolate covered beans.
pinch of kosher salt
Optional toppings: Chocolate covered espresso beans, chocolate sauce, sprinkles.

Directions
1. In a standing mixer fitted with a whisk attachment, whip cream until stiff peaks form.
2. With the mixer on low, slow pour the sweetened condensed milk into the whipped cream until well combined. 
3. Add espresso powder, vanilla, salt, and Godiva Liqueur to mixture. Turn mixing speed to high and beat until mixture has thickened (about 1 minute).
3. Stir in chopped chocolate.
4. Transfer to a container, cover tightly and freeze for at least 8 hours or overnight (recommend waiting the full 24 hours).
5. Scoop into bowls or cones. Top with favorite toppings or savor topping free.

Notes: The other no churn ice cream recipes on the blog are for Peach Ice Cream and Strawberry Ice Cream.


Summer flowers in bloom.


Thursday, August 11, 2016

Mocha Chocolate Chip Icebox Cake


Along with having apple pie, baseball, hotdogs, and the Statue of Liberty being considered some of quintessential elements of our American heritage, we need to add having a homemade birthday cake to commemorate one's birthday to the list. As beautiful and delicious as a cake brought home from the bakery might be (nothing against all the great bakeries out there) but a homemade birthday cake has an elusive quality not found in something store bought. No matter how rustic or fancy it may look, a homemade 'with love' confection of your choosing to mark the anniversary of one's arrival in the world makes one feel even more extraordinarily special. And isn't what birthdays are really all about? Whether it's a rich, over the top, decadent cake or something lighter and simpler, the tradition of a homemade birthday cake creates memories lasting a lifetime. We might not remember what the bakery or store bought cake we had for our birthdays in our youth, teens or even into adulthood (without peeking at photos on social media or going through stacks of old family photos) but we never seem to forget the homemade ones. No matter how old we get.


After recently learning two of my running friends shared the same birthday (albeit they are a few years apart in age but not in energy or endurance), I thought I would make them a 'shared' homemade cake. Something more on the rich, decadent side seemed to be in order, considering so many calories have been burned on our long and short-hard runs this summer. Although secretly I believe most birthday cakes should be slightly over the top confections regardless if there are any pre- or post cake eating calorie burning activities planned. Remember the mantra: life is short. I had been wanting to make this Mocha Chocolate Chip Icebox Cake for awhile now. Ironically, it is a homemade cake with a twist.


Descending from Renaissance-era Trifles, Colonial Era Charlottes, and 19th century ice cream cakes, the modern version of Ice Box cakes gained popularity in the 1920s and 1930s. While no one person has been credited with its' conception, many cookie manufacturers began printing "back of the box" recipes for ice box cakes on their packages. Viewed as a kind of commercial shortcut dessert, the icebox cake was simply made with layers of packaged, store bought cookies and whipped cream (or custard). After resting in the ice box (or refrigerator) overnight, the cookies transform into sponge-like layers after absorbing the moisture of the cream. The result is a cold, rich, creamy confection. A cookbook author in the early 20s described it as "....the dessert is so extremely rich that it should be served only in small quantities in a meal containing very little fat." Ida Bailey Allen's Modern Cookbook (1924) 


The inspiration for this cake came from none other than the culinary goddess Ina Garten. Because who else makes the 'gift' of food as important as the food itself? If there were ever a cake to make the family and friends in your life feel special and important to you, this Mocha Chocolate Chip Icebox Cake would be it. Seriously, this should be added to list of universal truths.


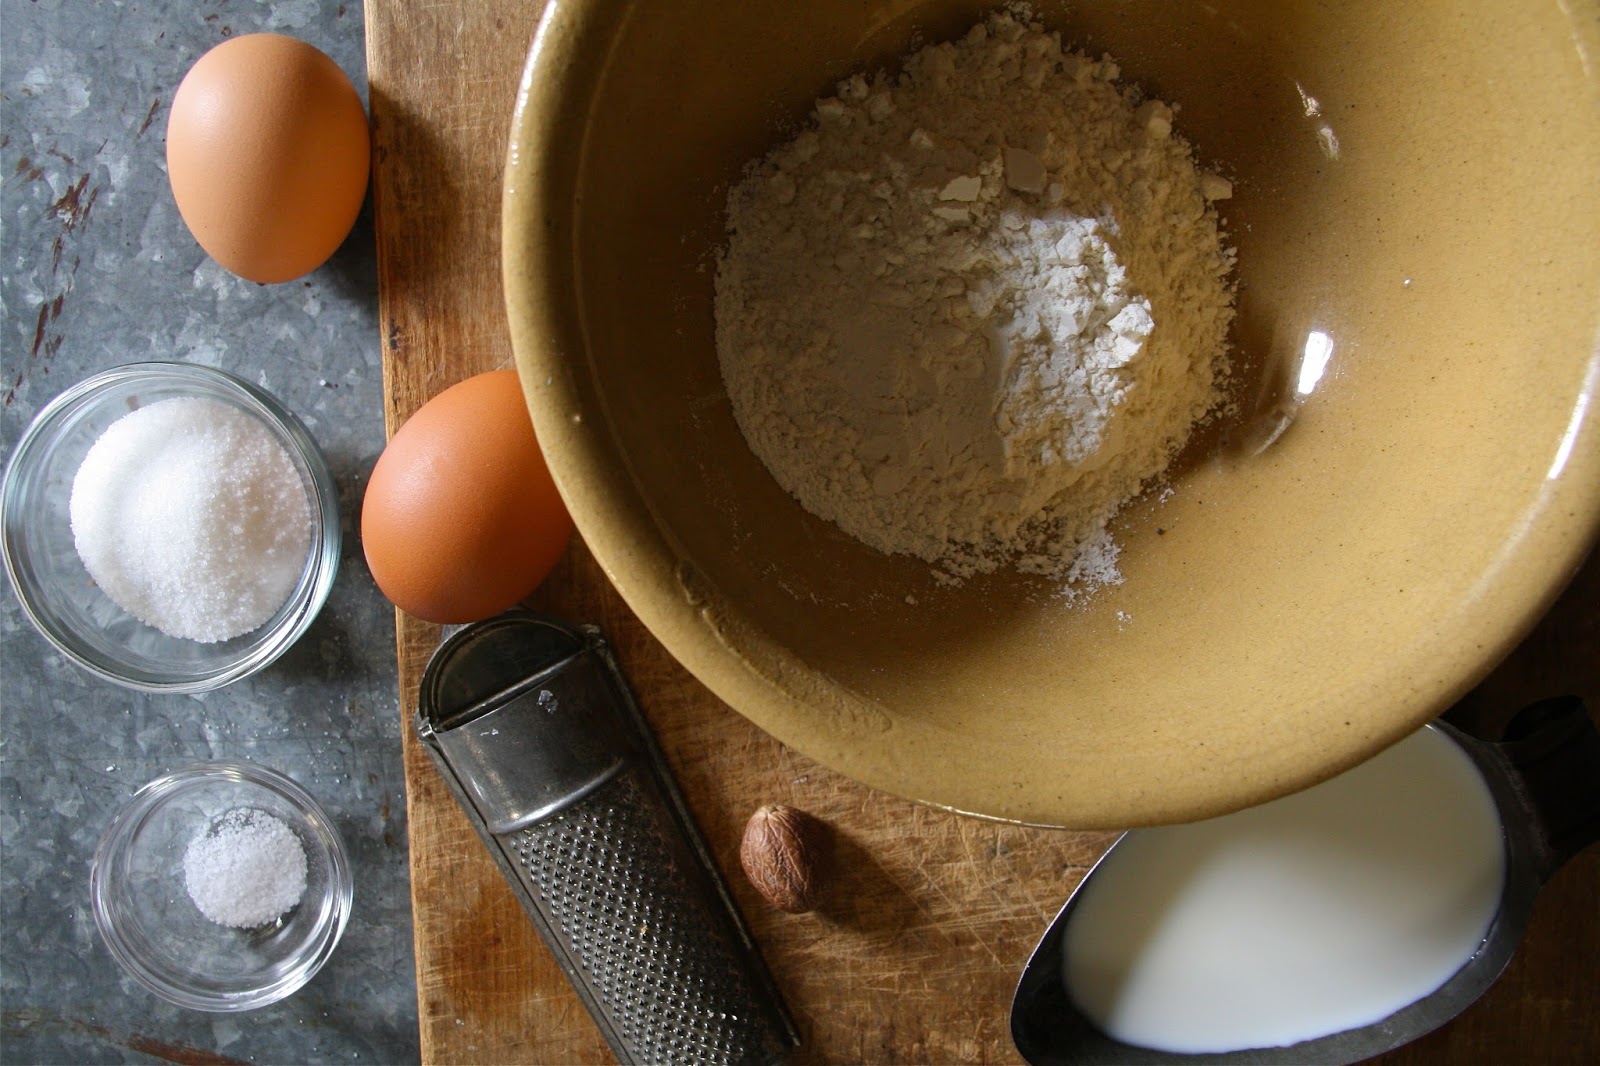
Other than needing at least 24 hours and a 9" (or 8") springform pan, the list of ingredients is relatively simple. Whipping cream, mascarpone cream (slightly softened), sugar, vanilla, unsweetened cocoa, espresso powder, some Kahlua, small pinch of kosher salt, and store bought packages of thin crispy chocolate chip cookies are all you need for this cake. Chocolate covered espresso beans, shaved/curled milk or semi-sweet chocolate and, of course, birthday candles are some of the finishing touch options.


Mascarpone cheese is the buttery-rich double-cream to triple-cream cow's milk cheese hailing from Italy. Although it is technically not considered a 'real' cheese, but rather a curdled cream because of the addition of citric or acetic acids. Often described as the lighter version of American cream cheese, Tiramisu may single-handedly be the one dessert responsible for familiarizing many of us with the creamy deliciousness qualities of mascarpone cheese. What I learned in the making of this Mocha Chocolate Chip Icebox Cake is to allow it soften slightly before mixing up the ingredients for the 'whipped' cream portion of the cake. In the event that you take all of your ingredients out of the refrigerator and pantry and immediately start whipping them together, be prepared to splatter your kitchen walls, counter top and floor.


A standing mixer with a whisk attachment whips up the most beautiful 'mocha whipped cream'. With the mixer beginning at slow speed and then increased to high speed, the mixture is beaten until stiff peaks form. I didn't watch the clock for time but it took less than 5 minutes for the cream to become perfectly whipped.

I used Kahlua, but you could easily swap out Bailey's Irish Cream or even Tia Maria in this cake. Just please don't omit the espresso powder as when combined with the unsweetened cocoa, adds to the chocolatey richness of this cake.


Now for the chocolate chip cookies. Of course you can bake your own thin crispy chocolate chip cookies (especially if you enjoy baking on a 90 degree plus day), or you can buy three packages of Tate's Chocolate Chip Cookies. It's hard not to trust the recommendation of Ina Garten even if she is friends with the maker of these cookies. If you would like to use another store bought thin, crisp chocolate cookie, well I can't stop you. Other than sending you a piece of this cake made with the Tate's Chocolate Chip Cookies or making this cake for you if you enter my circle of friends, I don't know how else to tell you that a cookie swap in this cake might not be one of your best decisions of the decade.


Using a 9" springform pan, the bottom is lined with cookies. Spaces between the cookies are filled with broken cookie pieces. Not to worry, there are enough cookies in three 7 ounce packages to create five cookie layers in this cake. And you might end up with one extra cookie (a reward for your hardwork). Visually divide the whipped cream into fifths, spreading one fifth of it over the first layer of cookies. The cake is make with alternate layers of cookies and mocha whipped cream, beginning with cookies and ending with cream. Easy peasy, right?


Once assembled the cake is covered tightly with plastic wrap and refrigerated for 24 hours. That's when the magic happens!


To remove the cake from the springform pan, insert a sharp knife along the edge of the pan. Once the side of the pan is released, dip an offset spatula or butter knife into a cup of hot water and smooth the sides of the cake.


The top of this cake was decorated with some shards and curls of shaved milk and dark chocolate along with some chocolate covered espresso beans. I melted some chocolate to create the shards/curls, but you can easily use a peeler to create curls from a thick bar of chocolate. This cake needs to be served cold! And a sliver goes along way. Seems Ida Bailey Allen knew what she was talking about way back in 1924.


We celebrated the birthdays of my running friends on a very warm (actually hot) night after one of our mid-week 'hard' runs. This cake fooled even their most sophisticated palates as no one initially guessed it wasn't a 'baked sponge' cake. Maybe I shouldn't have told them. just in case I lost some points for not making a homemade-homemade birthday cake from scratch. But I will let you decide what to tell your family and friends when you make and serve this cake for a special occasion. They may or may not remember what you tell them (or what you don't), but they will never forget the taste of this cake. If there was ever a cake to bring back or begin the tradition of homemade birthday cakes (especially for those in the heat of the summer birthdays), this Mocha Chocolate Chip Icebox Cake would be the one. Another universal truth? Maybe. Or maybe a hundred years from now someone will say I knew what I was talking about.
Recipe
Mocha Chocolate Chip Icebox Cake (a slight adaptation to Ina Garten's Mocha Chocolate Icebox Cake recipe)
Serves 8-12, depending on how you slice it

Ingredients
2 cups heavy whipping cream
12 ounces mascarpone cheese, slightly softened
1/2 cup granulated sugar
1/4 cup Kahlua (or Bailiey's Irish Cream)
2 Tablespoons unsweetened cocoa (recommend Ghiradelli Unsweetened Cocoa)
1 teaspoon instant espresso
Small pinch of kosher salt
3 (7 or 8 ounce) packages of Tate's Chocolate Chip Cookies
Semi-sweet or dark chocolate, shaved or curled for garnish
Espresso beans, optional garnish

Directions
1. In the bowl of a standing mixer fitted with a whisk attachment, lightly whip the mascarpone cheese (approximately 1 minute).
2. Add the heavy cream, sugar, Kahlua, cocoa, kosher salt, and instant espresso. Starting on low speed, mix to combine. Gradually increase speed to high and whip until stiff peaks form.
3. In a 9" (or 8") springform pan, line bottom of pan with a layer of cookies. Fill in spaces with pieces of cookies. 
4. Spread approximately 1/5 of the mocha whipped cream evenly over the cookies. 
5. Place another layer of cookies over the icing, pressing down very lightly. Again fill in spaces with pieces of cookies. Repeat until there are five layers of each, finishing with a layer of the mocha whipped cream. Smooth the top. Cover with plastic wrap and refrigerate overnight.
6. To unmold, run a sharp (slightly warmed) knife around the edge of the cake. Remove the sides of the pan and place cake on a cake plate or round platter.
7. Dip an offset spatula or knife in hot water and smooth sides of cake.
8. Top cake with shards, shavings or curls of chocolate. Arrange chocolate covered espresso beans along edge of cake (if using).
9. Cut with a sharp knife and serve cold. Store any leftover cake covered in the refrigerator.

Notes: (1) You can buy Tate's Chocolate Chip Cookies at Whole Foods as well as at several other grocery stores or markets. They also make a gluten-free version of their cookies. (2) If you don't want to buy pre-packaged cookies, there are a variety of thin, crispy versions of chocolate chip cookies recipes out on the web. (3) I used a 9 inch springform pan and was able to get five layers of cookies and mocha whipped cream. If you don't want to serve the cake on a stand or platter with the bake of the springform pan, line the bottom with parchment paper and trim the edges before placing on a cake stand or platter.


Images of iconic rides from a summer festival fairgrounds.


Tuesday, August 9, 2016

Mexican White Rice with Fried Plantains


After weeks of watching the Presidential conventions and sideshows, my patriotic spirit has been slightly dampened. While there certainly have been a few inspirational moments, nothing has been more disheartening than watching the darker sides of this year's political process play out. But then this past weekend I started to feel differently or rather start to feel more like myself again as my resiliency kicked in. Or I should say was rather kicked. The pride, hopes, and dreams I have for this country (and the world) returned. What caused this 180 degree shift in restoring my patriotism, my love of country? The 2016 Olympics. Quite possibly the most perfectly scripted, well-timed event to happen.  Am I not the only one who needed this year's summer Olympics to get a much needed patriotic adrenaline rush? Not only as a reprieve (or at best a diversion) from listening, watching or reading about the Presidential candidates and their campaigns, but to restore an optimistic, unifying spirit. Between the individual and team events along with the back stories on athletes themselves, the 2016 Olympics may seem to be a temporary distraction from everything else going on in the world. Except, their impact extends well into the future. From planting seeds of dreams for future generations both on and off the athletic playing fields to promoting peace and unity, the individual and collective impacts of the Olympics seem to have gone well beyond what the Ancient Greeks had conceived in 776 BC. And, I for one, could not be happier.


A few weeks ago I took a cooking class with a couple of running group friends. After having a margarita at A Todo Madre (an incredible Mexican Bistro in the western suburbs of Illinois) we walked across the street to Marcel's (an amazing locally owned culinary and food emporium) to learn all about the making of Summertime Street Tacos. Although the focus of the class was on tacos and not the Mexican Rice side dish, I first tasted and learned how to cook with plantains while in this intimate, hands-on class. Can you believe I had somehow managed to live a plantain free life? Who knew some of the takeaways from this class were opening my eyes to the deliciousness of a Mexican White Rice with Fried Plantains and discovering that White Rice with Fried Plantains is a perfect side dish for tacos!


In addition to cooking plantains for the first time, my eyes and palate were opened to the flavor (and heat) of Serrano chiles. Apparently my culinary life has been a little more sheltered than I have been willing to admit. This Mexican White Rice with Fried Plantains was the perfect way to expand my gastronomic horizons.

In addition to being insanely delicious, it is a relatively inexpensive dish to make. A little olive oil, celery, half of an onion (sweet yellow or white), garlic, half of a Serrano chili, a small bunch of cilantro, some long (or extra-long) grain rice, some kosher salt, chicken broth, two black (ripe) plantains and some vegetable oil make up the ingredients. 


I used a sweet yellow onion instead of the white onion we used in class. Feel free to use either one, although the white onion is the onion of choice in classic Mexican cooking. Both the onion and celery should be cut to fine dice. While the garlic and Serrano chile are finely minced. The heat in this rice dish comes from a half of Serrano chile, seeds and all. As someone who doesn't really do 'hot' well, this rice dish had just the right amount of heat. 


After the diced onions and celery are sautéed until the onions are slightly translucent, the garlic and chile are added and cooked for 30-45 seconds before the rice is added. Long grain rice is the rice most commonly used in Mexican cooking. Chefs like Rick Bayless and Zarela Martinez recommend using a medium-grained white rice for best results as the long grain rice found in the US is not comparable to the long grain rice found in Mexico. Having learned that after I made this rice dish and using extra-long instead of long grain rice, all I will say is that my choice of rice did not at all affect the incredible flavor of this dish. What it did affect was my rice cooking time.


Before the chicken stock is added to the saucepan, the rice is cooked along with the sautĂ©ed vegetables until it is slightly translucent (approximately 3-4 minutes). During this phase of cooking, you will be stirring the rice constantly. However, once you add the chicken stock and reduce the temperature to low, the covered pot remains undisturbed for at least 15 minutes or until all of the liquid has been absorbed by the rice. Side note: My cooking time was almost 25 minutes.  

According to Wikipedia 'Plantains contain more starch and less sugar than dessert bananas and are therefore usually cooked or otherwise processed before being eaten'. Sometimes referred to as the pasta and potatoes of the Caribbean, they have found their way into the produce section of many grocery stores. As the peel changes to black, the plantain becomes sweeter while still retaining the firmness necessary for frying.


The skin of a plantain is much thicker than that of a banana and requires a few knife cuts to remove it. By making several long cuts though the skin from one end of the plantain to the other, the skin removes easily. When frying the plantains in vegetable oil, keep these two things in mind: (1) make sure your vegetable oil is hot and (2) work in batches so you don't overcrowd the plantains. The cooking time for 1/4" slices is approximately 1-2 minutes. Transfer the cooked plantains to a dish lined with paper towels and season with kosher salt. Side note: You can make the plantains either before or while you are making the rice. They don't necessarily need to be hot when added to the rice.


The cooked rice is finished with chopped cilantro and the fried plantains served either in a bowl or platter. If you are not a big fan of cilantro, this Mexican White Rice with Fried Plantains might have you changing your mind.


In addition to being a perfect side dish to tacos, this Mexican White Rice with Fried Plantains would compliment a grilled chicken dish or any other Mexican entree. Although I could just eat this rice as a meal. Especially if margaritas were involved! Or maybe to pay homage to the Olympics in Brazil, I should serve this dish with some Caipirinhas (Brazil's national cocktail) using some of the Cachaca (clear sugarcane hard liquor) the person who shall remain nameless brought back from a work trip to Brazil last week. Served with or without alcohol or with or without tacos this Mexican White Rice with Fried Plantains could end up being one of your favorite side dishes. Or if you are anything like sheltered me, open your palate to the deliciousness of fried plantains.

Recipe
Mexican White Rice with Fried Plantains (ever so subtle changes to Robin Nathan's Mexican White Rice with Sweet Plantains recipe)

Ingredients
Rice
2 Tablespoons olive oil
1/2 large sweet yellow or white onion, finely diced
2 stalks celery, finely diced
4 cloves garlic, minced
1/2 Serrano chile (with seeds), finely minced
2 cups long grain or extra long grain white rice
4 cups chicken broth
Kosher salt to taste
1/4 cup chopped fresh cilantro

Plantains
2 ripe (black) plantains, peeled and cut into 1/4" slices
Vegetable oil for frying
Kosher salt

Directions
Rice
1. Heat oil in a heavy medium sized pan or stock pot. 
2. Add onion and celery, sautĂ©ing until onion is slightly translucent (approximately 2-3 minutes).
3. Add garlic and chiles, continue to cook for an additional 30-40 seconds, stirring constantly.
4. Add the rice and stir to coat with vegetables. Cook until rice becomes slightly opaque (approximately 3-4 minutes).
5. Add broth and a generous pinch of salt. Bring to a quick simmer, cover, reduce heat to low and cook undisturbed for 15-25 minutes (or until all of the liquid has been absorbed by the rice). Note: My cooking time for the rice was almost 25 minutes. This may have been due to the level of heat or size of pot. Would recommend checking for doneness at 15 minutes and then continue cooking until rice is done.
6. Fluff with a fork and transfer to serving bowl or platter.
7. Sprinkle with chopped cilantro

Plantains
1. In a large, preferable non-stick skillet, pour in vegetable oil to coat bottom of pan and to a height of approximately 1/4".
2. When oil is hot, add a third or half of the plantain slices (you do not want to overcrowd the pan). Cook for 1-2 minutes per side, flip when lightly browned. Repeat with remaining plantains.
3. Place cooked plantain slices on a plate lined with a paper towel. Season with kosher salt.
4. Arrange plantain slices around the edge of the bowl/platter of Mexican White Rice. 
5. Serve immediately.

Images from a walking tour of Philadelphia (Summer 2015).


Wednesday, August 3, 2016

Blueberry Dutch Baby


Breakfast seems to be one of these meals we are often in a hurry to eat. Usually this means when going out for breakfast we set relatively short time parameters around the time it takes to place the order to the time it is brought to the table. Invariably we often avoid ordering any menu item requiring a twenty minute wait time. For some reason twenty minutes in the morning is considered an endless eternity. We need to convince ourselves we are much too busy to wait that long. Although we think nothing of waiting in endless lines at the coffee shop, at the ice cream shop on a really hot summer's day, or at an amusement park. Essentially our perception of 'too long' is consistently inconsistent. Because if we really want something badly enough, we usually manage to deal with the wait time.


Dutch Babies are those 'do I really have to wait twenty minutes?' breakfast menu items causing us some angst. As soon as we place a breakfast order for anything other than a Dutch Baby, it seems the universe conspires against us. Within seconds of the server leaving our table, another server delivers a a tray of Dutch Babies to the table sitting next to us. The sight of them immediately makes our mouths water or drool or both. Suddenly our perspective shifts and we silently admit a twenty minute wait is really not that long at all. So instead of going out for breakfast and not ordering what you  crave, why not just stay in and make some Dutch Babies!

With the possible exception of wild blueberries, you more than likely generally have all of the ingredients for the making of this Blueberry Dutch Baby on hand. Less time consuming than making traditional pancakes and with a greater visual wow factor at the table, Dutch Babies are an impressive breakfast or brunch dish. By using different seasonal ingredients (blueberries, apples) or simply topping with a homemade lemon curd you may never grow tired of either making and devouring them. 

A prior dutch baby recipe post (Dutch Baby, At Last) used slightly different ingredients in the batter. I would be hard pressed to say which one of these Dutch Babies I liked better. Although in one bite of this Blueberry Dutch Baby and I was immediately smitten with the flavor the smaller, wild blueberries, lightly sprinkled with fresh squeezed lemon juice and finished with a generous dusting of confectionary sugar brought to it. Unfortunately fresh wild blueberries (a much smaller version of the blueberries most of us are familiar with) are not readily available here in the midwest. Driving to Maine or Canada is not a feasible option, so I instead used frozen wild blueberries (with success!). The recipe in Yankee Magazine called for using only one half cup of wild blueberries, but I can tell you now your Blueberry Dutch Baby really needs somewhere between three-quarters to a full cup of them.


The key to making the batter for a Dutch Baby is three-fold: use the best possible ingredients, use room temperature eggs, and whatever you do, do not over blend the batter. A lumpy Dutch Baby batter is a really good batter.


Cast iron pans and Dutch Babies are inseparable. Not only do they conduct heat evenly, they can stand up to relatively high oven temperatures (like the 425 degrees (F) oven temperature called for in this recipe). Cast iron pans at antique stores or flea markets may be a little more expensive than the newer ones made today although either of them will work (this comes from someone who has both). Never ever use a non-stick pan when making a Dutch Baby. Both your pan and your Dutch Baby will be ruined.


Getting the cast iron pan hot is important when making this puffy pancake. The best way to accomplish that goal is to first preheat the oven before placing the pan with the three tablespoons of butter in it. Not only will your butter melt (within about a minute) perfectly, your pan will be evenly heated. Once the butter is melted, the batter is poured into the pan first and then topped with the blueberries. In about 20-22 minutes you will the most beautiful, insanely delicious golden browned, puffy pancake. 

As soon as the Dutch Baby has finished baking, remove from the oven and immediately squeeze a half of small lemon over the top and dust generously with confectionary sugar. Serve immediately! Because part of the experience of a eating a Dutch Baby is taking it in with your eyes make certain everyone is at the table ready and waiting as the Dutch Baby will slightly deflate in a relatively short period of time. While it is as delicious fully puffed as it is deflated, seeing it puffed might make everyone at the table think twice before passing on ordering a Dutch Baby the next time they go out for breakfast at a restaurant. Life may be short, but who wants a life without a Dutch Baby, especially a Blueberry one.

Recipe
Blueberry Dutch Baby (slight adaptation to Yankee Magazine's Blueberry Dutch Baby recipe, July/August 2016)
Serves 2 generously and 4 slightly less generously

Ingredients
1/2 cup (65g) all-purpose flour
1/2 cup whole milk
2 large eggs, room temperature
2 Tablespoons sugar
1/8 teaspoon kosher salt
1/8 teaspoon freshly grated nutmeg or ground nutmeg
3/4 to 1 cup wild blueberries (fresh or frozen)
3 Tablespoon unsalted butter
Juice of 1/2 lemon
Confectionary sugar for finishing
Optional: Maple syrup

Directions
1. Preheat oven to 425 degrees (F) and position rack to lower position in oven.
2. Lightly beat the flour, milk, eggs, sugar, salt and nutmeg. Do not over beat as batter should be slightly lumpy.
3. Place butter in 9 inch cast iron pan. Place in oven. Allow butter to melt (about 1 minute).
4. Carefully remove pan from oven, immediately pour batter into the heated skillet and sprinkle with wild blueberries. 
5. Place pan in oven and bake until puffed and golden, approximately 20-22 minutes. Remove from oven.
6. Immediately sprinkle with fresh lemon juice and generously dust with confectionary sugar.
7. Serve immediately.

Notes: (1) I used one cup of wild blueberries here, but 3/4 cup could work as well. Anything less and well, it wouldn't be as delicious, (2) In the midwest, finding fresh wild blueberries (from Maine or Canada) is a challenge. Most grocery stores sell smaller wild blueberries in the freezer section, (3) Serving with maple syrup is optional, but not necessary. Personally I prefer a Dutch Baby without maple syrup, (4) This recipe definitely calls for the use of a cast iron pan. You can find vintage cast iron pans in antique stores and some flea markets or you can find new ones in a good culinary store. If buying new would recommend Lodge cast iron pans. Everyone should have at least one cast iron pan and (5) Feel free to make the base of this Blueberry Dutch Baby using the Dutch Baby, At Last recipe posted on the blog.


Views in Bar Harbor and on Mt. Desert Island (Maine)