Monday, August 7, 2017

Dutch Baby with Creme Fraiche and Mixed Berries


When I started this blog almost five years ago I was using my camera phone to take photos. At the time I thought their quality and composition were good. Not great, but good. Over time I came to realize good wasn't really 'good enough', for the blog or me. At some point I began using my Canon, a camera I had used primarily to capture vacation landscapes. In the spirit of full disclosure I had been shooting photos only Full Auto mode (aka the little green box icon). Sometimes these photos were great, sometimes good, but never all good or all great. As I began using my Canon, my food photos were definitely better than some of those early phone ones. Sometimes I got lucky and my photos captured exactly what my eye saw. But experiencing exhilaration due in large part to getting lucky wasn't good enough. At least not for me. What prompted yet another change, was the eight week photography class I enrolled in almost eighteen months ago. A class three steps more advanced than both my camera knowledge and photography experience. However, as a result of that class I learned how to take photos in the AV mode (aperture priority) and added some new words to my vocabulary. Aperture, ISO and shutter speed were words I could pronounce and spell, but didn't really get a really good grasp on. Like the old adage 'a little bit of knowledge is dangerous', I started shooting blog photos in the AV mode, manipulating the aperture, ISO, and shutter speed for the first time. While there was a discernible shift in the quality of my photos, there was still an over reliance on photography luck. Yes, I have a stack of photography books and have watched some online videos. However, for me to truly grasp new or seemingly complex concepts, hands-on learning works best. At least for me. Books and videos are great, but they can't answer my questions or tell my why my choice of exposure settings were or weren't working.


After the random meeting of a photographer over the weekend, I decided I would try to shoot photos in the Manual mode. The mode used by most professional photographers (and many food bloggers). Not only does shooting in the Manual Mode truly optimize the DSLR camera, it gives the photographer complete control over aperture, ISO and shutter speed in order to get the 'best' picture possible. And who wouldn't get a little pleasure out of 'complete control'? Shooting in the Manual Mode with my level of knowledge was like diving into the deep end of a pool after taking only a couple of swimming lessons. Putting common sense and ego aside, I decided to jump in anyway. What's the worst thing that could happen? My photos wouldn't have turned out; a day of taking photos for the food blog would have been wasted; they might not even be as good as those early phone photos; or my fragile ego would have taken a nose dive. Still, I decided if I didn't take this risk, my photos might always just be 'good enough'. That's not such a bad thing. Except I wanted more for the blog and for myself. 


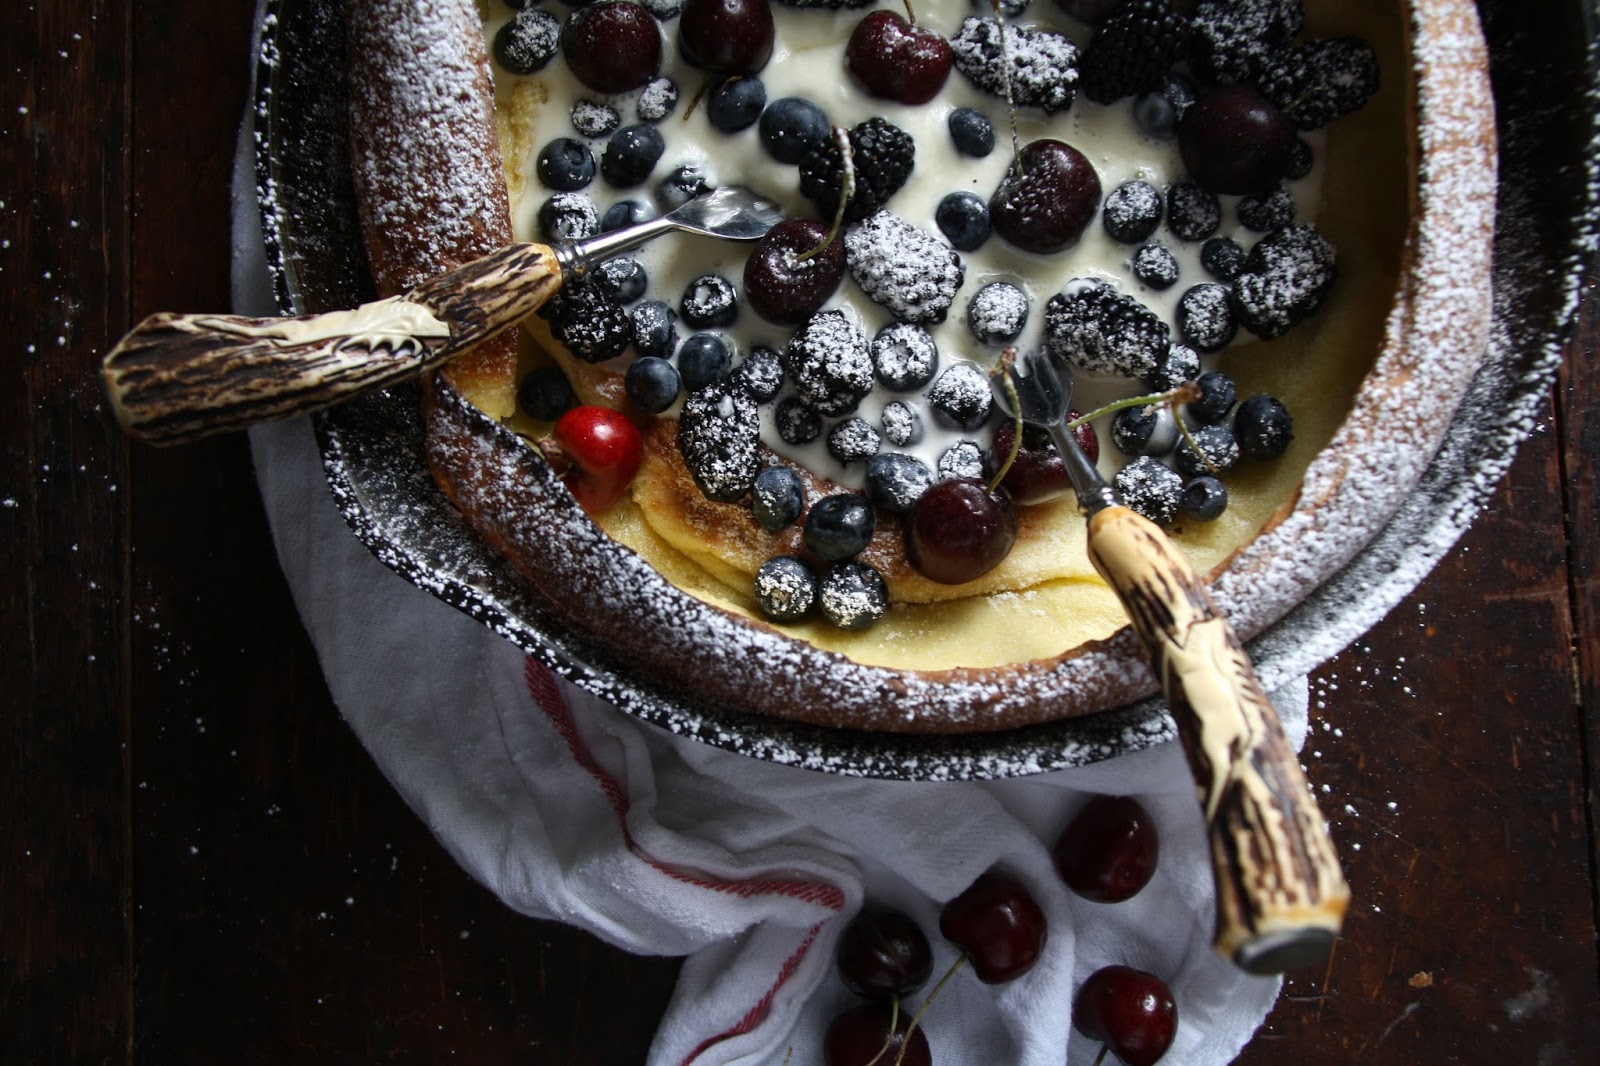
The photos for this Dutch Baby with Creme Fraiche and Mixed Berries are my first attempt at shooting in the Manuel Mode and playing around with aperture, ISO, and shutter speed. I don't yet have the kind of grasp on photography I envision I will some day, but I realize there won't be any (personal or professional) rewards if I don't take this risk. For those of you who follow this blog regularly or are here for the first time, thanks for joining me on my new journey. And, if I can convince (or bribe with food) the photographer I serendipitously met to give me a few photography lessons in the weeks or months ahead, I am certain than none of my photos in the future will be anything I consider to be 'just good enough'.


Four years ago I posted a recipe for a 'Dutch Baby, At Last' (and wait to you take a look at those early photos!). I recently came across a slight variation on this Dutch Baby. Almost instantly I knew I had to make it. The ingredient amounts for the eggs, milk, flour, sugar, and vanilla did not change between the earlier and this new recipe. However, in this Dutch Baby with Creme Fraiche and Mixed Berries, a half-teaspoon of salt has been added; the amount of butter used increased from 4 to 5 Tablespoons; and, the oven temperature reduced from 475 degrees (F) to 450 degrees (F). More important than these subtle changes was how the Dutch Baby was finished. The addition of lightly sweetened creme fraiche, mixed berries, and dusting of confectionary sugar were finishing touch game changers. 


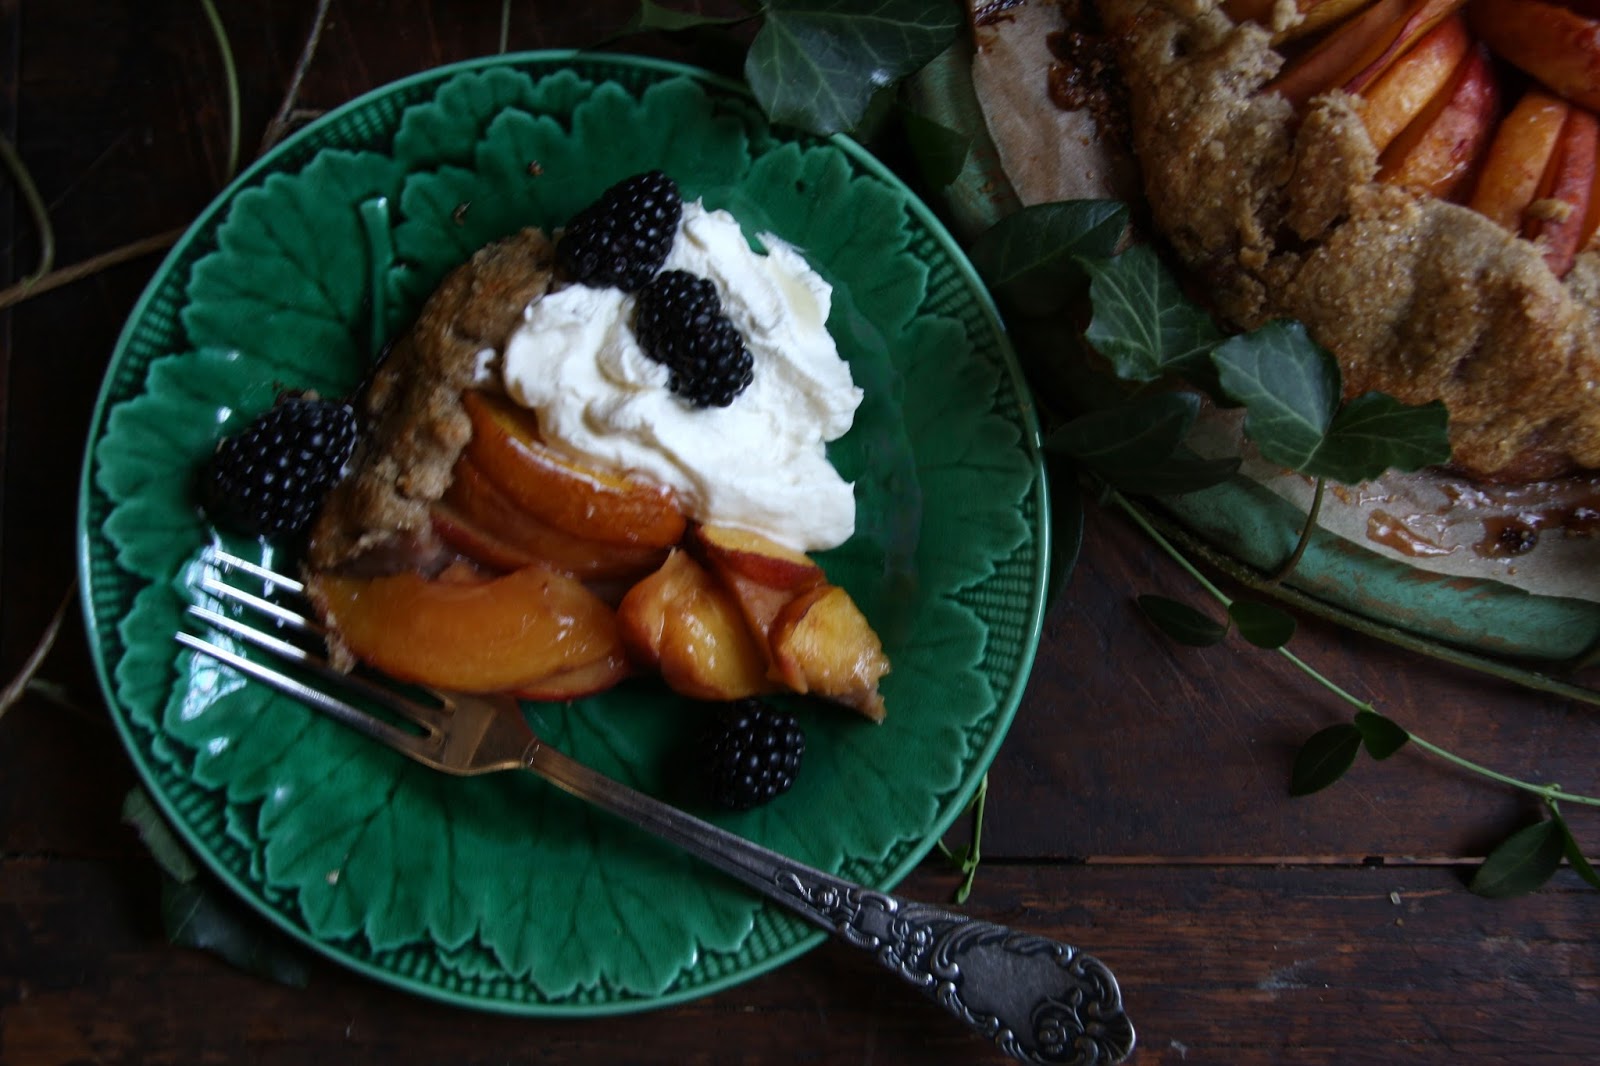
Before I talk about the Dutch Baby, I want to spend some time on the lightly sweetened creme fraiche. To be perfectly honest, I had thought about swapping it out for some lightly sweetened whipped cream. But after tasting the creme fraiche lightly beaten with some freshly squeezed lemon juice and confectionary sugar, I was really glad I didn't. Not that freshly whipped cream wouldn't be good on this Dutch Baby. It would. But why have good when you can have great. And this creme fraiche topping makes for an absolutely great Dutch Baby. Like really, really great.

To give the creme fraiche a whipped cream like look, I used my hand mixer to beat everything together until semi-firm peaks formed. A large dollop of creme fraiche melted into the Dutch Baby created a pool of decadent deliciousness underneath the fresh berries. If there was such a thing as Dutch Baby bliss, this would be it.

For any Dutch Babies you need a pan able to withstand a rather high oven temperature. Non-stick pans are not Dutch Baby friendly, but cast iron pans are. 


Using a blender to mix the flour, eggs, milk, salt, vanilla, and sugar together helps to create the perfect Dutch Baby batter frothiness. Poured into the hot, sizzling pan of melted butter, a deeply golden, puffed Dutch Baby is ready in approximately 15-20 minutes. With no additional leavening ingredients used, it will begin to collapse if not served almost immediately.


You can either bring the Dutch Baby directly from the oven to the table before adding the sweetened creme fraiche, topping with fresh berries, and sprinkling with confectionary sugar. Or you can work quickly to finish it before bringing it to the table.  Either way you serve it, there will be oohs and ahhs.


Described as a cross between a crepe, pancake, and popover, Dutch Babies will definitely take your breakfast game from good to great.


The dramatic presentation doesn't last very long (but long enough). And neither will this Dutch Baby with Creme Fraiche and Mixed Berries. 


Make sure to bring some of the lightly sweetened creme fraiche to the table. I am almost tempted to tell you to increase the recipe by half or double it, but will let you decide how much to make after you serve it the first time. This will definitely not be a one-time wonder breakfast item at your table.


If you have never made a Dutch Baby before, I hope these 'shot for the first time in the Manual mode' photos make you hungry enough to want to make one. And in the weeks and months ahead, I hope my blog posts make you feel even hungrier.

Recipe
Dutch Baby with Creme Fraiche and Mixed Berries (a slight adaptation to Williams-Sonoma's Dutch Baby with Fresh Berries Recipe)
Serves 2 starving people, 4 hungry people, or 6 able to show restraint people

Ingredients
3/4 cup (100g) all-purpose flour
3 large eggs 
3/4 cup (6 ounces) whole milk
1 teaspoon vanilla
2 Tablespoons granulated sugar
1/2 teaspoon kosher salt
5 Tablespoons (75 g) unsalted butter, cut into five pieces

1 cup (8 ounces) creme fraiche 
2 Tablespoons freshly squeezed lemon juice
2-3 Tablespoons confectionary sugar (Note: I used 3 Tablespoons.)

2 cup assorted berries (e.g., blueberries, blackberries, raspberries, pitted cherries)

Directions
1. Preheat oven to 450 degrees (F).
2. Using a hand held mixer, lightly beat the creme fraiche, lemon juice, and confectionary sugar in a small bowl until semi-firm peaks form. Keep chilled in the refrigerator.
3. In a blender, whip the milk, eggs, vanilla, sugar, salt, and flour for approximately 30-45 seconds. Note: If not using immediately, cover and store in the refrigerator.
4. Place butter in a 10-11 inch cast iron pan. Place pan in oven for 4-5 minutes or until butter is completely melted.
5. Remove the pan from the oven and immediately pour the batter into the hot pan. Quickly return the pan to the oven and bake until the sides are puffed up and golden brown (approximately 15-20 minutes). Note: My baking time was closer to the 20 minute mark.
6. Remove the Dutch Baby from the oven. 
7. Sprinkle about a cup of the berries over the Dutch Baby. Put a large dollop of the creme fraiche mixture in the center of the Dutch Baby. Lightly dust with confectionary sugar. Add remaining berries. Cut into wedges and serve immediately. Note: Bring the remaining creme fraiche mixture to the table.
8. Get ready to swoon.

Notes: (1) I use Vermont Creamery's Creme Fraiche. (2) Batter can be made the night before. Briefly pulse in the blender before pouring into the hot pan. (3) The original recipe called for a 12" pan, however, I used a 10.5" pan with great results. 

Thursday, August 3, 2017

Rustic Peach Galette


When I lived out east, I didn't need to wait until the weekly Farmer's Markets or take a twenty minute drive the nearest grocery store to pick up fresh fruits or vegetables. Because almost everything I needed could be found at the two well stocked local farm stands, the blueberry farm, my favorite apple orchard, or on the surprising large number of small tables filled with the day's fresh harvest sitting at the edge of driveways along the town's winding two-lane roads. If I wanted to make a recipe calling for fresh herbs, I simply walked out my farmhouse back door to the gardens containing an abundance of chives, sage, several varieties of thyme, oregano, rosemary, basil, dill, and mint. Having access to fresh eggs made the town I lived in even more endearing. However, if I went out too early or waited until the afternoon to go out to get them, the roadside coolers containing fresh eggs would be empty.


Having access to more than a dozen grocery stores within a five mile radius from where I live now is certainly a convenience. While it may just be my imagination or a bit of revisionist history, I have yet to find fruits and vegetables as fresh and flavorful as the ones bought at those roadside stands. Those were the not so long ago days.


The word galette has been linked to the French work 'galet', meaning a smooth, flat pebble. Nowadays sweet and savory galettes have come to be thought of as unfussy rustic, free-form tarts made with a single crust of pastry. Sometimes the edges of the pastry are folded up and over while other times the pastry is simply left flat. If you want a fancy pastry, make a tart. If you want a homey one, make a pie. But if you want pure and simple rusticness without sacrificing beauty, make a galette. Think of the rolled out dough as a blank canvas. How you arrange the fruit, piled high or arranged in a pattern, depends only on your imagination. 

In the past I have shared recipes for a couple of fruit galettes (Apple Galette and a Blueberry Pecan Galette) as well as with several fruit crostatas (Summer Fruit CrostataRustic Apple Crostata, Nectarine and Plum Crostata) some which look more like tarts and galettes. The crust I used for the Blueberry Pecan Galette is one of my favorites. Not only is it delicious, it pairs well with a variety of fruits. Making it the perfect pastry choice for this Rustic Peach Galette. 


Choose your peaches wisely when making this galette. Think bigger the better when buying them as the larger peaches have a tendency to be on the sweeter. more flavorful side. The ones I had bought at the Farmer's Market were big, but more on the ripe, ready to eat, and close to impossible to cut in half, let alone into the cut into wedges side. The ones from the grocery store were a little on the firmer, not yet ready to eat side. In other words, they were galette ready perfect. Not only were they easier to cut, the slices held their shape during the baking process. 


The most successful way to cut and slice a peach starts by placing the knife in the crease and cutting in half all the way around. Holding each half of the peach, you simply twist it in opposite directions will loosen the peach pit. If the pit remains attached to one half of the peach (and sometimes it does), remove before cutting the peach in 1/4" slices/wedges.


Toss the sliced peaches in freshly squeezed lemon juice, the granulated sugar/cinnamon mixture, and vanilla before arranging on the rolled dough. 


Arrange the peaches in a circular pattern as I did or be creative. If you want a bit more inspiration, do a quick peach galette search on the web! When laying out the peaches on the dough, it's important to leave about a 2"-3" border of dough in order to wrap the edges of the galette. Before brushing an egg wash glaze on the exposed dough, check to make sure you can pinch any tears. A leaky tart is a soggy tart.


Some galette recipes call for the use of apricot glaze over the peaches. However, I wanted only the taste of peaches in each bite. 


The Rustic Peach Galette bakes in a 375 degree (F) oven for approximately 45 minutes. If after 30 minutes, the dough is not getting to a beautiful golden color, turn the oven up to 400 degrees (F) for the last 10-15 minutes of baking. 


The galette needs to rest a bit, maybe 20-30 minutes, before it's cut into wedges. Because it's equally delicious warm or at room temperature, it can be made early in the day. 

Make some lightly sweetened whipped cream to go with the galette. Using a hand held mixer, whip one cup of heavy whipping cream with 1 to 2 tablespoons of confectionary or caster sugar until soft peaks form. Sometimes I add a splash of vanilla, sometimes I don't. 


With the peach season in full swing (at least here in the midwest), it's the absolute perfect time to make this irresistible, sweet tooth satisfying dessert. 

Recipe
Rustic Peach Galette (an ever so slight adaptation to dough portion of the Bon Appetit's Blueberry Pecan Galette recipe)
Serves at least 8

Ingredients
Dough
1/2 cup pecans, toasted for approximately 8-9 minutes in a 350 degree (F) oven.
1 cup plus 2 Tablespoons all-purpose flour
2 teaspoons sugar
1/2 teaspoon kosher salt
1/4 teaspoon cinnamon
1/2 cup (8 Tablespoons) chilled unsalted butter, cut into pieces (recommend Kerrygold unsalted butter)
3 Tablespoons ice cold water, added 1 Tablespoon at a time

Filling
3-4 large, not too ripe peaches, approximately 2 pounds, cut approximately 1/4" thick
4 Tablespoons granulated sugar
1/2 teaspoon cinnamon
2 teaspoons freshly squeezed lemon juice
1 teaspoon vanilla

Egg Wash and Finish
1 egg yolk
2 Tablespoons whipping cream or milk
1 -2 Tablespoons demerara sugar or sparkling sugar

Directions
Dough
1. Preheat oven to 350 degrees (F). Toast pecans on a baking sheet until fragrant and slightly darkened (approximately 10-15 minutes). Allow to cool.
2. Pulse pecans in food processor until the consistency of coarse meal.
3. Add flour, sugar, salt and cinnamon pulsing to just combine.
4. Add butter and pulse until mixture resembles coarse meal (a few pea sized pieces of butter will remain).
5. Add 3 Tablespoons of ice water (1 Tablespoon at a time) and pulse until mixture begins to come together. If necessary add additional water in 1 teaspoon increments.
6. Turn dough out and shape into a 6" diameter disk. Wrap in plastic and chill at least least one hour. Note: Dough can be made up to 2 days ahead.

Filling and Assembly
1. Preheat oven to 375 degrees (F).
2. Combine granulated sugar and cinnamon. Set aside.
3. Remove chilled dough from the refrigerator. Place it on a large piece of parchment paper. Roll out dough to a 12-13" round. Thickness should be at least 1/4". Transfer to a large baking sheet. Place baking sheet in the refrigerator while you prepare the peach filling. Note: Taping the parchment paper to the counter will prevent it from sliding while you are rolling.
4. In a medium sized bowl, toss together the sliced peaches, sugar mixture, lemon juice, and vanilla.
5. Arrange peaches in a pattern of your choice, leaving at least a 2-3 inch border. 
6. Fold edges of the dough, overlapping slightly over arranged peaches. Take care to fix any tears in the sides of the dough in order prevent leaking.
7. Transfer the parchment paper lined galette to the baking pan. Place in the refrigerator for at least 10 minutes in order to slightly firm up the dough.
8. Remove pan from the refrigerator. Brush dough with egg wash and sprinkle generously with demerara sugar or sparkling sugar.
9. Bake galette until crust is golden brown and filling is has thickened. Approximately 45-50 minutes. Note: Increase oven temperature to 400 degrees (F) for last 15 minutes of baking if crust is not turning golden brown.
10. Remove from oven. Allow galette to cool slightly (approximately 1 hour) before serving. (Note: Can be served warm or at room temperature).

Additional notes: (1) Serve with lightly sweetened whipped cream or vanilla ice cream. (2) Galette is best on the day it is made.


Views from the historic Lake Crescent Lodge on the Olympic Peninsula in Northwest Washington. (June 2017)


Monday, July 31, 2017

Garlic Aoili with Crudités


 "You have your way, I have my way. As for the right way, the correct way, and the only way, it does not exist." Friedrich Nietzsche After experiencing a moment of culinary angst last week, those words, combined with taking a deep breath, and reframing the moment with a yoga inspired intention enabled me to get a grip on myself. So what caused me to have an irrational, temporary moment of emotional regression? Well, it all had to do with making aoili. I had taken it a bit too seriously. Not only was my reaction to a failed attempt a bit out of character (it's not the first time something didn't exactly go as planned), so was the way I had usually approached making a new recipe. Instead of doing a fair amount of research and triangulating multiple recipes/sources of information, I made a new recipe without doing either or both of these things. This is not to say we shouldn't allow ourselves to have those blind faith moments. Because we should. Just not all of the time. Or at least for me, not in making aoili. As it turned out, throwing out the unsalvageable olive oil and (farm fresh) eggs turned out to be a blessing in disguise. While I didn't go into full doctoral dissertation research mode, I took a step back and spent some time learning a a bit more about making aoili and mayonnaise. Without going too far down into the aoili rabbit hole, I learned fairly quickly was there are a fair number of variations in both ingredient proportions and technique. Discovering some respected chefs have shared multiple recipes for their take on a good quality aoili and/or mayonnaise was reassuring. It seemed on any given day, one's choice of aoili recipe might depend on prior success, personal preference, and/or allegiance to a particular culinary belief. In an odd sort of way, this was proof there was no one right aioli making way.


If I could, please indulge my need to share some of what I learned during this aoili and mayonnaise learning quest. Feel free to skip ahead. Using the highly regarded Larousse Gastronomique as a reference, a Bon Appetit article helped to explain some of similarities and differences between these two sauces. "Mayonnaise is a 'cold emulsified sauce consisting of yolks and oil blended together', while an aoili is an emulsified sauce that must contain garlic and olive oil." So technically, a mayonnaise could be considered an aoili, if it's made with garlic and oil, and an aoili could be considered a mayonnaise as long as it is made with a yolk. However, don't expect everyone to agree on this interchangeability viewpoint. 

How the oil is incorporated into the yolk mixture can be achieved in a variety of ways, some more foolproof than others. Food processors, immersion blenders, whisks, and a mortar/pestle are some of the tools used. Some recipes provide directions specify the use of only one of these tools, while others offer directions for multiple options. Owning an immersion blender, food processor, or a mortar/pestle will not prevent anyone from making it. A larger sized, balloon shaped whisk and strong arm muscles will work. However, success will in large part be due to the amount and rate the oil is added to the yolk mixture.

The inherent oppositional qualities of oil and water (two common mayonnaise/aoili ingredients) can make achieving a thick, velvety, smooth texture somewhat challenging (there are reasons for this, scientific ones actually!). The classic aoili/mayonnaise technique (as summarized by Kenji Lopez-Alt) begins with whisking the egg yolks, a bit of mustard, a small amount of water, and either lemon juice or vinegar. Once combined, the oil is ever so slowly trickled in while simultaneously being rapidly whisked. Adding the oil too quickly will prevent the emulsification necessary to create the rich, lush, creamy sauce some of us love. 


All of this was good information, but I wanted, or rather still needed, to know if there was a best or definitive egg yolk to oil ratio?  After looking at significant number aoili/mayonnaise recipes from some highly respected food sources, I discovered there was a fair degree of variability. Even in recipes claiming to be classic versions. The ratios ranged from one egg yolk to a half-cup of oil; to one egg yolk to 3/4 cup (or 12 Tablespoons) of oil; to one egg yolk to 10 ounces of oil; to one egg yolk to 1 1/2 cups of oil. Michael Ruhlman, the food science guru and author of the Ratio: The Simple Codes Behind the Craft of Everyday Cooking, cited the one egg yolk to 1 cup of oil as the perfect ratio while my favorite cooking goddess, Ina Garten, used a one (extra-large) egg yolk to 3/4 cup olive oil ratio. Discovering all of these different egg/oil ratios could have caused an aoili head spinning moment if I hadn't kept repeating the mantra 'in cooking as in life, there is no one right way to do anything'. There might be best ways, favorite ways, better ways, or for no good reason ways. On the remote chance was there only one right way, I doubt the egg yolk to oil ratio would qualify for entry into such an exclusive category.

Then there was the nagging question: Was there one best oil to use? Some recipes called for olive only; some for a combination of a neutral oil (vegetable, canola or grapeseed) and an olive oil; and still others called for the use of peanut oil. Olive oil appeared to be prevailing choice, but best appeared to be a matter of taste.  Adding another layer to the oil decision making process was learning the powerful blades of blenders and food processors could actually be responsible for creating a bitter-tasting sauce. It seems olive oil is actually made up of tiny fragments. If sheared apart from one another, they can go from being delicious tasting droplets to bitter-tasting fragments in the blink of an eye. 

As I was finally nearing the end of semi-exhaustive research endeavor I began to wonder if I should put aoili in the category of things I shouldn't make. Wouldn't mixing some finely chopped garlic into some already pre-made mayonnaise might be easier? Couldn't I use a semi-homemade or homemade version of aoili to serve with the gorgeous vegetables I had picked up at the Farmer's Market? Would anyone really care? Maybe, maybe not. Could anyone tell the difference between the two? I am pretty certain they would. But would they prefer one over the other? Well, I'd like to think given the choice between eating a semi-homemade aoili and homemade aoili, the flavor and texture of the homemade one would be the hands down favorite. On the chance this assumption is incorrect, I felt a comelling need to experience the triumph of, with or without any adulation, making a really, really good garlic aoili. The farm raised, freshly picked vegetables deserved to be served with nothing less. 


As I embarked on the second, non-melt down garlic aoili making attempt I felt certain there would be a successful outcome. But I had several decisions to make first. Beginning with which tool to use. The food processor method didn't work the first time (for a number of reasons I now realize), I don't have an immersion blender, and I may not have the patience required for using a mortar/pestle. Which left me with one choice: the whisk. Next I to decide which oil or oils to use. Being partial to the flavor of olive oil helped make that decision. And lastly was settling on an egg yolk to olive oil ratio. I had done enough reading to realize any number of the yolk to oil ratios would work as long as I was patient with adding the oil. After a bit of deliberation, I decided on Plan A (aka the 1 egg yolk to 1/2 cup oil ratio). And if, by some chance the aoili was too thick and/or it didn't meet the taste test, I would go to Plan B and add more oil. Either way I didn't think I could go wrong this time, nor lose my sanity.


When selecting vegetables for a cruditĂ© platter, there are no hard and fast rules. Choose what you like, what you think everyone would enjoy. All steamed, all raw, or grilled vegetables or a combination of any of these would work. Choose a wide assortment of or several different kinds of vegetables. Create a platter with vegetables all having the same color or make it colorful. Add hard boiled eggs, olives, and/or bread. Or not. Garnish with fresh herbs and/or flowers. Or not. Make it as an appetizer or transform it into a meal. The Garlic Aoili with CruditĂ©s  possibilities are endlless.


But definitely have a bowl of homemade garlic aoili on the platter. Like the Plan A recipe below. The one having a rich, creamy, and almost perfect consistency. Not only did it exceed all of my expectations, it restored my culinary confidence. Let the happy dancing commence!


Key to its' success the second time around was adding the olive oil ever so slowly. Starting with only drips of olive oil, gradually increased to half-teaspoonfuls while rigorously whisking well during and after each addition contributed to its' emulsification.  If I could have figured out how to add the the oil in a slow, think steady stream at a certain point, I would have. But I only had two hands. You might think the aioli making process is little time consuming. Maybe slightly. But surprisingly it didn't feel that way. 


While I am more informed about aoili/mayonnaise than I was only a week ago, I am by no means an expert. It's quite possible the next time I make an aoili, I rush the process and fail to experience aoili nirvana. It is also not outside the realm of possibility I will try and fall deeply, madly in love with another aoili recipe I was somehow lulled into making. For the moment, I am over the moon smitten with this version. 


As far as most of my blog posts go, this one may have rambled on a bit more than usual. So let me thank you for taking the time to hang in there. The day cooking and/or baking stops becoming or feeling like an adventure is the day I should probably put away my measuring cups and spoons, the large assortment of kitchen gadgets, and collection of copper pots. The hundreds of cookbooks and stacks of magazines would also have to find a new home. And most importantly, the day I stop learning from and appreciating the culinary perspectives of others is the day I should....well, let's just say I hope that day never comes because I am not certain what the best thing to do would be. Here's hoping we all continue to be kind and encouraging toward one another while experiencing the trials, tribulations, risks, and rewards awaiting us all in the gray world of cooking, baking, and making a homemade garlic aoili.

Recipe
Garlic Aoili with CruditĂ©s (inspired by Bon Appetit's Real Deal Aoili recipe)

Ingredients
2 large egg yolks, room temperature
3 -5 medium garlic cloves, finely chopped (Note: The more garlic, the more intense the flavor. I love garlic and used only 4 medium garlic cloves.)
1 teaspoon sea salt or kosher salt
1/2 teaspoon dijon mustard
2 teaspoons freshly squeezed lemon juice
1 cup good quality olive oil
Assortment of raw and/or steamed vegetables (e.g., cherry tomatoes, carrots, string beans, baby red potatoes, artichokes, radishes, sugar snap peans, asparagus, cucumber slices, kalamata olives, etc.)
Hard-boiled eggs
Grilled Bread

Directions
1. Whisk egg yolks, salt, garlic, lemon juice and dijon mustard in a medium sized bowl to combine. The mixture should be creamy.
2. Using a large balloon whisk, add olive oil in drops whisking to ensure the mixture remains emulsified after each addition. After using about a 1/4 cup of the oil, begin to add oil in slightly larger amounts (think half teaspoons) or a very, very thin stream, whisking during and well after each addition. Note: If oil is added too quickly the aoili will break down and the oil will separate.
3. Continue whisking until all of the oil is incorporated and the aoili is thick enough to hold its' shape when spooned. Season with additional salt if necessary.
4. Serve immediately or cover and chill. Can be made a day ahead. Will last for at least a week in the refrigerator. 
5. Choose an assortment of steamed and/or raw vegetables; hard-boiled eggs; and/or grilled bread. Arrange on a platter. Serve with bowl of the garlic aoili. 

Notes: (1) Use a good quality olive oil and dijon mustard. It is not necessary to use extra-virgin olive oil, just a really good olive oil. In fact you can use a combination of olive oil and a neutral oil (like canola or vegetable oil. Maille is my favorite go-to dijon mustard. (2) The flavor of the garlic will intensify the longer the aoili chills in the refrigerator, so you might to use only 3-4 cloves of garlic the first time you make it. (3) This garlic aoili would also be a great condiment for grilled meats, burgers, chicken and/or seafood. It would even elevate any number of sandwiches. And oh, french fries dipped in this garlic aoili would be insane! (4) I didn't provide directions using immersion blender or any other tool as I have only made it using a whisk. If you have had aioli success with any other tool, feel free to use it. 


Farmer's Market bounty. (July, 2017)


Monday, July 24, 2017

Pasta with Marinara, Roasted Cherry Tomatoes, and Burrata


Making decisions on what to eat or not to eat on the mornings as well as the night before a long run or race has been a bit of an ongoing challenge for me. There are no shortage of recommendations or schools of thought about what one's body needs or what the protein to carbohydrate ratio should be in order to sustain intense and/or extended periods of exercise. I have read about and tinkered with most of them. Learning all too well that what works for some doesn't always work for others. Especially for those like me with overly sensitive stomachs. No matter what the most accomplished athletes or coaches prescribe as 'optimal performance foods', it turns out following the most prevailing wisdom, aka 'listen to your body,' may be the best pre- and post-run/workout advice out there. My food choices go through phases depending on a number of variables. Eating pasta the night before a long run seems to be working best at the moment. I couldn't be happier. 


For the past ten weeks I have been just one of cadre of committed runners helping to support a group of amazing women training for either a 5k or 10k race. Everyone who joined this running group came with at least one personal goal. They ranged from improving their running performance and/or endurance; to supporting their return to running after an extended period of absence; to getting physically and mentally ready to run a race. The newest members to the group learned more than good running form; the importance of speed/hill work and cross training; and/or why nutrition matters. They discovered the running group was more than a venue to become a better runner or to experience the benefits of being supported during a run. It was a place where great friendships are formed and where both small and big successes are celebrated. The intangible outcomes of being part of this running group almost outweigh its' tangible benefits. 


This past weekend we all ran either the 5k or 10k culminating race. It just happened the race was on one of the hottest, most humid days of the summer thus far. And while there had been some hot/humid training days, nothing came close to this runner's worst race days fears. Full sun, little to no wind, and temperatures/humidity soaring to incredibly high, warning levels. In spite of the running conditions and a series of unexpected hills on the course, everyone successfully finished their race. The best part of the day for me was being with the women I had been running with for the past ten weeks. Unbeknownst to them, they made me, the hot weather wimptress, want to keep my 'running head' in the game. For my part, I made certain I ate what I thought my body needed the night before the race. The Pasta with Marinara, Roasted Cherry Tomatoes, and Burrata may have been the best pre-race meal I have ever eaten. But I won't even tell you what my post-race food and beverage intake was as it violated almost all of the post-race food advice out there or how much fun sitting in a kiddie pool filled with ice cold water with four of my running friends was. But I couldn't have been happier.


There are so many rave worthy things about this pasta dish. One of them had to do with the choice of pasta. I absolutely love long, on the wider side pasta noodles. Tagliatelle, a long, flat pasta ribbon, was the perfect choice. They are slightly wider than fettuccine and much thinner than pappardelle. Instead of water, tagliatelle noodles are made with eggs. As a result they have a slightly higher absorbency quality, making them one that stands well to a variety of sauces (e.g., bolognese, carbonara). And they were the perfect choice for this pasta dish. 


Adding roasted cherry tomatoes to this pasta dish not only adds an amazing flavor and texture dimension, they make for even more visually appealing one as well. Drizzled with some olive oil and seasoned with kosher salt and pepper, the tomatoes are roasted in a 400 degrees (F) for approximately 20 minutes (or until they begin to blister). Roasting the tomatoes at a high temperature for a relatively short amount of time turns them into incredible bursts of flavor.


The recipe for this slightly chunky, deeply flavored marinara sauce was inspired by one of Lidia Bastianich's recipes. Unlike a more complex tomato sauce, a marinara comes together relatively quickly relying on very few ingredients to give it a deep, rich flavor.  Instead of using cans of plum tomatoes and crushing them by hand, this marinara uses cans of crushed tomatoes.You might think the use of 16-18 cloves of garlic would overpower this marinara sauce. But it doesn't. SautĂ©ing the chopped garlic in extra-virgin olive oil until they are pale golden in color tames their bitterness and transforms them into sweet bites of goodness. After the sauce simmers for 20-30 minutes, remove a generous cup from the pan as this recipe yields more sauce than you need to coat the tagliatelle. The extra sauce can be heated and served on the side for those who love a heavily dressed plate of pasta, used to lightly coat meatballs (if you are also making them) or reserved for another use. 


When the tagliatelle reaches al dente, it's drained and added to the simmering marinara sauce. Remember to reserve at least a cup of the pasta water. It will ever so slightly smooth the sauce as well as help to continue to cook the pasta after it's mixed into the sauce. Be sparring with the use of the pasta water as you still want this marinara to retain its' slightly chunky texture. Note: I added less than 1/4 cup of the pasta water to the sauce.


After the tagliatelle is completely coated with the marinara sauce, add half of the roasted tomatoes and all of the roasting juices from the pan. Gently stir and then pour the pasta into your serving dish. Top with chards of the burrata cheese and some additional chopped basil. To finish, drizzle some extra-virgin olive oil over the top. This Pasta with Marinara, Roasted Cherry Tomatoes, and Burrata is now ready to wow your family and friends. 


The addition of the roasted cherry tomatoes and burrata along with use of the tagliatelle pasta creates a most beautiful, most flavorful bowl of pasta. One certain to make a lasting impression on everyone's eyes and palates. Paired with a salad and some great bread, the Pasta with Marinara, Roasted Cherry Tomatoes, and Burrata is hearty enough to be an incredibly satisfying meal. Bring a great bottle of wine (or two, depending on your friends) to the table and it's possible no one will leave your dinner table until every last morsel of the pasta has been devoured. No one will be happier.

Recipe
Pasta with Marinara, Roasted Cherry Tomatoes, and Burrata (marinara recipe influenced by Lidia Bastianich)
Serves: 6 hungry or 8 not so hungry people

Ingredients
1/4 cup extra virgin olive oil (plus additional for finishing)
14-16 cloves of garlic, crushed and chopped
2 cans of San Marzano crushed tomatoes (28 ounce size)
2 to 3 Tablespoons sugar
2 teaspoons Kosher salt (or more to your liking)
1/2 teaspoon Aleppo red pepper
12-16 fresh basil leaves, sliced into slivers (plus additional leaves for garnishing)

16-18 ounces cherry tomatoes
2 Tablespoons extra virgin olive oil
Kosher salt and pepper

1 pound tagliatelle pasta 
12 ounces burrata 

Directions
Marinara Sauce
1. Heat extra virgin olive oil in a heavy deep saucepan.  Add garlic and cook until lightly browned.
2. Add crushed tomatoes and bring to a boil.
3. Reduce heat, add salt, Aleppo pepper flakes and sugar. Simmer until slightly thickened. Approximately 20-30 minutes.
4. Add slivered basil to sauce about 5 minutes before the sauce is finished.
5. Remove a generous cup of the marinara sauce and set aside.

Roasted Tomatoes
1. While marinara sauce is simmering, heat oven to 400 degrees (F). 
2. Place tomatoes in a roasting dish or pan. Drizzle with 2 Tablespoons of olive oil and season liberally with salt and pepper.
3. Roast tomatoes for approximately 20 minutes or until tomatoes begin to blister. Reserve drippings.

Pasta and Assembly.
1. Cook pasta in salted water until al dente (the cooking time for the tagliatelle was approximately 5-6 minutes). Reserve at least one cup of the pasta water after draining. 
2. Add drained pasta to the marinara sauce, add a ladle of the reserved pasta water (or enough until it reaches a desired consistency), toss until the pasta is coated and simmer for additional 1-2 minutes. This additional cooking time will bring the pasta to the perfect consistency.
3. Transfer pasta to serving bowl. Toss in half of the roasted tomatoes and all of the tomato juice drippings from the roasting pan. 
4. Arrange remaining half of the roasted tomatoes over the pasta.
5. Cut burrata into pieces and place on top of pasta.
6. Lightly drizzle with extra-virgin olive oil. Garnish with additional chopped basil. Serve immediately.

Notes: (1) Marinara sauce can be made a day ahead. Reheat before adding the cooked, drained pasta. Can use some of the pasta water to thin the sauce. (2) Can serve the generous reserved cup of marinara sauce on the side, use to coat meatballs if making, or save for another use. (3) If you can't find tagliatelle pasta, consider using linguine, fettuccine or pappardelle pasta for this dish.


One view of Chicago's skyline, an iconic building, the L-train, and the Buckingham Fountain, taken while an architectural boat tour (June, 2017)