Friday, July 21, 2017

Raspberry Crumb Bars


"I am beginning to recognize that real happiness isn't' something large and looming on the horizon ahead, but something small, numerous and already here." (Beau Taplin) It doesn't seem to take much to make me happy lately. Season seven of the Game of Thrones returned this past week, I bought a small 'kiddie' pool for running and exercise recovery reasons (partly true), having coffee with friends after running and/or working out, I absolutely loved a book (Eleanor Oliphant is Completely Fine) I came across unexpectedly, and the driveway went from looking like blight to brand new thanks to a long over due coat of sealer were some of the sources of happiness this week. It's true what they say. There is much to be said for finding joy in the small things. If you look back at your week, what would be those things that made your heart race or brought a smile to your face?


I thought these Raspberry Crumb Bars were really, really, really good, but having friends say they loved them was yet another of the week's highlights. Validation never ever gets old. I could say 'at least for me' but I don't think I am the only one who thrives on hearing kind words. One of the simplest gifts we can give to others, especially to those we love or value. Generosity comes in many forms, but gifting with words may be the most powerful of them all.


But let's not underestimate the power of a platter of home baked treats to let others know they matter to you. In the absence of words, the gift of anything homemade speaks volumes. Like these buttery, sumptuous Raspberry Crumb Bars for example. Amazon reminded me I bought the cookbook "Flour: Spectacular Recipes from Boston's Flour Bakery and Cafe" almost seven years ago. But it took seeing the luscious, ripe raspberries at this week's farmer's market to get me to make them.


I have made a number of fruit bar recipes before, but these may now be my favorite for so many reasons. All-purpose and cake flours help to create the tenderest of shortbread crusts. The butter adds the kind of melt in your mouth richness you come to expect from a really great shortbread. Granulated and confectionary sugars bring just the right amount of sweetness. The addition of fresh raspberries to the layer of raspberry preserves took these crumb bars to yet another level. 

Like the old adage 'don't judge a book by its' cover', don't judge these Raspberry Crumb Bars by their directions. At first look, they will appear to be a little on the cumbersome side. If anything, they are more on the time intensive than on the labor intensive side. 

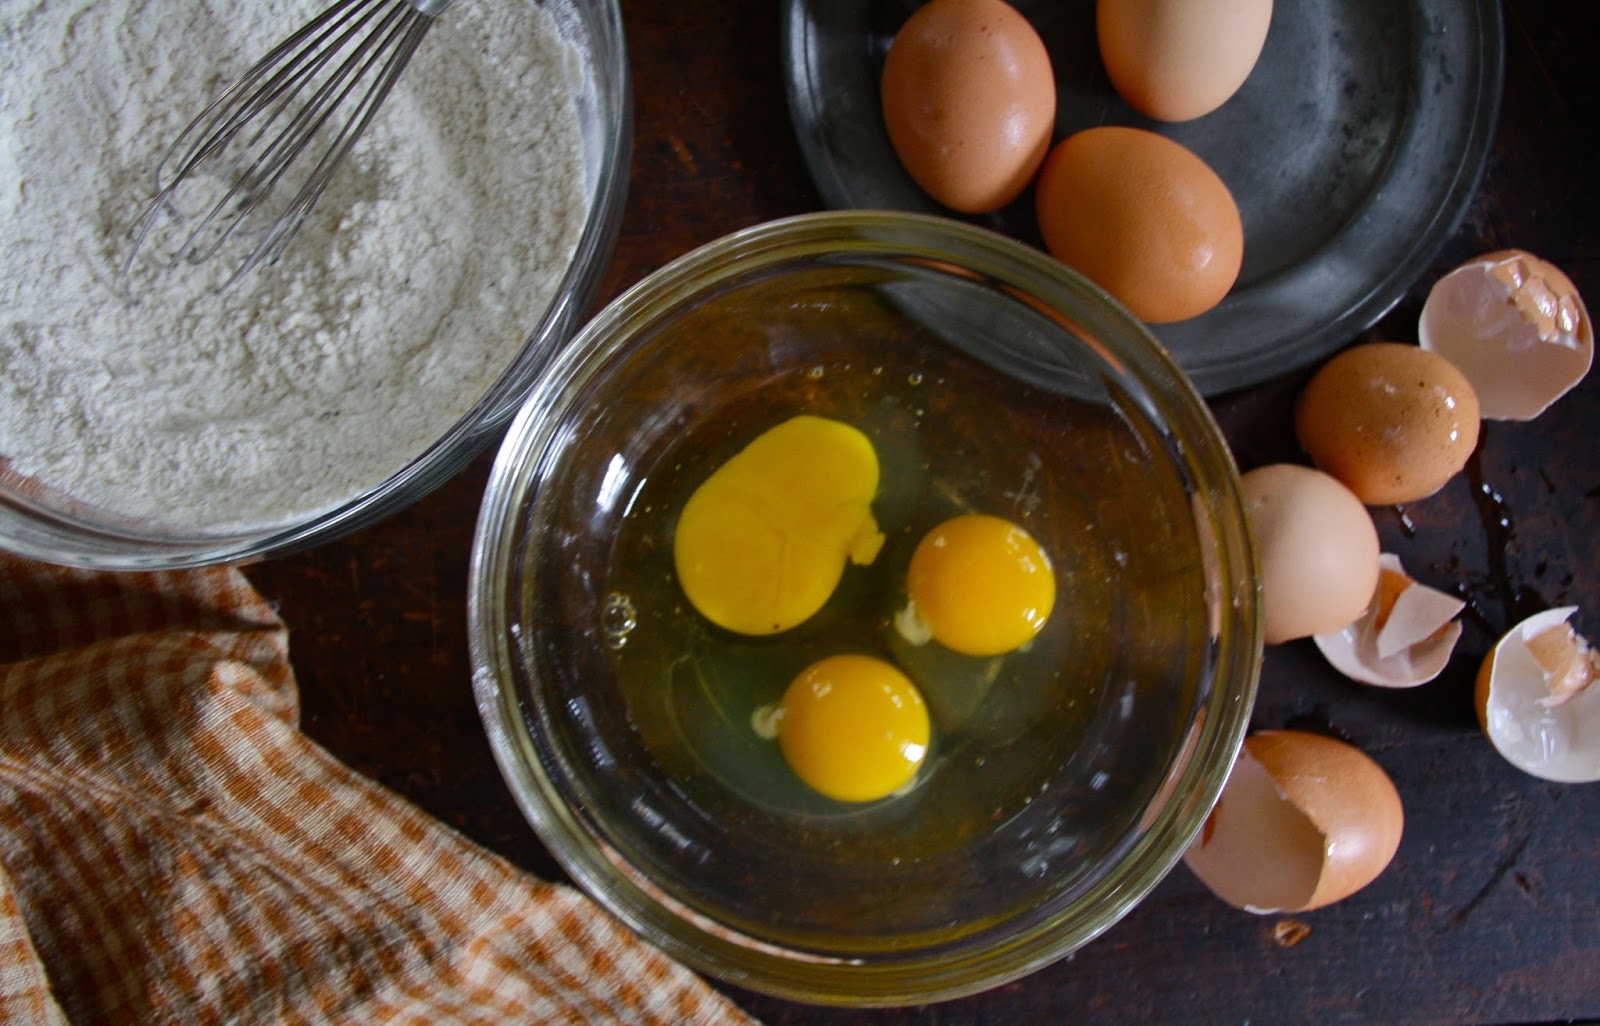
The dough for the shortbread base is beautifully soft and supple. It all begins with beating the butter and sugars together until light and fluffy (approximately five minutes). This first step is key so don't rush through it. With the addition of the egg yolks and vanilla there is another 2-3 minutes of beating time. The sifted dry ingredients are added slowly and mixed only until fully incorporated. The consistency of the dough requires it to be chilled. At a minimum the chilling time is 30 minutes, at a maximum it is 2 hours. After following the original recipe as written, I am not convinced a quarter of the dough needs to be put in the freezer for two hours. I think the dough for the base and dough for the top could both be refrigerated for at least 30 minutes, although 60 minutes may be better. But more on the top layer of these Raspberry Crumb Bars later.


Instead of making free form bars, these were baked in a 9"x12" baking pan. After the lightly floured dough was rolled between two sheets of parchment paper, it was lifted and placed into the pan (top piece of parchment paper removed before baking). The base layer is baked in a preheated 350 degree (F) oven for approximately 20 minutes or until a very light brown. Before the raspberry jam/preserves and if using, fresh raspberries are evenly spread over the base crust, the baked base needs to cool for 10-15 minutes. 


A large hole box or hand held grater is used to turn the block of frozen dough into chards of dough. Honestly, this was a bit messy. Which made me think it might be easier to break off bits of dough and spread evenly over the top of the jam/fruit before returning the baking pan to the oven. Eliminating the step of freezing some of the dough for 2 hours and replacing it with a chill time of approximately 60 minutes would save considerable time in the making of these Raspberry Crumb Bars.


The baking pan returns to the oven and continues to bake for 20-30 minutes or until the top is golden brown. As it turned out my baking time was 30 minutes, but would recommend you begin checking yours for doneness at the 20 minute mark. Before they are lightly dusted with confectionary sugar, the bars need to cool to room temperature. Yes, I know, this seems like a day long project. Maybe its' a half day one, but the investment of time has an incredible pay off.

The ratio of jam/preserves to shortbread is crumb bar perfection. All of the expectations I had for these Raspberry Crumb Bars were exceeded. They redefine melt in your mouth deliciousness. After cutting them into 18 smaller bars, I understood why the original recipe called for cutting them into 9 larger bars. As one small bar turned out to be a bit of tease. 


These Raspberry Crumb Bars are what you would expect to find at a high quality bakery. When you serve these to your friends and family, I wouldn't at all be surprised if they asked you where you got them. I can tell you these bars will be good for several days if stored in a covered container. But it's highly unlikely they will last that long. When you travel to the grocery store to pick up some raspberry jam or preserves, you should probably buy two jars. I have a strong feeling you will be making these more than once. 

Recipe
Raspberry Crumb Bars (a slight adaptation to Joanne Chang's recipe in her cookbook "Flour: Spectacular Recipes from Boston's Flour Bakery and Cafe")
Makes 9 large bars or 18 medium sized ones

Ingredients
1 1/2 cups (3 sticks/342 grams) unsalted butter, room temperature
1/2 cup (100 grams) granulated sugar
3 Tablespoons confectionary or caster sugar
2 large egg yolks
1 teaspoon vanilla
1 1/4 cups (175 grams) all-purpose flour
1 1/2 cups (180 grams) cake flour
3/4 teaspoon baking powder
3/4 teaspoon kosher salt
1 1/2 cups (510 grams) raspberry jam or preserves, with seeds. See Note.
1/4 cup (35 grams) confectionary sugar
Optional: 1/4 pint fresh raspberries

Directions
1. In a medium sized bowl, sift together the all-purpose flour, cake flour, baking powder, and kosher salt. Set aside.
2. In a standing mixer fitted with a paddle attachment, cream the butter, granulated sugar, and confectionary sugar on medium speed for approximately 5 minutes or until mixture is very light and fluffy. Stop the mixer intermittently to scrape down the sides and bottom of the bowl.
3 Beat in the egg yolks and vanilla at medium speed for 2-3 minutes or until yolks are fully incorporated. Scrape the sides of the bowl as needed.
4. On low speed gradually add in sifted flour mixture. Mix until flour is totally incorporated. Again stop the mixer as needed to scrape the bowl to make certain all of the flour is fully incorporated.
5. Scrape the dough onto a large sheet of plastic wrap. Remove 1/4 of the dough and transfer to a separate sheet of plastic wrap. 
6. Form large piece of dough into a rectangle, at least 1 inch thick. Form the smaller piece of dough into a small brick shape. 
7. Place the large piece of the dough into the refrigerator for at least 30 minutes. Note: If freezing small piece of dough for 2 hours, chilling time on the dough will be approximately 90 minutes.
8. Place the small piece of dough into the freezer for 2 hours. Note: Alternately, place small piece of dough in the refrigerator as well.
9. Preheat oven to 350 degrees (F). Position a rack in the center of the oven.
10. On a large sheet of parchment paper, trace the outline of a 9"x13" or 9"x12" baking pan. Turn paper over so ink or pencil is facing down. Lightly sprinkle the top of the dough with all-purpose flour. Top with another piece of parchment paper. Roll out large piece of dough to the size of the baking pan selected (see above).
11. Transfer parchment paper to baking pan. Remove top piece of parchment paper.
12. Bake for approximately 20 minutes, or until the shortbread is very light brown. Allow to cool for 10-15 minutes. Keep oven on.
13. Spread the raspberry jam/preserves evenly over the slightly cooled crust. Optional: Sprinkle with 1/4 pint of raspberries if using.
14. Remove small piece of dough from the freezer. Using the large holes of a handheld or box grater, grate dough into large flakes over the jam/preserves. Make sure dough is evenly distributed. Note: If the small piece of dough was refrigerated but not frozen, break up into small pieces and evenly distribute over the jam/preserves.
15. Return baking sheet to the oven and bake for 20-30 minutes, or until top is lightly browned. Remove from oven and place pan on a wire rack to allow the bars to cool completely.
16. When cooled, sift confectionary sugar evenly over the top. Cut into bars. Note: For large sized bars, cut into 9 pieces. for medium sized bars, cut into 18 pieces.
17. Serve immediately or store bars in an airtight container for up to 3-4 days. Note: Can also wrap bars individually and store in the refrigerator.

Notes: (1) A 13 ounce jar of Bonne Maman Raspberry Preserves yielded exactly what the recipe called for. (2) Instead of the free form method of rolling out the dough into a 9"x12" or 9"x13" inch rectangle and transferring to a baking sheet, recommend rolling out dough to fit into a baking pan so all of the edges are even and there is no waste. (3) The use of fresh raspberries is optional, but they took these bars to an even higher level of deliciousness. (4) It may have been my oven, but the bars on the second bake didn't get to a golden brown color. But their taste/texture were perfect after 30 minutes of baking. However, recommend checking for doneness at 20 minutes. (5) These bars were made with Raspberry Preserves, but these would be equally delicious with Mixed Berry Preserves or Blackberry Preserves.


Summer's bounty at the local Farmer's Market (July 2017)


Monday, July 17, 2017

Chocolate Peanut Butter Cake


Sometimes one needs a reason to make a cake. Or rather I need a reason to make a cake. Mine range from simply having a craving for cake, to wondering what a cake I had never made before tastes like, to honoring a special occasion with cake. If I acted on the craving cake reason as often as I had a yearning for one, a significant amount of my time would be spent in the kitchen making them. Fortunately there are other things competing for time in my life, so cake baking doesn't usually make it to the top of the daily list of things I need or want to do. If I baked a cake every time I came across a new recipe peeking my taste interests, there would be at least one new cake made weekly. In spite of a strong desire to master 'on the first try' a new recipe, I am pretty certain my family and friends would either soon lose their appetites for cake or start avoiding me. Which leaves baking for special occasions or rather I should say special people having a special occasion as my favorite reason for baking a cake. Especially when those special occasions are birthdays. 


Store bought cakes may work for some occasions, but birthdays call for homemade ones. And a friend's birthday this past week was the inspiration behind the making of this Chocolate Peanut Butter Cake. For as often as I have made chocolate cakes, I have never made one with Peanut Butter Icing. Seriously. Even I wondered how it was possible I had never combined two of my most favorite flavors together in a cake before.This hard to believe oversight may have actually been a blessing in disguise as this cake is one I could easily find a way to justify making for no good reason at all. It's absolutely wickedly delicious.

Deciding which chocolate cake and which peanut butter icing recipes to combine was an easy decision. Julia Turshen's Everyday Chocolate Cake now ranks high on my list of the best chocolate cakes ever.  Not only does it have a deep chocolate flavor and moist texture, it is surprisingly easy to make. I immediately knew the peanut butter icing used to top the Banana Cupcakes would elevate this chocolate cake to an even higher level of celebratory decadence. 

The peanut butter icing has an ethereal quality to it. Butter, cream cheese, peanut butter and confectionary sugar are whipped together to create the creamiest of icings. The taste of peanut butter is discernible without being either overwhelming or overpowering. 


When I first decided to make this Chocolate Peanut Butter Cake as a birthday cake for a friend, I toyed with the idea of making it a four layer cake. But after it was iced and decorated with some peanut butter cups, the two layer cake turned out to be perfect.


There are any number of ways you could ice and decorate this cake. Use of a pastry bag is optional. Adorning it with or without peanut butter cups, sprinkles and/or nuts/peanuts is purely dependent on the occasion and/or your imagination. 


Celebrating a birthday with a cake, especially one homemade, can often transport us back in time. Just having a single slice of cake can enable us to reconnect with our inner youthful selves. A birthday cake not only helps to mark the day, it can also be a powerful reminder of how much there is to celebrate in our lives. There are so many reasons why we need to have a cake on our birthday. Feeling like a kid again and being reminded of what friends have brought to our lives may be only two of them. 


Whatever it is that you wish for your next birthday, may it always include a homemade cake shared with friends. It is more than possible you will decide every one of your birthdays should include this two layer homemade with love cake, particularly after you take a bite of it. 

Having a homemade cake that combines chocolate and peanut butter may be the proverbial 'icing on the cake' reason for making this one. Because honestly, you don't need or shouldn't wait for a special occasion to make this cake. Really, you shouldn't. 

Recipe
Chocolate Peanut Butter Cake (minor changes to Julia Turshen's Happy Wife, Happy Life Chocolate Cake recipe as shared in her cookbook "Small Victories: Recipes, Advice, and Hundreds of Ideas for Home-Cooking Triumphs" and  s slight adaptation to the Matt Lewis/Renato Poliafito recipe for icing created for Bon Appetit)

Serves 8-12 people, depending on how you slice it

Ingredients
Cake
1 1/4 cups (150 g) all-purpose flour 
1 cup (200 g) granulated sugar
3/4 cup (75 g) Dutch-processed cocoa powder, sifted if lumpy
1 teaspoon baking soda
1 teaspoon baking powder
1/2 teaspoon kosher salt
8 Tablespoons (113 g) unsalted butter, melted and cooled
2 large eggs, room temperature, lightly beaten
1 cup strong black coffee cooled or 1 rounded teaspoon espresso powder mixed into 1 cup boiling water then cooled
1 cup buttermilk
1 teaspoon good quality vanilla

Icing
3 cups confectionary sugar, sifted
16 ounces cream cheese, room temperature
1 cup (16 Tablespoons) unsalted butter, room temperature
1 cup smooth, creamy peanut butter, recommend JIF (do not use old-fashioned, freshly ground or natural)
generous pinch of sea salt
Optional: Garnish with Peanut Butter Cups, sprinkles, chopped peanuts, etc.

Directions
Cake
1. Preheat oven to 350 degrees (F). Butter and parchment paper line two 8" baking pans. Lightly butter top of parchment paper.
2. In a large bowl, whisk together the flour, sugar, cocoa powder, baking soda, baking powder, and salt.
3. Add melted butter, eggs, coffee, buttermilk, and vanilla. Whisk until batter is thick and smooth.
4. Divide batter evenly between the two prepared cake pans. Lightly tap the cake pans to remove any air bubbles. Note: Using a digital scale helps to ensure each pan has equal amounts of batter.
5. Bake until tops of cake spring back when lightly pressed and edges begin to come away from the pan. Approximately 30 minutes of baking time.
6. Transfer cakes to a wire rack and allow to cool completely. 

Icing and Assembly
1. In a medium sized bowl, beat cream cheese, butter and peanut butter until smooth and creamy.
2. Add in sifted confectionary sugar, beat until well blended.
3. Using a pastry bag, pipe frosting onto cupcakes. Or spread frosting using an offset spatula.
4. Place one of the cakes upside-down on your serving platter or cake stand. Spoon slightly more than 1/3 of the frosting on the cake. Spread evenly over cake.
5. Place the second cake layer (again upside-down) on the frosted layer. Top cake with a light coat of the icing. Use a pastry bag to decorate top of cake. Will be using a little more than 1/3 of the icing.
6. Use the remaining frosting to frost the sides of the cake. If using, add cake garnishes.
7. Serve immediately or cover cake and chill in the refrigerator before serving. Take cake out at least 30 minutes before serving to soften the icing. The cake itself will remain sightly chilled.

Notes: (1) I used two different sizes of the milk chocolate peanut butter cups from Trader Joe's to garnish the cake. (2) Cake can be made a day ahead. Cover and refrigerate.

Hiking trail on Whidbey Island; forest fairy chair along a path in Snoqualmie (WA); and lupines at the base of Mount Si (Western Cascade Range in Washington).


Wednesday, July 12, 2017

Herbed Parmesan Dutch Baby with Cherry Tomato Jam


Up until just recently I had put the Dutch Baby into the sweet for breakfast or brunch category. And the only thing causing me to vacillate between ordering and not ordering one in a restaurant is the wait time. Twenty to twenty-five minutes feels like a lifetime, particularly if you are in a hurry or hangry. But if time is not an issue and you aren't falling over the edge of starvation, the deliciousness factor of a Dutch Baby is always off the charts. If Rotten Tomatoes rated Dutch Babies instead of movies, it would probably give it a rating of 97%. I have yet to meet a version of a breakfast Dutch Baby I didn't like. The Apple Dutch Baby may be my most favorite, but I wouldn't turn my nose at a Dutch Baby simply dusted with confectionary sugar or piled high with blueberries

The world of savory Dutch Babies was unfamiliar to me until I discovered Melissa Clark's recipe for the Herbed Parmesan Dutch Baby in her new cookbook Dinner: Changing the Game. Serving a savory Dutch Baby for lunch, dinner, or as an appetizer sounded intriguing. But then I would be game for making any dish destined to pair well with wine. In the case of this Herbed Parmesan Dutch Baby, think chilled chardonnay or sparkling wine.


My contribution to this recipe was pairing it with some homemade Cherry Tomato Jam instead of sriracha. I may be the only person on the planet not a fan of sriracha. I had a strong hunch the fruity, nutty taste of Parmigiano-Reggiano Cheese would go well with the slightly caramelized sweetness of the jam. And it must have been my lucky day as my hunch turned out to be right. If you have never made or had Cherry Tomato Jam before, you really should. Seriously, you should. Not only does it compliment the flavor of this Herbed Parmesan Dutch Baby, it is a game changer on cheese platters.


Unlike most of the other Dutch Babies I have made, this one is made with almost double or triple the number of eggs used most other of my Dutch Baby recipes. Making it a slightly denser, heartier version of this classic dish. 


When looking at Dutch Baby recipes, there seems to be two approaches to making the batter. Whisking the dry and wet ingredients together until blended or processing in a blender/food processor until smooth and frothy. I prefer the later method. In the direction below I give you both options.


Whenever an ingredient list specifies the amount of grated cheese in cups versus weight, I always convert to weight (grams or ounces). Unlike measuring brown sugar (lightly or firmly packed), there don't seem to be any clearly specified guidelines for measuring grated cheese. The lack of these guidelines more than likely often means a higher probability of erring on the side of not using the amount of cheese called for in a recipe. If you don't have a scale, try to buy a chunk of cheese in the amount you need. And don't even think of substituting packaged grated cheese for freshly grated. Nothing comes close to or tastes better than a high quality Parmigiano-Reggiano cheese.


Oven temperature is another one of the variations noted in Dutch Baby recipes. While all are baked at high temperatures, the recommended ranges are somewhere between 400 to 450 degrees (F). The only exception to these temperatures are found in some German Pancake recipes. This one calls for baking the Dutch Baby at 425 degrees (F). Cast iron pans not only handle the high heat well, their surfaces are inherently non-stick. Make your Dutch Baby in a 12" round or 9"x 12" pan, but make certain it's cast iron or one that can handle the high heat. Note: Most non-stick pans are not designed to perform at very high oven temperatures.

You can either melt the butter by placing it the pan and putting in the oven or melting it on the stovetop. It is critically important be hot when you pour in the batter.

In 20 to 25 minutes, the sides of your Dutch Baby will rise and turn the most beautiful golden brown. Garnish the baked Herbed Parmesan Dutch Baby with some additional chopped thyme and chives and immediately bring to the table. Not just for the wow factor, but like most Dutch Babies, this one is best enjoyed while still hot. Although I found picking at the room temperature leftovers was still an incredibly pleasurable eating experience.


Don't forget to make some Tomato Jam ahead of time.


The batter for this Dutch Baby comes together rather quickly. In less than an hour, you can have dinner (or lunch) on the table. However, you can also have everything prepped in advance. The batter and grated cheese can remain refrigerated until you are ready to assemble, bake, and serve.

But this savory Dutch Baby shouldn't be pigeon-holed in the Herbed Parmesan Dutch Baby category. As Melissa Clark suggested, it would also make for a great appetizer. What about the 20-25 minutes it takes for it to bake in the oven? Well depending on your timing, it won't seem long for your guests. But even if you decided to put in the oven once they arrive, this Herbed Dutch Baby is well worth the wait. And maybe I need to reconsider how and when I think about the sweet versions of this 'love child to the pancake'. 

Recipe
Herbed Parmesan Dutch Baby with Cherry Tomato Jam (A slight adaptation to Melissa Clark's Herbed Parmesan Dutch Baby recipe as shared in her cookbook Dinner: Changing the Gamea slightly revised version of the Cherry Tomato Jam for Cheese recipe as shared in the cookbook: The Cheesemonger's Kitchen: Celebrating Cheese in 90 recipes)

Ingredients for the Dutch Baby
1 cup (120 g or 4 1/4 oz) plus 2 Tablespoons all-purpose flour
1/2 teaspoon kosher salt
1/2 teaspoon black pepper
8 large eggs
3/4 cup whole milk
2 Tablespoons finely chopped fresh thyme, plus more for garnish
2 Tablespoons finely chopped chives, plus more for garnish
6 Tablespoons unsalted butter, room temperature
3/4 cup (75 grams or 2 1/2 ounces) freshly grated Parmigiano-Reggiano Cheese
Flaky Sea Salt

Directions for the Dutch Baby
1. Preheat oven to 425 degrees (F).
2. In a large bowl, whisk together the flour, salt and pepper. Set aside.
3. In a medium sized bowl, whisk the eggs and milk until well blended.
4. Add eggs to the flour mixture and whisk until well blended and frothy. (Note: Alternately put the flour and egg mixture in a blender and mix until well blended or whip using a hand mixer.)
5. Stir in chopped thyme, chives and a heaping tablespoon of the grated Parmigiano-Reggiano Cheese.
6. Place butter in a 12" or 9"x12" cast iron pan. Place in oven until butter melts and begins to slightly brown (approximately 3-5 minutes). Note: Check on butter after 2 minutes and every minute thereafter.
7. Remove pan from oven. Pour in egg mixture. Top with grated parmesan cheese.
8. Return to oven and bake for 20-22 minutes or until the Dutch Baby is puffed and golden.
9. Remove from oven, garnish with additional thyme and chives. Serve immediately with Cherry Tomato Jam.

Ingredients for the Tomato Jam
2 cups (340 g) cherry or grape tomatoes (or a mix of the two), cut in half
3/4 cup (150 g) granulated sugar
2 -3 Tablespoons freshly squeezed lemon juice
Zest of 1 lemon
generous 1/2 teaspoon finely chopped fresh rosemary

Directions for the Tomato Jam
1. Preheat oven to 350 degrees (F). Line a rimmed baking sheet with aluminum foil.
2. Place the cut tomatoes halves on the prepared baking sheet. Bake for 15 minutes to loose the skins.
3. Remove tomatoes from oven and place in a heavy bottomed saucepan. Add sugar.
4. Over medium heat gently melt sugar, then bring to a boil and cook (boiling rapidly) for 5 to 7 minutes, or until thick and syrupy. Notes: Stir frequently. My cooking time was 7 minutes.
5. Remove from heat and add lemon zest, freshly squeezed lemon juice and chopped rosemary.
6. Transfer tomato jam to clean, sterilized jars. Seal well. When cool, place jam in the refrigerator.
7. The tomato jam can be kept refrigerated for up to 2 weeks, if it lasts that long!

Notes: (1) Instead of melting butter in the cast iron pan in the oven, can melt on the stovetop over medium high heat; (2) Instead of using thyme and chives, could use thyme and tarragon or thyme (2 T), tarragon (1 T) and chives (1 T); (3) Instead of serving with the Tomato Jam, could serve with Sriracha and/or lemon wedges; (4) Definitely serve with a good quality white or sparkling wine; (5) If using a round cast iron pan, cut into wedges for serving; (6) The Dutch Baby is great hot out of the oven, but was equally delicious when it came to room temperature; (7) The batter and grated cheese can be prepared ahead of time and kept refrigerated until ready to use, making it a slightly make-ahead appetizer or luncheon/dinner entree. 


Fishing on the Snoqualmie River (June 2017)


Twin Falls, Snoqualmie Region, North Bend, Washington (June 2017)


Wednesday, July 5, 2017

Vanilla Sponge Cake with Berries and Mascarpone Icing


"Life is short, even on the longest days." (anonymous) With the Fourth of July holiday now behind us, it is easy to get lulled into thinking summer is almost half over. But some of the best parts of the summer season have only just begun. The abundance of fresh fruits and vegetables at the markets and farm stands being one of them. Take summer corn and tomatoes. So sinfully flavorful, you almost have to stop yourself from binge eating them. Who hasn't at least considered grilling corn or having a tomato sandwich for breakfast? Or how about those seasonal berries? In the summer they are juicier, sweeter, more beautiful than at any other time of the year. Berries in cereal, in and on ice cream, on crostini, in salads, on guacamole, in pies, in tarts, in jams, and/or in and on cakes are just a few of sweet and savory ways these gems of nature work their way into our lives for only a few months of the year.


While at the grocery store over the holiday weekend, I couldn't resist buying more blueberries, blackberries, raspberries, and strawberries. There were big plans for these berries. This Vanilla Sponge Cake with Berries and Mascarpone Icing was one of them. Even the hot, humid weather could not deter me from turning on the oven to make it. And if my house didn't have air-conditioning, I still would have made it.


I fell in love with this cake the moment I saw it on the cover of Linda Lomelino's cookbook, My Sweet KitchenAnd I waited only twenty-four hours after receiving the book to make it. Life is short, remember? I wonder how long you will wait after reading this post before you will?


This may be one of the easiest cakes I have ever made. It all begins with beating the butter, sugar and vanilla together in a standing mixer (recommend using a paddle attachment) until the mixture is light and fluffy (approximately 5 minutes). Still using the mixer, add the eggs in one at a time until they are fully incorporated. At this point you are done using your mixer. The dry ingredients are sifted over the bowl and folded in using a spatula. When no streaks of flour remain, the milk is added. You need only stir until the batter is creamy and even.


The cake batter is divided equally between two prepared 6" cake pans. If you needed a really good reason to buy more cake pans, consider this Vanilla Sponge Cake with Berries and Mascarpone Icing to be reason enough. Once you see (and then taste) this finished cake, you will more than likely start finding ways to adapt your cake recipes requiring 8" round, 9" round, and even your 9"x12" cake pans in order to make these 6" high beauties. 

To ensure your cakes bake evenly, measure out the batter between the two pans. A digital scale will take all the guess work out it. In a preheated 350 degree (F) oven, the cakes bake in the center of the oven for 25-30 minutes. Unlike most other cakes calling for the toothpick inserted in the center of the cake to come out clean, this cake calls for having the toothpick emerge with a minimal number of crumbs. 

Once removed from the oven, allow the cakes to remain in their pans for at least 5 minutes before transferring to a wire rack. When the cakes have cooled completely (approximately 30 minutes), they are ready to be iced. 


There is just enough of the mascarpone icing to make a 'naked' cake. But this mascarpone icing is so incredibly delicious, consider making more. You wouldn't need to double the icing ingredients, unless you wanted to frost the entire cake. Increasing the ingredients by half (e.g., 12 ounces of mascarpone instead of 8 ounces) might give this cake the kind of cake to icing ratio it deserves. Or rather, what you deserve.


The mascarpone icing should have a creamier finish to it than what you see here. I whipped it a tad longer than I should have. While it was still delicious, a creamy texture would have made it easier to top each layer with the berries. After spreading some of icing on the top of the bottom layer, layer on some of the berries. However, before putting the second layer of cake on, spoon a little more of the icing over the fruit. Using a pastry bag is optional when icing this cake. Personally I liked the 'refined rustic naked cake' look of the finished cake.


There are any number of ways you can top the cake with berries. Strawberries cut in half lengthwise and placed standing up on top of the icing will give the cake some height. Use an assortment of your favorite berries for this cake, but definitely use more than one berry. I also believe thinly sliced nectarines would also work well with this cake and icing.


A light dusting of confectionary sugar is the 'finishing touch'. Not only does it a tiny bit of sweetness to the berries, it gives the cake that bakery finished wow factor look. Think of the confectionary sugar as taking this simple vanilla sponge cake from good to great. And don't we all deserve to have great cakes in our lives?

If you are not serving this cake immediately after assembling, lightly cover with plastic wrap and store in the refrigerator. Note: If refrigerating, wait to dust with the confectionary sugar.  Take the cake out at least 30 minutes before serving if you like your cake a little more on the room temperature side.


From start to finish you can make and assemble this cake in approximately 90 minutes. Of you can make the cake layers ahead of time, wrap them in plastic and store in the refrigerator for a day or two, and wait until you are ready to serve to make the icing and assemble.

The Vanilla Sponge Cake with Berries and Mascarpone Icing can be either an everyday cake or a celebratory cake. Even the chocolate cake lovers in your life will be swooned by this cake.

Recipe
Vanilla Sponge Cake with Berries and Mascarpone Icing (an ever so slight adaptation to Linda Lomelino's Sponge Cake with Fresh Berries and Mascarpone recipe as shared in her cookbook, My Sweet Kitchen)
Serves 6-8

Ingredients
Cake
1 1/4 cups all-purpose flour
2 teaspoons baking powder
pinch of kosher salt
14 Tablespoons unsalted butter, room temperature
3 large eggs, room temperature
1 teaspoon vanilla
1 Tablespoon + 2 teaspoons whole milk

Icing
8 ounces mascarpone 
2 Tablespoons confectionary or caster sugar
1/4 cup heavy whipping cream

10-12 ounces mixed fresh berries
Confectionary sugar for dusting

Directions
Cake
1. Preheat oven to 350 degrees (F). Prepare two 6" cake pans. Butter/flour or spray with vegetable spray and line with parchment paper. Set aside.
2. In a medium sized bowl, combine flour, baking powder and salt. Set aside.
3. In a standing mixer fitted with a paddle attachment, beat butter, sugar and vanilla until fluffy (approximately 5 minutes).
4. Add eggs in one at a time, beating until well incorporated.
5. Sift the dry ingredients over the batter. Fold in using a spatula.
6. Add milk and stir until batter is smooth and even.
7. Divide batter evenly between two baking pans (recommend using a scale). Smooth tops before placing in the oven.
8. Bake in the center of the oven for 25-30 minutes or until a toothpick inserted in the center of the cakes comes out with moderate crumbs. Note: If toothpick comes out completely clean the cake will be over baked.
9. Place cake pans on a cooling rack. Allow cakes to cool for at least 5 minutes before removing from pan and continuing to cool on a cooling rack. Cakes should be completely cool before iced (approximately 30 minutes).

Icing and Assembly
1. In a medium sized bowl, beat the mascarpone and confectionary (or caster) sugar until creamy.
2. Slowly add the whipping cream and beat only until the icing is a spreadable consistency.
3. Place one cake layer on a cake platter or cake plate. Spread with a thick layer of the icing. Add an assortment of fresh berries.
4. Add the second cake layer and spread remaining icing on top.
5. Top iced cake with an assortment of berries.
6. Lightly dust with confectionary sugar.
7. Serve immediately. Or store cake lightly covered in the refrigerator until ready to serve.

Notes: (1) There is enough icing to coat the tops of each layer, however, next time I would make more icing. (2) To completely ice the cake, double the icing ingredients. (3) Beat the icing only until it has a spreadable consistency. If icing is too thick, add a little more of the heavy whipping cream until desired consistency is achieved. (4) Cakes can be made a day ahead. Wrap cooled cakes in plastic wrap and store in the refrigerator.


Admiralty Head Lighthouse on Whidbey Island in Coupeville, Washington (June 2017)