Tuesday, February 6, 2018

Cinnamon Rolls


For years I have yearned to make homemade cinnamon rolls. Tender dough swirled in cinnamon, topped with a creamy, gooey, slightly tangy cream cheese icing makes them comfort food irresistible. Convincing myself they were cumbersome and complicated to make, I put them on the list of 'maybe someday when I am ready'. Over the past couple of months the universe seemed to be sending me reminders of the promise I had made. Photos of drool worthy cinnamon rolls were popping up in my Instagram feed and recipes for them were in at least three of the last cookbooks I had recently purchased. It was becoming more and more difficult to ignore the 'signs' more than subtly suggesting time had come for me to stop using 'maybe' as an excuse for not keeping a promise. When looking in the mirror, even my alter ego was telling me to stop playing the 'maybe' game. Either put the cinnamon rolls on the 'will definitely make' or 'will definitely not make' list. But don't let them stay in recipe limbo or turn into a cinnamon roll tease. 


Someday finally came this week. And you know what I discovered? I was wrong about believing Cinnamon Rolls were cumbersome and complicated to make. Don't get me wrong, they aren't easy, but they aren't exactly rocket science difficult either. All it it took was making them to realize my thoughts and perceptions about them were flawed. Denying myself as well as my friends and family the pleasure of enjoying a sweet, warm out of the oven, sinfully delicious, homemade Cinnamon Roll seemed to be for naught. But I am not going to whine about all the years of going without cinnamon roll bliss. Delirium has a way of making you see things differently. Trust me when I say these cinnamon rolls will have your head spinning and heart racing. And that's just from taking in their intoxicating aroma while they are baking.


I can't even begin to tell you how many cinnamon roll recipes I have looked at over the years. Too many. Up until I recently discovered the sweet dough recipe shared by Sarah Kieffer in her cookbook "The Vanilla Bean Baking Book", did my dough-making fears lessen. I would be lying if I didn't say I have always been a little intimidated working with yeast based doughs. They are one of those things I feel are a little outside of my baking comfort zone. However, this dough made me feel differently. Not only does it come together relatively quickly, it can (and probably should) be refrigerated overnight. Which means you don't have to get up at one o'clock in the morning if you want to serve fresh, hot out of the oven Cinnamon Rolls for a late morning breakfast or brunch. But more on the essentially no-knead dough making process later.


I had a good feeling about these Cinnamon Rolls even before they went into the oven. 


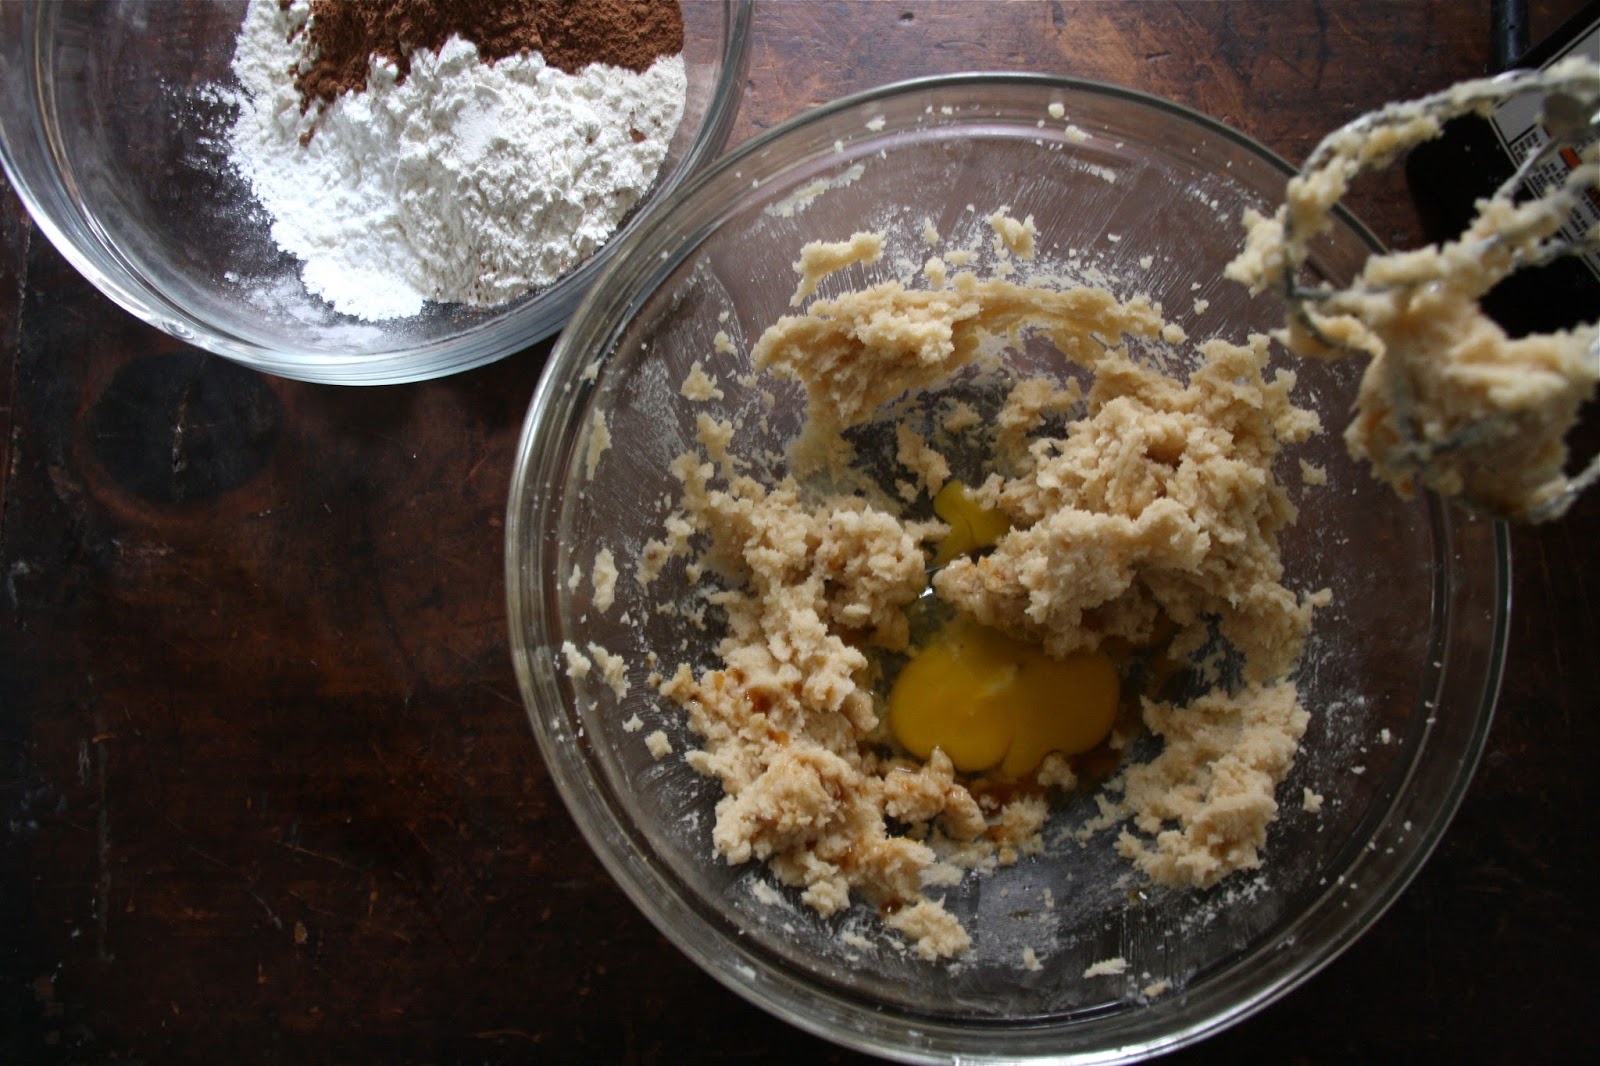
From the ingredients used to the assembly process, there are a number of variations to all of the cinnamon roll dough recipes out there. This one uses instant dry yeast (not rapid rise), honey (instead of sugar), eggs, whole milk, unsalted butter, all-purpose flour, and kosher salt. 


The dough is literally made in less than fifteen minutes. Which includes the time you need to assemble all of your ingredients. Once made it rests for a total of two hours before being refrigerated overnight. Over the course of the two hours of rising time, the dough is gently pulled up and rolled over itself every thirty (30) minutes. And that's it! Note: The dough could be used right away (after the initial 2 hour rise) if necessary, however, it is much easier to work with after it has been refrigerated overnight.


Whenever I make a batter or a dough for the first time, I put it through the 'taste test'. I take a bite of the raw dough. If it doesn't taste good, I know the final product won't either. But if it tastes good, even great, I know it will be even better when baked. This dough passed the taste test with flying colors. 

On a lightly floured surface it rolled out beautifully. 


Another one of the variations in the Cinnamon Roll recipes I had found was the filling. Some called for melted butter, some for room temperature butter; the amount of cinnamon ranged from a couple of teaspoons to two full tablespoons; and some used additional spices (e.g., nutmeg, cardamom). I knew I wanted these Cinnamon Rolls to have a strong, bold cinnamon flavor. One tablespoon of cinnamon didn't seem like enough and two tablespoons almost seemed to be too much. But rather than compromise, I decided to take a leap of faith and use two full tablespoons of cinnamon along with a 1/4 teaspoon of nutmeg. It would now be hard to settle for a cinnamon roll made with one tablespoon of cinnamon after tasting these.


Remember how I told you that you didn't to get up one in the morning to have them ready for a late morning breakfast or brunch? Well that's still true. But after removing the dough from the refrigerator, you are about 3 and a half hours away from serving them. But it's not a labor intensive 3 and a half hours.

After rolling out the dough, slathering on the cinnamon sugar filling, cutting into 12 even pieces, and placing on a parchment paper lined baking sheet, the rolls are lightly covered with plastic wrap for a second rise. This time it's only ninety minutes and you don't have to do anything.

In a preheated 350 degree (F) oven, the cinnamon rolls bake for 27-32 minutes or until the rolls are golden in color. 


Once out of the oven, the cinnamon rolls rest for only five minutes before the icing is lathered on. 


Like the recipes for the dough and the filling, there were also a number of variations for the icing. Some called for using only cream cheese, some called for using both butter and cream cheese. I decided to go with the 'more is better' and went with the butter/cream cheese option. 


If there was one thing I would change about the icing it would be making more of it. Either increasing the recipe by half or maybe even doubling it. 


One bite of these Cinnamon Rolls and I was in heaven. The dough was moist and sweet, the cinnamon flavor was just right, and the icing complimented the roll perfectly. You need to make them. The return on the investment of your time will be worth the risk of taking on your dough making, cinnamon roll making fears.

"If we wait until we are ready, we will be waiting for the rest of our lives." If I had waited until I was ready to make these Cinnamon Rolls, more than likely I would have never made them. Worse yet, I would have never experienced the thrill of making of them. Sure, the taste of them was beyond amazing, exceeding all of my expectations. But the process of making Cinnamon Rolls, well, words can't fully explain what that felt like.

Recipe
Cinnamon Rolls (Blended and adapted Cinnamon Rolls recipes from the cookbooks "The Vanilla Bean Baking Book" and "Bravetart: Iconic American Desserts")
Makes 12 

Ingredients
Dough
4 large eggs, room temperature
3/4 cup whole milk, warm (110-110 degrees F)
1/4 cup honey
4 cups (512 g) all-purpose flour
2 1/4 teaspoons instant dry yeast
2 teaspoons kosher salt
10 Tablespoons (142 g) unsalted butter, room temperature, cut into 1 inch pieces

Cinnamon Filling
1/2 cup (8 Tablespoons, 113 g) unsalted butter, room temperature
3/4 cup (172 g) firmly packed light brown sugar
2 Tablespoons cinnamon
1/4 teaspoon freshly grated nutmeg
1/4 teaspoon kosher salt

Icing
1/2 cup (8 Tablespoons, 113 g) unsalted butter, room temperature
4 ounces cream cheese, room temperature
1 teaspoon vanilla
1/4 teaspoon kosher salt
1 cup (113 g) confectionary sugar, sifted

Directions
Dough
1. Grease a large bowl with butter.
2. In a large measuring cup. combine the honey, eggs, and milk. Stir just until blended. Set aside.
3. In the bowl of a standing mixer fitted with a paddle attachment, mix together the flour, yeast and salt. Stir on low speed to combine.
4. Add the egg mixture to the flour mixture. Mix on low speed just to combine.
5. With the mixer on low, add the butter, one piece at a time.
6. When all the butter has been added, increase the speed to medium and beat the butter into the dough until all the little butter pieces have been incorporated (approximately one minute).
7. Transfer the dough to the prepared bowl. Note: The dough will be slightly sticky. You will need a spatula to scrape the dough into the bowl. Cover with plastic wrap, place in a warm place and let rise for 30 minutes.
8. Place your fingers or a spatula underneath the dough and gently pull the dough up and fold it over itself. Turn the bowl, repeat and fold again. Continue 6-8 more times, until all the dough has been folded over itself. Re-cover the bowl with plastic and let rise for 30 minutes.
9. Repeat this series of folding 3 more times, for a rise time of 2 hours and a total of 4 foldings. 
10. Tightly cover the bowl with plastic wrap and refrigerate overnight or up to 72 hours.

Cinnamon Filling
1. In a medium bowl, combine the butter, brown sugar, cinnamon, nutmeg and salt.
2. Using a hand mixer, beat on medium speed until creamy. Set aside.

Icing

1. In the bowl of a standing mixer, combine the cream cheese, butter, and vanilla. Beat until smooth and well blended (approximately 2-3 minutes).
2. Add the confectionary sugar and kosher salt. Beat until smooth, fluffy, and creamy. Transfer to either a small bowl or pastry bag. Set aside. Note: Recommend making the icing while the cinnamon rolls are baking. 

Assembly
1. Line a 9"x12" baking pan with parchment paper. Grease the sides of the pan with butter. Set aside.
2. Remove the dough from the bowl, shape into a ball, set on a lightly floured surface, lightly top with flour, cover with a light weight towel and let it come to room temperature. Approximately 60-90 minutes.
3. Roll the dough out to a 16"x12" rectangle. Spread the cinnamon filling evenly over the dough. 
4. Starting at the long side, roll the dough into a tight cylinder. Pinch the seam gently to seal it and positing the dough seam side down.
5. Using scissors or a sharp knife, cut the dough into 12 equal pieces. Transfer the pieces to the prepared pan. Note: Cut off the uneven edges of the rolled dough before cutting them into 12 pieces.
6. Cover the pan loosely with plastic wrap, set in a warm place and let the dough rise until doubled (approximately 1 to 1 1/2 hours). Note: My rising time was 1 1/2 hours.
7. Preheat oven to 350 degrees (F).
8. Remove the plastic wrap and bake the cinnamon rolls for 27-32 minutes, rotating the pan halfway through until the rolls are golden in color. Note: My baking time was 32 minutes.
9. Transfer the pan to a cooling rack and let sit for no more than 5 minutes. Note: If you like your cinnamon rolls to have more of a crispy crunch to them, wait at least 15 minutes before spreading on the icing. However, would recommend spreading it on while still warm to create the softest, gooey-est cinnamon rolls.
10. Using an offset spatula or knife, spread the icing over each of the cinnamon rolls.
11. Serve immediately. 

Notes: (1) If like your Cinnamon Rolls slathered with more frosting, double the icing recipe. You won't be sorry. (2) The dough and icing recipes were adapted from "The Vanilla Bean Baking Book" and the cinnamon filling recipe was adapted from "Bravetart: Iconic American Desserts". (3) I used a 128 g per cup ratio when measuring the all-purpose flour. The original recipe called for a 142 g per cup ratio. (4) Instant dry yeast comes in granular form. Do not substitute rapid rise yeast for it. (5) If by any chance you have any left, cover them tightly and reheat for about 10 seconds in the microwave. The icing will melt a bit, but they will be warm bites of pure gooey deliciousness.


Images from the Mystic Seaport Museum, Mystic, CT (November 2017)


Wednesday, January 31, 2018

Sea Salted Chocolate Peanut Butter Skillet Cookie a la Mode


This week's rare blue super moon seems to be causing me to so all sorts of strange things. Which might explain why I am having a rare week of self disclosure. In my last post I shared how complete strangers have come to influence my book and movie choices. Although I intentionally, I left out the role my friends play in these decisions to avoid crossing into too much information (TMI) territory. So here goes my next admission, one possibly showing a little less restraint. After almost a year of going to yoga three, four, sometimes five days a week I am still finding it challenging; I am pretty sure I am only marginally better than I was when I started; and, I continue to find yoga's underlying 'seek to be your best self, not seek to be THE best' philosophy to be incongruent with my competitive self. For all of the stretching, balancing, and 'how could that be humanly possible' poses my body has experienced over the last twelve months, one would think (or at least I think) I should have the strength and flexibility of someone at least half my age. Or at least have mastered the graceful and effortless flow of a handful of poses. But that hasn't happened....yet. I still hold out the semi-impossible expectation that one day it will. Yoga requires a relative high degree of concentration. But when I am dripping wet and on the verge of feeling pushed beyond my physical limits, I find my mind suddenly unable to translate yoga language (malansana, tadasana, trikonsana, supta baddha konasana, chataranga dandasana, and even shavasana) into English. You might wonder how I managed to earn a doctorate degree and not be able to have mastered the language of yoga no matter what. I am wondering the same thing! We are reminded in almost every yoga class to make it 'our practice'. In other words, there are no expectations. The only expectations and intentions are the ones you set for yourself. After spending nineteen years of my life going to school this philosophy continues to feel incongruent with the expectation messages permanently hardwired into my brain. More often than I should admit, I find myself assigning a letter grade during and/or after yoga. And it would be one of those grades I would have cringed at seeing if they ever appeared on a report card. So why would someone like me continue to religiously make yoga an almost daily practice? Well I suppose it's because (a) I am a glutton for punishment, (b) I believe the benefits of yoga, like the benefits of relationships, are endless with ongoing, continuous hard work, (c) I feel my running has benefitted, (d) I treasure the post-yoga coffee time with friends, and, last but not least, (e) I am unwilling to give up my love-hate-love relationship with it. What is it in your life challenging your body, mind, and spirit you don't want to walk away from either?


I believe if you make time for exercise in your life, you should reward yourself. Right? Yes, I know, the benefits of exercise are supposed to be THE reward. But don't we all deserve a little something more to refuel our energy levels? Like maybe something made with chocolate and peanut butter? Aren't they on the list of super foods?

This Sea Salted Chocolate Peanut Butter Skillet Cookie a la Mode might just be one of those perfect rewards.


After seeing a photo of a chocolate peanut butter skillet cookie on Instagram last week, I set off on yet another down the rabbit hole recipe search. This time there were only dozens, not hundreds of recipes out there. All with a variety of chocolate and peanut butter ingredient variations. Some were made with chocolate chips and peanut butter chips, some with cocoa and peanut butter, and some with chocolate chips and peanut butter. But there wasn't one saying 'pick me, I am the best'. The cocoa and peanut butter combination had the greatest appeal. However, most of the recipes I found didn't specify whether to use unsweetened or Dutch-processed cocoa. After doing a little more research on when to use unsweetened cocoa and when to use Dutch-processed cocoa, I decided probably either would work in this skillet cookie recipe. Instead of making two versions of this skillet cookie, I trusted my chocolate loving instincts and made it using unsweetened cocoa. While I can't tell you if it would be as good as or better using Dutch-processed cocoa, I don't need to know. Not after tasting this one. Swirling creamy peanut butter into the chocolate instead of mixing peanut butter chips chips into the batter made for a visually appealing skillet cookie. It definitely exceeded my eye catching expectations. The sprinkling of sea salt on top pushed this version into contention for the 'pick me I am the best' category.


More than likely you have all of the ingredients in your pantry and refrigerator for this skillet cookie.If you needed a reason to justify why a box of unsweetened cocoa, a pint of vanilla ice cream, and a cast iron skillet are absolute necessities, it would be this Sea Salted Chocolate Peanut Butter Skillet Cookie. Being able to make this warm chocolatey, peanut buttery skillet cookie whenever you wanted to wow your family and/or friends, have an impromptu gathering, were storm homebound, or simply had a craving for it might be some of them. Or simply having a bite might be reason enough.


The butter, brown sugar and granulated sugar are beaten until light and fluffy. It generally takes three to five minutes of beating at medium-high speed to achieve the perfect state of fluffiness. After beating in the egg and vanilla, the dry ingredients are mixed in only until no streaks of flour remain. The batter will be very thick. 

After scraping the batter into a buttered 8" or 9" cast iron skillet, use an offset spatula or large tablespoon spoon to smooth the top. Then drop on small dollops of peanut butter. Use a butter knife to lightly swirl the peanut butter into the cookie batter. Be careful not to over swirl as you want streaks of peanut butter to remain visible. The finishing touch is a light sprinkle of sea salt. It's now ready to go into a preheated 350 degree (F) oven. Baking time ranges from 15-18 minutes.

The Sea Salted Chocolate Peanut Butter Skillet Cookie is done when the edges begin to firm up but the center remains soft. You definitely do not want to over bake this cookie or wait until a tester inserted in the center comes out clean. It will continue to bake in the skillet after being removed from the oven. Letting it rest for five minutes gets your cookie to the best of both cookie worlds eating experience place. Crunchy edges and a warm, slightly gooey center. 

You could serve this blissfully delicious Sea Salted Chocolate Peanut Butter Skillet Cookie without scoops of vanilla ice cream, but why would you? Hold back on sprinkling miniature peanut butter cups if you really have to. But leaving out the vanilla ice cream would be akin to serving pancakes without butter, syrup, or jam. You could do it, but the eating experience would not be the same.


This is one of those desserts where you can pass out spoons, have everyone eat it directly out of the pan, and ultimately let there be a battle of the spoons for the final morsel. However, if you are worried about those who like to slowly savor their desserts not getting their fair share, you can spoon out the cookie into serving bowls and top with a scoop of vanilla ice cream. Either option works!


There are so many reasons why cast iron skillets have been around since the late 19th century. However, if I haven't yet convinced you this dessert alone is worth purchasing an 8" or 9" cast iron pan for, maybe this Dutch Baby with Creme Fraiche and Mixed Berries or this Caramel Apple Dutch Baby ala Mode or this Savory and Hearty Frittata or this Chocolate Chip Skillet Cookie would. 


You can more than satisfy the sweet tooth of up to six people with this Sea Salted Chocolate Peanut Butter Skillet Cookie a la Mode. Although you would make four of your chocolate and peanut butter loving friends even happier if you didn't invite two more people to the table. 

If you are looking for an easy to make, slightly decadent, insanely delicious, destined to satisfy any chocolate and peanut butter lover dessert, make this Sea Salted Chocolate Peanut Butter Skillet Cookie a la Mode. You might end up having a love-hate-love relationship with it but refuse to give it up. You can probably guess why.
Recipe
Sea Salted Chocolate Peanut Butter Skillet Cookie a la Mode (inspired by multiple sources)
Serves 4 to 6

Ingredients
8 Tablespoons (114 g) unsalted butter, room temperature
1/4 cup (50 g) light brown sugar, firmly packed
1/2 cup (100 g) granulated sugar
1 cup (128 g) all-purpose flour
1/3 cup (23 g) unsweetened cocoa (not Dutch-processed)
1 teaspoon cornstarch
1/2 teaspoon baking soda
1/4 teaspoon kosher salt
1 large egg, room temperature
3-4 Tablespoon creamy peanut butter
Sea Salt for finishing
Good quality vanilla ice for serving
Optional: Miniature peanut butter cups for garnish

Directions
1. Preheat oven to 350 degrees (F). Butter an 8 or 9 inch cast iron skillet and set aside.
2. In a medium sized bowl, combine the flour, cocoa, cornstarch, baking soda and salt. Whisk to combine. Set aside.
3. In a medium-large bowl, beat the butter, granulated sugar and brown sugar on medium speed using a hand mixer until light and fluffy (approximately 3-5 minutes).
4. Add egg and vanilla to the butter/sugar mixer. Beat to combine.
5. Add the dry ingredients to the batter. Beat until blended and no streaks of flour remain.
6. Spoon the batter into the prepared pan. Use an offset spatula to smooth and spread evenly.
7. Drop dollops of the creamy peanut butter on top of the batter. Use a butter knife to swirl it into the cookie batter. Lightly sprinkle the top of the cookie with sea salt
8. Bake for 15-18 minutes until the edges begin for firm up but is still soft in the center. Be careful to not over bake. 
9. Remove from oven and let the cookie rest for 5 minutes (the cookie will continue to bake during this time).
10. Top with scoops of vanilla ice cream. Sprinkle with miniature peanut butter cups, if using. Serve immediately Note: The Sea Salted Chocolate Peanut Butter Skillet Cookie is best served warm but is equally delicious served at room temperature.

Notes: (1) I used almost four tablespoons of creamy JIF when I made this skillet cookie. (2) If I was making this dessert on the east coast I would serve it with the vanilla ice cream made by Bliss. But since I am here in the midwest, I used Ben and Jerry's vanilla.


Little Compton, Rhode Island (November 2017)


Sunday, January 28, 2018

Salted Butter and Chocolate Chunk Shortbread


I have a confession to make. Before I see a movie or buy/read a book, I want to know what others have thought and/or have said about it. I read all of the reviews available, check to see the film ratings on Rotten Tomatoes, and/or look at how many stars a book has on Amazon or Goodreads. Although I haven't done any extensive research confirm whether or not the algorithms used to generate these ratings are true, universal indicators of the quality of a film or book, my working hypothesis is they aren't. Yet, in all honesty these sources sometimes influence my decisions. And then sometimes they don't. Yes, I have have been guilty of suffering from FOMO. However, the genre or story still has to interest or speak to me. Hype combined with the opinions of those who take the time (or are paid) to share them can sometimes lead to unrealistic high or low ratings as well as expectations. Worse yet, they can lead to regretful decisions. I have never walked out of a movie but do have a stack of unread books to prove this. Have you ever been lulled into seeing a movie or reading book based on its' hype and then found yourself saying 'what was all the fuss about'? If you haven't, you are lucky. Have you ever decided to see a film or read a book with less than a four star review and wondered how it could have been so under-rated? If you have, you are in good company. Or, have there been any books you labored through or set down for months before finally going back to? Only to later realize giving up on them completely would have been a huge mistake. If you have, you can appreciate why persistence can have its' rewards. Most recently that book for me was 'A Gentlemen in Moscow'. Had I put it back on the book shelf after the 'first hundred pages' (the no explainable limit I set), I might still be wondering why so many found it compelling or why it earned not 4 but 4.5 stars on Amazon. Fortunately I now know why. And after going on endlessly singing the praises of the film 'Get Out', I learned some of my friends may begin to think twice about taking a movie recommendation from me!


If you have made any inferences about my views on reviews and ratings, the rest of this post may seem a bit out of character. Or maybe not. I might have left out the part where I can be both consistently inconsistent and predictable. Spoiler Alert: If this Salted Butter and Chocolate Chunk Shortbread cookie was a book, it would have a 5 star rating. And if it was a movie, it would have a 99% rating on Rotten Tomatoes. 


They are described by cookbook author Alison Roman as a "less chocolate chip cookie, more brown sugar shortbread with chocolate chunks-they just might be the cookie you've been looking for." If those words aren't enough to inspire you to make her Salted Butter and Chocolate Chunk Shortbread cookie recipe, well maybe the hundreds of photos of them posted on Instagram in the last couple of weeks will whet your appetite for them. For those of you who don't believe every viral or trending photo of a recipe is worthy of being made (and in some cases it's not), this would be the time to BELIEVE. For those of you who suffer from FOMO, your fear would be considered clinically real this time if you don't make them. And for those of who you pride yourselves on not jumping on every new bandwagon along with having the patience of Job, all I can say is there comes a time in your life when you need to become a fast follower. There may have never been a cookie worthy of all of the rave reviews, accolades, and best cookie of year nominations this shortbread cookie has received thus far. I am here to say they live up to their hype. 


Light brown sugar, granulated sugar, all-purpose flour, semi-sweet or dark chocolate and salted (yes salted) butter are six of the ingredients needed to make these Salted Butter and Chocolate Chunk Shortbread cookies gaining a cult following. Flaky sea salt, demerara sugar, and one egg are the remaining three finishing ingredients. But let's go back to the butter for a moment. This may be the only cookie I have made specifically calling for salted butter. Alison Roman shares you can use unsalted butter but will need to add 3/4 teaspoon kosher salt. Although the salted butter adds a depth of flavor you won't experience if you use unsalted butter and salt. And after reading all the reviews about this cookie, there was overwhelming consensus advocating for the use of salted butter rather than the unsalted butter/salt option. So who was I to argue with both the recipe creator and consensus? I used salted butter or rather a European salted butter. My taste buds strongly believe there is a discernible taste difference between American and European butters, particularly in baked goods, and especially in things like cookies and caramels. So if the dominate flavor of a cookie comes from butter, I will use a European butter.

I thought I committed the number of grams in one cup of flour to memory. But I second guessed myself when I started making these cookies. Which invariably led me to do a 'grams to cup for all-purpose (AP)' search. And much to my dismay, there was not a hard, fast universal gram to one cup of flour measurement. Gram weights were as low as 120 g and as high as 130 g, with 123g, 125g, and 127g options. In other words, there wasn't a gram weight consensus. I used 120g when making this first batch of cookies (as it's the weight I have used before), however, after making them I would recommend using the 130g to a one cup measurement to ensure your cookie has a denser shortbread consistency and spreads less in the baking process (my shortbread seemed 'bigger' than the hundreds of photos of them posted to Instagram). Don't get me wrong, the first 120 g per cup version of this shortbread got rave reviews. But they have may have tasted the four and a half star version.


Sifting the flour is not required. So why would I sift the flour when it specifically did not call for it? Call it force of habit. In other words, you don't have or need to sift the flour when making this shortbread. Some might say you shouldn't.


If there are any downsides to this shortbread cookie it's having to wait (at least) two hours after making the batter before baking them. But good things really do come to those who wait. After dividing the dough half and wrapping in plastic wrap, it is shaped into 2" to 2 1/4" logs before going into the refrigerator to let the magic happen. Note: The dough can be made ahead and stored, tightly wrapped in plastic, up to one week in the refrigerator, or one month in the freezer.

Before slicing and baking the cookie logs, they are brushed with a lightly beaten egg and rolled in demerara sugar. The demerara sugar helps to create crispy, sugary edges. Turning every bite of this buttery, chocolatey shortbread cookie into a head-spinning experience. After laying the slices of the shortbread dough on a parchment paper lined baking sheet, lightly sprinkle with a flaky sea salt (Maldon is one of my favorites).

Use your sharpest serrated knife when cutting your completely firmed up, chilled logs into 1/2" slices. You will invariably hit some chunks of the chocolate when cutting, so slice slowly. If by chance any of your slices break apart (and they might), carefully reshape them using your hands.


In a 350 degree (F) oven the cookies bake for 12-15 minutes or until the edges just begin to turn brown. My baking time was slightly over 15 minutes, quite possibly because they were on the larger size. Allow the shortbread to cool on the baking sheet for 5 minutes before removing and placing on a cooling rack. Those five minutes will seem like an eternity. 


These Salted Butter and Chocolate Chunk Shortbread cookies are pure bliss. Serve with a glass of milk and be prepared to enter into a euphoric state unlike anything you have experienced. This would truth not hype. Quite possibly after one bite you may also find yourself seriously considering permanently or temporarily abandoning your favorite chocolate chip cookie recipe. It's only my opinion, but I don't think these cookies are worthy of the cookie of year nomination. I think they should be nominated for cookie of the decade. 

Recipe
Salted Butter and Chocolate Chunk Shortbread (quite possibly one of the most favorite, most photographed recipes from Alison Ronan's new cookbook "Dining In: Highly Cookable Recipes")
Makes 18-24 cookies 

Ingredients
1 cup plus 2 Tablespoons (256 g) room temperature salted butter, cut into 1/2 inch pieces (recommend a European salted butter)
1/2 cup (100 g) granulated sugar
1/4 cup (50 g) firmly packed light brown sugar
1 teaspoon good quality vanilla
2 1/4 cups (292.5 g) all-purpose flour (sifting is optional)
6 ounces (171 g) semi-sweet or bittersweet dark chocolate, chopped (but not too finely as you want chunks, not thin shards of chocolate)
1 large egg, beaten to blend
Demerara sugar, for rolling
Flaky sea salt, for finishing before baking (Recommend Maldon Sea Salt)

Directions
1. Using an electric mixer and medium-sized bowl or a standing mixer fitted with a paddle attachment, beat the butter, granulated sugar, brown sugar and vanilla on medium speed until super light and fluffy, approximately 3-5 minutes.
2. Using a spatula, scrape down the sides of the bowl. With mixer on low, slowly add flour, followed by the chocolate chunks and beat only to blend.
3. Divide dough in half. Place each  half on a large piece of plastic wrap. Fold plastic over the dough to keep your hands from getting sticky. 
4. Using your hands, form dough into a log shape, rolling on the counter will help you smooth it out, but it won't be perfect. Each of the logs should be 2-2 1/4" inches in diameter. Chill until firm, about 2 hours.
5. Preheat oven to 350 degrees (F). Line a baking sheet with parchment paper.
6. Brush the outside of the shortbread logs with the egg wash. Roll in the demerara sugar.
7. Slice each shortbread log into 1/2" rounds. Arrange on baking sheet, placing approximately 1" apart.
8. Sprinkle with sea salt.
9. Bake until the edges are just beginning to brown, approximately 12-15 minutes. 
10. Allow to cool on the baking sheet for 5 minutes before placing on a cooling rack.
11. Serve immediately. Store any uneaten cookies in a tightly sealed container for 3 to 5 days (if they last that long).

Notes: (1) My shortbread cookies were probably on the larger size as my shortbread logs were 2 1/4" in diameter. As a result, the yield was 18 cookies. If you want slightly smaller and up to 24 cookies, roll out your logs closer to 2" in diameter. (2) I chopped up Trader Joe's dark chocolate for these cookies. If it is available near where you live, would highly recommend. (3) If possible use a European salted butter when making these cookies. Kerrygold is one of my favorites. (4) Sifting the flour is optional, not required. 


Views of the Denison Homestead  built in 1717 in Mystic CT (November 2017)