Wednesday, December 29, 2021

Potato Chip Cookies


Some cookies are meant to be enjoyed with or dunked in milk and some are meant to be paired with prosecco or champagne. I would put these Potato Chip Cookies in the 'best enjoyed with some bubbly' category, although I won't tell you they couldn't be eaten with a tall glass of milk. They are a little bit sweet, a little bit salty, perfectly crunchy, and with a shortbread-like quality to them, these cookies are nothing short of being irresistibly, borderline addictive. And, if you are someone who happens to have a fondness for potato chips, you will understand when I say it's hard to just eat only one of these cookies. 


Almost every recipe for Potato Chip Cookies I have looked at attributed its' origin to a teacher, an aunt, a grandmother, or a church cookbook. In other words, they all came with a story, but none of them actually identified the actual Potato Chip Cookie creator. There are only two things for certain I learned with regard to this cookie. First, it was created long after 1853, the year George Crum invented the potato chip. And second, it wasn't until the 1940s or 1950s when potato chip cookie recipes started appearing in magazines and newspapers. 


Not unlike all of the other Potato Chip Cookie recipes I found out there, this one too has a story. As a rule, I am not a big fan of cookie exchanges. But had I decided not to go the running group's cookie exchange night a few weeks back, I may have never gotten the recipe for 'this' Potato Chip cookie. One coming from the aunt of my very good friend Rose. If I told you that both of these women grew up in Ireland, you might be wondering why or how the place of birth has anything to do with this cookie recipe. Well let me tell you.


If you were lucky enough to grow up eating Irish butter, you learned very early on what a game changer it was in cookies, cakes, and all things baked. Some of us (like me) didn't learn how Irish butter takes almost any cookie recipe from ordinary to extraordinary until it became readily available here on this side of the pond. But Rose and her aunt discovered the 'butter secret' growing up in Ireland. So, of course, the cookies I had tasted at the cookie exchange, the cookie I couldn't wait to get the recipe for, were made with Irish Butter. So it wasn't only the tablespoon of vanilla (yes, a tablespoon!) that took these Potato Chip Cookies to a whole new level of deliciousness, it was the cup of Irish unsalted butter. And I'm told using Irish potato chips instead of Lay's Classic Potato Chips creates an even more epic cookie! 


The recipe for making the cookies is pretty straightforward. With only six ingredients, it's an easy, unfussy cookie to make. In spite of the fact it called for chilling the dough for an hour before forming into 1' balls and baking in a preheated 350 degree (F) oven.


However, instead of forming the balls of dough from chilled dough, I formed and then chilled the balls of dough. Which I have to say worked out perfectly.


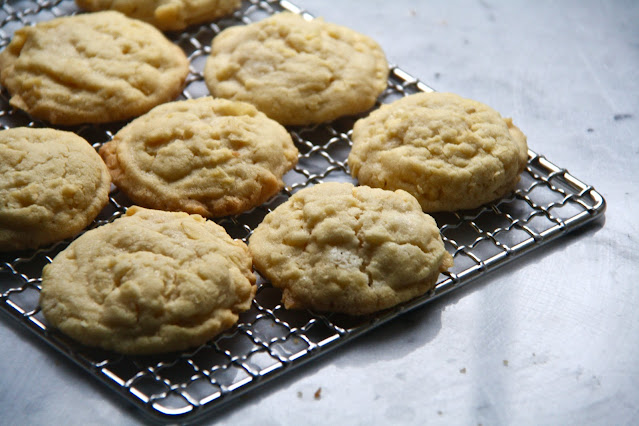
The recommended baking time for the cookies ranges from 15 to 20 minutes or until the cookies are lightly browned on the edges but still a bit soft in center. My baking time was about 18 minutes.


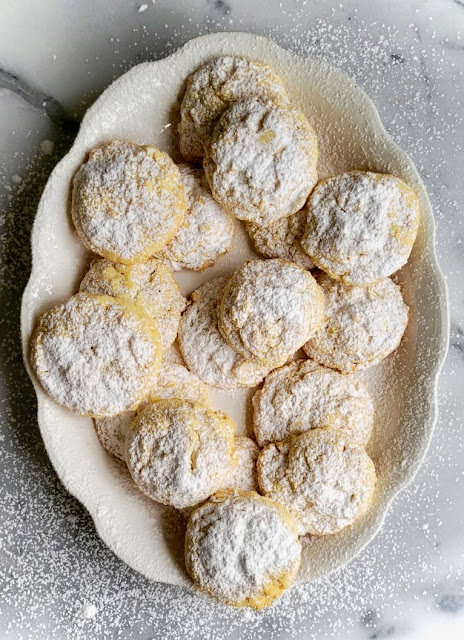
Dusting the cookies with some confectionary sugar while they are still slightly warm turned out to be the perfect finishing touch of sweetness.


If there was ever an ultimate cookie to bring in, to ring in the new year, it would be these Potato Chip Cookies! 


But I am guessing once you taste how irresistible they are, you will be making them again and again in the year(s) ahead. Because once you know, you know how such an unlikely ingredient can create the most scrumptious rustic shortbread-like, sweet-salty cookie.


Wishing you all a very happy, healthy, filled with an abundance of sweetness new year! Looking forward to continuing to share new recipes and yes, even updated recipes with you in 2022! 

Recipe
Potato Chip Cookies
Makes 24-26 cookies

Ingredients
1 cup (75g) crushed Lay's Potato Chips (see notes)
1 cup (226g) Irish or European-style unsalted butter, room temperature (recommend Kerrygold Unsalted Butter)
1 cup (200g) granulated sugar
1 large egg yolk
1 Tablespoon good quality vanilla
2 cups (258g) all-purpose flour
Confectionary sugar, for finishing

Directions
1. In the bowl of a standing mixer fitted with a paddle attachment, cream the butter for about 1 minute.
2. Add in the granulated sugar and beat until light and fluffy (about 2-3 minutes).
3. Beat in the egg yolk until incorporated.
4. Beat in the vanilla just until mixed in.
5. Add in the all-purpose flour in three (3) additions. Mix just until flour is absorbed into the dough.
6. Using a spatula, mix in the crushed potato chips.
7. Using an ice cream scoop, form the dough into 1 to 1 1/4" balls and place on a sheetpan. Wrap tightly with plastic wrap and chill for 55-60 minutes.
8. Preheat the oven to 350 degrees (F). Line two baking sheets with parchment paper.
9. Place twelve of the balls of dough on one cookie sheet. Bake for 15-18 minutes (rotating the baking sheet midway through the baking process) or until lightly golden around the edges (and still slightly soft in the center). Remove from the oven and let sit on making sheet for 5 minutes before transferring to a cooling rack and generously sifting confectionary sugar over the top of each cookie.
10. Place the remaining 12 balls of dough on the other baking sheet. Bake accordingly.
11. Let the cookies cool completely before packaging or plating. Store cookies in a tightly sealed (tin) container.  The cookies will be good for up to 5 days, if they last that long

Notes: (1) I found it was easier to weigh out the potato chips before crushing them in a bowl or in ziplock bag.  (2) This recipe, like most other Potato Chip Cookie recipes, called for the use of Lay's Potato Chips. So, unless you have a bag of Irish Potato Chips in your cupboard, only use Lay's Classic Potato Chips when you make these cookies. (3) And, last but not least, use only unsalted Irish Butter when you make them. I promise it makes a difference. I used Kerrygold.

Monday, December 20, 2021

Peppermint Crunch


With slightly less than five days left before Christmas, I am still decorating, baking, trying new recipes, wrapping gifts, doing some last minute shopping, deciding what the holiday table should look like this year, planning the Christmas dinner menu, and wondering how I will get it all done. Thankfully I have pilates and running to help keep me sane in this self-imposed madness and second-guessing myself. Although I am still struggling with my decision to let the beloved collections of beautiful glass ornaments and chalkware Santas remain in their boxes in the attic again this year. Naked trees are a thing, right?  


One of the things included in the holiday cookie and confection boxes made for friends this year, was this Peppermint Bark. A version similar to (but maybe even better than) the one sold at Williams-Sonoma. This Peppermint Crunch may be a better version. It's part bark, it's part cookie. In other words, it's the best of both worlds.

In addition to sandwiching a cookie layer between the dark and white chocolate layers, the dark chocolate layer also has some crushed peppermints mixed in. Creating what I think is the ultimate holiday peppermint confection. It also happens to be one of those things that falls into the 'easy to make, not overly time intensive' category.

The cookie layer is made with broken pieces of Famous Chocolate Wafers. You can find them in the cookie aisle at most grocery stores. Because you need only a half of box of the wafers, you will have enough left over to make a second batch as the first one is likely to quickly disappear!


If you are looking for one more thing to make for your holiday homemade love gift boxes or to serve on your cookie platters, make this Peppermint Crunch as it looks and tastes like Christmas! It's destined to become one of you holiday traditions! But I should warn you, it can be slightly addictive.

Recipe
Peppermint Crunch

Ingredients
16-18 ounces (452g- 508g) dark or semi-sweet chocolate (55-62% cocoa), coarsely chopped
16-18 ounces (452g- 508g) white chocolate, coarsely chopped
Half of a 9 ounce (225g) package of Famous Chocolate Wafers, broken into pieces
4.5 ounces/125g crushed candy canes, divided (Crushed Candy Canes, Andes Peppermint Crunch Baking Chips or Brach's Crushed Candy Canes)
3/8 teaspoon pure peppermint extract (recommend Nielsen-Massey Pure Peppermint Extract)
Optional: Edible white glitter flakes

Directions
1. Line an 15"x 10" baking pan with parchment paper.
2. Over a pot of simmering water, melt the coarsely chopped dark or semi-sweet chocolate. Stir in 1.8oz/50g of the crushed candy canes. Pour onto prepared baking and spread evenly using an offset spatula. Immediately top with the broken pieces of the Famous Wafers, pressing down lightly so the cookies are embedded in the melted chocolate. Leave a small amount of space between each cookie piece. Let the bottom layer set up while you melt the white chocolate.
3. Over a pot of simmering water, melt the coarsely chopped white chocolate.
4. Stir in peppermint extract and 1.8 oz/50g crushed candy canes into the melted white chocolate. Stir until combined. Pour evenly over the partially set dark or semi-sweet chocolate. Carefully and evenly spread using an offset spatula.
5. Immediately sprinkle remaining .9 oz/25g over the white chocolate. 
6. Allow the pan of Peppermint Crunch to set up. Note: Peppermint Bark is easier to cut into shapes before it has completely hardened.
7. Store Peppermint Bark in a tightly sealed container or wrap in the cellophane bags tied with a pretty ribbon or baker's string.

Notes: (1) If you don't have a scale to measure out the crushed candy canes, 1.8 ounces/50 g is equivalent to a slightly rounded 1/4 cup. .9 ounces/25g is equivalent to a slightly rounded 1/8 cup. (2) Use a good quality chocolate (not chocolate chips or melting candy wafers). I buy mine from a local chocolatier, but Ghiradelli sells dark and white chocolate wafers.

Saturday, December 18, 2021

Old Fashioned


While almost everyone in the blog world has been posting recipes for holiday cookies and confections in recent weeks, we took a first time whirlwind trip Nashville with friends for several days. I could say it has taken me a week to recover and catch my breath from three days of non-stop concert going, bar hopping, eating, sightseeing, as well as hat and boot shopping, but I would be lying. In spite of uncharacteristically day drinking on this trip, I'm happy to report it took me less than a day to get caught back up in the holiday shopping and baking frenzy. But honestly, I wish I was back in Nashville sipping a cocktail and listening to some really good music. Okay, and maybe going on the hunt for a third pair of cowboy boots. From listening to music in the iconic Blue Bird Cafe and Ryman Auditorium as well in some of the more famous honky-tonks on Broadway, to spending a few hours at the Cheekwood Estate and Gardens, to eating hot chicken at Prince's and Hattie B's (jury is out on which is better), to enjoying breakfast and dinner at some pretty amazing places, to just taking in Nashville's interesting architecture, I loved everything about that city. So why had it taken me so long to get there? Not sure I even know. But I am now available to be a tour guide to the capital city of country music! 


My relatively recently acquired taste for Bourbon whiskey served me well while I was in Nashville. Along with trying a Bushwacker for the first time (talk about a boozy milkshake) and drinking Ranch Waters, the timeless, classic Old Fashioned was my cocktail of choice on this trip. After sampling them at several different places, I discovered I am a bit of an Old-Fashioned fussytarian (is anyone surprised?). I definitely prefer them being made with a good Bourbon whiskey, garnished with both an orange peel and cherries (Luxardo cherries please), and a little on the sweeter side. 


Old Fashioned cocktails have been around since the 1800s. Some might say the Old Fashioned isn't really a cocktail. Just a glass of whiskey sweetened with some sugar and bitters. However, if you have ever had a great Old Fashioned you know it's a whole lot more than just a glass of whiskey. 


Like pretty much everything, great food and great cocktails usually begins with great ingredients. With a little bit of personal preference thrown in there too. And when it comes to the Old Fashioned there are no shortage of opinions on the brand of Bourbon (or rye) whiskey to use, the type of sweetener (sugar cubes or simple syrup), the kind and quantity of bitters, the citrus fruit (orange or lemon) garnish, the ice (one large cube or a handful of smaller cubes), and last but not least, the cherries. There are even a plethora of opinions on the amount of time the Old Fashioned should be stirred. 
 

The ingredient having the biggest influence on the taste of the Old Fashioned is going to be the bourbon whiskey. I happen to love the flavors of vanilla, molasses, toffee, mint, dark fruit, and anise found in Buffalo Trace Bourbon. For me it's my absolutely first choice when making this cocktail. But you will find a number of the 'best bourbons for an old-fashioned' recommendations if you look for them. Among some of those frequently mentioned are Elijah Wood Small Batch, Four Roses Small Batch or Single Barrel, Basil Hayden, Angel's Envy, and Maker's Mark. The flavor profile of the Old-Fashioned will differ slightly depending on which bourbon you choose. More expensive bourbons generally have a deeper oak, caramel and vanilla notes. So choose well and wisely.


Some Old-Fashioneds call for the use of a sugar cube muddled in water, while others call for the use of a simple syrup. This one uses a simple syrup made with equal parts Turbinado sugar. and water (see notes) to add a nuanced complexity and depth of flavor to the cocktail. 


To muddle or to spritz, that is the question with regard to the orange peel. And the answer is.....spritz! Spritzing gives the Old-Fashioned just the right amount of sweetness. Now to the cherry garnish. Which one and how many? The options for cherries include maraschino or ones in heavy syrup (like Maraska or Luxardo). If you are looking to create a really great Old Fashioned, use cherries in heavy syrup (save the maraschino for topping a sundae). And three of them on a cocktail skewer just seems to be the perfect number. Now to the bitters. You will find some Old Fashioned recipes call for the use of only kind of bitter and anywhere from 2 to 6 dashes. In the spirit of more is better, this one uses two different kinds: Orange bitters and Peychaud's Aromatic Cocktail Bitters. And three dashes of each. Last, but not least, is the ice. One large cube or a handful of cubes? The benefits of using one large ice cube is it is slow to melt and less likely to water down the cocktail. You want your Old Fashioned chilled, but not diluted. 


Like taking forever to get myself to Nashville, my appreciation and affinity for a really good (dare I say great?) Old Fashioned took almost as long. While I should have been influenced by my Old Fashioned loving friends (especially the girl from Minnesota aka the one who sometimes dons a 'Just call me Old-Fashioned' t-shirt) some years back, I only loved to drink bourbon a few short years ago. But like they say 'good things come to those who wait'. Although if you love bourbon or bourbon whiskey, think 'sooner rather than later' to enjoy this classic, timeless cocktail. Cheers!

Recipe
Old Fashioned
Makes 1 really good cocktail

Ingredients
2 teaspoons chilled simple syrup (see Notes)
3 dashes Orange bitters
3 dashes Peychaud's Aromatic Cocktail Bitters (or can use Angostura Aromatic Bitters)
1 large ice cube
2 ounces of Bourbon or Rye Whiskey (Buffalo Trace, Russell's, etc.)
1 orange peel (about 1 inch wide and about 3 inches long) 
3 Luxardo cherries

Directions
1. Add the two teaspoons of simple syrup followed by three dashes of the Orange and Aromatic bitters to a cocktail glass. 
2. Add in one large ice cube.
3. Pour in two ounces of a good quality bourbon or bourbon whiskey. Gently stir for at least thirty, but preferably sixty seconds.
4. Give the orange peel a squirt and add to the glass.
5. Place three Luxardo cherries on a cocktail skewer and place in the glass. Alternately drop a couple of cherries into the glass.
6. Now sit back and savor. Maybe put on some Old Dominion, The National, Carly Pearce, Dan and Shay, Zac Brown, Little Big Town, Lady A, Jason Aldean, or Chris Stapleton to create a bourbon whiskey drinking mood.

Notes: (1) Some like a little sweeter Old Fashioned. If you do, use 1 Tablespoon of simple syrup. (2) To make the simple syrup add one cup of water and one cup of Turbinado sugar to a saucepan. Bring to a boil, whisking occasionally, until the sugar has melted. Let cool. Store in a bottle or jar. Store in the refrigerator. Simple syrup will be good for at least one month. 

Broadway in Nashville (December 2021)

Friday, December 3, 2021

Dark Chocolate Peanut Butter Fudge Sauce


I had every intention of kicking off the month of December, aka holiday baking season, with a new cookie recipe. But those plans changed after I made this ridiculously delicious, drop-the-mic, shut the front door Dark Chocolate Peanut Butter Fudge Sauce. I thought you needed this sinfully luscious fudge sauce in your life sooner rather than later. Because instead of, or maybe in addition to gifting your family and friends with a box of homemade cookies, you just might want to gift them a jar of this Dark Chocolate Peanut Butter Fudge Sauce. Throw in a gift certificate to their favorite ice cream store and you will be in contention for the best ever, most thoughtful gift giver!


And, if by chance, they happen to have a serious soft spot for chocolate and peanut butter, this simple gift will prove the best gifts are not always the most expensive, the most sought after, or the trendiest ones. They are often the simplest, most thoughtful ones. And, the best part of gifting friends/family with a jar of this sauce is that everything you need to make it is not sitting in a container docked offshore somewhere. 


If there was ever a fudge sauce to take serving a bowl of ice cream for dessert from good to great, it would be this Dark Chocolate Peanut Butter Fudge Sauce. 

The fudge sauce takes less than twenty minutes to make. Other than chopping the unsweetened chocolate and cutting the butter into pieces, there is no other advance prep you need to do. No letting ingredients come to room temperature, no letting it rest for hours or overnight, or no patiently waiting for the mixture to reach a certain temperature. All you need a good heavy bottomed saucepan, a whisk. a scale to measure out your ingredients, and some good quality glass jars.

The directions for making the fudge sauce are pretty straightforward. In other words, it's really easy to make.


One taste of this insane, heavenly Dark Chocolate Peanut Butter Fudge Sauce and you may never again want to adorn your ice cream with a jar of store-bought fudge sauce. 

While I think it's the perfect topping for a bowl of ice cream, you could also pour this fudge sauce over brownies, a slice of pound cake, or a bowl of sliced bananas. I would tell you to try resist eating it right out of the jar but as a chocolate-peanut butter lover that would be foolish advice.


This Dark Chocolate Peanut Butter Fudge Sauce checks off all of the holiday 'food' gift giving boxes. It's a gift made with love, it's the right kind of decadent, it's easy to make, it's ridiculously scrumptious, it's perfect for the person who has everything or wants for nothing, and it's destined turn anything it's poured on into a euphoric eating experience. And more than likely you will be making this fudge sauce long after the holidays are over. 

Recipe
Dark Chocolate Peanut Butter Fudge Sauce
Makes 2 cups

Ingredients
1 1/4 cups (250g) granulated sugar
2/3 cup whole milk
5/8 teaspoon Kosher salt
1/3 cup (28g) unsweetened Dutch chocolate cocoa (see notes)
3 ounces (88g) unsweetened chocolate, finely chopped
4 Tablespoons (57g) unsalted butter, cut into 16 pieces
1/4 cup (56g) creamy peanut butter (I used JIF)
1 teaspoon vanilla 
Flaky sea salt for finishing

Directions
1. In a heavy bottomed medium sized saucepan, heat the sugar, milk, and Kosher salt over medium heat. Gently whisk until sugar has dissolved and sugar has completely dissolved. When the mixture begins to bubble around the edges of the pan (about 4-5 minutes), reduce heat to low, and whisk in the cocoa until smooth.
2. Remove from the heat and stir in the chocolate. Let stand for 3 minutes. Whisk sauce until the chocolate is fully melted.
3. Add in the butter and whisk until the sauce thickens slightly.
4. Whisk in the peanut butter until fully incorporated.
5. Whisk in the vanilla.
6. Pour into glass jars (see notes). Top each jar with a lightly sprinkling of flaky sea salt.
7. Unless serving immediately, let the sauce cool. Cover and store in the refrigerator. Sauce will keep up to one month in the refrigerator.
8. Heat the chilled sauce in a small pan or in a microwave and pour over your favorite ice cream.

Notes: (1) Use good quality glass jars (e.g., Weck, Ball) for store the sauce in. The recipe makes 2 cups. Use pint or half pint jars. (2) I used the King Arthur Double Dutch Dark Cocoa Powder but would highly recommend Droste Dutch Processed Cocoa. (3) Do not use a 'natural' peanut butter when making this sauce.

Monday, November 29, 2021

Small Batch Blueberry Muffins


Last week I made a batch of Blueberry Muffins. I liked them, but I wasn't sure I loved them enough to make them blog worthy. So I tinkered with the recipe and made a new batch aka version two. Before even tasting the second batch, I knew these would be everything I hoped they would be and then some. But hey, hold on a second. Hadn't I already shared the Best Ever Blueberry Muffins recipe with you eight years ago? So why on earth am I doing a happy dance over these Small Batch Blueberry Muffins? There has to be, there must be, at least one good reason why. And it can't be because I am pitting one blueberry muffin recipe against the other. 

A few weeks ago when I shared the recipe for the White Chocolate Cranberry Pecan Muffins (small batch) I said there would be more small batch muffin recipes coming in the weeks ahead. Well. I am keeping my promise. As much as I value having promises kept (and I do), that's not the reason why I am sharing the recipe for these Small Batch Blueberry Muffins with you. Having a recipe that makes just six beautiful, scrumptious muffins is one of those must-haves in our lives. Cutting a recipe for twelve muffins in half isn't the same as having a recipe making only six. Because sometimes flavor and texture get lost in translation when recipes are altered. 


Had I not already used the words 'best ever' in describing the first and only other blueberry muffin recipe shared all those years ago, I would be inclined to use those same words to describe these blueberry muffins. Maybe I could have called them the Best Ever Small Batch Blueberry Muffins, but even I would think it a bit much if every blueberry muffin recipe I posted was considered best ever. But let the words 'best ever' be amongst the first words you say when you taste them.

Without trying to cause any confusion here, I feel it's important to share the differences between the version one and version two recipes. Version one was made with canola oil, not butter; was made with toasted walnuts; had only one teaspoon of baking powder; and, had way too many blueberries. Version two was made with unsalted butter, the right amount of blueberries, had 1 1/8 teaspoons baking powder and was nut free. These simple changes created night and day differences between the two of them, particularly in texture and the ability to get them out of the muffin tin. Which explains why you won't ever see the recipe for version one.

Having seen how giving thick muffin batter resting time makes a difference, these domed, moist, golden brown, crunchy on top Small Batch Blueberry Muffins were allowed to rest for an hour before they went into a preheated 400 degree (F) oven. These muffins baked at only one constant temperature.


But unlike the technique of filling the empty muffin cavities with water to keep the pan from warping and the muffins baking evenly, I utilized the dried beans used in blind baking pie shells instead. And honestly, I loved this method so much better! 


Baking time for these muffins ranged somewhere between 22 and 26 minutes (I kept resetting the timer for two minute intervals at the 22 minute mark). Once baked the muffin tin was placed on a cooling rack and allowed to rest for at least 15 minutes before each muffin was carefully removed.


There are two keys to having beautifully browned sides and bottoms on sinfully good muffins. The first is baking them in a non-stick muffin pan liberally sprayed with oil or baking spray. And the second is placing the muffin pan on a large sheet pan when baking the muffins. Using paper liners might might pan clean up easier, but not all paper liners are created equal. Inexpensive liners will often dissolve during the baking process making it almost impossible to peel them away from the muffin. Taller liners may prevent the tops of the muffins from getting deep golden brown. So for me the best textured, most flavorful, and almost too pretty to eat muffins are ones made in a great non-stick pan and ensuring the muffin tin is well prepared. Save the muffin liners for after the muffins are baked.

These Small Batch Blueberry Muffins had that kind of bakery style cake like texture and crunch I love so much. The ratio of blueberries to muffin cake was just about perfect. These muffins are so flavorful they really don't need to be slathered in some butter. However, in this season of indulgence, a schmear of butter seemed to be one of those irresistible finishing touches. 

Instead of bringing over a tray of cookies or baking a loaf of your favorite bread this holiday season, why not bake up a batch of these Small Batch Blueberry Muffins and deliver them to friends and/or neighbors on a Saturday or Sunday morning. I promise it will be the most unanticipated, memorable, "best ever" delicious surprise they receive!

Recipe
Small Batch Blueberry Muffins
Makes 6 muffins
Ingredients
1 1/4 cups (165g) all-purpose flour
1 1/8 teaspoons baking powder
3/8 teaspoon Kosher salt
1/2 teaspoon cinnamon
1/4 cup (2 ounces) whole milk, room temperature
1 teaspoon vanilla
1/4 cup (2 ounces) unsalted butter, room temperature
1 large egg, room temperature
3/4 cup (150g) granulated sugar
1 1/4 cups (184g) whole blueberries, room temperature, divided
6 teaspoons of granulated sugar for finishing
Sparkling sugar for finishing

Directions
1. In a small bowl, add the vanilla to the milk. Set aside while assembling the rest of the ingredients.
2. In a medium bowl, sift together the flour, baking powder, cinnamon, and Kosher salt. Set aside.
3. In the bowl of a standing mixer beat together the sugar and butter for about 3-4 minutes.
4. Add in the egg and beat for one minute until batter has increased in volume and is light in color.
5. On low speed, add in the sifted dry ingredients and milk/vanilla in five additions (starting and ending with the dry ingredients).
6. Fold in all but about 18-20 blueberries with a spatula or wooden spoon. Let the batter rest covered with plastic wrap at room temperature for 60 minutes. The batter will be very thick.
7. Preheat oven to 400 degrees (F). Generously spray six cavities of a 12 cup muffin tin or three cavities of two 6 cup muffin tins. Note: Remember to make certain there is an empty muffin space between each sprayed cavity.
8. Using a large ice cream scoop, fill each muffin cup cavity. You will have enough batter for 6 regular sized muffins. Lightly press the reserved blueberries, about 3-4 blueberries into the top of each muffin. Sprinkle the top of each muffin with a teaspoon of granulated sugar and a sprinkle of sparkling sugar.
9. Place muffin tin on a large baking sheet. Fill the empty cavities with pie weights or dried beans (2/3s full). Place muffin tin in oven.
10. Bake the muffins for 22-26 minutes (rotating the pan midway through the baking process) until golden, puffed and spring back when lightly pressed.
11. Remove from the oven and let muffins rest in the tin for 15-20 minutes.
12. Carefully remove the muffins with an offset spatula.  Serve warm or at room temperature. Muffins are best the day baked but will still be pretty gosh darn good for up to 2-3 days if they last that long.

Notes: (1) Highly recommend using only whole milk. The use of any other milks will affect the muffin's flavor and texture. (2) I used fresh blueberries. (3) To keep the exterior of the muffins crunchy, store them uncovered on a plate in the kitchen. (4) You can freeze the blueberry muffins once they completely come to room temperature, however, freezing muffins will slightly change the exterior texture when thawed. (5) If gifting the blueberry muffins, place each muffin in a paper cupcake liner and arrange in a box or on a platter.


Great Smoky Mountains, Gaitlinburg, Tennessee (October 2021)