Thursday, July 30, 2020

Kitchen Sink Cookies


The majority of packages delivered on my doorstep over the past several months have been from Amazon, Lululemon, or puzzle stores (ones I hoped weren't fake pandemic pop-ups). But last week two unexpected surprise packages sent from friends living afar arrived. And by some seemingly odd coincidence they each contained the same thoughtful gift....a thousand piece puzzle. What were the chances, right? I initially wondered if they both took pleasure from reading my descent into puzzle madness posts (I frequently succumb to believing in a missing piece puzzle conspiracy). Or was knowing how much I love the challenge and distraction puzzles have provided to me in the new, ever evolving normal just indicative of their kindhearted, caring hearts. If I know them as well as they seem to know me, it was probably a little bit of both. It will be months from now, but I already know how I will express my gratitude to them. Yes, I will be violating all of the Emily Post thank you note timelines but I think they both might forgive me. Because if they know me as well as I think they do, they each probably have some idea of what form my thankfulness might take. No spoilers, but cookies might be involved.


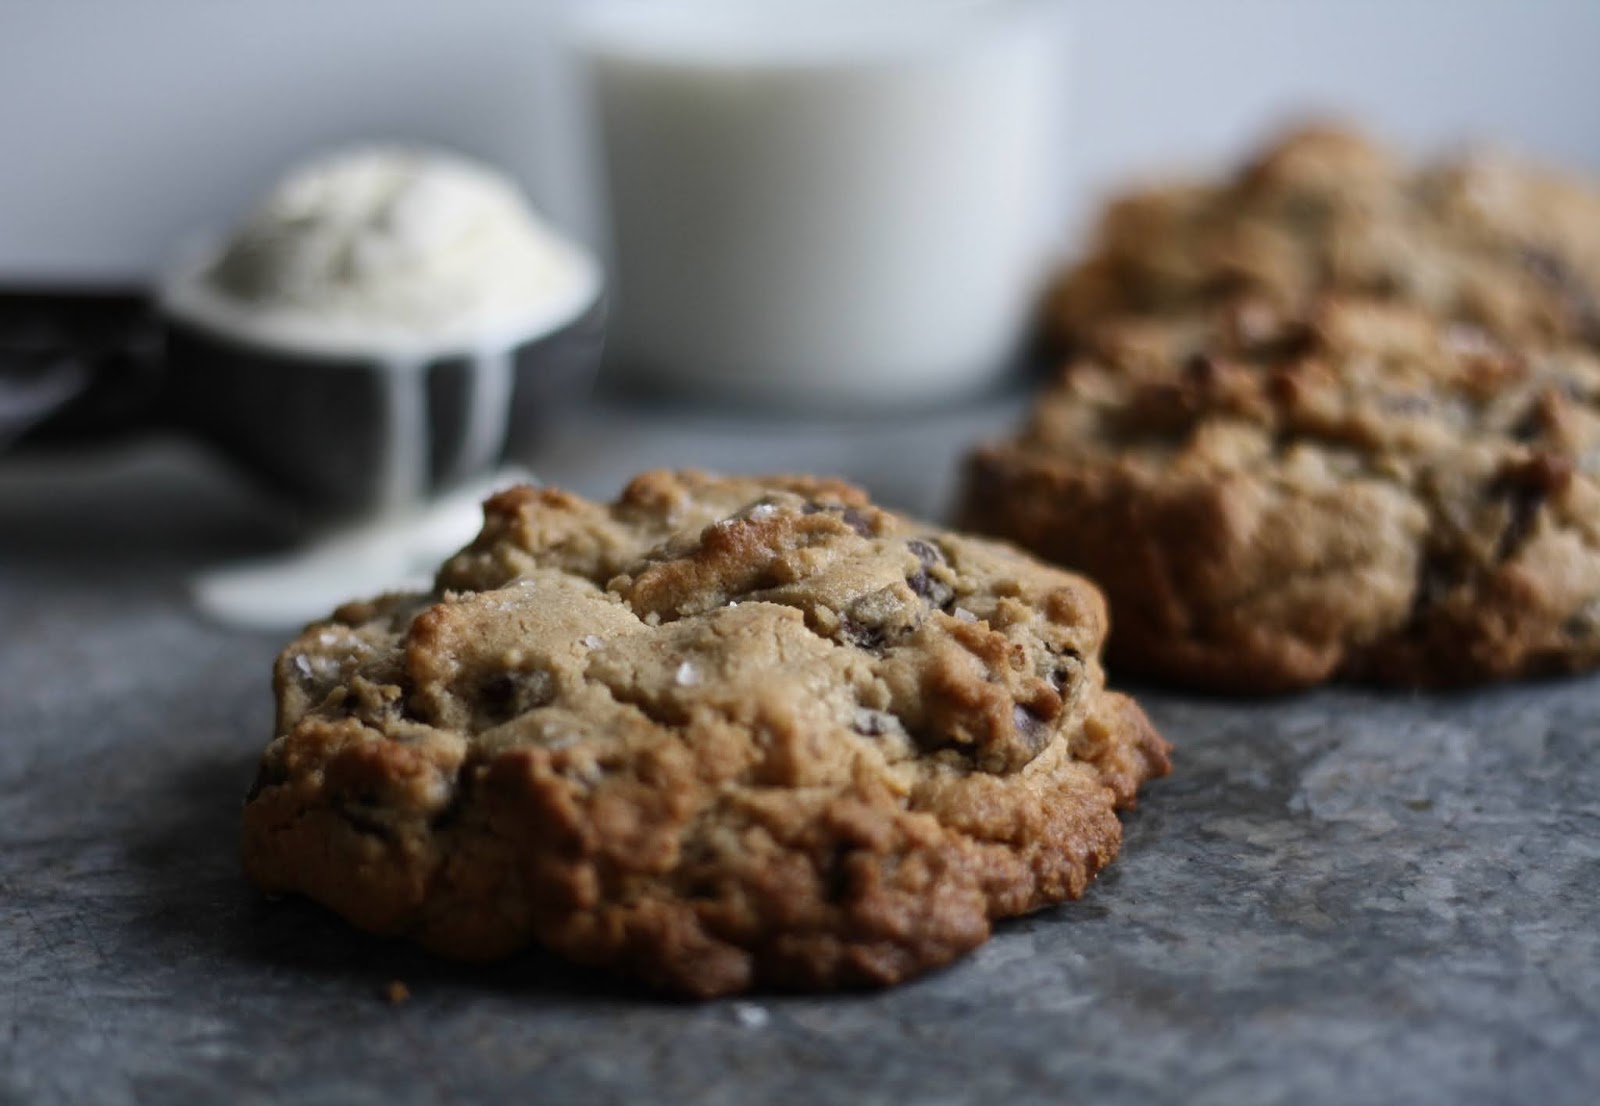
Could my thank you include these Kitchen Sink cookies? Maybe or maybe not. I wouldn't want to spoil their surprises. And speaking of surprises, these cookies might best be described as a "surprise in every bite". Crispy on the edges, a little chewy in the center, they are made with dark chocolate chips, sweetened shredded coconut, oats, toasted pecans, and dried cherries. In other words, they have almost everything in them but the kitchen sink. Hence their name.

There are many different versions of Kitchen Sink cookie recipes. What goes into them varies greatly as some include a myriad of ingredients. You might find toffee chips, butterscotch chips, pretzels, and/or potato chips mixed in or swapped out for others. But you almost always will find (dark, semisweet or milk) chocolate chips, nuts, and oats in them. Created with the intention of cleaning out cupboards of bits and pieces of ingredients leftover from other baking endeavors, some of us now go out and intentionally buy what we need to make them.


Adding a chard or piece of chopped chocolate and a sprinkling of sea salt to the tops of these cookies is a part of their evolution. While both of these ingredients are optional finishing touches, how could a little more chocolate, a puddle of melted chocolate be a bad thing? 


In addition to the flexibility of the ingredients used is the flexibility of their size. They can be made golf ball sized or Big Fat cookie sized. 


Like some cookies, they benefit from a short (at least 2 hour) chilling time before going into the oven. However, unlike some other cookies, these are intended to be slightly under baked. Allowing the cookies to begin cooling on the baking pan will help them to achieve their crispy/chewy texture. As much as I loved these cookies, there will be a few things I might do differently in the future. Increasing the amount of chocolate chips, using only one egg instead of two, and increasing the amount of dried cherries. And instead of topping them with flaky sea salt, I might through in a half cup of chopped salty pretzels into the batter. Because the beauty of these cookies is that their possibilities are endless!


When you can't decide whether to make chocolate chip cookies, oatmeal cookies, coconut cookies, nutty cookies, or cookies with dried fruit, make these incredibly flavorful Kitchen Sink cookies. They are the cookies having a little something for everyone! And, if by chance you have a friend or two who happens to really like cookies, consider surprising them with a box of these cookies! 

Recipe
Kitchen Sink Cookies
Makes 27-29 cookies

Ingredients
2 1/2 cups (305g) all-purpose flour
2/3 cup (62g) old-fashioned oats
1 cup (226g) unsalted butter, room temperature
1 teaspoon Kosher salt
1 teaspoon baking powder
1/2 teaspoon baking soda
2/3 cup (135 g) granulated sugar
2/3 cup (135 g) light brown sugar (could use up to one cup/200g)
2 teaspoons vanilla
2 large eggs, lightly beaten (for a crispier cookie use only 1 egg)
10 ounces (283g) dark, semisweet, or milk chocolate chips (See notes below)
3/4 cup (89g) pecan halves, toasted and coarsely chopped
1/2 cup (50g) sweetened shredded coconut
1/2 cup (82g) dried cherries, coarsely chopped (cup increase to 3/4 cup or 103g)
Flaky Sea Salt

Optional: Chunks/shards of dark chocolate to top the cookies before baking

Directions
1. In a medium sized bowl, whisk together the all-purpose flour, baking powder, baking soda, coconut, and oats until combined. Set aside.
2. In a medium sized bowl, combine the chocolate chips, cherries, and pecans. Stir to blend. Set aside.
3. In the bowl of a standing mixer fitted with a paddle attachment, beat the butter, granulated sugar and light brown sugar until light and fluffy (about 2 minutes). Scrape the bowl as needed.
4. Add in the vanilla, mix until blended.
5. Add in the chocolate chips/cherries/nuts mixture. Mix to fully incorporate (about 30 seconds).
6. Add in the dry ingredients int three additions. Mix until fully incorporated (about 60 seconds total).
7. Add in the eggs. Mix until the egg is blended in and the dough comes together. (about 30 seconds).
8. Create golf ball sized balls of dough using an ice cream scoop. Place on a baking sheet, lightly cover with plastic wrap and chill for at least two hours or up to 4 hours.
9. Preheat oven to 365 degrees (F).
10. Place 9-10 balls of dough on a baking sheet lined with parchment paper, leaving about two inches of space between the cookies. Lightly sprinkle with flaky sea salt. Press a dark chocolate shard or chunk into the cookie dough ball (if using). 
11. Bake cookies for 13-15 minutes rotating the tray midway through the baking process. Cookies should be lightly golden along the edges but still slightly soft in the center. Do not over bake. Remove from oven and let cool on baking sheet for 10 minutes.
12. Remove cookies from the baking sheet and place on a cooling rack.
13. Serve cookies warm or at room temperature. Store cookies in a sealed container. Or package up in cellophane bags and share with friends!

Notes: (1) Instead of dried cherries could use dried cranberries. (2) If not topping the cookies with some additional chocolate, increase the amount of chocolate chips used by another 2 to 4 ounces. (3) Use a 1/4 cup measuring cup for larger, bakery style cookies. Yield will be about 20 cookies and baking time will increase slightly. (4) Instead of topping with flaky sea salt, mix in a half cup of chopped salted pretzels into the batter.


Indiana Corn Fields, Lowell, Indiana (July 2020)


Sunday, July 26, 2020

Lemon Zucchini Poppyseed Bread with Lemon Icing


This past week I gave myself a much needed respite from the angst caused by all that has changed since the arrival of the Pandemic. And when I say changed, what I really mean is lost. Like so many others, I have days when life's unexpected curveballs take a huge toll on my spirit. Like when things that seem effortless, feel more like heavy lifting. Or when things that I love doing feel more chore like (and yes, that includes baking). If I was going try side stepping going down into a looming dark hole, I needed to do something quick. And not wait for something to happen. So on two separate mornings, I got up before the crack of dawn and packed up my camera to go on two very different solo road trips. Each less than two hours away from my home. My destinations were to some never before seen as well as some familiar landscapes. Spending time out in nature has been my kind of saving grace as it usually helps me regain some sense of balance and perspective. For several hours on those two days I was so caught up in the incredible beauty of magnificent sunflower fields, lush canyons, sandy dunes, and towering cornfields all seemed right with the world. And with me. Whatever your lifeline may be, muster up whatever energy you need (or have) and grab a hold of it. Your heart and your spirit will thank you. Mine certainly did.


One of those road trips took me into the Heartland (aka farm country in Indiana). Without question, I knew I would be making the obligatory stop at a roadside farm stand. Coming away with some freshly harvested sweet corn along with some hand picked tomatoes, blueberries, and zucchini made me feel as if I had just won some kind of lottery.  Has anyone else felt a bit of giddiness at the sight of farm fresh produce? Because next to harvesting food from your own garden, I don't think anything tastes as good as 'farm fresh'. As I 'hand picked' my fruit and vegetable treasures from the bins (a feeling of old normal), my spirit was even further restored. And so was my desire for baking.


There are no shortage of zucchini bread recipes on the blog. There's the Best Ever Zucchini Bread, the Double Chocolate Zucchini Bread, and then there is the just the Zucchini Bread, a recipe posted seven years ago. So was there really a need for another one? If it's one made with lemon and poppyseeds, the answer is definitely YES! 

There is enough of a twist to the ingredients in this Lemon Zucchini Poppyseed Bread to make you rethink everything you ever thought (or dreaded) about zucchini bread. Because this one is dense, moist, lemony, and incredibly flavorful. The combination of the poppyseeds, zucchini, lemon juice and lemon zest in this bread is incredibly delicious. Better than any other quick bread where those ingredients are intended to stand on their own or with at least one other. 


Here's the thing about zucchini quick bread recipes (including some of mine), the baking temperature varies greatly. Usually ranging somewhere between 325 degrees (F) and 375 degrees (F). Depending on the density of the ingredients, quick breads baked at lower temperatures can sometimes have wet, raw middles while the outsides are borderline dry. And then there are the questions: "How much shredded zucchini is really in one cup?', Do you press the shredded zucchini in firmly when measuring? and/or Do you squeeze as much of the liquid out as possible before measuring?". Depending on how you measure shredded zucchini, it will undoubtedly affect how much of it or how much moisture you are adding to the batter. Worrying about how your quick bread will turn out shouldn't be left to a matter of chance or luck. And with everything else there is to worry about, this shouldn't be one of them. I happen to like when recipes call for a weighted amount because I want them to have the same levels of reliable and consistent deliciousness. Give me the choice between vagueness (what do 2 medium sized zucchinis actually look like?) and precision (when measured in ounces or grams), I will take precision every single time. And for this Lemon Zucchini Poppyseed Bread I give you the ability to have that precision! See the notes below for everything you know about buying, measuring, and taking the guesswork out the shredded zucchini.


Of the many things I love about making quick breads is they can be made with a spoon, spatula, or whisk and a bowl (or two). There is no need to take out the mixer! Quick breads often require an oven set to a moderate temperature (350 degrees F to 375 F degrees). Some quick breads benefit from the two temperature baking strategy (425 degrees F for the first eight minutes, then reducing the oven temperature to 350 degrees F for the remainder of the baking time). But quick breads baked at high temperatures (400 degrees F or higher) often end up with raw centers. This Lemon Zucchini Poppyseed Bread baked up beautifully at (a preheated) 375 degrees F for somewhere between 40 and 45 minutes (using two 8"x x 4" baking pans). 


To glaze or not to glaze is sometimes the question. For this Lemon Zucchini Poppyseed Bread I say the answer is definitely glaze. The added sweetness and tartness from the glaze makes it the perfect finishing touch. When making the glaze, it should have a thick, pourable honey-like consistency. Use an offset spatula to spread the icing if you like your finished bread to have a completely iced top. Or just let it drizzle over the top and sides for that rustic homemade look.

From the texture to the flavor, I loved everything about this Lemon Zucchini Poppyseed Bread. Quite possibly this is my favorite version of a zucchini bread. The cake is moist and has the right amount of tart zing to it. Already I am planning my next trip to the farm stand to buy more sweet corn, tomatoes, and ZUCCHINI! 

Whether you serve this Lemon Zucchini Poppyseed Bread with Lemon Icing for breakfast or as an afternoon snack with a cup of coffee or tea, more than likely you will be cutting yourself off another slice as the day goes on. If it weren't the specks of the zucchini skin, no one would even guess this bread was made with zucchini. 

With zucchini coming into season, maybe making some loaves of this Lemon Zucchini Poppyseed Bread (one for you, one to share) will help restore your sense of balance and perspective. It will definitely satisfy your sweet tooth.

There is much to be said for the power of simple pleasures and simple recipes. The next time life causes to you to wonder how much more change (or loss) you feel you will have to endure, do something or make something that grounds you, that brings you joy.  Your spirit is depending on you to navigate it through all of life's unpredictabilities. 

Recipe
Lemon Zucchini Poppyseed Bread with Lemon Icing
Makes two 8"x4" loaves (one for you, one to give away)

Ingredients
Bread
2 1/2 cups (325g) all-purpose flour
2 1/2 teaspoons baking powder
2 Tablespoons poppyseeds
1/2 teaspoon Kosher salt
1 1/2 cups (300g) granulated sugar
3 large eggs
2 1/2 cups (368g/13 oz) shredded zucchini (See Notes)
1/2 cup canola (or vegetable) oil
1/4 cup or 4 Tablespoons (56g) melted, slightly cooled unsalted butter 
2 Tablespoons freshly squeezed lemon juice
2 Tablespoons lemon zest

Lemon Icing
1 1/2 cups (180 g) confectionary sugar, sifted
3 Tablespoons freshly squeezed lemon juice

Directions
Bread
1. Preheat the oven to 375 degrees F. Generously spray two 8"x4" tin baking pans with vegetable spray. Line the bottom of the pans with a piece of parchment paper. Spray the parchment paper and set the pans aside.
2. In a medium sized bowl, whisk together the flour, baking powder, Kosher salt, and poppyseeds. Set aside.
3. In a large bowl, whisk together the eggs and sugar until well blended. 
4. Add in the lemon zest, lemon juice, oil and butter. Whisk until well blended.
5. Fold in the dry ingredients and shredded zucchini until no streaks flour remain (but do not overmix).
6. Pour the mixture evenly into the two prepared pans. Set on a baking sheet and place in the oven.
7. Bake for 40-45 minutes (rotating the pan midway through the baking process) until a toothpick inserted into the bread comes out clean. Place pans on a cooling rack and let rest for 10 minutes before removing from the pans. 
8. Let the bread cool for another 20-30 minutes before pouring on the icing.

Icing
1. In a small bowl, combine the the confectionary sugar and lemon juice. 
2. Whisk until it reaches the desired consistency.
3. Pour over the breads. Use all of the icing!
4. Let the icing set before slicing and serving.
5. Store the Lemon Zucchini Poppyseed Bread with Lemon Icing either wrapped at room temperature or wrapped and chilled in the refrigerator. The bread will be good for at least 3 days, if it even lasts that long.

Notes: (1) When buying zucchini make sure it weighs at least 1 1/4 pounds. As that will get you the 13 ounces (368g) of shredded, squeezed of liquid zucchini you need for this quick bread. After shredding the zucchini on the coarse side of a grater, squeeze as much liquid out it as possible (there will still be some left) and measure out on a scale. If you don't have a scale, press your squeezed shredded zucchini somewhat firmly in a measuring cup. Not as firmly as you would with firmly packed brown sugar, but close. (2) There is enough batter for four 4" mini loaf pans. Baking time will be 30-35 minutes or until a toothpick inserted into the center comes out clean. (3) You will need two large lemons (yes this is rather vague I know) in order to get two Tablespoons of zest and enough juice for both the bread and the icing. (4) If the icing is too thick, add a little more lemon juice. If it is too thin, add a little more confectionary sugar.


 Sunflower Fields, Matthiessen State Park, Oglesby, IL (July 2020)


Sunday, July 19, 2020

Pisco Sour


Imagine waking up to seeing the cabinet of some of your cherished barware unhinged from the wall and all of its' contents shattered on the floor. A nightmare you momentarily wished was just a really bad dream. Only it wasn't. But the horror doesn't end there. Spending three hours cleaning up all of the glass that had flown in a million different directions was an equally scary part. Had it not been for a friend who raced over to help, we might have spent the entire day cleaning up the extremely hazardous mess. Her presence alone caused me to take a few deep breaths to bring my stress level down to a manageable level. As with most unforeseen disastrous events, my coping strategy is usually saying 'well it could have been worse'. The bottle of red wine knocked over in the crash could have splattered all over and permanently stained the tan linen drapes; it could have crashed while friends or family were over for a gathering; the granite counter in the bar area could have been cracked or chipped; the brand new bottle of Casamigos Reposado Tequila knocked off in the crash could have been shattered (if you drink tequila you know this would be a travesty); or, in addition to everything in the cabinet, everything on top of the bar could have been smashed to smithereens. So yes, taking some solace in realizing it could have been much worse helped me get through and past it all. However, in the days following this nightmare, I had to remind myself more than once they were just things. While trying not to dwell on the fact all of treasured those things had a story attached to them. But there are some happy endings to this story. My extensive collection of (new or barely used) Riedel glassware sitting in the basement or stored in cabinets finally saw the light of day. And my favorite martini glasses (stored in another cabinet thank goodness) would now become my favorite Pisco Sour glasses.


My first taste of a Pisco Sour happened awhile back while we dined with some good friends at Tanta, a Peruvian restaurant in Chicago. The first one went down really easy. The second one even easier. Thankfully I wasn't the one driving home as I am known as a cocktail drinking lightweight as compared to some of my friends. Years later while on a cold weekend walking and exploring the city with friends, we made our way to Cabra, another Peruvian restaurant in Chicago. Neither of them had ever had or even heard of a Pisco Sour before. It didn't take too much convincing to suggest they get warmed up by having their first Pisco Sour. As I hoped, they were smitten with them in the first round. Which meant there wasn't any doubt there was going to be a second round. 

The Pisco Sour, a creamy, foamy, sweet, tart cocktail, is the national classic cocktail of Peru. Alleged to have been created in the 1920s by Victor Morris, an American Bartender and ex-pat, at his bar in Lima, Peru, an early version of a cocktail strikingly similar to the Pisco Sour had actually been conceived one hundred years earlier. However, it has been said a recipe for a Pisco Sour appeared in a 1903 edition of a Peruvian cookbook. Some seventeen years prior to when it ultimately came into popularity. To add to all of Pisco Sour's history, Peru isn't the only country citing origination rights. Chile also claims to have invented the Pisco Sour. But regardless of when or where it was developed or whose signature cocktail it is, this frothy, citrusy, sweet, drink is refreshingly resplendent. 

If you a Pisco Sour has never been on your radar before, you absolutely have to try this luscious cocktail! But I must warn you. They go down dangerously fast.

So what exactly is Pisco? Pisco is an unaged, clear brandy distilled from either a single variety or blend of extremely ripe, fermented grapes. As a result of a being distilled only once, a Peruvian Pisco will have a proof of 38 to 48 percent ABV. Pisco is a spirit having its' own unique flavor and personality. 

In other words, there are no substitutions for Pisco in a Pisco Sour. And for a truly authentic Pisco Sour you will need some Amargo Chuncho aka the original Peruvian Bitters. Freshly squeezed lime juice, some simple syrup and an egg white round out the other ingredients in this classic libation.


In order to create a frothy Pisco Sour it needs be shaken, not stirred. And preferably shaken by hand rather than in a blender to create a perfectly emulsified drink. Once all of the ingredients are poured into a shaker it is shaken vigorously for about 20 seconds. It gets another hardy 20 second shake after ice is added to the shaker. The cocktail then gets strained into a clear glass and topped with several dashes of the bitters. 


If it isn't already, it's quite possible a Pisco Sour could become one of your favorite cocktail beverages. Think love at first sip. And as always, drink responsibly.

With the bar cabinet nightmare behind me, with my favorite yoga studio reopening this past week, and with starting the weekend with a Pisco Sour (or two), life in the ever evolving normal is prettty good. At least that is what I am telling myself!

Recipe
Pisco Sour
Makes 1 cocktail

Ingredients
3 ounces Pisco (see notes)
1 1/2 ounces freshly squeezed lime juice (from 2 limes)
1 1/2 ounces simple syrup
1 large (or extra large) egg white (approximately 1 to 1 /4 ounces)
3-5 dashes of Amargo Chuncho (or Angostura) bitters
Ice 
Optional: Lime slice garnish on the glass

Directions
1. Combine Pisco, lime juice, simple syrup, and egg white in a cocktail shaker without ice. Cover and seal. Shake vigorously until egg white is foamy (10 seconds).
2. Add ice to the shaker and shake again vigorously until well-chilled (10 seconds).
3. Strain into a cocktail glass.
4. Add 3-5 dashes of the bitters on top of the egg-white foam.
5. Sit back, sip, and savor.

Notes: (1) Recommend the Peruvian Barsol Pisco. (2) Recommend using the Peruvian bitters Amargo for the most authentic Peruvian cocktail. (3) For a fancy finish to the Pisco Sour use a dropper when adding dashes of the Amargo Chuncho bitters to the top of the frothy egg white. Use a toothpick to create a design with the droplets. I couldn't find my dropper when I made these Pisco Sours, thus the rather rustic finish to them. (4) The first Saturday in February is International Pisco Sour Day. But don't want until them to have one.

Wednesday, July 15, 2020

Atlantic Beach (Lemon-Lime) Pie


Six years ago was when I first saw the recipe for Bill Smith's Atlantic Beach Pie. For some reason I resisted making the recipe as I thought it couldn't possibly hold up to its' hype. Every now and then I would see Instagram posts of the pie. As if it were stalking me, teasing me to reconsider the error of my way. And honestly, I was enticed to make it on more than one occasion, but I remained steadfast in my 'no, no, not going to make it' position. This week I discovered the uncharacteristically 'dig my heels in' stubbornness caused me to waste six years of my life. Yes, I had denied myself the experience and pleasure of relishing a pie made with a buttery, sandy, salty crust; a citrusy lemon-lime custard filling; and, a cool creamy freshly whipped cream topping. Nothing short of pure summer pie perfection. This relatively simple pie, one with having a sweet-tart-salty kind of complexity to it, is one no one should wait six years, six months, or even six days to make. Take it from me. Do not deny yourself this kind of satisfying deliciousness. The Atlantic Beach (Lemon-Lime) Pie is worthy of all the hype, accolades, and adulation it has received and will undoubtedly continue to receive for the unforeseeable future. No dessert may be more gratifying on a hot summer day than this pie. 


Just in case you have missed the back story behind chef Bill Smith's Atlantic Beach Pie recipe, here's the Reader's Digest version. He grew up along the sea coast of North Carolina being told if you had dessert after a fish dinner it may be the very last thing you ever ate. But a lemony dessert was the one exception to this strange folklore. Which explains, in part, how Atlantic Beach Lemon Pies became the only dessert offered in seafood restaurants in North Carolina way back in the 1960s. When asked to teach some fellow chefs traditional North Carolina recipes, Bill Smith did some research and created his version of an Atlantic Beach Pie. Replacing the original meringue topping with whipped cream and adding a sprinkling of sea salt, his restaurant in Chapel Hill ran out of his version of the pie on a daily basis. Somehow the local popularity of this pie caught the attention of NPR. After he appeared on a segment of "All Things Considered", well, the pie was soon being touted and made by a multitude of foodbloggers. Now years later, this pie continues to live on. Being socially unacceptably late to the Atlantic Beach Pie making and eating party isn't a good enough reason not make it. Time to pull up my big girl panties and admit I was wrong about this pie. And boy, was I wrong! So here's my way of offering a kind of apology to the Atlantic Beach Pie. In comes in the form of perpetuating the popularity of this pie by sharing my ever so slightly tweaked version. Apologies aside, I hope to convince you that you absolutely NEED, MUST HAVE this pie in your life. That is, if you want to life your best life!


There is enough Saltine cracker crumbs and butter in the crust to make this pie in a 9" (rather than an 8") pie or tart pan. Because a 9" pie is large enough to serve 8 to 10 people, depending on how you slice it. 


Saltine crackers create a much lighter, but insanely tasty pie crust. Crushed Saltines, some granulated sugar, and unsalted butter all gets blended together in a food processor. The key to creating a great, textured Saltine cracker crust is to not let the crackers get pulverized to dust. After pressing the crust mixture into a 9" pie plate, it goes into the freezer for 15-20 minutes to ensure the crust holds its shape when baked.


While the crust is pre-baking in the oven for 18-20 minutes (or until it starts to take on a golden hue), the ingredients for the filling are whisked together. Eggs and sweetened condensed milk are blended together first. Followed by the freshly squeezed lemon and lime juices, a pinch of sea salt, and some zest. The thoroughly blended filling gets poured into the slightly warm crust and bakes for 16 minutes. Which is the amount of time needed for the filling to set up. 

Once the baked pie cools, it is wrapped and refrigerated overnight. The pie needs to be well chilled before being sliced. So make the Atlantic Beach (Lemon-Lime) Pie (sans the Whipped Cream Topping) the night before you plan on serving it. Immediately before or up to several hours before it's served, whip up some heavy whipping cream with confectionary sugar and a pinch of Kosher salt. Overall, this is one of those easy-peasy, almost effortless desserts.


The Atlantic Beach (Lemon-Lime) Pie has been described as a cross between a Key Lime Pie and Lemon Meringue Pie. Or in other words, it's the best of both of those pie worlds.

In all seriousness, this may be one of the most refreshing pies you have ever tasted. One always worth saving room for at the end of a meal (even if it's not fish or seafood) and one definitely worthy of turning the oven on for. Even if it's a sweltering hot, humid day. If you are a fan of citrusy desserts, you will be instantly smitten with this Atlantic Beach (Lemon-Lime) Pie in the first bite. 


If these last four months of living in this new altered state have (re) taught me anything, it's that you never know just how much you are missing out on when you dig your heels in. I still can't believe it took me this long to see the error in my thinking about this Atlantic Beach (Lemon-Lime) Pie. Having now had a taste of this sweet-salty-tart summer time perfection, I feel like my life is now a little more complete. So have you been convinced to make it? I certainly hope so!
Recipe
Atlantic Beach (Lemon-Lime) Pie (inspired by Bill Smith's Atlantic Beach Pie recipe)
Serves 8-10, depending on how you slice it

Ingredients
Crust
60 Saltine cracker squares (200g)
3 Tablespoons granulated sugar
10 Tablespoons (141g) unsalted butter, room temperature

Pie
4 large egg yolks
14 ounce (396 g) can of sweetened condensed milk
1/2 cup (120 ml) freshly squeezed lemon and lime juice (preferably equal parts of each but at least a 2/3 lemon and 1/2 lime mixture)
Pinch of sea salt
About a teaspoon of zest from a lime and lemon
Flaky sea salt for finishing

2 cups heavy whipping cream
3 Tablespoons confectionary sugar
Pinch of Kosher salt
More zest for garnish (optional)

Directions
Crust
1. Preheat oven to 350 degrees (F).
2. In the bowl of a large food processor, crust the crackers to an almost fine (not dust) consistency. Add in the sugar, pulse to combine. Add in the butter and process until the butter is blended in.
3. Press the crust into a 9" pie pan (use metal if you have one). Place in the freezer for 15-20 minutes.
4. Set the pie plate/tin on a baking sheet. Bake for 16-18 minutes our until the crust begins to turn golden.
5. Remove from oven and set on a cooling rack. Now make the filling.

Pie
1. In a medium size bowl, whisk the egg yolks and sweetened condensed milk. Then whisk in the freshly squeezed juice, pinch of sea salt, and zest until the mixture is thoroughly combined.
2. Pour the pie filling into the slightly warm pie crust. Lightly sprinkle with flaky sea salt. 
3. Bake the pie for 16 minutes (the filling should set in that amount of time).
4. Remove from the oven and place on a cooling rack. Let cool, then cover and place in the refrigerator overnight. Note: The pie needs to be completely chilled before slicing.
5. In the bowl of a standing mixer fitted with a whisk attachment, whip heavy whipping cream, confectionary sugar, and pinch of Kosher salt until stable peaks form.
6. Either dollop and spread the whipping cream on top of the chilled pie or put the whipped cream in a pastry bag fitted with your favorite tip(s) and pipe onto the pie. Lightly sprinkle with some lemon and/or lime zest, if using.
7. Slice, serve, savor, and swoon. 

Notes: (1) For 1/2 cup of freshly squeezed lemon-lime juice, you will need 1 large lemon and 3 limes. Alternately you could also use 1 1/2 lemons and 2 limes for a filling with a slightly more lemony flavor. (2) For a more stable whipped cream add three ounces of room temperature cream cheese into the whipped cream. (3) Some suggest serving the whipped cream on the side versus spreading it over the top of the pie. You decide what works for you. You can guess how I like to serve it.


Early morning in Key West, Florida (August 2018)

Saturday, July 11, 2020

Levain Style Chocolate Chip Cookies


Apparently I have a thing for chocolate chip cookies. Or maybe I will never be satisfied. Ever since discovering and sharing the recipe for Tara's Chocolate Chip Cookies, I was convinced I never needed another chocolate chip cookie recipe in my life. Actually I never thought I would ever entertain the idea of making another version of a chocolate chip cookie. Evidently I had been holding out believing the sage old advice of 'never say never'. But two completely random events caused me to ultimately cave. The first was when a friend sent me a packet of recipes, including one for a Levain style chocolate chip cookie, she thought I might be interested in making. Considering she lives more than two thousand miles away, this was clearly a thoughtful, selfless gesture. In other words, she wouldn't get to be a taste tester. While scrolling through Instagram posts, I came across a posting from hi.imadehtis featuring a showdown of seven copycat Levain Bakery chocolate chip cookies. Call it serendipitous, but the chocolate chip cookie recipe sent by my friend and the winning showdown recipe were one in the same. I took it as a sign from the universe. One I couldn't ignore. 


This wasn't going to be my first attempt at replicating the Levain style chocolate chip cookies. Last year I shared the recipe for Gigantic Chocolate Chip Cookies, my version of one shared by foodblogger, cookbook author Stella Parks. And just like that recipe, I tinkered with the Copycat Levain Chocolate Chip Cookie recipe from Delish. Three of the changes made were intentional, but one was an unintentional oversight. But that unintentional change turned out to be a fortuitous one. Could I choose a favorite between the Gigantic Chocolate Chip Cookies and these Levain Style Chocolate Chip Cookies? I can't. Because I really, really liked them both. However, if I wanted to satisfy my craving for a ginormous chocolate chip without having to wait more than 3 hours, then I would make these cookies. If I could show some restraint, I would make the Gigantic Chocolate Chip Cookies.


So you might be wondering, if I already had a recipe for a Levain style cookie, why would I make another version? Like I said earlier, maybe I will never be satisfied. But in all seriousness, everything about this Levain Style Chocolate Chip Cookie defies everything I thought I knew about making cookies. Not only does it use cold butter, thus eliminating the need to take butter out to come to room temperature, it mixes in the chocolate chips and toasted walnuts before the flour is mixed in. What??!! And that's not all. The eggs are the last ingredient to be mixed in! The process of making these cookies was such a significant departure from all of the other cookies I have ever made, chocolate chip ones aside, caused me take pause. I almost didn't make them. Thank goodness I over rode my cookie baking instincts this time!


From start to finish you can be eating a incredibly delicious, satisfying, warm Levain Style Chocolate Chip Cookies in slightly more than three hours! For those of you with a limited ability hold off satisfy ing a craving, these are the cookies are for you!


When making these cookies, I strongly recommend you look for larger sized chocolate chips (not the regular, average sized ones) as you really want the chocolate to have a strong presence in each bite of the cookie. Additionally, use toasted versus instead of raw walnuts as toasting them is game changing flavor enhancer in any cookie. 

This recipe makes eight GINORMOUS cookies. Each ball of dough weighs a little more than 6 ounces (172-176 grams). If you don't have a scale, evenly divide the dough into eight large balls.

When baking a batch of these cookies, you will need two baking pans. One for the cookies to bake on and one turned upside down underneath the pan holding the cookies you are baking. Turning one of the baking pans upside down helps to prevent the bottom of the cookies from getting too dark as they bake at a relatively high oven temperature (375 degrees F) for a relatively long time (24-26 minutes). And due to the size of these cookies, bake the eight (8) balls of dough in two batches.

Cookies and ice cream or cookies and milk? Which kind of chocolate chip cookie eater are you? And, yes, you can be both. You don't have to choose which one to go with these crispy on the outside, slightly doughy on the inside monstrously scrumptious, oh so satisfying cookies. Just when you think you didn't know or even believed your life needed another chocolate chip cookie recipe, one comes along to tempt you. To prove you should say never say never. If you have gotten this far in the blog post, the universe has now also sent a 'you need these Levain Style Chocolate Chip Cookies in your life" message to you. 

Recipe
Levain Style Chocolate Chip Cookies  (inspired by the Copycat Levain Bakery Cookies from Delish)
Makes 8 ginormous cookies

Ingredients
2 cups (260 g) all-purpose flour
1 cup (113 g) cake flour
2 teaspoons baking powder
1/2 teaspoon baking soda
1/2 teaspoon kosher salt
1 cup (8 oz/226 g) unsalted butter, chilled and cubed (recommend a European-style butter)
2/3 cup (134 g) light brown sugar (or combination of light and brown sugar) - See Notes
2/3 cup (134 g) granulated sugar
2 teaspoons vanilla
2 cups (340 g) dark chocolate, chocolate chips - See Notes
1 cup (4 oz/112g) walnut halves, toasted, very coarsely chopped
2 large eggs, lightly beaten
Flaky sea salt for finishing (optional, but really good)

Directions
1. Combine the all-purpose flour, cake flour, baking powder, baking soda and kosher salt in a medium sized bowl. Whisk to combine. Set aside.
2. Using a standing mixer fitted with a paddle attachment, beat cold butter on low speed until the butter cubes lose their shape (about 30-45 seconds).
3. Beat in the granulated sugar (about 30 seconds)
4. Beat in the brown sugar and vanilla (about 30 seconds). Mixture will be thick and creamy.
5. Mix in the chocolate chips and walnuts to distribute evenly in the batter (about 30 seconds).
6. On low speed mix in the dry ingredients in three additions. Do not over beat, but there should be no streaks of flour showing.
7. Add in the lightly beaten eggs in two additions. Beat until mixture forms a cohesive dough.
8. Divide the dough into 8 balls. Balls of dough will weigh slightly more than 6 ounces each (or 172-176 g).
9. Place the balls of dough on a baking sheet, lightly cover with plastic wrap and chill in the refrigerator for 2-3 hours.
10. Preheat oven to 375 degrees (F). Get out two baking sheet pans Line only one baking pan with parchment paper. 
11. Place 4 balls of the cookie on the parchment paper lined baking sheet. Lightly sprinkle with flaky sea salt. Place this baking sheet on top of an upside down baking sheet so the bottoms of each baking pan are touching. (Yes, you are using two baking sheets.)
12. Bake cookies for 22-24 minutes or until the edges and spots on top are lightly golden. Do not over bake the cookies. Let cookies rest on the cookie sheet for at least 5 minutes. 
13. Remove from baking sheet and place on a cooling rack. Let cool slightly or let come to room temperature before serving. 
14. Store any left over cookies in a tightly sealed container or wrap in a cellophane bag.

Notes: (1) I used a combination of light and dark brown sugars, about a 2/3 to 1/3 ratio. (2) I used Nestle's 53% Cacao chocolate chips because of their larger size. Next time I make them I would increase the amount of chocolate chips to at least 2 1/4 cups (383 g). (3) To toast walnuts, preheat the oven to 350 degrees (F). Place walnut halves on a baking sheet and bake for approximately 10 minutes. (4) There were multiple changes made to the inspiration recipe: cake flour was decreased from 1 1/4 cups to 1 cup, kosher salt was increased from 1/4 teaspoon to 1/2 teaspoon, 2 teaspoons of vanilla were added, and the cookies were topped with flaky sea salt.