Monday, October 31, 2016

Iced Sugar Cookies


When one of my friends put out a platter of Halloween inspired Iced Sugar Cookies, I immediately asked 'where did you get them?'. Turns out she was the one who made those absolutely gorgeous, incredibly delicious, almost too pretty to eat cookies. My envy was apparent as I couldn't stop gushing over her cookie works of art. A week later I had the recipe. While her cookies were decorated with all of the finesse of professionally trained pastry chef, it turned out I was able to successfully channel my inner 10 year old for my first time at bat making and decorating cookies with royal icing. Yes, first time. Which explains in part why the cookies intended to pay homage to the Chicago Cubs (that hometown team currently playing in the World Series) had more than a little bit of a whimsical look to them.

My initial cookie decorating plan was a little on the ambitious or rather overly ambitious side. Clearly I had overestimated my 10 year old artistic abilities when I embarked on this cookie making endeavor. Although the mess I made in the kitchen lived up to or possibly exceeded the work of any 10 year old. So instead I thought I would take some inspiration from one of Cubs Manager Joe Maddon's maddonisms. 'Do simple better.' As it turns out, simple can be a pretty good thing in both baseball and the making of iced sugar cookies.


In spite of taking some photos of the baked and iced cookies, I wasn't sure I was going to post these recipes to the blog as the finished cookies seemed to be in a 'league of their own'. But then the more I thought about why I created this blog in the first place I decided I would. Unless we take some risks with our baking and cooking, we won't ever know what we might be able to create, what we are capable of, what we might learn along the way, or what pleasure might be derived from making and eating them. In other words, playing it safe (at least in the culinary world) isn't always a good thing.


With two other sugar cookie recipes on the blog (Randee's Iced Sugar Cookies and the Sugar Saucers inspired by Rebecca Rather) why would I share a third one? Partly because each one is different. But mostly because this cookie was too good not to share.


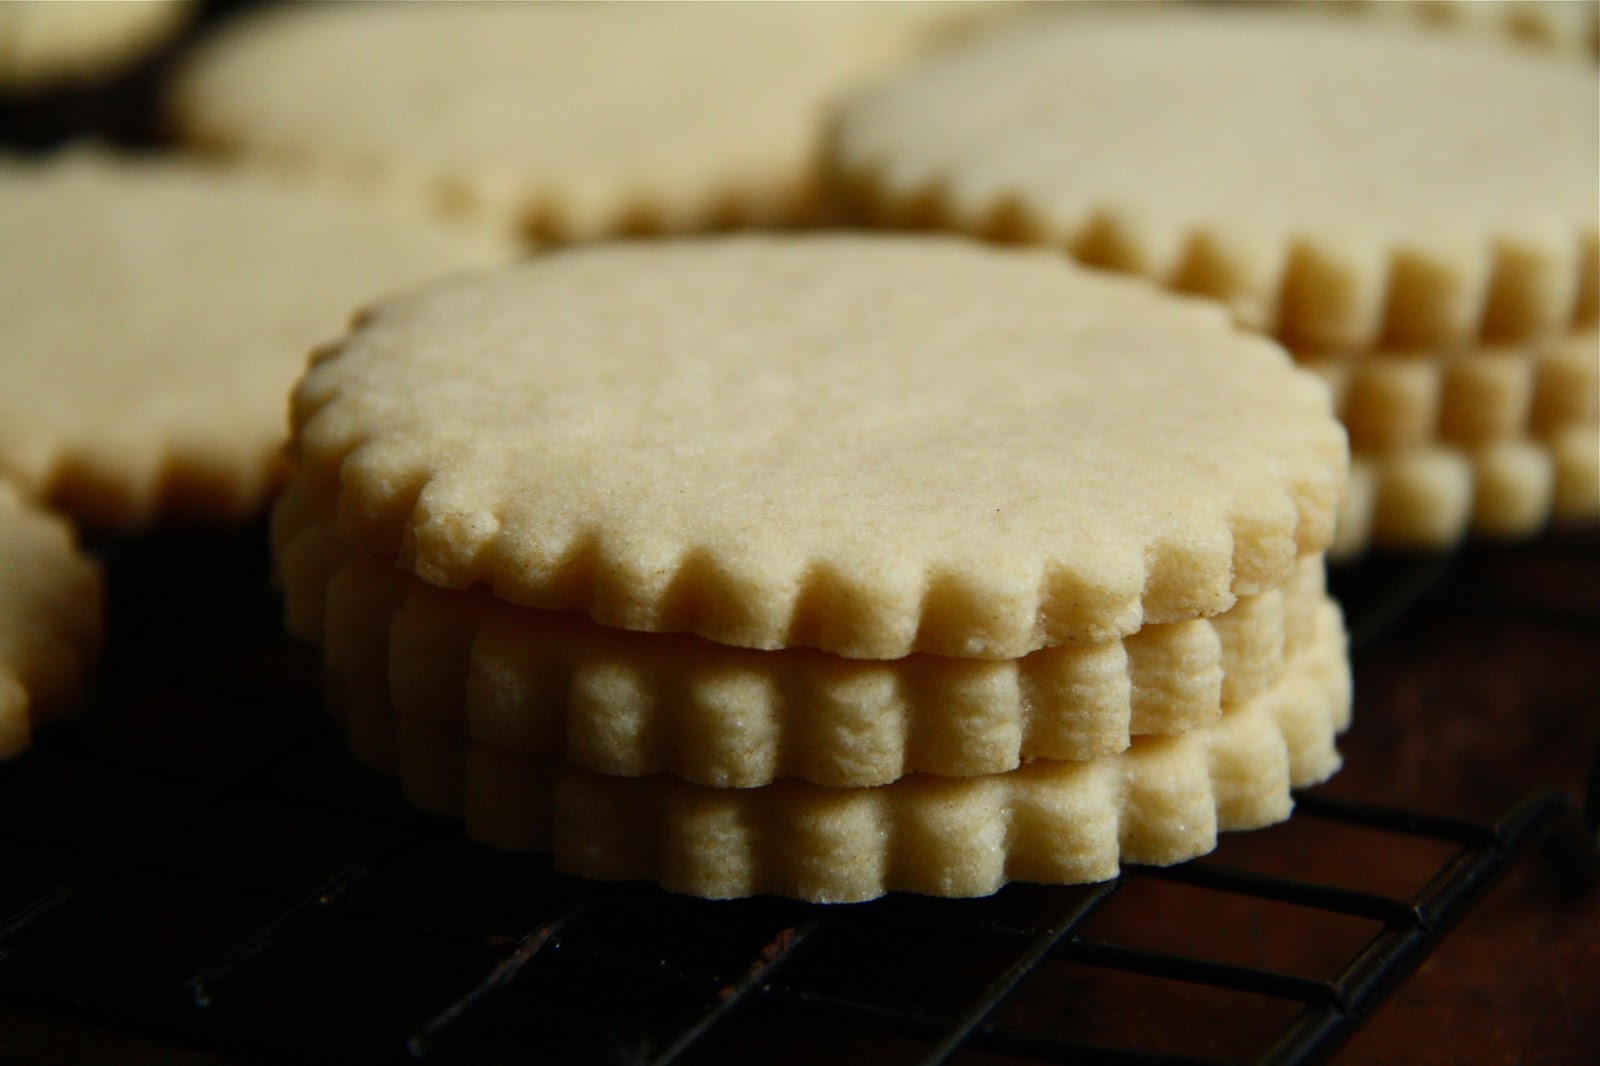
If there was ever a cookie dough that rolled out perfectly, this may be the one. For those of you having a cut-out cookie phobia, these may be the cure you have waited your whole life for. And the best part? No chilling is required. One of the keys to these awesome sugar cookies is rolling out the dough to a 1/4 inch up to a 1/3 inch thickness. The result is a sugar cookie that feels and tastes sort of a like a shortbread cookie. 


I made a couple of ingredient changes to the inspiration recipe. I increased the amount of vanilla from 1 teaspoon to 1 1/2 teaspoons and I added 1 teaspoon of kosher salt. My baking time was closer to 13 minutes (for an almost 3 inch in diameter cookie) instead of the recommended 6 o 8 minutes. Personally I like the hint of almond flavor in these sugar cookies, however, if you aren't an almond flavor fan, I would recommend increasing the amount of vanilla to 2 teaspoons. 

Admittedly I am not a royal icing expert. So before I made the icing I found it helpful to read a few postings (one from Sweetambs and one from Annie's Eats and watch a couple of videos online. The video posted by Julia Usher was really helpful.

My royal icing was initially on the too thick side. Adding a little bit of water was all it needed to get it to the desired consistency. I used #3 and #4 tip sizes in the making of these cookies. For this sized cookie, next time I would use #2 and #3 tip sizes. Numbers 2 or 3 for outlining and number 2 for the detail work. For smaller cookies or finer designs #1 tip may work best. My icing was colored with either a gel or paste. The liquid food coloring used in the making of cupcakes and cakes does not work well with royal icing.

Allow the iced cookies to get before packaging or storing in a container. While the cookies may look dry on the surface, they still retain some moisture. I learned that the hard way when I put a layer of parchment paper between the cookies. Some of the cookies 'bled' and lost some of their whimsical prettiness. Some cookie experts out there recommend waiting 24 hours before packaging them (I must have skimmed over that recommendation). 


Even if you don't want to make the royal icing, make THESE sugar cookies. For the sake of simplicity, ice them using the icing recipe in Randee's Sugar Cookies. But who knows, you might hit a home run out of the park on your first try at making and decorating cookies with royal icing!

For years I would look at those large over-sized cookie cutters and think 'why?'. Having now made these sugar cookies, I am now thinking 'why not!' Decorated, as fancy or simple as one's cookie-loving heart desires, they would make beautiful gifts, be great place cards, make for fun favors, serve at a party, and/or make to celebrate an event. Like the World Series. Although with the outcome of the World Series yet to be decided, I will share another Maddonism. "I'm not superstitious. I'm just a littlestitious." So I will just end this post by saying Go Cubbies! 

Recipe
Iced Sugar Cookies (sugar cookie recipe adapted from The Best Sugar Cookie Recipe shared by In Katrina's Kitchen and icing recipe adapted from the royal icing recipe shared by Moms and Munchkins)
Makes approximately 30-33 cookies (2 1/2 inch sized)
Updated April 2022

Ingredients
Sugar Cookies
1 cup (226g) unsalted butter, room temperature
1 cup (200g) granulated sugar
1 1/2 teaspoons vanilla (or 2 teaspoons in not using the almond extract)
1/2 teaspoon almond extract
1 large egg, room temperature
2 teaspoons baking powder
3 cups (390g) all-purpose flour
1 teaspoon kosher salt

Royal Icing
2 pounds (906g) confectionary sugar
1/2 teaspoon cream of tartar
5 large egg whites (look for eggs labeled pasteurized)
1 Tablespoon clear vanilla extract
Food gels and/or pastes in colors of your choice

Directions
Sugar Cookies
1. Preheat oven to 350 degrees (F). Line two baking sheets with parchment paper and set aside.
2. In a medium sized bowl, combine flour, baking powder and salt. Set aside.
3. In the bowl of a standing mixer fitted with a paddle attachment, cream butter and sugar until light and fluffy (approximately 4-5 minutes).
4. Beat in egg and extracts.
5. Add in dry ingredients in three batches. Mix until incorporated and dough is smooth. Note: Dough will be stiff, but pliable. 
6. Remove half of dough from the bowl. Form into a disk and roll out dough to 1/4" to 1/3" thickness on a lightly floured surface. Note: You do not want your cookies to be thin, but rather be on the thicker side.
7. Cut into desired shapes and transfer to parchment paper lined baking sheets. Space cookies about an inch apart. Note: Cookies should not spread.
8. Bake cookies for 10-14 minutes or until lightly browned on the underside. Note: Baking time may increase or decrease based on the size of the cookies.
9. Allow cookies to cool on cookie sheet for 5 minutes before transferring to a cooling rack.
10. Cool cookies completely before icing.

Royal Icing
1. Place powdered sugar and cream of tartar in the bowl of standing mixer. Stir to blend.
2. Add in egg whites, stirring by hand until sugar is moistened. Note: If mixture is too dry, add another egg white.
3. Place whisk attachment on mixer. Begin beating on low speed until egg whites are thoroughly mixed in.
4. Increase speed to high  and beat for approximately 3 minutes our until icing is silky, smooth and light.
5. Beat in vanilla. Note: Using a clear vanilla extract helps to keep the color of the icing a purer white.
6. If icing is too thick, thin with water. Icing should have a thick but not stiff consistency.
7. Divide icing into bowls to add food gel and/or paste in colors of your choice. 
8. Place icing in icing bags fitted with pastry tips (sizes 2, 3, 4 or 5). Keep unused icing tightly covered so it does not dry out.

Notes: (1) Un-colored Royal icing can be stored in the refrigerator for 5-7 days. Bring to room temperature before using and mixing in food paste and/or gel. (2) Instead of using egg whites can use meringue powder but eliminate use of cream of tartar. Follow directions on meringue powder container to determine how much to use. (3) If you don't like the flavor of almond in your sugar cookies, increase the amount of vanilla to 2 teaspoons. (4) When storing these cookies, do not stack them on top of one another or put a layer of paper between them. Although the cookies appear to be dry after several hours, the retain some moisture so they may bleed if covered in paper. (5) Recommend using the plastic disposable pastry bags for use with the icing.


 Morton Arboretum on a cloudy day in October (2016)


Wednesday, October 26, 2016

Corn Muffins


This past weekend was marked by the first roaring, crackling fire of the season. The temperature outside finally dipped down low enough where a fire was needed to take the chill out of the air in the house. The house I grew up had neither a wood burning nor gas fireplace. Although at Christmas we did have one of those large faux red brick corrugated cardboard fireplaces to hang our stockings from. Not quite the same experience as having a 'real' fireplace. The only time in my life I wished I had a gas instead of a wood burning fireplace was when the power went out during a three day east coast blizzard and I became a fireplace slave. At some point during the second day, of what felt like a return to the Little House on the Prairie life, I wondered if the early settlers and pioneers were sleep deprived or if they just adjusted to various states of frozenness. Because keeping a fire going morning, noon, and night was exhausting (and I didn't even have to cut the wood!). The kind of exhaustion you might temporarily feel after an hour of sculpt yoga, any long run over 13.1 miles, or a several hour high elevation hike. Fortunately I live in a house with one working wood burning fireplace (the repairs needed for the second one have yet to be done). Rather than generating warmth needed for physical survival, this fireplace now has the primary function of creating ambiance to warm and soothe the souls of everyone sitting near it.


Admit it. A corn muffin with golden brown, slightly domed tops is something we find incredibly appealing. They may, in fact, borderline on being lust worthy. Conversely, corn muffins pale in color with flat or caved in tops are ones we might wrinkle our noses at, or eat only if desperately hungry. And when we come across a domed top, golden brown muffin, rich with buttery corn flavor and perfectly moist, we know we have finally arrived in Corn Muffin heaven. After thanking the powers that be for creating such a gift, we pledge to never ever eat any other corn muffin not living up to this gold(en) standard. Even if we are starving. Thanks in large part to Cook's Illustrated, we no longer have to search far and wide for the seemingly illusive, most delectable corn muffin on the planet. We can now make them ourselves whenever we want. For breakfast, for lunch with a warm bowl of soup, for dinner with a hot bowl of chili, or just because you crave them.


In the past several weeks I made these Corn Muffins twice. The first time because I have long wanted to find a recipe for sweet, buttery, moist Corn Muffins. The second time was because I had a craving for sweet, buttery, moist Corn Muffins. These might fall into the category of rather addicting comfort food.

There ingredients in this recipe are pretty similar to those found in other corn muffin recipes. However, the technique for making them is decidedly different from most others out there.


To keep the cornmeal flavor at the forefront of these muffins while ensuring they had great texture and moistness, Cook's Illustrated discovered the secret was cooking some of the cornmeal with milk to a polenta like, porridge consistency. The result of using a combination of slightly cooked and dry cornmeal in the batter is a feast for the eyes, tender crumb, buttery rich flavor corn muffin.


The sugar, slightly cooled melted butter and sour cream help to bring down the temperature of the milk/cornmeal mixture to ensure the eggs aren't 'cooked' when added in to the batter. If your batter is a little too warm to the touch, allow it to sit for a couple of minutes before whisking in the eggs. Use a spatula or wooden spoon to stir in the dry ingredients as once everything comes together, the batter will become very thick.


When making cupcakes or some muffins, the recommendation is usually to fill the cups 2/3's full. However, the batter will be slightly mounded up over the top of the cupcake papers for these corn muffins.


They are baked for 14-17 minutes in a preheated 425 degree oven or until the tops are golden brown and spring back when lightly pressed. Or alternately insert a toothpick in the center of the muffin. If it comes out clean, the muffin is done. Before removing the muffins from the tin, allow to cool for at five minutes.

Serve these muffins warm, at room temperature, or reheated with honey and/or butter.


These Corn Muffins are moist on the inside, yet have an almost slightly caramelized, crunchy exterior surface. They are pure perfection.


Some of you might be wondering if corn muffins and cornbread are interchangeable terms for the same thing. And actually they aren't. The most significant difference between the two is no sugar and sugar. Most traditional cornbreads do not use sugar as an ingredient, while sugar plays an important role in the corn muffin.

Speaking of sugar, I made two changes made to Cook's Illustrated recipe. The first was increasing the amount of sugar in the batter from 3 Tablespoons of 1/3 of a cup. The second was sprinkling the tops with sanding sugar. When making these corn muffins, increase the amount of sugar in the batter to at least 1/4 cup (equivalent of 4 Tablespoons) but no more than 1/3 cup. The sanding sugar on the top is optional and matter of personal preference. Kind of like preferring a wood burning fireplace to a gas fireplace. One isn't necessarily better than the other, it's all about what makes you the happiest.

Recipe
Corn Muffins (slight adaptation of the Savory Corn Muffin recipe in the new Cook's Illustrated cookbook, Cook's Science: How to Unlock Flavor in 50 of our Favorite Ingredients)
Makes one dozen muffins

Ingredients
2 cups yellow (fine, medium, or a combination of fine and medium grind) cornmeal, divided
1 cup all-purpose flour
1 1/2 teaspoons baking powder
1 teaspoon baking soda
1 1/4 teaspoons kosher salt or fine sea salt
1 1/4 cups whole milk
1 cup sour cream
8 Tablespoons unsalted butter, melted and cooled
1/4 - 1/3 cup granulated sugar (See Notes)
2 large eggs, room temperature
Optional: Sanding sugar

Directions
1. Preheat oven to 425 degrees (F). Line a 12 cup muffin pan with cupcake papers or squares of parchment paper.
2. In a medium sized bowl, whisk together 1 1/2 cups cornmeal, flour, baking powder, baking soda and salt. Set aside.
3. In a heavy bottomed saucepan, combine the remaining 1/2 cup of cornmeal with the milk. Over medium-high heat, cook mixture until it has a thick batter or polenta-like porridge consistency (approximately 4-6 minutes of cooking time). Note: Stir continuously. Transfer to a large bowl.
4. Add the butter and sugar into the milk/cornmeal mixture.  
5. Add the sour cream, stirring until no streaks appear.
6. If mixture is cooled enough, whisk in eggs until combined. Note: If mixture is too hot, wait 5 minutes before adding eggs.
7. Fold in flour mixture until the batter is smooth and thick.
8. Using an ice cream scoop, divide the batter evenly amongst the prepared muffin cups. 
9. Bake until tops are golden brown and the top of the muffin bounces back when lightly pressed. Approximately 14-18 minutes. Allow to cool in pan for at least 5 minutes before removing and transferring to a wire rack to cool for an additional 5 minutes.
10. Serve warm with room temperature butter and/or honey.
11. Store muffins in a tightly sealed container or ziplock storage bag. 

Notes: (1) Cook's Illustrated recommended using 3 Tablespoons of sugar. I used 1/4 cup of sugar in the first batch of the corn muffins and 1/3 cup of sugar on the second batch. The 1/3 cup of sugar yielded the kind of sweetness I love in a corn muffin. (2) Do not use white cornmeal or coarse grain cornmeal. I used Bob's Red Mill Yellow medium-grind cornmeal. (3) My baking time was almost 16 minutes. (4) I sprinkled mine with sanding sugar for an added bit of crunch and sweetness, but if you are serving them with a savory dish (e.g., soup or chili) omit the sanding sugar.


Cows grazing on a misty morning along the Sakonnet River in Little Compton, Rhode Island.

Monday, October 17, 2016

Sloppy Joe Sliders with Avocado Crema and Jalapeños


Early on many of us learned there are some unwritten, somewhat ambiguous, riddled with exceptions rules in life. Depending on where you grew up, where you live now, how attentive you were in your early adult life, or whether or not the mere thought of a rule sends you spiraling downward, the customs and etiquette around food and social gatherings is a bazillion shades of gray. Living in the Midwest for approximately 95% of my life, being brainwashed by Martha Stewart while in my still impressionable early twenties, and suffering from the vice known as 'perfection', has significantly influenced my food and social gathering set of maxims. In my world, all social gatherings must involve some kind of food, semi- or full out homemade, as well as beverages, preferably alcoholic in nature. Whether it's simply serving a big bowl of microwaved popcorn and ice cold bottled beer or a four-course dinner accompanied by some great bottles of wine, my so-called book of social gathering and food rules has undergone a myriad of nuanced changes over the years. However, one thing hasn't changed. Doctoring up a packaged mix or can of Manwich Sloppy Joes would be nothing short of committing a sacrilegious act along with reliving a bad childhood memory. Sloppy Joes must be made from scratch Well, sort of. Bottled ketchup, sweet chili sauce, Worcestershire sauce, and hot sauce are amongst the list of ingredients one might put into the semi-homemade category.

\

For years my recipe for homemade Sloppy Joes came from a fellow co-worker. Amongst the gifts my childhood best friend gave me for my birthday this year was the Foster's Market Favorites, the 25th Anniversary Collection cookbook. One of Sara Foster's recipes immediately catching my attention was the Sloppy Joes Topped with Cheddar Cornbread, a kind of Sloppy Joe casserole. For a moment I considered making this casserole version. Then I came across a Cornbread Muffin recipe while looking through an old Cook's Illustrated magazine. Abruptly I switched gears and decided to make the Sloppy Joes sans the cornbread topping as well as try the new muffin recipe. Using Sara's Sloppy Joe recipe and being inspired by the use of Avocado Crema as an accompaniment, I hoped these Sloppy Joe Sliders with Avocado Crema and Jalapeños would be the new, next best, homemade Sloppy Joes in my life.


Before you scroll down to the list of ingredients listed in the recipe below, let me take a Johnny Carson mind-reading Karnack moment and tell you not to be dissuaded by what may seem like a long list. In order to achieve thicker than soup Sloppy Joes, ones having a spicy-sweet tang, each and every one of these ingredients is needed to build their deep, layered savory flavor.

The original recipe called for two (2) pounds of ground beef. With so many ground beef options, I decided to use a combination of Ground Round (85% lean) and Ground Chuck (80% lean). There is flavor in fat, but too much or too little fat results in either a too fatty or too dry taste to a Sloppy Joe. The Ground Round, Ground Chuck mixture worked better than well (See Notes below). Additionally I increased the amount of the beef to almost two and a half pounds (2.34 pounds to be exact) in order to achieve a meatier Sloppy Joe consistency.


To achieve the maximum flavor possible and an uber thick hearty texture, the Sloppy Joes were cooked over low heat for almost 45 minutes after all of the ingredients had been added.


One taste of these Sloppy Joes and your taste buds will be tantalized in ways you never imagined Sloppy Joes were capable of doing.


While it may seem like a slightly non-traditional combination, I beg you to fully embrace the concept of topping these Sloppy Joe Sliders with Avocado Crema and Jalapeños. The sweet-spicy tang of the meat mixture, the cool creamy taste of the crema, the crunch of the sliced (jarred) mild jalapeños, and richness of the bread will completely transform all perceptions one may have on these 'messy to eat' sandwiches. They might also have you wondering how this much awesomeness had been missing in your life.


This Avocado Crema recipe is easy to make. A cup of sour cream (or Mexican Crema), a whole ripe, diced avocado, juice from half of a small lime (about a teaspoon) and a pinch of kosher salt whirled together in the food processor until creamy takes less than a couple of minutes to come together. When assembling the sliders, top the meat mixture with a tablespoon of the crema and several jalapeño slices. Note: I used the mild-deli instead of the hot jalapeños, but if you like added heat, go for it!


As much as I had loved the Sloppy Joe recipe I had been using for years, these call into the over the moon category. Whatever preconceptions you have about Sloppy Joes, be prepared to have your mind-blown and food rules changed. These are the kind of rule changing, throwdown worthy Sloppy Joes one gladly put up against anyone claiming to have their 'best' sloppy joe version.

To round out a meal where the Sloppy Joe Sliders with Avocado Crema and Jalapeños are the main course, serve with Calico Coleslaw, ridged potato chips, domestic/imported bottled beer and/or margaritas. These sliders would be also be memorably great served as a hearty appetizer.

Recipe
Sloppy Joe Sliders with Avocado Crema and Jalapeños (slight adaptation to Sara Foster's Sloppy Joes Topped with Cheddar Cornbread recipe shared in her cookbook Foster's Market Favorites)

Ingredients
Sloppy Joes
1 Tablespoon vegetable or canola oil
1 large onion, diced
2 1/4 - 2 1/3 pounds of ground beef - equal parts Ground Round (85% Lean) and Ground Chuck (80% Lean)
1 teaspoon chili powder
1/2 teaspoon garlic powder
1 1/2 teaspoons kosher salt
1/2 teaspoon black pepper
1 jalapeño, cored, seeded, and diced
2-3 garlic cloves, minced
1 cup ketchup 
1 cup sweet chili sauce
2 Tablespoons Worcestershire sauce
2 Tablespoons balsamic vinegar
1 teaspoon hot sauce
1/2 teaspoon crushed red pepper flakes
1/4 to 1/2 cup water

Avocado Crema
1 cup sour cream or Mexican Crema
1 ripe avocado, diced
Freshly squeezed lime juice from half of a small lime, about a teaspoon
Pinch of kosher salt

Slider buns (store bought or homemade)
Jarred jalapeño slices (recommend mild/tame or deli style)

Directions
Sloppy Joes
1. Heat oil in a large skillet over medium heat. Add diced onions and cook until softened (approximately 5 minutes).
2. Add ground beef to the skillet, breaking it up as it cooks. Season with the chili powder, garlic powder, salt and pepper. Continue to cook, stirring frequently, until the beef is cooked through (approximately 10 minutes). Drain off any fat from the skillet.
3. Stir in diced jalapeño and minced garlic. Continue cooking for an additional 2 minutes.
4. Add ketchup, chili sauce, Worcestershire sauce, balsamic vinegar, hot sauce and red pepper flakes. Stir in 1/4 cup of water (if too thick add the remaining 1/4 cup). Reduce heat to low and cook for 40-45 minutes to allow flavors to fully develop. Note: Mixture should have a thick consistency.

Avocado Crema
1. In a food processor, combine sour cream, avocado, lime juice and salt. Process until smooth.
2. Store any remaining avocado crema covered in the refrigerator.

Assembly
1. Top the slider bun with the sloppy joe mixture, a Tablespoon of the avocado crema and several mild (jarred) jalapeño slices. Cover with top of bun.
2. Place a skewer in the center of the sloppy joe. Serve immediately

Notes: (1) Instead of using a combination of Ground Round and Ground Chuck, consider using all Ground Round. (2) Whichever ground beef combination you use, drain any fat before adding in the garlic and jalapeños. (3) Use softer slider rolls (I used Martin's Potato Rolls) so the sloppy joe sauce can soak into the bread yet still be hand held eatable. (4) A twelve ounce bottle of Bennett's Chili Sauce yields one measured cup of the chili sauce. (5) To ensure the sloppy joes are not too sloppy, start by adding only 1/4 cup of water into the mixture. If too thick, add the additional quarter cup (or more if necessary). (6) Can be made the day before and reheated. If necessary, add a little water to achieve a not too thick consistency.


Garden of the Gods, Colorado Springs. Three Graces, Balanced Rock and Siamese Twins rock formations. (September 2016)


Thursday, October 13, 2016

Cinnamon and Apple Crumble


Over the weekend I had the opportunity to be one of the ten thousand volunteers at the Chicago Marathon. A few months back several of  us decided to volunteer at one of the water stations to support the larger running community and, more importantly, to cheer on the runners from our half-marathon and marathon training group. Maybe it was having run two marathons in my first running life that made the day emotionally exhausting for me. For reasons a little hard to explain, tears welled up in my eyes several times as I watched the runners run by our water station. But I'll try. Until you actually run a marathon, it's hard to fully understand the emotional and physical toll the training as well as the marathon itself takes on your spirit and body. It should almost be considered a kind of extreme sport as your psyche runs the gamut from being exhilarated to being enervated. All sometimes within a five minute period of time. Watching from the ten and a half mile mark (they had 15.7 miles more to go), the determination on the faces of those who were running strong as well as those already starting to struggle (trust me, I know what struggle looks like) was clearly evident. Standing on the sidelines holding out cups of water, I could almost feel the collective joy, pain, and angst of every one of the first time and seasoned marathoners as they passed by. It was almost too much to take in. My weepiness reflected how simultaneously inspiring and depleting it felt being just there. By the time I eventually got back home, my body felt as if it had vicariously run that marathon with them.


Had this Cinnamon and Apple Crumble been in the house waiting for me when I got home, I may have allowed myself to eat more than a single piece. One with a generous side of cinnamon whipped cream of course. But I didn't discover the recipe for this crumble until I was scrolling through some of the recipes posted by a recently discovered fellow blogger, Meike Peters in the middle of the night (exhaustion sometimes leads to sleeplessness). As is often the case with recipes shared by food bloggers living in other countries (Meike currently lives in Berlin), the ingredient amounts are in metric form (not a problem when using a scale) and some ingredients (e.g., Boscoop apples) are indigenous to different parts of the world  and not yet available in the states. Minor obstacles, especially when one is motivated to make a recipe.


The Cinnamon and Apple Crumble is part cake, part crumble, and pure deliciousness. It is the best of both worlds combined into a single dessert. Once you too feel compelled to make this cake, the only decision left will be whether to serve it as a dessert, for breakfast, as a reward, or for some or all of the aforementioned reasons.

Years ago I bought an OXO food scale. Not only has it enabled me to measure ingredients in either ounces or grams, it has been invaluable in ensuring accuracy and consistency. With more and more cookbooks listing recipes in metric form and more recipes emanating from all over the world (where grams are the standard unit of measure), the scale has become an invaluable kitchen tool. If you have not yet invested in one of these scales, I have provided conversions for you in the recipe listed below. Meike's recipe called for the use of Boscoop apples which, I have to admit, were a variety of apple I had never heard of before. Quite possibly because these medium-sized, yellow with a red blush skinned, tart apples are primarily available in the Netherlands and France (two places I have not yet traveled to). The closest 'American' version of this apple would be a Granny Smith. 


Depending on the size of the Granny Smith apples picked at the apple orchard or bought from the market, you will need 4 to 5 of them. The apples are peeled, cored, halved, and cut into quarter inch slices.


There are essentially three layers to this Cinnamon and Apple Crumble: The base cake layer, the apple layer, and the crumble layer. It comes together easiest if you begin by first making the base cake layer. The cake batter can be made in a standing mixer fitted with a paddle attachment (or a handheld mixer). Once all of the ingredients are blended, it has a beautiful consistency and spreads easily in a prepared 10 inch springform pan. 

To add a bit more cinnamon flavor to the crumble, I sprinkled the sliced apples with a cinnamon-sugar mixture (see recipe below). Note: Lightly press the sliced apples into the cake layer before sprinkling with the cinnamon sugar and/or topping with the crumble mixture.


The consistency of the crumble mixture was perfect. However, if for some reason yours turns out a bit dry, add a little more melted butter.  And if too wet, add a little more flour, one tablespoon at a time. It should be wet and crumbly, not sticky or dry.


The Cinnamon and Apple Crumble is baked in a preheated 355 degree (F) oven for 50-55 minutes. The crumble is done when the top is beautifully browned and a tester inserted into the cake comes out clean. Allow the cake to rest in the pan 15-20 minutes before running a knife along the edge of the cake and transferring cake to a cake stand or platter. Note: Do not remove the cake from the springform bottom while hot and/or warm. I served my crumble with the bottom still under it.

Freshly whipped Cinnamon Whip Cream or vanilla ice cream are the proverbial icing on the cake, or in this case crumble, accompaniments. 


Made in a 10 inch springform pan, this cake generously serves 10-12 people. 


There is a lot going on in this crumble. From the tender, sweet cake bottom, to the tart, baked apples, to the cinnamon crunchy crumble top, it is a sweet tooth satisfying trifecta.

No matter how many apple recipes you have in your repertoire, you need to make room for one more. This one. With apple season in full swing here in the states, this Cinnamon and Apple Crumble is yet another reason to make a trip to an apple orchard (or the market) sooner rather than later. 

Recipe
Cinnamon and Apple Crumble (slight adaptation to Meike Peter's Apple and Cinnamon Crumble recipe)
Serves 10-12

Ingredients
Cake
125 grams of unsalted butter, room temperature (or 9 1/2 Tablespoons)
3 large eggs, room temperature
2 teaspoons baking powder
1 teaspoon vanilla paste (or 1 teaspoon vanilla or 1 teaspoon of commercially made vanilla sugar)
Pinch of kosher salt
125 grams of granulated sugar (or slightly less than 2/3 cup)
250 grams of all-purpose flour (or 1 3/4 cups plus 1 generous Tablespoon)
4-5 Granny Smith apples, peeled, cored, halved, and cut into 1/4 inch slices

Crumble
125 grams of unsalted butter (or 9 1/2 Tablespoons), melted
125 grams of granulated sugar (or slightly less than 2/3 cup)
1 teaspoon vanilla paste (or 1 teaspoon vanilla or 1 teaspoon of commercial vanilla sugar)
2 teaspoons cinnamon
200 grams all-purpose flour (or 1 1/2 cups plus 1 Tablespoon)

Cinnamon Whipped Cream
1/2 pint heavy whipping cream
2 Tablespoon confectionary sugar
1/4 teaspoon cinnamon
1/2 teaspoon vanilla paste (or vanilla)

Directions
Cake
1. Preheat oven to 355 degrees (F). Butter and/or spray a 10 inch springform pan and set aside.
2. Whisk together the flour, baking powder, and salt. Set aside.
3. In a standing mixer fitted with a paddle attachment, cream butter. Add sugar and beat until light and fluffy (approximately 3-4 minutes).
4. Add in eggs one at a time, beating well after each addition. Note: Scrape sides of bowl between egg addition.
5. Blend in flour mixture, beating on low until well blended.
6. Spread cake batter in prepared plan. 
7. Arrange the apples on top of the batter, pressing lightly into the batter. Note: I sprinkled the top of the apples with a cinnamon sugar mixture before topping with the crumble. To make the cinnamon-sugar mixture, blend together 1/4 teaspoon cinnamon and 1 Tablespoon of caster or granulated sugar.

Crumble
1. In a medium sized bowl, blend the flour, sugar, cinnamon and melted butter until crumbles form. Note: If the mixture is too dry, add some additional butter. If too wet, add more flour, 1 Tablespoon at at time. 
2. Sprinkle the crumble mixture evenly over top of the apples.
3. Place baking pan in the preheated oven. Bake for 50-55 minutes or until top is golden and a skewer comes out clean when inserted into the cake. Allow cake to cool in pan for 10-15 minutes. Run a knife along the edge of the cake and remove springform pan ring. Transfer cake to a plate or platter.

Cinnamon Whipped Cream
1. In a mixer fitted with a whisk attachment, whip cream at high speed until soft peaks form.
2. Add confectionary sugar, vanilla paste and cinnamon. Continue beating until firm peaks form.
3. Serve crumble with Cinnamon Whipped Cream and/or vanilla ice cream. 


Grazing horses in northern Illinois.