
Other than the 'white' lights on the bushes surrounding the front of the house and urns filled with greenery, there are no other tell tale signs inside the house that Christmas will be here in just a few short weeks. For some reason the thought of going up and down the attic stairs to bring down the holiday decorations seems more exhausting than exhilarating. If you only knew how much Christmas 'stuff' is up there you might understand my holiday decorating hesitancy. Maybe years of putting up and decorating multiple trees has finally caught up with me or maybe I am just not yet in the holiday decorating spirit. Surprisingly not even the thought of bringing out all of the Valliancourt chalkware Santas collected over the years is enough to motivate me to get going on making the house reflect the spirit of Christmas. Could a few more batches of cookies and several more trips to the stores to shop for presents be what I need? We shall see.


Sugar cookies themselves have a history here in states going back to the mid 1700s when Morovians (German Protestant settlers) living in Pennsylvania created a round, crumbly, buttery cookie they called the Nazareth Sugar Cookie. The increased availability of tin cookie cutters made by tinsmiths after the Civil War not only made the making of these cookies easier, they gave way to cookies with more varied and complicated shapes. The iced and decorated versions of the sugar cookie came into popularity in the 1930s when it became traditional for children to leave out a plate of 'sugar' cookies and milk for Santa Claus on Christmas Eve. Hmm, could it be I didn't always get what I wanted from Santa because the cookies left on the plate were 'store bought' and not homemade sugar cookies?


By definition, a sugar cookie is made of sugar, flour, butter, eggs, vanilla and either baking powder or baking soda. This classic sugar cookie recipe consists of all of those ingredients but also includes whole milk and kosher salt. The original version of Randee's Iced Sugar Cookie listed margarine rather than butter as one of the ingredients, however, both of us use unsalted butter for these cookies. Not only does butter pay homage to the early version of the sugar cookie, it makes for a melt-in-your-mouth, delectable cookie.

The batter for this cookie comes together easily and results in dough that rolls out beautifully on a lightly floured surface. It all begins with beating the butter and sugar until light and fluffy. On medium to high speed, the liquid ingredients are then added to the butter/sugar mixture and mixed until the batter is smooth (this could take at least two minutes to get the desired consistency). Flour, salt and baking powder are added with mixer on low speed. Mix only until the dry ingredients are fully incorporated. The dough is shaped into a disk, wrapped in plastic wrapped and chilled. Minimally the dough should chill in the refrigerator for several hours, but I strongly recommend allowing it to chill overnight.

The rolled out, cut into shapes cookies are baked at what I would consider a relatively high heat level (375 degrees) as well as a relatively short baking time (ranges from 8 to 10 minutes depending on thickness of the cookies). I like a 'thicker' sugar cookie so I rolled mine out to about a 1/4 inch thickness. If you like them even thicker, your baking time will increase. Conversely, if you like them thinner, your baking time will be reduced. The kind of cookie cutter you use will also influence the thickness of your rolled out dough. If using a more intricate cookie cutter, the thicker the dough needs to be. I recommend using a relatively heavy versus a thin baking pan to ensure the bottoms of the cookies don't 'burn' before the cookie is fully baked. My favorite cookie pans come from either Stonewall Kitchen or Williams-Sonoma (I use half-sheet, 3/4 sheet and/or full sheet pans when baking cookies).

Before icing (or frosting), the cookies need to be completed cool. There are many icing options, however, my personal favorite is creating a confectionary sugar icing, one enabling me to dip the cookie into it (versus having to spread it with an offset spatula). In order to achieve the smoothest icing possible, the confectionary sugar needs to be sifted (whatever you do, don't skip this step). Four to five tablespoons of milk added to three cups of sifted confectionary sugar usually achieves the desired 'dipping' consistency. If you use up to 6 tablespoons of milk and your icing becomes a little too 'runny', not to worry. Sift in some additional confectionary sugar.

A few months ago I bought clear imitation vanilla extract to ensure I could make the 'whitest' icing/frosting possible. Normally I would shudder at the thought of using imitation vanilla, but when Christina Tosi from the Momofuku Milk Bar recommended it, who was I to ignore the suggestion of an incredibly talented pastry chef?

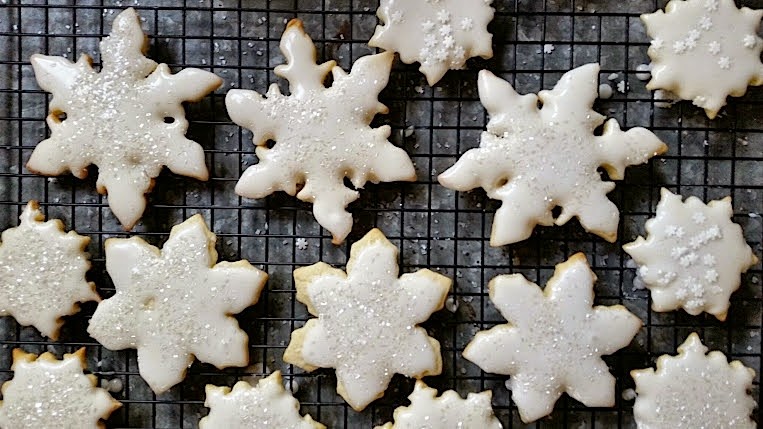
I find dipping the cookies into the icing results in a perfect smooth finish. To achieve this 'bakery perfect' finish, simply dip the entire top of the cookie into the icing, then carefully lift and place on a cooling rack. These sugar cookies dipped in icing are beautiful with or without the addition of sugars, sprinkles or decoratifs (like mini-snowflakes). How you finish these cookies is all up to you, make them as simple or as fancy as your 'big' heart desires. For some reason one of Iggy Azalea's songs runs through my head whenever I hear the word fancy.

If using sugars, sprinkles or decoratifs, sprinkle them on immediately after the cookies are are dipped as the icing develops a quick 'crust'. Once this 'crust' is developed, nothing will stick to it. The icing on the cookies takes at least 30 minutes to completely set up, but I strongly suggest you wait at least an hour before putting the cookies on a platter/in a container or putting in cellophane bags.
These sugar cookies have a perfect, yet tender crisp to them. With the icing more like a thick glaze than a thick frosting they are just the right amount of sweet. Like my white lights bias, I am one of those who love sugar cookies glazed rather than frosted (out of fear of making you cringe a second time, I thought I would wait until the end of this posting to reveal that personal preference to you). Don't let my icing/frosting preferences influence how you finish these oh so scrumptious 'Santa will bring you what you wished for even if you were just a bit naughty this year' sugar cookies.
Randee's Iced Sugar Cookies (inspired by a recipe cut out of a newspaper years ago)
Ingredients
Cookie
1/2 cup (8 Tablespoons) unsalted butter, room temperature
1 cup granulated sugar
1 large egg, room temperature
1/4 cup whole milk
1/2 teaspoon vanilla
2 1/4 cups all-purpose flour
1/2 teaspoon kosher salt
2 teaspoons baking powder
Icing
3 cups confectionary sugar, sifted
4-5 Tablespoons whole milk
1 teaspoon clear vanilla extract (can use regular vanilla extract)
Note: Can add food coloring for colored icing.
Optional
Glitter sugar
Decoratifs
Other cookie decorating sugars
Directions
1. In a standing mixer, cream butter and sugar until well blended, light and fluffy.
2. Mix together egg, milk and vanilla. Add to butter/sugar mixture beating until well blended and batter is smooth.
3. On low speed, add in flour, salt and baking powder mixing until flour is fully incorporated.
4. Remove dough from bowl, shaped into a disk, wrap in plastic wrap and chill for several hours or overnight (recommend chilling overnight).
5. Preheat oven to 375 degrees. Line baking sheets with parchment paper and set aside.
6. On a lightly floured surface, roll out dough to about a 1/4 inch thickness. Cut into desired shapes, place on parchment paper lined baking sheet and bake 8 to 10 minutes or until bottoms are lightly browned. Note: Baking time will be dependent on the thickness of the cookie. Recommend setting timer for 8 minutes, checking cookie and adding time if needed.
7. Transfer cookies to cooling rack. Allow to cool completely before icing.
8. Make icing by mixing sifted confectionary sugar, milk and vanilla in a medium sized bowl. Stir until completely smooth. If icing is too thick, add additional milk until desired consistency is reached.
9. Dip top of each cookie in the icing. Transfer to cooling rack. Sprinkle immediately with sugar if using.
10. Allow icing to completely set up before arranging on a platter or placing in a container.
