Sunday, November 27, 2022

Spiced Ginger Cookies w/ White Chocolate Icing


After a fun, memorable, food coma inducing Thanksgiving trip to Nashville, the madness of the Christmas holidays has already begun. Between deciding which holiday decorations to bring down from the attic to determining which Christmas confections to make this year, my head is already spinning. Unlike in prior years when I spent three exhaustive twelve-plus hours days baking and creating more than a dozen cookie gift boxes to ship, this will be a scaled back year. While the number of cookies baked and packages sent will be less this year, one thing will remain the same. They will all be made with the best ingredients and love.

Just as my Christmas collections have grown over the years, so have the number of my favorite Christmas cookies and confections. Which not surprisingly makes for a slightly more complicated baking decision making process. And these insanely delicious thick Spiced Ginger Cookies with White Chocolate Icing have now made things a bit more challenging. After having just one bite of these crispy on the outside, chewy on the inside deeply spiced cookies, I cannot begin to imagine a Christmas season without them. That's how scrumptious they are.


What gives these Spiced Ginger Cookies with White Chocolate Icing such a deep gingery flavor is the use of both ground and finely chopped crystallized ginger. Added spiciness comes from cinnamon, ground cloves, allspice and black pepper. Yes, black pepper. Dark brown sugar and molasses help to create a cookie with an even richer flavor and chewier texture. Rolled in granulated sugar as well as dipped or drizzled in white chocolate transforms them into an even more extraordinary ginger cookie. They are the epitome of visions of sugar plums!


What is not to love (even more) than a cookie made in a single bowl using only a whisk and a spatula? 


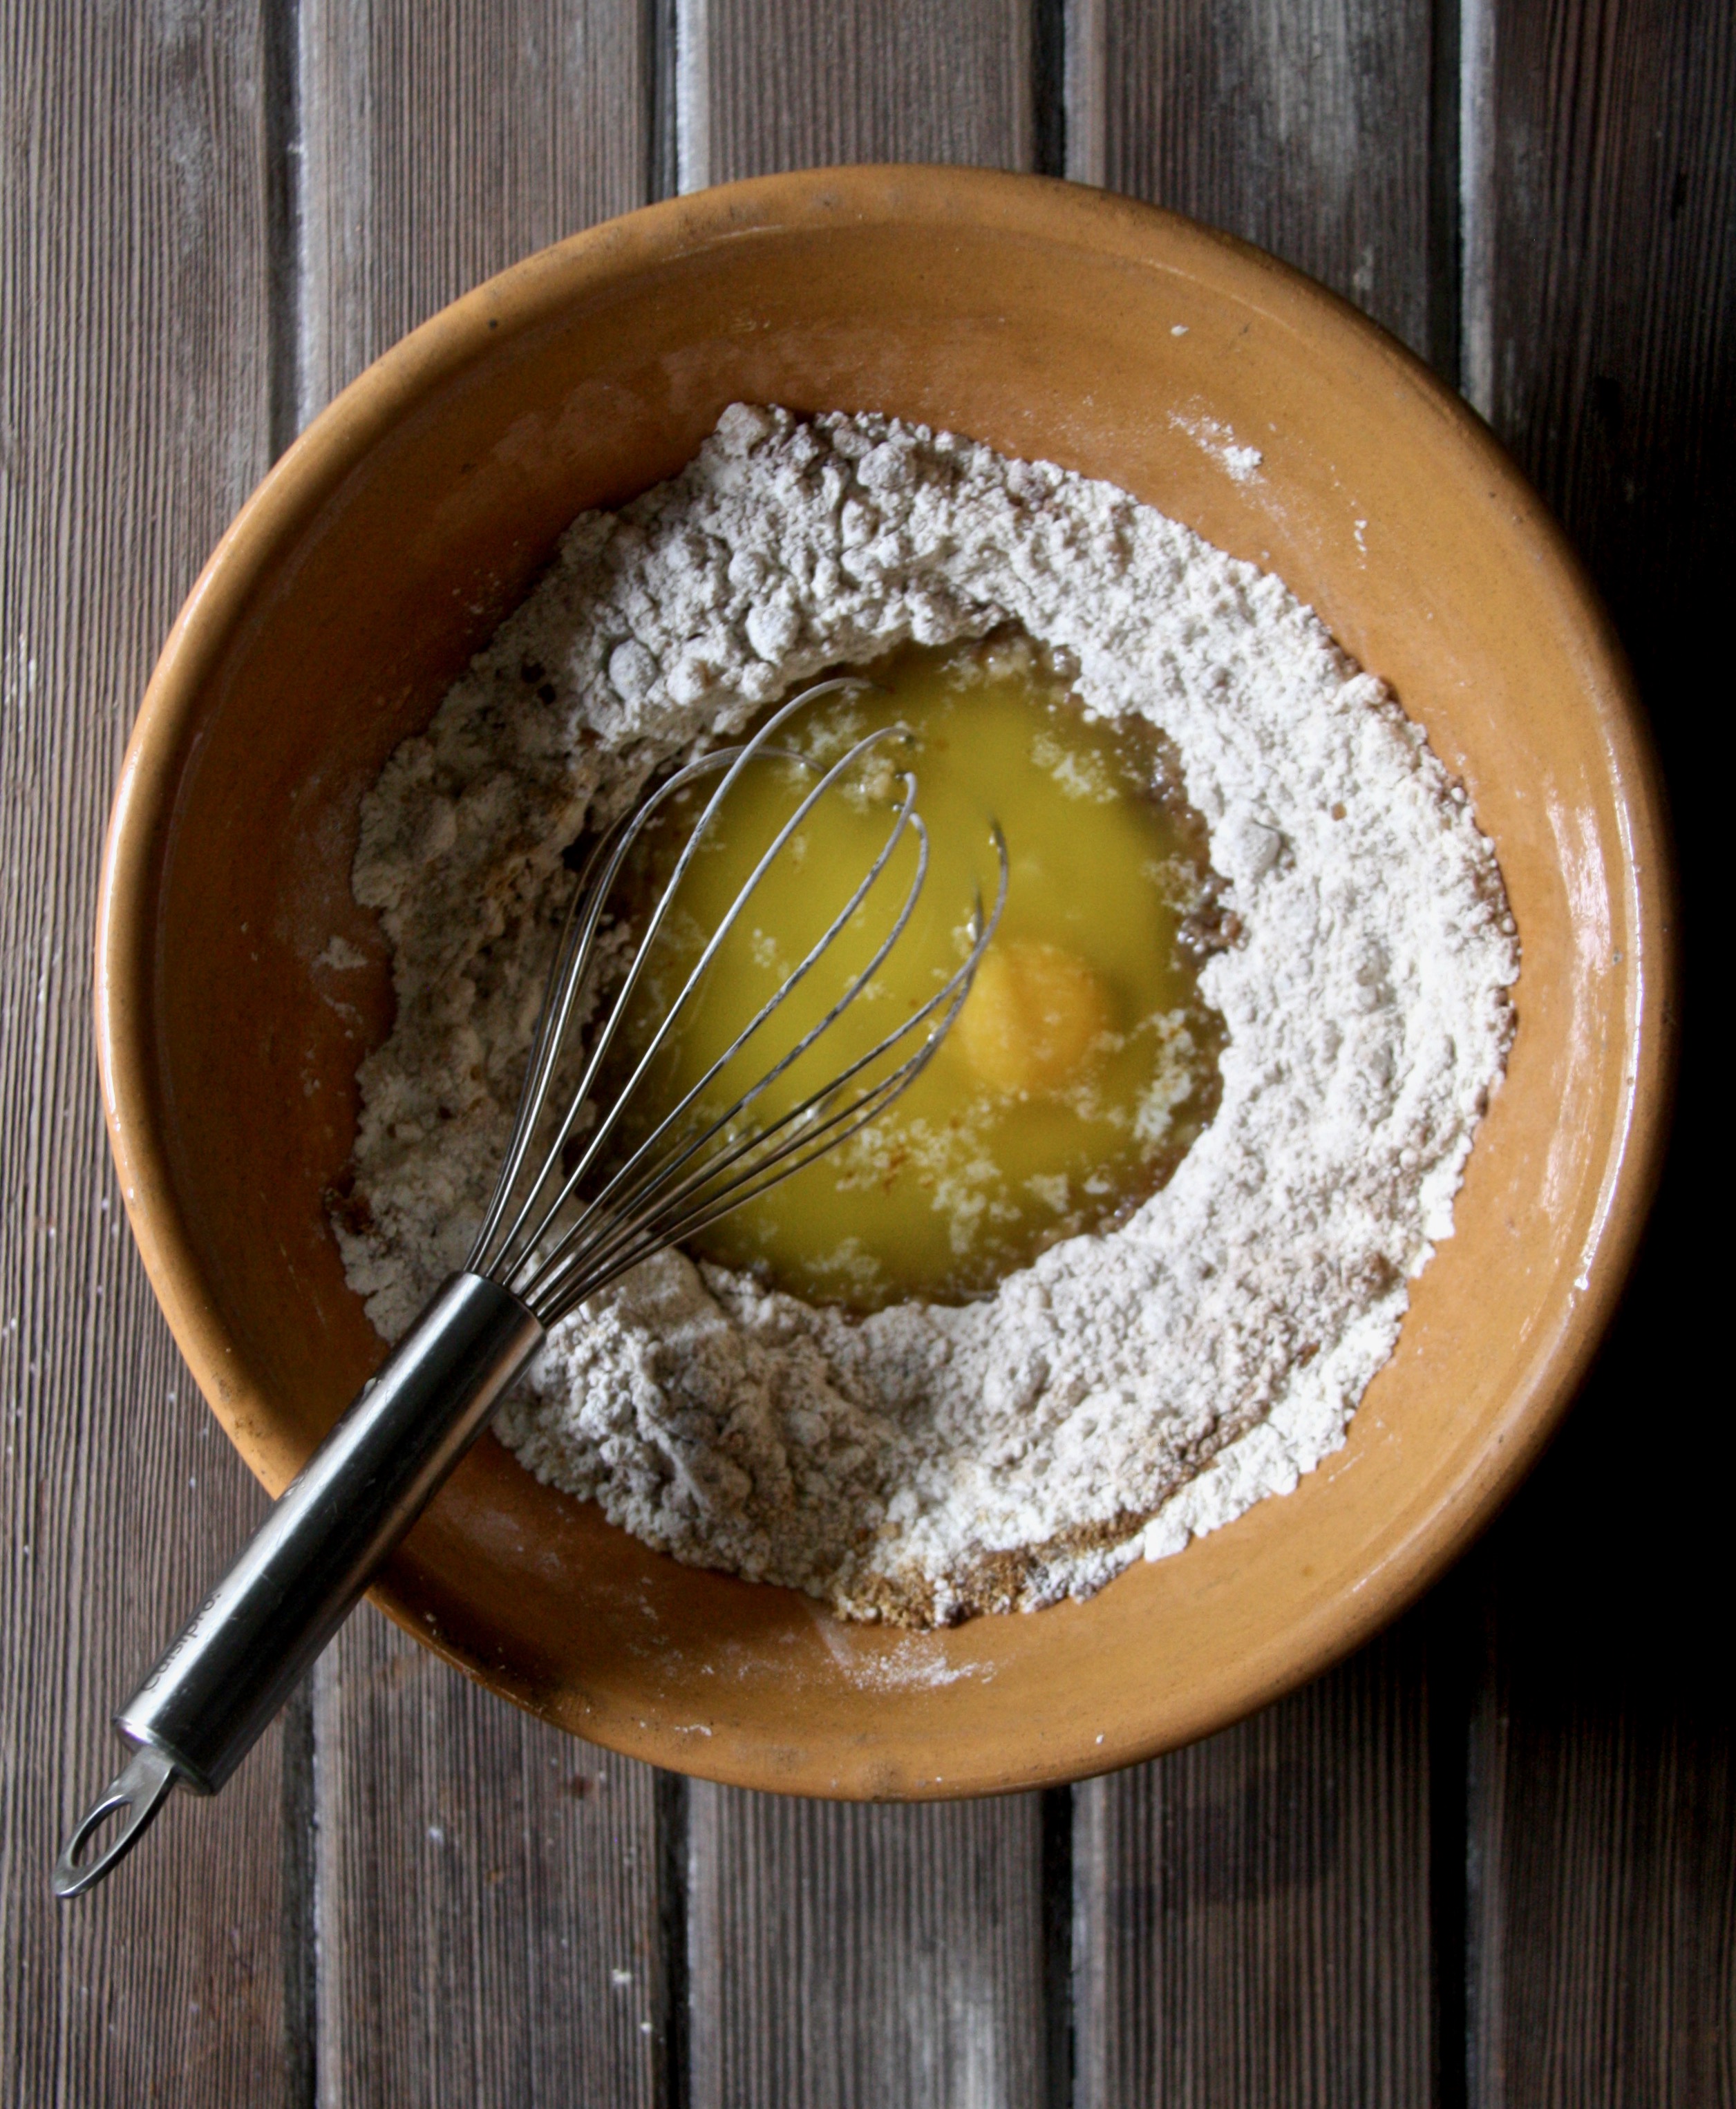
Once the dry ingredients are blended together a well is created in the center for the 'wet' ingredients. After a quick whisk of the wet ingredients, the dough comes together with the use of a spatula.


The result is a very thick, dense dough. Aka the perfect spiced ginger cookie dough.


The recipe will make 18 ping pong ball sized balls of dough. The use of a cookie scoop (about 1 3/4 inches in diameter) helps to create the most uniformed sized balls. The ice cream scooped dough is first rolled into balls then rolled in granulated sugar. If you don't have that size of an ice cream scoop, form the balls with two generous sized tablespoons.


The cookies will spread slightly when baking so giving them enough space on the baking tray is key. In a preheated 350 degree (F) oven, the cookies bake for only 11-13 minutes. The cookies will look slightly under baked although their bottoms should be a shade darker. They will continue to bake when left on the baking sheet for 6 to 8 minutes before being transferred to a cooling rack. It's critical you not eat the Spiced Ginger Cookies until they have cooled for at least 15-20 minutes. Because if you bite into them any sooner you will be wondering what kind of extraordinary cookie looks slightly raw in the center. Because all ovens bake differently, I highly recommend you bake up a small batch (maybe just 2 cookies) first to determine the baking time yielding the absolute best ginger cookie texture.


Here are several more tips to help you create the best ever spiced ginger cookie. When rotating your baking sheet midway through the baking process, lightly sprinkle the tops of them with a little more granulated sugar. Then, after the cookies rest on the baking sheet for 6-8 minutes, use the bottom of a juice glass to very slightly press down their domed tops.


I couldn't decide whether to dip half of the Spiced Ginger Cookies in melted white chocolate or generously drizzle them. So I finished them both ways. The white chocolate adds a nuance of flavor that doesn't overwhelm but rather compliments the spiciness of the cookie.


As you ponder what holiday cookies to make this.year for your family and friends, you should absolutely put these deeply spiced, crispy, chewy, delectable ginger cookies high on your list! Did I mention they also happen to have the added qualities of being gorgeous, crowd pleasing, and craveworthy? And last, but not least, these Spiced Ginger Cookies with White Chocolate Icing shouldn't be pigeonholed into the 'holiday cookie' category even though their spiced flavor screams Christmas. Because they are the kind of cookies you will want to eat year round in cold or chilly weather as they will help warm you up. Happy holiday baking!

Recipe
Spiced Ginger Cookies w/ White Chocolate Icing
Makes 18 - 3" sized cookies

Ingredients
2 1/3 cups (304g) all-purpose flour
2 teaspoons (6g) ground ginger
3/4 teaspoon Saigon cinnamon (or Vietnamese cinnamon)
1/4 teaspoon ground cloves
1/4 teaspoon ground allspice
1/2 very slightly rounded teaspoon baking soda
1 teaspoon Kosher salt
1/4 teaspoon black pepper
12 Tablespoons (170g) unsalted butter, melted and cooled slightly
1/2 cup (150g) molasses
2/3 cup (140g) dark brown sugar
1 large egg yolk
3 Tablespoons (45g) crystallized ginger, finely chopped
4 Tablespoons granulated sugar
6 ounces (170g) white chocolate (see notes)

Directions
1. Preheat oven to 350 degrees (F). Line two baking rimmed baking sheets with parchment paper. Set aside.
2. In a large bowl, whisk together the flour, ground ginger, cinnamon, cloves, allspice, baking soda, Kosher salt, and black pepper until blended.
3. Make a well in the center of the dry ingredients and add in the melted butter, egg yolk, dark brown sugar, molasses and chopped crystallized ginger. Use a whisk just mix the wet ingredients in the center of the bowl. Then use a spatula to finish mixing the dough (it will be thick).
4. Using a 1 3/4 inch cookie scoop create balls of dough the size of ping pong balls. Alternately use two tablespoon of dough to create the balls. Roll the balls of dough to smooth the edges.
5. Roll the balls of the dough in the granulated sugar.
6. Place 9 of the sugar rolled balls of dough on the baking sheet, giving two inches of space between them. Note: You will bake up two trays having 9 cookies on each.
7. Bake for 11-13 minutes or just until cracks begin to show. Midway through the baking process, quickly sprinkle the top of each cookie with a little more sugar and rotate the baking sheet. The cookie should still be soft and look slightly under baked. Allow the baked cookies to remain on the cookie sheet for 6-8 minutes before removing and transferring to a cooling rack. Use the bottom of glass to press the domed tops of the cookies down slightly. Allow to cool completely! Remember don't eat them until more than 15 minutes has passed.
8. Melt the white chocolate in a double boiler or in the microwave. Either dip half of the completely cooled cookies in the melted white chocolate or drizzle using a pastry bag. Allow the chocolate to set. 

Notes: (1) Cookies will be moist and tender on the inside while crisp on the outside. Individually wrapped in cellophane or glassine bags OR stored in a tightly coveted container, the cookies will be great for up to a week, but still really good for up to 2 weeks. However, it's not likely they will last that long! Keeping the cookies wrapped and stored in the refrigerator will extend their enjoyability life! 2) I use either the Ghiradelli White Chocolate melting disks or white chocolate disks from my local chocolate confectionary. Do not use the melting disks found at some craft stores or chocolate chips. (3) This recipe was heavily inspired by Smitten Kitchen's Thick Molasses Spice Cookies recipe.


Cheekwood, Nashville, TN (November 2022)

Tuesday, November 15, 2022

Roasted Garlic Buttermilk Mashed Potatoes


If I had told my younger self that I would someday love mashed potatoes, those words would have been considered to be the most unfathomable, downright hilarious ones ever heard. In retrospect, I attribute my 'dislike' of mashed potatoes during my childhood years to the fact that they weren't very creamy, tangy, or buttery. They were clearly inferior mashed potatoes. At some point in my life I discovered what really good mashed potatoes were supposed to taste like. And well now, if a bowl of great mashed potatoes is on the table, I might be tempted to have two helpings. But if I am only having a single serving, there wouldn't be any trace of mashed potatoes left on my plate. 


Mashed Potatoes might be one of the most traditional sides served at the Thanksgiving or Christmas holiday meals, but they are equally delicious paired with meatloaf, a Mississippi Pot Roast, a Pot Roast with Roasted Vegetables, or Swedish Meatballs, to name just a few. 


There are no shortage of opinions on how to make the 'best' mashed potatoes. Everything from the kind of potatoes to use, to the ingredients added to the cooked potatoes, to the mashing process is influenced by personal taste or family tradition. The recipe for these creamy, buttery Roasted Garlic Buttermilk Mashed Potatoes is a simple one. I personally love the flavor roasted garlic cloves mashed into the potatoes, but I understand not everyone does. If you leave the roasted garlic out you will still end up with incredibly scrumptious Buttermilk Mashed Potatoes.


The rich texture, flavor, and creaminess of Yukon Gold potatoes make them the ideal choice for creamy, dense mashed potatoes. Which means if I had to choose between using Yukon Golds or Russet Potatoes, I am on team Yukon when making this classic comfort food.


To peel or not to peel is yet another one of those personal taste preference decisions. If you like a rustic finish look to your mashed potatoes, keep the peels on. But if you want the smoothest, creamiest mashed potatoes, peel the potatoes before cutting and cooking them.


So you might be wondering if there is or have very strong feelings on the best way to mash potatoes. Again, the answer to that question depends heavily on the texture you prefer your mashed potatoes to have. There are several really good ways to mash potatoes, and some not so good ways. If you like them fluffy and a tiny bit lumpy, use a hand potato masher. If you like them airy and perfectly smooth and don't mind how tricky it can be use or how hard it is to clean, use a food mill. If you want to mash them quickly, use a standing mixer fitted with a paddle attachment but over beating could create a gluey texture. As food writer Jeff Steingarten once wrote "any cookbook (recipe) that sanctions the use of a blender or food processor for mashing should be carefully shredded". The recipe for these Roasted Garlic Buttermilk Mashed Potatoes calls for the use of a potato masher. The result is a creamy mashed potato having tiny bits of potato pieces. But again, the tool you use to mash with is ultimately up to you.


With very few exceptions, most mashed potatoes are made with butter as one its' ingredients. Other ingredient options include buttermilk, sour cream, cream cheese, goat cheese, parmesan cheese, heavy cream, half-and-half, whole milk, and even chicken broth. This recipe uses buttermilk. It not only adds to the creaminess of the mashed potatoes, it gives them a slightly tangy flavor. And it just so happens to be the ingredient Ina Garten, my favorite food goddess, uses. And in all seriousness, how does anyone not trust Ina?

Rather than give an exact amount of buttermilk to use, I am recommending using anywhere between 1 1/4 and 1 3/4 cups. The amount you use will be based on the thickness (texture) you like your mashed potatoes. For this recipe, begin with using 1 1/4 cups (in two additions) of buttermilk before adding any more. Note: I used close to 1 3/4 cups of buttermilk.


These made from scratch Roasted Garlic Buttermilk Mashed Potatoes are rich, creamy, fluffy, and buttery with a hint of tang perfection. With the addition of the roasted, caramelized garlic cloves they are elevated to an even higher level of classic comfort food deliciousness! They are mashed potatoes I would send back to my childhood self.

Recipe
Roasted Garlic Buttermilk Mashed Potatoes
Serves 6-8

Ingredients
Roasted Garlic (see notes)
1 large head garlic
1 Tablespoon water
Extra-virgin olive oil

Roasted Garlic Buttermilk Mashed Potatoes
3 pounds (1.36kg) Yukon Gold potatoes, peeled and cut into a 1" dice
1 Tablespoon Kosher salt
8 Tablespoons (113g) unsalted butter, room temperature, cut into tablespoons
1 1/4 to 1 3/4 cups buttermilk
1 teaspoon Kosher salt
1/2 teaspoon black pepper
Cloves from one head of roasted garlic

Directions
Roasted Garlic
1. Preheat the oven to 425 degrees (F).
2. Cut the top of the head of garlic just enough so the cloves are exposed.
3. Place the garlic in the center of a piece of aluminum foil (about an 8" square piece). Drizzle with extra virgin olive oil. 
4. Slightly fold up the sides of the aluminum foil and add in 1 Tablespoon of water.
5. Tightly seal the foil to make a pouch. Place on a small baking sheet. Bake for 35-45 minutes. To check for doneness open up the foil pouch. If the top of the head of garlic has nicely browned and caramelized, your roasted garlic is done.
6. Remove from the oven.
7. When ready to use, squeeze of the roasted cloves.

Roasted Garlic Buttermilk Mashed Potatoes
1. Add the diced potatoes to a medium-large sized Dutch oven. Add enough water so that the potatoes are completely covered. Add in one Tablespoon of Kosher salt.
2. Over medium-high heat, bring the water to a boil. Then reduce to a simmer, cover and continue cooking until the potatoes are knife pierced tender (approximately 20-25 minutes).
3. Drain the potatoes but immediately return them back to the hot pan.
4. Use a potato masher and begin mashing the potatoes to your desired consistency. As you are mashing the potatoes, add in the butter, two tablespoons at a time. Before adding in the buttermilk, mash in the roasted garlic cloves and one teaspoon of Kosher salt and a half teaspoon. of black pepper. 
5. Stir in the buttermilk (in two additions) using a large wooden spoon until the mashed potatoes reach your desired consistency. Note: Begin with using only 1 1/4 cups of buttermilk. Add more buttermilk in 1/4 cup increments (to a maximum of 1 3/4 cups) to bring them to your desired level of creaminess.
6. Transfer the Roasted Garlic Buttermilk Mashed Potatoes to a serving dish. 
7. Serve immediately. Note: You can keep the potatoes warm by covering the dish with some aluminum foil if you need another 10 minutes before serving. To keep the potatoes warmer longer, put them in a heat proof dish and place covered in an 200 degree (F) oven for up to 20 minutes.

Notes: (1) If you are someone who doesn't like the flavor of the roasted garlic, leave it out. The Buttermilk Mashed Potatoes will still be amazing! (2) If you looking to make decadent, rich mashed potatoes as well as ones that can be made the night before and baked up the next day, make the Wendy's Mashed Potatoes recipe. Don't be shocked when you look at the ingredient list. Those potatoes are heavenly. 


Homestead in the Badlands (August 2022)

Sunday, November 13, 2022

Chai Spiced Shortbread Cookies


For the record I am not one of 'those' people who knows exactly how many days there are until Christmas no matter which month of the year you ask. Nor do I keep track of when the holiday music starts streaming or when the Hallmark holiday movie marathon begins. Although some of 'those' people' happen to be my most favorite people. Instead I am one of 'those' people who gets excited over the return of Starbucks holiday cups, "It's a Wonderful Life" on television, and the excuse to bake an abundance of cookies. So after making these buttery, melt in your mouth Chai Spiced Shortbread Cookies I got to thinking. Maybe the holiday cookie baking bender should, like almost everything else, come earlier this year. 


I should probably fess up and tell you something else about me. My favorite cookie will always be the newest cookie I make. Which means for the next few weeks, even months, these Chai Spiced Shortbread Cookies will be going on repeat. And if I were you, I would abandon all thoughts of waiting to begin baking holiday cookies until December or until the week before Christmas. Because you really need my newest favorite cookie in your life now. I promise you have zero regrets making this lightly spiced cookie. One evoking all of the warmth of the holiday season. 


Here's how excited I am about this shortbread cookie. If there was a shortbread cookie throw down or holiday cookie baking contest, I would be all in. Or if there was such a thing as a shortbread cookie bakery, I would be opening one up. I have absolute no doubt the Chai Spiced Shortbread Cookie would be sold out within hours of the bakery opening its' doors. Lastly, if there was just one new cookie you wanted to add to your holiday baking platters/boxes this year (although you are going to want to make them year round), this would be the one! So, I guess it's fair to say I am feverishly passionate about these cookies. 

If you have ever ordered a hot or iced chai tea from your favorite coffee shop, you already know the spiced tea blend mixes black tea with rich, strong spices. The spices in a chai mixture might include combinations of cinnamon, cardamom, ginger, allspice, nutmeg, cloves, and/or even black peppercorns. Which means chai beverages can vary greatly across the country, across the world as they are highly influenced by traditions and taste preferences. Creating a chai spice mixture for these shortbread cookies wasn't an easy task. After doing the usual deep dive into the chai spice rabbit hole, I settled on a chai combination that included cinnamon, cardamom, ginger, allspice, and nutmeg with cinnamon being the more dominant spice. I am keenly aware that if I say the mixture was perfect, I am admitting to being completely biased. 

One of the other important decisions you have to make when baking shortbread has to do with which butter to use. You will never ever go wrong when you use an unsalted European quality butter (see notes). It's higher percentage of butterfat not only creates a richer tasting shortbread but an easier to roll out dough (without having to chill it). 

Two of the visual characteristics giving this Chai Spiced Shortbread Cookie its' extraordinary wow-factor are its' thickness and size. Rolled out to a thickness of 3/8" and cut out with a 3" cookie cutter (stars make for the most beautiful, most enticing cookie) they are everything you want to have in a great shortbread cookie. 

Baking time for the shortbread cookies range between 22-24 minutes or until they are golden along the edges. Unlike most other cookies, these remain on the baking sheet until they have cooled down considerably (about 8-10 minutes). While still on the baking sheet, the warm shortbread cookies are generously topped with granulated sugar. When you are ready to transfer them to a serving platter or tin, simply shake off the excess sugar. Your ready to eat, ready to serve shortbread cookie should have a gorgeous sugared finish.


In spite my blind enthusiasm, I always feel a bit anxious when sharing my new favorite cookie for the first time with others. But all of my fears were laid to rest this past weekend when I brought a platter of the Chai Spiced Shortbread Cookies to a gathering. They got great reviews!


The rich, buttery, crispy Chai Spiced Shortbread Cookies are destined to become the new classic shortbread and your newest obsession! Enjoy them with a cup of coffee, a cup of tea or yes, even a cup a chai tea (because there is no such thing as too much of a good thing). 

Recipe
Chai Spiced Shortbread Cookies
Makes 19-20 3" cookies
Updated November 2022

Ingredients
3/4 pound (339g) unsalted European style butter, room temperature (see notes)
1 cup (200g) granulated sugar, plus more for finishing the cookies
2 teaspoons good quality vanilla
3 1/2 cups (455g) all-purpose flour
1 teaspoon Kosher salt
1 1/2 teaspoons cinnamon
1/2 teaspoon ground ginger
1/4 teaspoon cardamom
1/4 teaspoon allspice
1/4 teaspoon ground nutmeg

Optional: White chocolate, melted (see notes)

Directions
1. Preheat the oven to 350 degrees (F). Line two large rimmed baking sheets with parchment paper set aside.
2. Sift together the flour and spices. Set aside.
3. In the bowl of a standing mixer fitted with a paddle attachment, mix the butter, sugar and vanilla on low speed, just until combined (do not whip).
4. Add the dry ingredients in two batches, mixing just until the dough comes together. Large clumps should form.
5. On a lightly floured surface, roll out a third of the dough to 3/8" thickness. Cut out with a 3" sized cookie cutter (stars make for gorgeous cookies). Note: Before rolling out the dough, gently shape into a ball, then flatted to about an inch thickness before rolling out. I did not need to chill the dough before rolling it out. But if your dough is soft for some reason, chill only for 10 minutes before rolling out.
6. Carefully transfer the cookies to one of the baking sheets. Space the cookies at least one inch apart as they will expand slightly as they bake.
7. Bake for 22-24 minutes or until the edges just begin to brown. Remove the pan from the oven but keep the cookies on the pan. Immediately generously spoon granulated sugar over each cookie. Allow the cookies to cool completely on the baking sheet. When the cookies cool, shake off the excess sugar.
8. Repeat with remaining dough.
9. Serve the cookies slightly warm or at room temperature. Store the cookies in a sealed container at room temperature or wrap in cellophane bags.

Notes: (1) I used Kerrygold unsalted butter and highly recommend. It's higher butterfat content helps to create the most flavorful shortbread as well as a dough with a great consistency. (2) It is not necessary to chill the dough before rolling it out. It rolls out beautifully. (3) Instead of topping the baked chai shortbread cookies with sugar, dip the cooled baked cookies in melted white chocolate to create a Chai Spiced Latte version. (4) I used these star biscuit cutters from Williams-Sonoma.

Wednesday, November 9, 2022

Lemon Blueberry Ricotta Cake


Nothing takes the chill out of the house on those 'not cold enough to turn on the furnace' days quite like turning on the oven to bake. Between the heat from and aromas coming out of the oven, baking days warm more than one's soul. Once fall arrives here in the midwest my passion for baking goes into overdrive. Which explains in part why there is currently about fifteen pounds of unsalted butter sitting in the refrigerator. And in all probability it will not last until Christmas. Keeping my fingers crossed there will be another sale on butter in the weeks ahead.


With Thanksgiving still just a few weeks away and everyone either dreaming about or planning their favorite dishes, I am going to sneak in a recipe for a cake. Because it's one you need in your life. Especially in the weeks and months ahead. The Lemon Blueberry Ricotta Cake is first and foremost one of those quintessential breakfast cakes. Not too sweet, filled with fresh fruit, and satisfyingly scrumptious. Aka the trifecta of a great cake! It happens to be one of those cakes perfect to enjoy as a post turkey trot race treat, to nibble on while you are decorating for the holidays, to serve at or bring to a weekend brunch, to enjoy in the afternoon with a cuppa, and/or to make just because you want cake. 


As far as cakes go, this one leans toward the easy to make end of the continuum. From assembly to baking, the Lemon Blueberry Ricotta Cake is ready to enjoy in less than ninety minutes. Which makes it one of those cakes easily made early in the morning and enjoyed all day.


Indulge me as I take a brief moment to get on my 'why ingredients matter' or rather I should say 'why good ingredients' matter soapbox. If you are looking to make the most flavorful foods, high quality ingredients create higher quality goods and dishes. It is a matter of eating something delicious versus something divinely delicious. For this Lemon Blueberry Ricotta Cake there are five difference making ingredients. Whole milk ricotta. It can be homemade or store bought. Unsalted butter with at least an 18% butterfat content. Less expensive, generic butters generally have less fat. Thus less flavor. Fresh blueberries. Frozen blueberries will not work in this cake. Extra-large eggs are a must. And last, but not least, a really good quality vanilla. 


There will be a point during the making of the batter where it will look slightly curdled. Once the dry ingredients are blended in it will smooth itself out. The blueberries get divided. Two thirds go into the batter and the remaining one third get scattered (and lightly pressed) over the top. 


Using a nine inch spring form pan lined with parchment paper make it easy to remove the cake from the pan. 


Baking time for the Lemon Blueberry Ricotta Cake will range from 55 to 65 minutes. However, I recommend testing for doneness at the 50 minute mark (all ovens bake differently). To test for doneness, insert a toothpick in the center (not in the sides) of the cake. If it comes out clean, the cake is done. Other signs of doneness: the edges of the cake will slightly pull away from the pan and they will be golden.


Allow the cake to cool slightly before dusting with confectionary sugar. If you dust the cake while it's still too warm, the confectionary (icing) sugar will melt into the cake.

The Lemon Blueberry Ricotta Cake is slightly dense, luscious, fruity, just the right amount of sweet for breakfast or as a snack, and divinely delicious. Make this cake soon and have a slice for breakfast. You will be very happy you did. 

Recipe 
Lemon Blueberry Ricotta Cake
Serves 8-10, depending on how you slice it

Ingredients
10 Tablespoons (141g) unsalted butter room temperature
1 cup (200g) granulated sugar
3 extra-large eggs, room temperature
1 cup (250g) whole milk ricotta
2 Tablespoons sour cream
1 teaspoon good quality vanilla
1 teaspoon grated lemon zest (from on medium sized lemon)
1 1/4 cups (163g) all-purpose flour
1 Tablespoon baking powder
1 teaspoon Kosher salt
2 cups (343g) fresh blueberries, divided
Confectionary sugar, for finishing

Directions
1. Preheat the oven to 350 degrees (F). Line a 9" springform pan with parchment paper. Butter the sides and top of the parchment paper. Set aside.
2. In a medium sized bowl, whisk together the flour, baking powder, and Kosher salt. Set aside.
3. In the bowl of a standing mixer fitted with a paddle attachment, add in the butter and sugar. Beat on medium speed until light and fluffy (approximately 3 minutes), scraping the bottom and sides of the bowl as necessary.
4. Reduce the mixer speed to low and add in the eggs, one at time, mixing well after each addition.
5. Add in the ricotta, sour cream, vanilla and lemon zest. Mix well. Note: The batter will look curdled, do not worry, it should look that way.
6. With the mixer on low, add in the dry ingredients. Mix just until incorporated. 
7. Fold in 2/3 of the blueberries (229g) using a rubber spatula. 
8. Spoon the batter into the prepared pan. Smooth the top with an offset spatula. 
9. Evenly scatter the remaining 1/3 cup (114g) blueberries on top of the batter. Press down lightly.
10. Place the baking pan on a baking sheet, then place in the oven. Bake for 55-65 minutes (checking at the 50 minute mark) until a toothpick inserted in the center comes out clean.
11. Remove the pan from the oven and set on a cooling rack. When cool, use a knife to carefully loosen the cake from the sides of the pan. Remove the pan sleeve. Transfer the cake to a serving platter.
12. Lightly dust the cake with sifted confectionary sugar. Serve slightly warm or at room temperature.
13. The cake is delicious the first and even up to the third day. To keep any leftover cake fresh, store covered in the refrigerator.

Notes: (1) With an exception to the change in the baking time, the recipe for the Lemon Blueberry Ricotta Cake was heavily inspired by Ina Garten's Blueberry Ricotta Breakfast Cake recipe from her newest cookbook "Go-to Dinners". (2) Use only whole milk ricotta. Either store bought or homemade. (3) Use only fresh blueberries. (3) Instead of dusting the cake with confectionary sugar, could also make a confectionary sugar glaze to finish the cake. (4) This cake is one of those perfect breakfast or brunch cakes!


Sheep's Lake, Rocky Mountain National Park, (August 2022)