Monday, May 31, 2021

Cucumber Dill Pickles


If there was only one condiment I could put on a hamburger, chicken sandwich, or pulled pork, it would be pickles, extra pickles. Either Bread and butter pickles or dill pickles, I love them both equally. As soon as the pickling cucumbers start showing up at the Farmer's Market, I rush home to begin making either these Bread and Butter Pickles or these Sweet and Spicy Refrigerator Pickles. When the pickling cucumber season ends, I return back to eating store bought jarred pickles. Although nothing store bought tastes quite like really good homemade pickles.


While having lunch at the Bird and Jim restaurant in Estes Park after a great morning hike in Rocky Mountain National Park, my insanely good hamburger came with a side of some really delicious homemade cucumber pickles. As I sat at the bar and started to wolf down the burger, before slowing down to savor it along with the unusual sweet potato rounds and homemade pickles, I had a pickle epiphany. Why was I waiting for the arrival of pickling cucumber season to make homemade pickles and enjoying them for maybe only three months a year? Why wasn't I making pickles year round using cucumbers? Well there are no good answers to those questions. But pickle making was now about to change forever.


As soon I returned home from my trip I went on the down the rabbit hole hunt for dill pickle recipes. Only I didn't have to go down too far this time.


All of the other pickle recipes posted on the blog are made by pouring a hot brine over the sliced cucumbers. This one is different. As these Cucumber Dill Pickles are made with a cold brine. One of the benefits of using a cold brine is you end up with a slightly crunchier pickle. For maximum flavor the brined covered cucumber slices need to be refrigerated for at least twenty-four hours. Which technically makes this more of a quick pickle recipe.


Instead of making dill pickle spears, I made dill pickle rounds. Which given the choice between a spear and a round, I much prefer round pickles. I used medium sized cucumbers, cut to 1/4" thickness, to ensure there was a better seed to solid ratio in each slice. 


The brine for these Cucumber Dill Pickles has a higher ratio of vinegar to sugar and uses either a jalapeño and/or Thai bird chile. Because I had never used a Thai bird chile before (as well as it being 15 times hotter than a jalapeño) I made the brine with a sliced in half jalapeño. However, I placed a whole Thai bird chile in each jar. 

The brine is made at least two hours before you begin layering the sliced cucumbers and dill in your jars. Don't throw away the cooked jalapeño. Top each jar with the cooked in brine sliced in half jalapeño.


These just might be my new favorite dill pickles. Unlike some store-bought dill pickles, these are definitely crunchier, a bit tangier, have a slight bit of heat to them, and just a slight dill flavor. I absolutely loved them! 


The recipe for these Cucumber Dill Pickles makes two jars. One to keep, one to give away (but only if you want to). Once you taste them, you too will want to be making them year round. Quite possibly they will become your go to favorite easy to make, homemade dill pickle. These Cucumber Dill Pickles would be perfect as either a condiment, piled high on a burger or sandwich, or as a side dish. I have been known to open up the refrigerator and snack on a few pickles.

With the summer barbecue season officially beginning this weekend, it's perfect timing to begin making Cucumber Dill Pickles. I wouldn't' be at all surprised if you keep making and enjoying homemade pickles long after summer ends. 

Recipe
Cucumber Dill Pickles

Ingredients
3 cups distilled white vinegar
1/2 cup (100g) granulated sugar
2 teaspoons Kosher salt
1 jalapeño and/or Thai bird chile, sliced in half lengthwise
1/2 teaspoon mustard seeds
3 medium cucumbers (approximately 1 1/2 pounds of 700g), unpeeled and cut into 1/4" slices
1 1/2 cups (1/2 ounce or 18g) fresh dill fronds

Directions
1. In a small saucepan, combine the vinegar, sugar, Kosher salt, mustard seeds, and jalapeño or Thai bird chile. Bring to a boil. Remove from the heat and let cool. Refrigerate until cool, approximately 2 hours.
2. Arrange the cucumber slices and dill in two 16 ounce canning jars.
3. Pour the brine into the jars to cover completely. Seal and place in the refrigerator until cool (at least twenty-four hours).  Place a half of the jalapeño or Thai bird chile in each jar. Note: I used a jalapeño in the brine but also added a Thai bird chile to each jar.

Notes: (1) Cucumber Dill Pickles will be good for up to one week stored in the refrigerator. (2) This recipe was inspired by the Cucumber Dill Pickle recipe shared in Karen Mordechai's cookbook, Sunday Suppers: Recipes and Gatherings.


Sheep in Rocky Mountain National Park, Colorado (May 2021)


Wednesday, May 26, 2021

M & M Sugar Cookies (aka best sugar cookie)


"Into the forest I go, to lose my mind, to find my soul." (John Muir) For the second time in the past nine months I returned back to siren call of the Colorado mountains. The grandeur, beauty, and wonder of the Rocky Mountains never fails to deeply affect me. While there were moments when I wept, I was in a constant state of euphoria for six glorious days. Not even my hiking mishaps of falling into Nymph Lake, having a hallucinating moment believing I saw a mountain lion while on a trail, or being slightly overwhelmed at the challenge of crossing over stones covered by rushing water, could damper my exhilaration or sense of inner peace. From seeing big horn sheep run down and back up the mountains, to watching a bull moose make his way down from the mountain to the lake in the meadow, to watching a moose cow with her calf laying under some cinnamon pine trees, to seeing elk grazing, I was in wildlife heaven on this trip. Taking the train up to Pike's Peak on one of the most glorious days ever filled my head with images permanently etched in my memory. And with the exception of a brief lightning and thunderous storm, the weather and skies were more than I could have ever dreamt of or wished for. As much as I love being near the ocean, nothing restores my soul, my spirit more than spending time in the mountains. The sense of jubilation and sheer joy felt is almost indescribable. And even though I treasure spending time alone surrounded by the sounds of nature, I also thrive on human connections. Snippets of conversations with friendly, incredibly kind strangers on the trails along with having dinner with some friends were enough to sustain me until I returned home. While the effects of this trip are still with me (and hopefully will stay with me for a little while longer), I really, really do need to share the recipe for the oversized, crispy, sugary M & M Sugar Cookies I made more than a week ago. Quite possibly they are one of the best sugar cookies I have ever to come out of my kitchen.

Like the sight of the mountains, these cookies are a sight to behold. It's almost impossible not to smile just looking at them. A cookie loaded with the perennial favorite M&Ms and topped with a sanding sugar/granulated sugar mix might be one of the most perfect cookies to begin the summer season. 


In the spirit of go big or go home, these were made on the larger side. Big enough to nibble on, or if you must, share with a friend, they are the most perfectly textured, balanced sugar cookie. At least I think so. And I was so confident of their impressive deliciousness I made up a small box to give to the pilots on my flight out to Colorado. Yes, I really did.


In the cookie chemistry world, we all know that butter, especially a European style butter, enhances flavor, while shortening, or in this case oil, gives the cookie both a bit of softness and flakiness. So using both butter and oil makes for the best of both worlds cookie. And this sugar cookie recipe uses both of them. 

However, a cookie dough made with both butter and oil tend to be on the softer side. Which means it greatly benefits from a period of refrigeration. A minimum of 90 minutes in the refrigerator is needed to not only give them the right scooping consistency but to prevent them from over spreading or worse yet, flattening, in the oven.  

After scooping the cooke batter onto a parchment paper lined baking sheet, use a glass to slightly flatten them before pressing a few more M&Ms on top and then giving them a heavy dose of the granulated/sanding sugar mixture. Note: The cookies should be at least 2 inches apart on the baking sheet.


In a preheated 350 degree (F) oven, the cookies bake for 15-17 minutes or until lightly golden around the edges. Once baked the cookies need to remain on the baking sheet for 15-20 minutes to help the edges crisp up a bit more before transferring them to a cooling rack.


If you are a big fan of super soft sugar cookies, aka in the Lofthouse style, these are not for you. But if you are all about a sugar cookie with a melt in your mouth crispness to them, these are the Greek mythological sirens calling your name. While chocolate chip cookies might be the fan favorites of many (including me), these M & M Sugar Cookies definitely need to go into your cooking baking rotation starting this summer. Use red, white and blue holiday M&Ms to make them holiday festive! Or keep them rainbow happy with the traditional M&M mix. 


With Memorial Day weekend just days away, make your weekend one for the ages and bake up a batch of these M & M Sugar Cookies and watch both the eyes of children and adults get as big as saucers! If ever there was a cookie good for the sugar cookie loving soul, it would be these. Definitely these. Because what is not to love about a buttery, sugary, crispy, flaky, and chocolatey cookie?

Recipe
M & M Sugar Cookies (aka best sugar cookies)
Makes 11 four inch plus sized cookies

Ingredients
1/2 cup (114g) unsalted butter, preferably European style unsalted butter, room temperature
1/2 cup canola oil
1/2 cup (100g) granulated sugar
1/2 cup (63g) confectionary sugar
1 large egg, room temperature
2 teaspoons vanilla
2 cups (260g) all-purpose flour
1/2 slightly rounded teaspoon baking soda
1/2 teaspoon Kosher salt
1 1/2 cups (300g or 10 1/2 ounces) M&Ms divided

1/3 cup (67g) granulated sugar
1/3 cup (67g) sanding or sparking sugar

Directions
1. Sift together the all-purpose flour, baking soda, and Kosher salt. 
2. In the bowl of a standing mixer fitted with a paddle attachment, cream the butter (approximately 2 minutes) scraping down the sides when done.
3. Add each of the following ingredients separately, beating well between each addition: granulated sugar, confectionary sugar, canola oil, and egg.
4. Add the sifted dry ingredients to the bowl and stir with a spatula or wooden spoon.
5. Stir in 1 1/4 cups of the M&Ms.
6. Cover the bowl with plastic wrap and chill for at least 90 minutes.
7. Preheat oven to 350 degrees (F). Line a baking sheet with parchment paper. Set aside. Mix together the 1/3 cup of granulated sugar and 1/3 cup of sanding/sparking sugar and set aside.
8. Use an ice cream scoop (I used a 2 1/4 inch size scoop) and place on a parchment paper lined cookie sheet. Space cookies out at least two inches. Top each cookie with a small piece of parchment paper and using a clear glass, press cookies down slightly (to slightly more than 1/4 inch thickness.) Use the remaining 1/4 cup of M&Ms to top each cookie (about 6-7 candies per cookie). Generously sprinkle with the granulated sugar/sparkling sugar mixture. Note: I recommend baking only 6 cookies on a sheet.
9. Bake cookies for 15-17 minutes or until lightly golden on the edges, rotating the baking sheet midway.
10. Let cookies rest for 15-20 minutes on the baking sheet before transferring them to a cooling rack. Repeat with remaining cookie dough.
11. Once cool, immediately place cookies in a sealed container or wrap in cellophane bags if not serving them immediately.

Notes: (1) These cookies are best when enjoyed within two to three days after baking. After that they get a bit soft. (2) If you don't have or can't find sanding or sparkling sugar, use granulated sugar. (3) If you bake these cookies smaller to get a larger yield, adjust your baking time accordingly.


Denver Botanic Gardens, Denver, Colorado (May 2021)


Friday, May 14, 2021

Balsamic Rosemary Blueberry Jam & A Charcuterie Board


In less than a week I head out west to Colorado. And I have already started packing. A clear indication I couldn't be more excited to spend time hiking in the mountains. Even if many of the trails are still snow packed. Here I thought I would be experiencing a Colorado spring on this trip, but instead it seems as if it might look and feel a bit more like winter. Which means by the time I am ready to head out to the airport I will have overpacked. Although truth be told there has never been a trip where I didn't overpack. Only this time I can put some blame on the weather. How anyone can go on a week long adventure and take only one bag never ceases to amaze me. 


In many ways I approach my charcuterie boards the same way I do packing my luggage. More is always better. Always. 


The star of this black and blue themed charcuterie board is the Balsamic Rosemary Blueberry Jam as it is an ideal compliment to creamy double/triple cream brie, to a soft, tangy chevre, and to a sharp, slightly pungent blue cheese. It also happens to be insanely good.


In less than 20 minutes (plus some cooling and chilling time) you can make a small batch of this Balsamic Rosemary Blueberry Jam. Because it is made with only seven ingredients, the entire flavor profile of this jam is elevated. In a single spoonful you will detect the tartness of lemon juice and balsamic vinegar, the sweetness of the honey, sugar, and blueberries, the aromatic rosemary, and just a hint of salt. This jam is a virtual dance party on your palate!


Besides having good ingredients, two of the keys to making a really good jam is using a heavy bottomed saucepan and letting the jam first come to a boil then simmer until it has the perfect jammy consistency. 


One of the ways I test for the jam's doneness is to dip a spoon in the cooking jam, then swipe my finger down the back of it. If the finger swipe remains, the jam is ready to be removed from the heat.


As soon as the jam is ready, it should be transferred to a heatproof jar so it can cool to room temperature. If you allowed the jam to cool in the saucepan, the heat will adversely affect the jam's viscosity. The jam can be served  warm or chilled. It's incredibly delicious either way.

The contrasting colors on this charcuterie board gives it that 'wow' factor. Making it one everyone will gravitate toward as well making it hard for everyone to resist digging in! Paired your 'house' cocktail or favorite wine, this charcuterie board makes for an incredibly impressive appetizer. 


So what are some of the secrets to making a great charcuterie board? Well, first it's one having three or four critical components: cheese, charcuterie (meats), crackers/bread, and accoutrements (fresh and/or dried fruit, nuts, honey, and jams). This one only has three but the three selected are amazing. The second secret comes to choosing your cheese. Always think in terms of odd numbers: one, three, five or seven. Also think of the variety (firm, semi-soft, creamy, crumbly, smoked and/or stinky) as well as the compatibility of each cheese. This board uses three differently flavored and textured cheeses, however, they all work well with one another, but especially with the Balsamic Rosemary Blueberry Jam!


Last, but not least, is the arrangement. The most beautifully arranged boards are the most inviting boards. So fill it up. Or as I like to say 'overpack it'.  Using small bowls for nuts and jams and/or jars for honey, not only create some visual interest, they are easy to replenish. To cut or not to cut the cheeses is always a question I ask myself when putting together a charcuterie board. And there is no absolute right or wrong answer. I will say it depends in part on the number of people you are serving as well as the density of the cheeses. For harder cheeses, like a gouda or parmesan, I like to cut them at least 2/3s of the way through. I generally don't cut the softer cheese, like brie or chevre, as the slices sometimes stick together. But that too isn't a hard and fast rule. 

A fabulous charcuterie board doesn't have to break the bank. Yes, good quality cheeses and crackers can be expensive. With a few exceptions, I often buy most of my cheeses from either the never disappoints Trader Joe's or Whole Foods. And if I can't find what I want there, then I am lucky enough to have a local grocery store with a great selection of cheeses.  


There might be a few guidelines to building your version of an epic, gorgeous charcuterie board, but there are no absolute rules. Remember that. So get creative and have fun putting boards together than bring people together!

P.S. If you happen to have any of the Balsamic Rosemary Blueberry Jam leftover, it's fabulous spread on a piece of thick toasted bread spread with some whole milk ricotta cheese. Just saying. 

Recipe
Balsamic Rosemary Blueberry Jam & A Charcuterie Board

Ingredients
Balsamic Rosemary Blueberry Jam 
1 pint/2 cups fresh blueberries
1/2 cup (100g) granulated sugar
1 Tablespoon freshly squeezed lemon juice
1 Tablespoon balsamic vinegar
1 Tablespoon honey
1 scant Tablespoon freshly minced rosemary
1/8 teaspoon Kosher salt

Charcuterie Board
A wedge of Double or Triple Cream Brie Cheese
Small log of Chevre 
A wedge of a good quality blue cheese
Black seedless grapes
Fresh blueberries
Fresh blackberries
Salted Roasted Cashews
Marcona Almonds
Honey
Dried cherries and/or cranberries
Assortment of crackers and/or crostini
Optional: edible flowers (e.g., pansies) for decoration

Directions
Balsamic Rosemary Blueberry Jam 
1. In a heavy bottomed saucepan, add in the blueberries, sugar, and lemon juice. Over medium heat, cook until the sugar melts (approximately 3-4 minutes).
2. Add in the salt, honey, balsamic vinegar, and rosemary. Stir to blend. Bring mixture to a boil.
3. Reduce heat to low and continue cooking until the jam begins to thicken (approximately 8-10 minutes).
4. Remove from heat and transfer to a heat proof jar. Let cool completely before covering and refrigerating.

Charcuterie Board
1. On a large oval platter or round cheese board, place the cheeses in three locations.
2. Add a small bowl of the Balsamic Rosemary Blueberry Jam and small jar of honey.
3. Add a small bowl of the cashews a large handful of the marcona almonds.
4. Arrange the grapes, blackberries, and blueberries around the cheeses.
5. Add some dried cherries and/or cranberries.
6. Add in the crackers in various locations on the platter/board.
7. Top with several edible flowers.
8. Serve and savor!

Notes: (1) All of the cheeses were purchased from Trader Joe's. (2) While not used on this platter, my favorite blue cheese is the Point Reyes Blue. (2) All of the fresh fruit and nuts were purchased at Trader Joe's. (3) Use a good quality, small batch honey. (4) Instead of marcona almonds use roasted almonds or walnuts.

Morton Arboretum, Lisle, Illinois (May 2021)


Monday, May 10, 2021

Rhubarb Spoon Cake


Some of you were fortunate enough to grow up having a mother, aunt, or grandmother who grew rhubarb in their gardens. And just the mere sight of anything rhubarb more than likely evokes memories of the first time you tasted a homemade rhubarb dessert. My first taste of rhubarb didn't come until I moved out east and lived in a small coastal, historic, bucolic town where almost everyone had a garden. Lucky for me my neighbor Sheila had a large patch of rhubarb growing in her abundant garden. Having a piece of her rhubarb pie not only opened up my eyes and taste buds to rhubarb's tart-sweet deliciousness, it turned me into a rhubarb lover. 


Quite possibly one of the most anticipated vegetables to arrive in late spring is rhubarb. Yes, rhubarb is technically a vegetable in spite of often being thought of as a fruit due in large part to both it's tartness and culinary uses. With recipes for this pie, this rhubarb strawberry crispthese strawberry rhubarb hand pies, and this ginger cardamom rhubarb compote already posted to the blog, we now have a recipe for this lovely Rhubarb Spoon Cake. One inspired by the self taught chef, restauranteur, and author Erin French. 


Spoon Cakes have been described as a cross between a spoon bread, pudding cake, and a biscuit. It's an unfussy, homey, scrumptious dessert best served warm, maybe lightly sprinkled with some confectionary sugar, and served with some freshly whipped cream or vanilla ice cream. Serving Rhubarb Spoon Cake at the end of a casual weeknight dinner or fancy dinner party is akin to giving your family and/or guests a big, huge bear hug. And considering the events of the past year, the return of hugs may be one of those things at the top of many new normal checklists. It's definitely high on mine.


The return of hugs and the return of rhubarb season is cause for celebration with some cake. 

The Rhubarb Spoon Cake is made up of two components: a rhubarb compote and a cake. The compote needs to be made first. As little as less than an hour before assembling the spoon cake or a day or two before. 


Three cups of rhubarb equates to three-quarters of a pound. But when buying rhubarb, I would encourage you to buy at least a pound as any green leaves need to be removed. After cutting the rhubarb into one inch pieces, they are combined with the sugar, lemon zest, lemon juice, cornstarch, and Kosher salt. When cooked over medium heat in a heavy bottomed saucepan, the rhubarb compote comes together in five to seven minutes. Transferring the rhubarb compote to a bowl will help it cool down faster as well as help stop the cooking process.


The dry and wet ingredients for the cake are mixed together first before they are gently combined to create the batter. Honestly, this may be one of the easiest cake batters to assemble. 


After generously buttering and flouring a ten inch cast iron pan, two-thirds of the rhubarb compote is evenly spread on the bottom. Next the cake batter gets spooned on over the compote. After smoothing it with an offset spatula, the remaining compote is dropped in dollops and gently swirled into the batter.

The pan goes into a preheated 400 degree (F) oven. Baking time is somewhere between 22-25 minutes (my baking time was closer to the 25 minute mark). 

While the Rhubarb Spoon Cake is baking, made the freshly whipped cream. Instead of the whipped cream, you could also serve it with some vanilla ice cream. You can't go wrong with either option.


A light dusting of confectionary sugar on a piece of warm Rhubarb Spoon Cake is a just the right amount of sweet finishing touch.

From the tart-sweet rhubarb compote puddled on the bottom and swirled in the moist, buttery cake, every bite of this Rhubarb Spoon Cake is pure delight. A generous dollop of freshly whipped, lightly sweetened billowy cream is not just delectable, it takes this rather simple dessert to a most extraordinary level. 

And here I thought rhubarb season couldn't possibly get any better. However, one bite of this spoon cake let me know just how wrong I was. If you are lucky enough to have rhubarb growing in your garden or a friend is willing to share some of their bounty, you won't need to immediately rush out to check to see if it's available in your grocery store. Because you really do need to make this scrumptious spoon cake. Especially if you consider yourself a rhubarb aficionado.

Recipe
Rhubarb Spoon Cake
Serves 8 (best served warm but still good room temperature if there are any leftovers)

Ingredients
Rhubarb Compote
3 cups (3/4 pound/342g) fresh rhubarb, cut into 1 inch pieces
2/3 cup (166g) granulated sugar
1 teaspoon lemon zest
2 1/2 teaspoons freshly squeezed lemon juice
2 teaspoons cornstarch
Pinch of Kosher salt

Rhubarb Spoon Cake
1/2 cup (113g) unsalted butter, melted, cooled slightly, plus more for the pan
1 cup (132g) all-purpose flour, plus more for the pan
2 teaspoons baking powder
1/2 cup (100g) granulated sugar
1/2 teaspoon Kosher salt
1 large egg, room temperature
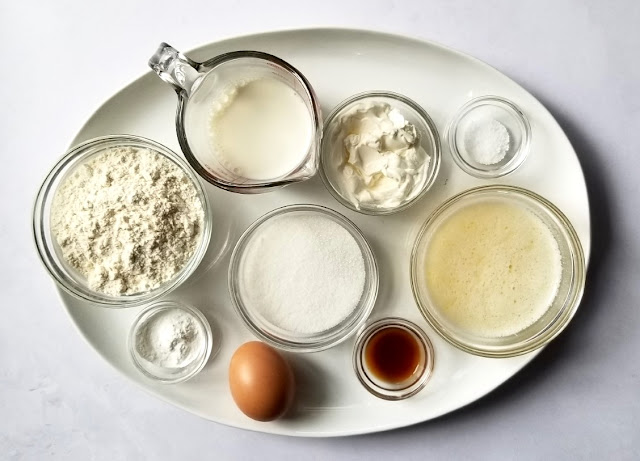
1/2 cup whole milk
1/4 cup (58g) sour cream

Whipped Cream
1 pint (473 ml) heavy whipping cream
2-3 Tablespoons confectionary sugar 
1 teaspoon vanilla

Optional: Confectionary sugar for dusting finished rhubarb spoon cake

Directions
Rhubarb Compote
1. In a medium sized heavy duty saucepan, combine the rhubarb, sugar, lemon zest, lemon juice, cornstarch, and Kosher salt.
2. Bring to a simmer over medium heat, stirring constantly until the rhubarb becomes tender and sauce like (approximately 5-7 minutes).
3. Remove from heat, transfer to a bowl, and let cool to room temperature. (The compote will keep covered in the refrigerator for up to a week.) 

Rhubarb Spoon Cake
1. Preheat the oven to 400 degrees (F). Generously butter a 10 inch cast iron pan. Dust with flour and shake out any access. Set aside.
2. In a large bowl, combine the all-purpose flour, baking powder, granulated sugar, and Kosher salt. Whisk to combine. Set aside.
3. In a medium bowl, combine the melted butter, milk, butter, vanilla, and sour cream. Whisk until blended.
4. Add the wet ingredients to the dry ingredients. Gently stir using a spatula until ingredients are just blended.
5. Spread about two-thirds of the rhubarb compote evenly in the prepared pan.
6. Spoon the cake batter over it, spread evenly, then dollop with the remaining compote over the top.
7. Using an offset spatula or butter knife, gently swirl the compote into the batter.
8. Bake until lightly golden and a cake tester comes out clean when inserted into the middle of the cake (approximately 23-25 minutes).
9. Serve while warm with the freshly whipped cream.

Whipped Cream
1. In the bowl of a standing mixer, combine the whipping cream, confectionary sugar, and vanilla.
2. Whip until soft peaks form.

Notes: (1) This is an ever so slightly modified version of chef and author Erin French's Rhubarb Spoon Cake recipe. If you would like to learn more about Erin French's story, would highly recommend you read her newly published book "Finding Freedom: A Cook's Story; Remaking a Life from Scratch". (2) The rhubarb compote would also be delicious served over ice cream. So consider making a double batch.


Lake Michigan view from Bailey's Harbor, Wisconsin (April 2021)