Sunday, February 25, 2018

Chocolate Sheet Cake with Milk Chocolate Buttercream Icing


After an almost two month hiatus from running, one that felt like an eternity, I ran for the first time last weekend. As I was getting ready for this long awaited return to running, you would have thought I was about to run some high stakes or challenging course race. I felt queasy, nervous, and overly anxious about a two mile run. Yes, just two short freakin' miles. But in my post injury head, it wasn't only this distance I was worried about. No, what was taking up even more worry space in my mind was whether or not I would re-injure myself. As well as whether my body was truly healed or was it a case of wishful thinking. The bad news, relatively speaking, was my running pace was slower and much more labored than it had been before the injury. And the good news? After getting myself into a pre-run tither, it was a pain free run. I was simultaneously bummed about my pace and elated over the absence of wincing discomfort. Which I suppose you could say the glass was half-full, maybe a little more than half full. Having this 'first' post-injury run now behind me, I continue to be hopeful any lingering trepidation, including the queasiness, will continue to fade each time I go out for a run. I have only three months to rebuild up my endurance and speed (again relatively speaking). In early June, we have a destination run on the east coast. A ten miler. Piece of cake, right?

Speaking of cake, I have only recently become a big fan of the homemade sheet cake. This would be a significant shift from my love for and loyalty to layer cakes. Like a slab pie, there is something irresistible about a sheet pan cake. It's rustic and humble in its' presentation, yet so incredibly appealing. And so much easier to cut than a layered cake! Particularly when someone says they only want a very small sliver (really? chocolate cake with chocolate frosting and someone requests only a sliver? crazy!). This, however, may be one of those cakes where anyone with unswayable self-control will be requesting a second sliver. The taste of the icing alone will have them giving it up.


As much as I love this chocolate cake, it's the 'icing on this cake' that I am deeply, madly in love with. Paired together they are a match made in heaven.


After indulging myself with a small piece of this Chocolate Sheet Cake with Milk Chocolate Buttercream Icing I cut it up into pieces and gave it all away. I regretted this random act of kindness as soon as I got home with my empty baking sheet. Oh, how I wanted to have another piece of this insanely delicious cake!

The recipe for this one bowl chocolate cake has become one of recent favorites. Previously I had only made it as a two layer cake. However, there is enough batter in the recipe to make a 9"x12" or 9"x13" sheet pan cake.


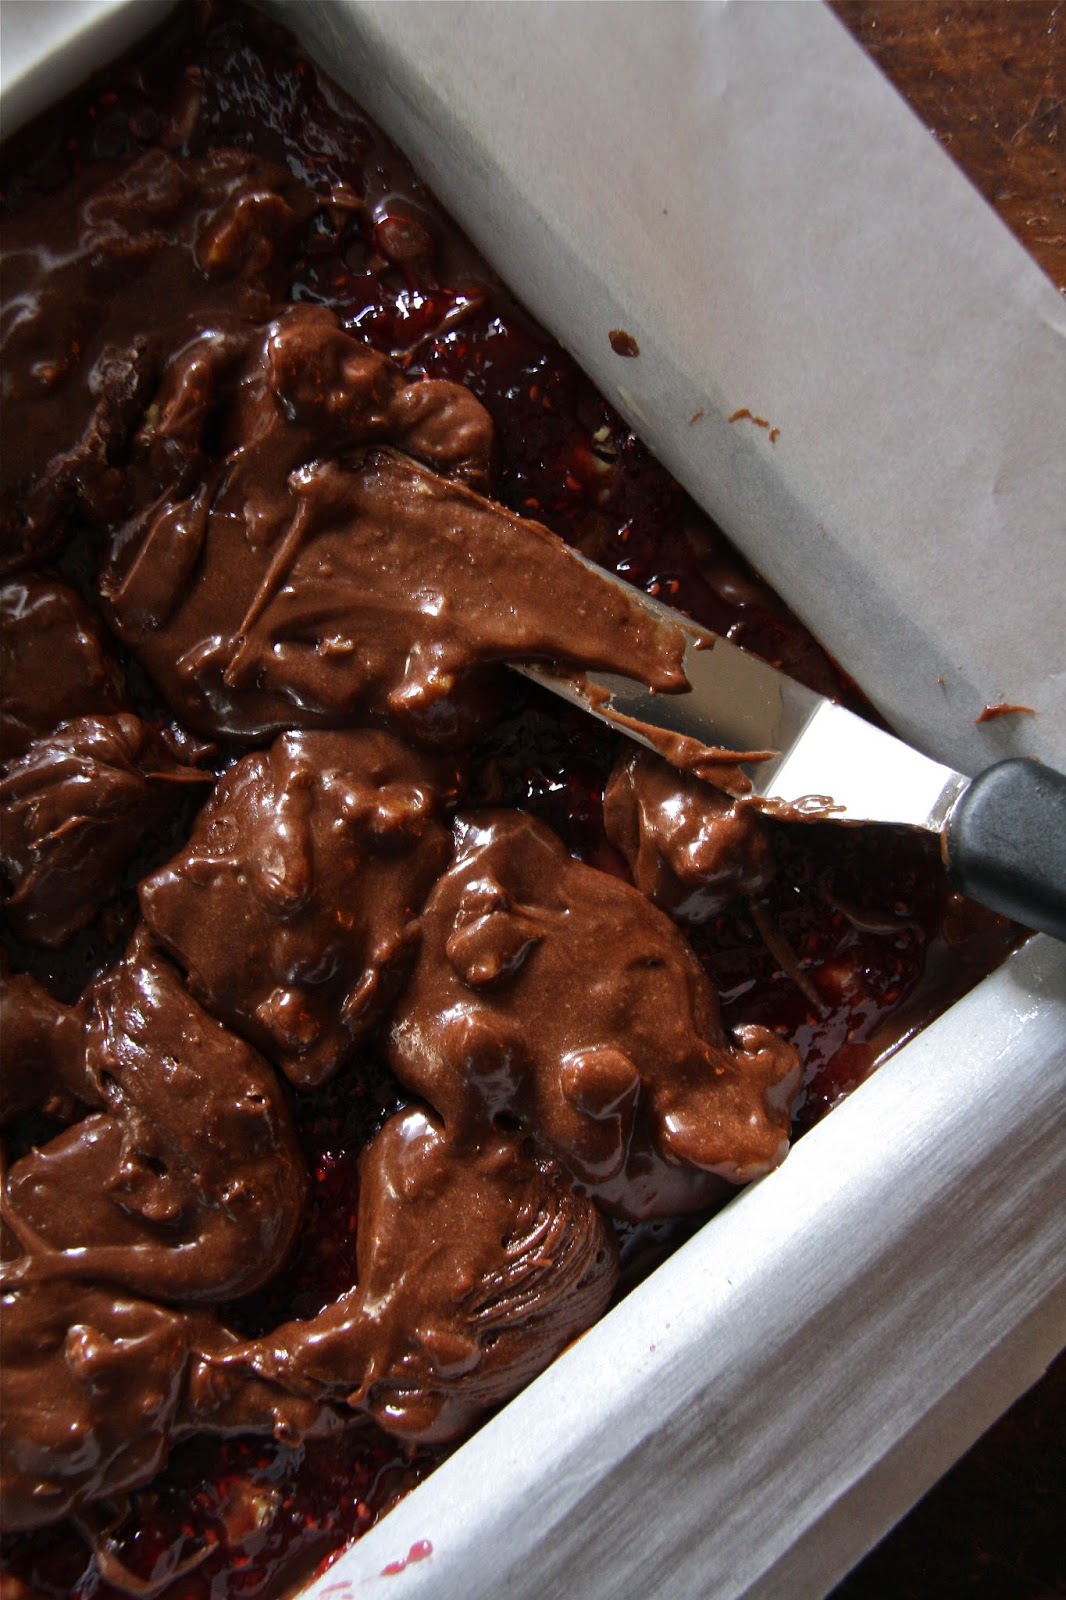
This cake's deep, dark color comes from both the Dutch-processed cocoa and the coffee. These two ingredients create a cake with the most perfect color to contrast to the Milk Chocolate Buttercream Icing. As a side note, if you ever come across a recipe for a chocolate cake calling for warm water, replace with it a cup of coffee. Not only will the coffee intensify the flavor of the chocolate, it will deepen the color of the baked cake.


This Milk Chocolate Buttercream Icing is velvety smooth, glossy, and creamy delicious. The recipe makes enough to generously frost the sheet cake. You might even have a spoonful or two left to secretly enjoy.


Whip the icing using either a standing mixer with a whisk attachment or with a hand held mixer. The addition of heavy whipping cream adds suppleness, lusciousness, and richness to this Milk Chocolate icing.


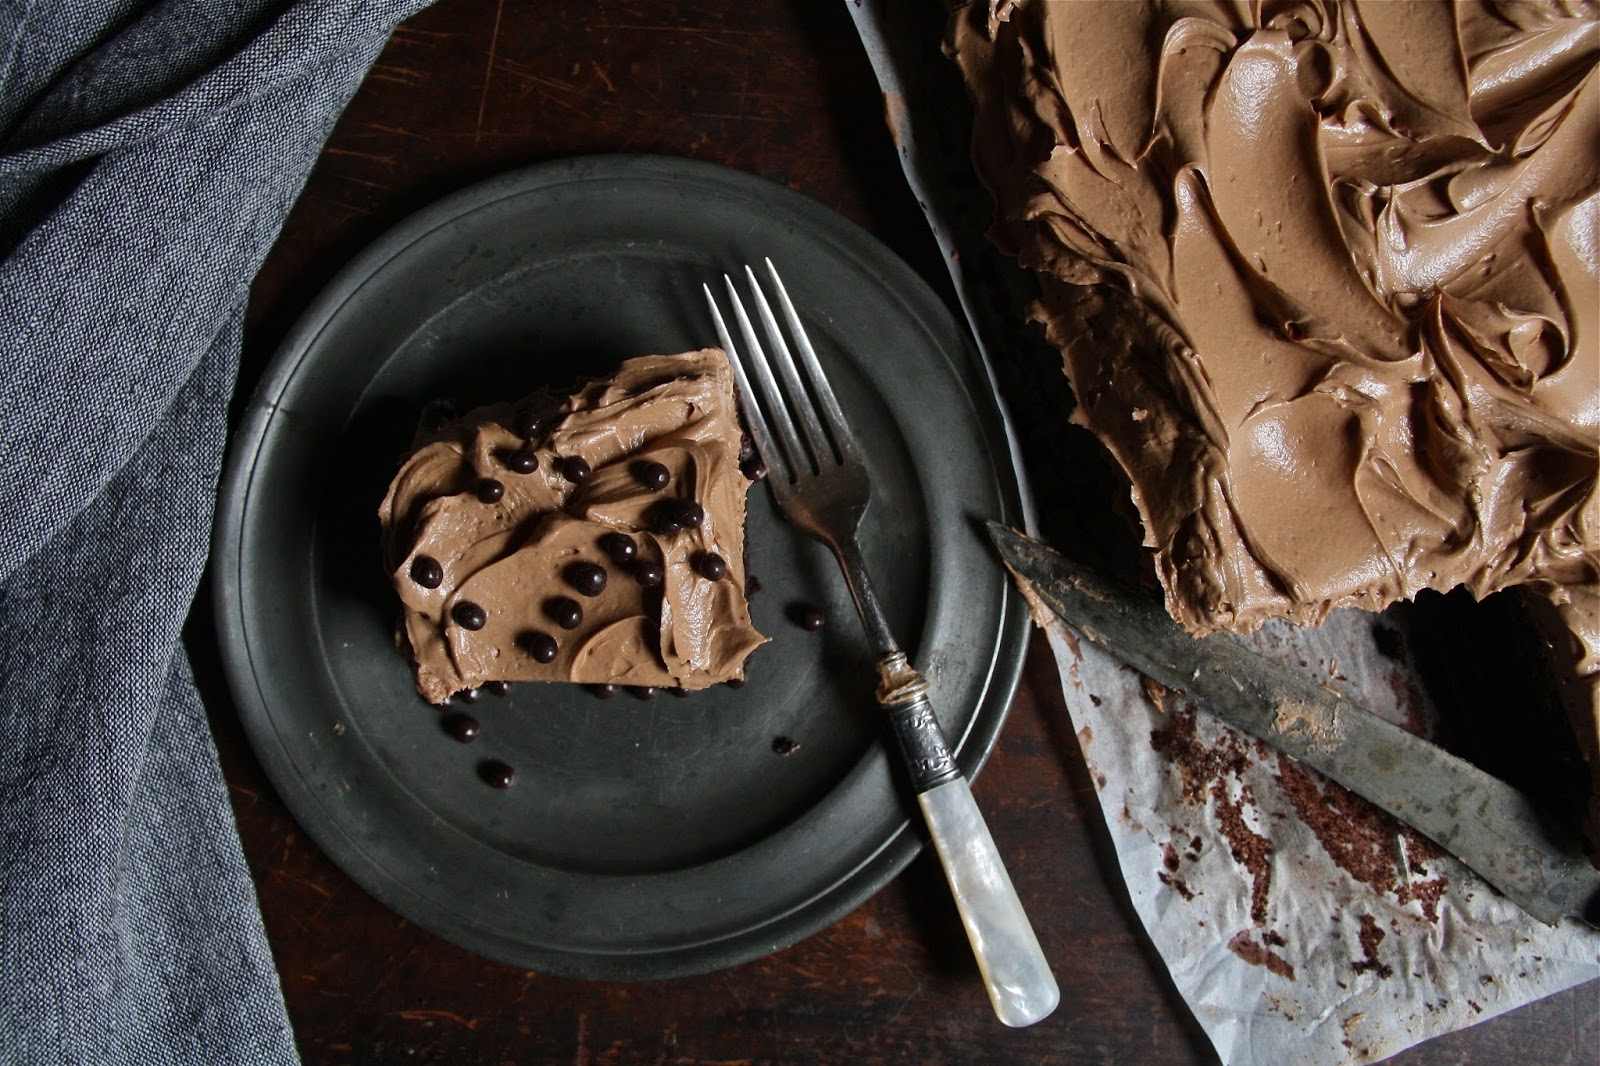
The use of an offset spatula or large spoon to swirl the icing on top of the sheet cake makes the most beautiful swoopy looking cake. If you want a fancy, fussy finish, pipe on the icing using a pastry bag and your favorite pastry trip.


Top with sprinkles or not top with sprinkles? That was the question. After some deliberation, I decided the Chocolate Sheet Cake looked sexier without them and more whimsical with them. So depending on your mood or the one you are trying to create, either leave them off or sprinkle them on. Or if you can't really decide, serve the cake with a bowl of them on the side and let everyone choose for themselves. Several years ago, I came across the Callebaut's Chocolate Crisp Pearls for the first time in an incredible chocolate shop in Boulder, Colorado. Ever since then, they have been my favorites.


The next time you want to make a cake for your family and friends or to simply give it away, make this Chocolate Sheet Cake with Milk Chocolate Buttercream Icing. Or ice it with the Peanut Butter Frosting used in the making of the layered Chocolate Peanut Butter Cake. I promise, whether you frost this cake with a rich, creamy milk chocolate icing or a smooth, lush peanut butter icing, everyone will go wild for your sheet cake! 

If serving to a large crowd, consider serving it on a large wooden board rather than in the pan or on a platter. Note: Don't remove the parchment paper if serving it on a wooden board.

Recipe
Chocolate Sheet Cake with Milk Chocolate Buttercream Icing (minor changes to Julia Turshen's Happy Wife, Happy Life Chocolate Cake recipe as shared in her cookbook "Small Victories: Recipes, Advice, and Hundreds of Ideas for Home-Cooking Triumphs")

Serves 16-20  people, depending on how you slice it

Ingredients
Cake
1 1/4 cups (160 g) all-purpose flour 
1 cup (200 g) granulated sugar
3/4 cup (75 g) Dutch-processed cocoa powder, sifted if lumpy
1 teaspoon baking soda
1 teaspoon baking powder
1/2 teaspoon kosher salt
8 Tablespoons (113 g) unsalted butter, melted and cooled
2 large eggs, room temperature
1 cup strong black coffee cooled or 1 rounded teaspoon espresso powder mixed into 1 cup boiling water then cooled
1 cup buttermilk
1 teaspoon good quality vanilla

Icing
1 cup (8 ounces) unsalted butter, room temperature
1 1/2 cups (188 g) confectionary sugar, sifted
2 teaspoons vanilla
8 ounces good quality milk chocolate, chopped, melted. and slightly cooled
Pinch of sea salt or Kosher salt
2-3 Tablespoons heavy whipping cream
Optional: Chocolate Crisp Pearls (Recommend the ones made by Callebaut) or Chocolate Sprinkles

Directions
Cake
1. Preheat oven to 350 degrees (F). Line a  9"x13" or 9"x12" baking pan with parchment paper. Lightly butter and/or spray top of parchment paper and sides of pan if not covered with parchment paper.
2. In a large bowl, whisk together the flour, sugar, cocoa powder, baking soda, baking powder, and salt.
3. Add melted butter, eggs, coffee, buttermilk, and vanilla. Whisk until batter is thick and smooth.
4. Pour batter into prepared baking pan. Lightly tap the cake pan to remove any air bubbles.
5. Bake until top of cake spring back when lightly pressed and edges begin to come away from the pan. Approximately 25-30 minutes of baking time.
6. Transfer cake pan to a wire rack and allow to cool completely before icing.

Icing and Assembly
1. In the bowl of a standing mixer fitted with a whisk attachment (or a hand held mixer), beat butter and confectionary sugar on medium-high speed until creamy (approximately 2 minutes).
2. Scrape down sides of the bowl, add vanilla and salt. Mix on low until incorporated. 
3. With the mixer on low speed, beat in melted, cooled milk chocolate until all is incorporated. Stop to scrape the bowl as needed. Increase speed to medium high and beat until light and fluffy (approximately 2-3).
4. Add heavy whipping cream and beat until light and fluffy. Approximately 3-4 minutes.
5. Spread icing evenly over the top of the cake. Swirl icing with a spoon or offset spatula. Alternately put icing in a pastry bag fitted with pastry tip of choice. Optional: Top with Chocolate Crisp Pearls or Sprinkles.
6. Serve immediately or store in the refrigerator until ready to serve. Allow the chilled cake to sit out at least 30 minutes before serving.

Notes: (1) For the flour weight calculation, I used the 128 g per cup equivalent. (2) I am partial to a chilled cake, so I like to eat it right out of the refrigerator. (3) Can melt chocolate over a double boiler or in the microwave. Make sure to chop the chocolate evenly before melting. I used the Trader Joe's Milk Chocolate for the icing.

Wednesday, February 21, 2018

Avocado Toast with Poached Eggs


Schmearing or putting thin slices of a rich, buttery avocado on toast hardly seems worthy of a blog post. Although in my defense, I am not the first one to do so and probably will not be the last. Because when something is healthy, slightly indulgent, simple to make, a significant departure from a traditional breakfast, and beautiful on a plate, it seems justifiable to talk about. There are hundreds of 'recipes' (using the term loosely) out there for avocado toast. In reality they are merely multiple ways of showcasing the current obsession we have with the avocado. One that doesn't seem to have an expiration date.


Some claim we have the Australians to thank for this essentially open faced sandwich. But others aren't so quick to give them full credit for a culinary 'invention' believed to have been around for awhile. Regardless of where the concept of putting avocado on bread came from or where it first appeared on a menu, there is one thing we might all be able to agree on. It's insanely delicious. Making it worthy of all of the hype this no clear end in sight 'food' trend has been receiving.

Given the choice of slathering your toast with butter or "nature's butter", which would you choose? I suppose the answer depends in part on deciding whether your choices are influenced by their nutritional value. Would knowing an avocado has 'twice the potassium of a banana, are packed with fiber, help lower levels of bad cholesterol and have powerful anti-aging properties' sway you one way or other? Until any new nutritional researcher debunks all of these claims,  choosing"nature's butter" seems like one of the easiest choices to make.


Topping the avocado with a poached egg (or over easy egg if that's what you like) makes it feel more like a complete meal, and less like you are eating avocado bruschetta for breakfast.


If you haven't yet jumped on the avocado toast bandwagon, one with a significant social media presence, there is still time. 

Recipe
Avocado Toast with Poached Eggs 

Ingredients
1 ripe avocado, halved, seed removed, thinly sliced
1 lemon, halved
Everything Bagel Seasoning Blend (from Trader Joe's or make your own)
2 pieces of  rye, pumpernickel, whole grain or sourdough bread, toasted
1 or 2 poached eggs (or over easy eggs)

Directions
1. Before removing the sliced avocados from their skin, squeeze half of a lemon over each one. Place on toasted bread.
2. Sprinkle with Everything Bagel Seasoning Blend and top with a poached egg (or over easy eggs).
3. Serve immediately.

Notes: (1) You could also mash up the avocado and spread on the toast. Squeeze the lemon juice into the mashed avocado. Sprinkling with the Everything Bagel Seasoning Blend after the mashed avocado is spread on the toast. (2) If you can't find or don't have a Trader Joe's near you, make your own everything topping. A recipe for one can be found on this Everything Chicken Puffs link.


Wednesday, February 14, 2018

Raspberry Brownies


Happy Valentine's Day! Happy Galentine's Day! Happy 106th birthday to the state of Arizona! If there was ever a day calling for something decadent, something chocolate, it would be this day! However, for those of you who give up sweets for Lent, this has to be one of those days where chocolate temptation is everywhere around you. You might even wonder if you should have given up something else. But for those of you with enough will power to take you through the next 40 days, bookmark this Raspberry Brownie recipe. Because if you love a fudgy, intensely chocolate brownie, you will want to make this brownie. For those you gave up something else or don't give up anything at all, it is your lucky day. You don't have to wait to make them!


Over the past fifteen years, there have been a number of variations made to the well published, highly touted brownie recipe attributed to Katharine Hepburn. Some have reduced the amount of sugar; some have replaced the unsweetened chocolate with cocoa powder; some have increased or doubled the amount of flour; some have added additional chocolate; some have added coffee granules; and some have added another layer of flavor in the middle of the brownies. The addition of a thin layer of flavor, in the form of raspberry preserves, came from Maida Heatter as shared in her cookbook "Book of Great American Desserts". When I read 'If they gave Oscars for Brownies, this would win" in Maida Heatter's description of the Raspberry Brownies, the to make/not to make decision was made. When Maida Heatter, 'America's First Lady of Desserts', so boldly makes such a claim, I admit I wanted to believe her.


If there was ever cookbook author I have admired, it would be Maida Heatter. Since 1983 she has had eleven cookbooks published. I own ten of them them. Not including a double copy of the "Book of Great American Desserts". At one time I thought it had lost this book, so I ordered another one. As luck would have it I found the first book within days after receiving the second copy. If food blogs and instagram were around when Maida Heatter first starting sharing her recipes she would undoubtedly be the undisputed foodblog and social media dessert goddess. Although maybe she and Alice Medrich would share this title as both of these women have unselfishly shared not only their recipes but their baking knowledge. Their cookbooks both inspire and teach. Having made numerous recipes from Maida Heatter's cookbooks, I have never been disappointed.


And these Raspberry Brownies did not disappoint.


I made three changes to the ingredients in Maida's Raspberry Brownie recipe. None of them truly radical. I used caster sugar instead of granulated sugar, toasted the walnuts, and increased the amount of all-purpose flour from 1/4 cup to 1/3 cup. If you don't have caster sugar, you could absolutely use granulated sugar. If you don't normally toast your nuts before putting them in your baked goods, you really should. It honestly makes a difference. And if you like gooey, but not overly gooey brownies, then you will love the slight increase in all-purpose flour.


I also made some changes to the techniques use in the making of these brownies. After melting the chocolate and butter, I transferred the mixture to a bowl before adding the sugar, vanilla, and salt; used a hand mixer instead of a spoon to make these brownies; sifted the flour; used parchment paper to line the baking pan instead of aluminum foil; and, finished them with a dusting of Dutch-processed cocoa and confectionary sugar. Again, none of these changes were truly radical. But they were all ones I would highly recommend.


The use of an 8" square pan would be one of the non-negotiable aspects of this Raspberry Brownie recipe. The baked brownies are slightly thicker than 1/2". They would lose their moist, gooeyness if a larger pan was used. One of the distinctive, addictive features of this brownie.


These Raspberry Brownies take longer to make than the original Katharine Hepburn recipe due to the assembly process. But the extra time is worth it. After evenly spreading half of the batter into the prepared baking pan, it is covered with aluminum foil and placed in the refrigerator for approximately 30 minutes. Which is just long enough to firm up the bottom layer, making it easier to spread the raspberry preserves in a very thin layer over it.


After evenly spreading the remaining brownie batter over the preserve layer, the brownies sit at room temperature for approximately 30-45 minutes, giving the bottom layer some time to thaw before going into a preheated 325 degree (F) oven.


The baking time for these Raspberry Brownies ranges between 35 and 40 minutes.


So would these Raspberry Brownies win an Oscar? I would vote for them.


These are kind of brownies where it eating just one is extremely difficult. If you consider yourself a chocoholic, these are the kind of brownies you want to eat when you have a craving for chocolate.


If you are a big fan of the flavors of raspberry and chocolate, you will love these Raspberry Brownies. You might also love these Raspberry Truffle Brownies. If make either of these recipes, you will definitely make someone's heart really happy. Especially your own.

Recipe
Raspberry Brownies (inspired by the Raspberry Brownie recipe shared in Maida Heatter's Book of Great American Desserts)
Makes 16 two inch brownies

Ingredients
2 ounces (57 g) unsweetened chocolate, coarsely chopped
8 Tablespoons unsalted butter
1/4 teaspoon kosher salt
1/2 teaspoon vanilla 
1 cup (200 g) caster or granulated sugar
2 large eggs, room temperature
1/3 cup (43 g) all-purpose flour, sifted
1 cup (112 g) walnuts, roasted, and coarsely chopped
1/3 cup (108 g) raspberry preserves (seeded or unseeded)
Optional: Dutch processed cocoa powder and confectionary sugar for dusting

Directions
1. Line an 8" square baking pan with parchment paper. Lightly butter or lightly apply cooking spray. Set aside.
2. Place butter and chocolate in a small heavy bottomed saucepan. Over low heat, stir frequently until melted. Transfer mixture to a medium sized bowl.
3. Immediately add in salt, vanilla and sugar. Blend using a hand held mixer. 
4. Add in eggs one at a time, beating until well incorporated.
5. Add in sifted flour, beating on low speed until there are no flour streaks.
6. Stir in walnuts. The batter will be thick.
7. Scrape half of the batter into the prepared plan. Smooth using an offset spatula. Cover with aluminum foil and place in the freezer for 30 minutes or until just firm enough to spread raspberry preserves. 
8. Spread the raspberry preserves in a very thin layer evenly over the bottom brownie layer. 
9. Spoon remaining batter on top the preserve layer. Carefully spread using an offset spatula or spoon.
10. Let mixture stand for 30-45 minutes until the bottom frozen layer has thawed.
11. While waiting for the mixture to thaw, preheat oven to 325 degrees (F).
12. When ready to place the pan in the oven, bake for 35-40 minutes or until a toothpick inserted gently in the middle comes out clean Do not over bake.
13. Transfer pan to a cooling rack. Allow brownies to cool to room temperature. 
14. Place pan in the freezer until firmed up (approximately 30-45 minutes). 
15. Remove brownies from the pan. 
16. Sift Dutch-processed cocoa powder and/or confectionary sugar over the top. 
17. Cut into 2" squares. Serve immediately and/or wrap in cellophane.
18. Brownies are really good at room temperature but incredibly great when chilled. Store brownies (well-wrapped) in the refrigerator.

Notes: (1) These Raspberry Brownies can be made a day ahead and stored in the refrigerator. Serving them chilled optimizes their flavor and fudgy texture. 


Winter at Morton Arboretum, February 2017 


Sunday, February 11, 2018

Pot Roast with Roasted Vegetables


A year ago this week we were in Oahu, a piece of heaven on earth, with friends enjoying the warm weather, ocean breezes, white sandy beaches, blue skies, and exquisite landscapes. If I close my eyes I can still take myself back there. Like some say, what a difference a year makes. It has been snowing for four days here in the midwest. Double digit snow accumulations along with icy, snow packed roads have made for less than desirable driving or running conditions. Getting the long and circular driveways shoveled are exhausting, but not as energizing, as a boot camp workout. Before this snowpocolyse began Thursday evening, I along with hundreds of others, filled a large cart, and waited in the long lines at one of my local grocery stores. This was not a milk and bread mission. Anticipating this hyped winter storm would actually come to fruition, I put together a grocery list containing all of the ingredients needed to make some long over due comfort foods. The Potato Leek Soup and this Pot Roast with Roasted Vegetables were two things I thought would not only get us through the snowy weekend, but would make for some great leftover meals in the upcoming week. Which would mean each time I opened up the refrigerator door I could find myself saying 'Hello Delicious' outloud.


Pot Roast, a timeless combination of melt in your mouth beef, seasoned root vegetables, and a rich, velvety gravy, is quintessentially classic American comfort food. The method of slow cooking meat in a liquid is a century old technique (aka braising), but one not appearing in American cookbooks until the late 19th century. Beef chuck, brisket, short ribs, and pork shoulder, generally considered tougher cuts of meat, have always been considered ideal braising options, as they are rich in marbled fat and connective tissue. Over a long, slow cooking process those qualities convert to gelatin, resulting in swoonworthy, fork tender, pull-apart perfection bites of deliciousness. Many of us grew up with Pot Roasts gracing the Sunday dinner table. When craving the taste of a childhood memory meal, we might find ourselves seeking it out on diner menus. Yet, invariably we never seem to find a Pot Roast to live up to the ones we remembered. Get ready to create new memories.


Cooking options for a Pot Roast are roasting in the oven or cooking in a slow cooker. This one stays with a traditional approach and uses the oven method. Braising liquids used in Pot Roasts include he options of beef stock, red wine, or a combination of the two. This one uses only beef stock. The aromatics used to flavor the beef and subsequently the gravy range from a myriad of fresh herbs (rosemary and thyme being the most common) to dried herbs to fresh vegetables to spices to various combinations of all of the aforementioned. This version relies primarily on spices and fresh garlic, however, beef bouillon powder and Worcestershire sauce are critical flavor components.


Searing the beef is less about retaining moisture and much more about adding flavor. The key to a good sear is the use of a heavy bottomed pan, like a cast iron skillet, in order to prevent the meat from being 'steamed' rather than being 'seared'. Once seared, the beef is transferred to a roasting pan and the meat is studded with garlic cloves. After pouring the braising liquid over the beef, the pan is tightly covered with aluminum foil and inserted in a preheated 425 degree (F) oven for 30 minutes. Remove the pan from the oven, top with carrots and parsnips, tightly recover the pan with foil, reduce the oven temperature to 300 degrees (F), and then let cook for up to 5 hours or until it is pull apart fork tender. That's it! Sit back, go to yoga, read a book, watch a movie, sit in a hot tub, or shovel snow. Let the oven do all the work of melding the flavors together.


The difference between a too short or just right roasting time is the difference between a tough roast and one melt in your mouth, fork tender. After several hours of roasting, begin to check for doneness. My four and half pound chuck roast was done perfectly after four hours of roasting at 300 degrees (F), not including the thirty minutes of roasting at 425 degrees (F) for thirty minutes. (See Note below for cooking times.)


Between the beef stock you added to the roasting pan and the juices exuding from the beef, you should have somewhere between three and four cups of liquid at the end of the cooking process. This highly flavored liquid creates the most incredible gravy imaginable. Usually when making a gravy, I transfer the liquid to saucepan, combine some flour and milk together to make a paste, add a little of the heated liquid to the flour/milk mixture, pour that mixture into the saucepan, then whisk until the liquid turns to gravy. But the process for making this gravy is different. You begin by creating a roux with melted butter and flour in a saucepan. As soon as the roux takes on a light brown color (approximately 2-3 minutes of cooking time), slowly add in the liquid. Whisking until it reaches your desired state of gravy consistency. I honesty had a moment when I tasted this rich, velvety, deeply flavored gravy. And if gravies could win medals, this one would earn GOLD. I will never make a savory gravy any other way again. Never ever.


I love roasted potatoes but with a Pot Roast I much prefer mashed potatoes. Yukon Golds hand mashed with their skins on is how we roll here. 


The carrots and parsnips were sweet, fork tender, and went perfectly with this Pot Roast. Of course, Ina Garten has been pairing these two root vegetables for years. If you have never had parsnips before, this Pot Roast gives you the perfect opportunity to discover how deliciously sweet they are.


When serving the Pot Roast, ladle some of the gravy over the meat and arrange the roasted vegetables around it. Sprinkle with chopped flat leaf parsley and bring this jaw dropping platter to the table. This Pot Roast is seriously throw down worthy. In my fantasy world, someone invites me and the Pioneer Woman to a Pot Roast throwdown and this one wins! 

Recipe
Pot Roast with Roasted Vegetables (inspired from multiple sources)
Serves 6-8

Ingredients
Roast
3-5 pound chuck roast, trimmed
2 Tablespoons olive oil or vegetable oil
4-6 garlic cloves, peeled, quartered
3 cups beef broth
2 Tablespoons Worcestershire sauce
3 Tablespoons dry minced onion
2 Tablespoons beef bouillon powder
1 teaspoon garlic powder
1 teaspoon kosher salt
1/2 teaspoon black pepper
1 fresh bay leaf (could use a dried bay leaf if fresh is not available)
2-3 pounds of carrots, peeled and kept whole
1-2 pounds of parsnips, peeled and kept whole
Optional: Chopped flat leaf parsley for garnish

Gravy
2 cups of the broth/juice from the roast
4 Tablespoons unsalted butter
1/4 cup all-purpose flour
Kosher salt and pepper to taste

Directions
1. Remove chuck roast from the refrigerator at least one hour prior to cooking.
2. Preheat oven to 425 degrees (F).
3. Heat olive oil or vegetable oil over high heat in a cast iron or heavy skillet. Sear meat on all sides until browned (approximately 2-3 minutes per side). Transfer meat to a large roasting pan.
4. Insert garlic clove slivers into the roast.
5. In a large mixing bowl/cup, whisk together the beef broth, Worcestershire sauce, dry minced onion, beef bouillon powder, garlic powder, kosher salt, black pepper, and bay leaf. Pour over the roast.
6. Cover the roasting pan tightly with aluminum foil. Roast for 30 minutes.
7. Reduce oven temperature to 300 degrees (F). Remove pan from oven, add the carrots and parsnips. Cover the pan tightly with aluminum foil. Continue to cook for an additional 4-5 hours. The Pot Roast is ready when it is fall apart tender.
8. Remove carrots and parsnips from the roasting pan. Place on a baking sheet and return to the oven to keep warm.
9. Transfer roast to a serving board, cut against the grain in 1/2" slices and place on a large serving platter.  Cover loosely with aluminum foil to keep warm while you make the gravy.
10. Melt butter in a medium sized saucepan. Add in the 1/4 cup flour and whisk to create a roux. Cook for 2-3 minutes, whisking continuously, until the roux is lightly browned.
11. Slowly stir in two cups of the juices/broth from the roasting pan. Simmer until gravy has thickened. Season to taste with kosher salt and pepper.
12. Arrange carrots and parsnips around the roast. Drizzle some of the gravy over the roast, sprinkle with chopped parsley, and serve. Put remaining gravy in a gravy boat.

Notes: (1) Recommend serving with homemade mashed potatoes rather than putting the potatoes in with the roast. (2) Roasting time will vary based on the size of the roast. For a 3 pound roast allow 3 to 3 1/2 hours, for a 4 to 5 pound roast, allow for 4 to 5 hours of cooking time. (3) You should have at least 3 to 4 cups of roasting broth/juices which would enable you to make a double batch of the gravy. (3) When cutting the pot roast, cut across the grain. (4) Leftovers reheat beautifully in a low temperature oven or in the microwave. Any leftover pot roast also makes great sandwiches.


Oahu, February 2017