Friday, May 24, 2019

Peppermint Patty Brownies


As hard as I try, I can't remember the exact tipping point responsible for my obsession with weather forecasts. It may have started back during my early 40s aka my first running life. This preoccupation with weather then deepened each time I was planning a trip. Especially one where my plan was to spend as much time outdoors as possible. And now in my second running life, constantly checking on the weather forecast has turned into a time-consuming, admittedly time-wasting addiction. It doesn't matter that I know weather forecasts are not an exact science. Nor does it matter there is little reliability in forecasts seven to ten days out. Or in some cases just a few hours out. Because checking on the weather several times a day and worrying about the weather has become a new constant in my life (maybe I need to get a life!). All in spite of knowing this isn't the most productive use of my time. Although it is a pretty good excuse to avoid doing those things that don't bring me any joy. Like folding laundry. But after last weekend, my weather obsession might have gone down a notch. One probably not discernible to anyone but me. The thunderstorms predicted to come during last Sunday's 10k race never materialized. A few well timed rain drops came during the race, but the sort of, kind of, hoped for torrential rains and lightning were no shows. No, I didn't want to run in crazy, inclement weather. I was just a little anxious about running at a race pace for 6.2 miles. Which turned out to be 6.5 miles because I must have been weaving on the course. With half-marathon training starting up in the next two weeks (yes, I really have lost my mind as I am going down the 13.1 road again), my weather mania will more than likely return back to new normal levels. The funny thing is, I will probably be wishing for some rain, especially on hot, humid summer running days. But like they say, be careful what you wish for. 


"The biggest, thickest, gooiest, chewiest, darkest, sweetest, mostest-of-the-most..with an almost wet middle and crisp-crunchy top." (Maida Heatter) . Those may be the most irresistible, drool invoking words about a brownie I have ever read in my life. Back in the mid 90s many cookbooks contained less professional photography glossy photos and more black and white line drawings. Which meant after scanning the ingredient list, either the cookbook author's reputation and/or the recipe's description influenced recipe making decisions. At least it did in my world. Even recipes containing some of my least favorite ingredients would sometimes sound tempting. 


As much as I love cookies, brownies are my weakness. I was all in on this brownie recipe after reading there was a layer of peppermint patties sandwiched between the top and bottom layers of brownie batter. With the flavor of peppermint confined to the middle layer, the taste of chocolate was not going to get lost in these brownies. I knew they were destined to be the kind of love at first site as well as at first bite brownies I love.


Long before Ina Garten was telling us to add instant coffee and/or espresso to chocolate desserts as a way to deepen the flavor of chocolate there was the Queen of Desserts Maida Heatter telling us this. Whether or not she was the first to discover this baking secret doesn't matter. Because I am giving her all the credit.

You might think brownies made with only unsweetened chocolate wouldn't live up to their 'hype'. But they do. Could the instant espresso powder be responsible? Or the high sugar, low flour ratio? The answer is probably both are.


I tinkered slightly with both the ingredients and baking process. As far as the ingredients go, the salt was increased from 1/4 teaspoon to 1/2 teaspoon, the walnuts were roasted before being chopped and added into the batter, the almond extract was omitted, and the amount of vanilla increased from two teaspoons to one Tablespoon. In the recipe notes, Maida shared the edges of the brownies might become somewhat burned during the baking process. This could be due in large part to the short baking time (approximately 35 minutes) and high oven temperature (425 degrees (F)). To prevent the brownies from burning without sacrificing their gooey, chewy center, I altered the baking temperature. More specifically I baked these brownies at three different temperatures for almost 40 minutes. The result was even better than I had anticipated. So while it means you have babysit the baking process a bit, the brownies baked up perfectly and you shouldn't have any burnt edges. 


For the first 13 minutes, the brownies were baked at 350 degrees (F). For the second 18 minutes, the oven temperature was increased to 425 degrees (F). And for the last 6 to 8 minutes the oven temperature was reduced to 400 degrees (F). My total baking time ranged somewhere between 37 and 39 minutes. And the brownie pan was rotated midway through the baking process to ensure they baked evenly. When inserting a toothpick in the brownies to test for doneness please know it will come out with a few crumb crumbs but it will also come out a bit wet. Trust the baking process (and Maida Heatter) and don't over bake your brownies. These are intended to be more on the gooey than cakey side. 


These brownies need to be cooled completely and chilled before you cut and serve them. I had cut some of them after about 4 hours of chilling time and some after almost 24 hours of chilling time. My recommendation would be to give these brownies an overnight rest in the refrigerator before cutting them. Keep the brownies in the refrigerator even after they are cut as I think they are best served slightly chilled rather than at room temperature.


These Peppermint Patty Brownies are the ones you want whenever you get a craving for chocolate, whenever your sweet tooth won't take no for an answer, when the weather turns warmer and you want something refreshing, when you are having friends over for a gathering, when you host a backyard barbecue, or when you get a yearning for a gooey, chewy, dark, sweet, decadent brownie. There are probably at least a dozen other reasons why you should make these brownies. I won't even try to top Maida Heatter's perfect description of these brownies. If I was to make a small contribution, it would be to tell you they are EPIC! They deserve to become an obsession. One that will bring you great joy!

Recipe
Peppermint Patty Brownies (slight adaption to Maida Heatter's Palm Beach Brownies with Chocolate Covered Mints recipe from her cookbook "Maida Heatter's Brand-New Book of Great Cookies")

Ingredients
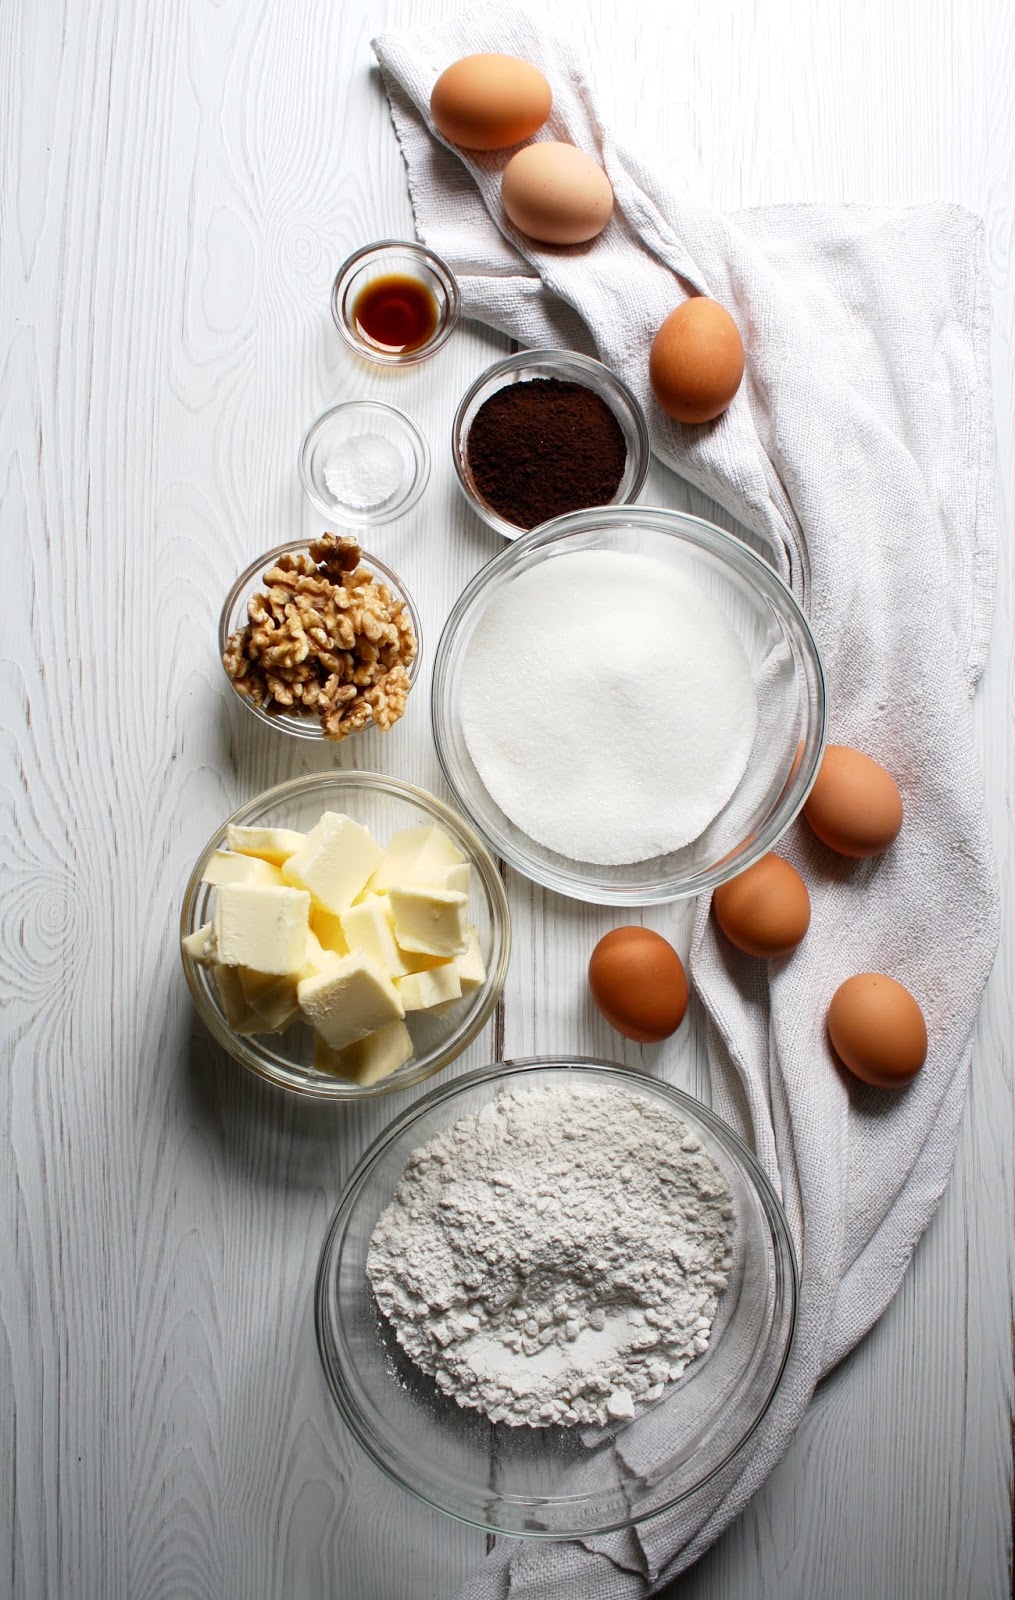
8 ounces unsweetened chocolate, chopped
1 cup unsalted butter
2 generous cups walnut halves, roasted
5 large eggs, room temperature
1 Tablespoon vanilla
1/2 teaspoon kosher salt
1 Tablespoon plus 1 teaspoon instant espresso powder
3 3/4 cups (750 g) granulated sugar
1 2/3 cups (220 g) all-purpose, unbleached flour, sifted
18-22 ounces chocolate covered peppermint patties, unwrapped (see Note)

Directions
1. Preheat oven to 350 degrees (F). Line a 9" x 11" baking pan with parchment paper. Lightly butter and set aside. Notes: I used a 7 1/2" x 12 1/2 " baking pan, which was the closest in pan volume to the recommended pan size.
2. In a saucepan, melt the butter and unsweetened chocolate. Remove from the heat and set aside.
3. In the bowl of a standing mixer fitted with a paddle attachment, beat the eggs with the vanilla, salt, espresso powder, and sugar at high speed for 9-10 minutes.
4. On low speed, pour in the chocolate mixture and beat only until blended.
5. Add in the flour. Beating on low speed mix only until just mixed.
6. Fold in the walnuts with a spatula.
7. Pour half of the batter into the prepared pan. Spread top with an offset spatula to smooth out.
8. Place a layer of the peppermint patties, touching each other and the edges of the pan, all over the bottom chocolate layer. Cut some of the mints to fill in the large spaces on the edges. 
9. Pour the remaining chocolate mixture and smooth the top with an offset spatula.
10. Bake in accordance with the following times and temperatures: (1) 13 minutes at 350 degrees (F), (2) 18 minutes at 425 degrees (F), and (3) 6-8 minutes at 400 degrees (F). Note: Rotate the pan midway through the baking process. At the end of the 37-39 minute baking time, insert a toothpick in the middle. It will come out with some crumbs but look wet. This is how it should look. Do not over bake. Note: The sides of the brownies will be firm to the touch.
11. Transfer the pan of brownies to a cooling rack. Allow to come to room temperature.Cover with aluminum foil and chill in the refrigerator for at least 4 hours but preferably overnight.
12. Cut into squares or bars with a sharp knife. Serve immediately.
13. If not eating immediately or if you have extras, pack in an airtight container or wrap in cellophane and store in the refrigerator.

Notes: (1) To roast walnuts, bake in a preheated 350 degrees (F) oven for 10 minutes. Allow to cool before chopping and adding to the batter. (2) I used these York Peppermint Patties for the mint layer. Use the smaller bite sized patties versus the larger candy bar sized. 


Wilder Park, Elmhurst, Illinois, Memorial Day Weekend, 2019

Monday, May 20, 2019

Lemon Curd Tart


"Good things come in threes." From Columbus sailing three ships; to the stories of the three little pigs, three blind mice, and three bears; to a three-ring circus; to the three wishes granted by genies; to the Christian trinity; to the three wise men, the number three has been associated with either good fortune or good luck for centuries. Going as far back as the time of Confucius (500 BC). In the Chinese culture the number three is considered a lucky number. The origin of the concept is alleged to come from the Latin principle "omne trium perfectum". When translated into English it means "the rule of three". But whether or not the number three has magical properties may lie with the believer. For the record, I would be one of the believers in the superstitious, legendary, grounded in folklore power of three. Perhaps this swoonworthy Lemon Curd Tart could be one of many examples to explain why. 


For one thing this tart is made up of three separate components (a shortbread crust, a lemon curd, and an Italian meringue). Which, when combined, create an incredibly decadent, beautiful, impressive dessert. Destined to wow the visual and taste senses of your family and friends, this Lemon Curd Tart will have everyone wondering whether it's homemade or from a French patisserie. However, I am inclined and maybe just slightly biased to think it is better than anything you could buy from an expensive, fancy bakery.


After having a meringue making meltdown a few weeks back, I did experience a bit of trepidation when making the tart's finishing touch: the Italian meringue. Whether the number three had anything to do with it or not, it could not have turned out more heavenly. I share this because you might think making a tart having three different components is either a bit on the daunting side or one depending heavily on luck. It's actually easier to make than you think. Especially if you take the 'divide and conquer' approach making the lemon curd and tart dough one day and the Italian Meringue the next. None of the individual components take more than 15 minutes to make (although the baking time on the shortbread crust is 40 minutes) so it's not nearly as labor intense as you might think.

The recipe used for the lemon curd is one of two I have previously posted to the blog. The one used here is my favorite as it's pretty close to foolproof and far better than anything you can buy off the grocery store shelves. The recipe makes a little more than you need for the tart. Which means you will have some leftover curd to spread onto your scones, mix into your yogurt, dollop over your Dutch Babies, or eat off the spoon. The curd can be made the day before or several days before you plan on assembling and serving the Lemon Curd Tart. Depending on whether or not you have any Lemon Curd eating bandits living in your house, you might have to put either a 'please don't touch label' or a skull and crossbones sticker on it. 


The shortbread crust for the tart is an adaptation of one previously posted to the blog. The most significant change made to the earlier posted recipe was reducing the amount of unsalted butter. This one uses only eight versus eighteen Tablespoons. Surprisingly, the reduction of butter doesn't significantly affect the buttery taste of the shortbread. Rather it made for easier to roll out dough. Making the shortbread dough, rolling it out, fitting it into your tart pan, and refrigerating overnight is highly recommended. Giving the dough a long chill time helps to reduce any shrinkage during the baking process. As as side note, the consistency of the shortbread dough made it possible to roll out immediately without any pre-rolling refrigeration.


Not only do I love the look of a tart made in a rectangular pan, I love how you get more shortbread in each slice.


An Italian meringue differ significantly from a French and Swiss meringue. It's made by drizzling a 240 degree (F) simple syrup into egg whites whipped to soft, but stable peaks. Whipping the syrup into the egg whites for up to seven minutes (or until the bowl is slightly cooled) creates a voluminous, glossy, and firm meringue. Resulting in a very stable, somewhat dramatic meringue. One perfect for piping or spreading onto the tart before being lightly browned with a kitchen torch. 

Once the tart is topped with the Italian meringue it is ready to serve. If not serving immediately, place the tart in the refrigerator for up to two hours. 


If you love the tart, refreshing flavor of lemon, you will be smitten with this Lemon Curd Tart. Serve this tart at your next dinner party and your friends/family will be smitten with you!

The simplest of ingredients are transformed into the most luscious, velvety, scrumptious dessert. There are so many reasons why you should make this Lemon Curd Tart, but let me give you just three of them. First and foremost it is satisfyingly delicious. The flavors and textures from the shortbread crust, lemon curd, and Italian meringue are a party on your palate. Second, this tart has an impressive wow presentation factor. How could anyone resist an eye candy dessert? And third, the recipes for the lemon curd gives you enough to enjoy it the next day or in the week ahead. In other words, it's one having multiple benefits. Hope this enough to convince you to make it!

Recipe
Lemon Curd Tart
Serves 8-10 

Ingredients
Lemon Curd
4 large eggs, room temperature
1 1/2 cups (300g) granulated sugar
2/3 cup freshly squeezed lemon juice (from approximately 4 lemons)
Zest from four lemons
12 tablespoons or 1 1/2 sticks unsalted butter (170g), room temperature 
pinch of sea salt

Shortbread Crust
8 Tablespoons (113 g) unsalted butter cut into eight pieces (butter should be room temperature)
1/3 cup (40 g) confectionary sugar
1 1/2 cups (188) all-purpose flour
1/4 teaspoon Kosher salt1 large egg yolk

Italian Meringue
1 1/4 cups (250 g) granulated sugar
1/3 cup water
1/2 cup (120 g) egg whites (from 3 large eggs), room temperature

Directions
Lemon Curd
1. In a heavy bottom medium sized saucepan, beat eggs and sugar together.
2. Add lemon juice, lemon zest, butter, and sea salt. Stir until all ingredients are combined.
3. On medium-high heat, bring mixture to a boil (whisking constantly) so that it thickens. Note: The mixture's temperature should reach 180 degrees (F).
4. Remove from heat, transfer to a heat proof bowl or jars. Place a piece of plastic wrap on top to prevent a crust from forming. Allow to cool before chilling in the refrigerator. (Note: Mixture will need to be well chilled before proceeding. Can make lemon curd early in the morning or the day before.)

Shortbread Crust
1. In the bowl of a standing mixer fitted with a paddle attachment beat butter until smooth (approximately 1 minute).
2. Add in confectionary sugar and salt. Beat until sugar is incorporated and mixture is smooth (approximately 1 minute).
3. Add egg yolk and beat until well combined (approximately 1 minute).
4. Add the flour in two additions, beating until mixture begins to come together in a ball and no longer sticks to the sides.
5. On a lightly floured surface roll out dough to 1/4" thickness to match the shape of your removable bottom tart pan. See notes.
6. Slide bottom of the tart pan under the dough and transfer to the pan. Gently press the dough into the pan and up the sides. Trim any excess. Cover with plastic wrap and refrigerate at least 4 hours or preferably overnight.
7. Preheat oven to 325 degrees (F). Line the tart pan with parchment paper and fill with dried beans and/or pie weights.
8. Bake for 30 minutes. Remove the parchment paper and weights. Return to oven and bake for an additional 10 minutes or until the crust is lightly golden brown. 
9. Transfer pan to a cooling rack. Let cool to room temperature. Note: Can bake shortbread crust up to 4 hours before serving. Lightly cover cooled crust with plastic wrap, especially in humid weather.

Italian Meringue
1. In the bowl of standing mixer fitted with a whisk attachment, whip the egg whites until soft, stable peaks form. Set aside.
2. In a small saucepan, heat the sugar and water over high heat until the mixture reaches a temperature of 240 degree (F).
3. With mixer running, slowly pour in the hot sugar syrup. Increase speed to high and beat until the mixture is voluminous, glossy, and bowl has cooled to the touch (approximately 6 to 7 minutes).
4. Use immediately.

Assembly
1. Remove the shortbread tart crust from the tart pan and transfer to a platter.
2. Spread enough lemon curd into the cooled tart crust to fill about a 1/4" from the top of the tart shell. Note: The lemon curd will have a depth of approximately 1/2".
3. Transfer meringue to a pastry bag (if using) and pipe the design of your choice. Alternately spread the meringue over the top, swirling into the design of your choice.
4. Using a kitchen torch, carefully brown the meringue.
5. Serve immediately. Or place in the refrigerator for no longer than 2 hours before serving.

Notes: (1) I used this non-stick rectangular removable bottom tart pan. The pan's dimensions are 13 3/4" x 4 1/4". Suggest not using a round tart pan larger than 9" in diameter. (2) Wait until your meringue is ready before adding the lemon curd to the tart shell. Do not fill shortbread tart with the lemon curd until ready to finish with the Italian meringue. (3) We stored some of the leftover Lemon Curd Tart in the refrigerator. While the texture of meringue changes slightly it was still delicious. (4) The recipe for the Italian Meringue came from the May/June 2019 issue of Bake from Scratch.

Tuesday, May 14, 2019

Rustic Strawberry Slab Tart


"It's arguable to say that every one of us has been moved by the beauty of what I have called snapshots, but for photographers they are charms and proverbs, and like lightening or wild strawberries.." (Tod Papageorge) Whether or not I actually get to see blossoming cherry trees this year is now anyone's guess. Between a later than usual blooming season, the anticipated weather forecast for the next two weeks, and my schedule, I may or may not get to take in, let alone photograph, the beauty found in Door County's cherry orchards. While a whirlwind trip isn't exactly what I had in mind, I may have to go with a 'something is better than nothing' plan. I am keeping my fingers crossed I will find this much desired unicorn.


During moments of disappointment, no matter how insignificant or consequential, I tend to find solace in the kitchen. Baking is my therapy. The telltale signs of my self-medicating remedy would be the seven plus pounds of unsalted butter found in my refrigerator and well-stocked cabinets. There may not be any "food" in the house, but there is always an abundance of sugars, chocolate, flours, and spices. In the event of an apocalypse, we will have to survive on cookies, cakes, brownies, and tarts. And if, by chance, this happens in the spring or summer, we will probably be eating this Rustic Strawberry Slab Tart. 


Slab tarts are relatively easy to make. Rustic slab tarts are even easier and as endearingly beautiful as artwork done by a three year old. 


Instead of an all-butter crust, this one has a rye crust. Using part dark rye flour and all-purpose flour, the baked crust is darker in color, deeper in flavor, and makes for a perfect base for fruit based desserts (recipe for an all butter crust is in the notes below). Iced cold butter, iced cold water, and chilled apple cider vinegar (I keep mine in the refrigerator) are essential when making a dough. Having all of your ingredients measured out before starting the dough is always a good thing. Using your hands to make the dough will help it enhance its' flakiness. Once made, the dough chills in the refrigerator for at least two hours (or early in the day or overnight). Whether you shape it in an oval, circle, square, or rectangle, the rolled out dough bakes in a preheated 400 degree (F) oven for 25-30 minutes. 


If you find or pick strawberries, look for the smallest ones you can find. Not only are they usually the sweetest, they help to make this tart look even more beautiful. Mine were more on the medium size.


On top of the baked crust is a generously slathered layer of lightly sweetened, vanilla bean enhanced mascarpone cream. After adding some dollops of strawberry preserves, the sliced strawberries are arranged on top in as rustic or precise manner as you wish. Like old weathered barns, I am drawn to rustic tarts.

The finishing touch comes from brushing on a melted strawberry preserves and Chambord mixture over the sliced strawberries. 


There is only one downside to this Rustic Strawberry Slab Tart. It is best enjoyed as soon as it is fully assembled. If you bake the tart slab early in the day (keep covered) and make the mascarpone cream (keep in the refrigerator), it will take about 15 minutes to put it all together. 


This isn't the first Strawberry Tart posted to the blog, but this version is my favorite. After listening to one of my friends share how her mother's recipes never seem to turn out like her mother made them, I couldn't help but wonder what nuances she may have made, but never wrote down, to them. Whenever I make enough changes to a recipe significantly affecting the outcome, I will share them here on the blog. Call them do-overs, updates, or good to great versions. Because the last thing I want to hear anyone say when they make one of the recipes from this blog is 'it didn't taste the same as when Lynn made it." 
Recipe
Rustic Strawberry Slab Tart
Serves 8 (one small tart) Serves 12-16 (one large tart)

Ingredients
Dough (makes enough for two smaller or one large slab tart)
1 1/3 cups (175 g) all-purpose flour
1 1/3 cups (175 g) dark rye flour
1 teaspoon of kosher salt
1 cup plus 2 Tablespoons (255 g) cold unsalted butter, cut into small cubes
1 Tablespoon chilled apple cider vinegar
8-10 Tablespoons (120-150 ml) ice cold water
1 large egg, lightly beaten (for egg wash)

Tart
1 pound (450 g) strawberries, cut into 1/4" slices (smaller strawberries work best)
1 cup (225) mascarpone
3 Tablespoons caster sugar (or granulated sugar)
1/2 teaspoon vanilla bean paste (or vanilla extract)
6 Tablespoons high quality strawberry preserves, divided
1 Tablespoon Chambord (optional)

Directions
Dough
1. In a large bowl, whisk together the flours and salt. Set aside.
2. Mix together 8 Tablespoons of ice cold water with the apple cider vinegar. Set aside.
3. Add in the cold, cubed butter. Using your fingers, press each cube of butter until they are flattened.
4. Sprinkle 7 Tablespoons of the water/vinegar mixture over the flour/butter mixture. Using a wooden spoon, stir until the mixture is combined. More than likely you will be adding the last tablespoon of the water/vinegar mixture and up to 2 more Tablespoons of water in order for the dough to get to a consistency where you can squeeze a handful together without it falling apart. Note: Add the additional ice cold water, two teaspoons at a time.
5. Press the dough into a ball. Cut in half, shape into a disk, wrap in plastic wrap, and chill in the refrigerator for at least two hours (or overnight).
6. Preheat oven to 400 degrees (F).
7. On a lightly floured surface roll out the dough to 1/4" thickness in your desired shape (square, rectangle, oval, or circle). Transfer to a large baking sheet lined with parchment paper. Using a fork, prick rows of hole (about 1/2 inch spacing between rows) in the crust. 
8. Brush the egg wash over the dough.
9. Bake for 25-30 minutes, rotating the baking sheet midway through, until the dough is a deep golden brown. Note: Press the dough down with a spatula if it bubbles form during the baking process. 
10. Let the crust cool completely on the pan.

Tart and Assembly
1. In a small bowl, whisk together the mascarpone, caster sugar, and vanilla bean paste (or vanilla extract). Set aside.
2. Remove hulls and cut strawberries to a 1/4" thickness. 
3. Place 3 Tablespoons of the strawberry preserves in a small pan. Add in the Chambord. Heat until the alcohol burns off the preserves have melted.
4. Transfer the baked crust to a large platter. 
5. Spread the mascarpone mixture over the baked crust.
6. Evenly dollop the remaining 3 Tablespoons of the strawberry preserves over the mascarpone layer.
7. Layer the sliced strawberries.
8. Brush the melted strawberry preserves over the top of the strawberries.
9. Serve immediately and enjoy!

Notes: (1) The recipe for the dough will give you enough for two smaller slab tarts or one large slab tart. If making a large slab tart, double the tart ingredients. (2) Instead of a rye crust, can make a butter crust. Use 2 2/3 (340 g) all-purpose flour instead of an all-purpose/rye flour mix. (3) Instead of a slab tart look, can also make in a 9" inch tart shell. (4) Make the dough early in the day or the day before. Assemble the tart right before serving as it's best enjoyed shortly thereafter as the crust will get soggy from the mascarpone mixture after a couple of hours. (5) Instead of strawberries, make this tart using fresh blueberries and/or blackberries using blueberry and/or blackberry preserves in lieu of the strawberry preserves.

Friday, May 10, 2019

Strawberry Crumble a la Mode


If the stars align and the predicted sunny weather forecast remains unchanged, I will be headed up to the north woods for a couple of days early next week. As often as I have traveled to Door County, Wisconsin, I have never been there when the cherry trees were blossoming. For years I have drooled over the mesmerizing photos taken by others. With a little luck, I am hoping I too can capture more than a few swoonworthy photos. In addition to taking a few hikes, my primary mission on this trip is to take an inordinate number of cherry trees, cherry orchards, and cherry blossoms photos. I might get distracted by horses, sheep, cows, barns, and maybe a lighthouse or two because that's what usually happens when I am up there. The landscapes and farmscapes in Door County never fail to disappoint. As much as I love having travel companions, this cherry blossom or bust trip will be a solo one. Mostly because waiting around for me to take a zillion photos isn't the least bit fun for anyone except me. And those sudden stops on the highway, well they can also be a bit disconcerting for those who would prefer to return home safely. It's not always easy being my friend on a road trip when I am channeling my inner amateur photographer persona.

Cherries may not be in season at the grocery stores here in the midwest yet, but strawberries are readily available. While they may not be the much anticipated locally grown June summer strawberries, the strawbeerries I have bought recently are satisfyingly sweet. Although when baked in this Strawberry Crumble they became sinfully sweeter. Fruit never tasted so good.


But is this a crumble or a crisp? Depending on who you ask, crumbles and crisps have come to be used somewhat interchangeably. Although technically the streusel topping on most crumbles normally didn't include oats. No matter what you call them, these rustic, streusel topped, baked desserts are one of the easiest ways to deepen the flavor of fresh fruit. With thickened fruit oozing from under a buttery streusel topping, crumbles are one of those hard to resist desserts. Maybe because we subconsciously or consciously tell ourselves desserts made with fruit fall on the healthy(ier) end of the dessert continuum. 


In order that there be discernible chunks of the strawberries, I cut mine in either halves or quarters. Smaller berries are can in half and larger ones are cut into quarters. 

Many crumble recipes call for the addition of a small amount of liquid in the fruit mixture. Water and lemon juice are the more common ones. But there is nothing common about this Strawberry Crumble. because it has a secret ingredient: Port. The addition of port brings a deeper flavor to the baked strawberries. I would be remiss if I didn't suggest you use a good Port. The kind you would enjoy sipping.


Streusel toppings are made with either room temperature butter cut into cubes or melted butter. This Strawberry Crumble uses the former. 


When baked in a preheated 350 degree (F) oven for 45-50 minutes, the fruit filling thickens and oozes from the sides of the pan and the streusel topping turns golden brown. Allowing the crumble to rest 10-15 minutes before serving helps with the structure of the fruit filling.


Whoever said crumbles wouldn't win any beauty contests is someone whose definition of beauty is much narrower than mine. In keeping with the old adage beauty is in the eye of the beholder, I find this Strawberry Crumble to be beauty contest worthy. In fact, I would go so far as to say it's so irresistibly, rustically beautiful it's worthy of being declared the winner. 


Topped with a scoop of vanilla ice cream, I mean because what's a crumble without ice cream, this Strawberry Crumble is beguiling. I dare you to resist taking a bite. I double dare you not to leave even the tiniest morsel in your dish. Note: Take your ice cream out of the refrigerator at least 15 minutes before serving so each scoop begins to melt slightly when placed on top a warm serving of the crumble. The melted ice cream tastes like a sinfully rich creme anglaise.

If there was ever a dessert to scream dessert of the summer, it would be this Strawberry Crumble a la Mode. And if there was ever a way to incorporate more fruit into your life, well you guessed right, it would be this Strawberry Crumble a la Mode. Mouthwatering delicious and requiring almost minimal skill or effort, it's definitely a crowd pleaser. While it may be best served warm (you can reheat individual servings in the microwave), I wouldn't refuse it if served room temperature. 

Recipe
Strawberry Crumble a la Mode
Serves 6 to 8, maybe one more

Ingredients
3/4 cup (65 g) old-fashioned oatmeal (not quick oats)
7/8 cup (116 g) all-purpose flour
3/4 cup (130 g) light brown sugar, firmly packed
1/2 teaspoon baking powder
1/2 teaspoon kosher salt
6 Tablespoons unsalted butter, room temperature, cut into cubes

2 pounds fresh strawberries, cut in quarters or halves depending on size
2 1/2 Tablespoons cornstarch 
1/2 cup (100 g) caster, superfine, or granulated sugar
2 Tablespoons of a good quality Port
1 teaspoon vanilla
1/4 teaspoon kosher salt

Vanilla Ice Cream for serving

Directions
Topping
1. In a medium sized bowl combine the oatmeal, flour, brown sugar, baking powder, kosher salt, and butter. Mix together until well combined. Once you stir everything together, use your hands to fully incorporate the butter into the dry ingredients. Set aside.

Crumble and Assembly
1. Preheat oven to 350 degrees (F).
2. In a large 10" or 11" round baking dish or 9" x 12" inch oval/square baking dish, add the cut strawberries.
3. In a small bowl, combine the sugar, salt, and cornstarch. Sprinkle over the strawberries. Stir to coat the strawberries.
4. Add in the vanilla and port, stirring just until blended in. Top with the crumble mixture. Sprinkle a tablespoon or two of additional oatmeal on top.
5. Bake in the center of the oven for 40-50 minutes or until the topping is golden brown and the strawberry mixture begins bubbling through the sides and middle of the crumble. Note: The strawberry mixture should have thick consistency.
6. Remove from oven and let rest for at least 10-15 minutes or up to 30 minutes before serving.
7. Spoon the Strawberry Crumble into serving dishes and top with a generous scoop of vanilla ice cream. Or if serving 6-8 people who like to share, place several scoops of the vanilla ice cream in the middle and hand out spoons.

Notes: (1) You can make the topping ahead of time. Cover and keep in the refrigerator if made several hours ahead of time. (2) Cut the recipe in half and bake in a smaller dish if serving 2-4. (3) Store any leftovers covered at room temperature for up to a day. Reheat individual servings in the microwave because it is so good warm. (4) I served the Strawberry Crumble with Ben and Jerry's Vanilla Ice Cream because it's my favorite.

Wednesday, May 8, 2019

Coffee Walnut Cake


"A good cook knows that it's not what is on the table that matters, it's what is in the chairs." I genuinely believe good food shared with good friends and/or family is the cure for just about anything, the source of a great endorphin rush, or both. After having a great (winning) run with friends and going to a fun (but not winning) Kentucky Derby party on Saturday, we had some friends over for dinner on Sunday. If I didn't put so much pre-dinner preparation pressure on myself, I would love to end every weekend or rather begin every week having friends sitting around my dining room table. Especially like the friends we had over this past weekend. Not just because they eat every morsel on their plates (guaranteed to make my heart sing) or not because they are so effusively complimentary (guaranteed to make my head spin), but more importantly because they are just so much fun to be with (guaranteed to make my soul happy). Sometimes you have people come into your life and then for one reason or another, they temporarily leave. But then your lives cross paths again and they return back in. The first time might be by chance, but the second time is by choice. Which for me, feels almost better than meeting them for the first time. Maybe the joyfulness you feel when reconnecting with a friend is what destiny feels like. But whatever it is, spending time and sharing a meal with friends creates some of the life's best memorable moments.


The first time I saw a photo of Thida Bevington's Coffee Walnut Cake, I knew it was a cake I had to make. Coffee or anything coffee flavored came into my life only recently. While my new found affinity for coffee started with iced coffee, I now love all things having the taste of coffee. Between the coffee infused cake and coffee infusing icing. this Coffee Walnut Cake is a coffee lover's dream.


When a cake has a light, tender crumb and a thick, creamy icing, I am instantly and permanently smitten. This Coffee Walnut Cake had me swooning in the first bite.

Served with a cup a tea or coffee if you dare, this Coffee Walnut Cake is one best made for and savored with friends. 


I made several changes to the cake and icing recipe for a variety of reasons. Some due to ingredient accessibility and some due to cake baking preferences.


Instead of instant coffee I used instant espresso reducing the amount from 24 g to 20 g. Four tablespoons and two teaspoons provided more than enough coffee flavor. Because salt always enhances the depth and complexity of flavor, I added 1/2 teaspoon of kosher salt to both the cake and icing recipes. And in my world, cakes and icing beg to made with some vanilla. The only ingredient causing me to stall on making this Coffee Walnut Cake was the use of double cream in the icing. I used heavy whipping cream as a substitute (and it worked), but the next time I think I will go on the hunt for some double cream. Like many European cake recipes this one was made with self-rising flour. A flour easily found at the grocery stores here. 


Baked in preheated 350 degree (F) oven, my two 8" cakes baked somewhere between 35-40 minutes. Alternately you can bake the cake in three 6" cake pans (baking time may need to be adjusted).


For the most level assembled cake, use a serrated knife to cut off the domes of each cake. Which you can snack on while making the icing.


The recipe for the icing will give you enough for the filling between layers, to make a crumb coat on the sides and top of the cake, and to pipe on top of the cake. Note: The sides of the cake will have the naked cake finish.


Whether you slather a thick layer of the icing on top or use a pastry bag to pipe a design of your choice, there are no rules or must-do's when it comes to finishing the cake. I decided to lightly dust with confectionary sugar and mound some chocolate covered espresso beans in the center this time, but next time, who knows what I will do the next time. And there will be a next time as this is one cake definitely going into cake rotation here.


Essentially a sponge cake, the addition of the chopped walnuts give the cake an unexpected texture. Coffee Walnut Cakes are somewhat popular on the other side of the pond. We need to start a Coffee Walnut Cake campaign here!

If you are looking to make a cake for Mother's Day, this one might be perfect for the coffee loving females in your life. If you wanted or needed a reason to invite friends over, this Coffee Walnut Cake is more than reason enough. In other words, this cake would be lovely whether you are having a casual gathering or celebratory event. 

Recipe
Coffee Walnut Cake (inspired by Thida Bevington's Coffee Walnut Cake recipe)
Makes 1 8" (two-layer cake) or 1 6" (three layer cake)

Ingredients
Cake
1 1/2 cups plus 1 Tablespoon (350 g) unsalted butter, room temperature
1 1/2 cups (350 g) caster or superfine sugar
4 tablespoons and 2 teaspoons (20 g) instant espresso or instant coffee
1 Tablespoon boiling water
7 large eggs, room temperature
1 teaspoon vanilla
1/2 teaspoon kosher salt
2 1/2 cups and 1 Tablespoon (350 g) self-rising flour
Generous 1/2 cup (80 g) finely chopped walnuts

Icing
1 3/4 cups (400 g) unsalted butter, room temperature
1 pound (475 g) confectionary sugar
1/2 teaspoon kosher salt
4 tablespoons and 2 teaspoons (20 g) instant espresso or instant coffee
1 Tablespoon boiling water
1 teaspoon vanilla
1/2 cup double cream (or heavy whipping cream)

Optional: Confectionary sugar for dusting, chocolate covered espresso beans and/or walnut halves

Directions
Cake
1. Preheat the oven to 350 degrees (F). Prepare two 8" (or three 6") cake tins for baking (lightly butter and line with parchment paper) and set aside.
2. In the bowl of a standing mixer fitted with a paddle attachment, beat the sugar and butter until light and fluffy.
3. Add in the eggs one at a time, beating until each is incorporated.
4. Mix together the instant espresso and boiling water. Stir to blend. Note: The mixture will be very thick. 
5. Add the espresso and vanilla to the batter and mix to blend.
6. Add in the self-rising flour and chopped walnuts. Mix to blend. Note: Scrape the bottom and sides of the bowl to ensure you have a smooth, even batter.
7. Evenly divide the batter between the cake pans. Bake for 30-35 minutes or until the a tester comes out clean when inserted in the center of the cake. Note: Rotate cakes midway during the baking process and begin checking for doneness at 30 minutes.
8. Place baked cakes on a cooling rack. Allow cakes to remain in pan for about 5 minutes, then invent onto a cooling rack to allow them to cool completely before icing the cake.
Icing and Assembly
1. In the bowl of a standing mixer fitted with a paddle attachment, beat the butter for about 2 minutes.
2. Add in the confectionary sugar and salt. Beat until mixture is light and fluffy.
3. Mix together the instant espresso and boiling water. Stir to blend. Add in the whipping cream (or double cream) and stir to blend. 
4. Add the coffee mixture and vanilla to the batter. Beat until icing is light and fluffy.
5. Cut the domes off each of the cakes so you have two flat, even surfaces.
6. Place one cake layer (cut side up) on a cake platter. Spread icing evenly over the bottom layer.
7. Invert the second cake (cut side down) on the bottom iced layer.
8. Spread a thin coat of icing on the top and sides of cake. To set the icing, place in the refrigerator for 15-30 minutes.
9. Either spread or pipe the remaining icing on top of the cake.
10. Serve immediately and savor. Note: If not serving immediately, place the cake in the refrigerator. Bring the cake out about 30-45 minutes before serving.

Notes: (1) The inspiration recipe called for 120 g (or 1 cup) of double cream in the icing. I used 1/2 cup of whipping cream. If using double cream, recommend using 120 g. (2) Be careful not to over bake your cake so it doesn't dry out.