Thursday, November 14, 2019

Chocolate Ganache Filled Spice Sandwich Cookies


For three and a half days I had a temporary reprieve from the early winter weather we are having here in the Midwest. My escape from the cold and snow to warm and sunny was a solo road trip to Birmingham, Alabama to spend a long weekend with my nephew. Our last two aunt-nephew experiences included a memorable trip to Montana almost four years ago and one to Philadelphia and Annapolis three years ago. So having some quality time together was long overdue (at least from my perspective). Needless to say there was no shortage of multiple memorable moments. What happened in Birmingham will more than likely not stay in Birmingham. But from hiking in a historic state park, to discovering a great Mediterranean restaurant, to seeing the dark, compelling movie "Joker", to doing a Feng Shui makeover of his living room (he pinky-swore he wouldn't change it), to hanging the belated birthday gift of a piece of art, to a shopping excursion, to trying to remain calm around the cutest new puppy and a very jealous two year old rescue dog 'playing', there were more than enough stories to last us until our next adventure. The ten hour drive to Birmingham was uneventful. But the eleven and a half hour drive back home was at times perilous. For at least three hours I drove through a blizzard followed by another couple of hours of driving on snowy roads. Yes, we had an atypical blizzard in early November. All I could think about was the Tarot Card Reader telling me a few weeks back there was an adventure in my foreseeable future. Needless to say, a semi-white knuckle drive home wasn't exactly what I was envisioning. Thankfully, I returned home without incident, feeling blessed, and happy knowing I had the endurance to make such a long drive by myself. A reminder that anything is possible.


It's been almost three weeks since I was over the moon excited to share a new cookie recipe with you. Like the Vanilla Brown Sugar Shortbread Cookies, these almost too pretty to eat Chocolate Ganache Filled Spice Sandwich Cookies will be making a first time appearance on this year's cookie platters. And here I thought this might be a Christmas where only the usual suspects would be making their appearances. Ha! I am predicting my holiday baking endurance will be tested in the weeks ahead (no Tarot Card reading necessary!).


Reminiscent of a Moravian Spice Cookie, but without the molasses and not as thin, these Chocolate Ganache Filled Spice Sandwich Cookies are crispy and spicy. But unlike a Moravian Spice Cookie, these cookies are made not with three spices but with five spices. Technically speaking though, they are actually made with seven spices due in part to the use of the warm, somewhat sweet, somewhat spicy flavors coming from Mixed Spice, a British spice blend.


Inspired by a cookie recipe found in a magazine from the United Kingdom, these Chocolate Ganache Filled Spice Sandwich Cookies are unlike any cookie you have ever tasted. The combination of the chocolate ganache with a crispy, spice cookie is nothing short of a dangerously delicious confection.


You might be wondering 'what exactly is Mixed Spice'? The history of the British Mixed Spice goes back more than two hundred years. Sometimes called 'cake spice' or 'pudding spice', Mixed Spice is frequently used during the Christmas season in a variety of holiday confections, including the traditional English Christmas pudding. The most common Mixed Spice is made with a very specific blend of cinnamon, allspice, nutmeg, mace, cloves, coriander, and ginger. While not readily available here in the states, you can find it online, be lucky enough to have a friend bring you back some on their travels to the UK, or make your own. You can find the recipe for Mixed Spice in the notes section below. 


The dough for the Spice Cookie comes together in a standing mixer fitted with a paddle attachment and easily rolls out without any chilling time. Rolled out to about a 1/6" thickness, the cookies bake in a preheated 350 degree (F) oven for 13 to 15 minutes or until firm (the cookies will crisp up further as they cool).

My yield using a cookie cutter slightly larger than 2 1/2 inches was a dozen sandwich cookies (24 cookies). As much as I loved this substantially sized cookie, I would recommend using a 2 inch cookie cutter (you should be able to get at least 15-16 sandwich cookies). 


Unlike most ganache recipes, this one is not made with pouring hot heavy cream over coarsely chopped chocolate. Instead it is made with pouring warm heavy cream over melted chocolate. Additionally the chocolate ganache differs in the more typical ingredient ratios (2-1 chocolate to cream). This version of a rich ganache set up beautifully as the filling in these sandwich cookies. Note: It is important the cream is well heated before being added to the melted chocolate or a 'cool' cream will seize the chocolate. 


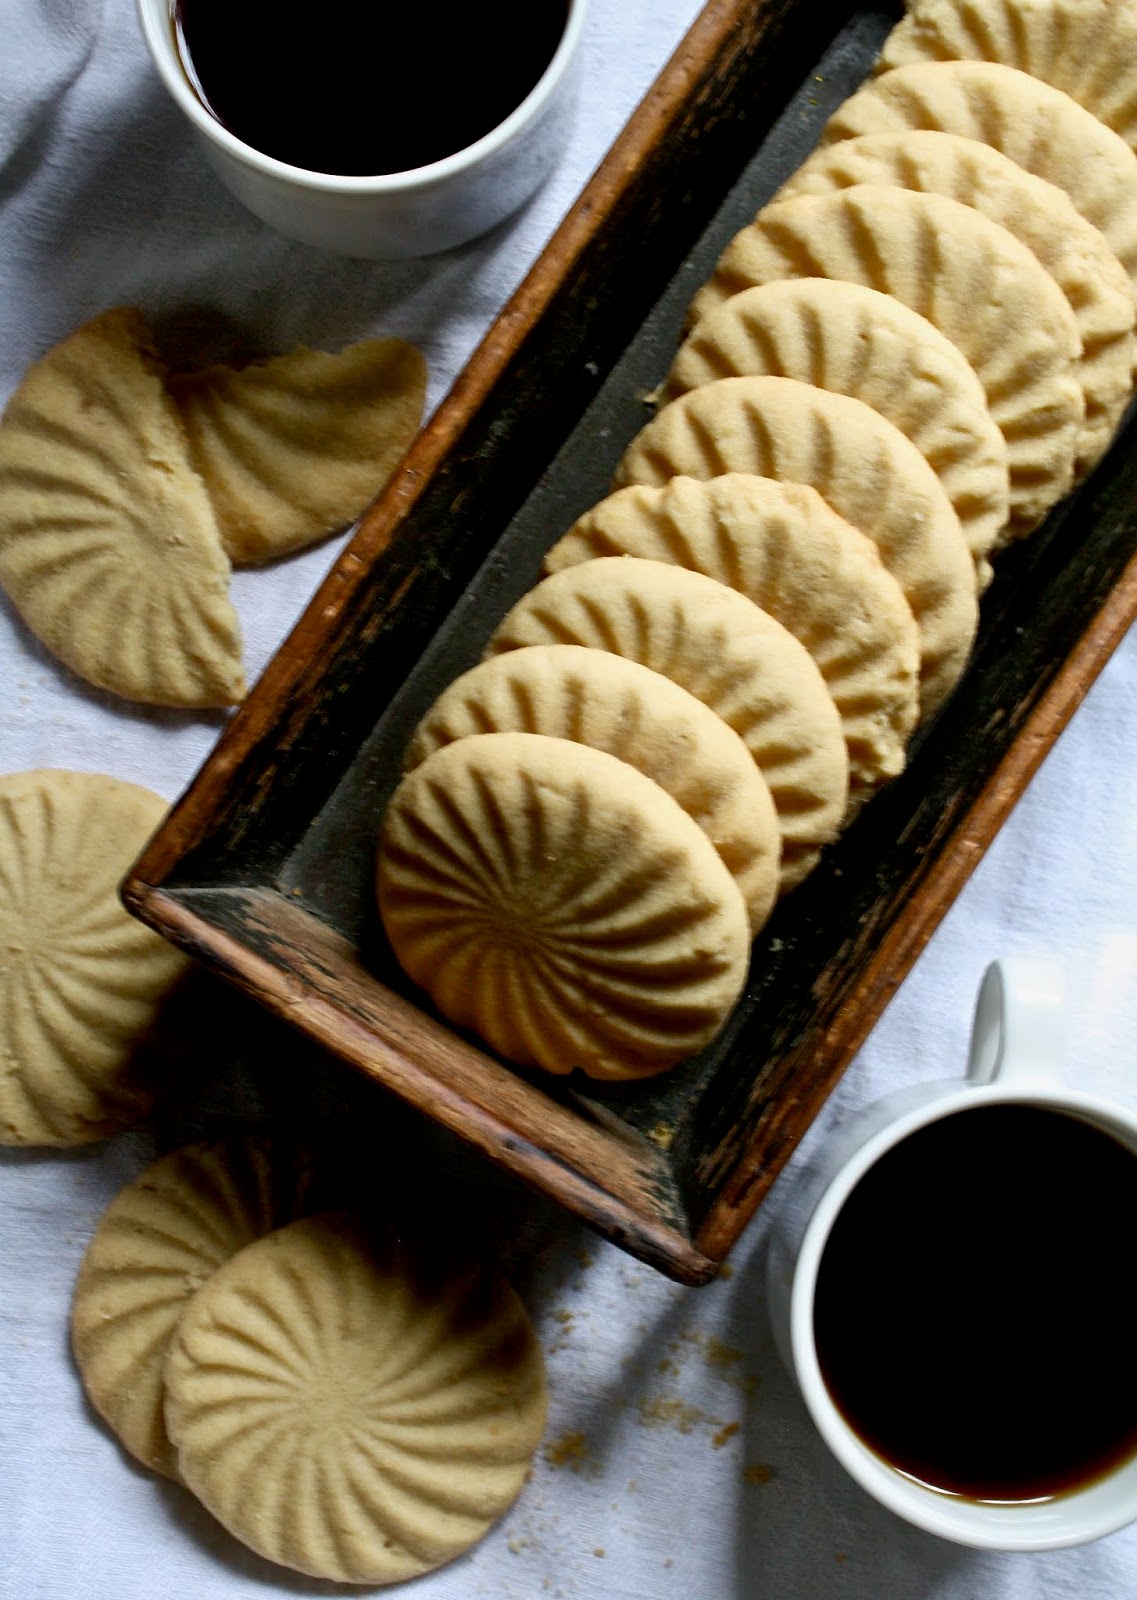
I used a cookie stamp to create the design on the cookies, however, you can use a heavy glass with a patterned bottom to create the same effect. After making the cookies I discovered my Waterford crystal would have worked equally as well. You are likely to find patterned bottoms on barware, old glassware, and crystal. Just be certain to choose a glass that is heavy enough it will not break when pressed down on the dough.


If you love sandwich cookies, especially ones filled with chocolate, you will be smitten with these. One bite and you just might be wondering where these flavorful, decadent cookies have been all of your life. From their spicy, warm flavor to their crisp and creamy texture they are destined to become a beloved favorite. 

Have a friend who seems to have everything or a friend with a sweet tooth or a friend who loves homemade baked gifts? Well getting a package of these impressive, gorgeous looking Chocolate Ganache Filled Spice Sandwich Cookies may be one of their most memorable, most beloved gifts of the holiday season. If you thought your Christmas cookie platters and gift boxes were already swoonworthy or didn't need to be Fung Shuied, well just wait until you add either these Chocolate Ganache Filled Spice Sandwich Cookies or the Vanilla Brown Sugar Shortbread Cookies to them. Blissful euphoria and paradise awaits.
Recipe
Chocolate Ganache Filled Spice Sandwich Cookies
Makes 12 - 2 1/2 sized sandwich cookies or 15-16 - 2 inch sized sandwich cookies

Ingredients
Spice Cookies
10 Tablespoons (135 g) unsalted butter, room temperature
1/2 cup plus 1/8 cup (125 g) firmly packed light brown sugar 
2 Tablespoons plus 1 teaspoon whole milk
8 7/8 ounces (250 g) all-purpose flour (or 2 cups less 1 tablespoon and 1 teaspoon)
1 teaspoon baking powder
1/2 teaspoon baking soda
1/2 teaspoon kosher salt
2 teaspoons cinnamon
1 teaspoon ginger
1 teaspoon mixed spice (see notes)
1/4 teaspoon nutmeg
1/4 teaspoon ground cloves

Chocolate Ganache
9 ounces dark chocolate, coarsely chopped
1/4 cup heavy whipping cream, warmed

Directions
Spice Cookies
1. Preheat oven to 350 degrees F (180 C). Line two baking sheets with parchment paper and set aside.
2. In the bowl of a standing mixer fitted with a paddle attachment, beat the butter and sugar until light and creamy (approximately 3-4 minutes). Scrape down sides of the bowl as needed.
3. On low speed add in the milk. Beat on low speed until milk is blended into the sugar/butter mixture. Note: If you mixer speed is too high milk will splatter. Once there are no puddles of milk, you can gradually increase the speed.
4. In a medium sized bowl, whisk together the flour, baking powder, baking soda, kosher salt, cinnamon, ginger, mixed spice, nutmeg, and cloves. 
5. Add the dry ingredients and beat until a dough begins to form.
6. Form dough into a bowl and cut in half. Wrap one ball in cellophane will rolling out the other.
7. On a lightly floured surface, roll out one of the dough halves to about an 1/6 inch (4mm) thickness.
8. Use a 2 1/4 to 2 1/2 inch round cookie cutter to cut out cookies. Place rounds on prepared baking sheet. If using, stamp cookies using a cookie stamp or a heavy glass with a patterned base.
9. Bake cookies, one sheet a time, for 13-15 minutes or until firm. Let cookies remain on cookie sheet for 5 minutes before transferring to a cooling rack.
10. Repeat remaining dough half.
11. Allow cookies to cool completely. 

Chocolate Ganache and Assembly
1. Melt chocolate in the microwave or over a double boiler. Remove from heat and let sit 2 minutes.
2. Pour warmed heavy cream over the melted chocolate. Whisk until ganache is smooth and glossy. Let set until ganache slightly thickens to the consistency of a soft butter. Note: The ganache may initially seize when the warmed milk is added to the melted chocolate. Be patient, it will come together. 
3. Place a large dollop of the chocolate ganache on the bottom side of a cookie. Top with another cookie and press down lightly.
4. Place cookies on a rack and let ganache fully set up before serving or packaging. Store in a tightly sealed container.

Notes: (1) To make your own Mixed Spice, blend together: 1 Tablespoon ground allspice, 1 Tablespoon cinnamon, 1 Tablespoon nutmeg, 2 teaspoons mace, 1 teaspoon cloves, 1 teaspoon coriander, and 1 teaspoon ground ginger. Store in a sealed jar.


Fall Snow at Morton Arboretum (November 2019)


Tuesday, October 29, 2019

Bourbon Apple Pie Cocktail


This past weekend six women, first brought together by running, traveled to Galena, IL and Dubuque, IA for their third annual girls' getaway. Our two-state adventure (well technically one considering we all live in Illinois, but two sounds better) gave us the opportunity to spend some quality time together and add to the stories we often repeat amongst ourselves. Galena is a picturesque river town with breathtaking rolling hill landscapes, a historic downtown, and a 19th century architectural feast for the eyes. As a popular tourist destination, it also happens to have some great restaurants, an abundance of shops, a beautiful running trail along the river, and a resurrected distillery. We did our best to sample almost everything Galena had to offer, including, running in the annual fall 8k and having our Tarot cards read. On our short side trip to Dubuque we had lunch in a brewery in the warehouse district, took the hundred year old cable cars up a steep hill to get an expansive view of the Mississippi River,  stopped in an antique store, and bought a few trinkets (the mood rings from the Irish Store, ones alleged to be popular with the much younger set, were this year's group souvenirs). Not even the late Saturday afternoon rain affected my inability to find a 'wanted but definitely didn't need' Galena sweatshirt as well as not having enough time for a second round of drinks at the distillery spoiled anything about this adventure. We all packed more clothes than we ended up wearing, but left with some great memories and just enough to make us dangerous information on the making of whiskey, vodka, and bourbon. 


Whether or not you believe the bourbon shortage in this country is real, I can tell you the number of bourbon aficionados increased over the weekend.  Now that I am one of them, I am obsessed. Not just with drinking (or rather sipping) bourbon, but with going on a few more distillery tours (is there trip to Kentucky in my future?), and getting my hands on some of those highly rated bourbons having long waiting lists. 


As much as I would love to share with you all of the things I learned about the making of bourbon including my new found knowledge on the differences between bourbon, whiskey/whisky, and scotch, you might enjoy reading "Simple Guide to Types of Whisk(e)y: Bourbon, Scotch, and Rye" from Todd and Diane, food and travel bloggers. There is enough information in this post to make you more than a little dangerous, but enough to let you hold your own when conversing with other bourbon lovers. 


The recipe for this Bourbon Apple Pie Cocktail was inspired by one we sampled at the Blaum Brothers Distilling Company in Galena, Illinois. It's the perfect fall cocktail for anyone who loves bourbon, for anyone who may still be acquiring a taste for bourbon, for anyone who loves a cocktail that can warm you up on a chilly evening (or afternoon), and for anyone who loves apple pie. Made with apple cider, apple juice, a touch of sugar, a cinnamon stick, vanilla, and bourbon, it's a cocktail you can make ahead and keep chilled in the refrigerator. Having ready to serve cocktails when you want to indulge expected or unexpected guests is the sign of a really good host/hostess.


The recipe below serves four, but you can (and probably should) double, triple, or quadruple it as it works well as a big batch recipe. Because it's best served very chilled, you should plan on making it a day or two before you plan on serving it. After one or two sips of this Bourbon Apple Pie Cocktail, you will definitely begin to feel the warmth of the bourbon. 


You don't really need to garnish the Bourbon Apple Pie Cocktail with a slice of apple (I used Honey . Crisp) or a cinnamon stick, but it makes for a pretty presentation. I would be remiss if I didn't tell you this is definitely one of those cocktails where a second round is very likely to happen. Make certain you have made a big enough batch as well as have a few snacks available to keep your friends bourbon happy. Important Note: In the notes below you will find the ingredient amounts for making a large batch. Use these ingredient amounts when calculating how to double for an even larger batch.

Not overly sweet and lightly spiced, this Bourbon Apple Pie Cocktail could become your new house drink for weekend entertaining, Thanksgiving, and/or day drinking with friends. Cheers! 
Recipe
Bourbon Apple Pie Cocktail
Makes 4 cocktails

Ingredients (see notes below for the large batch recipe)
8 ounces apple cider
8 ounces apple juice (should be 100% juice)
1/4 cup granulated or caster sugar
1 teaspoon vanilla
1 cinnamon stick
4 ounces good bourbon, bourbon whiskey, or moonshine
Ice
Beer Nuts, Cashews, or your favorite roasted nut mix

Optional: Apple slices and cinnamon sticks for garnish

Directions
1. In a medium sized pan, add in the apple cider, apple juice, sugar, vanilla, and cinnamon stick. Bring to a boil, stirring occasionally to dissolve the sugar.
2. Remove from heat and allow to cool to barely warm to the touch. Pour in the bourbon. Stir.
3. Transfer mixture, including the cinnamon stick, to a pitcher or jar. Cover and refrigerate until chilled (at least 4 hours or overnight). Note: Mixture will be good for up to one week if kept in a sealed container in the refrigerator.
4. Add ice cubes to cocktail glasses. Pour in the Bourbon Apple Pie Cocktail. Garnish with a fresh cinnamon stick and apple slice, if using. 
5. Sit back, sip, and savor. 

Notes: (1) You may want to make a double batch if serving 4. One of these is not enough. (2) Use a good quality apple cider (I used a Honey Crisp Apple Cider) and good quality apple juice. (3) I used Blaum Brothers Bourbon Whiskey. But use whatever Bourbon you love. (4) Definitely serve these cocktails with some nibbles like Beer Nuts, Cashews, or Roasted Nuts. (5) Large batch recipe: 1/2 gallon (32 ounces) apple cider; 1/2 gallon (32 ounces); 1 cup (200 g) granulated or caster sugar; 2-3 cinnamon sticks; 1 1/2 teaspoons vanilla; 16-18 ounces bourbon or bourbon whiskey.


Bourbon Barrels, Blaum Brothers Distillery, Galena, IL (October 2019)


Early morning in Galena (October 2019)


Home of Ulysses S. Grant, Galena, IL (October 2019)


Mississippi River (October 2019)

Thursday, October 24, 2019

Vanilla Brown Sugar Shortbread Cookies


A trip up to attic this past weekend to search for Halloween decorations was akin to a trick or treating experience. Some of the containers hadn't been opened in years. So going through all of the Halloween treasures collected over the years (decades actually) was simultaneously a feast for the eyes and a little bit frightening. Rediscovering some vintage and hand painted folk art Halloween decorations was like discovering your trick-or-treat bag contained the large size of your favorite candy bar. Definitely a heart-racing moment. And then there were some things in the boxes generating the same kind of reaction those black and orange wrapped peanut butter candy kisses used to give me as kid. Yikes, yuck! Apparently some of my tastes in Halloween decorations had periods of borderline questionableness. After working through the 'what was I thinking?' moment, I sorted everything into two piles. Similar to those 'you can have those' and the 'I'm not sharing' candy piles we made after emptying our hours and hours of trick-or-treating bags. As I have yet to buy this year's Halloween candy, I wished I now lived in a neighborhood where homemade cookies brought as much excitement as a super-sized candy bar. Having lived in two different places where that really was the case put me in a cookie making mood this week.


After making a surprise delivery of a box of chocolate chip cookies, I made these buttery Vanilla Brown Sugar Shortbread Cookies. Honestly, I think they rival those irresistibly delicious Walker Shortbread Cookies.


Maybe replacing the granulated sugar with brown sugar, maybe using a high-quality Irish Butter, or maybe using two Tablespoons (yes, two tablespoons of vanilla) was responsible for creating these beautiful, melt in your mouth cookies. Whatever it was, these shortbread cookies are insane! 


It's hard to believe that five simple ingredients are responsible for creating shortbread cookie greatness. For optimal cookie flavor splurge on a European butter and good quality vanilla.

Until now all of the shortbread cookies on the blog are either rolled and cut out or made in a pan and then cut. These start as a golf ball sized mound of dough and end as a stamped bakery finished look cookie. If you ever needed a reason to buy cookie stamps, here it is. I mean, seriously, look at these Vanilla Brown Sugar Shortbread Cookies. They are almost too pretty to eat. 


Baked for 20-25 minutes in a preheated 325 degree (F) oven, these Vanilla Brown Sugar Shortbread Cookies have a lightly golden, crisp, slightly decadent finish. 

Many of the recipes I post on the blog make me giddy, but my level of giddiness over these stunning cookies is off the charts! I am not exaggerating when I tell you these are absolutely amazing. Creating this new recipe brought me as much excitement as unearthing those Halloween treasures lovingly stored in the attic did. If you don't live in a neighborhood where your baked cookies are as coveted as store-bought candy, bake these Vanilla Brown Sugar Shortbread Cookies for the adult friends in your life who would love to get a surprise homemade Halloween treat! 

I promise once you taste these scrumptious, divine, buttery, sinfully delicious shortbread cookies, they will instantly become one of your most beloved favorites. 
Recipe
Vanilla Brown Sugar Shortbread Cookies
Makes 32-36 3" cookies

Ingredients
1 pound (545 g) unsalted butter, room temperature (see Notes)
1 cup (220 g) light brown sugar, firmly packed
2 Tablespoons vanilla extract or vanilla bean paste
4 cups (520 g) all-purpose flour
1/2 teaspoon kosher salt

Directions
1. Preheat oven to 325 degrees (F). Line two baking pans with parchment paper and set aside.
2. In the bowl of a standing mixer fitted with a paddle attachment, mix the butter and brown sugar until well combined (approximately 2-3 minutes).
3. Add in vanilla. Mix to blend.
4. Add in the flour and salt. Mix on low speed just until thorough combined. Be careful not to overmix or your cookies will be tough.
5. Using a 1 1/4" ice cream scoop, scoop balls of dough onto the baking sheets (spacing at least 2 inches apart).
6. Dip cookie stamp in flour and press down onto each dough ball to about a 1/4" thickness.
7. Bake for 20-25 minutes or until the edges of the cookies are lightly browned and/or the bottom of the cookie is golden brown. Note: Bake one cookie sheet at a time.
8. Let cookies rest on cookie sheet for approximately 10 minutes before transferring to a wire rack to cool to room temperature.
9. Serve with coffee or tea. Store cookies in a tightly sealed container. Cookies will be at their best for 3-5 days.

Notes: (1) You can easily cut this recipe in half! (2) Highly recommend using a European or European quality butter. These cookies were made with Kerrygold butter. (3) I used Nordicware's Cookie Stamps but you can use any cookie stamp. Or if you don't have a cookie stamp, press down on the dough balls with a flat bottomed glass. For best results when using a glass, cut a small piece of wax paper, place wax paper on top of the dough, then press down with the glass.

Sunday, October 20, 2019

Herbed Spiced Nuts


Have I ever told you lately how much I love the fall? Like really, really love everything about the fall. So much so that if I created the universe we would live in a perpetual state of fall with a couple of months of summer thrown in. Just so we could still enjoy homegrown tomatoes, all the berries, and an abundance of fresh herbs. I am certain there are many of you, especially the sun worshippers and snow bunnies, who shudder the thought of a fall weather dominated world. However, if you happen to be someone who loves to bake or make temperature sensitive seasonal candies; loves sleeping under a pile of blankets in a room where some of the windows are open; loves sitting by the fire reading a book or enjoying a glass or two of wine; and/or loves running in crisp, cooler temperatures, we just might be kindred spirits. 


Before we get a hard freeze, I need to find as many ways as possible to cook and bake with all the fresh herbs currently thriving in my urns. Particularly my two favorites: thyme and rosemary. And it just so happens these Herbed Spiced Nuts use both of them.
  

You might be wondering if these Herbed Spiced Nuts are the Chipotle and Rosemary Roasted Nuts with a different name or if they are a completely different roasted nuts recipe. While they both share some common ingredients and have addictiveness qualities, they are two completely roasted nut recipes and have two different flavor profiles. At the moment, these Herbed Spiced Nuts are my new favorites. More than likely they will be the only roasted nuts I serve over the next couple of months. That's what usually happens around here when something becomes a new favorite.


My idea of a perfect roasted nut combination is cashews, almonds, and walnuts, with a little heavier on the cashews. However, you could easily turn this three nut recipe into a four nut version by adding in some pecans (just make certain the overall quantity of nuts remains the same). I am going to go out on a short limb and say only fresh herbs and only a good quality maple syrup work in this recipe. Dried herbs work in many recipes, just not this one. And if you keep your maple syrup in the refrigerator it will last in the refrigerator for a really long time. The maple syrup brings a little sweetness, the freshly chopped thyme and rosemary brings the savoriness, and the cayenne pepper, cinnamon, and kosher salt brings a little heat and spiciness to these hard to stop eating Herbed Spiced Nuts.

The baking pan I use is well seasoned so I generally don't line it with aluminum foil or parchment paper when roasting nuts. If your pan is new or you don't want to take the risk of having them stick to the pan, you might want to line it with foil or baking paper. Regardless of which way you roast them, you will want to stir them using a metal spatula to loosen them both during the roasting process as soon as immediately after they come out of the oven. 


The aroma from these nuts roasting in the oven is intoxicating. After sprinkling the fresh out of the oven nuts with some flaky sea salt, put them in a bowl and serve while still warm. Or if you make them earlier in the day, they are equally delicious served at room temperature. 


You absolutely must serve these sweet, spicy, perfect amount of heat Herbed Spiced Nuts with beer, wine, or cocktails. Or, if you decide to package some up to bring as a hostess gift or send with a significant other going on weekend trip with friends, include a note saying alcoholic beverages must be served with them. Don't waste these mouthwatering, habit-forming roasted nuts on friends who don't drink.


These Herbed Spiced Nuts are good enough and hearty enough to be the stand alone cocktail hour or pre-dinner appetizer. However, if you are like me and feel compelled to have more than one nibbling option, they are a great compliment on a simple cheese or charcuterie board. Don't be surprised if your friends and family go nuts over them. 
Recipe
Herbed Spiced Nuts
This one is my favorite!

Ingredients
1 1/2 cups (210 g) whole cashews
1 cup (190 g) whole almonds
1 cup (108 g) walnut halves
1/4 cup pure maple syrup
2 Tablespoons olive oil
1 - 2 Tablespoons finely chopped rosemary and 1-2 sprigs fresh rosemary (I used 1 1/2 T)
1 - 2 Tablespoons chopped thyme and 3-4 springs of fresh thyme (1 used 1 1/2 T)
1/2 teaspoon Saigon cinnamon
1/4 teaspoon cayenne pepper
1 1/2 teaspoons kosher salt
1 1/2 teaspoons flaky sea salt, for finishing (I like using Maldon Sea Salt.) OR use 1 teaspoon of a fine sea salt.

Not optional: Alcoholic beverages

Directions
1. Preheat oven to 300 degrees (F). Optional: Line pan with aluminum foil or parchment paper.
2. In a small bowl, mix together the maple syrup, olive oil, chopped rosemary, chopped thyme, cinnamon, cayenne pepper and kosher salt.
3. In a large bowl, mix together the cashews, almonds and walnuts.
4. Pour the spiced herbed mixture over the nuts. Stir to coat. Transfer the nuts to a large, rimmed sheet pan. Spread into a single layer. Top with some additional sprigs of thyme and rosemary.
5. Place baking pan in the oven and bake for 30-35 minutes or until the nuts are glazed and golden brown. Midway through the baking process stir the nuts using a metal spatula.
6. Remove the roasted nuts from the oven and immediately sprinkle with the sea salt and again stir using a metal spatula to ensure they don't stick to the pan (or foil or parchment paper).
7. Let nuts sit on tray for 3-5 minutes before transferring to a serving bowl. Enjoy while warm or at room temperature.
8. Nuts will remain crunchy if stored in a tightly sealed container for up to 3-4 days.

Notes: (1) If you like a four nut combination (cashews, walnuts, almonds and pecans), just make certain you don't exceed a total 3 1/2 cups of nuts. I love cashews so this recipe goes a little heavier on them. Feel free to alter your nut ratios based on your personal preferences.

Monday, October 14, 2019

Pecan Pumpkin Bread with Pecan Streusel Topping


Apparently I decided to be a canned pumpkin hoarder last year. I probably read an article predicting there would be a shortage of pumpkins and canned pumpkin. Whether it was true or fake news, my gullibleness caused me to stock up on pumpkin puree. I couldn't imagine a life, let alone a year, without homemade pumpkin pie, pumpkin muffins, or pumpkin bread. Taking an inventory of the ingredients needed for this Pecan Pumpkin Bread with Pecan Streusel Topping I discovered I had squirreled away six cans of canned pumpkin in the pantry. Learning canned pumpkin has a pretty long shelf life wasn't the only thing I discovered when making this pumpkin bread. But rather than make the pumpkin bread again, not because there wasn't enough canned pumpkin in the house or because it wasn't ridiculously delicious or because it might qualify for contention in the BEST pumpkin bread category, I thought I would share the mixed blessing lesson with you. Some of you might already be asking 'where the heck is the streusel?' as you look at these photos. It's there, you just can't see it.

I say mixed blessing because the intentional but 'with reservations' change to the streusel recipe turned out to have a good unintentional consequence. Instead of the crunchy, nutty, buttery, spicy streusel gracing the top of the pumpkin bread, it seeped it's way into the bread. The result was a river of nutty, buttery, spicy deliciousness. Some of you may have already guessed what caused the disappearing streusel. If you said, there wasn't any flour mixed in with the melted butter, brown sugar, cinnamon, pecans, and kosher salt, you would be right! Some of you might also be wondering why would anyone do that? Doesn't she know any better? The simple answer is I wanted to try something new. 


So depending on whether your want your Pecan Pumpkin Bread to have a lovely streusel top versus a almost praline like streusel middle, you now have a choice. The recipe below gives you two pecan streusel options. Alternately you can forget about the streusel and generously top the bread with some sanding sugar before baking it or just dust it with confectionary sugar after it has baked and cooled. Personally, I like the added flavor and texture a streusel brings to the pecan pumpkin bread. Although now I am not so sure if I like the streusel made with or without flour.


This recipe makes two 9" x 5" Pecan Pumpkin Breads. Yes, two! One for you, two for you, one to give away, or one to wrap well in cellphone and freeze for later. If you decide to freeze one of the loaves, the pumpkin bread needs to completely cool to room temperature before you wrap with plastic wrap. If your bread is warm the condensation will form some ice crystals on the bread. The well wrapped frozen bread will be good for up to two months. Before serving, bring it to room temperature. For that just out of the oven taste experience, heat the slices in the microwave.


Like most quick breads this is a no mixer needed one bowl recipe. Wet ingredients are mixed together using a whisk before the dry ingredients are folded in. Just remember to toast your pecans before adding them to the batter and streusel for the most flavorful pumpkin bread. There is a world of taste difference in baked goods with nuts toasted or nuts not toasted.


For the best baking results (at least from my perspective), bake the pecan pumpkin bread in light (versus dark) colored aluminum baking pans. Aluminum not only heats evenly, it cools down relatively quickly. Which means your bread will cook more evenly while baking and will not dry out while coming to room temperature. Recently I have switched from lining my baking pans with parchment paper to liberally buttering them as I like the sides and bottom of quick breads to slightly caramelize. If you are at all worried about whether your bread will easily release from the baking pan, line the bottom with a piece of parchment paper and then liberally butter the sides of the pan and top of the parchment paper.


If you like your pumpkin bread to be moist but still have great texture and to be highly spiced, this is the pumpkin bread you want or rather need in your life. It is one of those pumpkin breads almost encouraging you to run out to the grocery store to buy up at least a half dozen cans of pumpkin puree. Yes, I am encouraging you to cause a run a canned pumpkin! When the fall pumpkin spice craze and all the fall holidays come to an end, you are going to want to bake up some loaves of this crave-worthy Pecan Pumpkin Bread with Pecan Streusel Topping on a cold winter or chilly spring day. Nothing warms the body and soul like the flavors of cinnamon, nutmeg, allspice, and cloves. Especially when they come in a slice of this Pecan Pumpkin Bread with Pecan Streusel Topping or if I may be so bold as to say 'this real contender for BEST' pumpkin bread.

Recipe
Pecan Pumpkin Bread with Pecan Streusel Topping
Makes two 9"x 5" loaves

Ingredients
Pecan Streusel Topping (see recipe for two options)
1/2 cup pecan halves, toasted, coarsely chopped
1/2 cup light brown sugar (or a combination of light and brown sugar)
2 teaspoons cinnamon
4 Tablespoons unsalted butter, melted and cooled slightly (or very room temperature butter)
3 Tablespoons all-purpose flour
Pinch of kosher salt

Pumpkin Bread
1 cup pecan halves, toasted, coarsely chopped
1 cup canola oil
3 cups (600 g) granulated sugar
4 large eggs
15 ounce can pumpkin puree
1 cup water
3 cups (390 g) all-purpose flour
1 teaspoon baking powder
2 teaspoons baking soda
1 teaspoon kosher salt
1 1/2 teaspoons ground cinnamon
1 1/2 teaspoons allspice
1 teaspoon cloves
1 teaspoon nutmeg

Optional: Sanding sugar, if not using the streusel

Directions
Pecan Streusel Topping
1. In a medium sized bowl, mix together the melted butter, brown sugar, cinnamon, and salt.
2. Add in the flour and pecans. Stir until combined. Place in the refrigerator to firm up slightly while you assemble the pumpkin bread.
3. Alternately, mix together the melted butter, brown sugar, cinnamon, salt, and pecans in a medium sized bowl. Stir until combined. Place in the refrigerator to firm up slightly while you assemble the pumpkin bread.

Pumpkin Bread
1. Preheat oven to 350 degrees (F). Generously butter two 9" x 5" metal baking pans. Set aside.
2. In a large bowl, whisk together the canola oil and granulated sugar. Stir to combine. It will look like wet sugar.
3. Whisk in the eggs, pumpkin puree, and water until combined.
4. Using a spatula, fold in the flour, baking powder, baking soda, spices, and salt.
5. Gently fold in the pecan pieces.
6. Divide batter evenly between the two pans.
7. Evenly sprinkle clumps of the Pecan Streusel Topping over the pumpkin loaves.
8. Place baking pans on a large baking sheet. Place in oven. Bake for 60-70 minutes or until a toothpick inserted into the center comes out clean. 
9. Let the Pecan Pumpkin Bread rest in the pan until cool.
10. Remove from pan. Cut into thick one inch slices and serve.
11. Store any leftover bread tightly covered in the refrigerator for up to 7 days (if it lasts that long). Heat slices up in the microwave before serving for that just out of the oven taste experience or heat up just enough to take the chill off the bread.

Notes: (1) To toast the pecans, preheat oven to 350 degrees (F). Lay pecan halves flat on a baking sheet. Bake for 7-9 minutes until lightly browned and aromatic. Let cool before chopping. (2) Instead of topping with the Pecan Streusel Topping, liberally top with sanding sugar. (3) Instead of making loaves of the Pecan Pumpkin Bread, you can make muffins. Baking time will be 30-35 minutes or until a toothpick inserted in the center comes out clean. (4) For an even more intensely spiced bread, increase both the cloves and nutmeg from 1 to 1 1/2 teaspoons.