Thursday, January 9, 2020

Hearty Ham and Bean Soup


Growing up the traditional New Year's Day afternoon meal was always a baked ham and potato salad. For a short while in my early adult life I kept this tradition going. But during neither of those periods did the ham bone turn into either a ham and bean soup or a split pea soup. Apparently the first half of my life didn't include homemade soups. Which may in part explain why I am now such a homemade soup lover. I suppose I am trying to make up for lost opportunities. 

Even though I no longer make a baked ham for either a holiday meal or Sunday dinner, I don't have to live a Hearty Ham and Bean Soup free life. And neither do you. Nowadays all of those ham specialty stores, like Honey Baked Ham, actually sell meat on the bone hams year round. While you might not be craving a bowl of hot soup on a really hot summer day, nothing prevents you from making this ham and bean soup whenever you get a craving for it. Note: Some butcher stores might also sell them.

Soup may be one of the ultimate comfort foods. And this Hearty Ham and Bean Soup may be one of the most soul soothing soups I have ever eaten. Give me a bowl of hot soup, a homemade buttermilk biscuit or loaf of hearty bread, and a maybe salad on a sweater or winter weather day if you want to see what a person in delirious food coma might look like. Soup is a bit like a magic elixir as it not only cures almost anything that ails you (physically or emotionally), it is one of the healthiest ways to satisfy your appetite. In other words, soup really should be considered a super food. 


Most ham and bean soups call for the exclusive use of Northern, Cannellini, or Navy beans or a combination of two or three beans. But not this one. This one calls for fifteen different beans! Fortunately you can buy a bag containing 15 different soup beans! (See notes below). So before I go on any further about this incredibly savory and satisfying Hearty Ham and Bean Soup, I need to tell you it can't be made in one day. Rather it is made over the course of two days, but if you have the patience to wait three days, well your palate will be rewarded for your patience. In spite of a soup taking at least two days to make, it isn't one needed your constant attention. In fact on day one, all you have to do is rinse the beans, put them in a large pot filled with eight cups of water, cover, and let sit overnight. Pretty easy start, right?


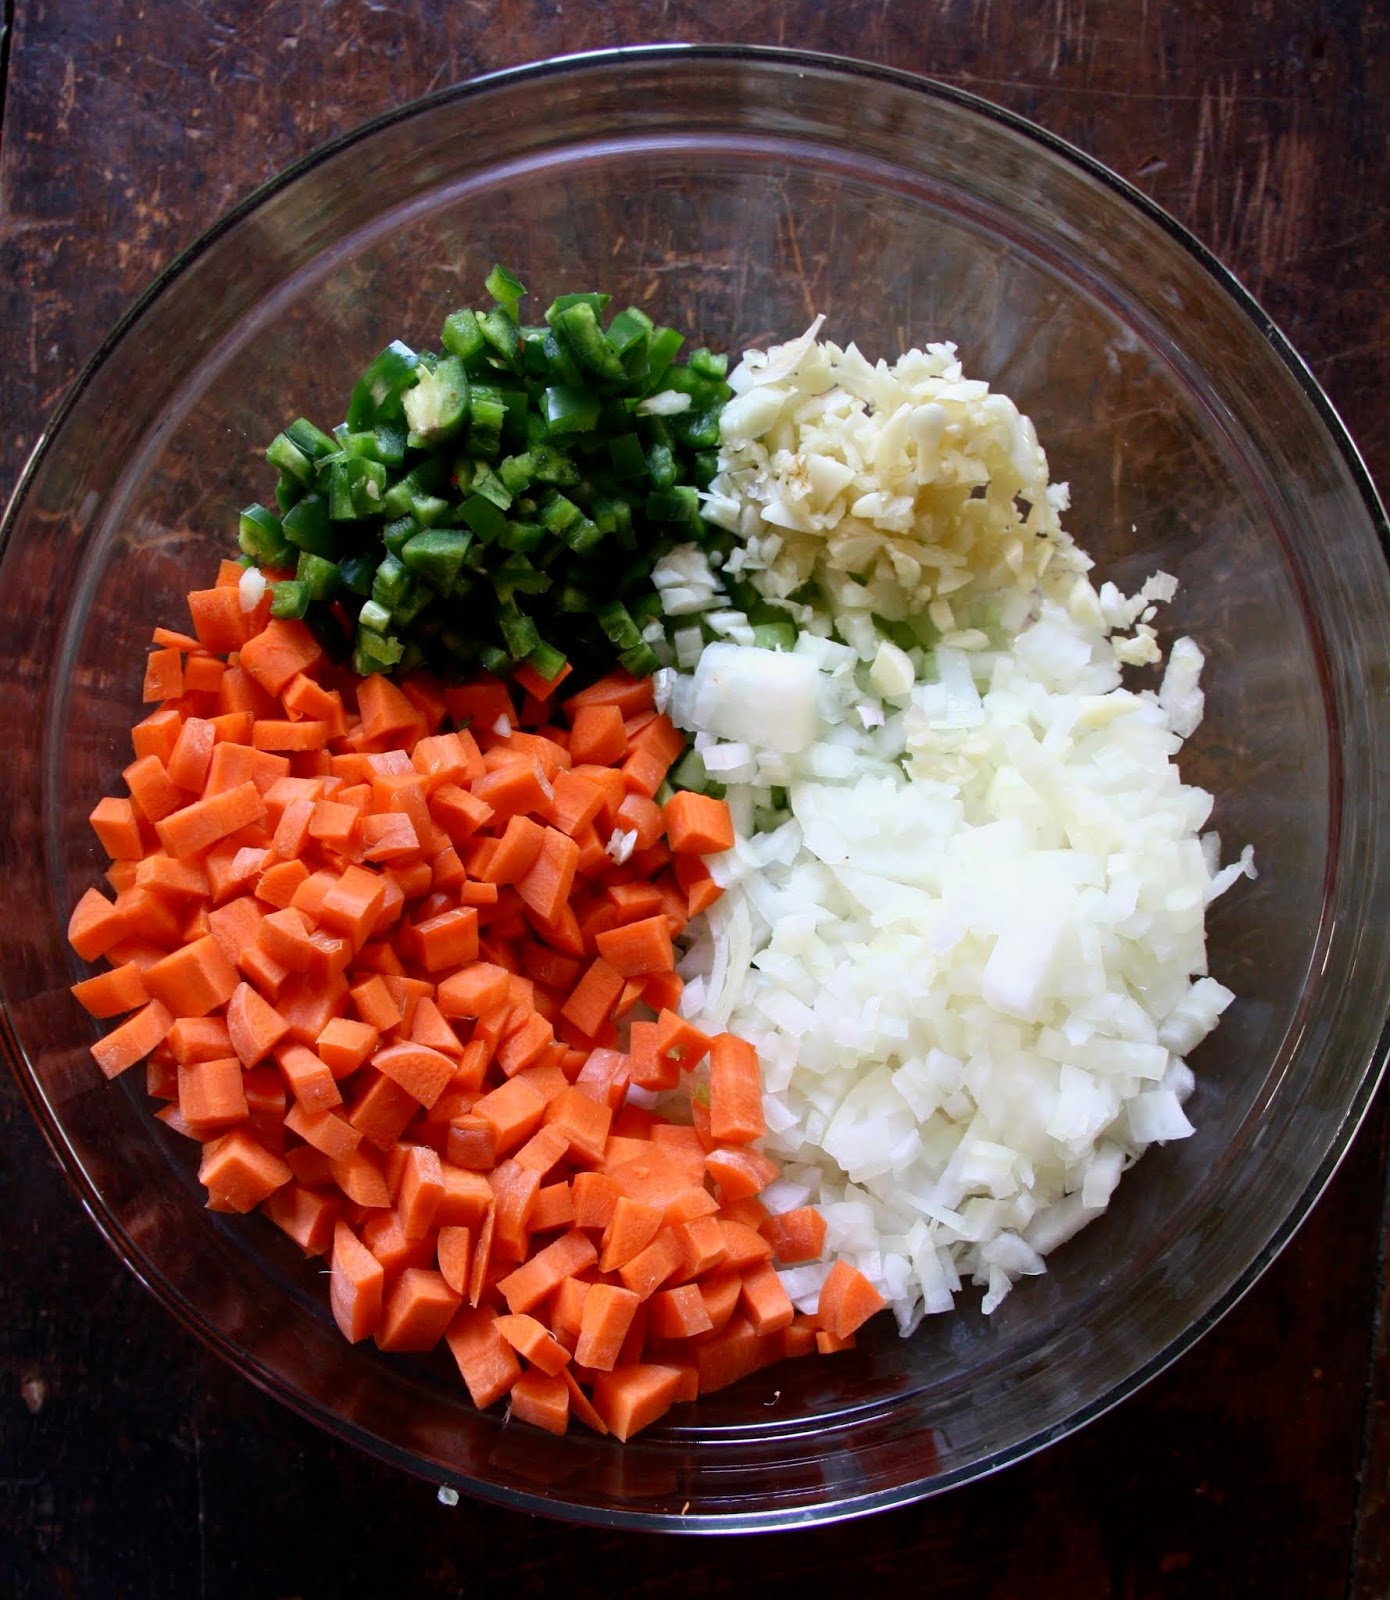
Most bean soups include the use of mirepoix. A holy trinity of diced onions, celery, and carrots. But this one doesn't stop at relying on onions, carrots, and celery for flavor. Minced jalapeños (seeded) and garlic (8-9 cloves) help to deepen the flavor of the soup as well as bring a very slight amount of heat to it. 

Now let's talk spices for a quick second. This one uses ginger, yes ground ginger. Trust me when I say don't think of omitting it or replacing it with anything else. So sparingly with a rounded half-teaspoon of ginger or go full in with a teaspoon. Either way, the ginger brings another layer of flavor to this incredibly savory mouthwatering soup.


Other than dicing vegetables and giving them a quick sauté, assembling the rest of the soup's ingredients into a large stock pot is really easy. Everything goes into the pot, gets a quick stir, is brought to a boil, and then is left to simmer (uncovered) for 2 1/2 to 3 hours. That's it! Well almost.


The ham bone used for this soup should be a pretty meaty one (about 4 1/2 pounds in total weight). When the soup has finished cooking, remove the ham bone, cut the meat off into bite sized pieces, then return the ham pieces to the soup. If not serving the soup right away, return the ham bone back into the soup, let it cool completely, cover and refrigerate overnight. The combination of keeping the ham bone in the soup and chilling it results in a thicker, even heartier soup. Note: You can always thin the soup with a little more water if that's how you like it.


If you have the patience to wait until the third day, I promise you will be rewarded. Although the soup is really, really good on it's first (technically second day). Because it makes enough to serve 8-10 people, you actually might end up with some leftovers. Which means you can compare the taste and flavor of the soup on day two and day three. This soup freezes well, so don't let the soup sit in the refrigerator for more than 4 days. Instead on day two (technically the day it's actually cooked), put some of the cooled soup in containers and freeze it. You will be glad you did. Especially on those days when the weather turns wicked, when you don't have anything good to eat in the house, when you have unexpected guests, need a little comfort food, or whenever you get a craving for this soup. 

January happens to be National Soup Month and for good reason. Most of us crave some comfort food and want things to slow down after the hectic holiday season. Chilling or rather warming up with a good bowl of soup, like this Hearty Ham and Bean Soup, is one of the best post-holiday gifts we can give to ourselves, to our families, to our friends.

Recipe
Hearty Ham and Bean Soup
Serves 8-10

Ingredients
1 (20 ounce) package 15 bean soup mix (see notes)
8 cups of cold water

2 Tablespoons olive oil
1 large yellow onion, diced
3 large or 4 medium celery stalks, diced
8-9 medium garlic cloves, minced (approximately 3 Tablespoons)
jalapeño peppers, seeded and minced
3 large or 4 medium carrots (unpeeled), diced
10 cups of water
1 very meaty (approximately 4 1/2 pounds) ham bone (see notes)
1 (10 ounce) can of Original Rotel Tomatoes (or use a can of Fire-Roasted Tomatoes)
1/2 to 1 teaspoon ground ginger (I used a slightly rounded half teaspoon of ginger)
2 teaspoons kosher salt
1 teaspoon black pepper

Optional: Serve with homemade Buttermilk Biscuits, cornbread, or a loaf of hearty bread.

Directions
1. Rinse beans in a colander. Place rinsed beans in a large pot. Pour the 8 cups of cold water over. Cover and let sit (at room temperature) overnight.
2. In a large Dutch oven or large heavy bottomed saucepan, heat the olive oil over medium heat.
3. Add in the onion, garlic, jalapeños, carrots, and celery. Sauté for 6-7 minutes or just until the vegetables become slightly soft.
4. Transfer the sautéed vegetables to a large stock pot, 10 cups of water, tomatoes, ginger, salt, pepper, and meaty ham bone.
5. Drain the soaked beans. Add the drained soaked beans to the stock pot.
6. Bring the mixture to a boil over high heat.
7. Immediately decrease heat to simmer and cook uncovered for 2 1/2 to 3 hours or until the beans are tender.
8. Remove the ham bone and cut off all of the meat from the bone into bite-sized pieces. Return the ham pieces to the soup.
9. Taste for seasoning. Add kosher salt and/or pepper if needed.
10. Serve the soup hot. 
11. Alternately return the ham bone back to the stock pot. Cover and refrigerate overnight to let the flavors further develop.
12. Remove ham bone and reheat soup for serving. If the soup is too thick, add a little more water.
13. This recipe makes a lot of soup. Recommend freezing some of it for up to 2 months. On a chilly day, you will be glad you have some soup in the freezer.

Notes: (1) You don't need to bake a ham to make this soup. You can buy a meaty ham bone from either your local butcher or ham specialty stores like Honey Baked Ham. (2) You can find 15 Bean Soup beans in most grocery stores. I used the 15 Bean Soup mixture from Hurst's HamBeens. Do not use the flavor package included in the bean mixture in the soup. (3) Some use either vegetable broth or chicken broth instead of water when making soup. Personally I like using water, but if you use either of those broths I would recommend using half water and half broth. Even with broths having with less sodium these days, I like having the ability to adjusting my seasonings after the soup has cooked.

Tuesday, January 7, 2020

Bacon Wrapped Dates w/ Roasted Red Pepper Sauce


With all of the sports playoff games, film award shows, and the return of the long awaited final season of "Homeland" in the months ahead, there is no shortage of opportunities or reasons to invite friends and/or family over. Call me a bit of a home body but in all honesty, I much prefer the coziness of the house over the craziness found in most local bars particularly when watching sports on television. Or maybe I just love having people over as much as I do these Bacon Wrapped Dates w/ Roasted Red Pepper Sauce. Who doesn't love a sweet and savory bite, especially one wrapped in bacon and served with an addictive dipping sauce? Paired with some wine or better yet, a pitcher of Bourbon Apple Pie Cocktails, everyone is certain to go absolutely CRAZY for them. Seriously, even those who claim not to like dates will be completely smitten with these scrumptious two bite appetizer wonders.


Bacon wrapped dates fall into two general categories: stuffed and unstuffed. More than likely you have had them filled with nuts, a variety of cheeses, dried fruits, chorizo, or even sun-dried tomatoes. And all of these are good options. But they also happen to be a little more work to assemble. Sometimes given the choice between something a little more complicated and simple is an easy one to make. I happen to be on team unstuffed as I don't want anything else but the Roasted Red Pepper Sauce to compete with or detract from the flavor of the crispy oven roasted bacon and sweet melt in your mouth, almost candied Medjool dates. I also love having easy appetizer options!


Especially ones you can put together early in the day and then just pop into the oven when everyone arrives!


For the absolute best Bacon Wrapped Dates look for the larger, sometimes called fancy Medjool Dates and buy the more thinly sliced bacon. It's not critical to find pitted dates as it's super easy to cut into them lengthwise and remove the pit. As much as I love really thick bacon and who doesn't, it won't crisp up as nicely as thinner bacon slices will. And for these Bacon Wrapped Dates you definitely want the bacon to be very crispy!  


A half slice of bacon almost wrap around each date twice. Place the bacon seam side down when putting the wrapped dates on an aluminum foil lined pan. Inserting a toothpick into them ensures the little bite stays intact as well as makes serving easy. 


Lightly brushed with a mixture of maple syrup and apple cider vinegar and sprinkled with some red pepper flakes, the wrapped dates bake in a preheated 425 degree (F) oven for 25-30 minutes (or until the bacon is crispy). Once out of the oven, give the dates a light sprinkling of sea salt.


The Roasted Red Pepper Sauce brings the ying and yang of a little bit of heat and some coolness in each bite. The garlic and cayenne combined with the mayonnaise, roasted red peppers, and red wine vinegar makes for the most flavorful dipping sauce. It's one of those dipping sauces that seems to encourage double dipping! You can make your own roasted red peppers or you can buy them in a jar (I used jarred red peppers this time). Mincing the garlic and red peppers with a knife or putting them into the bowl of a small food processor are two options that both work. If you like a slightly chunkier sauce, mince them with a knife (I used a mini-food processor). Making the Roasted Red Pepper Sauce earlier in the day will not only enable the flavors to deepen but the sauce will thicken up slightly. Note: If using jarred red peppers make certain to drain them or your sauce will be runny.


Serve the Bacon Wrapped Dates either warm right out of the oven or at room temperature. I prefer them warm, but wouldn't refuse a room temperature one. Note: If you by chance have any leftovers, which is highly unlikely, you can reheat them in the microwave on high for 20-25 seconds.


For those of you following a Whole 30 diet or living a gluten-free life, you will be thrilled to learn you can eat all the Bacon Wrapped Dates your heart desires! For those of you wanting to be certain there are appetizer options for your Whole 30 and Gluten-Free friends, you definitely want to serve them these Bacon Wrapped Dates! They will love you more than they already do!


An event on television doesn't need to the reason you invite your family and/or friends over for a gathering or to make these Bacon Wrapped Dates w/ Roasted Red Pepper Sauce. You don't even need to plan a game night, host a book club meeting, or celebrate a milestone event. Sometimes it's just nice to invite some of your favorite people over for the sake of getting together and enjoying each other's company. In other words, great memories can and should be made around food, beverages, and conversations. I don't know about you, but there never seems to be enough quality time spent with those that matter most to me.
Recipe
Bacon Wrapped Dates w/ Roasted Red Pepper Sauce
Makes 24 

Ingredients
1 pound package Fancy Medjool Dates, remove pits (See notes)
1 twelve ounce package of thinly sliced bacon, slices cut in half
1 1/2 Tablespoons apple cider vinegar
1 Tablespoon pure maple syrup
Red Pepper Flakes
Flaky Sea Salt

1/2 cup roasted red peppers, well-drained
2 large garlic cloves
1/2 cup good quality mayonnaise 
2 teaspoons red wine vinegar
1/4 teaspoon cayenne pepper
Sea salt and black pepper, to taste

Directions
1. Preheat oven to 425 degrees (F). Line a large rimmed baking pan with aluminum foil and set aside.
2. Wrap a half piece of bacon around each pitted date. Insert a toothpick through the center of the date. Place wrapped date, seam side down, on the prepared baking sheet.
3. Whisk together the apple cider and maple syrup. Brush each wrapped date with the apple cider/maple syrup mixture. Lightly sprinkle with red pepper flakes.
4. Bake the wrapped dates for 25-30 minutes or until bacon is crisp.
5. Transfer the baked dates to a paper towel before quickly transferring over to a serving platter. Lightly sprinkle the bacon wrapped dates with flaky sea salt.
6. Either early in the day or while the dates are baking, make the sauce. To make the sauce either finely mince the garlic and roasted red peppers or mince them in a small food processor. In a medium sized bowl, whisk together the minced garlic, minced red peppers, mayonnaise, cayenne pepper, and red wine vinegar until well blended. Season to taste with salt and pepper.
7. Serve the Bacon Wrapped Dates warm or at room temperature with a small bowl of the Roasted Red Pepper Sauce. 

Notes: (1) I bought both the Fancy Medjool Dates and bacon from Trader Joe's. (2) When removing the pits from dates, use a sharp knife and slice lengthwise into the date. You only need to make a small slit to be able to remove the pit. (3) I love dipping the Bacon Wrapped Dates in the Roasted Red Pepper Sauce, but honestly, they are so, so good all on their own. (4) Both the wrapped dates (unbaked) and roasted red pepper sauce can be made early in the day.

Friday, January 3, 2020

Cranberry Orange Pecan Bread


While having lunch in the city, one of my friends asked a question that went something like this 'Do you ever feel pressure making a meal when everyone's expectations are exceedingly high?'. It took me a few seconds to wrap my head around that question as I knew there was a compliment in there somewhere. He happens to be one of those friends who has the uncanny ability to remember every meal, every course, every beverage ever served here while making you feel like everything was the 'best' ever. However, after giggling for a few seconds my first answer was a simple one. No I don't. But then I went on for a bit. The beginning and end of the meal were always things I thought were really, really, really good. Because like a really good book, everyone remembers how it starts and how it ends, but not everyone remembers everything in the middle. The middle, aka main course, is where I usually take the most risks or try out new recipes on family and friends. Yes, I really do make and  serve things made for the 'first' time but only to family and/or friends, almost never for people who have had a meal here. They would be the ones who only remembered what happened in the middle! But his simple question got me thinking. And not just about making meals at my house or having meals in the homes of my friends.


One of the downsides of being the one who usually gifts friends with homemade food is that it's rare for me to receive a gift coming out of anyone else's kitchen. So when I do, I am thrilled to death! Over the Christmas holidays I actually received two of these gifts! Which happens to be two more than I received all year! And ionically these homemade love gifts came from friends living in Colorado. The first was a jar of incredibly delicious homemade pickles and its' recipe. I can hardly wait for the return of pickle season to start making them as I love pickles! The second was a loaf of Cranberry Orange Pecan Bread. One we inhaled in record time, but one without an accompanying recipe. A recipe I had to have. After there wasn't a reply to my first request, I made a second one. Persistency is my middle name and patience is a virtue I haven't completely embraced.


The Cranberry Orange Pecan Bread happened be made my the wife of my doctoral college roommate, my dissertation advisor, a PiPhi sister, and my friend. So I knew my chances of getting the 'secret' recipe from the woman who has been working tirelessly to earn tenure at a university at the young age of almost 70, to launch a national network with rural education leaders, and to help her doctoral students finish their dissertations (just to name a few), were pretty good, in spite of how busy she was. Based on how insanely delicious and slightly addictive the Cranberry Orange Pecan Bread was, I wasn't expecting the recipe I received. Because absolutely nothing about the look, taste, flavor, or texture of this bread said 'semi-homemade'. I was beyond thrilled to discover it was! Being able to make an unfussy recipe for a Cranberry Orange Pecan Bread tasting like it came from a high-end bakery had me feeling deliriously happy. It felt like I was gifted twice by the same person.


In spite of having a passion for baking from scratch, I secretly embrace 'semi-homemade' recipes. Especially ones like this one. Honestly, I don't think there is better recipe for Cranberry Orange Pecan Bread out there. This doctored up version (no pun intended) is the BEST one ever!


It all starts with a box of Cranberry Orange Muffin Mix. The addition of orange zest, fresh orange juice, fresh cranberries (in addition to the cranberries in the mix), and coarsely chopped roasted pecans transforms the mix into the moistest, most flavorful, most beautiful Cranberry Orange Pecan Bread I have ever tasted. Which means you need this bread in your life too!


For the record, I made some very minor changes to Kristina's recipe. I used fresh instead of frozen cranberries (because I had them in the refrigerator), increased the pecans from 1/3 cup to 1/2 cup (because I love a nutty fruit bread), topped it with a thick icing (just because), and finished it with some sugared cranberries (because I can't leave well enough alone). However, this bread is incredibly delicious without the icing or add the sugared cranberries. And if I were sending this bread in the mail, I wouldn't be icing it or adding sugared cranberries either. 


The recipe below for the sugared cranberries gives you more than you need for topping the Cranberry Orange Pecan Bread so you will end up with plenty to snack on! If you have never had them, you are in for a treat!


Kristina's changes of replacing some of the water with fresh orange juice, adding the zest of an orange (Cara Cara are her favorites) along with adding more cranberries as well as pecans seriously take the boxed cranberry orange muffin mix from good to great, from ordinary to extraordinary.


Using an 8" x 4" bread pan lined with parchment paper and sprayed with vegetable oil, the Cranberry Orange Pecan Bread bakes for 50-55 minutes in a preheated 350 degree (F) oven.


If serving this Cranberry Orange Pecan Bread for breakfast I might leave off the icing and sugared cranberries. Well maybe not the icing. But if serving it as a dessert, I would definitely add both of them. This bread has just the right balance of tart and sweet. One without being overly tart or sweet. 


With the start of a new year I know everyone has either resolved or created the intention to more closely watch what they eat. But the rule of 'everything in moderation' makes eating almost anything possible. So when it comes to serving this Cranberry Orange Pecan Bread, cut it in thick 1/2 inch slices. Yes half-inch thick slices. You could always serve someone half of a thickly cut slice, but whatever you do, don't slice it thinly. Just don't.


Fortunately my memory is relatively still intact. Which means I will be remembering all of the gifts I received this Christmas. But when my memory starts to fail me I will never forget the homemade gifts of pickles and Cranberry Orange Pecan Bread received this year as their flavors are permanently imprinted on my taste memory. Who can ever forget a homemade gift?

This is one of those 'quick' breads you can make year round (but maybe not with the sugared cranberries on top). It would make for a thoughtful hostess, birthday, holiday, or housewarming gift; a perfect start to any morning; a lovely dessert to a simple meal; and/or a great mid-morning or mid-afternoon snack. This may be, no it will be, one of the best 'semi-homemade' breads you will ever make. And remember, don't feel compelled to be so forthcoming and reveal your secret recipe so quickly. If your friends and/or family don't ask, then don't tell them. But is they do, please share it with them. Be prepared to see the look of shock on their faces when they learn how easy such a luscious Cranberry Orange Pecan Bread can be to make.

P.S. You should run out now and pick up a handful of boxes of Krusteaz's Cranberry Orange Muffin Mix!

Recipe
Cranberry Orange Pecan Bread (inspired by a recipe shared by my good friend Kristina Hesbol)

Ingredients
1 box of Cranberry Orange Muffin Mix (18.6 oz/525g) - see notes
1/4 rounded teaspoon baking powder 
2 large eggs, room temperature
8 Tablespoons water
2 Tablespoons orange juice
1/2 cup vegetable or canola oil
1/2 cup (55g) fresh or frozen (unthawed) cranberries (cut in half if the berries are large)
1/2 cup (55 g) pecan halves, roasted and coarsely chopped
Zest from a small orange

Orange Glaze
1 cup (115g) confectionary sugar
1 Tablespoon unsalted butter, room temperature
1 Tablespoon water
1 Tablespoon orange juice

Sugared Cranberries
1/2 cup water
1 1/2 cups granulated sugar, divided
8 ounces (226g) fresh cranberries

Directions
Cranberry Orange Pecan Bread
1. Preheat oven to 350 degrees (F). Line an 8" x 4" metal baking pan with parchment paper. Lightly butter or spray with vegetable oil. Set aside.
2. In a medium-large size bowl, mix together the muffin mix, eggs, water, orange juice, and canola oil. Mix just until blended.
3. Gently stir in the fresh cranberries, the cranberries that came in the muffin mix (do not drain), the pecans and orange zest. 
4. Spoon the mixture into the prepared pan. Smooth the top with an offset spatula.
5. Bake for 50-55 minutes or until done. Note: Baking time could be as long as 65 minutes.
6. Transfer to a cooling rack. Let bread completely cool, if topping with the glaze.
7. In a medium sized bowl, add in the confectionary sugar and butter.
8. Bring the one tablespoon of water and one tablespoon of orange juice to boil. Pour it over the confectionary sugar and butter. Whisk until smooth and creamy. 
9. Remove the bread from the baking pan and place on serving platter. Pour over the orange glaze. Top with sugared cranberries, if using. Let the glaze set before slicing into 1/2" thick slices.
10. Store any leftover bread in the refrigerator to maximize it's freshness or store covered in plastic wrap at room temperature

Sugared Cranberries
1. In a medium sized saucepan, heat 1/2 cup of water and 1/2 cup of sugar over medium-high heat until sugar dissolves. 
2. Remove from heat and add in the cranberries. Stirring to ensure all of the cranberries are coated.
3. With a slotted spoon transfer the cranberries to a cooling rack set over a large sheet pan.
4. Let the cranberries set for 5 minutes. Note: They should still be a little sticky.
5. Pour the remaining cup of sugar into a bowl or onto a plate. Toss the cranberries into sugar mixture until they are completed coated.
6. Set the coated cranberries onto a pan lined with parchment paper or let sit in the sugar until ready to use.

Notes: (1) Recommend using the Cranberry Orange Muffin Mix made by Krusteaz. The mix contains a tin of cranberries which were also used in this bread. (2) A half cup of water is 10 Tablespoons. Instead of saying use 1/2 cup less 2 Tablespoons of water, I thought it would be easier to break out the water and orange juice into Tablespoon measurements. (3) When slicing the bread, use a long sharp not, not a serrated knife. (4) If you can't bring yourself to make anything not baked from scratch, this Cranberry Nut Bread is really good too.

Tuesday, December 31, 2019

Steamed Chocolate Pudding with Peppermint Hard Sauce


The holiday decorations have not yet been put away and there are a few Christmas cookies and confections left or rather I should say hidden from view, stored safely away in tins. In less than twenty-four hours a new day, new week, new month, new year, new decade arrives. There is barely enough time for me to get my final blog post for the year, for the month, for the decade up. But I am bound and determined to share the recipe for this Steamed Chocolate Pudding with Peppermint Hard Sauce with you before midnight arrives and before the chaos of dismantling and packing up all of the Christmas treasures begins. Normally I like to get the house back to "normal" before the new year arrives, but having spent a couple of days being tourists and having an early New Year's celebration in the city (Chicago) with friends means the decorations return to the attic will just have to wait. For the past couple of years the four of us have gone up to Door County (Wisconsin) to ring in the new year, but life events caused what turned out to be a fabulous change in plans. If the good fortune and luck we had on our adventures in the city are a prelude to what lies ahead in 2020, I can hardly wait for the new year, new decade to begin. 

While I generally make steamed pudding for the holidays, I have decided it will now be, should now be making appearances throughout the winter. I am thinking the steamed pudding would make for a lovely Valentine's Day dessert, birthday 'cake', end to a dinner with friends, or treat after going to see a movie like the newly released film "Little Women". Sans the Christmas sprinkles and change from a peppermint hard sauce to an almond flavored hard sauce, Steamed Pudding could shift from being a traditional holiday dessert to year-round one, at least around it should be around here. Considering this is a somewhat non-traditional recipe for a traditional dessert, there isn't anything preventing me and/or you from making this gorgeous, delicious traditional dessert throughout the year. 


Not only did our New Year's relatively new tradition change this year, so did how we celebrate Christmas Day. New puppies for my sister and nephew were responsible for an adjustment to our usual much beloved celebration. So instead of opening gifts, having dinner, and watching the annual Christmas movie with a dessert intermission here at our house, we had dinner at my sister's, then traveled back to our house for everything else. I was slightly disappointed when I realized we wouldn't be having the epic, traditional day here as I love having Christmas here. But we couldn't leave two new puppies alone for nine hours and I wouldn't have been able to remain calm with four dogs running around here. As it turned out, the day turned out to be perfect. Proof that changes to long standing traditions can be a really good thing. Although I am secretly holding out for a return to tradition next year!


While it's called a pudding, it really is more cake-like in texture. At least this Steamed Chocolate Pudding with Peppermint Hard Sauce is. In keeping with the theme of change at Christmas I altered the version I had made in years past. Instead of the side of an almond flavored hard sauce I served it with a peppermint flavored hard sauce. And wow, it was amazing! I almost added peppermint extract to the pudding (cake) too (maybe next time), but added in vanilla and some instant espresso instead. Lastly I drizzled some peppermint glaze over the top of the steamed pudding along with topping it with some sprinkles and crushed candy canes. Even my family who has always loved the 'traditional, original' one I had served for Christmas went crazy for this one!


No one and I mean no one will know you made this steamed pudding with a box of doctored up cake mix. And you shouldn't tell them! For a rich chocolatey steamed pudding use a Devil's Food Cake mix (and not one with pudding in the mix). The addition of the vanilla and instant espresso helped to deepen the flavor of chocolate further. Why I had never thought of that before is anyone's guess.


I have used both vintage and a non-stick steamed pudding mold. My non-stick mold was bought at Williams-Sonoma many, many years ago. Today you can find some available at specialty cooking stores or online. Regardless if your mold is or isn't non-stick, it is critical the pan is buttered (or sprayed with vegetable oil) and floured before the 'cake' mixture is poured into the mold. Equally important is having a mold with a tight fitting lid as you don't want water or steam getting into it as well as placing the filled mold into a pan of water brought to the boiling point. 


You definitely want a large dollop of the hard sauce served with a slice of the steam pudding. This peppermint version is insanely delicious.  


In year's past I have served the steamed pudding 'naked'. But this year I drizzled it with a peppermint glaze and topped it some crushed candy canes and holiday sprinkles. Those puddles of glaze on the cake platter were swoonworthy!


Many serve steamed pudding warm, but I like serving it room temperature. If you serve it warm, forget drizzling it with the glaze as it will melt.


Steamed pudding goes back to 17th century England. I believe this slightly decadent 21st century version would be as beloved back then as it is today. If by chance you happen to love chocolate, you will be smitten with every bite of this Steamed Chocolate Pudding with Peppermint Hard Sauce. And you needn't have to wait until next Christmas to make it. Note: The recipe for the Steamed Pudding with Hard Sauce shared with you six years ago can be found here

Wishing you all a very happy, healthy new year, new decade! And as the new year begins, always believe that something wonderful is about to happen.

Recipe
Steamed Chocolate Pudding with Peppermint Hard Sauce

Ingredients
Steamed Pudding
15.25 ounce box of Devil's Food Cake Mix (not one with pudding in the mix)
1 teaspoon vanilla
1 teaspoon instant espresso
Optional: 1/2 teaspoon peppermint hard sauce

Peppermint Hard Sauce
8 Tablespoons unsalted butter, room temperature
2-3 Tablespoons whole milk
1/4 teaspoon peppermint extract
1 1/2 cups (173g) confectionary sugar
Pinch of sea salt

Peppermint Glaze
1 cup (115 g) confectionary sugar
1 Tablespoon unsalted butter, room temperature
2 Tablespoons boiling water
1/4 teaspoon peppermint extract
Optional: Sprinkles and/or crushed candy canes

Directions
Steamed Pudding
1. Fill a large deep pan (pasta pots work best) will enough water that it will cover 1/3 of the steamed pudding mold. Begin heating the water to the boiling point. Note: The water needs to be hot when you set the filled mold in.
2. Butter (and/or spray with vegetable oil) and flour a steamed pudding mold. Set aside.
3. Prepare cake according to directions on the box but add in the vanilla and instant espresso.
4. Pour the cake mix into the prepared mold. Top with and secure the lid, making sure the mold is tightly sealed.
5. Place a folded (thin) dishtowel on the bottom of the pot before carefully place the steamed pudding mold into the water and cover with lid. Reduce heat to low and simmer for 90 minutes. Notes: You don't want the bottom of the steamed pudding mold to touch the bottom of the pan. Periodically check to make certain you have enough water in the pot. If you need to add more water, it must be hot water.
6. Remove the steamed pudding mold from the water and place on a cooling rack. After 5 minutes, carefully remove the lid and unmold the steamed pudding onto a cake stand or round dish. Note: Steamed pudding can be served warm or at room temperature. I generally serve it at room temperature.

Peppermint Hard Sauce
1. In the bowl of a standing mixer fitted with a paddle attachment, beat the butter until creamy (approximately 2 minutes).
2. Add in the milk, peppermint extract, pinch of sea salt and gradually add in the confectionary sugar. Blend until smooth and creamy. If the hard sauce is too thick, add a little more milk.
3. Transfer the hard sauce to a small serving bowl, cover and refrigerate. Should be made at least an hour in advance. Note: If made several hours in advance, remove from the refrigerator at least 30 minutes before serving.

Glaze
1. In a medium-sized bowl add the confectionary sugar. Make a well and add in the butter and peppermint extract.
2. Pour the boiling water of the mixture and whisk until smooth. If your mixture doesn't have a pourable consistency, add a little more boiling water.
3. Pour the glaze over the unmolded steamed pudding. Top with sprinkles and/or crusted candy canes if using. Let sit for 10 minutes before serving and slicing the steamed pudding.

Note: (1) Instead of placing the mold on top of a folded cloth in the pan, make a ring made of aluminum foil and place the mold onto the foil ring. 


Iconic artwork, Edward Hopper, The Art Institute Chicago (2019)

Friday, December 27, 2019

Key Lime Pie


In addition to have the goal of sharing more unfussy recipes in the new year ahead, 2020 could also become the year of the make-over to some of my most favorite, most loved, and most often made dishes. Whenever I make a beloved recipe over and over again I find myself making changes to it. Sometimes there are small, subtle tweaks, sometimes a major overhaul happens. Several of my friends have often accused me of holding out on the "real" recipe when in reality I just haven't gotten around to sharing my changes here on the blog. Why would I even mess with cherished, treasured recipe? Is there no such thing as a sacred recipe? This all sounds a bit blasphemous, right? But what if I told you the revised recipe might even be better than the original? So let me ask you this. Would you rather settle for good enough when you could have better than good enough or even great instead? Let that question sink in for just a minute. 

The Key Lime Pie recipe shared almost seven years ago is one of the most favorite recipes on the blog. After I first served this pie to two of my friends living in Rhode Island, I believe they are both vying for world record for making this luscious, creamy, tart pie. If anyone is going to gasp when they see this post, it will probably be the two of them. And even though I wasn't present during any of their holiday gatherings, I am willing to bet my original Key Lime Pie recipe was on the menu. For the record, I still love the original version of this pie. I just happen to love this one a little bit more.


For those of you who have made the original Key Lime Pie recipe before you might consider the changes made to the revisited recipe as relatively minor ones. And on the surface they kind of are. It will not be until you have the experience of eating this one will you see there were in fact considerable changes made. Particularly to the graham cracker macadamia nut crust to key lime filling ratio. Think 'less is more'. 


One of the issues I sometimes had with the original recipe had everything to do with the graham cracker macadamia nut crust. When I looked at the dessert plates left behind there was almost always big chunks of the crust left behind. Not because it wasn't delicious, but because there was too much of it. Reducing the amount of graham cracker crumbs, macadamia nuts, and butter not only creates a better, even more delicious crust, it creates a much better filling to crust ratio. The focus returns back to where it should be. The key lime filling. The crust compliments rather than competes with the filling.

With regard to the filling none of the ingredients or amounts have changed here. However, how the filling ingredients are blended has. Instead of whisking them all together in a bowl, I found mixing them in a standing mixer fitted with a whisk attachment created an even creamier filling. A small nuance, but one I believe matters.

In the original version, the graham cracker macadamia nut crust was pressed into a tart pan having a removable bottom. One of the biggest complaints about and/or obstacles to making this pie was the tart pan. Not everyone wanted to go out and buy one. The use of 10" springform pan not only removes this obstacle, it makes for a much easier (and possibly more beautiful) serving presentation. More importantly, using the 10" springform pan also creates a most perfect crust to filling to whipped cream filling ratio. Every bite is heavenly.

Pre-baking the crust is a real game changer for this pie. Not only does it deepen the flavor of the crust, the crust remains in tact when the pie is sliced. In fact, hardly any crumbs are left behind when you slice it! Pressing the crust firmly into the pan is equally important in the pre-baking process. Using a flat bottomed cup (like a measuring cup) to press the crust into the pan works beautifully.


Pre-baking the crust for 10 minutes adds time to the overall cooking process, but those ten minutes make a world of difference. Using a 10 inch springform pan didn't change the baking time after the filling was added. It is still 30 to 35 minutes or just until the filling is partially set. Note: I tend to bake closer to the 35 minute mark.


The longer you chill the baked pie, the better it cuts when serving. Personally I like baking the Key Lime Pie the night before and adding the whipped cream on shortly before serving.

I just happen to like using a pastry bag when topping a pie or cake with lightly sweetened whipped cream (remember I have fussy tendencies), but it can be dolloped on and swirled with a spoon. A pastry bag should not be the obstacle preventing anyone from making this pie.


Top the pie with thin slices of a key lime (or a regular lime) and some grated lime zest or top with fresh berries. However, you finish it, it is quite an irresistible pie. And I am going to go so far as to say it's significantly better than any other store-bought, bakery, or restaurant served key lime pie. You really haven't had the best key lime pie until you have tasted this one! And you deserve to have the best! 


This Key Lime Pie is a year-round pie. Not one you have to wait seasonly to make or one pigeon-holed as a holiday dessert. Which means anytime you have a craving for a creamy, luscious tart pie having an incredibly scrumptious crust, you can make it. I promise this version will get the same rave reviews you got when you made the first version. Although maybe the gushing will go on even longer. And don't be surprised if some ask for seconds. 

Recipe
Key Lime Pie 
Serves 10-14, depending on how you slice it
Updated December 2019

Ingredients
Crust
1/2 cup (2 1/2 ounces or 70g) macadamia nuts, roasted and finely chopped
2 1/2 cups (9 3/4 ounces or 275 g) graham cracker crumbs, preferably freshly crushed graham crackers
2 Tablespoons granulated sugar
8 Tablespoons (1 stick) unsalted butter, melted and slightly cooled

Filling
3 cans (14 ounce size) sweetened condensed milk
1 1/2 cups key lime juice
3 large egg yolks

Topping
2 cups heavy whipping cream
1/2 cup (58 g) confectionary sugar
1 teaspoon vanilla
Sliced key limes or fresh berries for garnish
Optional: Finely grated key lime peel

Directions
Crust
1. Preheat oven to 300 degrees (F). Line a 10" springform pan with parchment paper.
2. In a medium sized bowl, combine the macadamia nuts, graham cracker crumbs, sugar, and melted butter. Mix to combine.
3. Pour into the prepared pan. Press firmly. Crumbs should come up about 1/2 inch the sides of the pan.
4. Bake for 10 minutes. Remove from oven and let cool slightly.

Filling
1. In the bowl of a standing mixer fitted with a whisk attachment, blend the sweetened condensed milk, key lime juice, and egg yolks until smooth and creamy.
2. Pour the filling into the pan with the pre-baked crust.
3. Bake for 30 to 35 minutes or until filling is partially set. Remove from the oven and let cool.
4. Cover the pan with aluminum foil and refrigerate at least 8 hours or overnight.

Topping and Assembly
1. In the bowl of a standing mixer fitted with a whisk attachment, beat whipping cream and vanilla until semi-soft peaks form.
2. Add in the confectionary sugar and beat until firm peaks are formed.
3. Remove the key lime pie from the pan and transfer to a cake plate or round platter.
4. Using a pastry bag fitted with a pastry tube, pipe whipped cream onto the pie. Alternately, drop dollops of the whipped cream onto the pie and swirl using a large spoon.
5. Garnish with thinly sliced limes and freshly grated key lime peel and/or fresh berries.
6. Serve and savor!

Notes: (1) I use the key lime juice made my Nellie and Joe's. (2) Always, always make your own graham cracker crumbs.