Thursday, March 5, 2020

Pecan Sandies


Most of us have a favorite childhood store bought cookie. Ones we not only still find endearing, but ones often bringing back memories as soon we take a bite. Some of you were probably smitten with the buttery, nutty Pecan Sandies. I wasn't a member of that cookie fan club. It wasn't until my adulthood that I came to appreciate those shortbread like cookies. Oreos had a powerful hold on me in my early cookie formative years. While they still haven't released their grip, I am now a big fan of melt-in-your-mouth, buttery, nutty cookies. Had I tasted a homemade version of Pecan Sandies early on, I would have understood why a cookie made without any chocolate could be so loved.


These Pecan Sandies could turn anyone into a Pecan Sandie lover. They may also cause some to replace their store bought favorites with this homemade version.

Because they are made small you just might find yourself enjoying a handful of these delicate, buttery, nutty cookies in one sitting without feeling like you have overindulged your sweet tooth. Anything is possible, right?


Toasting the pecans and topping them with Turbinado sugar is what helps to set these Pecan Sandies apart from their store bought counterpart. When pecans are roasted until they are well-browned, they impart a compelling maple undertone to a baked cookie. Additionally, the dark, course crystals in Turbinado sugar brings a more well-rounded flavor than granulated sugar would to the cookie. As a side note, it also happens to be one of the healthier sugars. Just in case you needed a reason to justify indulging your cookie sweet tooth.


The cookie dough comes together easily in a standing mixer fitted with a paddle attachment. On a lightly floured surface the dough can be rolled out without needing any chilling time. However, if I were making them them on a warm day, I would roll the cookies out on a piece of parchment paper and chill them for about 30 minutes before cutting them into squares.

You might be wondering 'do I need to cut them into one inch squares?'. The simple answer is no, you don't. The biggest advantage to cutting them into squares is very little dough is wasted. While some advise against re-rolling out the scraps, I often don't heed that advice. But if your dough absorbs too much of the flour used in rolling them out the first time, you could end up with a drier cookie. Which is why some bakers take a no re-rolling stance. Another advantage of making them into these small squares is you end up with about four dozen cookies. Giving you more to share! But feel free to cut them into circles or any other shape of your choosing. Just remember your volume of cookies will be reduced depending on their size.


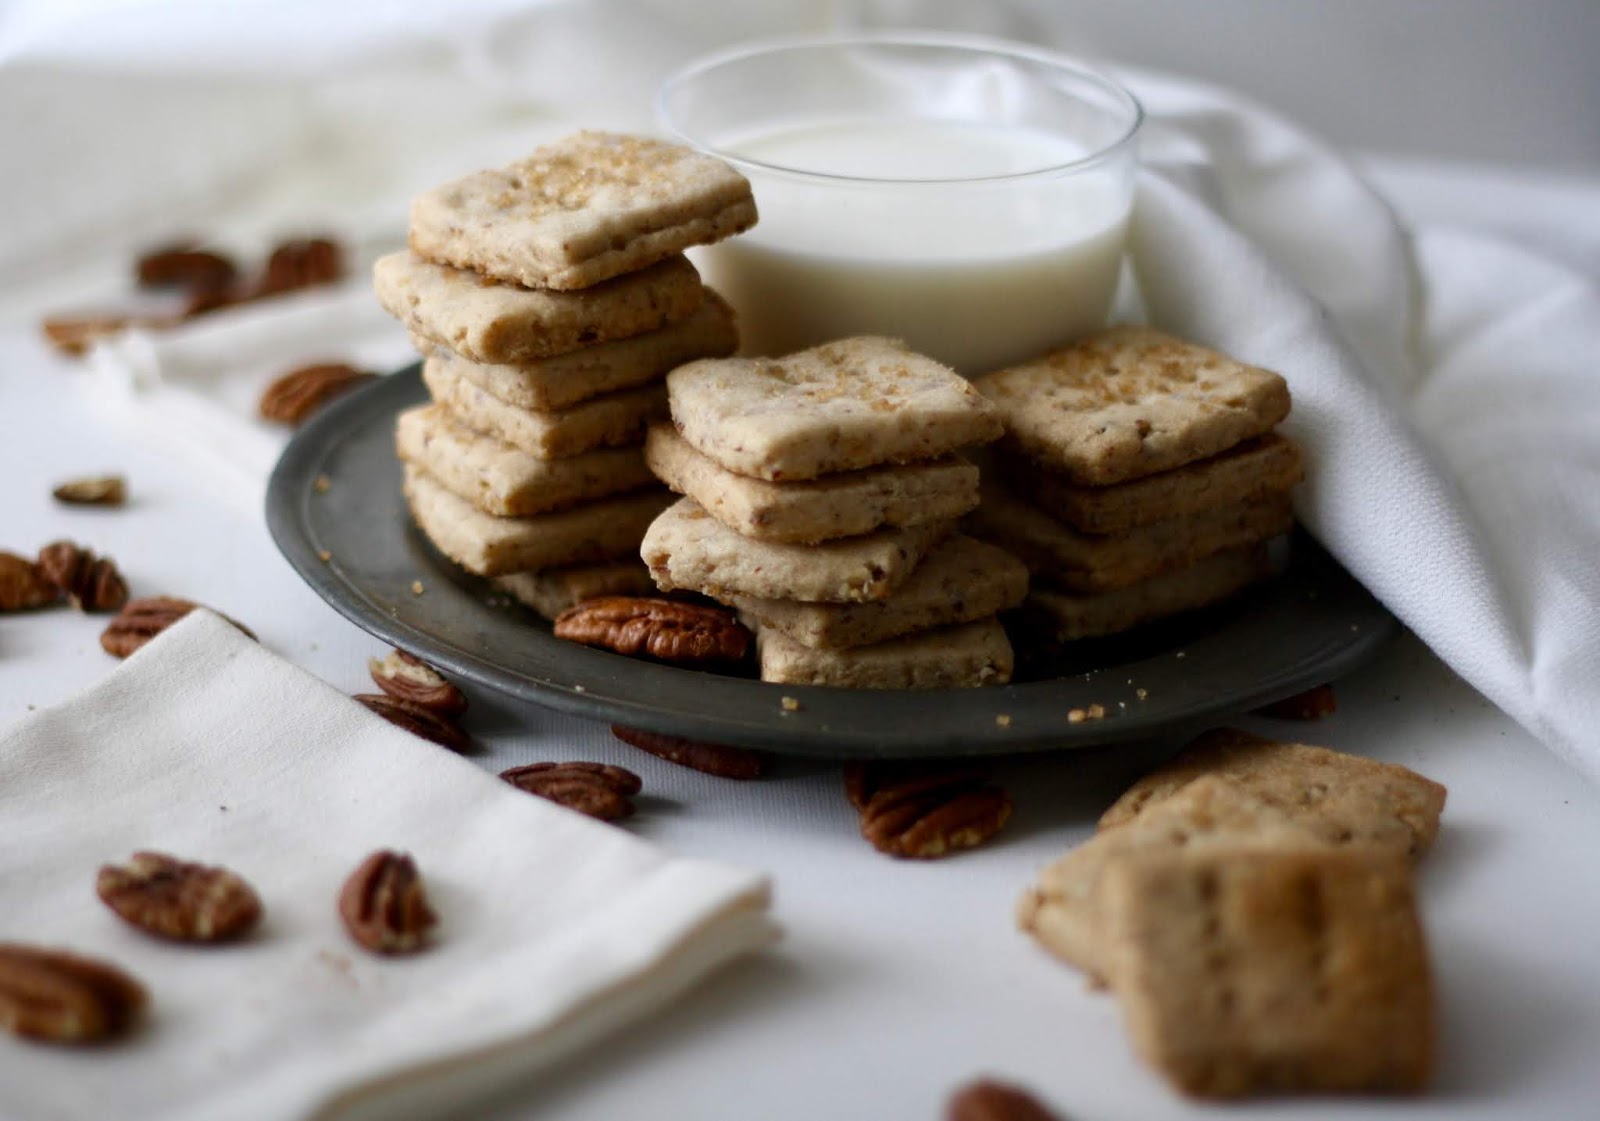
Store bought Pecan Sandies don't have wholes in them. But these do. Made easily with a fork, the Pecan Sandies look like cute little buttons. Before the cookies go into the oven, they are generously sprinkled with the Turbinado sugar.


Baking time for the one inch sized cookies ranges somewhere between 12 and 15 minutes. Rotating the cookie sheet midway through the baking process creates a more evenly browned cookie.

The Pecan Sandies pair well with coffee, tea, or milk. They are also really good all on their own.

I honestly debated about whether to partially dip or drizzle them with some melted milk chocolate. But I decided to keep them a little more classic. However, having given up chocolate for the 51 days leading up to Easter was the other more compelling reason. 


Stored in a tightly sealed container they will be good for at least a week. Maybe longer. But they probably won't last that long. While we are months away from Christmas (thank goodness), consider adding these Pecan Sandies to your cookie trays and gifts. Because of their shortbread like nature, they are kind of cookie that will ship well to your family and friends. But hey, don't wait until December to make them or send out a gift box of cookies. 


For those of you who were and maybe still are big fans of Pecan Sandies, you really need to make these. And for those of you still clinging to your other childhood favorite cookies, you really need to make these too! These delicate, buttery, nutty, melt in your mouth cookies are really hard to resist.

Recipe
Pecan Sandies (inspired by the Pecan Sandies recipe in Claudia Fleming's cookbook "The Last Course: The Desserts of Gramercy Tavern")
Makes 4 dozen 1" cookies

Ingredients
1 cup (110 g) pecan halves, toasted
2 cups (260 g) all-purpose flour, divided
1 cup unsalted butter, room temperature
2/3 cup (80 g) confectionary sugar
2 teaspoon vanilla
1 teaspoon kosher salt
1/2 teaspoon baking powder
2-3 Tablespoons Turbinado sugar
Directions
1. Preheat oven to 350 degrees (F). Line two large rimmed baking sheets with parchment paper and set aside.
2. In a small food processor, add in the cooled toasted pecans and 1/4 cup of the all-purpose flour. Grind the nuts. Set aside.
3. Sift together the remaining 1 3/4 cups of all-purpose flour, kosher salt, and baking powder. Set aside.
4. In the bowl of a standing mixer fitted with a paddle attachment, beat the butter and confectionary sugar until light and creamy (approximately 2-3 minutes). Scrape down the sides of the bowl midway through the beating process.
5. Add in the vanilla. Beat to combine.
6. Add in the sifted dry ingredients mixing until combined.
7. On low speed add in the ground nuts. Mix until well incorporated. Dough will begin pulling from the sides of the bowl.
8. On a lightly floured surface, remove half of the dough from the bowl. Roll out the dough to 1/4" thickness. 
9. Using either a 1" cookie cutter or a ruler, cut the dough into 1" squares.
10. Place squares on the baking sheets. Generously sprinkle the cookies with the turbinado sugar. Use a fork to make two rows of pricks into the cookies.
11. Bake for 13-15 minutes, rotating the tray midway, or until the cookies are a pale golden brown along the edges and on the bottom.
12. Transfer the cookies to a wire rack and cool completely.
13. Serve and enjoy. Store any undevoured cookies in a tightly sealed container.

Notes: (1) To toast the pecans, preheat oven to 350 degrees (F). Place pecans in a single layer on a small baking sheet. Roast in oven for 10-12 minutes or until well browned. Remove pan from oven, transfer to wire rack to cool. (2) You could also dip them partially or drizzle them in melted milk chocolate if you want to get fancy.

Door County, Wisconsin (February 2020)


Tuesday, March 3, 2020

Roasted Mini Sweet Peppers, Burrata, and Italian Meats Crostini


It has been almost six years since I shared the recipe for Roasted Red Pepper Salad, Goat Cheese, and Grilled Bread with you. While many things have remained the same, some things have changed since then. Burrata was a much harder to find cheese back then. Nowadays, you can find this decadent cheese in many grocery stores. And I believed red peppers should be roasted on the grill, not in the oven (at least in my world). While we use our gas grill year round, roasted red peppers were generally made in every season except winter. On occasion, I roasted mini red peppers in the oven, but then sliced and stuffed them with, yes you guessed it, goat cheese. In keeping with my newest trend of simple and jaw dropping recipes comes this Roasted Mini Sweet Peppers, Burrata, and Italian Meats Crostini. Seriously, this may become one of those appetizers going on regular repeat around here. I would even consider turning on the oven on a hot summer day to make this so it become one of those crave worthy four season appetizers. 


If you ever needed an excuse to invite some friends over, this Roasted Mini Sweet Peppers, fresh Burrata, and Italian Meats Crostini would be it. If you ever needed an excuse to open up a bottle or two of some really good red wine, this would be it too. Okay, I know, no one ever really needs an excuse to open a bottle of wine. 

This one of those incredibly versatile recipes as it can be easily doubled or even tripled. You can serve it with a freshly sliced baguette or you can turn your baguette into crostini. Instead of serving it with mild or hot coppa and prosciutto, serve it with any assortment of your favorite thinly sliced Italian meats. If your friends are vegetarians, don't serve it with any meats at all. You can serve it differently each time you make it or if you have creature of habit tendencies make it the same way again and again. Either way no one will be the least disappointed. Unless of course your wine choice is questionable.


You are definitely going to need a large, heavy, flat bottomed enameled or cast-iron pan to roast the peppers in. The size of your pan will determine how many peppers you can roast at one time. Because your peppers roast in the olive oil, they need to lay flat in the pan. Squeeze as many of them as you can as they will shrink a bit when roasting in the oven. The amount of olive oil used will either slightly decrease or increase depending if you alter the amount of mini sweet peppers listed in the ingredients below. I was able to squeeze in one and half pounds of mini sweet peppers in this pan. For this amount of peppers I used 3/4 cup of olive oil. (Note: As a guideline use a 1/2 pound peppers to 1/4 cup olive oil ratio when making your adjustments). 


The mini sweet peppers roast in preheated 400 degree (F) oven for 50 to 60 minutes or until they are slightly charred and tender. Whatever you do, do not throw out the olive oil the peppers roasted in! 


To make this an appetizer on the slightly hearty side, I served mine with some thinly sliced mild coppa and prosciutto I bought at my favorite local Italian deli. These two Italian meats happen to be two of my favorites. Serve yours with all of your favorites! 


Unlike roasting regular sized red peppers, these mini sweet peppers do not need to be peeled. The entire pepper, including the stem, is edible. I cannot even begin to tell you how incredibly flavorful they are. But think face plant delicious. Or think dance party in your mouth!


Remember I told you not to throw the olive oil the peppers roasted in away? Pour it over the roasted peppers and/or the burrata. Because when all of the peppers and gone, you are definitely going to want to dip your bread into it! Speaking of bread, I used a freshly sliced baguette. Had it not been still too wintery for me, I would have grilled the sliced baguette to further elevate the flavors!


The drizzle of some balsamic glaze is optional, but one I would strongly encourage! It is a great compliment to the oh so sweet flavor of the roasted peppers as well as the burrata. 

It's also been awhile since I put anything on the last meal list. So I am going end the hiatus and put the Roasted Mini Sweet Peppers, Burrata, and Italian Meats Crostini on it!!!! 

Some say we usually remember the last thing we heard and/or the last thing we ate. If there was ever a rule to be broken then the Roasted Mini Sweet Peppers, Burrata, and Italian Meats Crostini breaks it. Because if this is the first thing you serve to family and/or friends, I promise they will remember this beautiful deliciousness. From the sweetness of the roasted mini peppers, to the creaminess of the burrata, to the flavorfulness of the Italian meats, they might not even remember anything else!

Recipe
Roasted Mini Sweet Peppers, Burrata, and Italian Meats Crostini
Serves 6, maybe 8

Ingredients
1 1/2 pounds (681 g) mini-pointed sweet peppers
3/4 cup extra-virgin olive oil, plus more for finishing
1 teaspoon kosher salt
2 or 3 -  4 ounce (113 g each) balls of burrata
1 baguette sliced on the diagonal (slightly generous 1/4" slices). Note: Freshly sliced, made into crostini or grilled
1/4 pound mild or hot coppa, thinly sliced
1/3 pound prosciutto, very thinly sliced
Balsamic Glaze, for drizzling

Directions
1. Preheat oven to 400 degrees (F). 
2. Lay the mini sweet peppers flat in a large, heavy bottomed enameled or cast iron pan.
3. Pour over the olive oil. Sprinkle with the kosher salt.
4. Roast peppers for 50-60 minutes or until the peppers are slightly charred and tender. Remove from oven when done.
5. Place the balls of burrata in the center of the platter.
6. Using tongs, remove the roasted peppers from the baking pan and arrange along one side of the burrata. (See notes below for an alternative arrangement.)
7. Arrange the sliced baguette on the other side of the burrata.
8. Arrange the coppa and prosciutto above and below the burrata.
9. Drizzle some balsamic glaze over the peppers and/or burrata (optional but really good). And/or drizzle some of the olive oil the peppers roasted in over the burrata.
10. Open up a bottle or two of wine and serve the roasted mini sweet peppers warm or at room temperature.

Serving note: (1) The olive oil the peppers roast in is incredibly flavorful. As an alternate presentation, place the balls of burrata in the center of the platter. Surround with the roasted peppers. Pour the roasting olive oil over the peppers. Serve with a sliced baguette, crostini (oven roasted or grilled).

Notes: (1) The roasted mini-sweet peppers are best served warm but are still delicious at room temperature. (2) Adjust the amount of olive and kosher salt slightly if making 2 or more pounds of the peppers. Additionally reduce the amount of olive oil if making only 1 pound of peppers. (3) Serve the baguette freshly sliced, make it into crostini, or grill it!


Barns in Door County, Wisconsin (February 2020)


Saturday, February 29, 2020

No Bake Cherries Jubilee Cheesecake Parfaits


Seeing cherry trees in full bloom is one of those sights that must be seen. Especially when there are endless rows of them in an orchard. The sight rows upon rows of heavily laden pink hued blossomed branches set against a blue spring sky is literally breathtaking. Yet, seeing trees with their stark branches set against the back drop of deep blue winter sky and blanketed by snow is it's own kind of beauty. Taking in the landscape of a cherry orchard is akin to drinking a magic elixir. You can't help but feel completely smitten with it's beauty. Having had the experience of seeing cherry trees in all of their spring glory and their winter hibernation, I can honestly say both are equally visually compelling sights. But for completely different reasons. On my recent trip up to Door County, I came home with photos of orchards, bags of chocolate covered cherries, jars of cherry jam, and only one jar of a cherries jubilee topping. I realized what a bad one jar decision I made as soon as I took a bite of these No Bake Cherries Jubilee Cheesecake Parfaits. 


Summer may be months away but that doesn't mean we can't enjoy cherries in the off season. These elegant, yet easy to make No Bake Cherries Jubilee Cheesecake Parfaits are a perfect way to get your cherry fix in year round. 


A trend of simple meals, simple desserts seems to be emerging here on the blog. Whether with age comes wisdom or not, this emerging trend is one definitely growing on me. And hopefully you too! Especially when these semi-homemade recipes taste and look like those time and labor intensive homemade ones. 

Sometimes you want to serve a substantially sized dessert. Then there are those other times where you want the meal to end with a 'small' bite to satisfy the need to end the meal with a little sweetness. Depending on which size glasses or jars you use, this recipe makes enough to serve four to eight. Maybe even up to ten! Whichever sized parfait you make, they are definitely one of those destined make friends or influence people desserts!


Cream cheese, sweetened condensed milk, vanilla, and freshly squeezed lemon juice create the cheesecake layers. Store bought graham crackers lightly toasted in the oven, cherries jubilee topping, lightly sweetened whipped cream, and a cherry for the top make up the rest of the ingredients for the parfaits. 


Allowing the cream cheese to soften slightly will help to ensure it whips up smoothly. The key to creating the most luscious cheesecake filling is beating the mixture until it is super light and creamy. Freshly squeezed lemon juice adds just the right amount of tartness. 


Toasting the graham crackers in the oven before crushing them will keep them from softening in the assembled parfaits. Because you definitely want a bit of crunch in your spoonfuls. 


You can serve the parfaits immediately after you make them or you can make them several hours or more ahead. Just cover, keep them chilled, and wait to put the finishing touch of the lightly sweetened whipped cream and cherry on top!


For the cherry layers I used a jar of Cherries Jubilee topping I bought up in Door County (ordering information is listed below). If you live near a town filled with cherry orchards you might find one similar. Or you can make your own (recipe listed below in the notes). But if you don't want to wait for a mail ordered jar or make your ow cherries jubilee, a jar/can of a good cherry pie filling is yet another option. 


The cheesecake and cherry lovers in your life these No Bake Cherries Jubilee Cheesecake Parfaits are the embodiment of everything they love. Which means their love for your cooking will only deepen. If, by chance, you serve this to first time guests at your dinner table, some will be wondering how to get on next invite list. For those who are repeat dinner guests, they might be wondering why you were holding out on them. Seriously, these parfaits are the dreamiest, creamiest, crave worthy little bites of deliciousness. Unlike some cheesecakes, these parfaits are more light than heavy in texture. And visually, these parfaits are absolutely stunning! So, if you are looking for an impressive dessert, one delivering huge on flavor, and super simple to make these No Bake Cherries Jubilee Cheesecake Parfaits are the ones you want! Just in case you need a reminder, don't be so quick to tell everyone how easy they were to make. Enjoy letting them think you spent hours creating these little masterpieces for awhile before you spill the beans. 

Recipe
No Bake Cherries Jubilee Cheesecake Parfaits
Serves 4 to 8 or maybe even 10 (depending on size of glass/jar used)

Ingredients
1 pound (452 g) cream cheese, slightly softened
1 - 14 ounce (396 g) can of sweetened condensed milk
1/4 cup freshly squeezed lemon juice
1 1/2 teaspoons good quality vanilla
12 double sized graham crackers (about 1 1/2 sleeves), toasted and crushed
19 ounce (538 g) jar of cherries jubilee topping. Note: You can make your own (see below), purchase online (link here), or use a good quality cherry pie filling
1 cup heavy whipping cream
1/3 cup (40 g) confectionary sugar, sifted
4-8 stemmed cherries (fresh, amarena, or luxardo cherries)

Directions
1. Preheat oven to 350 degrees (F). Place graham crackers on a cookie sheet. Toast graham crackers in the oven for 10 minutes. Remove from oven. Let cool completely before crushing. Put graham crackers in a large ziplock back. Use a rolling pin to create crumbs. Set aside.
2. In the bowl of a standing mixer fitted with a paddle attachment, beat cream cheese until smooth and creamy (about 3-4 minutes).
3. Add in the sweetened condensed milk. Beat until mixture is well blended and creamy.
4. With the mixer on low add in the vanilla and lemon juice. Beat until very smooth and creamy.
5. Using stemless wine glasses or small jars/clear glasses, layer the graham cracker crumbs, followed by the cheesecake filling, and then the cherries. Repeat the layering process a second time. If not serving immediately, cover and chill. Note: Can be made early in the day.
6. When ready to serve, whip the whipping cream and confectionary sugar until firm peaks form. Pipe the whipped cream on top of the cherry mixture. Top with a fresh cherry, pitted amarena cherries with stems, or luxardo cherries! Note: If the parfaits were chilled, wait until you are ready to serve to pipe on the sweetened whipped cream.

Notes: (1) The size of the glass and/or jar used will determine how many parfaits this recipe will make. Using a stemless wine glass, it will yield 4 servings. But using smaller clear glasses or jars, it will yield at least 8 servings. If using smaller glasses/jars, fill them to almost the top. (2) I used this 19 ounce jar of Cherries Jubilee Topping from Lautenbach's Orchard Company. You could use a good quality cherry pie filling or make your own cherries jubilee. If you make your own cherries jubilee, you will need to make ahead. See recipe below. (3) If not using fresh cherries to top the parfaits, use the Pitted Amarena Cherries with Stems from Trader Joe's or Luxardo Cherries.

Cherries Jubilee Recipe: 2 cups frozen or canned red tart cherries, 3/4 cup tart cherry juice, 3/4 cup water, 1/3 cup granulated sugar, 1 1/2 Tablespoons cornstarch, 1 teaspoon vanilla, and 1/3 cup brandy. Combine cherry juice, water and sugar in a saucepan over medium heat. Stir to dissolve sugar. Bring to a boil. Reduce heat to medium-low, mix in the cornstarch, and stir constantly until the mixture has thickened Add the cherries and cook for an additional 2 minutes. Remove from the heat an stir in the vanilla. Add the brandy and ignite with a match. When the flame subsides, stir and let come to room temperature. Pour into a large jar, seal, and place in the refrigerator until ready to use.


Cherry Orchards, Door County, Wisconsin (February 2020)


Wednesday, February 26, 2020

Baked Spinach and Cheese Tortelloni


Needing a change in scenery I took a short trip up to Door County (WI) earlier this week. For the last two weeks I had been watching the weather on a twice, sometimes four times daily basis, trying to see if there was a window of uneventful, non-treacherous travel. Weather here in the midwest can be on the unpredictable side. With three days of predicted partly sunny skies and moderate temperatures, I packed up my camera and headed up north to one of my happy places. Door County never disappoints, but for the first time in all of the winters I have driven up there, it exceeded my expectations. With blue skies and temperatures in the 40s (definitely balmy weather this time of year), I spent ten to twelve hours a day outdoors. In addition to going to some of my favorite places, I made some new discoveries driving around the two lane back roads. If my license plates didn't give me away, my roadside parking, along with the where my camera was pointed, did. Not many Wisconsin residents leave their car doors open as they walk along the highway with their cameras trying to conjure their cow and horse whisperer skills. In my defense there isn't much traffic on the roads crisscrossing a landscape rich in farms and incredible landscapes. As it happened there was one exception. While I was completely lost in taking photos, I thought I heard a car in the distance. Running as fast I could back to my car to close the door, the oncoming car slowed down and came to a stop. After the woman first asked me if everything was okay, she asked if I was taking photos of the grazing dairy cows I could only respond by saying 'Can you tell I am not from around here?'. Fortunately this made her laugh. And it probably gave her a story to tell around her dinner table. Stories like this one explains, in part, why some of my friends are often reluctant to take their life in their hands traveling with me. My driving, the frequent stops to take photos, and my boldness in knocking on the doors of farmhouses (at least I have the good sense not to trespass on private property) means I am often taking solo trips up to Door County. Although truth be told, having a couple of days away by myself always resets my spirit.


I left for home about six hours earlier than originally planned as there was a significant winter storm predicted back in the Illinois. A storm that never managed to materialize. But cutting this trip a little short just gave me another reason to travel back up there in the months ahead. This next trip won't just be about hiking and exploring, it will also be about stocking up on some of the award winning Wisconsin cheeses I tasted on this trip. Wisconsin is cheese heaven. Just like this Baked Spinach and Cheese Tortelloni!


Speaking of cheeses, the cold weather months are perfect for making this Baked Spinach and Cheese Tortelloni topped with fresh mozzarella. It's one of those simple, good for soul kind of dishes. Elegant enough for a dinner party and casual enough for a weeknight dinner, it's destined to become a favorite.


If making a one pot meal using a good quality jarred marinara sauce and fresh pasta bought from the grocery store appeals to you, today is your lucky day. From start to finish this Baked Spinach and Cheese Tortelloni comes together in less than an hour. You can even make the casserole early in the day and pop it in the oven when you are ready to serve dinner. How easy is that?


You have a number of options when making this dish. You can use mild or spicy Italian sausage; use spinach and cheese tortelloni, use spinach only, or use cheese only. And using fresh pasta (the kind usually found in the refrigerated section of the grocery store) eliminates the need to pre-cook it before assembling the casserole. 

Adding whole milk ricotta to the sauce creates an even heartier, richer pasta dish. Adding some red wine to the dish makes for an even more deeply flavored sauce. But the addition of fennel seeds adds yet another flavor dimension.


After all of the ingredients are mixed together, the dish is topped with sliced and/or grated (or a combination of sliced and grated) fresh mozzarella. 


In a preheated 400 (F) degree oven, the Baked Spinach and Cheese Tortelloni bakes for 25-30 minutes or until the sauce is bubbling along the edges and tortelloni is tender.

The aroma coming out of the oven is intoxicating!


Winter weather puts me in a comfort food kind of mood. And this deeply flavorful, soul satisfying Baked Spinach and Cheese Tortelloni is akin to sitting by a warm fire and drinking a glass of wine. You can't help but feel better than good after eating it. Who doesn't want to serve an incredibly delicious, stress-free, crave-worthy meal to family and friends? Especially one so simple to make. Looking for a reason to invite people over for dinner this weekend? Well, here it is!

Don't forget to serve the Baked Spinach and Cheese Tortelloni with a bottle (or two) of a great red wine and a loaf of Italian bread. Instead of a salad, put together a beautiful charcuterie board (because one cannot have enough cheese. An affogato would make for a perfect finishing touch. This simple meal is one destined to go on repeat.
Recipe
Baked Spinach and Cheese Tortelloni
Serves 6 - 8

Ingredients
1 pound mild or spicy Italian sausage
1 24 ounce (680 g) jar of good quality marinara sauce
8 ounces (226 g) whole milk ricotta
1 teaspoon kosher salt
1/2 teaspoon black pepper
2 - 3 teaspoons fennel seeds (I used 3 teaspoons)
20 ounces (567) fresh spinach and cheese tortelloni or only cheese tortelloni (see notes)
1/2 cup hearty red wine (optional, but so good)
8 ounces (226 g) fresh mozzarella, sliced and/or grated
Fresh basil
Optional: Freshly grated or shaved Parmigiano-Reggiano for serving

Directions
1. Preheat oven to 400 degrees (F).
2. In a large cast iron or ovenproof skillet, cook Italian sausage until lightly browned and/or cooked through.
3. Add in the marinara sauce. Stir to combine.
4. Add in the ricotta, kosher salt, pepper, fennel seeds, tortelloini, and wine (if using). Stir to completely combine.
5. Top the dish with sliced, sliced and grated, and/or grated mozzarella.
6. Bake for 25-30 minutes or until the sauce is bubbling at the edges and the tortelloni is cooked through. 
7. Remove from the oven. Top with fresh basil. 
8. Serve immediately with freshly grated or shaved Parmigiano-Reggiano, if using.

Notes: (1) I used Rao's Homemade Marinara Sauce, but use any high quality jarred or freshly made marinara sauce. (2) I used Rana's Family Size Fresh Spinach and Cheese Tortelloni. (3) You can make the entire casserole early in the day. Cover and refrigerate until you are ready to bake it. Remove dish from the refrigerator at least 30 minutes before putting in the oven. Baking time may need to slightly adjusted upward.


Dairy cows. Door County, Wisconsin (February 2020)