Wednesday, January 27, 2021

Baked Cod w/ Herbed Panko/Cracker Crumbs


After a longer than anticipated hiatus from yoga, I returned back to my yoga mat last week. Some say the comeback is always stronger after the setback, however, at the moment I am not convinced. Maybe I just haven't given it long enough. Maybe it will take a few more weeks (or months) before my balance and strength will at least begin to return (if not exceed) my pre-pandemic yoga practice. Sporadically engaging in some online yoga classes over the past few months is definitely not the same as being in a very warm yoga studio. However, the return back to the yoga studio is yet another slightly different experience. As having to wear a face mask for an intense sixty minute yoga class makes it feel as if I am now practicing in one of those hot, high humidity yoga bikram studios. Between my lack luster performance, the heat, and intermittent periods of that hyperventilating feeling, my love of and for yoga is definitely being challenged. Although somehow walking away from something that has pushed me, has made incredible demands on my body as well as made me question my sanity, isn't an option I am willing to put on the table. At least not anytime soon, if ever. No one ever said yoga would be easy, not even before or during a Pandemic. Which means I am just going to have to get comfortable being uncomfortable as I am committed to staying in this for the long haul. 

Less than three miles from my home is a great fish and seafood store. It's one I have gone to mostly at the holidays or when looking to make an impressive shrimp platter for guests. Which means it isn't a place I go to frequently. This is due partly because I can sometimes be a creature of habit and partly because cooking fish/seafood (other than my usual salmon) isn't something I have felt confident about. Which is a bit of a surprise considering how much I actually love fish. Quite possibly my fish cooking reluctance has something to do with the red snapper marinated in a whole bottle of French Dressing recipe we made in college. At the time my sorority sister roommate and I thought it so 'gourmet' we made it our company dinner party signature dish. Yes, this is a true fish story! I can't help but wonder if all these years later any of those dinner guests have an aversion to making or having a home-cooked fish dinner. I even wonder if it's a fish dish they still remember it. Quite honestly it would be hard not to!.
.
 Just recently I decided cooking fish is one of things I need to get better at, maybe even good at. Not just because I live close to store sourcing some really great fresh fish, not just because it's an incredibly heart healthy source of protein rich in the good for you Omega-3 fat, and not to erase a fish dish memory from long ago, but because it's simply delicious.
 

After making this Baked Cod w/ Herbed Panko/Cracker Crumbs I discovered cooking fish wasn't as complicated as I had erroneously convinced myself it was. Isn't it funny how we can so easily convince ourselves something is so much harder that it really is? It only took one bite of this incredibly tender, melt in your mouth, flavorful cod for me to realize I had been depriving myself (as well as family and friends) of enjoying amazing home-cooked fish meals for years. So, for those of who consider cooking fish to be something a little out of your comfort zone, I am here to tell you this Baked Cod will help to change that perception. 

If at all possible when shopping for cod or any fish for that matter, find a fish or grocery store that has sells fresh (not previously frozen) fish as well as has frequent fish deliveries. In other words, for the best fish cooking and eating experience you want really good fish. My seafood store did not sell center cut cod fillets, only larger sized cod fillets. So I asked if I could have the thickest fillets possible as I would be cutting them half for this dish. Fillets with an even thickness will bake up evenly. Meaning you won't end up with some under and overcooked pieces of fish. 


This Baked Cod w/ Herbed Panko/Cracker Crumbs recipe has a two-part cooking/roasting process. For the first ten minutes the cod is roasted in oven only coated with olive oil, salt, and pepper. After the partially baked cod has a wine/lemon mixture poured over it and is then topped with a herbed, garlic panko/Ritz Cracker mixture, it bakes for another twelve minutes. After just twenty-two minutes of total baking/roasting time, you will have made one of the best, most elegant cod dishes to grace your table. 


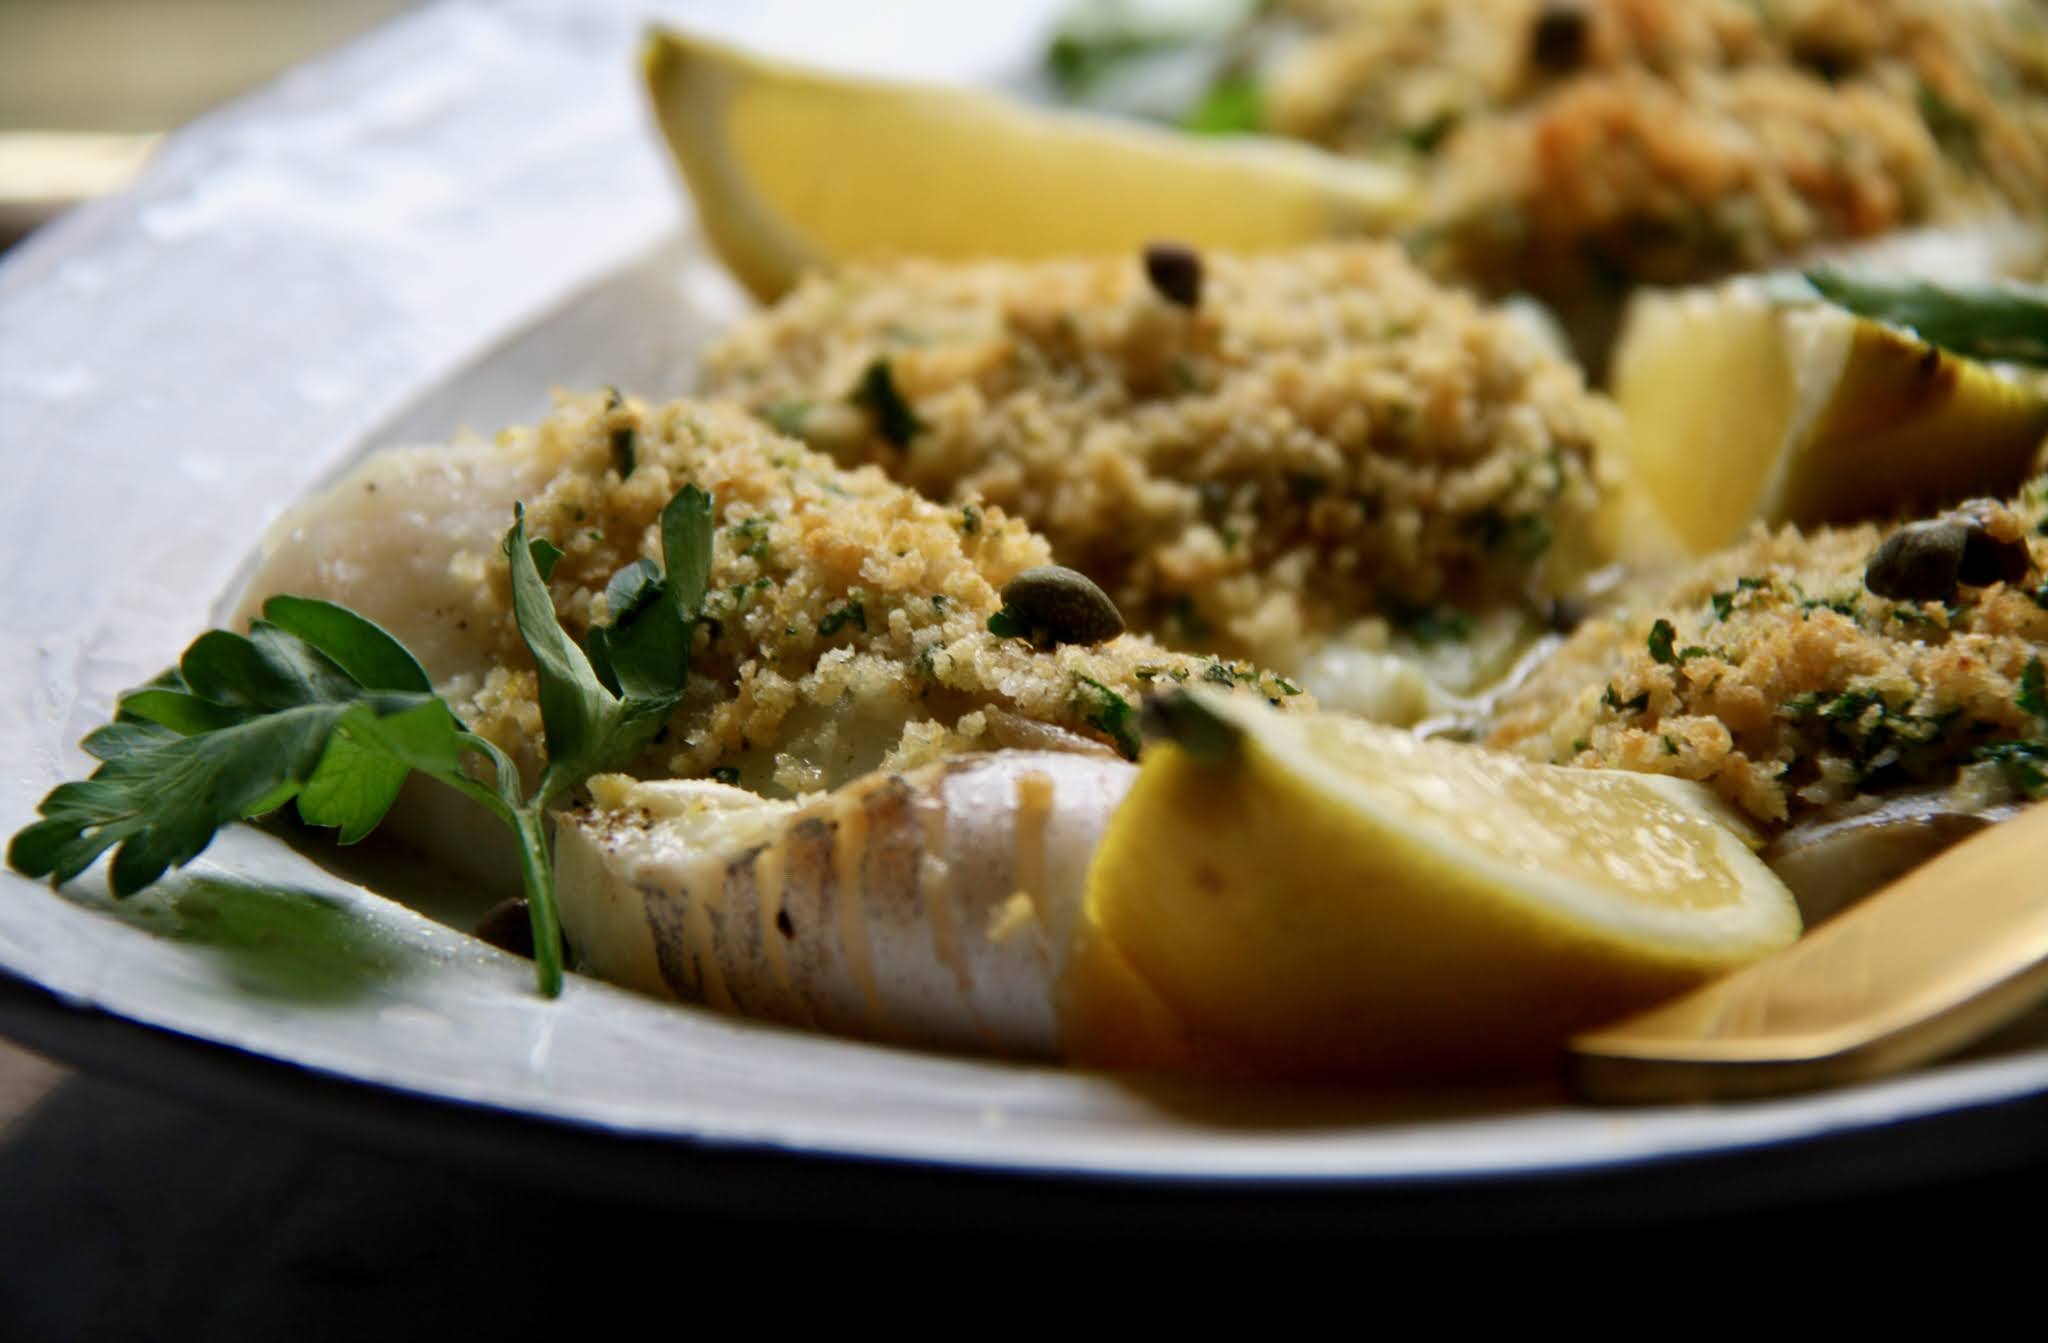
The contrast in flavors from the tender, luscious cod to the slightly crispy buttery, herby, panko/Ritz cracker topping will have your head spinning. 


The fork-tender, succulent cod is the result of roasting it at a high oven temperature combined with the poaching effects of the wine/lemon juice mixture. In other words, how you cook/bake this fish partly contributes to what makes it so divine.


Pair the Baked Cod w/ Herbed Panko/Cracker Crumbs with some sautéed spinach, roasted asparagus and/or a beautiful salad. Open up a bottle of your favorite wine and sit back while enjoying every single bite. As you savor each morsel ask yourself if you are starting to get comfortable cooking fish at home. I am guessing the answer will be a yes.

Recipe
Baked Cod w/ Herbed Panko/Cracker Crumbs
Serves 4-6

Ingredients
2+ pounds boneless cod fillets cut into six 6-7 ounce pieces or 6 center cut boneless cod fillets 6-8 ounces each
2-3 Tablespoons olive oil
15 Ritz crackers (46g) finely ground
1/3 cup (32g) Japanese style Panko crumbs
2 Tablespoons fresh parsley, minced
2 medium sized cloves (2 teaspoons) minced garlic
1 teaspoon lemon zest
4 Tablespoons (57g) unsalted butter, melted
1/4 cup white wine (Chardonnay or Pinot Grigio)
2 Tablespoons freshly squeezed lemon juice
Kosher salt and black pepper
1-2 Tablespoons capers, for serving
1 whole lemon cut into 6 wedges, for serving

Directions
1. Preheat oven to 400 degrees (F). 
2. Pour 2-3 Tablespoons of olive oil into a 9" x 12" ceramic baking dish. Tilt the dish to coat the bottom of the dish.
3. Place the cod fillets in the dish, turn to coat both sides of the cod with the olive oil.
4. Mix together 1 1/2 teaspoons salt and 1/2 teaspoon of black pepper. Evenly sprinkle over the cod fillets.
5. Place the baking dish on a baking sheet and place in oven. Bake for 10 minutes.
6. Mix together the ground Ritz crackers, Japanese-style Panko crumbs, minced parsley, minced garlic, and 1/2 teaspoon of Kosher salt in a small bowl. Pour in the melted butter and mix until the crumbs are evenly moistened. Set aside.
7. Mix together the wine and fresh lemon juice.
8. Remove the cod from the oven and evenly pour the wine/lemon mixture over the fillets.
9. Evenly top each fillet with the crumb mixture. Pat it down lightly. Don't worry if some of it falls into the pan.
10. Return the baking dish to the oven and continue roasting for 12 minutes or until the fish is just cooked through in the center, depending on the thickness of the fillets. Note: My baking time was exactly 12 minutes.
11. Transfer cod fillets onto a large serving platter. Pour the incredibly flavorful pan sauce along the edges (not over) the baked fish.
12. Top the cod with 1-2 Tablespoons of capers. Garnish with lemon wedges and serve immediately. Definitely encourage everyone to spoon some of the sauce on their fish. It's really, really good.

Notes: (1) If buying boneless cod fillets, ask your fish monger for the thickest fillets. If using boneless cod fillets, look for ones about 3/4" thick. If buying center cut cod fillets, ask for ones about 3/4" inch thick. (2) Japanese-style Panko crumbs are slightly larger than regular panko bread crumbs which helps to add some nice crunch to the topping. (3) I used Chardonnay insteadd of Pinot Grigio but either will work. (4) This recipe was inspired by the Baked Cod with Garlic and Herb Ritz Crumbs from Ina Garten in her cookbook "Modern Comfort Food".

Friday, January 22, 2021

Nutty Dried Fruit Granola Bars


After posting the recipe for the Homemade Nutty Granola with Dried Cherries and Cranberries late last summer, I have been craving a granola bar version of oatmeal, dried fruit, nutty deliciousness. In spite of there being so many different granola bar options found on the shelves of the grocery stores, very few of them speak to me. Because while there are always some exceptions, homemade is almost always better than store bought. If I can be so bold, these Nutty Dried Fruit Granola Bars turned out to be so much more delicious and possibly healthier than anything you could buy. Perfect for breakfast, as a post-run/workout refueling snack, as a kinder healthy alternative to a candy bar, to take on a hike, and/or to satisfy a craving for something a little sweet, you really need these bars in your life.
 

Made with almost all natural ingredients and only a small amount of sugar, they are chewy, nutty, the perfect amount of sweet, crunchy, and oh so satisfying. And as a bonus they are seriously delicious.


This could not be an easier to make, baked version granola bar. So easy in fact, you will be making them on a regular basis.


Toasting the oats, almonds, wheat germ, and coconut in the oven for just 10-12 minutes at 350 degrees (F) before mixing them with all of the other ingredients further deepens the flavor of these granola bars. 


The honey, dark brown sugar, butter, vanilla, and Kosher salt brought to a boil on the stove becomes the mixture used to bind the oats, nuts, dried fruit and chocolate together. After adding the honey/sugar/butter mixture to the toasted oats, only the dried fruit is mixed in. Then it needs about 15-20 minutes of cooling down time before you add the miniature chocolate chips. If you add the chocolate if the mixture is too warm, your chocolate will melt. Note: I personally love dried cherries and dried cranberries. But feel free to substitute equal amounts of your favorite dried fruits.


After the chocolate chips are mixed in, the mixture is transferred to a parchment paper lined 9"x9" baking pan. If you lightly butter your fingers, it will be easier to press the mixture evenly into the pan.


Baking time ranges from 25-30 minutes or until the granola bars are lightly golden. Once baked the bars need to rest for about two hours before you cut them into bars. Using a 9" x 9" pan creates ten perfectly sized granola bars. Enough for you and enough to share! To keep them as fresh as possible, completely wrap them in parchment paper (not plastic wrap) and store them in a sealed container.


As hard as this may be to believe, I would absolutely choose one of these Nutty Dried Fruit Granola Bars over a candy bar to satisfy my insatiable sweet tooth! And, if by chance, you decided to be a healthier you this year, these granola bars might help you keep that promise to yourself! 

Recipe
Nutty Dried Fruit Granola Bars
Makes 10 bars

Ingredients
2 1/4 cups (203g) old-fashioned oats
1/2 cup (41g) wheat germ
1 cup (130g) whole almonds, coarsely chopped
1/2 cup (50g) flaky sweetened coconut
4 Tablespoons (56) unsalted butter
1/3 cup (113g) honey
1/4 cup (50g) dark brown sugar
1/4 teaspoon Kosher salt
1 1/2 teaspoons vanilla
1/2 cup (74g) dried cherries
1/4 cup (37g) dried cranberries
1 cup + 1 Tablespoon (92g) mini chocolate chips, divided

Directions
1. Preheat the oven to 350 degrees (F). Line a 9"x 9" pan with parchment paper. Set aside.
2. On a large baking sheet, mix together the oatmeal, wheat germ, almonds, and coconut. Bake for 10-12 minutes or until just lightly browned. Transfer mixture to a large bowl.
3. Reduce the oven temperature to 300 degrees (F).
4. Add the butter, honey, brown sugar, Kosher salt and vanilla to a small saucepan. Bring to a boil over medium heat. Pour over the toasted oatmeal mixture.
5. Stir in the dried cherries and dried cranberries. Let mixture rest for 15-20 minutes.
6. Add in one cup of the miniature chocolate chips. Stir to blend.
7. Pour the mixture into the prepared baking pan. Lightly butter your fingers and press the mixture down evenly in the pan. Sprinkle with the remaining one tablespoon of miniature chocolate chips.
8. Bake for 25-30 minutes or until lightly golden brown. Remove from the oven. Let the granola bars rest for at least 2 hours before cutting into bars.
9. Store bars in a tightly covered container. 

Note: (1) If you want to make these granola bars gluten free eliminate the wheat germ and increase the amount of old-fashioned oats to 2 1/2 cups and dried cranberries to 1/2 cup. (2) To keep them fresh, wrap them in parchment paper and store in a tightly sealed container.

Friday, January 15, 2021

Lemon Glazed Lemon Poppy Seed Muffins


When life gives you lemons, you can make lemonade, you can make limoncello, or you can make these Lemon Glazed Lemon Poppy Seed Muffins. While these are all really good options, there is only one best option. Can you guess which one that would be? If you picked the muffins you would be right! Because who doesn't love having a flavorful muffin for breakfast, for a mid-morning or afternoon snack, or even for a post workout boost? I thought I had a favorite go-to muffin until I tasted these gorgeous high domed, incredibly flavorful Lemon Glazed Lemon Poppy Seed Muffins. If you love a bakery style lemon muffin, the kind having a dense, yet tender crumb, perfect bursts of lemon flavor, a beautiful top lightly drizzled with a lemon glaze, and just the right amount of moistness, you are going to fall deeply, madly in love with these.

Not only is lemon is a refreshing flavor on a hot day, it also helps to brighten up cold, cloudy days. So these Lemon Glazed Lemon Poppy Seed Muffins are great year-round!

Would you believe me if I told you the lemon flavor in the muffins comes only from lemon zest? Yes, it's true. Lemon juice is only used in the glaze. 


The combination of butter, a neutral oil, and sour cream creates both a perfect texture and just the right amount of moistness in these muffins. The sugar helps to further boost the lemony flavor. And rubbing the lemon zest into the sugar helps to release all of that zesty lemon flavor into the batter. Once the batter is mixed together, it rests at room temperature for an hour. Defying the recommendations made by many other bakers. We all know pancake and crepe batters as well as cookie doughs benefit from a rest period, although muffin batters don't usually get this recommendation. But this one does. 


So what else is different about these muffins? Is the baking temperature different? No, not really. They are baked in a 400 degree (F) preheated oven. The consistent high heat helps to create those swoonworthy sky high muffin tops. Is filling the cupcake papers different? Not really. But each cupcake paper contains about six tablespoons of batter, which should bring it all the way to the top. Using a large ice cream scoop helps to make evenly filled cupcake papers. So what's different about baking these muffins then? Instead of filling every muffin cavity with batter, every other cavity is filled. With a yield of ten muffins, you will bake only five muffins at a time. If your oven can fit two muffin tins, you can bake all ten muffins at the same time. Baking time ranges from 20-22 minutes.

The lemon glaze, made only with freshly squeezed lemon juice and confectionary sugar, can be assembled while the muffins are baking. The consistency of your glaze should be similar to a crepe batter. Not too thick and not too thin. Giving your glaze a bit of rest will help you decide if it has the consistency you desire. If it's too thick, add a little water or lemon juice. If it's too thin, add a little more confectionary sugar.


If you spoon or brush on the lemon glaze while the muffins are hot out of the oven, it will melt completely into the oven. Letting the muffins rest in the pan for 2-3 minutes and then for an additional 10+ minutes on a cooling rack will cool them down enough for the glaze to soak in as well as remain visible on top. 

Having tasted the muffins with and without the glaze, they are good unglazed, but they are GREAT glazed.


Considering that it has felt like life has been giving us nothing but proverbial lemons for the past ten months, these Lemon Glazed Lemon Poppy Seed Muffins are the perfect antidote to all the angst many of us have been feeling. If ever there was a muffin to bring some joy or to boost our spirits, it would be these. Never have we needed a muffin, especially these muffins, in our lives more. So yes, when life gives you lemons you really do need to make Lemon Glazed Lemon Poppy Seed Muffins!


Recipe
Lemon Glazed Lemon Poppy Seed Muffins
Makes 10 bakery-style beautiful muffins

Ingredients
Muffins
8 Tablespoons (113g) unsalted butter, room temperature
1 cup (200g) granulated sugar
2 generous Tablespoons finely grated lemon zest (from 2-3 medium sized lemons)
1/4 cup canola or vegetable oil
2 large eggs, room temperature
3/8 teaspoon Kosher salt
2 teaspoons vanilla
1/2 cup (120g) sour cream
2 1/2 cups (310g) all-purpose flour
1 Tablespoon baking powder
1/2 teaspoon baking soda
3 Tablespoons poppy seeds

Glaze
1/2 cup plus 2 Tablespoons confectionary sugar
2 Tablespoons freshly squeezed lemon juice

Directions
Muffins
1. Whisk together the flour, baking powder, baking soda, Kosher salt, and poppy seeds together in a medium sized bowl. Set aside.
2. Combine the granulated sugar and lemons zest. Using your fingers, blend the sugar and zest together. Set aside.
3. In the bowl of a standing mixer fitted with a paddle attachment, beat butter for approximately 1 minutes.
4. Add in the sugar-lemon zest mixture. Beat for 2-3 minutes or until light and fluffy.
5. With the mixer speed on low, add in eggs, one at a time, beat until each is well-incorporated.
6. In separate additions, beat in the canola oil, vanilla and sour cream. Make certain each ingredient is fully incorporated until the next one is added.
7. In three additions, add in the dry ingredients. After the last addition is incorporated, beat the mixture on low for an additional 30 seconds.
8. Cover the bowl with plastic wrap and let rest at room temperature for one hour.
9. Preheat oven to 400 degrees (F). Place five muffin cups in two cupcake pans, giving each muffin paper space from the other.
10. Using a large ice cream scoop, scoop the batter (about 6 generous Tablespoons) into each muffin tin.
11. Place muffin pans in the center of the oven and bake for 20-22 minutes or until the tops of the muffins are lightly golden, spring back to the touch and/or show very few crumbs attached to an inserted skewer. Note: Alternately bake one pan of muffins at a time.
12. Let muffins rest in pans for 3 minutes before transferring to a cooling rack. Let muffins cool for another 10 minutes before topping with the glaze.

Glaze
1. While the muffins are baking, make the glaze.
2. Whisk together the confectionary sugar and lemon juice until smooth and creamy. The mixture should be thick enough to remain on muffin when spooned on. Note: If mixture is too thin, add more confectionary sugar. If mixture is too thick, add a little water.
3. Spoon the glaze over each muffin.
4. Serve muffins at room temperature. Take a bite and let yourself get to a happy place!

Notes: (1) Store muffins in a sealed container or individually wrap in cellophane bags. Muffins will be delicious for up to 3 days. Alternately store the cooled muffins in a well sealed container in the freezer for up to 6 weeks. (2) This recipe was inspired by the Bakery Style Lemon Poppyseed Muffin recipe from ful-filled.

Friday, January 8, 2021

Pan Seared Filet Mignon w/ Port Wine Mushroom Sauce


Despite the fact that I am posting a recipe for Pan Seared Filet Mignon w/ Port Wine Mushroom Sauce, it's really a post mostly about the most luscious Port Wine Mushroom Sauce ever. And I have wanted to share this sauce recipe with you for awhile now. Consider the recipe for the Pan Seared Filet Mignon a bonus. However, when these two recipes are made together you have what I would call a signature dish. One you would make when having friends over for dinner, when celebrating a special occasion or holiday, or when having a date night at home. Beyond making for a most stunning, elegant presentation and tasting like something coming out of a four star restaurant, it's really very simple to make. Which makes it's the perfect signature dish. 


Buying individual filet mignons is not only often less expensive than buying a whole beef tenderloin, they are so much easier to cook. And as much as I am a fan of grilling, from a flavor standpoint the pan seared and roasting method is one of the best ways to cook filets. Additionally cooking the filets this way allows you to cook them to varying levels of doneness. Which matters especially when there is an outlier or two who don't like their meat done medium rare! Growing up, every kind of beef cooked my father cooked was either rare or medium rare, no exceptions. Which explains why I never understood how anyone could enjoy a great filet, steak or roast cooked any other way. I still can't. As it happens, I live with someone who orders their steaks well done. To this day I still cringe when I hear the words 'well done'. Even the words medium-well cause me to hyperventilate. Now that I got that off my chest, I will tell you the recipe below for filet mignons gives you cooking times ranging from medium-rare to medium-well. Just in case some of you also live in a household having divergent points of view on how beef should be cooked.


But like I said earlier, this post is  really intended to be about the Port Wine Mushroom Sauce. A deeply flavored sauce that elevates the savoriness of most any meat it is paired with. Ribeyes, rib roasts, beef tenderloins, filets, meatloafs, and yes, even hamburgers go from ordinary to extraordinary when finished with the Port Wine Mushroom Sauce.

If you have already scrolled down to the ingredient list for the sauce your first thought might be 'for a simple recipe it has quite a number of ingredients'. And there are in fact thirteen ingredients, all of which come together to create a sauce many would guess take hours to make. You probably have most of the sauce ingredients in your refrigerator, pantry, or bar area. With the exception of the Port wine, none of them are neither unusual nor expensive. 


Cremini mushrooms were used here but this sauce is equally delicious when made with Shiitake mushrooms or even a combination of the two. The amount of mushrooms used will depend on how mushroomy you like your mushroom sauce. I prefer it to be a little heavier on the mushrooms. So while the recipe below recommends using 16 ounces (454g), you could easily reduce that amount to 10 to 12 ounces without significantly altering the consistency of the sauce.

Tossing the mushrooms in a tablespoon of flour is what helps to give the finished sauce it's spoonable consistency. However, finishing the sauce with a tablespoon of unsalted butter gives it a rich, glossy, restaurant quality finish.


From start to finish, the sauce takes about 20 minutes to make. And that includes time used for both prepping the ingredients and cooking the sauce!


The Port Wine Mushroom Sauce can be made right before serving, early in the day (cover, refrigerate, reheat), or even the night before (cover, refrigerate, reheat). Note: The flavor deepens if the sauce is allowed to rest for a couple of hours before serving.


When I first tasted a version of this sauce many, many, many years ago I was very close to throwing my table manners to the wayside and licking my plate. Had there not been some bread served with the meal I might very well would have. Fortunately I was spared from embarrassing myself in front of a group of friends from my doctoral cohort. So I might suggest you too be the hostess with mostest by also serving some bread with this dish. As I am quite certain there will be others destined to be table manner challenged when they taste this rich, luscious, insanely delicious, high in umami sauce. 

Recipe
Pan Seared Filet Mignon w/ Port Wine Mushroom Sauce
Serves 4

Ingredients
Port Wine Mushroom Sauce
16 ounces (454g) mushrooms, stems removed, and cut into 1/4" pieces (See notes)
1 Tablespoon all-purpose flour
1/3 cup Port wine 
1/3 cup (52g) minced shallots
1 Tablespoon balsamic vinegar
1 cup beef broth (recommend organic)
1/4 teaspoon Kosher salt
1/8 teaspoon black pepper
1 teaspoon tomato paste
1/4 teaspoon dried rosemary
2 teaspoons Worcestershire sauce
1/2 teaspoon Dijon mustard
1 Tablespoon unsalted butter

Filet Mignon
4 six ounce filet mignons, at least 1 1/2" thick 
2 Tablespoons unsalted butter
Kosher Salt
Freshly cracked black pepper

Directions
Port Wine Mushroom Sauce
1. In a medium sized bowl, toss the sliced mushrooms and flour together. Set aside.
2. In a medium sized skillet, add in the port wine, shallots and balsamic vinegar. Bring mixture to a boil over medium-high heat and then reduce the heat to medium and let simmer for 2-3 minutes.
3. Reduce the heat to medium and add in the beef broth, Worcestershire sauce, tomato paste, rosemary, Kosher salt and black pepper. Cook for 2-3 minutes.
4. Add in the mushroom mixture and cook for 3-4 minutes, stirring regularly, until the sauce has begun to thicken.
5. Add in the dijon mustard and unsalted butter. Continue cooking the sauce for an additional 2-3 minutes or until it reaches the desired consistency.
6. Remove from heat and serve. Note: The sauce can be made earlier in the day or the night before. Reheat before serving.

Filet Mignon
1. Preheat oven to 415 degrees (F).
2. Generously season both sides of the filets with salt and pepper.
3. Add two tablespoons of unsalted butter to a medium sized cast iron pan. Melt butter over medium to high heat. When the butter has melted, lay the filets down flat in the pan. Cook for 2-3 minutes per side. I generally cook them somewhere between the 2 1/2 and 3 minute mark.
4. Place cast iron pan in the oven to finish the cooking process. For medium rare, cook for 5-6 minutes. For medium, cook for 6-7 minutes. For medium well, cook for 8-9 minutes.
5. Remove the pan from oven and let filets rest in the pan for one minute. Then transfer the filets to a cutting board and let rest for 2-3 minutes before slicing.
6. Arrange the sliced filets on a platter. Spoon the Port Wine Mushroom Sauce over the meat. Top with some chopped fresh parsley. Pour the remaining sauce into a bowl.

Notes: (1) I used Cremini mushrooms, but Shiitake mushrooms or a combination of Cremini and Shiitake mushrooms would work well in this sauce. I prefer this sauce to be heavy on the mushrooms. If you don't then use only 10 ounces-12 ounces (284g-341g). (2) I like to buy tomato paste in a tube and store it the refrigerator. Because why open up a whole can when you need such a small amount? (3) Roasting times for the filets might vary slightly based on their thickness. If bigger than 1 1/2" roasting time might be ever so slightly longer. (4) If you make the sauce ahead and it has thickened up even more, just add a little more beef broth until it reaches the perfect spoonable, pourable consistency.

Thursday, December 31, 2020

Caramelized Apple Toffee Crisp a la Mode


This is the last day of and the last post for 2020. Ending the year on a sweet note seems to be in order. More than likely we all have a list of words to describe how we felt or what we thought of the past year. So after giving a fair amount of reflection on what my words were at various times, I am going to settle in on just one. Gratitude. The word is derived from the Latin word 'gratia', which means grace, graciousness, or gratefulness. Defined as "the quality of being thankful; readiness to show appreciation for and to return kindness", gratitude is more than being thankful or showing thankfulness. The sheer expression of gratitude generates more positive emotional energy, better enables us to deal with adversity, strengthens our connections to others, and contributes to better physical and emotional health. In other words gratitude, is one of the keys to a life filled with greater happiness. To helping us refocus our energies on what we have rather than what is missing. But if I am going to be completely honest, I had spent more than my fair share of moments over the past year lamenting on what I was missing. Gratitude served as my reset button, my lifeline when I was getting close to viewing the year as a lost one. It gave me energy when I needed it most. There was a moment in early December when I seriously considered not baking for the holidays or putting together cookie boxes for friends and neighbors. As I wasn't certain I had either the enthusiasm or energy for continuing my time intensive annual tradition. But the more I thought about it, the more I realized these little expressions of gratitude actually generated more energy than the energy needed to create them. Such is the power of gratitude. In looking ahead to 2021, I believe gratitude will be one of the things reminding me to remain hopeful as well as to be optimistic for the future. Because as long as we feel and express gratitude, nothing is ever really lost.


My blog will be turning nine in 2021! It's almost hard to believe. There have been days when I wondered why I keep it going. Why I continue to be a microscopic fish in the ginormous food blogging sea. You may already guess the answer to these musings. Yes, it's gratitude. When friends and even strangers (who then sometimes become friends) show up again and again to support and encourage me, I feel an overwhelming sense of gratitude and a boost of energy. Creating takes energy, involves risk, and can be downright scary at times. But knowing just one person believes in me is enough to keep me going, to inspire me to continue to evolve in the worlds of food and photography. So let me simply say thank you to all of you have followed me, encouraged me, learned something from me, and supported me. I am truly very grateful.


To show my gratefulness, I am going to share with you a recipe I first discovered and then revised fifteen years ago. Yes, I know I have shared recipes for apple crisps with you before. And I have loved each and every one. But this one, the Caramelized Apple Toffee Crisp a la Mode, could be the best one of them all. It would be the one I would enter in a apple crisp throw down. And it would be the one I would serve when I wanted to show gratitude. 


Originally I had planned to make this Caramelized Apple Toffee Crisp a la Mode for dessert for Christmas using the last of the Granny Smith apples we picked at the orchard. But with so many other cookies and candies competing for attention, I decided it was best to wait. 


There are a few things that make this crisp different from all of the others. This one is made with walnuts. None of the other crisp recipes have nuts in them. This one uses toffee bits in the topping. An ingredient you won't find in any of the other recipes. Lastly, the apples are tossed in with some melted unsalted butter (along with a few other ingredients). Which is what I believe helps to create the caramel-like sauce coating the baked apples. All of these things combined create the most mouthwatering, incredibly delicious apple crisps.


For this recipe, I suggest using medium sized versus large/super sized Granny Smith apples to get the most evenly sized cut apple wedges. These will be neither too large or too small and will bake up beautifully. However, if your apples are on the large size, you might need to get 5 cut wedges from each half (or 10 pieces per apple) versus 4 cut wedges per half (or 8 pieces per apple). 


Baking time for the crisp ranges from 50-60 minutes. Spoiler alert! The aroma coming out of your oven is intoxicating! 


This Caramelized Apple Toffee Crisp a la Mode is a perfect cold weather dessert! Nothing warms you up more than a bowl of warm, just out of the oven, heaping serving of apple crisp. Topping it with some really good vanilla ice cream will help to warm your soul. Because even in the winter ice cream is still an irresistible treat. 

Tart apples swimming in a lovely caramel like sauce and the crunchy buttery topping is a heavenly combination of flavors and textures. Which explains why I think this may be the best apple crisp of all! The Caramelized Apple Toffee Crisp a la Mode is a great example of what gratitude looks and taste like. Everyone who takes a bite will feel deliriously happy. Quite possibly it will set a tone of hope and optimism for the new year ahead. 

Happy 2021 to you all! Thank you again for being here! 

Recipe
Caramelized Apple Toffee Crisp a la Mode
Serves 6-8

Ingredients
Crisp
3 pounds (1,380g) medium sized Granny Smith apples, peeled and cored
5 Tablespoons (71g) unsalted butter, melted and cooled slightly
2 teaspoons freshly squeezed lemon juice
1/2 cup (100g) granulated sugar
1 1/2 teaspoons cinnamon
1/2 teaspoon Kosher salt

Topping
1 cup (115g) walnuts, coarsely chopped
2/3 cup (102g) Toffee Bits, plus 1-2 Tablespoons more for topping crisp before baking
2/3 cup (87g) all-purpose flour
1 teaspoon cinnamon
1/2 cup (100g) light brown sugar
1/2 cup (45g) Old-fashioned oatmeal (not quick oats)
8 Tablespoons (113g) chilled unsalted butter, diced

1 pint Vanilla Ice Cream

Directions
1. Preheat oven to 350 degrees (F). Have a 10 inch round or 11" x 9" cast iron or baking dish ready.
2. Cut the peeled, cored apples in half lengthwise, then cut each half into 4 pieces. Note: If your apples are large sized, you may need to cut each apple half into 5 pieces.
3. Place apple slices in the baking pan/dish. Toss with the melted butter and lemon juice.
4. Mix together the sugar, cinnamon and Kosher salt. Sprinkle over the apples and toss.
5. In a medium sized bowl, add in the walnuts, toffee bits, all-purpose flour, brown sugar, cinnamon, and oats. Mix well.
6. Add in the diced butter and rub mixture together using your fingers until it resembles pea-sized clumps.
7. Evenly scatter the topping over the apples. Sprinkle the additional Tablespoons of toffee bits on top.
8. Bake the crisp on the center rack in the oven for 50-60 minutes or until the apples are tender and the topping is golden brown.
9. Let the crisp rest for 10-15 minutes before serving. Spoon into dishes and top with a generous scoop of vanilla ice cream. Then sit back and just let that overwhelming feeling of happiness flow through your veins!

Notes: (1) Do not use chocolate covered toffee bits, just plain toffee bits. (2) The crisp can be prepared up to 3 hours ahead and left uncovered at room temperature. If serving warm reheat in a preheated 350 degrees (F) oven for 15 minutes.

Monday, December 28, 2020

Caramelized Baked French Toast with Berry Sauce


"Simple is the new perfect." Although I have a pretty good concept of what simple and perfect mean, seeing them both in the same sentence was enough to cause me to take pause. To let those words sink in for a few minutes. This wasn't the first time I had come across this message. However, when perfectionism and living in the cursed circle of "not enough..." has guided or rather misguided your thinking for most of your life, words such of these are often easily dismissed out of hand. But for some reason they weren't this time. If there are any blessings coming from living in the never ending storm of the pandemic or from getting older, then for me seeing the words "simple is the new perfect" differently might be one of them. Rather than interpreting them as preventing me from becoming the best version of myself, I saw them as words helping to create an even better me. It was time to embrace them. So I am going to do my best to make "Simple is the new perfect" my only mantra for 2021. Wish me luck!


What better way to get an early start on the simple is perfect way of thinking than with this post for Caramelized Baked French Toast with Berry Sauce. 


Imagine being able to wake up in the morning to enjoying a thick slice of warm out of the oven caramelized French Toast lightly dusted with confectionary sugar and either drizzled with some maple syrup or topped with a homemade berry sauce. And with not very much effort, you can. All it takes is a little planning ahead. Before going to bed at night simply whisk up the milk/egg custard mixture, cut a loaf of sourdough bread into two inch thick slices (then cut in half again), and combine both in a resealable gallon sized plastic bag. As the bread marinates overnight in the refrigerator magic will start to happen.


When you wake up in the morning, you simply preheat the oven to 425 degrees (F), remove the soaked pieces of bread from the bag, evenly sprinkle them with granulated sugar, and bake them at 400 degrees (F) until they are golden on both sides and along the cut edge. With the total baking time ranging from 27 to 32 minutes, the wait time for deliciousness is relatively short. While the French Toast is baking, make some coffee and the berry sauce. Or skip making the berry sauce completely and warm up some maple syrup. 


With an egg and milk mixture flavored with vanilla and some Grand Marnier, eggs, milk and bread combined gives way to the most heavenly French Toast. Sprinkling the soaked bread in granulated sugar and melting some butter on a cast iron or baking sheet, creates the most beautifully caramelized French Toast exterior. With the outside of the bread becoming crispy and caramelized, the inside of the bread is transformed into a mouthwatering bread pudding-like texture when baked on cast iron (or sheet pan) in the oven. 


Beginning the day with a plate topped with a thick slice of the Caramelized Baked French Toast, maybe some fresh berries, berry sauce and/or maple syrup could make for a perfect start. The first time you see and taste this Caramelized Baked French Toast with Berry Sauce you will undoubtedly experience a profound change to your concept of French Toast should be. This version is simply perfect.

As this long year comes to end, take some time to relax, reenergize, and renew your spirit.  Do what makes you happy. Commit to being the best, truest version of yourself. As those are some of the simplest gifts, the ones giving us the greatest sense of fulfillment and gratitude, we can give to ourselves. A platter of Caramelized Baked French Toast with Berry Sauce might be the most perfect, simplest gift you can give to someone else. More than likely it will bring you a bit of pure joy as well.

Recipe
Caramelized Baked French Toast
Serves 2-4

Ingredients
Caramelized Baked French Toast
3 large eggs
1 large egg yolk
1 cup whole milk
1/2 cup heavy whipping cream
1/4 teaspoon Kosher salt
A few gratings of fresh nutmeg
1/4 teaspoon cinnamon
1 teaspoon vanilla
1/2 cup (100g) plus 2 Tablespoons granulated sugar, divided
1 Tablespoon Grand Marnier
2 (2 inch thick) slices of sourdough or country bread, cut in half (total of 4 pieces) (See Notes)
3 Tablespoons unsalted butter, divided

Blueberry and Blackberry Sauce
9 ounces (255g) fresh blueberries
6 ounces (170g) fresh blackberries
1/4 cup water
1/2 cup caster or granulated sugar
1 - 2 teaspoons freshly squeezed lemon juice
2 Tablespoons maple syrup

Optional but really very good: Confectionary sugar, maple syrup and some extra fresh berries

Directions
Caramelized Baked French Toast
1. In a medium bowl, whisk together the eggs, egg yolk, milk, cream, Kosher salt, vanilla, nutmeg, cinnamon, 2 Tablespoons sugar, and Grand Marnier.
2. Place the bread slices in a gallon-size resealable plastic bag. Pour the egg mixture into the bag. Seal the bag, letting as much air out as possible. Lay the sealed bag on a small sheet pan or flat platter and place in the refrigerator overnight. Turn the bag over several times to ensure the milk mixture evenly soaks into the bread.
3. Preheat oven to 425 degrees (F).
4. Remove the bread slices from the bag, let any excess liquid drip off and place on a platter. 
5. Coat the bread evenly with the remaining 1/2 cup of sugar.
6. Place a large flat cast iron pan or rimmed baking sheet in the preheated oven for 5 minutes. 
7. Add two Tablespoons of butter to the hot pan and spread it down the center of the pan.
8. Reduce the oven temperature to 400 degrees (F), place the sugar coated bread slices on the pan, and bake for 14-18 minutes or until the slices are golden brown on the bottom.
9. Flip the bread slices, add the remaining one Tablespoon of butter around the slices, and bake another 7-8 minutes (or until the bottom is nicely browned).
10. Turn the slices on their cut side ends and bake for another 4 to 5 minutes.
11. Remove from the oven and place caramelized baked French Toast on a platter. Lightly dust with confectionary sugar. Serve with the Berry Sauce, fresh berries, and maple syrup.

Blueberry and Blackberry Sauce
1. In a small saucepan, combine the blueberries, blackberries water, sugar, lemon juice, and maple syrup.
2. Bring mixture to a boil. Allow to boil for several minutes.
3. Reduce the heat to low and continue to cook (stirring frequently) until the sauce has thickened (approximately 10-15 minutes).
4. Transfer to a serving dish.

Notes: (1) This recipe is a slightly adapted version of the Caramelized Sheet-Pan French Toast recipe created by Susan Spungen and published in the New York Times. (2) Use a large loaf of round or oblong sourdough bread (I used sourdough) or a dense loaf of country bread. Because you only need two thick (2") slices of bread for this recipe, you will have extra bread leftover to use in making a second batch or for eating. For the best French Toast, take your slices closer to the center of the loaf of bread. (3) I used a Lodge cast iron pan similar to this one but a large rimmed baking sheet will work as well. Baking time might vary slightly based on which one you use to bake the French Toast.