Tuesday, January 18, 2022

Chocolate Chip Cookies, Jacques Torres Style


Late last week, we ventured out of the house to take a drive 'out west'. After a slightly more than an hour's road trip, the landscape changes from dense and suburban to wide open and rural. With the harvested fields blanketed in fresh show, the farm houses and barns set against the backdrop of a blue sky gave way to a most picturesque, tranquil setting. It never ceases to amaze me just how much something like a change in landscape can energize my spirit. Whether it's a walk in the woods, a drive in the country, or a trip to the mountains, my affinity and appreciation for these landscapes has grown considerably over the years. Maybe because it has, in part, become a kind of therapy for my soul. In less than a month, I will get a strong dose of landscape therapy as I travel out west to Colorado for a long weekend. I can hardly wait to return to one of my happy places for a few days. No matter how many times I return and as odd as this may sound, Colorado always feels simultaneously both familiar and new. 


Speaking of familiar, chocolate chip cookies are somewhat commonplace around here. Over the past several years, I have shared recipes for various versions of this much beloved cookie. I like them all for very different reasons, but Tara's Chocolate Chip Cookies have been my favorite go-to ones for the past six and a half years. They are ones I make for friends, for care packages, for raising money for good causes, for when I need some baking therapy, or for when I need to satisfy my fussytarian craving for a really, really good chocolate chip cookie. 

Fourteen years ago I jumped on the famed chocolatier Jacques Torres's Chocolate Chip Cookie recipe when the New York Times published it. Hailed as "perfect" the consummate chocolate chip cookie was described as one "built on decades of acquired knowledge, experience, and secrets." Crispy on the outside, chewy on the inside, laden with chocolate, and having an addictive sweet and salty combination, qualities that would bring a chocolate chip cookie aficionado to their proverbial knees. So why on earth did I walk away from that cookie in 2008? Maybe I couldn't really appreciate that cookie or maybe it was just easier to stay with the cookie I knew. Who knows. I can't tell you specifically what prompted me to give this cookie a second chance, I can only tell you that it may be the best cookie return decision I have ever made. What I am trying to say in a rather non-linear way is that this will now be cookie I will be making for friends, for care packages, for raising money for good causes, for when I need some baking therapy, or for when I need to satisfy my fussytarian craving for a great, not just really good chocolate chip cookie.


Much has changed, including in the baking world, since I first made that Jacques Torres chocolate chip cookie. First, bread flour and cake flour are now much more readily available than they were fourteen years ago. Second, options and price points for good quality chocolate have also changed considerably. And last, and maybe most importantly, my baking knowledge has improved considerably. I am definitely not the same baker I was fourteen years ago. For those reasons as well as a few others, I will tell you I was drunk in cookie love when I took a bite of this cookie. However, in full disclosure this isn't the exact same cookie I made fourteen years ago. I made a few nuanced changes to it. 


With the exception of the vanilla, I kept the quantities of all of the other ingredients the same as the originally published recipe. So what were the specific changes I made to Jacques Torres's recipe? Instead of using only light brown sugar, I used a combination of both light and dark brown sugar and instead of using two teaspoons of vanilla, I used a tablespoon. And what were those so called subtle changes? I used European style butter as it has a slightly higher fat content than most American made butters. I can't be absolutely certain, but if Jacques Torres learned to bake in France he had to using European butter. And lastly, instead of using the very expensive oval shaped chocolate feves, I chopped up a 17.6 ounce bar of Trader Joe's Dark Chocolate. And for the coarse salt, I used Kosher salt. 

When I first made this cookie years ago, I measured the ingredients using measuring cups and spoons. This time I used my food scale and measured in grams (not ounces). If there was ever a cookie to convince you to use weighted versus cup measurements, this would be the cookie. With ingredient amounts asking for two cups of flour to be reduced by two tablespoons or one cup of sugar increased with two additional tablespoons, measuring in grams makes measuring easier.

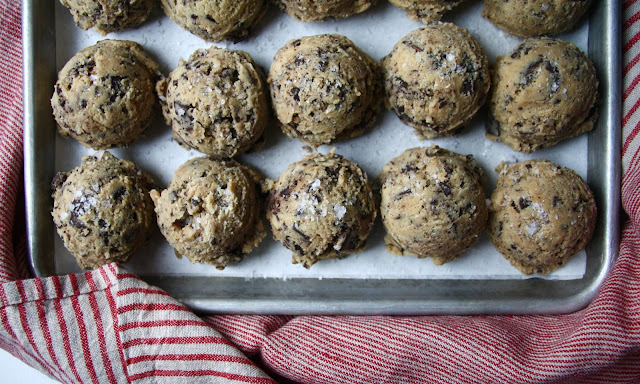
If there was ever a chocolate chip cookie to test your patience, your ability to wait, this would be the one. Because once you make the batter, use an ice cream scoop to create eighteen to nineteen 3 1/2 ounce balls, the balls of dough need to chill in the refrigerator for at least 24 but up to 72 hours. Although I would recommend waiting until at least 36 hours before baking them. The amount of time the balls of dough need to spend in the refrigerator may sound like a drawback or deal breaker to some. But the textural and flavor benefits far outweigh any temporary inconvenience. And this is coming from someone who doesn't list patience high on their list of virtues! Note: I baked a batch at the 36 hour mark and another after a 66 hour pause. Both batches came out perfectly.

Baking time for the cookies ranges from 17-20 minutes or until they are golden brown on the edges but appear to still be slightly soft in the center. Rather than immediately transferring the baked cookies to a cooling rack, allow them to remain on the cookie sheet for at least 10 minutes. 

To get that beautiful, perfect round bakery look to your chocolate chip cookies, use a glass bowl or oversized round cookie cutter to swirl the cookies shortly (less than a minute) after they come of the oven. 


These jumbo Chocolate Chip Cookies (Jacques Torres Style) have crispy, chewy edges and soft centers, are laden with chocolate, are surprisingly light, and are a seriously scrumptious, spectacular chocolate chip cookie.  At slightly more three and a half inches in diameter, these impressive sized chocolate chip cookies are certainly large enough to share. Although I would encourage you to be a tad selfish and allow yourself to savor every last morsel. The recipe below makes eighteen cookies so there is more than enough to go around. 


How do they compare to Tara's Chocolate Chip Cookies? It would almost impossible and even a bit unfair to compare these two chocolate chip cookies as they have two completely different flavor profiles. If you love a chocolate chip cookie having a slightly higher chocolate to cookie dough ratio, you will absolutely be smitten with these. They are as rich and delicious as they are gorgeous. Bringing these Jacques Torres style chocolate chip cookies back into my life (permanently this time) reminded me that good things sometimes really do come to those who wait. 

Recipe
Chocolate Chip Cookies, Jacques Torres Style
Makes 18-19 very large (slightly larger than 3 1/2 inches), bakery style cookies

Ingredients
1 1/4 cups (283g) European or European style unsalted butter, room temperature
1 cup plus 2 Tablespoons (226g) granulated sugar
1 cup (200g) light brown sugar
1/4 cup (50g) dark brown sugar
1 Tablespoon vanilla
2 large eggs, room temperature
2 cups less 2 Tablespoons (214g) cake flour
1 2/3 cups (226g) bread flour
1 1/2 teaspoons Kosher salt
1 1/2 teaspoons baking powder
1 1/4 teaspoons baking soda
1 1/4 pounds (500g) dark, bittersweet or milk chocolate, chopped (I use the 17.6 oz Trader Joe's Pound Plus Bar)
Flaky sea salt (e.g., Maldon Sea Salt)

Directions
1. In a large mixing bowl, whisk together the cake flour, bread flour, Kosher salt, baking powder, and baking soda. Set aside.
2. In the bowl of a large standing mixer fitted with a paddle attachment, beat the room temperature unsalted butter for about 2 minutes.
3. Add in the granulated sugar, light brown sugar, and dark brown sugar. Beat until light and fluffy (approximately 4-5 minutes).
4. Mix in the vanilla.
5. Beat in the eggs one at a time, beating well after each addition.
6. Reduce the mixer speed to low and mix in the flour mixture in three additions. When all of the flour has been added in and it is no longer visible, add in the chopped chocolate. Mix until just incorporated.
7. Using a large ice cream scoop or a 1/4 cup measuring cup, form 18 balls of dough (each approximately 3 1/2 ounces each). Place the balls of dough on a tray. Wrap well with plastic wrap and refrigerate for 36-72 hours.
8. Preheat oven to 350 degrees (F). Line two baking sheets with parchment paper. Note: Bake only one pan of cookies at a time.
9. Place six balls of the dough (spaced at least 3 inches apart) on a baking sheet. Sprinkle each cookie with flaky sea salt.
10. Bake the cookies on the center rack of the oven for 17-20 minutes (rotating the pan midway through the baking process) or until golden on top and along edges but still a bit soft in the center. Remove the pan from the oven. Wait one minute before using a bowl or large round cookie cutter to swirl the cookie to create a perfectly round cookie. Let cookies remain on the baking sheet for up to 10 minutes before transferring to a cooling rack.
11. Savor these beautiful bakery style looking chocolate chip cookies immediately (you have waited long enough!) or store them in a tightly sealed container once they have come to room temperature. 

Notes: (1) For calculating weight measurements, I use the following base formulas: 200g = 1 cup brown sugar, 200 g = 1 cup granulated sugar, 115 g = 1 cup cake flour, 136g = 1 cup bread flour, 226g = 1 cup unsalted butter, 371g = 1 pound chocolate (2) I chopped up the 17.6 ounce bar of the Trader Joe's Dark Chocolate for these cookies. 

Tuesday, January 11, 2022

Baked Gnocchi with Spinach, Beans and Burrata


"One life, one day, one moment, but infinite possibilities. They're all yours, infinite avenues are open, with infinite intersections, and infinite waypoints, infinite destinations lie beyond. An infinite variety of changes may occur along the way. Your future is sprawling and unfathomable. You can't see what will happen. Your vision is hindered by your past. Accepting the unknown isn't about discovering something new and better, but about becoming something new and better. Take a f*cking chance." This quote, this mantra, these inspiring words popped up not once, but several times on my Instagram feed this past week. It resonated with me so much I almost reposted it. Even considered sending it on to some people I know. But instead, I just let this string of compelling words sink in for awhile. While I have moments filled with pessimistic and cynical thoughts, there are more moments of optimistic, hopelessly romantic, and a bit of Pollyanna musings swirling around in my head. Which explains in part why that quote felt like a validating, life anthem worthy of orally reciting each and every day. Books move me, words move me, but these words, well I can't think of ones more perfect to frame the start, to chart the course of the new year. So I decided to include them as part of this blog post so they wouldn't get lost, so they could live on endlessly, and well, so they might spark something in you as they did in me.


So how do I now possibly segue onto now talking about this Baked Gnocchi with Spinach, Beans and Burrata dish after beginning with such profound words? Other than being completely and hopelessly smitten, what could be the possible connection between the infinite possibilities mantra and this epic baked pasta dish? Well, they both happen to be game-changers. 


The Baked Gnocchi with Spinach, Beans and Burrata had me with its' aroma. When the first bite sent my sense of taste into uncharted gastronomical delight territory, I knew my pasta eating life changed. Immediately I thought this was a dish worthy of earning the 'last meal worthy' distinction. How ever many dishes there might be on this list (I think less than ten out of the 700+ recipes on the blog), this one is at the top! But I am going to go one step further. I actually think it happens to be the baked gnocchi version of Ina Garten's engagement chicken (this would be the optimistic, hopeless romantic in me talking!). 

So here I go again sharing a recipe for a dish having a long ingredient list. But here's the best part. The Baked Gnocchi with Spinach, Beans and Burrata can be made with a good quality jarred marinara sauce rather than one homemade AND with store bought fresh or frozen gnocchi. Between the assembly and baking times, you can have this gorgeous, deeply flavored dish ready to serve in less than 75 minutes! You can even make it early in the day (up to the point of topping with the cheeses), refrigerate it, and bake it up later in the day! 


The melt-in-your-mouth, pillowy textured gnocchi is one of the many highlights of this dish. I used a (frozen) spinach stuffed gnocchi from my favorite local Italian deli, but any high quality fresh or frozen (unthawed) potato gnocchi would work just as well. Whatever you do, do not buy the pre-made, vacuum packed gnocchi you might find sitting on a grocery store shelf. 


After sautéeing the mild Italian sausage, onions, and garlic, the jarred marinara sauce, dried oregano, fresh parsley, fresh basil, Kosher salt, and black pepper are added in. The mixture then simmers for about 20 minutes, giving it time to develop into a rich, flavorful sauce. But adding in some mascarpone cheese takes the sauce to a whole new level of other worldly deliciousness! 


Baby spinach, cannellini beans, and the gnocchi get mixed into the sauce before it's transferred to the baking dish. Grated Parmigiano-Reggiano cheese and fresh mini-balls of mozzarella (cut in half) top the dish before it goes into a preheated  425 degree (F) oven. In 30 to 35 minutes you will have created a five star worthy dish! Honestly, I can't gush on a dish destined to go on regular repeat enough. 


Be prepared to be absolutely blown away by how mouthwatering this Baked Gnocchi with Spinach, Beans and Burrata is. Finishing the baked gnocchi with burrata is akin to being handed a personal invitation to a state of bliss. And this is one invitation you absolutely cannot mull over, put on indefinite hold, or refuse. Once you have tasted a pasta dish topped with fresh burrata your concept of what makes for a truly great pasta dish will be permanently altered. Because once you know, you know.

In a little more than three weeks we are having friends over for a post New Year's Eve dinner. While I usually spend an inordinate amount of time belaboring over a menu, it took me all of a nanosecond to decide we will definitely be having this absolutely amazing Baked Gnocchi with Spinach, Beans and Burrata (aka my new signature dish!). Combined with the wine I am planning to serve along with the salad and dessert I have in mind, this is going to be a droolworthy epic meal! 

Recipe
Baked Gnocchi with Spinach, Beans and Burrata
Serves 8-12

Ingredients
2 Tablespoons olive oil
1 1/2 pounds mild Italian sausage, casings removed and broken up into pieces
1 medium yellow or Spanish onion, diced
4 garlic cloves, minced
2 jars (24 oz/630g size) good quality marinara sauce or 4 cups of homemade (See Notes)
1 teaspoon Kosher salt
1/2 teaspoon black pepper
2 Tablespoons mascarpone 
1 teaspoon dried oregano
1/4 cup fresh Italian parsley, chopped
5-6 basil leaves, julienned
2 (15oz/439g size) cannellini beans, drained and rinsed
4 ounces (114g) fresh baby spinach
1 pound (454g) spinach stuffed gnocchi or potato gnocchi (frozen or refrigerated)
8 ounces (227) fresh mozzarella (small) balls, cut in half
1/4 cup (23g) freshly grated Parmigiano-Reggiano
8 ounces (226g) burrata, bite sized balls if you can find them

Directions
1. Preheat oven to 425 degrees (F), Have a 12" round cast iron pan (at least 2 inches deep) or a 9"x12" baking dish (at least 2 inches deep) ready.
2. In a large saucepan (12"-14") heat the olive oil over medium heat.
3. Add in the Italian sausage. Cook until the sausage has started to brown and crisp (about 6-8 minutes).
4. Add in the diced onion, garlic, Kosher salt, and black pepper. Continue cooking until the onions have softened (about 5-7 minutes).
5. Add in the marinara, oregano, fresh parsley and basil. Bring the sauce to a simmer and cook for approximately 20 minutes to let the flavors develop.
6. Stir in the mascarpone.
7. Turn off the heat and add in the baby spinach in handfuls until fully incorporated. 
8. Stir in the cannellini beans and the frozen or fresh gnocchi.
9. Pour the mixture into the baking dish or pan. Top with the mozzarella and grated Parmigiano-Reggiano. 
10. Place on a baking sheet and insert into the oven. Bake for 30-35 minutes or until the cheese has melted and the sauce is bubbling.
11. Remove from heat. Let sit for about 5 minutes, then top with pieces of burrata and some additional julienned basil.

Notes: (1) I used Rao's Marinara sauce as I think it's one of the best jarred sauces out there. (2) The frozen spinach stuffed gnocchi came from my local Italian deli. Look for a good quality fresh or frozen gnocchi. If you can't find a spinach or spinach stuffed gnocchi, use a potato gnocchi. (3) You can prepare the dish ahead early in the day. Cover and place in the refrigerator. Wait until you are ready to bake before you add the mozzarella and Parmigiano-Reggiano cheeses. (4) Leftovers store well in the refrigerator for up to 4 days. Keep tightly covered. (5) Recipe inspired by TheKitchn's Gnocchi Lasagna, with Spinach, White Beans and Sausage.

Sunday, January 9, 2022

Cottage Pie


Backstories have always intrigued me. Whether they be about the people in my life, the choices of a gift, or the food I create, backstories have always shaped some of my perspectives as well as made for more meaningful, deeper connections to the people and things that matter to me. To be interested in a 'story' is to show genuine interest. Which is why learning some of the history behind a recipe has been an important part of the journey of making and/or developing a new recipe to share. While the origin of some recipes are conflicting, hard to find, or lack specificity, I find going on the hunt to be somewhat exciting and always enlightening. After taking a dive into the history of Cottage Pie, I came away finally understanding why Cottage Pie and Shepherd's Pie aren't exactly the same thing. In spite of the fact that some (okay, I will own this one) have incorrectly used the two descriptors interchangeably. 


So here's the Reader's Digest versions of the backstories aka histories of Cottage Pie and Shepherd's Pie. Sometime in the late 18th century, some cite 1791 as it's birth year, when the potato emerged as an affordable, every day food in both Ireland and the United Kingdom, Cottage Pie was created by resourceful women. While the dish is often attributed to being first developed in Ireland, some give Scotland that nod. The early Scottish version of this pie would have been made with a pastry crust, not a potato crust and the early Irish version most likely would have been with sliced not mashed potatoes. Considered to be a rather genius and economical way to use leftover meats and vegetables, Cottage Pie was considered to be more of a humble, rather than a nobel dish. Attributed to those who first ate this dish--poor Irish peasants living in cottages, explains the origin of its' name. Some sources also cite the late 1700s, early 1800s as the time period when the Shepherd's Pie was created. While originating in Scotland's and Northern England's sheep country, both Ireland and England also lay claim to its' origins. In paying homage of the shepherds of sheep, the term"Shepherd's Pie" wasn't coined until 1854 although it actually predates "Cottage Pie" by nearly a century. Regardless of which pie came first, each term was used synonymously and interchangeably with one another up until the 20th century. At some point a distinction was made between the two. Cottage Pie being one made with 'meat' and Shepherd's Pie being made with 'lamb'. Which means to call a pie made with a savory gravy, vegetables, meat (not lamb) and having a potato crust a Shepherd's Pie would technically be incorrect. Which is why the recipe shared below can only be called "Cottage Pie" and not "Shepherd's Pie". 


Cottage Pie is the quintessence of savory comfort food. Whipped mashed potatoes atop a rich, wine enriched medley of vegetables and ground sirloin is an unfussy, ultra-hearty, unbelievably uber flavorful dish is a feel good kind of meal. One perfect for warming and cheering you up on a chilly, cloudy or cold night. 

The ingredient list may look a little daunting, but there are no hard to find ones and it's really a very simple dish to make. To say we are now obsessed with this blissfully, mouthwatering delicious Cottage Pie would be an understatement. 

Aside from the potatoes, the most traditional vegetables found in a Cottage Pie are carrots, onions, and peas. This recipe contains all of them as well as some diced celery and garlic. To deepen the flavor of the gravy, there is chopped fresh parsley, thyme, and rosemary; tomato paste; Worcestershire; beef broth; and, a hearty red wine. For the ground beef I used a 90% lean ground sirloin, although you can use any lean ground beef as long it's 85%-93% lean. 


While the original versions of Cottage Pie may have been made with leftover meat and potatoes, this version doesn't. 


Made with russet potatoes, the mashed potatoes are creamy and craveworthy. Sour cream, heavy cream, and butter are what makes them so incredibly delicious. You can use a ricer to process the cooked potatoes, but I used a hand held potato masher. Making mashed potatoes by hand versus whipping them with a hand held electric mixer helps to retain their creaminess. You can simply spread the mashed potatoes over the top of the meat/vegetable mixture. Or you can pipe them on in a swirling design of your choice using a pastry bag and large open star pastry tube. 


Cottage Pie is a great make ahead early in the day dish. Just cover and refrigerate it until you are ready to bake it. But remember to take it out of the refrigerator for about 20 minutes before placing in a hot, preheated oven.


The Cottage Pie gets baked, uncovered, in preheated 375 degree oven for 30-35 minutes or until the potatoes are slightly golden brown and the gravy is bubbling along the edges. To get an even deeper golden color finish to the potatoes, broil the pie for an additional 3-5 minutes.


Cottage Pie may have traditionally been considered a humble dish, but it definitely deserves to be put it the celebratory and dinner party worthy categories. Sure it's a great casual, weeknight meal, but it's also an impressive one. So gather your friends around your table, put out some cloth napkins, open up a great bottle of wine or some bottles of Guinness, slice up some good bread, make a salad, and sit back to watch an evening of pure joy unfold. 

This is the kind of dish you want to make the moment there is a chill in the air, the moment when you decide you need a break from decadent meals, and/or the moment you crave comfort food. In other words, this simple soul satisfying Cottage Pie is probably calling your name like it did mine.

Recipe
Cottage Pie
Serves 6-8

Ingredients
Mashed Potato Layer
2 1/2 pounds russet potatoes, peeled and cut into 1" chunks
6 Tablespoons unsalted butter, room temperature
1/3 cup whipping cream (or half and half)
1/3 cup sour cream
1 1/2 teaspoons Kosher salt
1/2 teaspoon white pepper

Vegetable/Meat Layer
2 Tablespoons unsalted butter
1 medium yellow or Spanish onion, diced (about 1 1/4 cups)
2 medium carrots, peeled and diced (about 1 1/4 cups)
1 large or 2 medium celery stalks, diced (a generous 1/2 cup)
4 garlic cloves, minced (generous 1 Tablespoon)
1 1/2 to 1 3/4 pounds ground sirloin (90% lean) - See Notes
2 1/2 Tablespoons tomato paste
2 Tablespoons all-purpose flour
1 Tablespoon minced fresh rosemary
1 Tablespoon minced fresh thyme
1/2 cup hearty red wine (see notes)
1 1/2 cups beef broth
2 teaspoons Worcestershire
1 1/2 teaspoons Kosher salt
1/2 teaspoon black pepper
2 Tablespoons chopped fresh parsley
1 cup frozen peas

Directions
Mashed Potatoes
1. In a medium-large pot, add in the potatoes. Add water, covering the potatoes by about one inch. Generously season the water with Kosher salt. Bring to a boil over medium-high heat.
2. Reduce the heat to medium, cooking until potatoes are knife tender (about 12-15 minutes). Drain the cooked potatoes in a colander. Quickly rinse under hot water to remove the starch. Return the potatoes to the pan.
3. Using a hand held potato masher, break up the potatoes as much as possible, but do completely mash.
4. Immediately add in the room temperature butter, sour cream, heavy cream, 1 1/2 teaspoons Kosher salt, and 1/2 teaspoon white pepper. Using a wood spoon stir until potatoes until they are creamy. Put the lid on the pan and set aside while you make the meat/vegetable filling. 

Vegetable/Meat Layer
1. Preheat oven to 375 degrees (F).
2. In a 12 inch saucepan, melt two tablespoons of butter. Add in the onions, celery, and carrots. Sauté until the vegetables start to soften (about 6-7 minutes). Add in the minced garlic and continue to sauté for additional minute.
3. Add in the ground sirloin (broken into pieces). Cook until the meat is no longer pink inside (about 5-6 minutes).
4. Add in the flour and tomato paste. Cook for one minute.
5. Pour in the wine, beef broth, Worcestershire, thyme and rosemary. Reduce the heat to medium-low and cook until the mixture has thickened and liquid reduced by a little more than half (about 7-9 minutes). The mixture should have a thick sauce like consistency.
6. Stir in the peas, parsley, Kosher salt and black pepper. Cook for about one minute. Taste for seasoning. Add more salt and/or pepper if needed.
7. Transfer the mixture to a 9" x 12" baking dish. Spread the vegetable/beef filling to an even layer.
8. Using a large pastry bag fitted with an open star attachment (Ateco 827/828), pipe the mashed potatoes evenly over the top of the filling in a swirly design. Alternately, drop the mashed potatoes in spoonfuls over the filling. Run a fork through the potatoes to create a pattern (e.g., wavy rows).
9. Place the baking dish (uncovered) on the large baking sheet and place in the preheated oven. Bake for 30-35 minutes or until the potatoes are lightly golden and the gravy is bubbling on the sides. Note: If making early in the day to bake later, cover and refrigerate. Remove from the refrigerator about 20 minutes before baking.
10. If you want more browned mashed potatoes, turn the oven to broil and continue cooking the Cottage Pie for additional 3-5 minutes. Important Note: If you intend on broiling the dish at the end, make certain your baking dish can withstand a heat level of more than 500 degrees (F). To avoid any breakage issues, I prefer to use cast iron baking dishes rather than glass baking dishes.
11. Remove from the oven. Let rest about 5 minutes before serving.

Notes: (1) Whipping cream makes for a delicious, rich mashed potato. If you would like it slightly less rich, use half and half. (2) Fresh herbs make a significant difference in flavor. I do not recommend using dried herbs as a substitute. (3) For the wine, I used a red blend. If I had an open bottle of Cab, I would hav use that. (4) Leftovers heat up beautifully in the microwave. (5) I am not the biggest fan of freezing cooked foods, but if you are, let the Cottage Pie cool considerably after it is assembled before you wrap in plastic/freezer wrap. Baking time will change considerably when cooking a frozen Cottage Pie. (6) Last, but not least, if you make it with ground lamb, you can call it Shepherd's Pie!

Wednesday, January 5, 2022

Sour Cream Pecan Crumb Cake


If you asked me to tell you exactly how many recipes there on this blog, I couldn't tell you. I could only tell you there are more than "X number". However, if you asked me if I had a specific recipe for something, my answer would depend on what it was. With more than 700 recipes on the blog, I must admit that I don't have them all memorized! But it's actually when I get this question do I come to learn I have some gaping recipe holes on the blog! This actually happened a couple of weeks ago when Linda, one of my very good friends, asked if I had a recipe for coffee cake. Needless to say, even I was surprised or rather I should say shocked, to learn I didn't. I mean really, coffee cake? Something that has been around for hundreds of years and is pretty much standard fare at every breakfast potluck (remember those?) I had ever attended. And I don't have a recipe for it? What the heck, right? So I promised her I would make that a goal for 2022. Little did I know this goal would take me down a coffee cake, crumb cake rabbit hole. One that caused me to, technically speaking, not even meet the goal. But more on that later. On the upside, had it not been for her to give me a push, who knows when or even if I would have ever created this melt in your mouth, ambrosial Sour Cream Pecan Crumb Cake? 


A sour cream enriched cake with, not one but two, cinnamon, pecan, buttery, sugary streusel layers, and drizzled with icing is the kind of attention getting crumb cake just beckoning you to pour a cup of coffee, cut yourself a square, and then sit down uninterrupted while you savor every delicious morsel. Without being overly melodramatic, a piece of this blissfully delicious Sour Cream Pecan Crumb Cake should be one enjoyed with reckless abandon. To take only a sliver of it would not only be blasphemous, but it would be akin to denying your tastebuds the chance to have the complete euphoric experience. In other words, this is one of those crumb cakes having no place for self-control or restraint. 


So why is it called a crumb cake and not a coffee cake? Can it be considered both? Can you call a crumb cake a coffee cake and a coffee cake a crumb cake? The simplest answer to the first question has everything to do with the size of the crumb, the amount of the crumb, and the subsequent sweetness factor of the cake. Bigger and more crumbs create a sweeter cake and ultimately one we would call a crumb cake. This Sour Cream Pecan Crumb Cake definitely meets the basic "crumb cake" requirements. While there isn't a higher ratio of crumb to cake, it has more crumbs than the thinner layer typically found on most 'coffee cakes'. So it leans closer to the crumb cake (in both texture and taste) end of the continuum than the coffee cake end. And yes, you can call a 'crumb cake' a 'coffee cake' because it was intended to be enjoyed with coffee. But no, you can't or shouldn't call a coffee cake a crumb cake if it lacks the appropriate amount of crumbs.


This Sour Cream Pecan Crumb Cake has three components: the cake layer, the streusel layer(s), and the icing layer. It's a pretty straightforward, easy recipe to assemble and make. Although the multiple steps and layers might make some of you think otherwise. (See, this is why I find recipe rating is so challenging!). But regardless as to how you might rate it after you read the recipe below, let me just say it's definitely one you will want to make. Especially if you are a big fan of crumb cakes or cakes intended to be enjoyed with coffee! As an added incentive, this is THE cake you want to make for friends and family. The one you want to serve to weekend guests, the one you want to bring to a gathering, the one you want to serve to your book club, the one you want have on your brunch/breakfast table, the one you want to package up and share with friends and/or neighbors. 


While I say there is a fair amount of sweetness to this crumb cake, in large part to do the luscious middle and top layers of brown sugar cinnamon streusel, it's not at all overly sweet. Even with the icing on the top finishing touch. The recipe for the icing below gives you enough to drizzle over the cake, then drizzle on more when you serve each slice. It's up to you as to whether or not you want to enjoy it with a single or double drizzle. Personally, I am on team 'double drizzle'. 

I rarely bake cakes in pans not lined with parchment paper, but I always bake them in metal not glass pans. For this cake I used a 9" square metal baking pan and simply buttered and floured the pan so that the bottom and sides of the crumb cake could get a bit more browned. The cake baked up beautifully! 


Any day that starts with cake is destined to be a good day! But any cake that starts with this Sour Cream Pecan Crumb Cake is destined to be a great day! 

There are still 360 days left in the year. Enough time for me to fulfill the promise of sharing a 'coffee cake' recipe. While this perfectly proportioned cake topped with gorgeous clusters of brown sugar and cinnamon and the loveliest icing layer may not exactly be what my friend was looking for when she asked for a coffee cake recipe, I really think it could be the cake she didn't know she was actually hoping to find. It may have taken me more than eight years to post a 'crumb cake' recipe, but this one was well worth the wait.

Recipe
Sour Cream Pecan Crumb Cake
Serves 12-16

Ingredients
Streusel
1 1/2 cups (195g) all-purpose flour
1/2 cup (100g) light brown sugar
1/4 cup (50g) granulated sugar
1/2 teaspoon Kosher salt
1 Tablespoon cinnamon
1/2 cup (113g) unsalted butter, melted and cooled very slightly
1/3 cup (36g) pecans, toasted and finely chopped

Cake
2 1/4 cups (292g) all-purpose flour
1 cup (200g) granulated sugar
2 1/2 teaspoons baking powder
1 1/4 teaspoons Kosher salt
1 teaspoon cinnamon
1/2 cup (113g) unsalted butter, room temperature
1/2 cup (120g) sour cream
1 cup whole milk
2 1/2 teaspoons vanilla
2 large eggs, room temperature

Icing
1/4 cup (56g) unsalted butter, room temperature, cut into 8 pieces
1 teaspoon vanilla
1/2 teaspoon Kosher salt
1/4 cup whole milk
2 cups (240g) confectionary sugar

Directions
Streusel
1. In a medium sized bowl whisk together the flour, brown sugar, granulated sugar, Kosher salt, cinnamon and chopped pecans. 
2. Pour the melted butter into the bowl and stir using a spatula or wooden spoon. Stir until the mixture looks like wet sand and there are no streaks of flour showing.
3. Cover and set aside. Note: You could put the bowl in the refrigerator while you are assembling the cake as it will make it very easy to create clumps using your fingers. 

Cake
1. Preheat the oven to 350 degrees (F). Generously butter and lightly flour a 9" square metal pan (or alternately line with parchment paper, buttering the parchment paper). Set aside.
2. In the bowl of a standing mixer fitted with a paddle attachment, mix together the flour, sugar, baking powder, cinnamon, and Kosher salt just until blended.
3. Add in the chunks of room temperature butter and sour cream. Beat until the mixture comes together (about 2-3 minutes). 
4. In a large measuring cup, whisk together the milk, eggs, and vanilla until well-blended.
5. Add the liquid ingredients to the flour/sugar/butter mixture in three additions and beat for about 20 seconds after each one. Then beat for additional minute until the batter is light and fluffy.
6. Spread half of the batter on the bottom of the pan. Smooth out using an offset spatula.
7. Sprinkle slightly less than half of the streusel mixture over the bottom cake layer. 
8. Spread the remaining batter of the first streusel layer. Note: It helps if you try to even pour the batter over the streusel or drop it evenly over the streusel layer with a large spoon before spreading it out evenly.
9. Using your fingers, create small crumbles of the remaining streusel and spread over the top.
10. Place the baking pan on a large baking sheet and bake for 65-75 minutes, or until a toothpick or cake tester comes out clean.
11. Remove the cake from the oven and place on a cooling rack for about 15 to 20 minutes before drizzling on some of the icing.
12. Cut into 16 squares, place on a serving platter, pour some coffee, and sit back to savor the moment.
13. The crumb cake will keep covered at room temperature for up to 2 days. Or you can over and store in the refrigerator for up to 5 days. If refrigerated, when ready to serve warm up each piece in the microwave on high for about 10-12 seconds (it will taste like it just came out of the oven).

Icing
1. In a medium sized bowl, whisk the room temperature butter until creamy (you can also do this with a hand held mixer).
2. Add in the vanilla, Kosher salt, milk and confectionary sugar. Whisk until very smooth. The icing should have a pourable consistency to it. If it doesn't, add in some more milk, one Tablespoon at a time.
3. You will have enough icing to drizzle the cake and drizzle again when serving each piece. 

Notes: (1) Toast the pecans on a sheet pan in a 350 degree (F) oven for about 7-8 minutes before cooling and chopping. 

Monday, January 3, 2022

Red Chicken Enchiladas


It's a new year! It's the start of a new chapter!  And believe it or not, it's the 9 year anniversary of the blog! I'm not certain which of those things I am most excited about. But hey, it's 2022 so I don't have to choose just one. I can choose them all! It's anyone's guess what the year ahead may hold for all of us, but if I have any influence, then I hope it brings a healthier world, a kinder world, a less divisive world, and, in the words of poet Amanda Gorman "let us not return to what was normal, but reach toward what is next." Just the idea of 'next' makes one want to believe an infinite number of possibilities lie ahead of us. 

With regard to the blog, I have given some thought to 'what's next?'. Although to be completely honest, I haven't yet set clear, measurable goals for the year ahead. While the blog is definitely what I call a labor of love, it's been more of a creative outlet rather than a livelihood. Over the years I have given some consideration to turning it into a lucrative venture, but have stopped short of making that decision. But who knows, maybe this is the year. Over the past several years, I have worked to improve my photography and food styling skills. But I still have much work to do. It's almost hard to believe there are more than 700 recipes posted to the blog! Yet, I don't yet feel done. Some are really easy to make and some are as one of my friends recently said 'should be labeled as advanced'. What I do know is that in the year ahead I want to continue to share recipes in both the sweet and savory categories as I feel we all need to have both in our lives. And maybe I try to figure out a way to explain where the recipes fall on the easy to difficult continuum. Although if rating recipes is anything like the ratings of trails or hikes taken (or not taken) in Rocky Mountain National Park or the Great Smokies, then that could be a challenge. But whatever is 'next' here on saltedsugaredspiced.com I hope you stay along for the ride in the year ahead. 


In the past eight years the first recipe of the year has fallen evenly in the sweet and savory categories. With the Red Chicken Enchiladas recipe being the first one of the new year, the scales are now slightly tipped toward savory. The kind of hearty, comfort food savory and the kind easy enough to make for a weeknight dinner or assembled early in the day for a perfect weekend gathering dinner. And, if by chance, you are cooking meals for one or two, the assembled enchiladas can be frozen and thawed for cooking later. If there were ever a perfect recipe to kick off the new year, this would be the one!


Having only eight ingredients with all or most of them store-bought (see notes below), it's the kind of impressive, semi-homemade recipe that looks and tastes like you were cooking for hours. Using a store-bought rotisseire chicken instead of roasting some chicken and using canned mild Enchilada Sauce instead of making your own significantly simplifies this dish. And while you can buy already shredded mozzarella and Pepper Jack cheeses, grating your own isn't hard at all. However, if there is any non-negotiable in this recipe it's the use of corn tortillas. Not only do they make this dish look and taste more authentic, they are significantly more flavorful than flour tortillas as well as sturdy enough to hold up in the assembly process. The best way to soften up the corn tortillas so they can filled and rolled is to wrap them in a damp paper towel and microwave them on high for one minute. This method is almost fail proof.

With the exception of the red enchilada sauce and reserved four ounces of the shredded mozzarella and Monterey Jack cheeses, all of the ingredients get mixed together in a large bowl. The messiest part of assembling the enchiladas comes next. After dipping a softened corn tortilla in the red enchilada sauce, they are hand filled with the chicken mixture, rolled and then placed seam side down in a baking dish. To make the assembly process a little easier and slightly less messy, place a small sheet pan between the pan with the sauce and bowl with the chicken mixture. This will help catch any sauce that drips off of the tortilla and make the rolling process much simpler. 


After all of the enchiladas are made and placed in the baking dish, pour all of the remaining red enchilada sauce over the top and sprinkle on the reserved cheese. If you are not baking the dish immediately, cover with plastic wrap and place in the refrigerator. Otherwise place the baking dish on a large sheet pan and place in the preheated 375 degree (F) oven and bake for 25-35 minutes.


The Red Chicken Enchiladas are done when the sauce is bubbling along the edges and the cheese has melted.


For garnishes I like to serve the enchiladas with some sliced avocado, a dish of crema, fresh lime wedges, crumbled queso fresco cheese, chopped cilantro, and a side of Cilantro or Mexican Rice. 


For a complete Tex Mex dinner experience, heat up or make some queso, mix up a large bowl of this guacamole, and make some Cilantro or Mexican Rice. For beverages mix up some margaritas, chill some bottles of beer and/or Topo Chico, or chill some cans of ranch water. This gives you all the makings of a mouthwatering, hearty, memorable, almost epic meal! So invite some Tex Mex loving friends over in the weeks ahead and serve them Red Chicken Enchiladas with all the fixins. More than likely this will be one recipe in 2022 you will be putting on repeat! It might even become your signature dish! 

Recipe
Red Chicken Enchiladas
Serves 6-8

Ingredients
4 cups of cooked, shredded chicken, then cooled considerably (meat can come from a 2 pound rotisseire chicken or two pounds of roasted chicken)
12 ounces shredded mozzarella, divided
12 ounces shredded Monterey Jack Cheese, divided (see notes)
1 cup plus 2 Tablespoons sour cream
2 Tablespoons store bought taco seasoning
1/2 teaspoon Kosher salt
12 corn tortillas (use 8' or 10" sized)
28-30 ounces Mild Red Enchilada Sauce
1/2 cup (220g) black beans, drained (about a half of 15.5 oz/439g can) - optional but really good

Fresh cilantro
Crema or additional sour cream
Sliced avocado
Queso fresco cheese, crumbled
Fresh lime wedges
Cilantro or Mexican Rice

Directions
1. Preheat the oven to 375 degrees (F). Have a 9" x 12"/13"baking dish ready.
2. Combine 8 ounces of the shredded mozzarella, 8 ounces of the shredded Monterey Jack Cheese, the sour cream, the taco seasoning, Kosher salt, the shredded chicken and the black beans (if using). Mix until well blended.
3. Slightly warm the red enchilada sauce in a small sauce pan, but one large enough to dip in the corn tortillas. Note: Do not warm the sauce too much or your will burn your fingers.
4. Wrap the tortillas in a damp paper towel. Heat in the microwave on high for one minute.
5. Dip the warmed, softened tortillas in the red sauce one at a time. Place a generous 1/3 cup of the chicken mixture in the center of the tortilla, roll, and place seam side down into the baking dish. Repeat until all of the tortillas have been filled. Note: You might have about a half cup of leftover chicken left. You can refrigerate, reheat and eat with tortilla chips as a snack.
6. Pour the remaining red enchilada sauce over the enchiladas. Top with the remaining 4 ounces of shredded mozzarella and 4 ounces of Monterey Jack cheeses.
7. Bake for 25-35 minutes or until the sauce is bubbling and the cheese has melted.
8. Let rest for 5 minutes before serving.
9. Serve with some Cilantro or Mexican Rice, sliced avocado, crema, chopped cilantro, and/or Queso Fresco cheese.

Notes: (1) I used the farmstyle thick cut Spicy Mexican Blend from Tillamook. A Monterey Jack cheese with Jalapeños and Cheddar Cheese. If you can't find it, use a good quality Monterey Jack cheese and grate it on the large hole side of the grater. (2) I used the El Milagro Corn Tortillas (sold in packages of 12). (3) I used a 10 ounce (283g) and 19 ounce (538g) can of Old El Paso (mild) Red Enchilada Sauce. (4) I used Old El Paso Taco Seasoning. The package contains more than the two Tablespoons called for in this recipe. (5) I used a rotisseire chicken but would also recommend roasting some chicken thighs as dark meat is much more flavorful than white meat. Shred the chicken while it is still warm but let it cool off considerably before you mix it with the other ingredients, particularly the cheeses. (5) If freezing the enchiladas, take out of the freezer and let thaw in the refrigerator overnight. Wait to put the cheese on top until ready to bake.