Showing posts with label Bread. Show all posts

Tuesday, January 7, 2014

Edna's Houska


Everything I ate in the home of my childhood best friend's parents was incredibly delicious. And once I got over my hesitancy to try new foods, I was able to experience the full range of Italian and Polish dishes served in their home. Edna and Andy were as amazing as parents as they were cooks. This perspective (seen first through the eyes of a ten year old) was one that never changed. I may have been one of those kids who almost spent as much time at their dinner table as their children did. In retrospect, the genesis of my love of gathering friends and family around food began in their home. So each time I make one of Edna's recipes, it feels as if I am momentarily time traveling back to those carefree days of my youth. So the other day I decided to make Edna's Houska.

So what exactly is Houska? Well here is the simple answer. It is a rich, egg, slightly sweet yeast bread, one that almost every Eastern European culture (especially the Polish, Czech and Bohemian cultures) has a name for or version of. Typically the bread is braided, studded with golden raisins (although some versions omit the raisins) and contains candied fruit (or lemon zest). It is a bread traditionally associated with the Christmas, New Year or at Easter holidays. Around which holiday or holidays the Houska is served generally depends on traditions of the various Eastern European cultures where some version of the bread is made. Just like Challah (another sweet yeast bread) is eaten year round and traditions aside, I actually think it would be a shame to enjoy this incredibly flavorful, moist bread a few times a year. And getting a bit of a youthful jolt shouldn't have to be limited either.


When I first received this recipe from Edna, the mother of my childhood best friend, my initial reactions were 'maybe this is beyond my culinary capacity, maybe I will just to have to wait until I am invited for Easter dinner to experience it again, and why didn't I spend time watching her cook than I did eating hat she made'. These were just a few of my thought process I had (and remembered from) more than 30 years ago. Yes, this is how long I have had this recipe. Many things have changed over the course of the past 30 years, including how I view the making of this bread. It is actually not as complicated as my first impression lead me to believe. 

This is a bread recipe using cake yeast as opposed to granulated yeast. The cake yeast is usually found in the refrigerated dairy section of the grocery store. In addition to the yeast, eggs, milk, sugar, flour, Imperial margarine, golden raisins, lemon zest, vanilla and salt are all you need to make this sweet bread.

Sometimes when a recipe calls for the zest of a lemon we think of it as an optional ingredient. If that thought has ever crossed your mind before, this bread will have you make a permanent paradigm shift.


It all begins with scalding one cup of milk over medium-high heat in a medium sized saucepan. The milk is heated through enough to be considered scalded when small bubbles form around the edges of the pan. Once it reaches this state, remove from heat and add in the Imperial margarine, vanilla, lemon zest, sugar and salt. Stir until the butter and sugar have melted. The margarine will melt easier if you cut it up into tablespoons. The milk mixture should be lukewarm (you want to be certain not to cook the eggs) before you add the four lightly beaten eggs and the yeast/water mixture. After stirring and blending these ingredients, pour into the bowl of a standing mixer fitted with a dough hook.

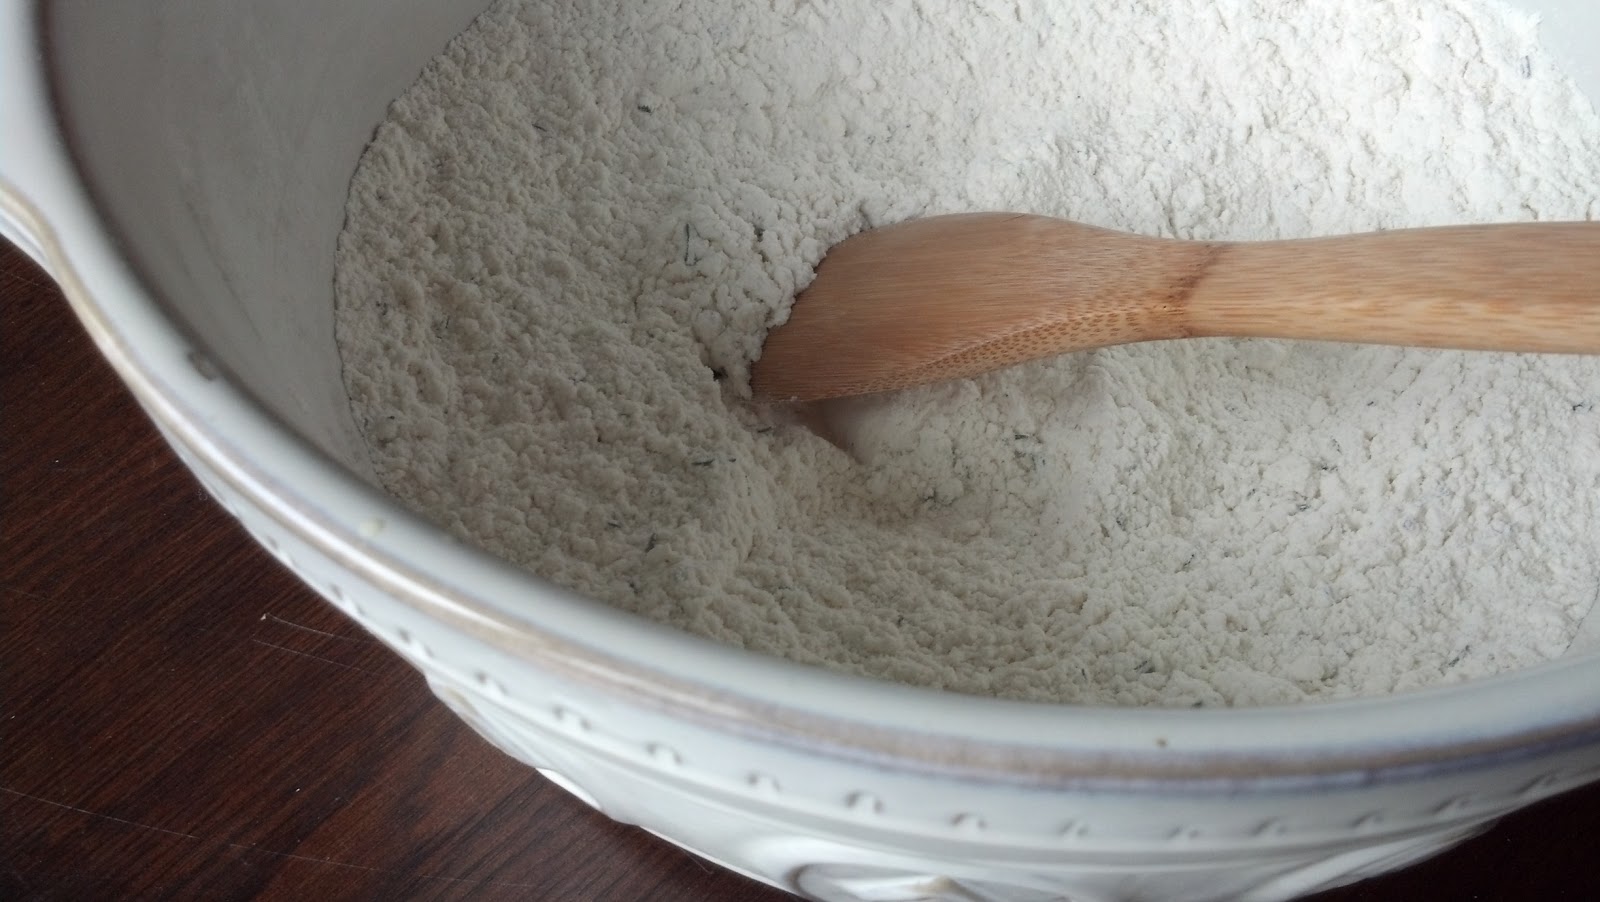
Six cups of flour are added one at a time, each one being fully incorporated before adding the next one. After all of the flour is added, the golden raisins are mixed in for approximately one minute or until blended in the dough. You will think the dough needs more flour because it will be slightly sticky. Resist the temptation to add more flour as you will end up with a drier, less moist bread.


The dough is scraped onto a lightly floured surface and kneaded for several minutes (or until it is not longer sticky and has a smooth finish). The kneaded dough is placed in a large buttered bowl. Before covering the bowl with plastic wrap, turn the dough bowl over so all sides of the bread are coated in butter. Place the covered bowl in a warm place and allow the dough to rise for 1 hour to allow it to double in size.

After the dough has gone through the first rise, transfer the dough to a lightly floured surface. The dough is cut into 4 equal pieces. Each quarter is then cut in half (so you end up with 8 equal pieces).
Each piece is rolled into a log approximately 14-16 inches in length. The braids are formed by using two of the logs. When the logs are formed, tuck each end under and place on a parchment paper lined baking sheet. The finished braided logs are covered with a light towel (flour sack towels work best) and the dough goes through a second rising period of 1 hour. Because the logs will almost double in size, I use two baking sheets.


The beautiful golden finish on the Houska comes from the egg wash. Using the two remaining eggs, separate the eggs. Using only the yolks, add 2 teaspoons of water and stir until well blended. Brush each of the loaves so the entire surface of the dough is covered. Place baking sheet in a preheated 350 degree oven and bake for approximately 20 minutes. Remove baking sheets from the oven and transfer breads to a cooling rack. I generally bake my bread in the center of the oven, one baking sheet at a time. I envy those of you with double ovens.


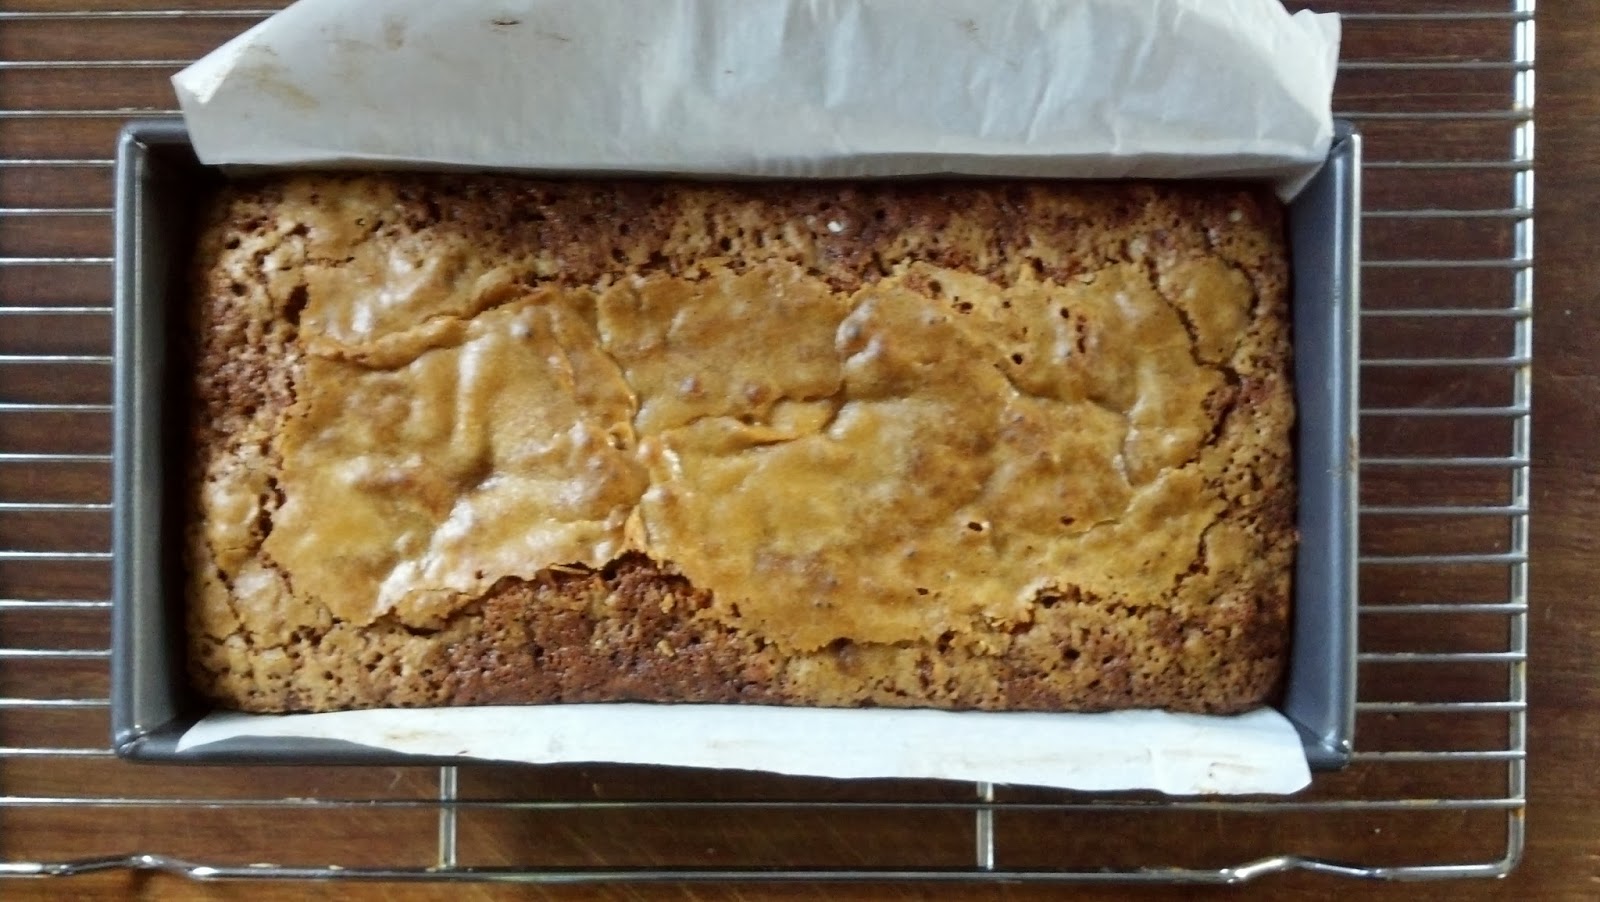
Houska is delicious all on its' own, but when you schmear room temperature butter on it, it goes from simply delicious to additively delicious. Loaves of this bread will disappear before your eyes. Literally. It is also one of those breads perfect for making french toast or a bread pudding. That is, if you have any left after serving it. While eating this bread may not bring you back to your youth, it will bring you to a place you will want to return to again and again. Yes, life is too short to exercise restraint in making this bread for only one or two holidays a year. 

Recipe
Edna's Houska
Makes 2 very large or 4 perfect sized loaves

Ingredients
1 cup whole milk
1 cup (8 ounces/226g) margarine (recommend either Land O'Lakes or Imperial), cut into tablespoons
3/4 cup (150g) granulated sugar
1/2 teaspoon Kosher salt
Zest of one lemon
1 Tablespoon vanilla
2 ounces cake of yeast (dissolved in 1/2 cup of lukewarm water) See notes
6 large eggs, room temperature, divided
6 cups (768g) of all purpose flour, plus more as need and when kneading
15 ounces (425g) golden raisins

Directions
1. Scald milk. Add margarine, sugar, salt, zest of lemon and vanilla. Stir until margarine and sugar are melted. Remove from heat.
2. Lightly whisk 4 eggs until blended.
3. When milk mixture is lukewarm (95-105 degrees F), add lightly beaten eggs and yeast/water mixture. Stir until combined. Transfer to bowl of a standing mixer.'
4. Fit standing mixer with bread dough hook. Add flour 1 cup at a time, mixing until blended with each cup. Dough will be rather sticky. 
5. Add raisins and mix at medium speed until combined (less than 1 minute)
6.  Lightly flour a surface. Put all dough on floured surface and knead for several minutes (until dough is no longer sticky and comes together in a smooth ball). Kneading will take approximately 3-4 minutes. Note: Continue adding flour as needed while kneading. Dough should not stick to the surface before putting in the buttered bowl.
7. Place dough in a well buttered bowl. Turn dough over so all sides of the dough are covered in butter. Cover dough with plastic wrap, top with a light weight towel, and let rise in warm place for 1 hour or until the dough has doubled in size.
8. Lightly flour a surface. Remove dough from the bowl and place on lightly floured surface. Cut dough into 6 or 9 equal pieces. (6 pieces for 2 large loaves or 9 pieces for three perfect sized loaves).
9. Roll each piece into a log. Braid two logs (tucking ends under) and place on parchment paper lined baking sheet. Continue until you have 4 braided logs. Note: Alternately, cut each piece of dough into 3 pieces and braid accordingly.
10. Cover braided logs with a light weight towel (use flour sack towels if you have them). Let rise in a warm place for 1 hour.
11. Preheat oven to 350 degrees (F).
12. Make an egg wash using remaining 2 eggs but use the egg yolks only. Mix in 2 teaspoons of water (or milk) into 2 egg yolks and whisk until well blended. Brush wash on top of dough. Make sure the entire surface of bread is covered with egg wash. Note: Adding milk instead of water will create a more golden baked bread surface.
13. Bake for approximately 20 - 24 minutes (top will be beautifully browned).  When tapped, the bread will sound hollow.
14. Transfer bread to a cooling rack. Allow to cool to room temperature.
14. Using a serrated knife, slice and serve with softened butter.

Notes: (1) Recipe updated April 2020. (2) If you cannot find cake yeast in the refrigerated section of your grocery store use three 1/4 ounce packages of the granulated active yeast. (3) When measuring the flour I used a 128 per cup weight.


Over the course of my lifetime thus far my perspectives on a variety of things and people have either remained unchanged or have changed (nothing insightful about this observation, I mean really, what other options are there? Sometimes I can say the most ridiculous things. But bear with me, if you can stop laughing that is, this is going somewhere). Whether those perspectives are reaffirmed or altered is mostly dependent on how I choose to see them. I came across a quote the other day 'What we see mainly depends on what we look for.' The more I thought about it, the more I thought maybe there was wisdom in those words. The more time I spend looking for the positive, for the potential, or for goodness, the more I see. The more time I spend on finding reasons to not like something or someone, to focus on differences, or to pass judgment, the less I see (in them).

Had I never gotten over my reluctance to try new foods when I was younger, I may never have come to appreciate the wonderful foods served in the home of Andy and Edna or have had the opportunity to spend so much time at their dinner table or have learned early on how to make friends and family feel so welcomed, so special. I could go on with a million (maybe not a million, maybe hundreds) of examples of the outcomes associated with what I looked for in my experiences and in others. But regardless of how many of these I might share, I still come to the same conclusion. Yes, I really do believe the wisdom in the words 'what we see mainly depends on what we look for.' How we choose to see experiences or people really does affects our memories, relationships, and yes, maybe even our destinies.

Tuesday, October 1, 2013

Banana Bread, Version 2

I just couldn't wait for the throw down with my sister, I just couldn't let the ripened bananas go to waste. and I couldn't wait any longer to use the new pumpkin loaf pan my brother-in-law sent me for my birthday. So I had to make a decision. Make another loaf of banana bread using the adapted version of Flour's recipe or listen to my sister and make the recipe she says was perfect. Which turned out to be a recipe she had modified. So I half listened to my sister. I made what I am now calling Banana Bread, Version 2 because, of course, I too had to make my own adaptations.


Why was I so reluctant to listen to my sister? Anyone with a sibling knows the answer to that question, however, beyond the sibling rivalry decisions we make, the written reviews for this recipe on Epicurious were in my opinion 'all over the place'. A few said the banana bread collapsed when it baked. With my week long wait time for bananas to ripen, the last thing I wanted to make was a banana bread that didn't look bakery perfect. But my curiosity for tasting what my sister believed was the perfect banana bread needed to be satisfied. And since the recipe was rather simple and didn't require the use of a mixer, I thought 'okay I'm game, what do I have to lose?' (especially since I was my own judge and jury and if it didn't turn out, no one would be the wiser). The only issue would be coming up with a reasonable explanation for why I did not make this banana bread when pressed by my sister. And reasonable would not be 'our tastes in baked goods are not always in sync' (although that would be mostly true).


I wasn't going to post two banana bread recipes in one week (like how crazy is that). Which meant I taking many photos as I was baking. Just a few to text to my sister (call it a virtual thrown down of sorts). But after baking and tasting this banana bread, I thought you should be the one to decide which banana bread recipe version you want to make. Like version 1, this one was incredibly moist and also had a great denseness to it. I am not certain which one I like better yet. Will have to keep tasting them to see if a clear favorite emerges. Version 2 is definitely easier and requires less ingredients. That, in of itself, could be what influences your decision, especially those of you who subscribe to the 'less is more' way of thinking. Although you might want to make them both to decide for yourself!

And as you can see, this banana bread did not collapse (and I can't explain why that happened to others who have made this recipe although I have some ideas). Making this banana bread in the pumpkin mold from Williams-Sonoma certainly made it look even more beautiful. But I think the pumpkin bread  would also look beautiful made in 9"x 5" loaf pan.

Recipe
Banana Bread, Version 2 (slight adaptation of Aunt Holly's Banana Bread recipe shared on Epicurious)

Ingredients
3 1/2 ripened bananas mashed (or 1 1/2 cups of mashed bananas)
1/4 cup melted unsalted butter, cooled
1 teaspoon vanilla
1 large egg, room temperature, lightly beaten
1 cup granulated sugar
1 1/2 cups all purpose flour
1/4 teaspoon Kosher salt
1 teaspoon baking soda
1/4 heaping teaspoon of Saigon cinnamon
3/4 cup toasted and chopped walnuts

Directions
1. Preheat oven to 350 degrees (F). Prepare a 9" x 5"  baking pan or Williams-Sonoma botanical pumpkin mold and set aside.
2. In a medium sized bowl, first mix together the banana, butter, vanilla, and egg until blended. Then add all of the dry ingredients with a wooden spoon.
3. Scrap batter into prepared pan and smooth top.
4. Bake for 55 to 65 minutes or until a tester inserted into the bread comes out clean (Hint: if the banana bread springs back when you press lightly on it, it should be done. Just make sure to do this in the middle of the bread).
5. Cool on wire rack for 20 to 30 minutes and then unmold. Slice, serve and savor!
6. Tightly cover the leftovers. Storing the banana bread in the refrigerator will extend its' life. Warm a slice in the microwave or allow to come to room temperature before enjoying.


If you have ever moved you know how much work and stressful it can be. While nothing compares to moving from a house you have lived in for many, many years, moving after living in a house for as little as a year has its' own set of emotions. Sometimes it's not moving from one house to another that causes a little angst, it's moving from one city/town/state/country to another that has a way of tempering with the emotions of change. In less than two weeks (and yes I am counting the days so I can savor each of them), I will be packing up the farm house and heading back to the house in the midwest. Already I am missing things about the east coast town I am living in and I haven't even left yet. I am calling it the 'anticipation of loss' versus calling it the 'thankfulness for having had the time here'. Someday I will get to the thankfulness place, but I am definitely not there yet.

Yet, in spite of living in the farmhouse for a little over a year, it feels as if I have spent more time here. I had a connection to this house and this town the day I moved in. There are people back in the midwest whose vision of me is one best described as 'high maintenance, up town kind of girl'. Guess they could never see or know that I had another side of me (but I knew). Yes, I still like to shop and still like to collect things, but living here has only reaffirmed what I have always known. It is not the size of the house one lives in, it is how one makes a space a home. And over the course of the past fifteen months, it has been nothing less than thrilling to search for the things that would make the farmhouse into a warm, welcoming home. Antique shows (including a trip to Brimfield), antique shops, thrift stores, resale stores, yard sales and, yes of course, Pottery Barn and Williams-Sonoma were the places where I found all that I needed (and of course, I took just a few a things from the midwest home too). My attachment to these furnishings is as much connected to the hunt for them as it is to their simplistic beauty, in how they transformed the farmhouse, as well as my life here and the people who have come into it. But this move back to the midwest means letting go of almost all of these things. While I am trying to tell myself they are just things, this time these 'things' symbolize so much more to me.

Sunday, September 29, 2013

Banana Bread

Making banana bread is a lesson in patience, unless of course you are able to find overly ripe bananas at the grocery store. No such luck when I went looking for bananas last week. The only ones I could find were my favorite eating bananas, the ones with peels still a little green. It was all I could not to eat  those bananas this past week and needed to keep reminding myself I was waiting for them to ripen. And the wait was almost 8 eight days. In my world, that is kind of long wait, for making banana bread that is. But as the old adage goes 'some things are worth the wait' (and of course wait time is all relative depending on what it is you desire) and this banana bread was definitely wait worthy.


I had been wanting to make Joanne Chang's famous banana bread recipe ever since I bought her first cookbook, Flour: Spectacular Recipes from Boston's Flour Bakery and Cafe. There was just something about the ingredients in her banana bread recipe that seemed like it would be one that was both dense and delicious. While I don't have a real gift for clairvoyance, my prediction on this banana bread was pretty accurate. Flavored with just hint of cinnamon and containing toasted walnuts, this turned out to be a moist, delicious, dense banana bread. The kind that would hold up to butter or cream cheese lathered over it. Yet, regardless if you are a banana bread purist or not, this banana bread will definitely appeal to all taste preferences.


Give me a fresh banana or a piece of great banana bread and I would be happy. For some reason those are the only two ways I will or can consume 'bananas' as I have never liked anything else containing or flavored with bananas. I would rather starve to death than eat a piece of banana cream pie, bananas foster, or banana candy. On the other hand, who knows what I would do for a fresh banana or piece of banana bread.


In almost every banana bread recipe I looked at, they called for the use of 3 to 4 ripe bananas. However, not all bananas are the same size, so there can be quite a difference in the amount of banana one is adding to a recipe. Joanne Chang was the first one to further elaborate on the quantity of bananas used in the recipe. In addition to listing 3 1/2 ripe bananas, she provided a weight measurement (340 grams) as well as the American weight conversion amount (or 1 1/2 cups mashed). From this point forward when making this banana bread, I may allow 3 to 4 bananas to ripen but I will add 1 1/2 cups mashed bananas to the batter.

In going with the 1 1/2 cups option, it ironically turned out to be 3 1/2 of the sized ripened bananas. Whether or not this was a coincidence, I am sticking with cup measurement option. Remember, the riper the bananas the easier it is to mash them. A day or two more of a wait for them to ripen will make a difference. More ripe is better than less ripe.

The dry ingredients are sifted and set aside while the wet ingredients are combined. After the sugar and eggs are mixed together in standing mixer, the canola oil is slowly added (another lesson in patience) so as not to deflate the air incorporated into the egg and sugar mixture. The mashed bananas, vanilla and some creme fraiche are added in for even more flavor.


It surprises me that not all recipes calling for nuts advise they be toasted. But whether or not they do, I always do. Toasting walnuts at 325 degrees for 10 minutes will transform the taste and flavor of the nuts as well as transform whatever it is you baking.


The dry ingredients and toasted walnuts are folded in with a spatula until the flour is fully blended in or said differently, you should not see any streaks of flour in the batter.

On a recent trip up to New Hampshire I bought a new loaf pan, a 10" x 5" one. The pan was christened with this banana bread recipe. Even though it was a non-stick pan, I lined it with parchment paper. The banana bread bakes for almost 75 minutes in a 325 degree oven. I began checking for doneness at 60 minutes, but knew then it needed another 15 minutes. In spite of the long baking time, this is a really moist bread. I just might use this recipe to have a banana bread throw down with my sister. We will definitely need to find some impartial judges for this throw down.


Recipe
Banana Bread (slight adaption of Flour's Famous Banana Bread recipe created by Joanne Chang)
Ingredients
1 1/2 cups all purpose flour
1 teaspoon baking soda
1/4 heaping teaspoon of Saigon cinnamon
1/2 teaspoon Kosher salt
1 cup plus 2 Tablespoons granulated sugar
2 eggs, room temperature
1/2 cup canola oil
3 1/2 very ripe bananas (or 1 1/2 cups of ripe bananas mashed)
2 Tablespoons of creme fraiche (or you could substitute sour cream)
1 teaspoon vanilla
3/4 cups walnuts, toasted and chopped

Directions
1. Preheat oven to 325 degrees.
2. Sift flour, baking soda, cinnamon and salt and set aside.
3. Using a whisk attachment in a stand mixer, beat sugar and eggs until light and fluffy (about 5 minutes).
4. Slowly add canola oil (don't pour in all at once).
5. Add mashed bananas, creme fraiche and vanilla, mixing until combined.
6. Fold in flour mixture and toasted walnuts until thoroughly combined.
7. Pour batter into prepared 10x5 inch parchment paper lined loaf pan.
8. Bake 60 to 75 minutes (check at 60 minutes, but it will most likely take the full 75 minutes). 
9. Remove from oven and cool on wire rack for 30 minutes before unmolding.
10. Wrapped in plastic wrap the bread will be good for up to 3 days (if it lasts that long) or it can be frozen for up to 2 weeks.


This past weekend I drove up to New Hampshire to meet up with my friend Anne, someone I had not seen in a very, very long time. But neither time or distance has ever affected our ability to just 'pick up where we left off'. She is also one of those rare friends where I feel incredibly comfortable talking about anything and everything with her, even things I may kept only to myself. Whether our lives intersected at some point in another lifetime (yes, I lean toward believing in past lives) or whether we share an unexplainable connection to one another, I have grown and benefited from her friendship, wisdom and insights over the years. 

There are people that come into our lives for a short time and then there are the ones who stay. For me those that remain in my life are those that I consider my true friends, the ones I trust most and the ones I am not afraid to share my thinking with (even when this thinking isn't always rational). The people who come into my life and never leave are the ones I love and care for the most, regardless of the quantity of interactions I have with them. Everyone else in my life is just an acquaintance. 

Regardless of the reason or when someone came into my life, it is longevity in a friendship that I value most. For me it can be (and has been) incredibly painful when friendships are only context dependent. I have had my share of what I call 'false friends' over the course of my lifetime, those who seek to have only their needs met in the friendship, those who become your friend because of the position you hold, or even those who take more than they give. The most significant difference between a real friend and a false friend from my perspective? Well, I guess I believe that in times of conflict or misunderstandings, the real friend is someone who works to resolve and forgive while the false friend is someone who seeks to find fault or uses the conflict to take breaks from the friendship. If I have learned anything over the course of my lifetime, it has been the realization (and reaffirmation) that honesty and trust are the most important qualities in a genuine, in it for the long run friendship. A friendship may not always be about the quantity of interactions, but it is always about the quality of them.


Wednesday, September 25, 2013

Pumpkin Loaf aka a close Starbuck's version

There are many benefits to what I call living in God's country. Two lane highways; no stop lights; no street lights so one can see the stars perfectly at night; beautiful beaches; a lighthouse; farm and roadside stands selling fresh produce, eggs, and flowers; miles of stone walls surrounding homes and farms; blue hydrangeas dominating the summer landscape; a blueberry farm; an apple orchard; two Christmas tree farms, okay you get the picture. While it is a most picturesque environment, there are a few things that are at least a 20 to 30 minute drive away. The movie theatre; the grocery store; the bookstore; and yes, Starbucks. And even though I live in Dunkin' Donuts country, the closest one is also a 20 minute drive away. Not that 20 minutes is long, but a 40 minute round trip for an iced coffee and piece of pumpkin loaf is pushing it, even for me (little miss willing to drive long distances without packing a lunch).


Not having access to Starbucks would have been no big deal a couple of years ago because I was not a coffee drinker. Probably one of a handful of people in the universe who aren't. But then I discovered iced coffee and what a memorable day that was. Such deliciousness finally came into my life. As an added benefit, my daily caffeine intake changed from the drinking of diet soda to the drinking of iced coffee. In my quest to find the best iced coffee, I tried the ones from Starbucks, Dunkin' Donuts and my local coffee shop Coastal Roasters. I liked them all but if I had to choose a favorite, I would first choose the iced coffee from Starbucks, then the one from Coastal Roasters, and last but not least, the iced coffee from Dunkin' Donuts. Living on the east coast in DD country, I would be probably be considered a heretic for this opinion.


In spite of my iced coffee preferences, no one else but Starbucks sells slices of pumpkin loaf. If I was ever to indulge myself in something 'sweet' when ordering an iced coffee, I would always order a slice of the pumpkin loaf. Their pumpkin loaf is moist, not too sweet, and just one piece is enough to satisfy my craving for pumpkin. It is probably a good thing that the closest Starbucks is a 20 minute drive away because I have been able to severely limit my intake of their pumpkin loaf. Until now that is. No, there is not a Starbucks coming closer to where I live. But I recently found (on the internet of all places) a recipe that closely resembles the Starbuck's pumpkin loaf. It isn't exactly the same, but it is pretty gosh darn close as well as pretty gosh darn delicious.


Before making this recipe I must have looked at dozens and dozens of pumpkin bread and pumpkin loaf recipes. Expectedly the proportions of ingredients varied amongst the recipes, however, it was the type and combination of spices that were the most different. Some recipes called for only cinnamon, some included nutmeg, some had a combination of several spices, and some even said they left out spices when the making the bread (yikes). But it was the combination of cinnamon, ginger, cloves, and allspice in the Starbuck's like pumpkin loaf version that appealed to my taste preferences. After making this pumpkin loaf for the first time, I loved this spice combination but might even experiment with slightly increasing the amount of spices next time. Maybe.


All of the dry ingredients are blended together in a medium sized bowl and set aside. No sifting is required, but the use of a whisk helps to evenly distribute the dry ingredients.

This pumpkin loaf only takes 3/4 of a cup of pumpkin puree. I didn't think this was going to give it enough pumpkin flavor, but after tasting it, 3/4 of cup was the perfect amount. There is more granulated sugar than brown sugar in this recipe, but it is important to note that the recipe calls for dark brown sugar which adds an ever so slight molasses flavor to the bread.


The moistness for this loaf comes from two ingredients: eggs and vegetable oil. Four large eggs and 3/4 cup of vegetable oil are two of the wet ingredients. The eggs are combined with the sugars and vanilla before the dry ingredients are added. The vegetable oil and pumpkin puree are mixed in last.


This recipe makes one 9x5 inch pumpkin loaf. Even though recipes always say to prepare a loaf pan with butter/flour, I always, always use parchment paper. It makes one's baking life so much easier. My variation to the recipe was adding the sugar and the optional pumpkin seeds to the top of the loaf for added crunch as well as doubling the amount of vanilla. The loaf bakes in a pre-heated 350 degree oven for 65-70 minutes. It is a dense loaf and checking for doneness is really, really important. If it takes longer than 70 minutes in your oven, don't worry as it is a really moist loaf. And you definitely don't want an undone moist center.

Recipe
Pumpkin Loaf aka a close Starbuck's version (slight variation to a Starbuck's like version of the recipe found on the internet)

Ingredients
1 1/2 cups all purpose flour
1 teaspoon baking soda
1/2 teaspoon baking powder
3/4 teaspoon Saigon cinnamon 
1/2 teaspoon ground ginger
1/4 teaspoon ground cloves
1/4 teaspoon ground allspice
1/2 teaspoon Kosher salt
4 large eggs, room temperature
1 teaspoon vanilla
1 cup granulated sugar plus additional for sprinkling top of loaf
1/4 cup dark brown sugar firmly packed
3/4 cup canned pumpkin puree
3/4 cup vegetable oil (I used Crisco)
Optional: about a 1/4 cup pumpkin seeds

Directions
1. Preheat oven to 350 degrees.
2. In a medium sized bowl, combine flour, baking soda, baking powder, spices, and salt using a whisk. Set aside.
3. Beat eggs, sugars and vanilla on high speed in a standing mixer (or in a bowl using a hand mixer) for at least 30 seconds.
4. Add dry ingredients to the eggs/sugar mixture and mix until combined.
5. Add pumpkin puree and vegetable oil. Mix until combined.
6. Pour batter into a parchment paper lined 9x5 loaf pan. Bake for 65 to 70+ minutes or until top of loaf is brown and a cake tester is crumb or batter free.
7. Allow the bread to cool.
8. Cut into slices using a serrated knife and enjoy.


I love the taste of pumpkin year round, not only in the fall. Because it is a little harder to find pumpkin puree in the grocery stores in the spring and summer, I have a tendency to stock up on a few cans so I make pumpkin muffins, pumpkin pie or even pumpkin bread whenever I have a pumpkin craving. Thankfully the expiration date on the canned pumpkin is about a year out from the date of purchase. I have been known to put canned goods in places where I don't always look so I have thrown out more than my share of pumpkin puree over the years. That's what happens when you sometimes buy 'too' much of any one thing. Or when you can't remember if you did or did not have some in the house. But then in my very active imagination I sometimes think there will be a run on pumpkin puree at the holiday time and if I don't buy a few more cans than I need, well I might be forced to drive 40 minutes round trip to satisfy an off season pumpkin craving.


Saturday, September 7, 2013

Zucchini Bread

No eye rolling please as what I am sharing with you is not your ordinary zucchini bread recipe. I know there may be a few of you making some facial expressions right now because quite possibly we have all been served a zucchini bread that just didn't do it for us. Making us dread seeing it on the table or brought to us as a gift. For some, zucchini bread can even fall into the much aligned fruitcake category. But no one will be making any faces when you bring them or serve them a loaf of this zucchini bread. Even people who say they don't eat zucchini bread will become converts. I promise. Girl Scouts honor.


Yes, I know there are hundreds of zucchini bread recipes out there all claiming to be moist and delicious. But this recipe really does yield a most delicious and moist zucchini bread, one filled with raisins and toasted walnuts and enhanced with a generous teaspoon of cinnamon. The result is a zucchini bread perfect for breakfast (with a schmear of cream cheese), as a mid-day snack (with or without a schmear of cream cheese), or a before bed treat (definitely without the schmear of cream cheese).

The recipe makes two beautiful loaves. One for keeping, one for giving away. I am not big on freezing baked goods, with the exception of chocolate chip cookies. But I have known people who freeze loaves of zucchini bread. With a recipe is as simple as this one, and after having a taste of it warm, you might reconsider freezing a loaf.

The farm stand and road side stands are filled with beautiful zucchini now, making them a perfect end of summer, beginning of fall vegetable to cook, bake or make pickles with. And if you have friends how grew zucchini in their gardens, they are probably looking to give their bountiful harvest away. Which you can turn around and regift to them in the form of a freshly baked loaf of bread. The perfect win-win!


This zucchini bread calls for three cups of shredded zucchini. Depending on the size of the zucchinis you have, you will need anywhere from two to three of them. No peeling necessary as the skins remain on the zucchini when you grate them, adding bits of color to the finished bread. I used a hand grater to shred the zucchini but you can easily grate in your food processor.


Many zucchini breads have nuts in them, but not many of them have raisins. Whether you use golden or dark raisins or a combination of the two will not matter. The sweetness of the dried raisins further transforms this bread from ordinary into extraordinary.


All of dry ingredients, including the shredded zucchini, chopped toasted walnuts and raisins are mixed together in a large bowl. However, I like to first mix together the flour, sugar, baking soda, baking powder, salt and cinnamon before adding in the zucchini, raisins, and chopped walnuts.


In a separate bowl you will mix together three eggs, two teaspoons of vanilla and one cup of vegetable oil until well combined. You can mix the wet ingredients with a hand mixer or a whisk. When the eggs, vanilla and oil is thorough combined, you pour over the dry ingredients and stir using a wooden spoon until well blended.  The result will be a very dense, thick batter.


The recipe makes two loaves of bread if you are using 5x9 inch pans. If you line the pans with parchment paper the breads will be so easy to remove from the pan. When having to divide batter between two pans I like to weigh them on my kitchen scale so that both loaves come out looking exactly the same. Equally important is that your baking time will also be the same for both loaves. In 5x9 inch pans  at 350 degrees these loaves will bake anywhere from 55 to 65 minutes. I recommend you check them for doneness at 50 minutes, just in case your oven runs a little hot.


Recipe
Zucchini Bread (several adaptations to the Aunt Rose Zucchini Bread recipe shared by Dom DeLuise in his cookbook Eat This It'll Make You Feel Better)

Ingredients
3 cups all-purpose flour
1 1/2 cups granulated sugar, plus some additional for sprinkling on top of loaves
3 cups shredded, unpeeled zucchini (2-3 zucchini will yield this amount)
1 cup raisins (golden or dark)
1 cup walnuts, toasted and coarsely chopped
1 heaping teaspoon Saigon cinnamon
1/4 teaspoon Kosher salt
1 teaspoon baking soda
1 teaspoon baking powder
2 teaspoons vanilla
3 large eggs, room temperate
1 cup vegetable oil

Directions
1. Preheat oven to 350 degrees (F) and line two 5x9 inch loaf pans with parchment paper.
2. In a large bowl first mix in the flour, sugar, salt, baking soda, baking powder and cinnamon. Stir to combine. Then stir in shredded zucchini, raisins and nut. Mix to blend.
3. In a separate bowl, mix the eggs, vanilla and oil using a hand mixer or whisk.
4. Pour wet ingredients over dry ingredients and stir until thorough mixed.
5. Equally divide the batter into the two loaf pans (unless you have a really good eye, suggest you weigh them).
6. Optional: top loaves with a sprinkling of granulated sugar
7. Bake for 55-65 minutes until done. Use a cake tester or toothpick to test for doneness.
8. Remove from oven and let cool on a wire rack.


While fall is not yet officially here, September has already had a few sunny, crisp days. Without a doubt, the fall is my absolutely most favorite season and not just because my birthday falls in it (although that would be a good enough, slightly narcissistic though, reason to love it). No really, the weather (especially those cool perfect sleeping weather nights), the flowers, the changes to the landscape, the autumnal fruits and vegetables and of course, the holidays (Halloween and Thanksgiving) are all of the reasons that make me love this season more than the others. 

As I was driving the other day, the apple orchard/pumpkin farm had it's 'open' sign up. It may be a little too early, but I can hardly wait to fill the window boxes and decorate the porch with pumpkins. Of course, not the deep orange pumpkins, but the white, green and pale orange ones. And when combined with the flowering kale, they add such a great feel to the farmhouse here. Let's see how long I can wait until I go shopping for pumpkins. My guess is that it won't be too long.


Sunday, March 10, 2013

Garlic-Rosemary Focaccia

My addiction to carbohydrates most likely started when I was young or quite possibly it is in my DNA.  If I had to make a choice, I would say it is in my DNA, meaning I am not completely responsible for my bread intake. While I have come to learn there are good carbs out there to eat, my affinity is for the group of carbohydrates in the bread group.  For me, the meal at a restaurant could be over once the basket of warm bread and olive oil or butter is set on the table.  In spite of my love of breads, I have usually resorted to buying and not making them. Maybe I had been intimidated by bread baking or maybe I was just procrastinating. And then one day I discovered a Garlic-Rosemary Focaccia in one of Nick Malgieri's cookbooks and I thought why has it taken me so long to make something from one of my favorite food groups?


Finding a recipe for bread with garlic, rosemary and olive oil in it is liking finding a great pair of four inch black patent leather high heels on sale in my size no less.  Yes, my love of bread is ranked just slightly below my love of shoes.  In my world there is no such thing as too much of either although if I had to cut back on something it probably would be bread. But seriously I thought making bread was a little difficult but making focaccia completely changed that perception and was a paradigm shift that I never thought would happen. Yes, shift really can happen, well for most of us anyway.


If you don't have a thermometer I would encourage you to buy one just to ensure you get the water temperature right.  If you have a meat or candy thermometer either will work.  The yeast and three tablespoons of olive oil are added to the 110 degree temperature water, whisked together and then set aside.

This past summer when I moved into this little farmhouse I planted some rosemary. Although we have had alot of snow this winter, the climate near the ocean is milder than in the midwest so my rosemary bushes have not only survived but they have thrived.  There is something seductive about the smell of fresh rosemary, okay maybe seductive is too strong of a word, maybe I should have said it is intoxicating.  For this recipe you will need two tablespoons of freshly chopped rosemary.

Next to rosemary, garlic is my next favorite food aroma. The smell of freshly chopped garlic, garlic roasting in the oven or garlic being sautĂ©ed in olive oil, well this would be intoxicating too.  This recipe uses eight cloves of garlic chopped to a mince.


Five cups of flour and two teaspoons of Kosher salt are added to a large bowl.  When measuring flour add the flour to the measuring cup and then with a knife smooth over the top to get the perfect cup.  If you dip your measuring cup into the flour it will pack which means you will actually end up with more than one cup of flour.

The garlic and rosemary are added to the flour salt mixture.  Using a whisk or wooden spoon combine thoroughly.


The water-yeast mixture and milk are then added to the flour mixture.  Using a wooden spoon mix combine the wet and dry ingredients.  Once combined beat vigorously for about a minute until it all comes together in a ball.


Cover the bowl with plastic wrap and let sit for approximately one hour or until it has doubled in size.


Using an 11 by 17 inch jelly roll pan spread 1 1/2 Tablespoons of olive oil over the bottom.  Remove dough from bowl and using your hand press on dough so the pan is covered completely.  If the dough is resisting, let it set for a minutes before continuing to press and stretch it out.  Once it is all spread out, use your thumb to make indentations every two inches.


Top the dough with 1 1/2 Tablespoons of olive oil and one teaspoon of sea salt.  Additional sprigs of rosemary can be be added as well.  Let the dough rest uncovered for about an hour or until it has doubled in bulk.

Place in the lower third of the oven and bake at 450 degrees for 20 to 25 minutes.  If the is browning too quickly place another jelly roll pan underneath.  Rather than take any chances or getting distracted I begin the baking with the use of two jellyroll pans.


The focaccia bakes to a most beautiful golden brown.  The aroma coming out of the oven is incredible but the taste of this bread dipped in olive oil is so over the top delicious flavored.  The garlic and the rosemary don't overpower the focaccia but you can taste these flavors in each bite.  And as it turns out making this focaccia is pretty easy, really.

Recipe
Garlic-Rosemary Focaccia (slightly adapted version created by Nick Malgieri's "How to Bake" cookbook)

Ingredients
1 cup warm water (about 110 degrees)
1 envelope active dry yeast
6 Tablespoons of good quality extra virgin olive oil (divided)
5 cups unbleached all-purpose flour
2 teaspoons Kosher salt
2 Tablespoons chopped fresh rosemary
8 cloves fresh chopped garlic
1 cup whole milk
1 teaspoon of sea salt

Directions
1. Measure water in a bowl. Immediately whisk in yeast and 3 tablespoons of olive oil.  Set aside.
2. In a separate large bowl, combine flour with 2 teaspoons Kosher salt, rosemary and garlic.  Combine thoroughly.
3. Using a wooden spoon or spatula, stir the water-yeast mixture and milk into flour mixture stirring thoroughly until the flour is thoroughly moistened.  Then beat vigorously for one minute, as it will come together in a ball.  Cover the bowl with plastic wrap and let the dough rise  until it has doubled in bulk, about one hour.
4. Pour 1 1/2 tablespoons of olive oil onto a 11 by 17 inch jelly roll pan.  Spread olive oil with your fingers to cover the pan.
5. Turn the dough out to the bowl onto the pan and pat to press it to fill in completely.  If the dough resists let it rest for a few minutes before continuing to press it out to stretch it to fill the edges of the pan.
6. Dimple the surface of the focaccia with your thumb to poke cavities in the dough at 2 inch intervals.
7. Drizzle the remaining 1 1/2 tablespoons of olive oil and sprinkle with sea salt and fresh rosemary sprigs. 
8. Allow the dough to rise until doubled in bulk, about 1 hour.
9. About 20 minutes before baking set a rack in the lower third of the oven and preheat to 450 degrees.
10. Bake the focaccia for 20 to 25 minutes or until a deep golden color.  Lift a side of the focaccia with a spatula about 15 minutes into the baking to see if it is coloring too quickly.  It it is, slide another pan under it to insulate the bottom.
11. If you are serving immediately or serving later, slide the focaccia off the pan to a rack to cool.
12.  Cut into narrow long slices about 1 1/2 or 2 inches thick if serving for dinner or as an appetizer.  Serve with plenty of good quality olive oil for dipping or softened butter topped with sea salt. 
13. If making for sandwiches cut into the size squares of your choice, then cut horizontally when making the sandwich.
Note:  The focaccia is best on the day it is made.


Finding a new recipe that takes your cooking or baking to new places is like finding an interesting antique or treasure.  Just like I thought I had no interest in baking bread, I never in my wildest dreams thought that I would buy a set of real deer antlers.  But last fall I was up in Maine antiquing and there sitting on a table in an antique shop were a set of deer antlers.  I noticed them but kept on browsing.

When I am on the hunt for a particular item I tend not to see everything in front of me so I end up walking around and around an antique shop several times over. But as I kept walking around, I kept seeing the antlers. They were not anywhere on my list of must haves. Yet there was something alluring about them.  If they could have talked they would have been calling my name, no they would have been shouting my name. So about the fourth and last time around the antique store I decided I wanted them, that I needed to have them.  Suddenly all of my preconceived notions about antlers flew out the window. In some ways there is connection between these antlers and making of the focaccia.  After I let go of my preconceived notions about both of them, I wondered why it took me so long to open myself up to possibilities.