Showing posts with label Cookies. Show all posts

Monday, November 30, 2015

Brown Butter Sea Salted Cookies


As much as I would have loved to host the Thanksgiving family dinner this year, I have always longed to be able to run the Turkey Trot in the town where I live. Not that running a 5k was going to mitigate all of the holiday meal calories consumed (more than likely it would take an Ironman Triathlon for that), but a fresh air, running for a good cause start to the day felt good. Really, really good. Not even having to navigate around all of the strollers, walkers, dogs on leashes, groups walking 5 across, or the threat of an overcast, waiting to rain sky could spoil this Thanksgiving first. Already I am thinking ahead to next year, trying to figure out how to manage the possibility of hosting my favorite holiday meal and running this race. Because of course, I don't want to have to choose between the two.

And for the first time in years or I should say decades, I didn't succumb to the lure of all of those Black Friday sales or the endless number of emails offering all of those savings over the Thanksgiving weekend. That too felt good, surprisingly good actually. Over the years, but even more so recently, I have come to realize there is something to be said for savoring all of the sentiments of Thanksgiving for as long as possible. At least for a couple of days more.


Earlier this fall one of my best friends texted to tell me she had just tasted the ultimate, absolute best, most incredible cookie ever. The discovery of 'the' cookies sold by the Brown Butter Cookie Company occurred while she was on vacation in California. While she was savoring every bite of these cookies, I was left wondering 'so what does such a cookie taste like?' Not that I doubted her (okay maybe I did just a teeny tiny bit), but this was a rather significant claim. Fast forward to this past week when an unexpected, most generous gift of these cookies arrived. It took me all of ten seconds to tear open the box and taste one of these cookies. In a single bite, I learned what the ultimate, absolute best, most incredible ever cookie tasted like. After devouring one of the brown butter sea salted shortbread cookies, I thought 'okay now I need to find the recipe for cookies thousands are willing to drive hours to buy and many more thousands are willing to pay $1.00 per cookie for'. So I embarked on the search for this buttery, sweet, salty shortbread cookie. The looming holiday cookie season was an added incentive.


What I found on this search were a myriad of recipes all claiming to taste just like the ones sold at the Brown Butter Cookie Company. Ha! Like most shortbread cookie recipes the most significant difference amongst them is in the flour to butter ratio. These copycat recipes were no different. To make this slightly more challenging, this cookie had a tenderness to it I didn't think could be achieved by simply using only the recommended all-purpose flour. So I had a few decisions to make before attempting to replicate them. Or rather to get as close to them as possible.


For some unscientific, unable to explain from a culinary perspective reason, 6 ounces of unsalted butter and 12 ounces of flour made sense to me. Less butter or more flour just didn't seem right. But the browning of the unsalted butter would be key to the success of this cookie. Too light and the browning flavor would get lost, too dark and it would overpower the sweetness of the cookie. After listening to the which flour to use debate going on in my head, I decided to use a whole wheat pastry flour. If it didn't work, I would have wasted a stick and half of unsalted butter, 1/2 cup of light brown sugar, a teaspoon and a half of vanilla, some sea salt, some fine red Hawaiian sea salt, and 1 1/2 cups of the whole wheat pastry flour. Hardly the end of the world in terms of ingredient cost. Culinary ego and self-esteem were a completely different matter. Okay, yes I know, this is only a cookie.


This is a two bowl cookie recipe. The flour (the whole wheat pastry flour), the sea salt, and the baking soda are mixed together in one bowl. The browned butter, light brown sugar, and vanilla are mixed in another. And then the still warm browned butter mixture is stirred into the flour mixture just until combined. At this point you want the cookie to rest for anywhere from 15 to 30 minutes (I waited 20 minutes but a 30 minute wait would not be too long) to enable the flour to fully absorb into the butter as well as to allow the dough to cool slightly. As a side note, whole wheat pastry flour is not as fine as all-purpose flour, thus it is slower to absorb the liquid (the browned butter/brown sugar mixture) due primarily to the fiber it contains.


There are two benefits to using an ice cream scoop to form the cookies. In addition to creating uniformed sized cookies, it prevents the dough from being overworked and toughened. After removing the dough from the ice cream scoop, it is quickly rolled into a ball, placed on the baking sheet, and pressed down ever so slightly before being dusted with a very light sprinkling of fine Hawaiian red sea salt. Hint: A little of this salt goes a long way.


On a silpat or parchment paper lined baking sheet, the cookies are baked fro 13-15 minutes in a preheated 325 degree (F) oven (my baking time was 15 minutes). After transferring the baked cookies to a cooling rack, allow to completely cool before eating and/or packaging. Remember wait time is all relative. 

The cookie baking stars were aligned on the day I made these Brown Butter Sea Salted Cookies. These were definitely the dense, buttery, salty, melt in your mouth balls of deliciousness I hoped they would be. If the brown butter sea salted cookies from the Brown Butter Cookie Company can sell for $1.00 a cookie, these would be worthy of a 95 cents each price tag. Seriously.


These Brown Butter Sea Salted Cookies will definitely be making an appearance on all of my Christmas cookie platters. However, don't think of them as just another holiday cookie. No, these are kind of cookie you will want to bake year round. Once you taste them you will understand why they shouldn't be relegated to a single month a year. When the cookie connoisseurs in your circle of family and friends first see this rather simple, unassuming cookie, they may look at you and wonder what all of the fuss is about. But trust me, one bite and they will find them hard to resist. This is one incredibly delectable, decadent shortbread cookie. If you haven't noticed, browned butter is one of my favorite things. Fine red Hawaiian sea salt is now added to that list.

Recipe
Brown Butter Sea Salted Cookies (inspired by a recipe shared by Jason Hill)
Makes 15 cookies

Ingredients
12 Tablespoons (6 ounces) unsalted butter
1/2 cup light brown sugar, firmly packed 
1 1/2 teaspoons vanilla
1 1/2 cups whole wheat pastry flour (recommend Bob's Red Mill Whole Wheat Pastry Flour)
1 teaspoon baking soda
1/8 teaspoon sea salt
Hawaiian red sea salt, finely ground

Directions
1. Preheat oven to 325 degrees (F). Line a 12"x18" baking pan with silpat or parchment paper.
2. In a small saucepan, melt butter over low-medium heat. Continue cooking, stirring frequently until the melted butter is a deep golden color (approximately 8-10 minutes).  Remove from stove and pour into small-medium sized bowl.
3. Add light brown sugar and vanilla, stirring until brown sugar dissolves and is fully incorporated into the browned butter. Set aside.
4. In a medium sized bowl, whisk together flour, baking soda, and sea salt.
5. Pour butter/brown sugar mixture into the dry ingredients. Fold until combined, being careful not to overmix. 
6. Allow the dough to cool slightly and rest for 15-30 minutes before shaping into balls.
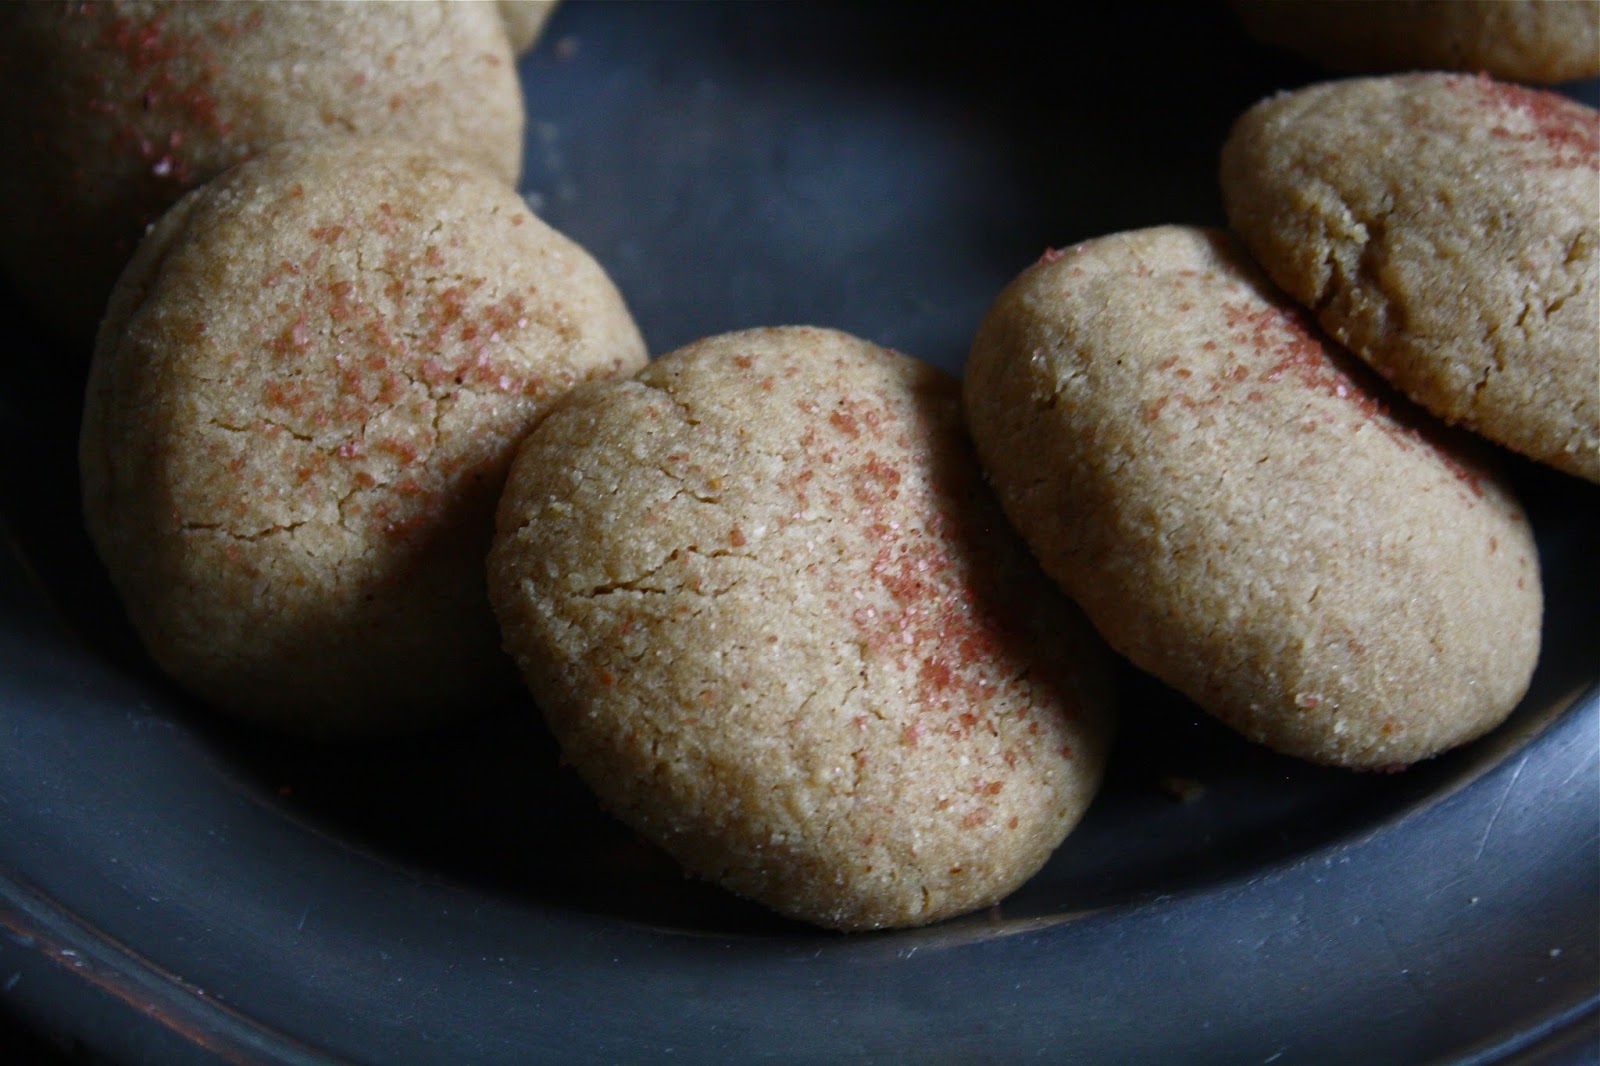
7. Using an ice cream scoop first and then your hands to make one inch bowls. Place on prepared baking sheet. Press down on each cookie ever so slightly. Very lightly sprinkle with red Hawaiian sea salt.
8. Bake for 13-15 minutes. Be careful not to over bake.
8. Transfer cookies to cooling rack. Allow to cool completely before eating or packaging.

Thursday, August 27, 2015

Salted Chocolate-Rye Cookies


After spending a long, whirlwind, weather perfect weekend exploring parts of Philadelphia and Annapolis, I haven't been able to get all of the 'experienced for the first time' images out of my head. From the historic sites in the Old City section of Philadelphia, to the vibrancy of the Reading Terminal Market, to the architecture of the buildings and homes on the narrow streets in Annapolis, to the breathtaking views on the Chesapeake Bay, my heart is still racing from the sheer beauty of the places with two very distinct personalities, yet ones retaining their Colonial days aura. On the food front, the cheesesteaks, tomato pie, and soft baked pretzels in Philly were delicious, however, the crab cakes made with fresh lump Maryland crab caused me to fall even more deeply, madly in love with Annapolis. Already I am wondering when I might be able to make a return trip there. 


After several days of absolutely gorgeous, sunny, low humidity, white cloud sky days out east, I returned back to the midwest to what felt like early October chilly weather. For a millisecond I thought 'how long was I gone for?' As much as I would selfishly like for summer to hang around for a little while longer, I must confess I can barely contain my enthusiasm for the arrival of my most favorite season. From the cooler temperature weather, to the changes in the colors of the landscape, to the return of my favorite holidays, to perfect sleeping weather, and to when just turning on the oven to bake is enough to take the chill out of the house, autumn is one of those seasons I wish could go on endlessly. While winter can sometimes be a bit of grinch and encroach on the final days of fall, it is a welcome blessing when summer graciously allows fall to begin a little early. 


I managed to read an entire book ("The Martian") during my weekend getaway (making my flights with stops being a little more palatable), flip through a few food magazines picked up in the airport on the flight out, and keep up with the myriad of food related emails populating my inbox. The book was exceptional, a must read in spite causing me to weep in public. The magazines were filled with ideas and inspiration. However, reading about one of Tartine's cookie recipes in an email made me incredibly grateful I had returned home to perfect baking weather temperatures. Before even unpacking my luggage, I went through my cabinets to make sure I had all of the ingredients for their Salted Chocolate-Rye Cookies. Discovering a quick morning trip to the grocery store to pick up some muscovado sugar was necessary, taking the the eggs and butter out of the refrigerator before ultimately heading to bed guaranteed I would be committed to making these cookies. 


Muscovado sugar is an unrefined dark brown cane sugar having a strong molasses flavor and slightly coarser than most brown sugars. With a texture similar to a wet, moist, sticky sand and having hints of fruit and toffee, muscovado has a more complex flavor profile than granulated sugar or light/dark brown sugars. But if it isn't something easily accessible in your grocery store, dark brown sugar can be substituted. However, if you can find organic dark brown sugar (versus the boxed or bagged 'normal' dark brown sugar) buy it as that would be a great substitute. Not exactly the same as muscovado, organic brown sugar is the next best thing. And it is what I used for these cookies (Trader Joe's has a great organic brown sugar).


I have recently become a big fan of the use of rye flour in pie crusts and other baked confections.  It so happens these cookies call for the use of an organic dark rye whole grain flour (Bob's Red Mill makes a great dark rye flour). Unfortunately there is no substitute for this flour. Once you start using it, more than likely it will become one of your flour staples. I promise.


There is a full pound of dark chocolate with 70-72% cocoa in these cookies. And in my world there is no such thing as too much chocolate. However, there are only four tablespoons of butter in these cookies. So on balance it's all good.


Tartine recommends melting the chocolate and butter using the double-boiler method. I used the microwave method. Use whichever method you have had the most success with. 

I am not the first one to share Tartine's Salted Chocolate-Rye Cookies on a food blog. But sometimes being late to the party is a good thing. Several foodbloggers shared the cookies flattened slightly after cooling (and some photos showed a pretty flat cookie). I wanted to make these cookies but I didn't want them to be flat. So I wondered if making a change to the chilling process (sort of but not exactly like the one used in Tara's Chocolate Chip Cookies) would ensure my cookies remain slightly puffy once they cooled to room temperature. If a picture tells a thousand words (or even just a few), these may have answered my question.


This is a very soft dough cookie when initially mixed. It is one that must be chilled for 30-45 minutes before it is scooped out into tablespoon sized balls (an ice cream scoop makes this easier). But the first chilling isn't enough to make it feasible to roll them into balls. Covering the cookie sheet filled with dough 'rough' balls with plastic wrap, they go back in the refrigerator for a second chilling. I waited three hours (because I had some errands to), however, I think a chilling time of at least an hour would work. Making perfect round 'balls' is easier if you allow them to sit out for about 15 minutes before rolling out the 'rough' dough balls.

Topped with flaky (Maldon) sea salt, the cookies are baked in a preheated 350 degree (F) oven for 8-11 minutes. My baking time was closer to 11 minutes, which was probably due to my slightly larger than one tablespoon sized balls of cookie dough.


Biting into this cookie is better than biting into your favorite fudgy brownie. The very slight exterir crunch gives way to an inside having an amazing creamy like, rich chocolately texture. These are definitely decadent, addictive cookies. Even if you think you do not need one more cookie in your cookie making rotation, especially one requiring dark rye flour and/or a dark brown organic sugar (things you might not normally buy) or made with a pound of chocolate, think again. And if you are thinking of waiting to make these cookies until the holidays, think again. 


I brought these cookies to my running group and several of them called me the 'devil'. While in another context I may have frowned at hearing that comparison, it was the best thing anyone said to me all day.

After making and tasting these cookies I ended up buying Tartine's third cookbook, one published two years ago. Again, a little late to the party. If my subtle attempts at encouraging you to visit Annapolis or read the book 'The Martian" are unsuccessful, I really, really hope you make these Salted Chocolate-Rye Cookies. And sooner rather than later. "Beware of missed chances; otherwise it may altogether too late some day."

Recipe
Salted Chocolate-Rye Cookies (ever so slight adaptation to the recipe in Tartine Book No. 3: Modern Ancient Classic Whole)

Ingredients
1 pound bittersweet chocolate (70-72% cocoa), chopped (I used Trader Joe's Belgium Dark Chocolate with 72% cocoa)
4 Tablespoons unsalted butter
3/4 cup whole-grain dark rye flour (recommend Bob's Red Mill)
1 teaspoon baking powder
1/2 teaspoon fine sea salt
4 large eggs, room temperature
1 1/2 cups organic brown sugar, muscovado sugar, or dark brown sugar, packed (I used Trader Joe's Organic Brown sugar)
1 Tablespoon vanilla
Flaky Sea Salt (recommend Maldon)

Directions
1. In a medium sized bowl, add in chopped chocolate and butter. Melt over medium heat in a saucepan filled with one inch of water brought to a simmer (be careful that bottom of the bowl is not touching the water). Stir occasionally until chocolate and butter are melted. Remove from the heat and allow the mixture to cool slightly. Alternately, melt chocolate in the microwave. 
2. In a small bowl, whisk together the rye flour, baking powder and fine sea salt.
3. Place the eggs in the bowl of a standing mixer fitted with a whisk attachment. Whip on medium-high, adding the sugar a few tablespoons at a time, until all the sugar is incorporated.  Turn mixer to high and whip until eggs have tripled in volume and turned very light yellow and fluffy (approximately 6 minutes).
4. Reduce the speed on the mixer to low and add melted chocolate, followed by the the vanilla. Mix to combine, scraping down the sides of the bowl as needed.
5. Add in flour mixture and stir until just combined. Note: The dough will be very soft.
6. Refrigerate dough until it is firm to the touch (approximately 30-45 minutes). Note: If cooled too long, the dough will be hard to scoop.
7. Remove chilled dough from the refrigerator. Using a tablespoon sized ice cream scoop, form rounded balls and place on a cookie sheet lined with parchment paper. Cover the dough balls with plastic wrap and return to the refrigerator for 60-180 minutes.
8. Preheat oven to 350 degrees (F).
9. Remove the cookie dough from the refrigerator and roll each dough ball until round and smooth. Place on a prepared baking sheet, spacing cookies 2 inches apart. Top each mound of dough with a few flakes of sea salt, pressing gently so it adheres. Note: Allowing the chilled dough balls to sit for 10 minutes makes rolling easier.
10. Bake 8-11 minutes or until the cookies have puffed up, have a smooth bottom and a rounded top with a few small cracks. Remove baking sheets from the oven and allow to sit for 2 minutes before transferring to a wire rack. Allow to cool completely. Serve immediately.
Note: Cookies will keep up to 3 days in an airtight container.


Images taken while walking in Central City Philadelphia and the Reading Terminal Market.


Thursday, August 13, 2015

Hazelnut English Chocolate Crisps


"Fantasy is a necessary ingredient in living, it's a way of looking at life through the wrong end of the telescope." (Dr. Seuss) In the childhood of my dreams I would come home from a long day of and even longer walk from school to find a June Cleaver clone standing with a plate of freshly made cookies. Warm out of the oven would be nice, but this fantasy isn't that fussy. It doesn't matter what kind of cookies they were, although they absolutely needed to contain some chocolate. Milk, dark, or white chocolate, it doesn't matter. However, as my cookie preferences have shifted over the years, there have been some revisions to this childhood school day fantasy. In its' current iteration Ina Garten has taken on the role of June Cleaver and the cookies...well they are still homemade with chocolate in them, but now they also contain some kind of nut. Walnuts, pecans, pistachios, almonds, macadamia nuts, hazelnuts, it really doesn't matter. Because one of the nice things about indulging yourself in a fantasy, without risking being perceived as someone who has completely lost touch with reality or worse yet, confuses reality with the fantasy, is being able to make changes to it as your life experiences change.


Whenever I see a recipe for a 'no-bake' cookie or bar (Rice Krispie Treats exempted), I am a little hesitant to try it. From some reason when I see 'no bake' I hear 'instant', as in 'instant pudding', 'instant potatoes' and all of those other 'instant' foods that really don't compare to their 'real' counterparts (with a few exceptions). For months now I have been fighting the urge to make a 'no-bake' cookie recipe published in Food and Wine sometime last year. But then I saw Ina Garten make a similar version of this cookie from her Make it Ahead cookbook and well, if it was good enough for Ina to make, how could it not be good? No let me take that back. How could it not be great? As an Ina seal of approval in 2015 might possibly be a more highly coveted endorsement than the Good Housekeeping seal of approval created more than a century ago.


After comparing the two recipes, I thought I would try my hand at creating a hybrid of the two while adding my own spin to it by combining my love of both chocolate and nuts into a single cookie. 


If making a 'no bake' cookie wasn't enough of a significant departure from my cookie baking preferences, then making one using corn flakes would make anyone question whether or not I had truly lost my mind. 'Breathe', I kept telling myself, 'If making cookies using cornflakes is good enough for Ina, it is good enough for you can too'. 

There are two kinds of nuts in this cookie: hazelnuts and pistachios. Roasting the hazelnuts further deepens the chocolate nuttiness taste to them as well as aids in removing their bitter tasting skins. There are also two kinds of chocolate: milk and dark. Use good quality chocolate, the kind you would use for candy-making, the kind that after melted it hardens to a beautiful sheen (in other words, the chocolate chips you use for baking don't necessarily lend themselves to having this cookie set up and look beautiful).


The cornflakes, dried fruits, salt and chopped nuts are mixed together in a large bowl. The melted chocolate is poured over the mixture and gently folded until everything is coated in chocolate. 

For more bite-sized Hazelnut English Chocolate Crisps use either a tablespoon or an small ice cream scoop and place on a parchment paper lined baking sheet. For larger crisps use two tablespoons and mound them onto the baking sheet.


Allow the crisps to come to room temperature and completely cool until you can easily remove them from the parchment paper before serving.


Waiting for them to harden may be the hardest part of this recipe.


Just like the size you make these crisps does not matter, the dried fruits you use does not matter as well (although I don't think dried apricots would be a good choice). Whether you choose to use a combination of golden raisins, cranberries, dried blueberries, and currants or simply choose one of them (hint: go with cranberries as a first option), these crisps are bound to be delicious. They are crunchy, salty, chocolately, nutty, and a little bit sweet. In other words, they are a cookie having the ability to satisfy almost every possible cookie fantasy. Honestly, as active as imagination operating in my head on  a regular basis, I wasn't even close to predicting how good, um, I mean great, these would be. Nor did I think they would be slightly addictive. And depending on your opinion of a cookie with the ability to become an obsession, this could be the only their only flaw.

The start of the new school year is just around the corner. For those of you with children, these Hazelnut English Chocolate Crisps might turn you into the parent of their fantasies (that is, if you are not that already). But don't let me mislead you into thinking these cookies are for children only. Make them for your partner and well, who knows what fantasies you will fill for them. Or better yet, what fantasy they will turn into a reality for you.

Recipe
Hazelnut English Chocolate Crisps (inspiration from Ina Garten's English Chocolate Crisps from the Make it Ahead Cookbook and Nicolas Berger's Milk Chocolate, Nut and Raisin Clusters shared in Food and Wine, February 2014)

Ingredients
2 3/4 cups corn flakes (recommend Kellogg's)
1/2 cup hazelnuts, toasted and chopped
1/4 cup pistachios, chopped
1/2 cup mixed dried fruit (raisins, cranberries, blueberries) or golden raisins or dried cranberries
1/4 cup currants (optional, but they add good flavor)
1/2 teaspoon kosher salt
7 3/4 ounces milk chocolate
5 3/4 ounces dark chocolate

Directions
1. Preheat oven to 375 degrees (F). Place hazelnuts on a small pan and place in oven for 7-8 minutes. Allow to cool. Rub hazelnuts in a kitchen towel to remove skins. Coarsely chop.
2. In a large bowl combine cornflakes, chopped hazelnuts, pistachios, dried fruit, currants, and kosher salt. Set aside.
3. Melt chocolate in either the microwave or over a double boiler. Note: If using microwave method, combine 3/4 of the chocolate and microwave at medium-high power in 30 second bursts, stirring in between, until melted (approximately 2-3 minutes). Stir in remaining chocolate until smooth.
4. Pour melted chocolate over the hazelnut/cornflake mixture. Using a spatula, gently fold until chocolate evenly coats cornflakes, dried fruit and nuts.
5. On a parchment paper lined baking sheet, scoop heaping tablespoons of the mixture.
6. Allow the crisps to cool completely. Peel firmed up crisps from the parchment paper and serve. Store crisps in a sealed container at room temperature.
Notes: (1) If you want them to be nut free, increase the amount of cornflakes to 3 cups. (2) You can replaced the combination of dried fruits, with a single dried fruit option. Dried cranberries and/or golden raisins would be two great options. 


Thursday, July 23, 2015

Tara's Chocolate Chip Cookies


Seemingly in an attempt to simplify the world and eliminate all shades of gray, we have been grouped into or defined by a myriad of classifications. Very few of us left high school without being willingly or unwillingly bound to one group or another. Almost daily there is some unscientific, yet ridiculously entertaining BuzzFeed survey feeding into our underlying need to feel connected to a group, regardless of how fiercely independent, unique, or different we believe ourselves to be. I can't help but wonder if we secretly wish these surveys would tell us something different, validate what we already know, or prove to some of the people in our lives they just don't really know us. It's okay if you don't want to admit being lulled into taking at least one of these surveys for any, some, or all of the aforementioned reasons. For those of you who have not yet been tempted, what are you afraid of? That the survey results will get hacked and everyone will discover your personal theme song, what country music cliche you exemplify, or which 80s movie girl you are? Spoiler alert: Everyone already knows. 

Regardless of our chosen profession, there are yet another set of groups to belong to, to define us. The Innovators, the Early Adopters, the Second Wave Followers, and the Laggards. The smallest of these groups are the innovators, the risk-takers, the ones quick to adopt new and innovative approaches or strategies. The Early Adopters, perennially young and restless are the ones paying attention to the discoveries and lessons learned by the innovators. The Second Wave Followers, skeptics who prefer to take the wait and see if this too shall pass approach before finally caving. And then there are Laggards, the traditionalists, content with the way things are, the last to change. In the food world, I find myself in awe of some of the innovators and going in and out of all of the other groups. Yes, even the laggards. In the spirit of self-disclosure and the risk of skewing to TMI, I must confess to being in a state of kicking and screaming over kale, adding sriracha sauce to almost everything, or topping my favorite foods with kimchi. 


However, I am happy to announce I have joined the group of early adopters of innovator foodblogger Tara O'Brady's chocolate chip cookie recipe. As loyal to and enamored as I have been with the Jacques Torres chocolate chip cookie recipe, I am now completely smitten with Tara's as close to chocolate chip cookie perfection as is possible recipe. They are the complete package. Beautiful, crispy around the edges, chewy in the center, chocolatey, addictive, incredibly easy to make. There is nothing high-maintenance about these cookies, yet you might think only high end kitchen tools and ovens could create such chocolate chip cookie perfection. 

Who knew that all it took was a large bowl, a whisk and a wooden spoon. Well Tara knew.


Chopping the chocolate might be the most time-consuming part of the recipe. If you have yet to give up using chocolate chips for your chocolate chip cookies, you should know chopped chocolate is not a passing, this too shall pass trend. There are not enough adjectives to describe the taste and texture Trader Joe's Pound Plus Dark Chocolate Bars bring to this cookie. I would put it in a throwdown against any of the high-end, pricey dark chocolate bars out there.

After reading the advice of other foodbloggers, I decided to wait to bake the cookies until they had a chance to chill in the refrigerator overnight. Forming the dough into balls, placing them on a parchment paper lined tray, and lightly covering them with a plastic wrap before chilling, makes baking the cookies feel effortless.

Approximately three tablespoons of dough goes into making the cookies. To ensure as uniform of a cookie as possible, I used an almost three tablespoon ice cream scoop and then rolled the dough into balls. However, you don't even need an ice cream scoop to make these cookies. 


A light sprinkling of flaky sea salt is the finishing touch.


The cookies spread when they bake. Allow for at least 3 inches of space between each of the balls of dough.


The cookies are baked in a preheated 360 (F) degree oven. Yes, 360 (not 350, not 375). My oven doesn't have a digital temperature setting, so I set it a smidge over 350 degrees. This lack of oven temperature precision may have been responsible for increasing my baking time by a couple of minutes. Before placing the cookies on a cooking rack, they remain on the cookie tray for two minutes.


One taste of Tara's Chocolate Chip Cookies and you won't be able to resist giving up your favorite chocolate chip cookie recipe. Unless of course, you take great pride being set in your ways or in belonging to the group known as the chocolate chip cookie laggards. If it has been awhile since you felt real bliss, make these cookies. Because cookie bliss is better than no bliss at all. And feel free to call them your own. 

Recipe
Tara's Chocolate Chip Cookies (inspired by Seven Spoons blogger Tara O'Brady's Basic, Great Chocolate Chip Cookies recipe)
Makes 28-32 large golf ball sized cookies
Updated December 2021

Ingredients
1 cup (225 g) unsalted butter, cut up into 8 pieces (European style butter highly recommended)
3 1/4 cups (415g) all-purpose flour
1 1/4 teaspoons baking powder
1 teaspoon baking soda
1 1/2 teaspoons kosher salt
1 1/4 cups (260g) light brown sugar, firmly packed (See Notes)
1/4 cup (60g) dark brown sugar, firmly packed 
1/2 cup (100 g) granulated sugar
2 large eggs, room temperature
2 teaspoons vanilla
12 ounces (340 g) semi-sweet or bittersweet chocolate, chopped (Recommend Trader Joe's Pound Plus Dark Chocolate)
Flaky sea salt for finishing (Recommend Maldon Sea Salt)

Directions
1. In a heavy bottomed saucepan, melt butter on lowest heat possible to ensure the butter does not sizzle or lose any of its' moisture. Stir occasionally. Once the butter has melted, remove from heat and set aside.
2. In a medium sized bowl, whisk together the flour, baking powder, baking soda and kosher salt. Set aside.
3. In a large bowl, pour in melted butter. Add brown sugars and granulated sugar, whisking until sugar has melted. 
4. Add eggs, one at a time, whisking after each addition.
5. Stir in vanilla.
6. Using a wooden spoon or silicone spatula, stir in flour mixture until barely blended and still a bit floury.
7. Stir in chopped chocolate until all ingredients are combined.
8. Using a large ice cream scooper (large golf ball sized), scoop dough and place on parchment paper lined cookie sheet. Leave at least 3 inches between the cookies. Note: For best results, the dough balls should be refrigerated at least 6 hours or overnight on a lightly covered tray.)
9. Before baking sprinkle each cookie with a bit of flaky sea salt.
10. In a preheated 360 degree (F) oven, bake cookies until the tops are cracked and lightly golden rotating pan halfway through the baking process. Baking time is approximately 10-12 minutes, however, mine ranged from 13-14 minutes. This could be due in part to not having a digital oven. Recommend checking the cookies at 10 minutes and making any time adjustments as necessary.
11. Allow cookies to cool on pan for at least 2 minutes before transfering to a wire rack to cool completely.
12. Enjoy immediately! Store cookies in a sealed container.

Additional notes: (1) You can alter the amounts of light and brown sugars used, but recommending not increasing your dark brown sugar to more than 1/2 cup or reducing the light brown sugar to less than 1 cup. The total amount of brown sugars used will be 1 1/2 cups or 320 g. (2) Chilling the balls of dough at least 6 hours or overnight is a game-changer. When baking each sheet of cookies (about 8-9 will fit on a sheet pan), keep the remaining dough( formed into balls) in the refrigerator. (3) Once chilled, cookie dough balls can be transferred to a freezer ziplock bag and stored in the freezer. When baking, remove frozen cookie balls, place on baking sheet, sprinkle with sea salt, and bake. Baking time may be one or two minutes longer. (4) If you are not a big fan of dark brown sugar, use all light brown sugar. The inspiration recipe called for the use of light brown sugar only.


The windmill in the Children's Garden at Morton Arboretum in Lisle, Illinois.