Showing posts with label Cookies. Show all posts

Friday, October 6, 2017

White Chocolate Dipped Cranberry Shortbread Cookies


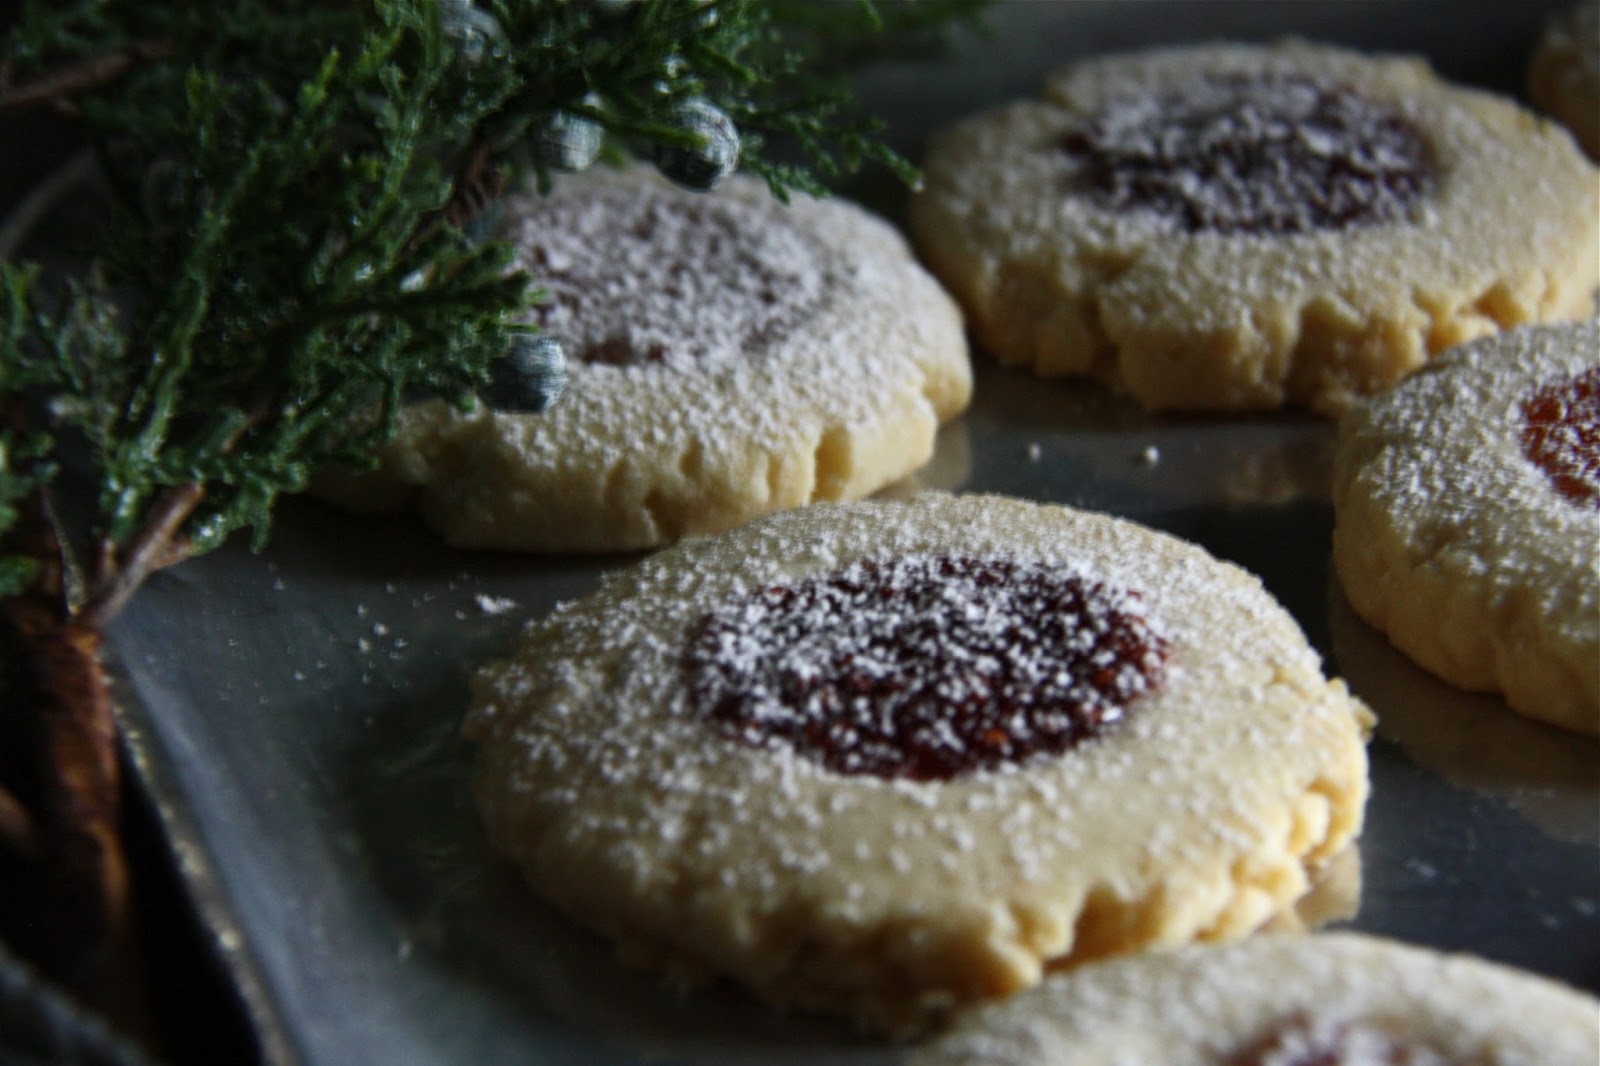
In the wide wonderful world of cookies, melt in your mouth shortbread cookies rank up there as my favorites. What is not to love about a buttery, borderline luxurious cookie that gets even better with age? Whether made simply with a dusting of sugar or dipped in white chocolate, left plain or studded with nuts, dried fruit or spices, shortbread cookies have an irresistible quality to them. They may one of the only cookies I find home made or store bought to be equally irresistible. Particularly if Walker's Shortbread is the store bought version. 


There are more versions of shortbread cookies on this blog than another kind of cookie. If hard pressed to pick a favorite, I couldn't. I love them all. Amy's Shortbread Cookies were one the very first cookie recipes posted to the blog. Made with chopped pistachios and white chocolate, they not only make an appearance around the holidays, but they have been known to make appearances year round.


Up until now I hadn't even considered tinkering with the original recipe. 


But then I had the idea of adding of dried cranberries to them. At first I thought about eliminating the pistachios, but then remembered just how much I love the flavor combination of dried cranberries and pistachios in the White Chocolate Dipped Cranberry and Pistachio Biscotti


Other than adding in a half cup of chopped dried cranberries to the batter, I reduced the amount of finely chopped pistachios from 1/2 cup to 1/3 cup. (See note in recipe.)

Some of my cranberries were finely chopped and some were a little more coarsely chopped. If using a crimped edge cookie cutter, finely chopping them will make the cutting process much easier.


Of the many things I love about this shortbread recipe is how easy the dough is to roll out as well as how forgiving it is. Scraps of dough can be balled up and rerolled out. Because they don't spread very much during the baking process, you can get alot of cookies on the baking pan.


In a preheated 350 degree (F) oven, the cookies bake for 12-15 minutes or until lightly golden on the bottom and edges. However, baking time will change depending on the size and thickness of the cookie. Thinner, smaller cookies will have a shorter baking time than a thicker, larger cookie. 


With or without the addition of melted white chocolate, these Cranberry Shortbread Cookies reminded me why it's a good thing I don't have shortbread cookie favorites.

You definitely need to make these White Chocolate Dipped Cranberry Shortbread Cookies for all of the cookie monsters in your life. Especially the shortbread loving kind. 
Recipe
White Chocolate Dipped Cranberry Shortbread Cookies (a variation to Amy's Shortbread Cookies)
Makes 2 to 3 dozen cookies depending on the size of cookie cutter used.

Ingredients
1 cup (230 g) unsalted butter, room temperature
1/2 cup (62 g) confectionary sugar
1 teaspoon high quality vanilla
2 cups (250 g) all-purpose flour
3/4 teaspoon kosher salt
1/2 cup (64 g) dried cranberries, finely chopped (could also use dried cherries)
1/3 cup (45 g) chopped pistachios, plus additional for sprinkling on top of cookies (Note: Could use up to a 1/2 cup of chopped pistachios)
9 ounces (255 g) white chocolate, coarsely chopped

Directions
1. Preheat oven to 350 degrees (F). Line a baking sheet with parchment paper. Set aside.
2. Sift together the flour and salt. Set aside.
3. In the bowl of a standing mixer fitted with a paddle attachment (or alternately in a medium sized bowl if using a hand mixer), beat butter and confectionary sugar at medium-high speed until light and fluffy (approximately 3-4 minutes).
4. Add vanilla and mix in.
5. With mixer on low speed, add sifted dry ingredients until incorporated.
6. Add in chopped pistachios and chopped cranberries. Mix until blended.
7. Divide dough in half. On a lightly floured surface, roll out one half of the dough to desired thickness (my preference is 1/4"). Using a cookie cutter of your choice, cut dough and place cookies on a parchment paper lined baking sheet. 
9. Bake cookies until lightly browned on the bottom (approximately 12-15 minutes, depending on the cookie's size and thickness). Allow cookies to cool for 3-5 minutes on pan before removing and transferring to a cooling rack. Allow cookies to cool completely before dipping in melted chocolate (approximately 30-45 minutes). 
10. Place a bowl filled with the chopped white chocolate over a pan of simmering water. Dip half or the top of the cookies into the melted chocolate. Place on a sheet of parchment paper. Note: While chocolate hasn't set, sprinkle with chopped pistachios if using.
11. Allow chocolate to set completely before serving and/or storing cookies in a tightly sealed container in a cool location.

Note: (1) I kept some of the cookies plan (no chocolate); dipped some of them in the white chocolate without topping with any chopped pistachios; and dipped some in the chocolate and finished with a sprinkling of finely chopped pistachios. (2) Cookies can be placed one inch apart on the baking sheet as they spread very little during baking.


Cape Elizabeth Light, aka Two Lights, in Cape Elizabeth, Maine

Thursday, June 1, 2017

Chocolate Cookie (Oreo) Bars


The long awaited new season of "House of Cards" came out on Netflix this week. Initially I had planned on binge watching it, but after viewing the trailer I am not certain I could handle the intensity of the full season of this slightly surreal political drama all at once. So I am going to attempt to pace myself and try making the the thirteen chapters last at least a month. If for some reason you have never watched or gotten into "House of Cards" you should. It's so crazy good. And in full disclosure, watching it may even drive you a bit mad. But shouldn't really great television have an impact on our thinking or even cause us to have an emotional reaction to the characters or the content? My definition of great television explains why I also find shows like "This is Us", "Homeland", "Breaking Bad", and "Game of Thrones"so compelling. As much as I am not a fan of a long hiatus between the seasons of some of my favorite shows (waiting is not one of my virtues), having a short reprieve from their heart racing intensity is probably a good thing. While genuinely well intentioned, I will let you know whether or not I ultimately succumbed to binge watching "House of Cards". Wonder what the odds in Vegas would be on this.


Clearly having chocolate and Oreo cookies in the house is dangerous as having access to a full season of television series all at once. And yes, for someone who much prefers home-baked cookies over store-bought ones, it might seem a little strange to you that I would bring Oreo cookies into the house. Although it's not strange for me at all. For as long as I can remember, I have had a weakness for this chocolate cookie with white filing confection. They are one of my guilty pleasures. Years back when Double Stuffs came out on the market I thought I had died and gone to heaven. Bring me a package of Double Stuff Oreos and I would go to the end of the earth for you. At least once.


Combining chocolate and Oreos together isn't exactly anything new. Chopping Oreos by hand, mixing them into melted chocolate, sprinkling them with sea salt, and then cutting them into bars may only be a slightly nuanced version of a Sea Salted Chocolate Covered Oreo. Eating an Oreo cookie dipped in chocolate feels like you are eating a cookie. However, eating a bar made of chocolate and chopped Oreos feels like you are eating a candy bar and a cookie without having to choose one over the other. 


I happen to like the taste of milk and dark chocolate blended together, but when you make these Chocolate Cookie (Oreo) Bars feel free use one or the other. Or if you don't want to choose, use an equal combination of both. For the past several years I have been melting chocolate in a heatproof bowl over a pot of simmering water. I may someday go back to it in the microwave, however, I seem to have more success tempering the chocolate and ensuring it has a glossy finish the 'old-fashioned' way. 

The majority of recipes I came across for Oreo Cookie Bars or Bark called for putting the Oreos in a plastic ziplock bag and using a rolling pin or meat tenderizer to 'crush' them. But I wanted these Chocolate Cookie (Oreo) Bars to be filled with cookie chunks and pieces, not cookie crumbs. So I coarsely chopped them with a knife. 


After mixing the coarsely chopped cookies into the melted chocolate, I poured the mixture into a parchment paper lined 9"x12"(half-sheet) baking pan as I wanted these bars to have a uniform thickness. Smoothing the top with an offset spatula helped to fully immerse the chunks of cookies into the chocolate. During the summer months when the humidity increases, exposed chunks of or even whole cookies will soften, ultimately spoiling the whole eating experience. If you ever took a bite of a 'soft' Oreo cookie, you know what I mean. Unless you are planning on binging on these Chocolate Cookie (Oreo) Bars in one day, keep the chunks of cookie hidden in the chocolate.


Rather than set up the chocolate by first putting it in the refrigerator, I let it sit at room temperature for somewhere between 20 and 30 minutes. Long enough for me to be able to pre-cut it into bars using a sharp knife. Once precut the pan went into the refrigerator for somewhere between 15-20 minutes. Long enough for them to set up a little more, but not too long for the the final cut to be made. After the second and final cut, return the bars back to the refrigerator for 20-30 minutes to ensure they would be easy to handle when being wrapped.


Did I mention the top of the not yet set Chocolate Cookie (Oreo) Bars were lightly sprinkled with some sea salt and the finely chopped crumbs from just one Oreo Cookie? It's a finishing touch detail taking them from ordinary to extraordinary.


These Chocolate Cookie (Oreo) Bars were wrapped in pieces of parchment paper and tied with baker's string. You have the choice to wrap or not wrap them. But they really do look pretty wrapped. #justsaying


If you are looking to serve an incredibly delicious, not for the faint of chocolate heart, semi-homemade cookie bar to your family and friends, make these Chocolate Cookie (Oreo) Bars. Cut them into squares instead of bars for the 'bite-sized' version. In other words, for those who might wan to pace themselves. Either way you decide to cut them, they are bound to quickly disappear. 

Recipe
Chocolate Cookie (Oreo) Bars

Ingredients
14 ounces milk chocolate, chopped
14 ounces dark chocolate, chopped
22-24 Oreo cookies (regular or Double-Stuff)
Sea Salt

Directions
1. Line a 9"x12" baking pan with parchment paper. Set aside.
2. Coarsely chop 22-23 Oreo cookies with a knife. Set aside. Finely chop 1 Oreo and set aside.
3. Place chocolates in the top of a double boiler or a bowl sitting over a pan filled with about an inch of water. Stir occasionally until chocolates are completely melted. Remove from heat.
4. Stir in the chopped Oreos. 
5. Pour chocolate and Oreo mixture into the prepared pan. Use an offset spatula to smooth out surface as much evenly as possible.
6. Lightly sprinkle top with sea salt and the finely chopped Oreo.
7. Allow the pan to sit at room temperature for approximately 20-30 minutes or until you can begin to cut into bars into 1"x 3" bars with a sharp knife. Note: If the cut doesn't remain, allow to sit slightly longer and recut.
8. Place the pan of partially cut bars in the refrigerator to harden. Approximately 15-20 minutes.
9. Remove from the refrigerator and use a sharp knife to make a final clean cut. Return cut bars to the refrigerator for an additional 20-30 minutes.
10. Remove chilled bars and wrap with parchment paper and baker's string. Serve and enjoy.
11. Store bars in tightly covered container.

Notes: (1) I used regular Oreos, but for bars with a greater amount of Oreo filling in them, use the Oreo Double Stuffs. If you want a Mint Chocolate Cookie (Oreo) Bar, use the Mint Oreos but omit finishing them with a sprinkling of sea salt. (2) Instead of using both milk and dark chocolate, can use either milk chocolate or dark chocolate only. (3) For slightly thinner bars, spread mixture out onto a large baking sheet. Either cut into bars or break into bark. 

Views of some of the statues and one of the formal gardens at The Mount in Lenox, MA. (May 2017)


Thursday, December 22, 2016

White Chocolate Dipped Cranberry and Pistachio Biscotti


"It's not how much we give, but how much love we put into giving." (Mother Teresa) I have been known to agonize over choosing the 'right' gifts for friends and family. Getting it right sometimes means getting them what they really want. Unless, as is sometimes the case, they don't really know. Over the years I have learned it's not really the thought that counts, but rather it's the thoughtfulness behind the gift that matters most. To truly be thoughtful requires one to listen, observe, and/or pay close attention. For years I used to give my brother-in-law the white the chocolate Santa or white chocolate Easter Rabbit because I thought he loved white chocolate. How or where I came to think this I honestly don't remember. But then one year, I learned what I had believed to be true wasn't. In a single moment my thoughtfulness turned into thoughtlessness. Recently a group of my friends were reminiscing about the gifts they had received in recent years and as far back as their childhoods. In almost every case, the gifts most cherished weren't necessarily the most expensive ones. In a few cases had very little monetary value. What made them 'heartwarming' memorable was the fact they were the things they had wished for, had talked about, or had seen, but for various reasons didn't buy for themselves. Someone in their lives was paying very close attention.


If there are people in your life who love to drink coffee and have a bit of a sweet tooth, these White Chocolate Dipped Cranberry and Pistachio Biscotti may be a perfect aka most thoughtful gift. And beyond being incredibly delicious, they just happen to be relatively easy and quick to make.


Today's modern version of biscotti are generally associated with the Tuscan region of Italy. Although the biscotti's origin can be traced back to Roman times. There are essentially two types of biscotti: ones containing butter and often dipped in coffee and ones made without butter for dipping into wine (i.e., vin santo). Biscotti or 'biscotto' derives from the medieval Latin word 'biscoctus': 'bis' (meaning twice) and 'coctum' (meaning baked). While there is a fair amount of variability in their ingredients (nuts, spices, dried fruit, chocolate), they must be twice-baked to be called biscotti. For more history on biscotti, click here.

Bring your unsalted butter and eggs to room temperature before making the biscotti dough. Here in the midwest at this time of the year, I generally take butter and eggs out of the refrigerator the night before.


Use either a knife or food processor to coarsely chop the pistachios.


The dried cranberries and chopped pistachios are stirred in the biscotti dough by hand.


The original recipe called for shaping the dough into a 13 inch long by 3 inch wide log and I complied. By making some slight adjustments to the length and width of the shaped dough (a tad longer, a tad thinner) the yield of biscotti will increase. More biscotti is better than less biscotti.

To give the baked biscotti a beautiful golden finish, the dough was brushed with an egg white wash before being placed in the oven.


In a preheated 350 degree (F) oven, the first baking of the biscotti is approximately 40 minutes (or until it has a beautiful golden finish).


Before cutting the biscotti for the second baking, it needs to rests for 20 to 30 minutes. Although most recipes call for cutting the biscotti on a slight diagonal using a serrated knife to cut the biscotti, I found using a really sharp knife created cleaner cuts and didn't crumble the ends of the slices.


The cut slices are returned to the baking sheet and baked for 15-20 minutes (or until they are crisp and golden). My baking time was closer to 20 minutes. Midway through the baking process, flip the biscotti to ensure they have their signature crispy texture.


After the biscotti slices have completely cooled, dip in the melted white chocolate and sprinkle with white sanding sugar. Personally I like the elegant white on white finished look of these biscotti, but if you want a more festive look sprinkle with red and/or green sanding sugar.


Allow the chocolate to set before serving, plating, and/or packaging. 


The flavor of the lemon zest is subtle but an absolutely necessary ingredient as it perfectly compliments the dried cranberries, pistachios, and white chocolate. These White Chocolate Dipped Cranberry and Pistachio Biscotti are crunchy but not 'hard' due to the use of butter in the dough. Dipping them in a cup of hot coffee is optional. So I encourage you to first take a bite to savor the biscotti's lusciousness before deciding whether or not to dunk in your favorite cup of coffee.

Although these White Chocolate Dipped Cranberry and Pistachio Biscotti will retain their freshness for a couple of weeks (if stored well), I seriously doubt they will. More than likely they will be devoured long before their freshness 'expiration' date. Of all of the baked goods you make as gifts this holiday season or serve to friends/family, these biscotti may be the most memorable.

Recipe
White Chocolate Dipped Cranberry and Pistachio Biscotti (slight adaption to Giada De Laurentiis's Holiday Biscotti recipe)

Ingredients
2 cups all-purpose flour
1 1/2 teaspoons baking powder
3/4 cup granulated sugar
1/2 cup (1 stick) unsalted butter, room temperature
1 teaspoon grated lemon zest
1/4 teaspoon kosher salt
2 large eggs, room temperature
3/4 cup pistachios, coarsely chopped
2/3 cup dried cranberries (or dried cherries)
1 egg white, lightly beaten
12 ounces good quality white chocolate
White sanding sugar

Directions
1. Preheat oven to 350 degrees (F). Line a baking sheet with parchment paper and set aside.
2. In a medium sized bowl, combine flour and baking powder. Whisk to blend.
3. In a medium-large bowl, beat butter, sugar, lemon zest, and salt until light and fluffy (approximately 3-4 minutes) in a standing mixer fitted with a paddle attachment or with a handheld mixer.
4. Beat in eggs, one at a time.
5. Add the flour mixture, beating just until blended.
6. Stir in the pistachios and cranberries.
7. Form the dough into a 13 inch long-3 inches wide log on the prepared baking sheet. Note: Consider shaping the dough into a 15 inch long-2 1/2 inch wide log to increase the yield on the number of biscotti. 
8. Brush the dough with the lightly beaten egg white.
9. Bake until lightly golden, approximately 40 minutes. Remove from oven and allow to cool for 20-30 minutes.
10. Using a sharp knife, cut the log on the diagonal into 1/2 inch to 3/4 inch thick slices. 
11. Arrange the biscotti, cut side up on the baking sheet.
12. Bake the biscotti for approximately 20 minutes or until they biscotti are crisp and pale golden. Note: Turn the biscotti over at the midway baking point.
13. Transfer the biscotti to a cooling rack. Allow to cool completely.
14. Melt chocolate in a bowl set over a saucepan of simmering water.
15. Dip top half of the biscotti into the melted chocolate.
16. Sprinkle with sanding sugar before chocolate sets.
17. Allow chocolate to set before serving. 
18. Store biscotti in a tightly sealed container and/or wrap in cellophane bags.

Notes: (1) I dipped half of the biscotti in the melted white chocolate, but you can dip the entire top/flat side of the biscotti for a different look. (2) During the second bake, I placed the biscotti directly on the baking sheet (no parchment paper) to get an even golden crisp. (2) Cooling time between the first and second bakes is recommended to be 20 to 30 minutes. Would recommend cutting closer to 20 than to 30 minutes to get the cleanest cuts.

Monday, November 28, 2016

Swedish Butter Cookies


"The first fall of snow is not only an event, but it is a magical event. You go to bed in one kind of world and wake up to find yourself in another quite different, and if this is not enchantment, 'where is it to be found?' J.B.Priestley Wreaths are on the house windows, cedar roping is draped around the front door, urns are filled with greens, Christmas stockings hung by the fireplace, and holiday pillows scattered in rooms throughout the house. The extent of my holiday decorating efforts this past weekend. The trees, lights, ornaments, chalkware Santa collection, indoor wreaths, and goodness knows how many other holiday items are still up in the attic waiting. Waiting for me to get in the decorating spirit. Not yet sure when that will happen. Quite possibly I am waiting for the first snowfall. While I may not yet be inspired to get the house dressed in all of its' Christmas finery, I have had an overwhelming urge to begin making an assortment of cookies, chocolate covered caramels, marshmallows, chocolate covered coconut balls, toffee, chocolate bark, orangettes, and of course, candied walnuts and pecans. There is only one problem with all of this unbridled enthusiasm. I need to reign my baking desires in as its' still too early and too dangerous (at least in my world) to begin putting the boxes of homemade confections together.


Sometime next week I will put together a recipe recap of some of my favorite cookies and candies while interspersing my blog posts with a couple of new holiday cookie recipes. Like this one. On Thanksgiving, my sister had made these Swedish Butter Cookies (Vaniljkakor), only she called them her version of a Kolachke. I suppose it's because these Swedish Butter Cookies closely resembled a Kolachke. Like the apricot and/or poppy seed filled ones my Polish father lovingly made every Christmas. The Kolachke is usually made with a cream cheese or yeast rolled out dough and filled with either a jam/preserve or cream cheese filling. These cookies are made with butter. While I am calling these bites of deliciousness Swedish Butter Cookies (Vaniljkakor) they are actually missing an ingredient found in the genuine, bona fide, official ones. My apologies to those of you who treasure your grandmother's Swedish Butter Cookie recipe, the family heirloom passed down through the generations, and are a little concerned this derivation lacks some authenticity due to the missing egg yolk. But whether I named these cookies Swedish Butter Cookies or Kolachkes I would be a little bit right and little bit wrong, invariably upsetting someone. Although less wrong on one of them. Seriously though, I am not convinced anyone would notice the missing egg yolk. Heck, if their centers weren't filled with jam, they might easily pass as Scottish or Irish Shortbread cookies.


We all need these cookies in our lives.

The cookie batter has only five ingredients: unsalted butter, confectionary sugar, vanilla, kosher salt and sifted all-purpose flour. Having room temperature butter is key when assembling the batter.

While I usually prefer to make a cookie dough in my standing mixer (with paddle attachment), the dense cookie batter came together perfectly using a hand held mixer.

I used a 1 1/4" ice cream scoop to form the dough balls, although once scooped I didn't roll them into balls. If I had, the finished edges of my cookies would have been smoother. Personally I wanted a more 'rustic, ragged edge, homemade' versus 'bakery finish' look to my cookies. I used a glass to flatten them to approximately 1/3" thickness and a shot glass (instead of my thumb or a spoon) to make the indentations to hold the preserves.


I used apricot and raspberry jams for these cookies. But feel free to use any of your favorite preserve flavors. The Bonne Maman preserves are my store-bought go-tos. Crane's Orchard's preserves are my new favorite small batch go-tos. The well of each cookie will hold about 1 to 1 1/2 teaspoons of preserves.

In a preheated 325 degree (F) oven, the cookies bake for 18-22 minutes or until set and very lightly brown on the bottom.


The Swedish Butter Cookies are sprinkled with confectionary sugar once they have cooled to room temperature. If sprinkled while still warm, the sugar will melt.

The melt in mouth buttery richness of these crisp, vanilla and preserve flavored cookies is what makes them addictively delicious. They are destined to be your new favorite cookie! How good are these cookies? Well if cookie maven Dorie Greenspan, cooking goddess Ina Garten, or pastry chef extraordinaire Mindy Segal read my blog, I would secretly be wishing they would invite me to bake with them someday after they make and taste these cookies. They are that kind of good.

Of all of the cookies I make for the holidays, these by far are one of the easiest. Additionally, I would rank them really high on the best tasting cookie list. If you are looking for one of those 'gets rave reviews' cookies, make a batch of these Swedish Butter Cookies. Like now. Then make another batch or two when you are putting your cookie exchange or holiday cookie platter/packages together. You need these Christmukkah cookies in your life sooner rather than later. Just like I need a little snow, sooner rather than later, to get me started on decorating the house for the holidays.

Recipe
Swedish Butter Cookies 
Makes about 18 cookies

Ingredients
1 cup unsalted butter, room temperature
1/2 cup confectionary sugar
2 to 2 1/2 teaspoons vanilla
2 cups all-purpose flour, sifted
1/4 teaspoon kosher salt
Approximately 1/2 cup of Apricot, Cherry, Mixed Berry, Peach, and/or Raspberry Preserves, divided
Additional sifted confectionary sugar for dusting

Directions
1. Preheat oven to 325 degrees (F). Line two baking sheets with parchment paper and set aside.
2. In a standing mixer fitted with a paddle attachment or with a hand mixer, beat butter, confectionary sugar and vanilla at medium speed until light and fluffy. 
3. Beat in flour and salt on low speed. Mix until blended.
4. Using an ice cream scoop, create generous 1" balls of dough. Flatten to about 1/3" thick. Using the bottom of a flat bottomed shot glass, press dough down in center to make a well. Note: If you want a more finished edge to your cookies, roll the balls of dough before pressing down with the glass.
5. Fill each well with 1 to 1 1/2 teaspoons of preserves.
6. Bake 18-22 minutes until set, but not browned. Remove cookies from pan and transfer to a cooling rack. Allow cookies to cool. Note: Rotate cookie sheet halfway through baking.
7. When cool, sift with confectionary sugar. Serve immediately.
8. Store in a tightly covered container. Note: May need to re-sprinkle with confectionary sugar to refresh if covered for more than 24 hours.


Barager Pines, a Christmas Tree Farm in Fennville, Michigan (November 2016)