Monday, June 10, 2024

Roasted Bone Marrow w/ Gremolata &/or Roasted Tomato Vinaigrette


"When someone cooks for you, they are saying something. They are telling you about themselves: where they come from, who they are, what makes them happy." (Anthony Bourdain). Serving good food beautifully presented and enjoyed by everyone at the table has always made me happy. But making simple food look and taste like something you might find at a (really good) restaurant or see in a magazine gives me a level of excitement akin to taking in a breathtaking landscape or wandering through an antique store filled with early 19th century treasures. After ordering roasted bone marrow, not once but twice, while in Jackson Hole, Wyoming I was delirious. And not just because of the guilt-free moments of savoring the rush of fatty pleasure. It was discovering how unbelievably easy this sexy, rich, and impressive appetizer was to make. When the roasted bone marrow was spooned over some grilled bread and topped with either the gremolata or roasted tomato vinaigrette my taste buds were sent into a euphoric state. It might have been after the second bite when I decided Roasted Bone Marrow would become one of the happiest, most satisfying starts to my future dinner parties. 


It wasn't long after I returned home from the best-ever western adventure that set off to learn all I could about roasting bone marrow. As it turned out, high heat, Kosher salt, black pepper and fresh herbs (thyme being the one used most), beef marrow bones cut lengthwise, slices of grilled bread, and a cast iron pan was all that was needed to make one of those 'best things I ever ate' kind of dishes. 


Finding a source for the lengthwise cut beef bones was much easier than I thought it would be. Meat markets and butcher stores are the best places to find them. If you are lucky, they will already be cut lengthwise. If they aren't, kindly ask the butcher to cut them for you. Cutting the bones lengthwise is often called the canoe cut. This cut makes it easier to get at the roasted marrow with a spoon. You can roast bones cut crosswise (about 3 inches in height), but then you need one of those fancy spoons to get at the roasted marrow. Note: Approximately three pounds of beef bones will give you enough for two hearty, appetizer servings. 

The seasoned bones are roasted in an oven preheated to 450 degrees (F). Preheating is key as you want your oven to be really hot when you put your cast iron pan in the oven. Roasting time is short. Somewhere between 20-24 minutes. Or until the ivory white bones are lightly browned and only some of the fat from the marrow will be in the bottom of the pan. If cooked too long, too much fat will be rendered from the marrow. And you want as much marrow left in the bones as possible!

Before you roast your beef bones, make the gremolata and/or the roasted tomato vinaigrette. Again these are very easy to make. If you are making Roasted Bone Marrow for the first time, I highly recommend you make only the gremolata. Eating the roasted bone marrow on (good quality) bread lightly grilled along with the refreshing flavor of the gremolata best showcases the richness of the marrow.


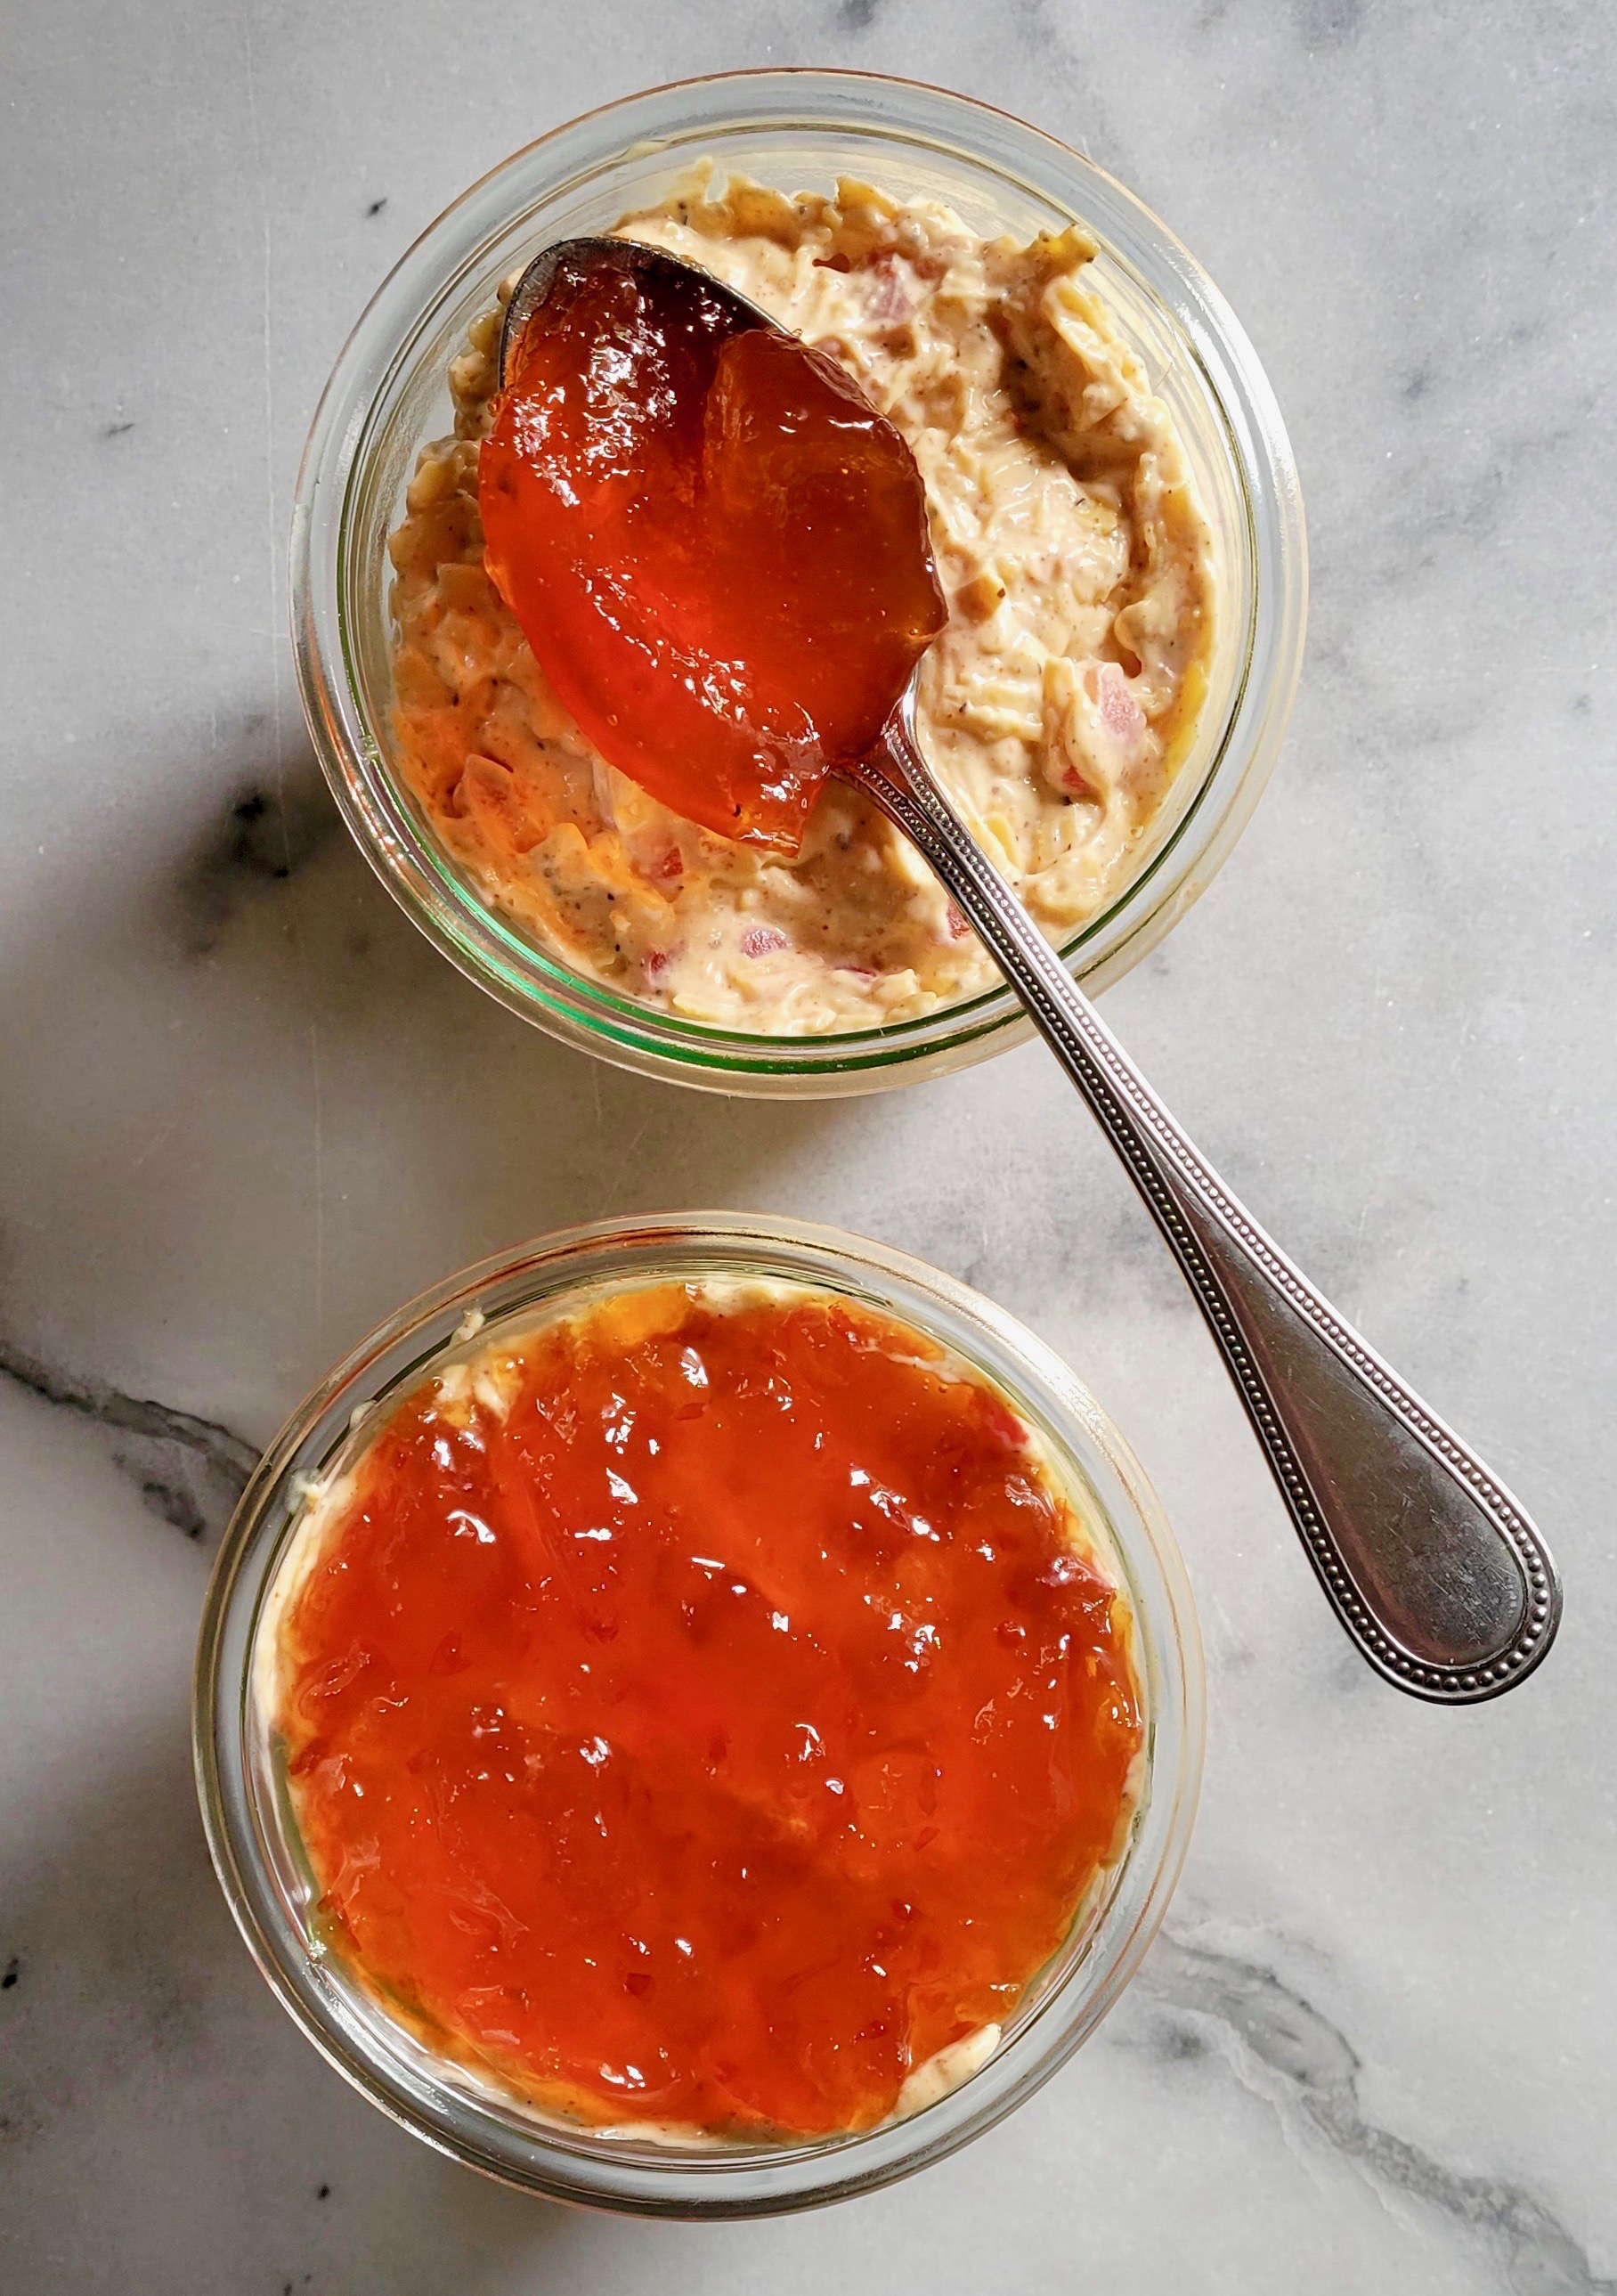
If you have had roasted bone marrow before, serve it with both the gremolata and the roasted tomato vinaigrette. You won't be sorry. Neither will your guests.

If you are looking for a mouthwatering, impressive, decadent, irresistible appetizer, make this Roasted Bone Marrow w/ Gremolata &/or Roasted Tomato Vinaigrette. It happens to be one of those appetizers made with simple ingredients yielding insanely delicious results. There's a reason its' been enjoyed for centuries and has become a featured appetizer on the menus of some really great restaurants. Once you taste it, you will understand why.

Recipe
Roasted Bone Marrow w/ Gremolata &/or Roasted Tomato Vinaigrette
Serves 2 as an appetizer

Ingredients
3 pounds beef bone marrow, split lengthwise (recommend 5" to 7" inch pieces) - See notes
Kosher salt
Black Pepper
3 teaspoons freshly chopped thyme, divided

3/4 cup Italian parsley, minced
1 garlic clove, minced
Zest of a large sized lemon (about 2 teaspoons)
1/4 teaspoon Kosher salt
1 Tablespoon olive oil

24 cherry tomatoes
1 Tablespoon olive oil
1 large clove garlic, minced
1/2 teaspoon Kosher salt
1/4 teaspoon black pepper
1 Tablespoon red wine vinegar
1-2 teaspoons sugar

Grilled baguette sliced on the diagonal or ciabatta slices (buy a good quality bread)

Directions
Roasted Bone Marrow
1. Preheat oven to 450 degrees (F).
2. In a medium-large sized cast iron pan, place the bones (cut side up) in. Season with Kosher salt, black pepper, and two teaspoons of the chopped thyme.
3. Roast for 20-24 minutes or until the bones are lightly browned. Note: Some of the fat will render from the marrow, but the majority of the marrow should stay in the bone.
4. Transfer roasted bone marrow to serving platter. Sprinkle with remaining one teaspoon of the chopped thyme (or with thyme sprigs).
5. Serve with grilled baguette or ciabatta slices and sides of gremolata and/or roasted tomato vinaigrette.

Gremolata
1. In a medium sized bowl, mix together the parsley, garlic, lemon zest, Kosher salt, pepper and olive oil. Stir to mix. Keep at room temperature until ready to serve. Note: Can be made shortly before or an hour before ready to serve.

Roasted Tomato Vinaigrette
1. In a medium sized skillet, heat the olive oil or medium-high heat. Add in the cherry tomatoes. Cook the tomatoes for about 3-4 minutes (or until they begin to soften). Note: If you can press down on the tomatoes and they start to break up, you are ready to add the additional ingredients.
2. Add in the minced garlic, salt, pepper, sugar and vinegar. Cook for another 2-3 minutes (stirring frequently).
3. Transfer the mixture to a small food processor. Process until the vinaigrette has a chunky, but blended consistency. Let cool before serving. Note: It can be made early in the day or the night before. Cover and refrigerate until ready to serve.

Notes
1. Most butcher shops sell split beef marrow bones. If the bones are left whole, ask your butcher to cut them, preferably lengthwise. 2. Instead of plating the roasted bone marrow, serve in the cast iron pan it was roasted in. Let everyone dip their bread in the drippings!


Mormon Row, Grand Teton National Park, May 2024

Tuesday, June 4, 2024

Lemon Blueberry Muffin Bread


I am still dreaming about our recent trip to Yellowstone and the Tetons. From the surreal, jaw dropping landscapes to the abundance of wildlife, I was in a continual state of visual overload. Every day brought unforgettable images, experiences, and moments. More than anything, this trip affirmed that I am a mountain girl at heart. The mountains are my happy place. Already I wondering how long it will be before I return to those spectacular, beautiful, stunning, awe-inspiring vistas. As John Muir once said 'The mountains are calling and I must go." But certainly not before I tell you about this dreamy, crunchy, densely blueberry filled Lemon Blueberry Muffin Bread. This absolutely delicious bread just might have affirmed I am more of a bread girl than a muffin girl. What is not to love about a thick slice of sugar topped, lemony, fruit filled, moist, dense crumbed Lemon Blueberry Muffin Bread? It's one of those breads that will have you swooning before you take a second bite.


And simplicity strikes again. As this is a one bowl, one pan bread. The assembly is quick and the baking time just slightly over an hour. If made early in the morning, you will be enjoying it before noon. If made the night before, you will have ensured a perfect start to the day. With blueberry season only just beginning, you won't be able to resist making this Lemon Blueberry Muffin Bread on a regular basis. It might even be the best hostess gift you can bring when visiting a friend.

To achieve the perfect lemony flavor, all you need is the zest from one medium sized lemon. The amount of fruit you use will depend on how dense you want your bread. Don't use any less than 2 cups or any more than 2 1/4 quarter cups. Mixing the blueberries and flour into the batter at the same time, helps to coat the blueberries and prevent them from falling to the bottom of the bread. You could toss the blueberries with some of the flour before mixing everything together, but you don't have to.


For me, a thick batter is a sign of a great bread. And this batter is lusciously thick.


If there is one thing that matters when making this Lemon Blueberry Muffin Bread, it's the type and size of pan. Definitely use metal, not glass. And using an 9" x 4" (not a 9" x 5") baking pan will yield a bakery perfect kind of loaf. I have found the pullman loaf pans (like this one), make the best-ever quick bread. If you like making quick breads, this pan will be put to great use.

Begin preheating your oven right before you begin measuring and mixing the ingredients. By time you are ready to put the bread into the oven, your oven will be perfectly heated. Baking time ranges from 60 to70 minutes. Begin checking for doneness at the 60 minute mark as ovens can vary (especially it's been awhile since you had it calibrated). I always put my baking pan on a sheet pan. Not only in case there is any spillage, but it makes it easier to rotate the pan midway through the baking process.

This Lemon Blueberry Muffin Bread is as scrumptious on day one as it is on day four (if it lasts that long). Keeping the top of the bread uncovered (at room temperature) will help to keep its' sinfully good crunchy, sugary top. To extend the life of the bread, you can always store it in the refrigerator. Just reheat a thick slice in the microwave before enjoying.

If there was ever a bread you will dream about, it will be this Lemon Blueberry Muffin Bread. There may be no sweeter way to start your summer.

Recipe
Lemon Blueberry Muffin Bread
Serves 10-12

Ingredients
1/2 cup (113g) unsalted butter, melted
3/4 cup (150g) granulated sugar
Zest of one medium sized lemon
1 cup (225g) plain, unsweetened Greek yogurt
2 large eggs
2 teaspoons baking powder
1/2 teaspoon baking soda
1 teaspoon Kosher salt
2 cups (260g) all-purpose, unbleached flour
2 to 2 1/4 cups (285-320g) fresh blueberries (I used 2 1/4 cups)
3 Tablespoons sparkling sugar

Directions
1. Preheat oven to 375 degrees F. Line an 9" x 4" baking pan with parchment paper. Butter any exposed sides of the pan. Set aside. Note: Pan measurements taken from the bottom of the pan, not from across the top of the pan.
2. In a medium sized bowl, whisk together the melted butter, sugar and zest.
3. Add in the yogurt and eggs. Whisk until well blended.
4. Sprinkle the baking powder, baking soda and Kosher salt on top of the batter. Whisk in.
5. Add in the flour and blueberries together. Use a spatula to mix in. Batter will be very thick.
6. Spoon batter into the prepared pan.
7. Smooth the top of the batter with an offset spatula. Sprinkle with the sparkling sugar (use it all). Let batter rest for 10 minutes before putting into the preheated oven.
8. Place baking pan on a baking sheet. Place in oven and bake for 60-70 minutes. Begin checking for doneness at 60 minutes (a skewer inserted into the center of the bread should come out clean or with a couple of crumbs.
9. Remove from the oven and place baking pan on a cooling rack. Let bread come to room temperature before removing from the pan and cutting into thick slices.
10. Store bread (uncovered) at room temperature to ensure the top of the bread remains crunchy. Alternately store in the refrigerator. Bread will be good for 3-4 days at room temperature and up to a week if refrigerated.
11. When serving, cut into thick slices! Slathering on butter is optional!

Notes: (1) I used Fage Total (5%) Plain Yogurt. (2) King Arthur is my preferred flour.


Grand Teton National Park, May 2024

Tuesday, May 14, 2024

Brown Butter Espresso Brownies


Before there were food blogs, food magazines, cookbooks with high gloss and styled photos, Tik-Tok videos, Instagram reels, there were cookbooks without color photographs. Sometimes there was a pencil drawing next to the recipe. However, those black and white drawings never really showed you what the finished dish should look like. Somehow generations of us managed to learn to cook and bake from those photo-free cookbooks. If you lived in the US, ingredient amounts in those recipes were (and in large part still are) measured in teaspoons, tablespoons, and cups. In recent years, there has been another trend in the food world. Recipes are now listing ingredient amounts in both the 'traditional American' way as well as in the 'rest of the world' way of grams and liters. Even when both measurements are provided, many of us continue to use the one we grew up with. So this is the part of the blog post where I tell you the recipe below for these rich, fudgy, glossy, chocolatey brownies is a big departure from what you have come to see here. The ingredient amounts are listed in the 'rest of the world' way. For those of you who use a kitchen scale to bake, this is no big deal. But for those of you don't, let me just say this is THE brownie recipe worth the price of kitchen scale. Because next to the recipe for the Decadent Chocolate Brownies aka Outrageous Brownies, this is the only other brownie recipe you need in your life. Or maybe it should be the only one.


The depth of chocolate flavor in these incredible, dense, thick Brown Butter Espresso Brownies is out of this world. Between the browned butter, the instant espresso, the melted chocolate in the batter, the Dutch Processed Cocoa, and the chocolate chips studded throughout the brownie, one bite of this brownie will feel akin to having a religious experience.


In addition to weighing out the ingredients, there is another key to creating this throw down, state fair blue ribbon worthy brownie. Baking them in a metal (aluminum) 8 inch square baking pan is a must. The thickness of the brownie adds to their allure and addictiveness.


To further enhance their fudgy texture, store the brownies in the refrigerator and serve them lightly chilled. They probably won't last more than a day or two, but if kept covered and chilled in the refrigerator they will be good for at least a week. Perfect in flavor, texture, and appearance, these luscious Brown Butter Espresso Brownies are worthy of being given some of the highest accolades possible. Best, best-ever, heavenly, ambrosial, and divine are just a few options. 

The shine on these brownies further adds to their dreamy appeal. You will be obsessed with these Brown Butter Espresso Brownies as they are the perfect combination of rich, decadent, chewy, fudgy and chocolately. I for one will be fan girling over these brownies for the rest of my life.

Recipe
Brown Butter Espresso Brownies
Makes 16 - 2" brownies

Ingredients
130 g granulated sugar
130 g light brown sugar
3 large eggs
120 g (9 Tablespoons) unsalted butter, cut into chunks
75 g semi-sweet or dark chocolate chips
70 g canola oil
2 teaspoons vanilla
75 g all-purpose flour
35 g cocoa powder (Dutch Processed)
1 Tablespoon cornstarch
1 Tablespoon instant espresso
3/4 teaspoon Kosher salt
75 g plus 2 Tablespoons semi-sweet or dark chocolate chips, divided
Flaky sea salt

Directions
1. Preheat oven to 325 degrees (F). Line an 8" square metal baking pan with parchment paper. Set aside.
2. In small saucepan, melt and brown butter (approximately 8-10 minutes). Pour browned butter and darkened bits into a medium sized bowl. Immediately add cocoa powder. Stir. Add in 75 g chocolate chips. Stir until mixture is melted. Set aside.
3. Sift together the flour, cocoa powder, cornstarch, instant espresso and Kosher salt.
4. In the bowl of a standing mixer fitted with a paddle attachment, beat the eggs, granulated sugar and brown sugar until thick and creamy (approximately 4 minutes.
5. Add in the butter/chocolate mixture, oil, and vanilla. Mix to combine.
6. Add in the flour. Mix jut until combined.
7. Fold in 75 g of chocolate chips. 
8. Transfer batter to prepared pan. Smooth top with an offset spatula. Lightly sprinkle with flaky sea salt.
9. Put baking dish on a baking pan and insert into the oven.
10. Bake for 45-50 minutes. Do not over bake. Important Notes: Rotate the pan midway through the baking process and sprinkle on the remaining 2 Tablespoons of chocolate chips.
11. Remove from the oven. Put the baking dish on a cooling rack. 
12. Cut into 16 two inch squares when the brownies have cooled or after they have cooled and been refrigerated.
13. If not serving immediately, cover and store in the refrigerator (the brownies get even fudgier when chilled).

Notes: (1) Before removing the brownies from the oven, insert a toothpick into the center. If it has moist crumbs on it, it's done. If wet batter is on the toothpick, continue baking another 5 minutes. (2) Instead of chocolate chips, you could also chop up semi-sweet or dark chocolate. (3) Dutch Processed Cocoa creates a deeper, chocolate flavor and even richer fudgier texture. Natural cocoa powder will not yield the same results. (4) This recipe was inspired by multiple sources.

Saturday, May 11, 2024

Elote Dip


Your gatherings are about to go from either good to great or great to epic. All thanks in large part to this spicy, creamy, intoxicating Mexican Street Corn Dip called Elote Dip. With fresh corn coming into season, this may be the one of the appetizers you put on repeat over the course of the next several months. Made with roasted corn, mayonnaise, freshly squeezed lime juice, hot sauce, red chili powder, garlic powder, Kosher salt, black pepper, chicken stock, sugar, freshly chopped cilantro and crumbled cotija cheese, this will be the appetizer everyone swoons over. While it's intended to be served with your favorite tortilla or plantain chips, you will be tempted to eat it with a spoon. 


Every time my friend Stacey posted her Elote Dip on Instagram, I wasn't just drooling, I repeatedly watched her post. Even without the benefit of tasting it, I believed her when she said it was one of those 'to die for' appetizers. As much as I wanted to rush out to the grocery store and gather all of the ingredients, I had to put my elote dip craving on hold until ears of fresh corn became available. If you have ever had elote before you know you cannot replicate it's flavors with frozen or canned corn. Not even the fire-roasted canned corn. 

For the absolute best flavor, roast unshucked corn on the grill until it's almost done (about 10 minutes). Then shuck the corn, return it to the grill (for about 5 minutes), and lightly char the kernals. You can find some alternatives to grilling the corn outdoors, however, because I have never tried any of those methods I can't promise they will have the same flavor of a cob roasted on the grill (gas or charcoal).

One of the beauties of this Elote Dip is that it can be made early in the day and heated in the oven before your guests arrive. Other than roasting the corn, this is a super easy appetizer to make. Everything comes together in just one bowl!

This creamy, spicy elote dip is craveworthy. Destined to be one of those appetizers completely devoured, you are bound to get multiple requests for the (your) recipe! 

Recipe
Elote Dip
Serves 6-8

Ingredients
6 ears of fresh corn, grilled, shucked, and lightly charred (see notes)
1 cup mayonnaise
1 Tablespoon Hot Sauce (e.g., Cholula or Tapatio)
2 Tablespoons freshly squeezed lime juice
3/4 - 1 teaspoon Kosher salt (begin with 3/4 and then taste before adding any more)
1/4 teaspoon garlic powder
1/4 teaspoon red chili powder
1 teaspoon black pepper
1 teaspoon sugar
1/4 cup chicken stock
3/4 cup cotija cheese, crumbled and divided
2 Tablespoons freshly chopped cilantro, divided
Smoked paprika, for finishing
Your favorite tortilla or plantain chips

Directions
1. Preheat oven to 350 degrees (F). 
2. Remove the kernals from the grilled corn.
3. In a medium sized bowl, combine the corn, mayonnaise, hot sauce, lime juice, Kosher salt, garlic powder, red chili powder, black pepper, sugar, chicken stock, 1/2 cup crumbled cotija cheese, and 1 tablespoon cilantro. Mix until blended.
4. Transfer the mixture to a skillet or baking dish. Baked for 20-25 minutes or until heated through.
5. Remove from the oven. Sprinkle with some smoked paprika. Top with the remaining 1/4 cup crumbled cotija cheese and remaining 1 Tablespoon chopped cilantro.
6. Serve with your favorite tortilla chips. Enjoy!

Notes: (1) Recipe inspired by one created by Jeff Smedstad, cookbook author and chef-owner Elote Cafe. (2) Roast the corn, still in the husks, over medium high heat for approximately 10 minutes. Remove the husks, return the corn to the grill and cook until the kernals are lightly charred (about 5 minutes). Turn the cobs so the corn is completely charred. Let the corn cool slightly before removing the kernals. (3) The dip can be made ahead early in the day or the day before. Remove your baking dish approximately 20 minutes before placing in the preheated oven. (4) Buy a wedge of cotija cheese and crumble it yourself. Don't buy the finely grated cotija cheese.

Tuesday, May 7, 2024

Little Gem Salad w/ Sugar Snap Peas, Radishes, Pecorino Romano & Green Goddess Dressing


The time had finally come for me to seriously shake up my salad game. This past weekend we had friends over for dinner to plan our upcoming trip to Yellowstone and the Tetons. And I didn't want to serve my usual mixed greens, cheese, fruit, and champagne vinaigrette salad. Not that I don't love all of the variations I make to my go-to 'house' salad, I wanted this salad to be as jaw dropping as the landscapes we would be seeing in the weeks ahead. If our trip will be as amazing as this Little Gem Salad w/ Sugar Snap Peas, Radishes, Pecorino Romano & Green Goddess Dressing was, we are in for quite the adventure. In all seriousness, this may be one of the best salads I have ever made. 


The smaller, slightly sweeter, more delicate version of romaine is Little Gem Lettuce. Think of it as the prettier, more delicious variety. With tender, yet crisp leaves, it pairs perfectly with the luscious, herby, creamy Green Goddess Dressing. Made with a myriad of fresh herbs, there are many variations of the classic Green Goddess Dressing. If there was ever a dressing to turn an ordinary salad into an epicurean delight, this would be the one. The original recipe created in the 1920's surprisingly used only a sparing amount of fresh herbs (parsley and chives). Over the last one hundred years, the number and variety of herbs used in the dressing has changed considerably. This Green Goddess Dressing recipe uses basil, parsley, and tarragon.

Sweet sugar snap peas, thinly sliced peppery radishes, and shavings of tangy, sharp Pecorino Romano Cheese not only add flavor and texture to the salad, they hold up well to the creamy, zesty dressing. If you are looking to serve an impressive salad at your next gathering make this one. It just might turn out to be declared the favorite of the night.

Recipe
Little Gem Salad w/ Sugar Snap Peas, Radishes, Pecorino Romano & Green Goddess Dressing
Serves 6-8

Ingredients
Green Goddess Dressing (makes 2 generous cups)
1 cup good quality mayonnaise
1 cup sour cream
2 whole anchovies
1 large garlic clove, minced
3 Tablespoons extra-virgin olive oil
2 Tablespoons freshly squeezed lemon juice (from one medium sized lemon)
1 cup loosely packed basil leaves
1/4 cup loosely packed tarragon leaves
1/4 cup loosely packed fresh Italian parsley leaves
3/4 teaspoon Kosher salt

Salad
4-5 heads little gem lettuces, core removed and torn into pieces
1/2 to 3/4 cup sugar snap peas, raw or blanched for 30 seconds, sliced on the bias
4-5 radishes, thinly sliced using a knife or mandolin
1/4 cup thin slices of Pecorino Romano Cheese (use a vegetable peeler to create the shaved slices)
Kosher salt for seasoning

Directions
Green Goddess Dressing
1. In a food processor, add in all of the ingredients. Blend until very smooth and a beautiful pale-green color with tiny flecks of the herbs.
2. Transfer dressing to a bowl. Cover and refrigerate until ready to use. 
3. The dressing can be made the night before or morning of serving. Note: Dressing will keep for a week covered and stored in the refrigerator.

Salad
1. Add the lettuce to a large platter. Toss with 4-5 Tablespoons of the Green Goddess Dressing. All of the pieces of the lettuce should be lightly coated. Lightly season with Kosher salt.
2. Sprinkle the sliced sugar snap peas, radishes and Pecorino Romano Cheese. Serve with a small bowl or gravy boat of additional dressing.
3. Serve immediately.

Notes: (1) I found Little Gem Lettuce at Trader Joe's. If you can't find it at your grocery store, buy baby romaine. (2) To blanch the sugar snap peas, bring a pot of water to a boil. Submerge the sugar snap peas for 30 seconds and then immediately immerse in an ice bath. You can skip this step and serve the sugar snap peas raw.Your salad will be just a little crunchier. 

Monday, April 29, 2024

Crudités Platter with Herby Ranch Dip


CruditĂ©s (crew-dee-tah) are nothing more than a platter of fresh, raw vegetables, cut into strips or bite-sized pieces and served with a dip. Filled with a variety of colors and textures, an artfully, beautifully arranged cruditĂ© platter is an elegant, show-stopping upgrade of the classic vegetable tray. With the summer entertaining season quickly approaching, sometimes the simplest thing to make is the absolute best thing to make. 

The beauty of a crudités platter is that there are no rules for which raw vegetables to use. Make it as colorful, flavorful, and textured as you like. The only thing to keep in mind is that a variety of seasonal vegetables can be the most visually appealing as well as most appetizing. Although a platter of similarly colored vegetables can also be equally eye-catching.


Until the Farmer's Market season opens near me, I generally like to source my fresh vegetables from Trader Joe's, Whole Foods, and/or my local grocery store. Baby and/or tri-colored carrots, peeled and sliced lengthwise in half, as well as Persian (baby) cucumbers (unpeeled) are perfectly sized delicious bites.

Making your own homemade Herby Ranch Dip can take any platter from ordinary to extraordinary. This quick and easy creamy dip is destined to be one of your favorites. You can easily turn this platter from a one dip to a two dip one by adding a bowl of homemade hummus or your favorite store bought one. 

Once you make this CruditĂ©s Platter with Herby Ranch Dip you might not be able to make it any other way. Quite possibly it might be one of those 'vegetable' platters quickly devoured at your next gathering. 

Recipe
CruditĂ©s Platter with Herby Ranch Dip
Serves 8-10

Ingredients
1 cup good quality mayonnaise
1 cup sour cream
1 green onion, thinly sliced (white and green parts)
2-3 cloves garlic, finely minced (I like to use 3 cloves)
1 1/2 Tablespoons finely chopped chives
1 1/2 Tablespoons finely minced fresh parsley
1 1/2 Tablespoons finely minced fresh dill
1 teaspoon Kosher salt
1/2 teaspoon black pepper

3-4 Persian Cucumbers, unpeeled and sliced in lengthwise wedges
1 large bunch of tri-colored or baby carrots, peeled and cut lengthwise
5-6 radishes, cut in half or quarters
8-10 broccolini stalks
1 small head of purple cauliflower
12-14 sugar snap or shelled English peas, several cut to expose the peas
Other optional vegetables: celery stalks, tri-colored cherry tomatoes, blanched asparagus
Optional garnish: edible flowers, mint sprigs

Directions
1. In a medium sized bowl, combine all of the dip ingredients. Cover and chill for at least 4 hours (or overnight) before serving. Transfer the dip to your serving bowl just before serving.
2. On a large platter or cutting board (14" or 16" long), begin to layer the vegetables, in no particular order. Starting from the outside of the board and working toward the bowl holding the dip. Keep in mind the variation between the colors, sizes and shapes as you arrange the vegetables.
3. Arrange the cut radishes, cut sugar snap peas and cherry tomatoes (if using) on top.
4. Top with edible flowers and/or mint sprigs, if using.
5. Serve immediately.

Notes: (1) The platter can be made several hours ahead. Cover and keep chilled in the refrigerator. (2) If you wanted to serve two dips with the vegetables a homemade hummus.

Sunday, April 28, 2024

Pimento Cheese with Red Pepper Jelly


Ten years ago I shared a recipe for Pimento Cheese. And for the past decade it's been my go-to recipe. Not unlike most 'firsts', it will always be a favorite. However, on a fun-filled, bourbon tasting inspired girl's trip to Louisville, Kentucky last week I discovered a twist on this beloved, classic spread. While having cocktails before dinner at Proof on Main, one of my friends ordered the pimento cheese appetizer. Considering the 150th running of the Kentucky Derby was just two weeks away, it couldn't have been a more perfect choice. Served in small canning jars, the Pimento Cheese was topped with Red Pepper Jelly. The contrast of flavors of the creamy, tangy cheese mixture with the sweet, spicy red pepper jelly was absolutely brilliant. 


As it turned out, I came home from the trip with more than multiple bottles of bourbon and a t-shirt from Churchill Downs. I returned home inspired. Rather than simply topping my pimento cheese recipe with red pepper jelly, I thought maybe I would make a new version of this highly addictive spread. 


This time around I added a small amount of cream cheese to the mixture, omitted the green onions, was slightly more heavy handed with the hot sauce, and used smoked paprika instead of cayenne. However, I did not even consider swapping out the sharp (yellow) cheddar cheese with any other cheese. Nor did I even consider using anything other than Duke's mayonnaise. I was more than pleasantly surprised to discover how divinely delectable this new version was. And that was even before I topped it with the red pepper jelly!


Serving the Pimento Cheese with Red Pepper Jelly on crostini instead of on classic white bread also turned out to be an ingenious idea! It may have been forty eight years since I first tasted Pimento Cheese at the Kentucky Derby, but my affinity for it hasn't changed. Except maybe now I am even more smitten with it.

With the Kentucky Derby just around the corner (it's the first Saturday in May), now would be the perfect time to make this cheesy, tangy, sweet, spicy spread. This homemade version will invariably be far superior to anything you might find in the grocery store! Serving it in canning jar creates an irresistible, rustic presentation. There may no better way to pay homage to this celebrated humble spread.

Recipe
Pimento Cheese with Red Pepper Jelly

Ingredients
8 ounces (227g) sharp cheddar cheese (see notes), coarsely grated 
1/2 to 2/3 cup Duke's mayonnaise
4 ounce jar of pimento peppers, drained
1/2 teaspoon black pepper
1/2 teaspoon Kosher salt
1/2 teaspoon smoked paprika
2-3 dashes hot sauce
2 ounces cream cheese, softened
Several Tablespoons of Red Pepper Jelly
Crostini made from a baguette (using either the oven or grill method)

Directions
1. In a large bowl, combine the grated cheddar cheese, cream cheese, 1/2 cup mayonnaise, pimento peppers, smoked paprika, Kosher salt, black pepper and hot sauce. Use a large spoon or spatula to combine. Mix until you have a well combined, creamy spread. If it's not creamy enough, add in a little more mayonnaise and blend again. Note: I usually end up using 2/3 cup of mayonnaise.
2. Transfer the mixture your serving containers and chill in the refrigerator for several hours or overnight.
3. When ready to serve, top with a thin layer of Red Pepper Jelly (use 2-4 tablespoons depending on the size of the jar). Serve with some oven baked or grilled crostini.

Notes: (1) Do not buy pre-shredded cheese! Buy a good quality sharp cheddar cheese (I used Tillamook) and grate it on the large holes of a grater. (2) I used Stonewall Kitchen's Red Pepper Jelly, but use any good quality one. Or use one you make from scratch. (3) If you can't find Duke's Mayonnaise, use a homemade mayonnaise or Hellman's (Best Foods) Mayonnaise. Whatever you do, don't use Miracle Whip. (4) Use smaller or medium sized canning jars for serving. (5) If you have any leftovers, use to make Pimento Cheese Toast. A slice of bread spread with the pimento cheese and topped with softly scrambled eggs. Or make a grilled pimento cheese sandwich!


Grazing horse in rural Kentucky and Churchill Downs (April 2024)

Monday, April 15, 2024

Mini Pavlovas w/ Lemon Curd, Berries & Whipped Cream


You might argue that the star of the show in these Mini Pavlovas w/ Lemon Curd, Berries & Whipped Cream is the tart, creamy, luscious Lemon Curd. Or you could easily make the case that the crisp on the outside, pillowy on the inside meringues deserve that honor. When you consider these meringues are actually mini-pavlovas, you might be tempted to give the nod to the meringues. I mean, really, is there anything more impressive than being served a pavlova for dessert? Okay, maybe you think so. Or maybe you have never had the good fortune of tasting one. Yes, I can be bold, even a bit cheeky, in my beliefs and assertions. It's one of the benefits of having this food blog.


Now that I have (un)intentionally pitted the lemon curd against the meringues, I am going to make an audacious claim. There is no single star in this dessert. Rather it's the interplay between the lemon curd, the meringues, the berries, and the freshly whipped cream responsible for putting it into the show-stopping dessert category. With the most heavenly combination of flavors, the jaw-dropping gorgeous mini-pavlovas are one of those rare desserts where each part makes the other part even more delicious. They are a flavor and textural wonder.


What better way to welcome in the spring and celebrate the anticipation of summer than with a refreshing lemony dessert?  Imagine ending your dinner party with platter of these mini-pavlovas. Some of them might say you raised the bar to an impossibly high to reach level. Humbly protest, but silently consider that high praise.

There are essentially three parts to the mini-pavlovas. The lemon curd, the meringues and the whipped cream. All of them can be made ahead of time, especially the silky, tart lemon curd. The curd needs to be cold (chilled) when you assemble the pavlovas, so making it one or two days beforehand is the best way to turn what looks like a complicated dessert, into a relatively easy one. The recipe for the lemon curd will give you more than you need, however, you can use what's left to serve with scones, to just eat off a spoon, to make a lemon tart, to spread it on toast, to fill crepes, or to make a parfait. I promise, it will not go to waste. 

Making meringues requires a little bit of patience. Patience when you are whipping the egg white, sugar, white vinegar, vanilla, and cornstarch to a thick, shiny, firm peaked state. And when you bake it so that it reaches crisp on the outside and marshmallowy on the inside state. So here are some helpful hints. When beating the mixture, begin with a medium-low setting. Gradually increasing to medium and ultimately to medium-high. This process will help create a thicker, more stable meringue. When baking the meringues, begin with your oven temperature set to 275 degrees (F). After fifteen minutes, reduce the temperature to 225 degrees (F) and continue baking for another 45 minutes. Your baking time will only be an hour, but keep the meringues in the oven for at least an hour after you turn off the oven (and keep the door closed). Allowing the meringues to 'cool' in the oven will help prevent cracking.


The meringues can be baked early in the day. Cover with a light towel (e.g., flour sack towels work great) and keep at room temperature. Note: The texture of the meringue shells will change over time. They might not be as crispy on the outside if you make them the day before.


When you are ready to assemble the mini-pavlovas, begin by lightly dusting the meringue shells with confectionary sugar. Then spoon on a generous dollop of the lemon curd.

Next come the berries. For garnish, consider using mint leaves or flowers. Last, but not least, top with a large spoonful of the freshly whipped cream. Serve the mini-pavlovas on a large platter or on individual plates. Or serve the pavlovas family style and let everyone put on the lemon curd, berries and whipped cream to their heart's content.

And just when you thought this dessert couldn't get better, it does. These Mini Pavlovas w/ Lemon Curd, Berries & Whipped Cream are gluten-free! 


If you are looking for a dessert to elevate your game, make these Mini Pavlovas w/ Lemon Curd, Berries & Whipped Cream. If you are looking to leave your guests feeling satisfied, euphoric, on a (slight sugar) high note, or like royalty, make these melt in your mouth pavlovas. Because there may be nothing better or more drool worthy than a crisp, pillowy meringue set against a tart lemon curd, juicy fresh berries, and the creamiest freshly whipped cream. Even your die-hard chocolate dessert loving friends may learn there is more than to one to end the night in a food coma.

Recipe
Mini Pavlovas w/ Lemon Curd, Berries & Whipped Cream
Serves 9-12

Ingredients
Lemon Curd
4 large eggs, room temperature
1 1/2 cups (300g) granulated sugar
2/3 cup freshly squeezed lemon juice (from approximately 4 lemons)
Zest from four lemons
12 tablespoons or 1 1/2 sticks unsalted butter (170g) at room temperature 
1/8 teaspoon sea salt

Meringues
4 large egg whites
1 cup (200g) granulated sugar
1/4 teaspoon Kosher salt
1 1/2 teaspoons cornstarch
1 teaspoon white vinegar
1 1/2 teaspoons vanilla

Whipped Cream
1 cup heavy cream
1 teaspoon vanilla
2 Tablespoons confectionary sugar
2 Tablespoons sour cream

Confectionary sugar for dusting
Fresh berries and mint leaves and/or flowers for garnish

Directions
Lemon Curd
1. In a heavy bottom medium sized saucepan, beat eggs and sugar together.
2. Add lemon juice, lemon zest, butter, and sea salt. Stir until all ingredients are combined.
3. On medium-high heat, bring mixture to a boil (whisking constantly) so that it thickens. Note: The mixture's temperature should reach 170-180 degrees (F).
4. Remove from heat, strain and transfer to a heat proof bowl or jars. Place a piece of plastic wrap on top to prevent a crust from forming. Allow to cool before chilling in the refrigerator. (Note: Mixture will need to be well chilled before proceeding. Recommend making lemon curd early in the morning or the day before.)

Meringues
1. Preheat the oven to 275 degrees (F). Line two heavy bottomed baking sheets with parchment paper.
2. In a medium sized bowl, whisk together the sugar, salt, and cornstarch. Set aside.
3. In the bowl of a standing mixer fitted with a whisk attachment, add in the egg whites.  Beat on medium/low speed just until they begin to thicken.
4. Increase speed to medium and add several tablespoons of the sugar/salt/cornstarch mixture. When the mixture has disappeared into the eggs whites, add another several tablespoons. Continue until all of the mixture is incorporated into the egg whites. Then beat for two additional minutes.
5. Add in the vanilla and white vinegar. Initially beat the mixture on a medium speed (for about 3 minutes). Then increase speed to medium/high and beat until the egg white mixture is glossy and stiff peaks form when the whisk is lifted. This might take an additional 3-4 minutes. But check the meringue for doneness every two minutes.
6. Using a large cookie scoop (about 2 1/4" in diameter), place balls of dough on the prepared cookie sheets. You should have a minimum of 9, maximum of 12 scoops. Notes: Put no more than 6 scoops on each tray. My yield was 9 meringues.
7. Using a tablespoon, press down lightly to create an indentation in the center of each ball.
8. Place the baking pans in oven. Bake for 15 minutes at 275 degrees (F). Then reduce oven temperature to 225 degrees (F) and continue baking for another 40-45 minutes. Turn off the oven (keep the door closed) and let the meringues cool (at least 1 hour but no more than 2 hours). Note: Before turning off the oven, press the outside of the shell (it should feel firm) and press lightly in the center of the shell (it will be slightly soft).

Whipped Cream
1. In the bowl of small standing mixer fitted with a whisk attachment, beat the whipping cream at medium speed. As soon as it begins to thick, add in the confectionary sugar. Continue beating until soft peaks form. Add in the vanilla and sour cream, continue beating until medium peaks form. Note: Can make the whipped cream ahead earlier in the day. Store covered in the refrigerator.

Pavlova Assembly
1. Place your pavlova meringues on a serving platter or individual plates. Lightly dust with confectionary sugar.
2. Place a generous dollop of the lemon curd in the center of the meringue.
3. Add your fruit, mint and/or flower garnish.
4. Add a generous dollop of the whipped cream.

Notes: (1) You can make the meringues and whipped cream early in the day. Keep the baked meringues at room temperature and cover with a light kitchen towel (e.g., flour sack towel). Keep the whipped cream in the refrigerator. (2) Highly recommend making the lemon curd the day before. It will be good for at least two weeks in the refrigerator. (3) Instead of a fruit garnish, you can top with chopped pistachios. (4) Use the leftover egg yolks to make a custard, like the one in this Graham Cracker Custard Pie.