Sunday, March 10, 2013

Garlic-Rosemary Focaccia

My addiction to carbohydrates most likely started when I was young or quite possibly it is in my DNA.  If I had to make a choice, I would say it is in my DNA, meaning I am not completely responsible for my bread intake. While I have come to learn there are good carbs out there to eat, my affinity is for the group of carbohydrates in the bread group.  For me, the meal at a restaurant could be over once the basket of warm bread and olive oil or butter is set on the table.  In spite of my love of breads, I have usually resorted to buying and not making them. Maybe I had been intimidated by bread baking or maybe I was just procrastinating. And then one day I discovered a Garlic-Rosemary Focaccia in one of Nick Malgieri's cookbooks and I thought why has it taken me so long to make something from one of my favorite food groups?


Finding a recipe for bread with garlic, rosemary and olive oil in it is liking finding a great pair of four inch black patent leather high heels on sale in my size no less.  Yes, my love of bread is ranked just slightly below my love of shoes.  In my world there is no such thing as too much of either although if I had to cut back on something it probably would be bread. But seriously I thought making bread was a little difficult but making focaccia completely changed that perception and was a paradigm shift that I never thought would happen. Yes, shift really can happen, well for most of us anyway.


If you don't have a thermometer I would encourage you to buy one just to ensure you get the water temperature right.  If you have a meat or candy thermometer either will work.  The yeast and three tablespoons of olive oil are added to the 110 degree temperature water, whisked together and then set aside.

This past summer when I moved into this little farmhouse I planted some rosemary. Although we have had alot of snow this winter, the climate near the ocean is milder than in the midwest so my rosemary bushes have not only survived but they have thrived.  There is something seductive about the smell of fresh rosemary, okay maybe seductive is too strong of a word, maybe I should have said it is intoxicating.  For this recipe you will need two tablespoons of freshly chopped rosemary.

Next to rosemary, garlic is my next favorite food aroma. The smell of freshly chopped garlic, garlic roasting in the oven or garlic being sautéed in olive oil, well this would be intoxicating too.  This recipe uses eight cloves of garlic chopped to a mince.


Five cups of flour and two teaspoons of Kosher salt are added to a large bowl.  When measuring flour add the flour to the measuring cup and then with a knife smooth over the top to get the perfect cup.  If you dip your measuring cup into the flour it will pack which means you will actually end up with more than one cup of flour.

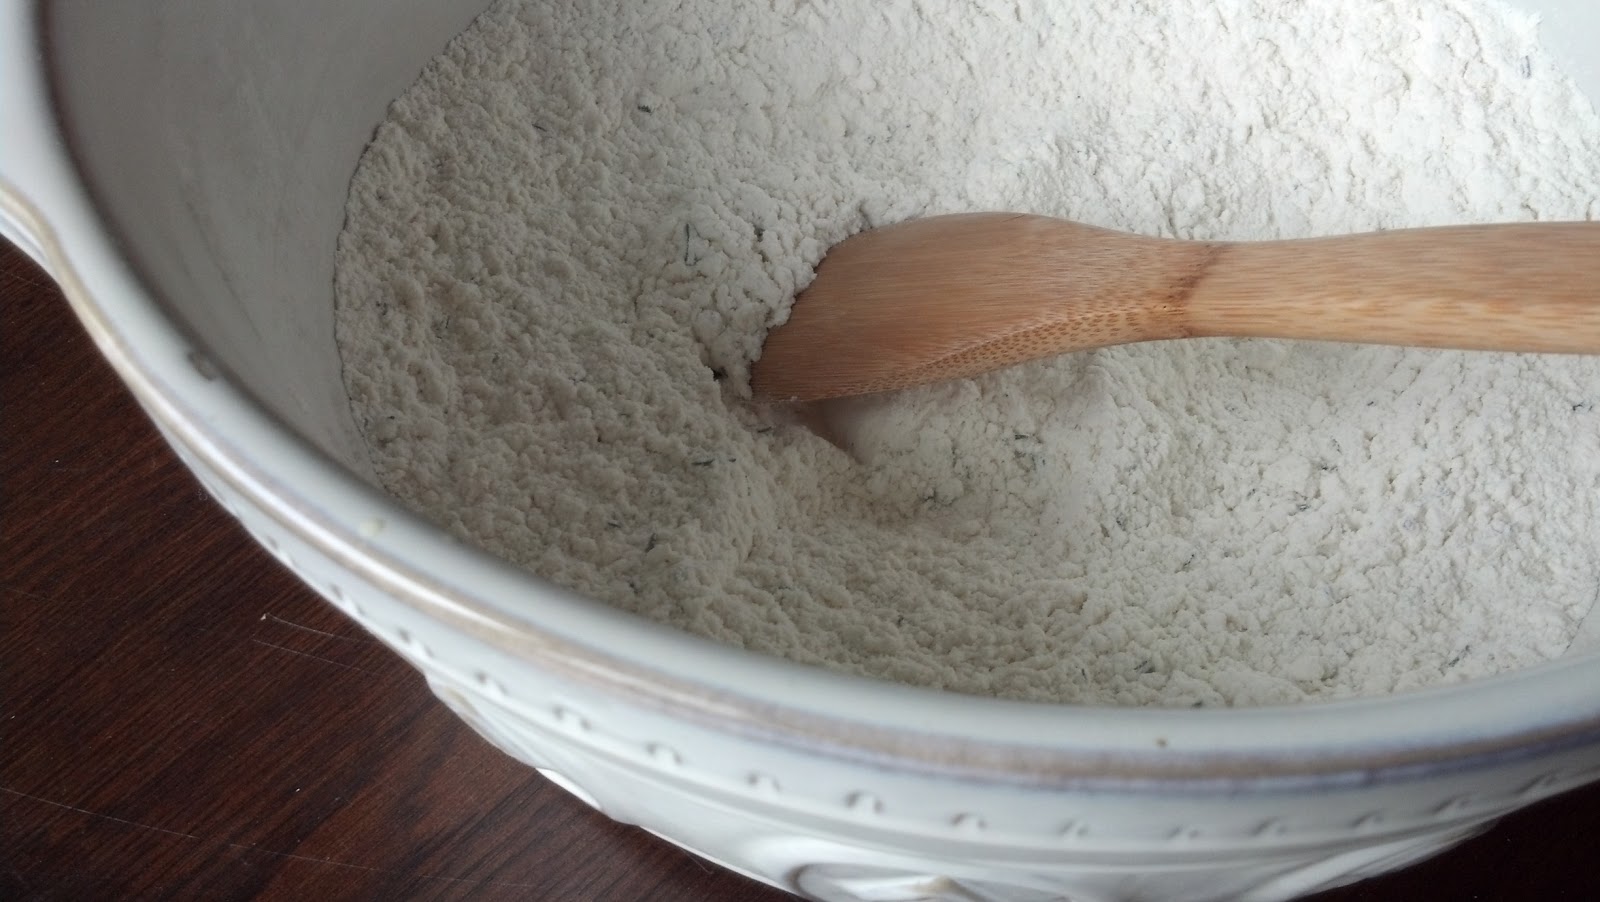
The garlic and rosemary are added to the flour salt mixture.  Using a whisk or wooden spoon combine thoroughly.


The water-yeast mixture and milk are then added to the flour mixture.  Using a wooden spoon mix combine the wet and dry ingredients.  Once combined beat vigorously for about a minute until it all comes together in a ball.


Cover the bowl with plastic wrap and let sit for approximately one hour or until it has doubled in size.


Using an 11 by 17 inch jelly roll pan spread 1 1/2 Tablespoons of olive oil over the bottom.  Remove dough from bowl and using your hand press on dough so the pan is covered completely.  If the dough is resisting, let it set for a minutes before continuing to press and stretch it out.  Once it is all spread out, use your thumb to make indentations every two inches.


Top the dough with 1 1/2 Tablespoons of olive oil and one teaspoon of sea salt.  Additional sprigs of rosemary can be be added as well.  Let the dough rest uncovered for about an hour or until it has doubled in bulk.

Place in the lower third of the oven and bake at 450 degrees for 20 to 25 minutes.  If the is browning too quickly place another jelly roll pan underneath.  Rather than take any chances or getting distracted I begin the baking with the use of two jellyroll pans.


The focaccia bakes to a most beautiful golden brown.  The aroma coming out of the oven is incredible but the taste of this bread dipped in olive oil is so over the top delicious flavored.  The garlic and the rosemary don't overpower the focaccia but you can taste these flavors in each bite.  And as it turns out making this focaccia is pretty easy, really.

Recipe
Garlic-Rosemary Focaccia (slightly adapted version created by Nick Malgieri's "How to Bake" cookbook)

Ingredients
1 cup warm water (about 110 degrees)
1 envelope active dry yeast
6 Tablespoons of good quality extra virgin olive oil (divided)
5 cups unbleached all-purpose flour
2 teaspoons Kosher salt
2 Tablespoons chopped fresh rosemary
8 cloves fresh chopped garlic
1 cup whole milk
1 teaspoon of sea salt

Directions
1. Measure water in a bowl. Immediately whisk in yeast and 3 tablespoons of olive oil.  Set aside.
2. In a separate large bowl, combine flour with 2 teaspoons Kosher salt, rosemary and garlic.  Combine thoroughly.
3. Using a wooden spoon or spatula, stir the water-yeast mixture and milk into flour mixture stirring thoroughly until the flour is thoroughly moistened.  Then beat vigorously for one minute, as it will come together in a ball.  Cover the bowl with plastic wrap and let the dough rise  until it has doubled in bulk, about one hour.
4. Pour 1 1/2 tablespoons of olive oil onto a 11 by 17 inch jelly roll pan.  Spread olive oil with your fingers to cover the pan.
5. Turn the dough out to the bowl onto the pan and pat to press it to fill in completely.  If the dough resists let it rest for a few minutes before continuing to press it out to stretch it to fill the edges of the pan.
6. Dimple the surface of the focaccia with your thumb to poke cavities in the dough at 2 inch intervals.
7. Drizzle the remaining 1 1/2 tablespoons of olive oil and sprinkle with sea salt and fresh rosemary sprigs. 
8. Allow the dough to rise until doubled in bulk, about 1 hour.
9. About 20 minutes before baking set a rack in the lower third of the oven and preheat to 450 degrees.
10. Bake the focaccia for 20 to 25 minutes or until a deep golden color.  Lift a side of the focaccia with a spatula about 15 minutes into the baking to see if it is coloring too quickly.  It it is, slide another pan under it to insulate the bottom.
11. If you are serving immediately or serving later, slide the focaccia off the pan to a rack to cool.
12.  Cut into narrow long slices about 1 1/2 or 2 inches thick if serving for dinner or as an appetizer.  Serve with plenty of good quality olive oil for dipping or softened butter topped with sea salt. 
13. If making for sandwiches cut into the size squares of your choice, then cut horizontally when making the sandwich.
Note:  The focaccia is best on the day it is made.


Finding a new recipe that takes your cooking or baking to new places is like finding an interesting antique or treasure.  Just like I thought I had no interest in baking bread, I never in my wildest dreams thought that I would buy a set of real deer antlers.  But last fall I was up in Maine antiquing and there sitting on a table in an antique shop were a set of deer antlers.  I noticed them but kept on browsing.

When I am on the hunt for a particular item I tend not to see everything in front of me so I end up walking around and around an antique shop several times over. But as I kept walking around, I kept seeing the antlers. They were not anywhere on my list of must haves. Yet there was something alluring about them.  If they could have talked they would have been calling my name, no they would have been shouting my name. So about the fourth and last time around the antique store I decided I wanted them, that I needed to have them.  Suddenly all of my preconceived notions about antlers flew out the window. In some ways there is connection between these antlers and making of the focaccia.  After I let go of my preconceived notions about both of them, I wondered why it took me so long to open myself up to possibilities.


Saturday, March 9, 2013

Turtle Cheesecake aka Pixie Cheesecake

In the midwest there was a chain of candy stores or I should say stores selling all kinds of 'finely made' chocolates that was a favorite destination. Receiving chocolates from this store in our Easter baskets, Christmas stockings or as a gift was a treat as we were thrilled to get what we thought to be the best chocolates in the world. This store we grew up with was called Fannie May Candy and their chocolates were contained in their distinctive white box with gold lettering. It is still around but it is not the same store I grew up with even though they carry the candies made by the 'original' Fannie May.  My personal favorites were the vanilla buttercreams dipped in dark chocolate and the caramels, but it seemed that everyone else in my family had as their perennial favorite, the Pixies.  A pixie was made of creamy caramel topped with pecans and then covered in milk chocolate.  Some of you know this candy confection by another name, turtles.  And when you look at them, I suppose they do sort of look like a turtle.


One day a few years in an office where the number of females outnumbered the number of males, one of the male staff members brought in what he called a Turtle Cheesecake. Everyone asked if he could ask his 'wife' to share the recipe.  He said no he couldn't.  You could have heard a pin drop as this was a place where everyone willingly shared their recipes. So to fill the void of silence, someone then said 'please will you ask her?' He laughed and said 'well I can't ask her because it isn't her recipe, it's mine'. Up until that point, no one knew he had a passion or talent for cooking and baking. And honestly if he wasn't married, I do think every 'single' female in the room would have wanted to be invited to dinner or at least for dessert.


So this Turtle aka Pixie cheesecake recipe has it all, the chocolate, the caramel and the pecans.  It is easy to want to skip the step of toasting the pecans before chopping them.  But just know that the taste and fragrance of the pecans is incredibly enhanced when lightly toasted.  So I beg you, do the toasting.


A box of vanilla wafers will yield more than the two cups of crumbs you need for the crust, leaving you some cookies to nibble on while you are making this recipe.  You can use a food processor to make the crumbs or place them in a large ziplock baggie and crush with a rolling pin.


The melted butter and crushed wafers are mixed together and pressed into a springform pan.  I always line my springform pan with parchment paper as it makes the removal of the cheesecake from the pan so much easier. Make the crust so it comes up about an inch on the side of the pan as you will need it to contain the melted caramel. The crust is baked at 350 degrees for 10 minutes and then cooled.


Maybe the most tedious part of making this cheesecake is the unwrapping of the caramels.  But not to worry, it goes fast.  Once unwrapped the caramels are combined with the evaporated milk in a bowl over steaming water on the stove.  Stir periodically until it is a creamy melted caramel mixture.


The melted caramel mixture is poured over the baked and cooled crust.  Adding a sprinkling of sea salt over the caramel adds a great depth of flavor. The toasted chopped pecans are then added on top of the sea salted caramel mixture.  The crust-caramel-pecans are then refrigerated for at least 10-15 minutes or just until caramel sets.  This helps to ensure the caramel remains in place when pouring the batter on top.


While the crust is chilling, the cream cheese and sugar are mixed together until smooth.  Having room temperature cream cheese is really important otherwise it won't cream well and you will have little clumps of cream cheese in the finished batter. After adding the vanilla, the room temperature eggs are added one at a time until completed blended in.
Once the cream cheese, sugar, eggs and vanilla are mixed together you add the slightly cooled chocolate.  If your chocolate is too hot it will clump up in the cheesecake batter, if it is too cold it will also appear like clumps in your batter. Its all about getting the chocolate to the right not too hot, not too cold balance.

The cheesecake batter is then poured into the pan.  Using an offset spatula, smooth the top before placing in the oven.

The cheesecake is baked for approximately 40 minutes or until the filling is barely set. You should have some movement in the middle.  But not to worry, this is how you want it.  Remove from the oven and allow to cool.  Cover and refrigerate overnight.  Use a knife to release the cheesecake from the sides of the pan when unmolding.

Place on a cake stand or platter. Cut into slices and enjoy.

Recipe
Turtle Cheesecake aka Pixie Cheesecake (slight adaptation to a recipe share by a colleague from long ago)

Ingredients
2 cups vanilla wafer crumbs
6 Tablespoons unsalted butter, melted

14 ounce package of wrapped caramels (unwrapped)
5 ounces evaporated milk
1 cup pecans, toasted and chopped
24 ounces cream cheese, room temperature (three 8 ounce packages)
1/2 cup sugar
1 1/2 teaspoons vanilla
2 large eggs, room temperature
1/2 cup semi-sweet chocolate, melted
sea salt

Directions
1.  Preheat oven to 350 degrees.
2.  Line a 9 inch springform pan with parchment paper.
3.  Toast pecans for 6 minutes.  Cool, chop and set aside.
4.  Mix vanilla wafer crumbs and melted butter.  Press into the prepared springform pan.  Bring some of the mixture up the sides of the pan.  Bake for 10 minutes. Allow to cool.
5.  Unwrap caramels and place in the top of a double boiler (or a glass bowl over steaming hot water).  Add the evaporated and milk.  Melt the caramels in the milk.  Could take up to 10 minutes.
6.  Pour melted caramel over the cooled crust.  Sprinkle very lightly with sea salt. Top with the chopped pecans.  Place pan in the refrigerator to allow caramel to set, about 10-15 minutes.
7. Melt chocolate chips over a double boiler, allow to cool but not harden.
8. In a mixer using a paddle attachment, mix the cream cheese and sugar until smooth.
9. Mix in vanilla.
10. Add eggs, one at a time until mixed in.
11. Add slightly cooled melted chocolate.
12. Pour batter over the caramel and nut layer of the crust.
13.  Bake for approximately 40 minutes, or until barely set in the center. Remove from oven and cool.
14. Cover the cooled cheesecake and refrigerator overnight.


When I was in college, my dad used to send me a pound sized vanilla cream filled egg from Fannie May Candies. It usually was sent after Easter as my economical dad would buy it on sale the day after the holiday. When it arrived at the dorm and ultimately at the sorority house, it didn't last long as everyone came in asking if they could have just a small slice. I suppose I should have been happy to be saved the intake of so many calories, but secretly I wanted to make this cream filled egg become a daily treat for all of the studying I was doing on Mondays, Tuesday, Wednesdays, Fridays, Saturdays and Sundays. Thursday nights at the University of Illinois were reserved for going out to the bars. Somehow beer and chocolate did not seem like a good combination on those nights.

Easter would not be Easter if I didn't buy Fannie May candy as gifts for family members or put out on a tray at the holiday dinner.  There are no Fannie May Candy stores out here on the east coast, so when I travel back to the midwest I usually try to pick up a box to keep for 'company'. Childhood memories are always pretty powerful.  So even though I have gone on to appreciate other chocolate candies (Donaldson's in Lebanon, Indiana and Haven's Candy in Maine), Fannie May candies will always be my favorites. Its funny how making this turtle cheesecake aka pixie cheesecake brings back a set of great memories from a long time ago, especially the ones involving my dad.


Monday, March 4, 2013

Strawberries in Agave Nectar, a beginning of the week amuse-bouche

On my last day of a too short five day vacation, we stopped for breakfast at the Starr Pass Resort in Tucson on the way to the airport.  The sky could not have been more blue on this day making the views from this resort seem even more incredible, more memorable.  Until seeing the blue skies in Arizona, I thought the blue skies on Nantucket and the blue skies in Colorado were amazing. Taking in the beauty of nature, particularly when I am in another region of the country, can literally take my breath away.  And on this day, I felt like I stopped breathing a few times. When I left Tucson, I thought 'what is not to love about this place?' Well, maybe the 100 degree temperatures in the summer.


Our breakfast began with an amuse-bouche or sometimes it is referred to as a chef's muse.  An amuse-bouche in French translates to 'mouth amuser' and it is intended to be an unexpected single, bite-sized appetizer.  It has been described as surprise beginning of the meal bite that allows a chef to express his/her big ideas in small bites.  For those of you have ever had an amuse-bouche, just know that sometimes this small 'bite' feels like a bit of a tease as it is so good you don't want to stop at just one bite.

The wonderful surprise start to our breakfast was an amuse-bouche of fresh strawberries in agave nectar.  I know this doesn't seem incredibly special but neither of us ever this combination of flavors before.  Those 'first' experiences can often be a little intoxicating. The strawberries were served in a small cylinder glass accompanied by a dainty little spoon. Fortunately, there was a little more than one bite of this simple, yet insanely delicious combination of flavors. The taste of those strawberries in agave nectar stayed with me days after returning back to the east coast. So I thought I would try to recreate this amuse-bouche needing only to figure out the ratio of strawberries to agave nectar.


The creation of this amuse-bouche began with first rinsing off and drying the strawberries.  I wanted small bites so I first quartered the strawberries and then cut each quarter into three or four little bite sized pieces.

After cutting up one quart of strawberries, I thought I would begin by mixing in one quarter (1/4) cup of light agave nectar.  Why a quarter cup?  Well a quarter cup of agave nectar is equivalent to one half cup of sugar.  And considering that agave nectar is sweeter than sugar and tastes more like a honey, I went with the less, but not too less, way of thinking. Given the quantity of strawberries I had cut up, I thought, no actually I was hoping, this might be the perfect ratio of ingredients.  And luckily I did not need to experiment any further as the result tasted almost exactly the same as the amuse-bouche eaten or rather devoured in the restaurant at Starr Pass.  Guess I would have had to start over if the quarter cup of agave nectar was too much.  


After I mixed in the agave nectar, I let the strawberries macerate in the refrigerator for a few hours so the berries themselves would exude even more liquid. It was the combination of eating both the strawberries and the agave sweetened liquid that made this little treat so incredibly delicious.

Served in a tall shot glass or small bowl or ramekin, this would be a great way to start any brunch or weekend breakfast.  But why wait for the weekend!  You can begin your day treating yourself to this incredible deliciousness. And in case you have a little bit of this left over, I think it would also be great poured over some vanilla ice cream.

Recipe
Strawberries in Agave Nectar (inspired by an amuse-bouche served at the Starr Pass Resort in Tucson)

Ingredients
1 quart of fresh strawberries, stems removed 
1/4 cup of light agave nectar

Directions
1. Wash and dry strawberries.
2. After removing stems cut strawberries into bite sized pieces.
3. Mix in one quarter cup of light agave nectar.
4. Cover and allow the strawberries to macerate in the nectar.  Can be made up to two hours ahead or made the night before.
5.  Serve in small ramekins or tall clear shot glasses.

I can hardly wait for the strawberry season to return here so I can experience this amuse-bouche with freshly picked strawberries.  And given the sweetness of fresh picked strawberries I might slightly lessen the amount of agave nectar used.  In the mean time, the strawberries bought at the grocery store will just have to satisfy me, my guests, and hopefully you as well.  Because sometimes a little bit of a tease can be a good thing.

Not surprisingly, I bought a few 'souvenirs' while in Tucson.  I am still awaiting the arrival of some great tequila shot glasses (they would be perfect for serving this small bite) and margarita glasses. Yet inspite of acquiring some new treasures, I actually think the making of this little chef's muse might just be the most perfect way to recreate a little bit of the southwest experience here on the east coast.  From the San Xavier Mission, to the DeGrazia Gallery, to the arts community of Tubac, to the Saguaro National Forest, to seeing the PiPhi house on the University of Arizona campus, to the hike in the canyon, I feel like my time there was a bit of a tease too.  Long enough to appreciate its beauty but not long enough to truly savor and take it all in.  But if I close my eyes, I think I can still see those incredibly blue Arizona day and before sunset skies.


Sunday, March 3, 2013

Chocolate Chip Cookies with Sea Salt, no Nuts

Chocolate chip cookies are comfort food.  Whether you are having a good day or not, they make any day better.  Over the course of my life I think I have made at least ten different recipe versions of chocolate chip cookies.  With each recipe I am convinced that I have found the best one.  Then I come across another recipe, reluctantly try it, and then to my amazement the new recipe becomes my absolute favorite.  The chocolate chip cookie recipes I have made ranged from melting the butter to not melting the butter, from using light brown sugar to dark brown sugar and variations in between, to chilling to not chilling the dough, to adding to leaving out nuts, to using milk chocolate to using dark chocolate, to adding oatmeal or not, to using two eggs to using an egg and one yolk.  Okay, you get the picture.


Now after years of making chocolate chip cookies, I am absolutely convinced that Jacques Torres' chocolate chip cookie recipe really is the best chocolate chip cookie recipe, ever.  It is a phenomenal cookie and hard to believe a cookie this delicious and this beautiful can come out of a home kitchen.  Your family and friends will think you have spent a fortune for them at a bakery.


There are a few things that make this recipe different.  The first is the use of both bread and cake flours. These flours change both the texture and taste of the cookie. Bread flour has a higher protein content and cake flour has a lower gluten content.  The combination of the two brings the best of both baking worlds into one cookie.  All of the dry ingredients are sifted together and then set aside while you mix the other ingredients.  Remember, measure first then sift.

The difference between measuring granulated white sugar and brown sugar is that brown sugar needs to be packed down into the measuring cups.


I like to cut up each stick of butter into about six pieces before adding to the mixing bowl.  It seems to make the creaming process a little easier.  Both sugars and the butter are added to the bowl and mixed with a paddle attachment.


The butters and sugar are mixed until light and fluffy.  This can take up to five minutes. Once the butter and sugars are mixed you add the eggs and vanilla.  The eggs are added one at a time.  After the eggs are incorporated, you add the vanilla extract.  I love the Nielsen-Massey Vanilla and think it is the best vanilla on the market.

After the dough is mixed you add in the dry ingredients and mix slowly for 15-30 seconds or until the dry ingredients are just mixed in.  Then it is time to add the chocolate chips. In Jacques Torres' recipe he calls for the use of a block of bittersweet chocolate that has been chopped.  In case you don't have high quality bittersweet chocolate available to you, I have found that using the Ghiradelli 60% cocoa chocolate chips work perfectly in this recipe. You can use milk chocolate chips for this recipe, but then you would omit the use of the sea salt.


This is one of those chocolate chip cookies where you have to chill the dough for at least 24 hours.  This means some planning ahead is necessary, but just know they are worth the wait.  The dough is covered with plastic wrap. Make sure you press the plastic wrap directly on top of the dough.  This will ensure that the dough does not dry out.

For uniformity of the cookies, I always use an ice cream scoop. To get the golf ball size rounds of dough, I use a 1 3/4 inch ice cream scoop.  Williams-Sonoma has a great selection of ice cream scoops with the ones made my Piazza perfect for making cookies as well as for scooping ice cream.


The second thing that separates these cookies from all others is the use of sea salt.  Yes, the finishing touch on this cookie is a light sprinkle of sea salt.  It is added before you put them in the oven. I very lightly press down on the mound of dough, just enough to take the top round down slightly before sprinkling the sea salt. The combination of the dark chocolate and sea salt in this cookie takes it over the top in taste.


The cookies are baked on a parchment paper lined cookie sheet for 18-20 minutes in the upper third of the oven.  If you bake the cookies in the center of your oven, your cooking time might only be 16 minutes, so I suggest you check the cookies as you bake them.  Not all ovens and not all cookie sheets are created equal, leading to some unintended outcomes.  The cookies are done when they are lightly browned but still looking soft.


Cookies are removed from the hot baking pan and placed on a rack to cool.  Cookies left on a hot baking pan continue to bake even if they are not in the oven. When the cookies have cooled place them on a platter to serve or store in a covered container.

Recipe
Chocolate Chip Cookies with Sea Salt, no Nuts, the Jacques Torres version (a mere suggestion of a change, it is not worth tinkering with perfection)

Ingredients
2 cups with 2 Tablespoons removed of Cake Flour (8 1/2 ounces)
1 2/3 cups bread flour (8 1/2 ounces)
1 1/4 teaspoons baking soda
1 1/2 teaspoons baking powder
1 1/2 teaspoons Kosher salt
1 1/4 cups (or 2 1/2 sticks) unsalted butter, room temperature
1 1/4 cups light brown sugar, packed 
1 cup plus 2 Tablespoons sugar (8 ounces)
2 large eggs, room temperature
2 teaspoons of vanilla extract
1 1/4 pounds (or two packages) of Ghiradelli bittersweet chocolate (at least 60% cocoa) 
Sea salt for topping the unbaked cookies

Directions
1. Take butter out the night before.
2. Sift together the flours, baking soda, baking powder, and salt and set aside.
3. Using a mixer with a paddle attachment, cream butter and sugars until very light, about 5 minutes.
4. Add eggs one at a time, mixing well after each addition.
5. Mix in vanilla.
6. Reducing speed to low, add dry ingredients and mix until just combined 15-30 seconds.  Do not over mix.
7. Drop in chocolate chips and mix until incorporated throughout.
8. Cover dough with plastic wrap, pressing the plastic wrap against the dough, and refrigerate for 24 hours. (Dough can be used for up to 72 hours of refrigeration.)
9. Preheat oven to 350 degrees.
10. Line cookie sheets with parchment paper.
11. Using a 1 3/4 inch ice cream scoop or scoop mounds of dough the size of golf balls and place onto prepared baking sheet. 
12.  Press dough down oh so lightly, just to flatten the top.
13. Sprinkle lightly with sea salt.
14. Bake in upper top third of oven for 16-18 minutes, or until they are lightly golden but still soft.
15. Transfer to wire rack to let cool.


For a still unknown reason I never went to kindergarten, so the experience of having a milk and cookie snack is not part of my school life memories.  My first memory of eating chocolate chip cookies were tasting a warm Nestle Tollhouse cookie fresh out of the oven.  It seems way back in the 60's the only chocolate chip cookie recipe made in kitchens across the country was the Tollhouse recipe made with margarine and not butter.  Well at least in the kitchen I grew up in margarine was substituted for butter. But as a kid pretty much any warm cookie coming out of the oven was going to taste delicious unless of course they were burnt. Yes there were quite a few burnt cookies made in my house.  Looking back I attribute this to thin cookie sheets and a non-calibrated oven.  

The evolution of the chocolate chip cookie and the proliferation of chocolate chip cookie recipes has made choosing the best one all the more challenging.  Like everything, we all have a personal favorite.  For me, the chocolate chip cookie recipe developed by Jacques Torres takes ordinary ingredients and turns them into a most heavenly cookie, certainly good enough to be food for the Gods and oh, let's not forget the angels.  Oh how I wish these were the cookies from my childhood.


Saturday, March 2, 2013

Margarita, Hill Country Style with a Twist

I think spending five days in Tucson last week has me obsessing about tequila and margaritas.  Not a bad thing really. So the first time I actually drank tequila was at Landry's restaurant in Chicago having dinner with friends. That is, if you call 'licking salt from your hand and then immediately devouring the shot' drinking tequila.  After my first exposure to tequila, I couldn't help but wonder how this way of drinking of tequila wasn't very different from the consumption of bad tasting medicine.  For some reason that first experience didn't exactly send me running to the store to buy tequila. It wasn't until I was in San Antonio and someone brought me one of those frozen margaritas they serve during the cocktail hour that I had my second experience drinking tequila. Being presented with a frozen margarita was a really kind and thoughtful welcoming gesture, but after looking at the concoction served in a plastic glass, I thought 'pretty sure what is in here is not really good tequila'.  Then I looked at what the person who brought me the frozen margarita was drinking.  The beer in his hand was all I needed to confirm my suspicions.


I began to think I was destined to not acquire an appreciation of good tequila or a good margarita until one night having dinner at restaurant, Bien Trucha, in Geneva, Illinois, with friends.  From the margarita to the flight of sipping tequilas, I learned what a great margarita and great tequila tasted like. The third time, as they say, was definitely the charm.

While I am not an expert in tequilas by any means, I seriously do think in a blind taste test I could tell the difference between the first tequila shot I drank, the tequila in my first frozen margarita and the tequila I had at Bien Trucha.  (As an aside, for those you who live within 100 miles of this restaurant, you need to go there for the food and the drinks.  It is an amazing little, and I mean little, gem of a restaurant. Lines form for lunch and dinner at this place, it is that kind of good. And if your tequila drinking experiences were like my first two, well this place could be a turning point for you too!)


Often when I want to learn more about something I either look to read a book about it or just try to seek out information through an internet search.  Seems there are quite a few internet sites rating, describing, discussing and debating the merits of the wide variety of tequilas on the market. Yes, I know the internet is filled with all sorts of misinformation, but I actually found a most interesting site: The Tequila Connection.  The writers of this site claim they evaluate tequila 'on the aroma, initial taste, body, flavor and smoothness...trying not to focus on price or presentation as you don't taste the bottle and prices vary considerably'.  They also have a disclaimer of sorts which leads you to believe they do not seem to take themselves too seriously.  And in spite of their rating information they pretty much say you need to decide for yourself what your taste preferences are.  Whoever the people behind this site are, I think I like them.

As much as I enjoy tequila all on its own, not everyone does. So the margarita may be the most fun way to serve and enjoy tequila.  There are so many margarita recipes written in books devoted to only margarita recipes, there doesn't seem to be enough time to make them all.  Well, maybe there is. In doing some research, it seems the classic margarita has at least three ingredients:  tequila, freshly squeezed lime juice and some type of orange liquor.  One of the least expensive orange liquors is Triple Sec while the more popular and most pricey of the orange liquors are Cointreau and Grand Marnier. Some say these two orange liquors are interchangeable in a margarita, that the one you choose is all a matter of taste.  Others claim the Cointreau doesn't detract from the flavor of the tequila and should be the orange liquor used when making margaritas. Again, like the 'guys behind The Tequila Connection website, ratings are only ratings, what matters is how it tastes to you. My personal preference is using Cointreau in margaritas.  Not sure why, it just is.

Rebecca Rather's original Hill Country margarita recipe called the use of guanabana nectar.  Even though I had made this recipe with agave nectar, I thought I would try to find some guanabana nectar while I was in Tucson last week.  But amazingly, no one in Tucson had ever heard of guanabana nectar. I was actually proud of myself for managing not to drag my friend to every grocery store in Tucson on my quest to acquire some guanabana nectar. I can get a little obsessed at times with wanting to experience a recipe as written, but seriously, the agave nectar is absolutely perfect in this margarita.  If guanabana nectar never passes my lips, I don't think I will be deprived.


Fresh limes and lemons make a difference in a margarita.  The combination of these two citruses are incredible. You might be lulled into buying a bottle of margarita mix, but if you never use fresh fruits you might never know what you are missing.


Seems the choices of drinking margaritas are 'with or without salt' and 'on the rocks or straight up'. I am a 'with salt and on the rocks' margarita girl.  Wetting the rim of a glass with a lime or water will enable the salt to stick perfectly to the glass.  Remember you need a coarse salt for margaritas.  The margarita salt from Williams-Sonoma is one of my favorites, but Jose Cuervo sells margarita salt too.


These margaritas are great all on their own but they go perfectly with the guacamole recipe shared with you a few weeks ago.  I don't know about you, but when drinking tequila I seem to need the balance of having a little bit of food in my stomach.  It's all about trying to maintain balance (literally and figuratively) as well as some sanity when drinking tequila.  I don't know about you, but I want to remember what I did and said after consuming a couple of margaritas.  Chips and guacamole or chips and salsa or chips, guacamole and salsa all go perfectly with margaritas.

Recipe
Margarita, Hill Country Style with a Twist (slightly adapted version of Rebecca Rather's Hill Country Guanabana Margaritas)

Yield:  Makes 2 servings.

Ingredients
1/4 cup freshly squeezed lime juice
1/4 cup freshly squeezed lemon juice
3/4 cups Silver Tequila
3 Tablespoons of Cointreau
1 Tablespoon confectionary sugar
1/4 cup agave nectar
1 cup crushed ice
Coarse salt, for coating the rid of the glasses
Lime wedges
More ice

Directions
1. Mix lime juice, lemon juice, tequila, Cointreau, confectionary sugar, and agave nectar in a large cocktail shaker.
2. Add one cup of crushed ice and shake until cold.
3. Pour coarse sugar on a plate, rub glasses with lime edge and then dip glass in sugar.
4. Fill glasses with ice.
5. Using a cocktail strainer, pour drinks into glasses.


I have been known to be a little gullible, okay maybe more than a little.  But anyone who tries to convince me a bottled margarita mix is better than mixing fresh ingredients will not even sway the oh-so gullible me.  Maybe it is because the bottled mixes remind me of the not so pleasant frozen margarita drinking experience I had in San Antonio years back.

Okay here I go again, making some of you ask yourself 'Who in the heck is this blogger?, Didn't she say more than once here taste is all a matter of preference?, Why I am reading this blog anyway?'  The answers are:  just a simple girl who likes nice things; yes I did say that; and well, I can't answer that last one.  So unless you are completely taken aback by what I just wrote, I really do hope you make this margarita recipe and then decide for yourself if it is any good.  For those of you who have been making margaritas with a bottled mix, I hope this recipe convinces you to shift from convenience to authenticity when making yourself and your friends margaritas.  Who knows, this could be your signature drink this summer. But then again why wait for warm weather, this is a four season margarita.