Sunday, April 28, 2013

Pan Seared Oatmeal with Cider Syrup & Warm Fruit Compote

Oatmeal, or rather cooked oatmeal, is a food that has grown on me over time.  It was once a food I barely tolerated, now it is a food I sometimes crave. I must confess though that I need to add a little brown sugar to my oatmeal. Which probably changes it from being a perfectly healthy food to being an almost perfectly healthy food. But better a little less healthy than mostly unhealthy. Right?

Every once in a while when having breakfast in a restaurant, I will order oatmeal.  Most menus offer cooked or baked oatmeal on the menu, but once when in a restaurant called Honey, located in the western suburbs of Chicago, I saw something called Pan Seared Oatmeal.  It was described as 'steel-cut oats cooked in apple cider, brown sugar, spices, seared then served with dried fruit, apple cider reduction'. They had me with brown sugar, but the thought of having the oatmeal flavored with apple cider, dried fruit and brown sugar was more than enough of an enticement for me order it. And I was so happy that I did. One bite and I was making noises. You know those kinds of Meg Ryan "When Harry Met Sally" noises one makes when they have just tasted something divinely delicious. These are not the kinds of noises you make in a restaurant by yourself, you need others sitting with you at the table.  Being mid-morning in a public restaurant, my noises were mostly audible to those at my table.


This wasn't a restaurant that shared its recipes.  Imagine that!  I have been thinking about this oatmeal lately. Yeah, go figure. So I decided to go on the hunt for this recipe, to try to find if there was anything out there closely resembling it.  Amazingly Cooking Light had a recipe for Pan Seared Oatmeal that contained ingredients almost replicating those in the restaurants oatmeal.  I was hoping this recipe would turn out as delicious as it sounded and closely resemble the pan seared oatmeal served in the restaurant back in the midwest.  And much to my delight, my hopes came true.


It is nice to wake up in the morning when having guests and be able to put together a beautiful and delicious breakfast without needing to spend too much time in the kitchen.  This pan seared oatmeal is one of those recipes where almost everything can and should be made the night before, particularly the oatmeal and the fruit compote.  And for those of you who don't rank oatmeal high on your list of favorite foods, consider this way of preparing oatmeal as list changer.


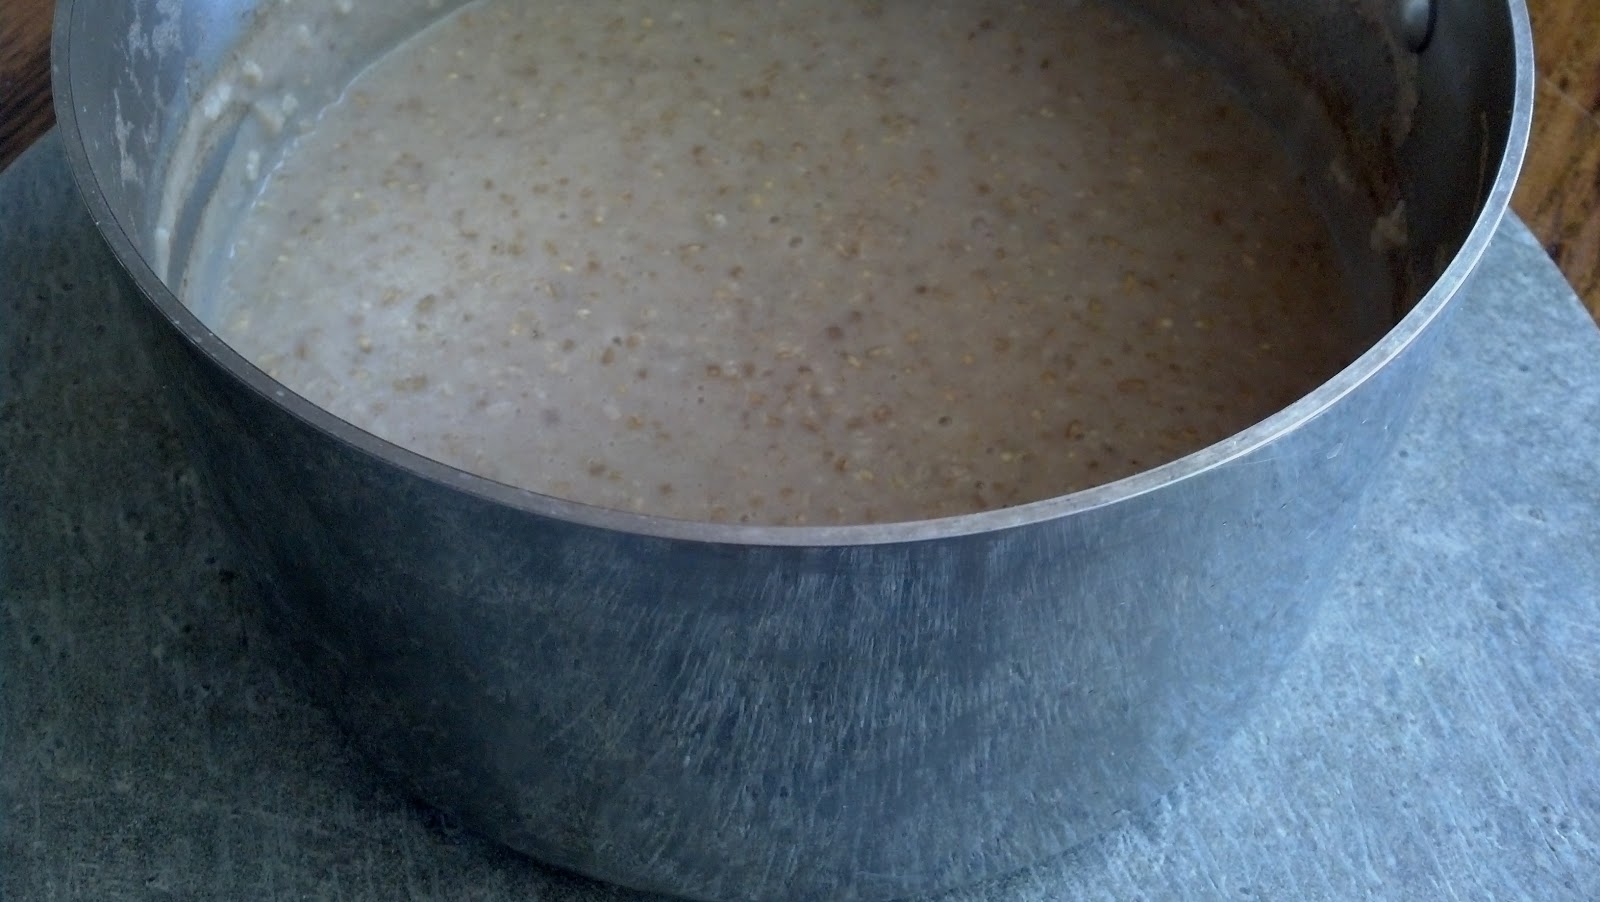
To make the oatmeal, you first combine the water, milk, brown sugar, cinnamon and salt in a heavy medium sized saucepan.  Cooked at medium-high heat this mixture is brought to a boil.  Once it reaches the boiling stage, you add the steel-cut oats, reduce the heat to simmer and continue to cook for approximately 20 minutes or until the oatmeal has thickened.  My cooking time was exactly 20 minutes.


The thickened oatmeal is then poured into a parchment paper lined 9 x 9 inch non-stick pan and allowed to set.  The recipe I adapted called for letting it set up for an hour, but I don't think an hour was long enough.  After it cooled to room temperature, I covered it and placed it in the refrigerator to set up overnight.

Trust me when I saw you will be really happy if you line the pan with parchment paper. You will be able to just lift up the oatmeal, place on a cutting board and then cut into triangles. The 9x9 sized pan enables you to make 16 evenly sized rectangles yielding 8 servings.


In a non-stick skillet, melt one to two tablespoons of butter.  Depending on the size of the skillet, add 4 or 8 triangles, giving them some breathing room to cook.  

The oatmeal triangles are seared on each side for 2 to 3 minutes or until golden brown and heated through. Remove from the pan, place in a warm oven and continue cooking until all of the oatmeal triangles are cooked.


When making the compote, you can use any combination of dried fruits that you like.  Because I love raisins, I thought I would create a compote made of a mixture of white and dark raisins.  For a different plated look next time, I might use a combination of regular sized and jumbo raisins.  The compote begins with combining the water, brown sugar, cinnamon and dried fruit.  It is brought to a boil and then simmered for 20 minutes or until thick.  The next time I make this I will use half water and half apple cider to give the compote mixture a deeper, richer flavor.


Yes, you can still buy apple cider in the spring1  Even my little grocery store in town carried it in the refrigerated section.  In larger grocery stores, you can sometimes find apple cider in the produce section or the juice aisle.  The syrup is simply a reduction sauce.  Cooked at medium-high heat for approximately 20 minutes or reduced to 1/3 cup and slightly thickened.  I found that it is best to use the syrup immediately after making it as it will further set up and harden.  But not to worry, you can loosen it by adding a small amount of apple cider to get the consistency back to a thickened syrup, sort of like the consistency of pancake syrup.

Recipe
Pan Seared Oatmeal with Cider Syrup & Warm Fruit Compote (slight adaptation of the Pan Seared Oatmeal recipe from Cooking Light)

Ingredients
Syrup
2 cups apple cider

Compote
2 cups water (or 1 cup water and 1 cup apple cider)
1/4 cup light brown sugar
1/2 teaspoon of cinnamon
7 ounces of dried fruit bits (I used 7 ounces of white and dark raisins)

Oatmeal
3 cups water
1 cup 2% milk
1/4 cup light brown sugar
1/2 teaspoon of cinnamon
1/4 teaspoon salt
1 1/2 cups stee-cut (Irish) oats (I recommend McCann's)
2 Tablespoons butter

Directions
Oatmeal
1. Combine water, milk, brown sugar, cinnamon and salt in heavy medium sized saucepan.  Bring to boil over medium-high heat.
2. Stir in oats and reduce heat to simmer.  Simmer for 20 minutes or until thick.  Stir occasionally.
3. Line a 9x9 non-stick pan with parchment paper.  Pour cooked oats into prepared pan.
4. Allow to chill at least one hour or until set.  Recommend making the night before to allow oatmeal to fully set.
5. Cut oatmeal into 8 equal squares, then cut diagonally in half to form a total of 16 triangles.
6. In a medium sized non-stick skillet, melt 2 tablespoons of butter.  Add 8 oatmeal triangles.  Cook 3 minutes on each side or until golden brown.
7. Remove from pan and keep warm.  Continue cooking remaining oatmeal triangles, adding another two tablespoons of butter to pan.
8. Place two oatmeal triangles on a plate.  Top with 3 to 4 tablespoons of fruit compote and 2 tablespoons of cider syrup.

Fruit Compote
1. Combine water, sugar, cinnamon and dried fruit in a medium saucepan.  Bring to a boil.
2. Reduce heat and simmer approximately 20 minutes or until thick.
3. Remove and heat. Serve immediately or refrigerate and reheat before serving.

Cider Syrup
1. Bring cider to a boil in small saucepan over medium-high heat.
2. Cook for approximately 20 minutes or until cider is reduced to 1/3 cup. Set aside.  (It is best to make the cider syrup on the morning of serving the pan seared oatmeal.)


As I now reside in the 'country' and not in the 'suburbs', the sounds of cars, trucks, planes, and trains have now been replaced with the sounds of roosters, sheep, chickens, cows, peacocks and horses. And oh yes, lest I forget the night time or very early sounds of coyotes.  But more than the sounds of these animals, are the sounds of silence and the ocean waves.  In my sometimes chaotic, stressful life, it is these sounds that nurture my spirit and allow me to have time to think, reflect.  I had a friend once who when I asked 'what are you thinking about?'.  His answer was sometimes 'nothing'.  I often wondered, how could anyone be thinking of nothing?  Well now I know that it sometimes feels good to just let your mind wander and give yourself permission to 'not think'.  And after the periods of a quiet mind I allow myself to have, I return back to my world of competing thoughts and multi-tasking happier.

As I was driving the other day, I stopped to take some photos of a few horses grazing.  Much to my pure delight, one of the horses came from across the field up to the fence where I was standing. He even allowed me to pet him, although I must admit I wasn't sure if this was such a good idea.  But just looking into this horse's most beautiful deep brown eyes, I somehow knew it was going to be okay.  And then I wondered to myself 'so what are you thinking horse with the beautiful brown eyes?'  This was not Mr. Ed so there was no response to this question (for those of you not old enough to remember Mr. Ed, he was a talking horse in a television show a very long time ago).  But did you ever just look into the eyes of someone and instantly feel an incredible connection to them, suddenly not hearing anything? These would be the best moments of silence.


Saturday, April 27, 2013

Crab Cakes, Shaw's Style


Thankfully the weather improved just enough this weekend for a long leisurely walk on the beach along the ocean. Since moving to the east coast, I have discovered just how soothing the sound of waves can have on my spirit, on my soul. Which means I have tried to make time to listen to them as often as possible. One's spirit can never be soothed too much! The drive from the farm house to the ocean is three short minutes. So even at the end of a long day I can have the zen like wave listening experience as often as the weather cooperates. With the days getting longer now, my end of the work day destination will be beach. That is, of course, unless my work commitments turn my usual 10 hour day into a 12 or 14 hour one.

One cannot help but being taken in by the ocean for both its beauty and its bounty. And speaking of bounty, I have had some lump crab meat in the refrigerator for awhile now. Time had come for me to make something with them, rather than just open up the can and just start eating them. Since it had been awhile since I had made crab cakes, it suddenly felt like a crab cake making kind of day.


The first time I ever had a crab cake was at Shaw's Crab House, a restaurant in Chicago.  Their lump crab cakes were and still are absolutely drive worthy, pay for parking, and wait for a table over the top good.  I had been making crab cakes using a recipe from a restaurant in Boulder, Colorado, but I thought if I spent some time searching I might find one that either replicated the Shaw's Crab House recipe or find their recipe.


It didn't take too much looking as I found a video posted by a chef from the restaurant who described how to make these delicious and decadent crab cakes.  The recipe I found listed chopped parsley and cayenne in the ingredients, but I didn't feel like having those flavors in the crab cake so I left them out.  After I made and tasted them, I thought they were perfect.  So I am pretty certain I wouldn't add parsley or cayenne to this recipe any time soon.


The recipe recommended using 3/4 pound each of crab meat and crab claw meat.  I wanted these crab cakes to have a higher ratio of lump crab meat to claw meat, so I used one pound of lump and a half pound of claw meat.  This turned out to be a perfect ratio.


The crab cakes are held together with a mayonnaise based mixture seasoned with mustard, Worcestershire sauce, white pepper and Old Bay Seasoning. One tablespoon of cracker meal (I used crushed Saltine crackers) and one tablespoon of the mixed egg are added to the mayonnaise mixture.

The mayonnaise mixture is then combined with the crabmeat. Once everything was mixed together, I added the remaining mixed egg and one additional tablespoon of crushed Saltine crackers to ensure the crab cake mixture would bind well.  The crab mixture is covered and hilled for at least 30 minutes. One of the great things about this recipe, is that you can mix everything together early in the day and then cook right before serving.


If you are making all of the crab cakes at once, use a nonstick skillet large enough to hold all of the crab cakes so they have room to breathe. I used a two-inch ice cream scoop to form my crab cakes so they were of the same size and weight.  The non-stick pan should be wiped with some vegetable oil and heated before adding the crab cakes.

The crab cakes are seared on both sides and then placed in a preheated 400 degree (F) oven where they are baked for 10 minutes.  These over the top, rich and delicious crab cakes are served with the mustard mayonnaise sauce. The combination of the flavors of the crab and the mustard mayonnaise sauce is incredible. I don't think you will ever use tartar sauce on a crab cake again.


The mustard mayonnaise sauce is one of the easiest you will ever make.  Rice vinegar, dry mustard, Worcestershire sauce and a pinch of Old Bay seasoning are added to one cup of mayonnaise.  After all of the ingredients are thoroughly mixed allow the sauce to chill for at least 30 minutes.  The sauce can be made the night before or early in the day to allow the flavors to more fully develop.


Recipe
Crab Cakes, Shaw's Style (inspired by Shaw's Crab House crab cake recipe)
Updated January 2024 

Crab Cake Ingredients

1 pound (554g) lump crab meat
1/2 pound (227g) crab claw meat 
1/2 teaspoon dry mustard
1/4 teaspoon white pepper
1/4 teaspoon Old Bay seasoning
1/2 teaspoon Worcestershire sauce
1/2 cup mayonnaise (recommend Hellman's)
1 large egg, beaten
1 to 2 Tablespoons cracker meal (or crushed Saltines)

Mustard Mayonnaise Ingredients
1 Tablespoon rice vinegar
1 Tablespoon dry mustard
1 teaspoon Worcestershire sauce
1 cup mayonnaise
pinch of Old Bay seasoning

Directions
For the crab cakes:
1. Mix dry spices into Worcestershire sauce.  Then add mayonnaise and mix well.
2. Beat egg until frothy.
3. Fold one Tablespoon of the egg into the mayonnaise mixture.
4. Mix together the lump crab and crab claw meat in a bowl or on a tray.
5. Incorporate the mayonnaise mixture and 1 tablespoon of cracker meal (or crushed Saltines) to the crab mixture.
6. Add additional cracker meal and egg as necessary for the mixture to hold together.  Refrigerate for at least 30 minutes.
7. Using a large ice cream scoop, form the crab mixture into 8-9 equal cakes.
8. Lightly brush non-stick a large frying pan with oil.  Heat pan.
9. Add crab cakes without crowding them together.  Press down on each crab cake slightly.
10. Sear crab cakes on both sides, then place on a foil lined baking sheet in a preheated 400 degree oven for 10 minutes to finish the cooking. Remove from the oven and transfer to a serving platter.
11. Serve with the mustard mayonnaise.

For the mustard mayonnaise sauce:
1. Mix the rice vinegar, dry mustard, Worcestershire sauce and mayonnaise together.  When mixed add a pinch of Old Bay seasoning.
2. Refrigerate for at least 30 minutes or overnight.

Notes: (1) I crushed 4 individual squares of Saltine crackers instead of using cracker meal. (2) If possible, buy your crabmeat from a seafood store. (3) The crab cakes can be formed early in the day. Cover and keep chilled in the refrigerator until ready to cook. (4) Instead of making 9 large crab cakes, you could make 18 smaller crab cakes. 


It is easy these day to take things and people for granted.  We get busy, we get distracted, or we have no other point of reference from which to make comparisons.  Because I did not grow up near the ocean or the mountains, I continue to be mesmerized by both of them.  For me, the water and the mountains have been great sources of energy and have been places where I gone to sort out my thoughts.  These views can make my heart race and they bring a sense of calm over me.  And sometimes I have wanted to cry as I can be overwhelmed at their sheer beauty.

I can take photos of the same mountain range or the same ocean time and again and each time I see it differently, my photos are just a little different as well.  Light, clouds, and color of the sky are just some of things that impact my photos of the ocean here out east or the mountains in Colorado.  But they are also affected by my moods. As when I am distracted with thoughts of things concerning me or when I am feeling all is right with the world, my focus changes and so do my photos. While I don't keep a diary, my photos in many ways reveal much of what I am thinking. I have known for a long time that the reason I take so many photos of these landscapes is because I want to capture forever a view that took my breath away or enabled me to simultaneously experience the feelings of calm and energy.  

I get to take in views of the sea everyday now. And there has not been a day that I have taken these views for granted.  Maybe it's because I didn't grow up with them. Or maybe I have just learned to appreciate just how much the landscape can affect my spirit.  It's not always what we hear that matters, it's also what we take in with our eyes.

Sunday, April 21, 2013

Margherita Pizza

Two weeks ago my neice, sister and brother-in-law were out east finalizing my neice's college decision. The good news is that the college decision was made, the better news is that my niece will soon be less than a ninety minute drive away from me. From my perspective I could not be happier that she will be close enough for me to be able to visit or for her to come stay for a weekend. As often as a college freshman wants to see their aunt of course.

While they were here we met for a late lunch at a restaurant that baked its pizzas over a coal fired oven. My sister wondered what kind of a place I had selected for lunch, but fortunately everyone gave the pizza, particularly its crust, rave reviews.  Ever since that lunch, I have been wanting to make a pizza.

Growing up the only kind of pizza we ordered had a thin crust.  I don't ever recall making pizza in our house, unless of course you count baking a frozen pizza in the oven as making pizza. It was a food that was ordered and picked up from the only pizza take-out and delivery place in town on either Friday or Saturday nights.  We always and only ordered an extra-large cheese and sausage.  Little did I know back then there were other options for toppings. When I went to college that I discovered the decadent and delicious world of deep dish pizza.  Garcia's and Papa Del's at the University of Illinois were two favorites.  Over the course of time, my taste in pizza has come full circle and I am now back to preferring thin crust over deep dish.


When Jim Lahey's book "My Pizza" cookbook came out I immediately had to make his dough to see what all the fuss was about.  His dough is really very good, however, it is a dough that takes quite a long time to rise. Although it's one that doesn't require kneading, the 18 hour rise and wait time makes you have to plan at least a day in advance. So this weekend I thought I would try Alex Guarnaschelli's dough recipe as its start to finish dough making time is a little more than two hours. And in a significant departure, I thought would take some short cuts and use a San Marzano pizza sauce (already made and bottled) and Stonewall Kitchen's basil pesto.  I wanted my attention to be only on the making of the dough.  Could I have made the sauce too? So yes, admittedly this is not a pure, made from scratch pizza recipe.  Sometimes we need to make things a little easier on ourselves. But seriously, this pizza was pretty gosh darn good.

Staying with the simple theme here (not a theme that I consistently subscribe to), I thought I would make a Margherita Pizza.  One having just pizza sauce, fresh mozzarella, freshly grated romano cheese, some olive oil and some chopped fresh basil.  A perfect Friday night pizza.  Better yet, this is a perfect just about any night of the week pizza.


In a medium sized bowl, the yeast and warm water (110 degrees) are mixed together and left to rest for five minutes. I am still using a thermometer to test the water temperature as I haven't yet learned what 110 degrees feels like. While the yeast is mixture is resting, measure out three and a half cups of flour, all-purpose flour.


Half of the flour is sifted into the yeast mixture.  Using your hands you mix both together until smooth. What makes this dough different from other pizza doughs is the use of honey. Before adding the rest of the flour, you add two teaspoons of Kosher salt, 1/2 teaspoon of white pepper an 1 scant Tablespoon of high quality honey.  The rest of the flour is then added.  


Initially I began mixing the dough with a wooden spoon and then started using my hands. At first it looks like it may not come together, but have patience as it will. Once all mixed together, you turn out onto a floured surface and knead for 3 to 5 minutes until soft and smooth.  I needed for almost the full 5 minutes.  The ball of dough is placed in an olive oil lined large bowl, covered with plastic wrap, placed in a warm location and allowed to rise for 1 1/2 hours or until doubled in size.


Once the dough has risen, you put onto a floured surface where you shape into a ball.  The large ball of dough is then cut into four sections. Reshape into balls, placed on a cookie sheet, covered with a clean dish towel, and allowed to rest for at least 15 minutes.


I like a free form pizza cooked on a pizza stone.  Working with one dough ball at a time, the dough is stretched into the shape of preference (circle or rectangle or oval).  The edges of the dough of brushed with olive oil.  Almost every book I read about making pizzas shares that this is one of the important 'tricks' of making a great pizza crust.


The pizza sauce is added to the top of the dough, up to the olive oil brushed edges.  I like adding small dollops of basil pesto randomly on top of the sauce.


The fresh thinly sliced mozzarella, freshly grated romano cheese and a sprinkling of pepper are the final layers before placing in the oven.  When I am working on a pizza peel, I sprinkle the peel with semolina flour so it is easier to slide the pizza onto the stone.  Before turning the oven temperature to 450 degrees, place the pizza stone in the oven.  The stone should be hot when you transfer the pizza from the peel to the stone.


The pizza is then baked for 10 to 14 minutes or until the mozzarella is melted, the sides of the pizza have puffed up and have a light to medium browned edge.  Remove from the oven, top with drizzle of olive oil and freshly chopped basil. Adding a drizzle of olive oil to the top of the pizza adds great flavor and makes for a perfect finishing touch. Slice into squares or wedges and enjoy.


Recipe
Margherita Pizza (pizza dough recipe very slight adaptation of Alex Guarnaschelli's recipe)

Ingredients
2 1/4 teaspoons active dry yeast (generally one package)
1 1/2 cups warm water (about 110 degrees F)
3 1/2 cups all purpose flour, plus more for rolling dough
2 teaspoons Kosher salt
1/2 teaspoon white pepper
1 scant Tablespoon of honey
1 Tablespoon of extra virgin oil oil

Jar of pizza sauce (this is enough for the four pizzas made with this dough)
Fresh mozzarella, sliced thin (I like the Bel Gioioso brand)
Basil Pesto (I like Stonewall Kitchen's)
Freshly grated Romano cheese (about a 1/4 cup over each pizza)
1/4 teaspoon black pepper on each pizza
Extra virgin olive oil
Semolina flour dusting the pizza peel or pizza pan
A few fresh basil leaves

Direction
1. In a medium sized bowl, combine yeast with warm water.  Stir to dissolve and allow to rest for 5 minutes.
2. Using a strainer or sifter, sift about half of the flour over the yeast mixture, blending with your hands until smooth.
3. Add salt, pepper, and honey and mix to blend.  Sift in remaining flour and mix until blended.
4. Turn dough out onto a lightly floured surface and knead for 3 to 5 minutes or until soft and smooth.
5. Place ball into a large bowl that has been lightly oiled with olive oil.  Cover with saran wrap, place in warm location an allow to rise until double in size, approximately 90 minutes.
5. Gently press on the dough and turn onto a floured surface.  Divide dough into 4 equal parts. rolling each quarter into a ball.  Place on a cookie sheet, cover with a clean dish towel and allow to rest for approximately 15 minutes.
6. Preheat oven to 450 degrees.
7. Flatten each dough ball into a 10 to 12 inch circle or rectangle.
8. Brush edges of dough with extra virgin olive oil.  Spread pizza sauce (amount as desired) up to edge of olive oil, and add dollops of basil pesto.  
9. Place thinly sliced mozzarella on top, spread a handful of grated romano cheese and 1/4 teaspoon of black pepper on top.
10. Bake for 10 to 14 minutes or until mozzarella is melted and edges of crust are a light to medium brown. Remove from oven.
11. Drizzle some extra virgin olive oil on top along with some chopped basil. Cut and serve immediately.


Eating pizza on Friday nights was a routine back in college, but since then there really have not been any 'food' routines in my life.  Whether it's always going to the same restaurant each week for dinner or breakfast or making the same food on one day of the week, there is something rather comforting about having certain predictable food routines in one's life. This pizza dough recipe has got me thinking that maybe I should again return to eating pizza on Friday night.  Maybe some things are meant to come full circle.  The only difference this time is that instead of ordering a pizza for takeout or delivery, the pizza will be homemade. 


Friday, April 19, 2013

Pancetta and Parmesan Tart

Last week I managed to squeeze in some time to drive to Williams-Sonoma with the intention of picking up some Aleppo pepper for a recipe I wanted to make.  But in my usual modus operandi fashion I managed to leave with a few more things that I just couldn't seem to live without.  Whether I am looking for a must have, need to have or nice to have, I love going into stores selling all things related to cooking no matter where I am traveling. And if there is a Williams-Sonoma anywhere close to where I am staying, I need to at least walk through it.  For those who travel with me, they know there is no such thing as me just walking through this store.  It seems I have gained a reputation for being a terrible influence on those that come into the store with me. Terrible in the sense that I like to find things for them and maybe encourage them, just a tad, to just get a little something. So spouses of my friends have been known to get a little anxious when their wives are shopping with the 'bad influence'. 


The very first time I made Giada De Laurentiis' savory Pancetta and Parmesan Torte, I inadvertently used prosciutto instead of pancetta as my non-Italian eyes and ears had the two confused. But after making it with pancetta the second time, I liked it much, much better. When I finally learned that pancetta is made from pork belly, is cured (but not smoked like bacon) and needs to be cooked, and that prosciutto comes from the hind leg of the pig (the place where ham comes from), is cured for a much longer period of time, and can be eaten uncooked, I knew when I could make substitutions in recipes listing either one of them as an ingredient. Now when my Polish-American ears hear pancetta, they hear bacon and when they hear prosciutto, they hear ham.

If I have to make a choice between making a sweet or savory tart, more often than not I lean toward making a savory one. What I love most about savory tarts is their versatility. They can be perfect as an appetizer, a first course, a lunch or dinner entree and, in some cases, even as a dessert.  Although I must admit, I prefer ending a meal with a little bit of sweetness.  So you won't find me any time soon serving a savory tart for dessert.  Shudder the thought.


The pancetta and parmesan tart is equally delicious served warm from the oven or at room temperature. While my preference is to serve it as an appetizer, it can be served for lunch with a great salad or as a brunch dish.  While a relatively simple dish to make, it presents as something you have labored over. Depending on who you are serving this to, you can either let them think it was a time-consuming endeavor or that it was something you just whipped up on the fly.  This tart would only be more time intensive if you chose to make your own crust.  I have something called a tart-crust making aversion disorder at the moment. Probably curable, but the refrigerated pie crust by Pillsbury works so well I am not feeling compelled (yet) to make my own crust.  Soon maybe.


I have found it a rather interesting coincidence that pancetta generally comes packaged in four ounce quantities and a few of the recipes I have using pancetta call for four ounces. Not three ounces, not five ounces, just four ounces. Because it does not contain as much fat as bacon, a little extra virgin olive oil is heated in a skillet before the pancetta is added. Surprisingly it takes about 7 to 8 minutes for the pancetta to get crispy.  Once crispy, drain on a plate lined with paper towels.

Parmesan cheese is one of those ingredients that is best freshly grated.  Hands down Parmigiano-Reggiano has so much more depth of flavor than that of what I will call a generic parmesan cheese. Between the pancetta and the parmigiano-reggiano cheese, it's hard to say which one of these two ingredients is the reason why this tart is so unbelievably delicious.


Don't you just love a recipe where everything can mixed into just one bowl?  I must confess that I don't mind spending the time it takes to shop for ingredients or prepare a meal, but cleaning-up is another story. You don't even need to pull out a mixer or the KitchenAid for this recipe.  Just a whisk and a bowl, or my personal favorite, the large pyrex measuring cup. The whipping cream, milk, eggs, parsley, salt and pepper are mixed until well blended before the crispy pancetta and cheese are added in.


Once all combined, the mixture is poured into the prepared tart shell.  Often I will sprinkle a little of the leftover grated cheese over the top of the tart as well. To avoid any spillage in the oven, I usually place the tart pan on top of a cookie sheet before placing in the oven. For someone who doesn't like cleaning up the messy dishes, I would gladly take that chore over cleaning spills in the oven any day.


This tart is baked a relatively high temperature (400 degrees) in the lower third of the oven for approximately 25 minutes.  I usually set the timer for 20 minutes and check on it before adding any additional time.  The top puffs up and turns into a beautiful golden color.  When cooled the tart will deflate, not to worry.


Because I like to serve this tart at room temperature I usually make it sometime in the afternoon for an evening gathering.  It serves at least 6 to 8, but if your guests are greater in number consider making two of them, as they has been known to disappear rather quickly.

Recipe
Parmesan Pancetta Tart (slight adaptation of the recipe by Giada De Laurentiis)
Ingredients
1 refrigerated pie crust, room temperature (suggest the Pillsbury brand)
1 teaspoon extra virgin olive oil
4 ounces pancetta, chopped
2/3 cup heavy whipping cream
1/2 cup whole milk
3 large eggs, room temperature
3 Tablespoons freshly chopped flat Italian parsley
1/4 teaspoon Kosher salt
1/4 teaspoon white or black pepper
2/3 cup grated/shredded Parmigiano-Reggiano cheese

Directions
1. Preheat oven to 400 degrees.
2. Press crust into a 9 inch removable bottom non-stick tart pan
3. Heat olive oil in heavy medium sized skillet over medium heat.  Add pancetta and saute until crisp.  Generally takes about 7-8 minutes. Remove pancetta, place on a plate lined with paper towels.
4. In a medium sized bowl, beat the cream, milk, eggs, parsley, salt and pepper with a whisk until well blended.
5. Stir in the cheese and pancetta.
6. Pour mixture into crust and bake for approximately 25 minutes in the lower third of the oven. The tart should be slightly puffed and golden in color.
7. Let rest for at least 15 minutes before cutting.


There have been a series of sudden deaths surrounding my family and friends on top of the recent tragedy in Boston. Beyond dealing with sadness of it all, these events only reaffirmed my belief that given life's unpredictability there are some things we should definitely not leave to chance. For me, the most important of those being friendships and relationships. Certainly we have all had those intense moments where you need walk away to collect your thoughts to avoid saying or doing anything to cause further harm or worse yet, regret.  Or sometimes we need just a little time and space to sort things out.  How we manage this 'time' seems to have been changed forever or maybe it really hasn't.  Maybe we have just taken some things, some people in our lives for granted.

No one in Boston or anywhere else for that matter thought for a moment this week that there would be a tragic loss of lives at the marathon. My sister's boss never thought it fathomable that his 47 year old wife and mother of four would leave this world suddenly one morning without any warning. In light of these daily, painful reminders that life can sometimes be fragile, if there is someone you care very much about, consider how much time you are letting go by before you decide to resolve a misunderstanding or a miscommunication or repair a friendship or relationship. What would be holding you back from letting someone know whether or not they matter to you or are you are willing to take the chance they will be there to listen when you are ready to talk? Time? Think I will be even more cognizant of how much time I think I want or even convince myself that I need. Pretty certain that I won't be taking time for granted any time soon as the risks seem even greater to me now.