Monday, January 20, 2014

Texas Style Chili

Moving out of the east coast farmhouse this past fall meant selling off much of the new and antique furniture I had purchased to furnish it. As the midwest home I was returning to was already fully furnished, I didn't have any room for all of these treasures. Fortunately I had friends and neighbors who bought up all of the furniture I was selling and parting with (although I just had to keep a couple of the antique pieces that I found in New Hampshire and Maine). To thank everyone for making these purchases I decided would make a Sunday lunch on 'furniture pick-up day' and we would all eat as a 'family' on the front porch, one last time before I left.

Now making lunch for everyone (which turned out to be about a dozen people) wouldn't have been such a big deal except that 'furniture pick-up day' was less than two days before I had to have everything packed up and loaded onto the rental truck. Packing up the things I had accumulated over the course of two years turned out to be significantly more work than I thought it would be. Yet, deconstructing and packing up the kitchen (the room with the most accumulations) was going to have to wait after the lunch (no one said I ever made anything easy on myself). Besides I needed to use the All-Clad slow cooker to make BBQ pulled pork and then there is something about eating on 'real' versus paper plates that makes food just taste better.


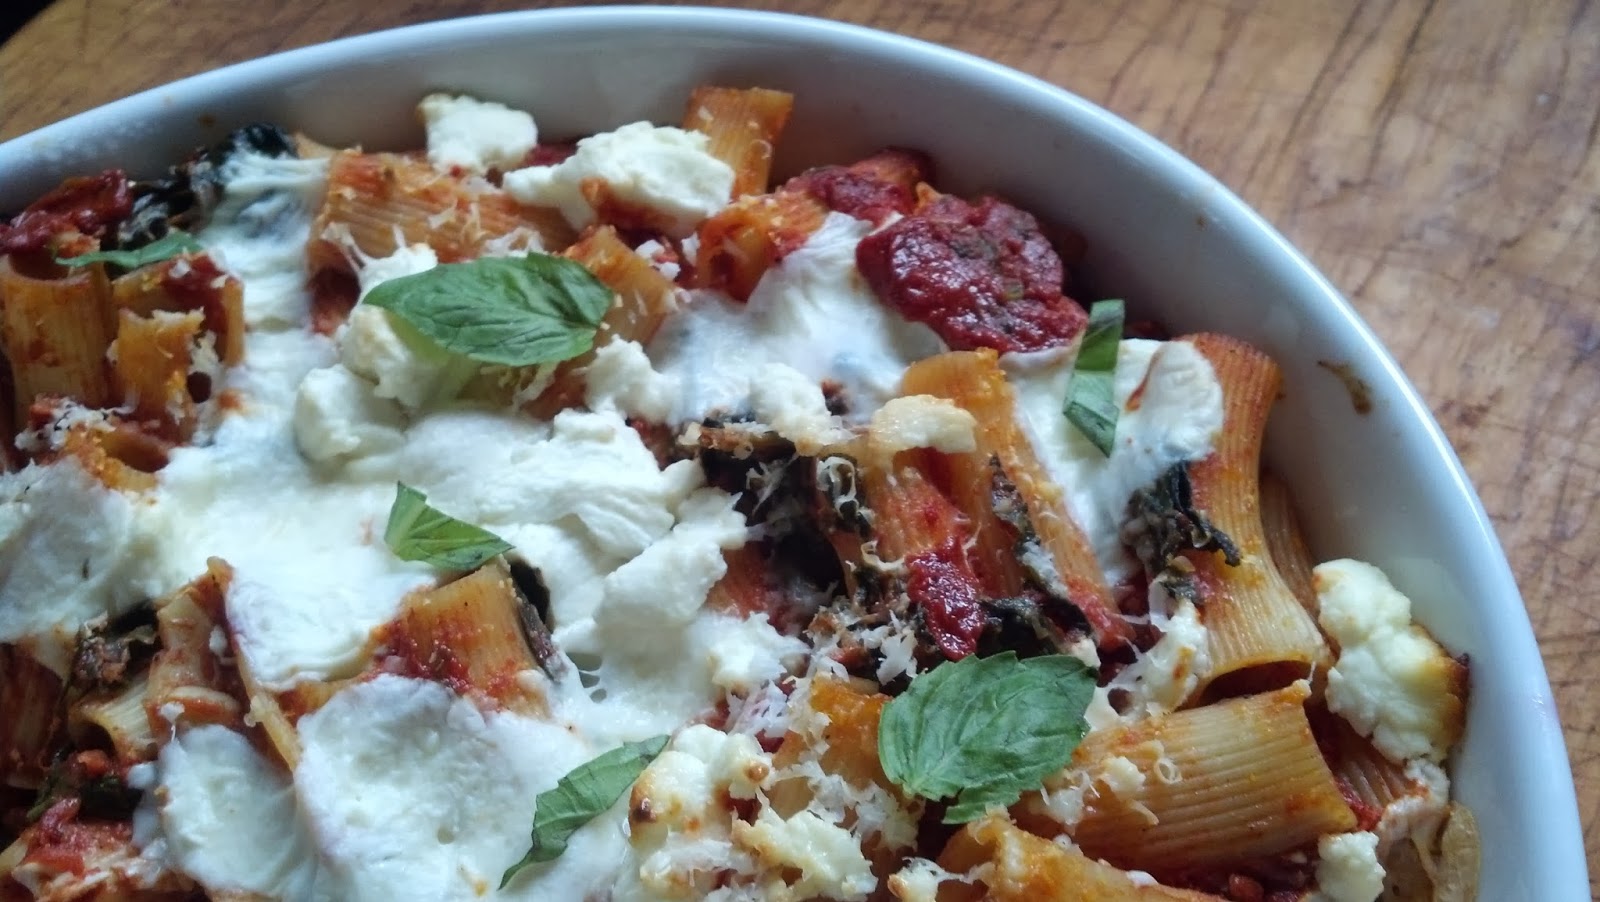
Lunch turned out to be great and ultimately everything in the kitchen was packed up, including the dishes and the slow cooker. For the past three months the slow cooker had remained in its' box. It wasn't until I was deliberating over whether I should make a BBQ brisket or Texas style chili that the slow cooker again saw the light of day. Tipping the scales in favor of making the chili was a craving for corn muffins (for some reason corn muffins and chili go together perfectly, more perfectly than corn muffins and brisket). The brisket could wait, however, I am pretty certain it won't be another three months before the slow cooker is used again.

There are probably many different versions of Texas style chili so it may be a little presumptive of me to even use those words to name this recipe (particularly because I am not from Texas and the handful of trips I have made there over the past 8 eight years would not qualify me as a Texas chili expert). I thought about calling it a Chuck Roast Chili (didn't sound right), a One Bean Chili (still didn't sound right), a Two Spice Chili (sounded a little better) and yes, I even considered calling it a Pretty Gosh Darn Good Chili. But rather than use my creative energies to come up with a name for this chili I decided to settle on Texas Style Chili. The inspiration for the recipe came from the Williams-Sonoma Essentials of Slow Cooking Cookbook. I thought if they could use the words Texas Style to describe this chili, well who I am to argue otherwise. But if anyone (especially if you are from Texas) takes any offense to the name of this recipe, it might be best if you directed any of your objections to them. I am merely a messenger of sorts and am not looking to mess with anyone from Texas.

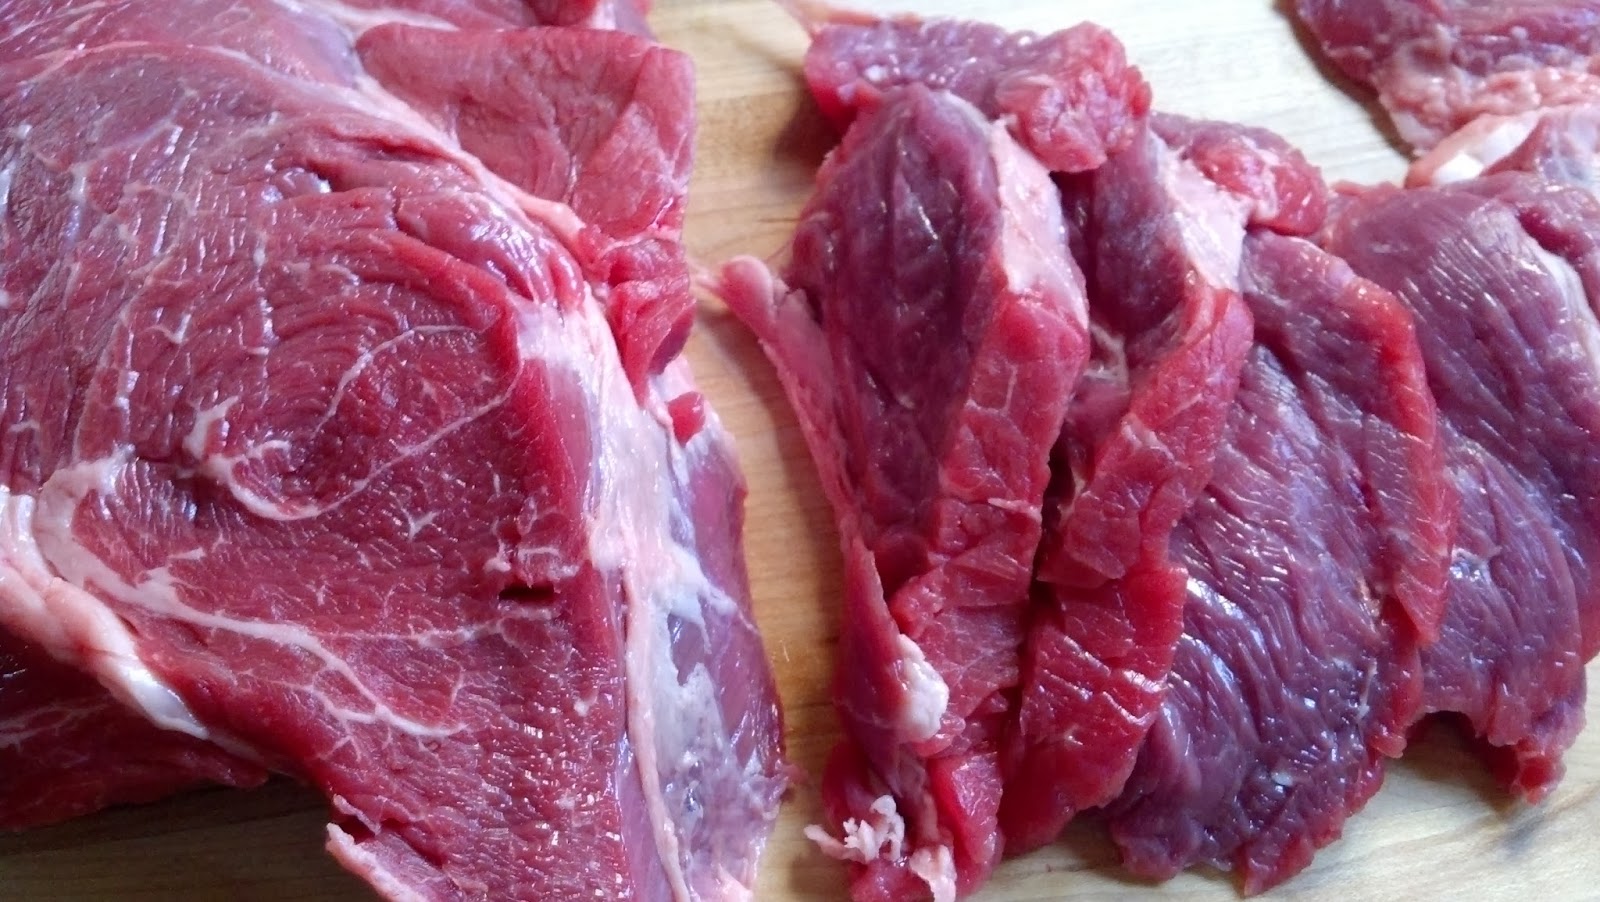
There are several ingredients that contribute to the deliciousness of this chili and the choice of meat used (a chuck roast) is one of them. As delicious as a chuck roast is, a chili slow roasted for eight hours transforms this not so tender meat into melt in your mouth meat. A three pound chuck roast is first sliced, trimmed of fat and cut into 1/2 inch cubes. Although the cubes were actually cut somewhere between 1/4 and 1/2 inch.


Before browning the cubes of meat, a large yellow onion chopped and three cloves of garlic are sautéed in two tablespoons of olive oil (use a large saucepan). Once the onions are softened (about three minutes) and the garlic is allowed to release its' flavor (another minute), the cubes of meat are added in batches until all sides are browned. I sautéed first batch of meat with the onions and garlic, however, before adding the second batch I transferred everything to a bowl. Each time I browned a batch of the chopped meat, I transferred it to the bowl. When the last batch of meat was browned, I emptied the bowl back into the pan.

Three tablespoons of chili powder and one teaspoon of ground cumin are added to the meat, onion and garlic mixture. The mixture is cooked for another two minutes to allow the spices to release their flavor. the entire mixture is then transferred to the slow cooker.


In addition to the onion and garlic, this chili uses fresh tomatoes and a fresh jalapeño. Both are seeded and chopped before added to the meat base mixture. Seeding the tomatoes is important. Your chili could end up being too thin if you don't. The heat for this chili comes from two chopped chipotle chiles in adobo. The seeds from the chipotle chiles were not removed. If you want a little less heat in your chili, remove the seeds or some of the seeds before chopping. In addition to the three tomatoes, one tablespoon of tomato paste is added to the chili mixture.


Two cans (15 ounce size) or red kidney beans are drained and rinsed before being added to the mixture in the slow cooker. The Williams-Sonoma recipe called for only one can but I wanted there to be a better ratio of beans to meat. Once the chili was finished cooking, I was glad I made the decision to double the amount of beans early on in the cooking process.


There are two sources of liquid in this chili: one cup of beef broth and one cup of dark beer. Just as you would never use a wine in a recipe you wouldn't drink, the same holds true with beer. I decided to use Left Hand Brewing Company's Fade to Black beer because it is a dark beer I like. It's also a beer brewed in Longmont, Colorado and I just happen to be a little partial to beers crafted in my favorite Rocky Mountain state. But if Fade to Black isn't available, feel free to use any of your favorite dark beers. 


Once all of the ingredients are added to the slow cooker, stir in two teaspoons of Kosher salt and one teaspoon of black pepper (you can always add more salt and pepper later). Set the slow cooker on low, cover, and cook the chili for 8 hours. At the end of 8 hours you will have a pretty gosh darn good Texas Style Chili. And if amongst your friends you have an annual chili cook-off contest or chili throw downs, well this is definitely competition worthy chili. Yes, it's that good.

At the end of eight (8) hours my chili had a great consistency and no additional cooking time was needed. However, if for any reason your chili seems a little thin to you, remove the cover, turn the heat up to high and continue cooking for another 30 minutes. 

You can serve the chili immediately or you can refrigerate overnight and reheat the next day. Allowing the chili to chill overnight further develops the flavors. 


This chili is delicious plain, however, I like to garnish my chili with a few toppings. Grated Vermont Cheddar cheese, avocado, sliced green onions and sour cream are my favorites. There are an endless number of chili toppings and topping combinations. Prepare as many of them as you as well as your friends and family might like. I would recommend at least having some sour cream or crema as one of the topping options. While I would not label this chili as 'hot', it does have a little bit of heat. The creaminess of the sour cream will help to balance it out for those who don't appreciate (or can't handle) a little heat in their chili.

And oh, don't forget to serve with corn muffins or cornbread. When thinking of beverages to serve with this Texas Style Chili, cold beer and margaritas should be two of the options. But don't let me limit your choices.

If you have a slow cooker that hasn't seen much use in awhile, this chili recipe would be a reason to dust it off. Hey, it is also reason enough to go out and buy one.
Recipe
Texas Style Chili (slight adaptations to the Texas-Style Beef Chili recipe shared in the Williams-Sonoma Essentials of Slow Cooking Cookbook)

Ingredients
2 Tablespoon extra-virgin olive oil
1 large yellow onion, chopped
3 cloves garlic, minced
3 pounds chuck roast, trimmed and cut into 1/2 inch cubes
2 Tablespoons Chili powder
1 teaspoon ground cumin
2 teaspoons Kosher salt
1 teaspoon black pepper
3 tomatoes, seeded and chopped
2 chipotle chiles in adobo, chopped (can remove some or all seeds if you want to reduce the heat)
1 jalapeño chili, seeded and finely chopped
1 Tablespoon tomato paste
1 cup beef broth
1 cup dark beer (recommend Fade to Black, Left Hand Brewing Company)
2 cans (15 ounce size) red kidney beans, drained and rinsed (recommend Goya brand)
Toppings: Grated cheddar cheese, sour cream or creme, minced green onions, chopped avocado, and/or finely chopped red onion.

Directions
1. In a large saucepan, heat two tablespoons of extra-virgin olive oil over medium-low heat. Add the onion and cook until onion is softened (approximately three minutes. Add the minced garlic and continue to sauté for an additional minute.
2. Turn the heat up to medium. In four or five batches, add the chopped beef cubes. Cook until the beef cubes are browned on all sides. After the first batch, remove the sautéed onions and garlic with the browned beef. Place in a bowl. Transfer each successive batch to the bowl. Return all of the beef, onions and garlic to the saucepan when the last batch has been browned.
3. Stir in 2 Tablespoons of chili powder and 1 teaspoon of ground cumin to the beef mixture. Continue cooking for another 2 minutes. Transfer mixture to slow cooker.
4. Add all remaining ingredients to the slow cooker, stirring to evenly distribute them.
5. Set slow cooker on low, cover, and cook for 8 hours. If sauce is too thin, uncover and cook on high for 30 minutes.
6. Serve chili with assorted toppings.

Friday, January 17, 2014

Baked Apples a la Mode

This past fall I must have stopped at the apple orchard near the east coast farmhouse at least a half dozen times to pick my favorite Honey Crisp apples. Because every time I take a bite of a Honey Crisp apple I am momentarily taken back to Boulder, the place where I first discovered them at a Saturday morning Farmer's Market. (Isn't it funny how when eating some foods we can vividly remember when and where and often even with who we first tasted them? If only everything we ever read, heard or learned was that easy to remember!) Okay, one tangential thought sometimes leads to another. The orchard had rows and rows of all varieties of apples, but apparently I had apple tunnel vision and picked only one variety. If I could have an apple picking do over, I would have expanded my apple gathering to include Gala apples (and if Granny Smith apples were at the orchard I would have pick them as well). And if this was actually possible, then it would have been this beautiful orchard where I first picked and bought Gala apples (certainly a better story than buying them in the grocery store). Other than baking with and eating Granny Smith apples as well as eating Honey Crisp apples, I have pretty much been a two apple kind of girl. Up until now that is.

If you take the Victorian proverb 'an apple a day keeps the doctor away' literally, you might be able to make that case that the health benefits of apples are not just limited to the consumption of raw apples. What if it were possible that an apple filled with a brown sugar, cinnamon, vanilla and raisin filling, baked in the oven until fork tender, and served either with or without vanilla ice cream could be equally as healthy as a raw apple? Okay it is highly unlikely, but think of eating a Baked Apple a la Mode as at least half healthy and a 'detaining the doctor' dessert.


I am not sure I remember ever eating an apple simply baked without a crust or crumble topping. However, if I had I am certain it would have left a permanent imprint on my memory. And I have Jenny McCoy, author of book Desserts for Every Season (and a pastry chef with ties to Chicago, including the amazing Blackbird restaurant), to thank for giving me my first experience making, eating and appreciating the deliciousness of apples simply baked with a raisin filling and sauce. While I probably should have tried one of her winter desserts first, I absolutely love warm apple desserts and this one seemed to say 'make me first'. So I did, but not exactly according to her directions.


It's not because I am an accomplished pastry chef (I am not), it's because I bought 'large' and not 'medium-sized' Gala apples that I needed to make some changes to the recipe. The larger Gala apples just looked so beautiful and they all had stems on them so I had to buy them. I figured I would have to adjust the baking time (and I had to). I also thought I would have to either increase the ingredients for the filling or make a sauce separate from the filling. I ended up making a sauce separate from the filling but keeping the ratios of ingredients the same (and making extra sauce turned out to be a good thing). 


The filling and subsequently the sauce is made up of unsalted butter, dark brown sugar, cinnamon, sea salt, vanilla paste and raisins. The original recipe called for the use of a vanilla bean, however, my go to substitution is always vanilla paste. Dark or golden raisins or a combination of the two can be used. I had some golden raisins left over from another recipe so I just mixed them in with the dark raisins. Next time I make this, I will use equal portions of the dark and golden raisins only because I like how this combination looks. In a medium sized bowl all of these ingredients are mixed and set aside while you prepare the apples.

I bought my first Shun knife a week ago and initiated it to cut the apples. I love my Wusthof knives, but this 'razor sharp piece of art' knife was amazing. It made slicing off the tops (about 3/4 inch thick) of the apples so easy. Hint: Make sure to keep the cut tops with their matching apple bottoms.


The core of each apple is removed with a large melon baller. Make sure you don't create a hole in the bottom of the apple when removing the core as you don't want the filling leaking out of the bottom of the apple.


Once all of the apples are prepared, spoon and pack the filling into the carved out core. Top each apple with the matching top and place all apples in a deep large baking dish or pan.

Add 1/4 inch of water to the baking dish/pan, cover tightly with aluminum foil and bake for 15 minutes in a preheated 375 degree oven. After 15 minutes, poke holes in the aluminum foil with a skewer and continue baking. Okay here is where my baking time differed dramatically. 


For medium sized apples, Jenny McCoy says it should take another 10-15 minutes for the apples to get to the fork tender stage. I baked the apples for another 60 minutes before they got to this stage, however, I attribute this to the size of the Gala apple I used. I initially set the oven time for 30 minutes and continued baking in 15 minute increments. When the apples are fork tender, remove from the oven.


I may have removed more than just the core of the apple, not too much but enough that I used all of the filling (the large size apple also contributed to using up all of the filling, not leaving enough for the additional raisin topping added once the apples finish baking). I used the same ingredient ratios and made the raisin sauce in a small saucepan. 

Before serving, place a large tablespoon of the raisin sauce on the apple, replace the top and plate. This is a dessert you definitely want to serve immediately after baking or while still warm. As delicious as the baked apple is all on its' own, it begs to be served with some vanilla ice cream. When you serve the Baked Apples a la Mode to family and friends, you just might be compelled to borrow a line from the classic film Good Will Hunting 'How do you them apples?"
Recipe
Baked Apples a la Mode (inspired by Jenny McCoy's Baked Gala Apples recipe shared in her book Desserts for Every Season)

Ingredients
8 medium sized Gala apples, with stems if possible (Note: If using large Gala apples, the baking time will change, see directions below)
4 ounces unsalted butter, room temperature
1/2 cup dark brown sugar
1 cup raisins, divided (dark, golden or any combination of both)
1/2 teaspoon vanilla paste
1/2 teaspoon Saigon cinnamon
1/2 teaspoon sea salt
Vanilla Ice Cream, slightly softened

Additional Raisin Sauce
2 ounces unsalted butter, room temperature
3/4 cup raisins (dark, golden or any combination of both)
1/4 cup dark brown sugar
1/4 teaspoon vanilla paste
1/4 teaspoon Saigon cinnamon
1/4 teaspoon sea salt
If needed, additional liquid from the pan of baked apples to slightly thin sauce

Directions
1. Preheat oven to 375 degrees.
2. In a medium bowl, mix together the unsalted butter, dark brown sugar, cinnamon, 1/2 cup raisins and sea salt. Set aside.
3. Slice top off of each apple so that you have a top at least 3/4 inch thick. Temporarily place tops back on each apple.
3. Remove the apple core using a large melon baller. Be careful not to cut into bottom of apple.
4. Pack filling into each of the apples. Place tops back on apples. Note: If using medium sized apples you should have some filling left. If using large apples you may not have any left (not to worry, you can make additional sauce).
5. Place apples in a deep baking dish or pan, fill with 1/4 inch of water, cover with aluminum foil and bake for 15 minutes.
6. Remove dish/pan from oven, poke holes in aluminum foil and return to oven. If using medium sized apples, continue baking for 15 to 20 minutes or until apples are fork tender. If using large apples continue baking for 30 minutes longer or until apples are fork tender (my baking time was 60 minutes for large Gala apples).
7. Remove apples from baking dish/pan.
8. If you have any of the butter/brown sugar/raisin mixture left, transfer to small saucepan, add in remaining 1/2 of raisins and cook on medium-low heat until butter has melted. Before serving top each apple with a Tablespoon of the raisin sauce.
9. If all of the butter/brown sugar/raisin mixture was used to stuff the apples, put additional sauce ingredients (see above) in a sauce pan and cook on medium-low heat until butter has melted. Note: if mixture is too thick, spoon in some of the cooking liquid into the sauce. Before serving top each apple with a Tablespoon of the raisin sauce.
10. Serve baked apples with vanilla ice cream that has been allowed to soften slightly.

Tuesday, January 14, 2014

Three Cheese Baked Rigatoni with Spinach

We had a short-lived heat wave here in the midwest for the past several days.The joy and jubilation you feel when temperatures go from below significantly zero all the way up to the low 40s makes your heart race in the best of ways. After last year's blizzard on the east coast, I thought I would never again look so forward to the end of winter and the arrival of spring (or better yet the return of summer). But this polar vortex midwestern winter makes the blizzard and no power for three days experience seem more like an inconvenience than a hardship. As much as I love living in a place where there are four distinct seasons, I am beginning to think there just might be something to be said for living in a place where there are no temperature extremes, where it feels summer-like all year long, and where you don't have to go to the grocery store to buy 'fresh' herbs.  


Just smelling fresh basil is enough to take me back to remembering what summer weather feels like even when it's below zero outside. So what better way to help one cope with the winter weather than to make something with fresh basil? Okay a vacation to a warm weather destination might be better. Since the vacation to a warmer climate isn't happening until March, I decided I would combine my cravings for both comfort food and the return of summer by making a Three Cheese Baked Rigatoni with Spinach. And of all of the comfort foods out there, pasta ranks pretty high on my list.


Setting this Baked Rigatoni apart from all other baked pasta dishes (other than the fresh basil in the garlic tomato sauce) are the cheeses: fresh mozzarella, Parmigiano-Reggiano, and goat cheese. While goat cheese may be something not usually associated with a pasta dish, it is a cheese that takes it to a completely different level of joy and jubilation on your palate. And if you are someone who gets perverse pleasure from having friends and family take seconds, the Three Cheese Baked Rigatoni with Spinach will definitely feed that addiction of yours. It is one of those pasta dishes you just want to keep eating.

This is also a pasta dish some of you might think has a bit of garlic in it. So how much garlic is in it exactly? Between the tomato sauce and the sautéing of the spinach you will use 10 cloves. If some of you are thinking this is 'too much', I can only say 'oh, the incredible flavor from those 10 cloves'.


The base of the Baked Rigatoni is the Garlic Tomato Sauce. Two tablespoons of extra-virgin olive oil are heated over medium-low heat in a large saucepan before 8 cloves of thinly sliced garlic are added. The garlic is sautéed until they turn golden (this will take about a minute or two). You then add a 28 ounce can of Tomato Puree and a 28 ounce can of Crushed Tomatoes (preferably San Marzano). The combination of the puree and crusted tomatoes makes for a great sauce, not just for this dish, but for any pasta dish. The garlic and tomatoes are simmered until thickened (approximately 15 minutes). I simmered for the full 15 minutes.

Once the sauce is slightly thickened you will add in a quarter cup of chopped fresh basil, two teaspoons of Kosher salt and 1 teaspoon of black pepper. Stir, remove from the heat and set aside.

The next step in sautéing a finely chopped small Spanish (or yellow) onion and two cloves of chopped garlic in extra-virgin olive oil, before adding in the fresh spinach in batches. I used a 10 ounce bag of fresh spinach but next time will probably use a 16 ounce bag so that there will be spinach 'in almost every bite'. Once the spinach has been wilted, remove the pan from the heat and set aside.


You definitely want to use rigatoni in this dish (even though some of are thinking of making it with penne or fusilli) because there is just something about the way the sauce coats the rigatoni that allows you to taste both the sauce and the pasta. The rigatoni is cooked until al dente as it will continue to cook during the baking process. Drain the al dente rigatoni (do not rinse) and return it to the pan.


With your garlic tomato sauce, the spinach mixture and the rigatoni now made, you will combine all of them until the pasta is well coated. Before transferring the mixture to a 9 x 13 baking dish, stir in three quarters of the 1/2 inch cubed fresh mozzarella.


Top the dish with the remaining fresh mozzarella, two ounces of grated Parmigiano-Reggiano and four ounces of crumbled goat cheese. Place the dish in a preheated 350 degree oven and bake for 30 to 35 minutes (or the cheeses on top have melted and it is heated through). If you make the dish early in the day and refrigerate until ready to bake, remove from the refrigerator at least an hour before baking and increase baking time by 10 to 15 minutes. Allow the dish to rest for 5 minutes before serving.

Whether you are craving comfort food or the return of warmer weather or not, this is a pasta dish that could turn into your signature dish. It is a perfect dish for large gatherings (and we all know football playoffs, the Hollywood Award ceremonies, and the upcoming March Madness are just some excuses for a gathering). Make a great salad (tossed with a Champagne Vinaigrette), slice up some bread, pour the wine (like a Barolo, Cabernet Sauvignon or Merlot), and you have the makings of a memorable meal. 

It is also one of those dishes that would be a great welcome gift for neighbors or a get well, hope you feel better gift for friends. When you go to the grocery store to buy the ingredients, remember to buy more than one package of rigatoni. I think once you taste this, you are going to want to make it again soon rather than later. 

Recipe
Three Cheese Baked Rigatoni with Spinach

Ingredients
Sauce
2 Tablespoons extra-virgin olive oil
8 cloves of garlic, thinly sliced
1 can (28 ounces) Tomato Puree, preferably San Marzano
1 can (28 ounces) Crushed Tomatoes, preferably San Marzano
1/4 cup coarsely chopped fresh basil, plus more for serving
2 teaspoons Kosher salt
1 teaspoon ground black pepper

2 Tablespoons extra-virgin olive oil
1 small Spanish or yellow onion, finely chopped
2 cloves garlic, minced
10 -16 ounces fresh spinach, coarsely chopped

Pasta/Cheese
1 pound rigatoni pasta
1 pound fresh mozzarella cheese, cut into 1/2 inch cubes (divided)
4 ounces goat cheese, crumble
2 ounces freshly grated Parmigiano-Reggiano cheese, plus more for serving
Kosher salt and black pepper

Directions
Tomato Sauce
1. Heat 2 Tablespoons of extra-virgin olive oil in large saucepan over medium-low heat. Add garlic and stir until it turns golden brown (approximately 1 minute)
2. Add Tomato Puree and Crushed Tomatoes, simmer for approximately 15 minutes, or until sauce slightly thickens.
3. Add chopped basil, salt and pepper. Remove from heat and set aside.

Three Cheese Baked Rigatoni with Spinach
1. Preheat oven to 350 degrees.
2. Heat 2 Tablespoons of extra-virgin olive oil in large saucepan over medium-low heat. Add onion and cook until it has softened (approximately 3 minutes). Stir in garlic and cook for additional minute.
3. Stir in spinach in batches, allowing each batch to wilt before adding the next one. Remove from heat and set aside.
4. Bring a large pot of lightly salted water to a boil. Add the rigatoni and cook for approximately 9 minutes or until al dente.
5. Drain pasta.
6. Add spinach mixture and pasta to tomato sauce. Stir to combine. Add salt and pepper to taste.
7. Stir in three-quarters of the fresh mozzarella. Transfer to a 9 x 13 lightly oiled casserole dish.
8. Top with crumbled goat cheese, grated Parmigiano-Reggiano cheese, and remaining fresh mozzarella.
9. Bake until cheese is melted and top is beginning to brown (approximately 25-30 minutes).
10. Let stand for 5 minutes before serving. 
11. Top with freshly chopped basil.

I am one of those who can get inspired by quotes and who has often used them in speeches, presentations or newsletters to tie an idea or concept together. Sometimes I read a quote that seems to just capture my thoughts or feelings of the day and I take solace in those words (because it feels like their other kindred spirits out there). The other day I across a quote I don't ever recall seeing before. But that wasn't the only reason that it caught my attention. Reading the words 'When the words don't match the actions, trust the actions' was like having an epiphany, a much needed one actually. Not a 'scientific breakthrough, religious or philosophical discovery' kind of epiphany, but rather one that seemed to bring a deeper perspective to some things I have been mulling over for awhile now. On so many levels these words just rang true. A part of me wished I had came across this quote a long time ago to trigger this epiphany of mine. But then as they say, better late than never.

Sunday, January 12, 2014

Sea Salted Butterscotch Pots de Crème

When we were kids our favorite treat was chocolate pudding eaten warm (you know the kind, the boxed pudding mix that was made on the stove and ready in less than ten minutes). No one wanted to or could wait for the pudding to chill. It was amazing it even made it from the pan to the Pyrex custard cups. This boxed semi-instant pudding became one of those comfort foods that somehow made all of our childhood worries disappear (even for a while longer after we devoured the warm chocolately goodness). Yes, the chocolate instant pudding was what 'pudding heaven' felt like back then. Fortunately, the transformative powers of pudding have since been generalized to all things with a rich creamy texture. Fortunately I don't have a pudding or a crème brûlée or a panna cotta or a pot de crème every time I want to temporarily put my mind in a no worry place. Although the idea has crossed my mind a time or two.


As I was browsing through some of my cookbooks the other day looking for a French Onion Soup recipe, I was distracted by a recipe for Butterscotch Pots de Crème. But since I recently reaffirmed my commitment to getting on the treadmill daily (a new year's good intention that I need to sustain), the thought making the Pots de Crème made me think I might be sabotaging the impact the running on the treadmill was having (and supposed to have). I had been on the treadmill for six days in a row (feeling good while simultaneously whining), yet I could not get the thought of that creamy textured butterscotch flavored dessert out of my mind, especially one where the flavor was further enhanced with sea salt.


So what do most of us do when faced with such a dilemma? Well, we could show great will power and forget about it (I know at least person with such will power); we could decide it should be a reward for the sacrifices we are making (I know several people who live by this way of thinking); we could make it and spend a little more time at the health club (I know at least one other person with the stamina for this), or we could just make and enjoy it without any guilt or sacrifice (I also know a few people in the 'everything in moderation' category). I decided that the 'everything in moderation' plan was probably the best option. With the added benefit of having one's worries temporarily suspended, well that just pushed me over the edge. I was making a Sea Salted Butterscotch Pots de Crème and that was that. I will get around to making French Onion Soup soon, very soon.


I like to think that pudding is the American version of the French Pots de Crème. Both are 'pots of custard' and both are made with eggs, cream, and milk. The differences between the two are primarily in how they are made. The entire process for making puddings generally happens on top of the stove. while the process for making the Pots de Crème begins on top of the stove but ends in the oven (bake in a water bath). You can't wrong with either 'custard' but if you have never made Pots de Crème, you really should. Really.


The whipping cream, whole milk and dark brown sugar and combined in a saucepan. The mixture is cooked at medium heat until the sugar has melted (be careful not to let this mixture boil). Once the sugar is melted, remove the pan from the heat and set aside.


The color, as well as the butterscotch flavor, for this Sea Salted Butterscotch Pots de Crème comes from the caramel mixture. In a medium sized saucepan, the water and granulated sugar are cooked at high heat until the sugar is melted and the mixture is a deep golden color. Swirling the pan often it takes approximately 4 to 6 minutes to achieve this color. 

Remove the caramel mixture from the stove top while you slowly whisking in the milk cream mixture. It will splatter and the caramel will seize up, but not to worry and don't freak out. Return the pan to stove and on low heat, continue cooking until all of the caramel has melted and the mixture is smooth. Remove from the stove and set aside.

In a heat proof medium sized bowl whisk the six large egg yolks. Then very slowly whisk in the hot milk/cream/caramel mixture. You will want to add the hot mixture this very, very slowly so you do not cook the egg yolks. You will know you did this well if the mixture is smooth and free of any lumps. Whisk in the vanilla and 1/4 teaspoon of sea salt.

Sometimes when recipes call for straining I want to omit this step. Invariably I learned this can be a mistake. So using a fine mesh sieve, strain the mixture. You can strain into a large heatproof measuring cup or you can strain back into a pan and then pour back into the heat proof measuring cup. Having the mixture end up in a measuring cup makes it easier to pour into the ramekins without spilling or wasting the mixture. Remember it makes only six servings, every drop counts.

The mixture is poured into 6 (at least six ounce each) ramekins. You can use custard cups, canning jars (Weck's small jars would be fun), porcelain ramekins/cups or any other container that is heat proof. I used some vintage FireKing custard jars. The ramekins are placed in a roasting pan (I like to use a large, deep sauce pan) before you add the HOT water. Some recipes call for having the water come up to the half-way point of the ramekin, others call for ensuring there is at least 1/2 inch of water in the pan. I went with the 1/2 inch of HOT water.


They are baked for 35 to 50 minutes. Time will vary due to the type/depth of ramekin you used. The Sea Salted Butterscotch Pots de Crème are done when they have a jello-like consistency to them when you lightly shake them (the center will not be completely set). Remove the ramekins from the water bath, allow to cool, and then refrigerate for at least 2 hours (or up to overnight). When getting ready to serve, sprinkle with additional sea salt.

If I had to describe the taste of the Sea Salted Butterscotch Pots de Crème in just one word it would be OMG (if that's a word)! Seriously, the creaminess of the custard and the deliciousness of the butterscotch flavor along the sprinkle of sea salt on top makes it something that almost defies a worthy description (or at least one in a just a few words). If I had eaten this when I was a kid, I would definitely better appreciate the difference between immediate and slightly delayed satisfaction. There is nothing that will keep me from experiencing a bit of this 'Pots de Crème heaven'. And I won't even whine about having to spend more time on the treadmill (or at least not so anyone can hear me).

Recipe
Sea Salted Butterscotch Pots de Crème (recipe inspired by Butterscotch Pots de Crème created by Michael Northern)

Ingredients
2 cups heavy whipping cream
1 cup whole milk
1/4 cup dark brown sugar
3/4 cup granulated sugar
1/4 cup water
6 large egg yolks
1 teaspoon vanilla
1/4 teaspoon Maldon Sea Salt, plus additional for garnishing
Optional: Freshly whipped cream

Directions
1. Preheat oven to 325 degrees.
2. Combine whipping cream, milk, and brown sugar in a saucepan. On low heat, stir until sugar is dissolved. Remove from heat and set aside.
3. In a large saucepan, combine the water and granulated sugar. Cooking high heat until sugar dissolves. Continue cooking, swirling often, until the color of the mixture has darkened to a caramel color (about 4 to 6 minutes). 
4. Gradually whisk in the hot cream mixture (go very slowly at first as it will splatter). Continue cooking over low heat until the caramel dissolves completely (as the caramel mixture will seize up). Remove from heat.
5. Whisk egg yolks in a medium sized heatproof bowl. Gradually whisk in the hot cream mixture (so slowly at first so as to prevent cooking the eggs). 
6. Whisk in vanilla and sea salt.
7. Strain mixture into a large glass mixing cup using a fine mesh strainer. 
8. Pour custard mixture into 6 ramekins ensuring the mixture is evenly divided.
9. Place custard cups into a deep saucepan or roasting pan. Pour at least 1/2 inch very hot water into the roasting pan.
10. Carefully transfer pan to the oven. Bake for 35 to 50 minutes (time will vary depending on the type of ramekin you use). To determine doneness, the custards will have a jello-like consistency when you slightly shake them (the center will not be completely set).
11. Remove ramekins from water. Let cool completely.
12. Cover each ramekin with plastic wrap and refrigerate until completely chilled (at least 2 hours but can be chilled overnight).
13. Sprinkle the top of each ramekin with a pinch of Maldon Sea Salt.
14. Optional: Also serve with a dollop of freshly whipped cream or serve whipped cream on side.