Tuesday, January 14, 2014

Three Cheese Baked Rigatoni with Spinach

We had a short-lived heat wave here in the midwest for the past several days.The joy and jubilation you feel when temperatures go from below significantly zero all the way up to the low 40s makes your heart race in the best of ways. After last year's blizzard on the east coast, I thought I would never again look so forward to the end of winter and the arrival of spring (or better yet the return of summer). But this polar vortex midwestern winter makes the blizzard and no power for three days experience seem more like an inconvenience than a hardship. As much as I love living in a place where there are four distinct seasons, I am beginning to think there just might be something to be said for living in a place where there are no temperature extremes, where it feels summer-like all year long, and where you don't have to go to the grocery store to buy 'fresh' herbs.  


Just smelling fresh basil is enough to take me back to remembering what summer weather feels like even when it's below zero outside. So what better way to help one cope with the winter weather than to make something with fresh basil? Okay a vacation to a warm weather destination might be better. Since the vacation to a warmer climate isn't happening until March, I decided I would combine my cravings for both comfort food and the return of summer by making a Three Cheese Baked Rigatoni with Spinach. And of all of the comfort foods out there, pasta ranks pretty high on my list.


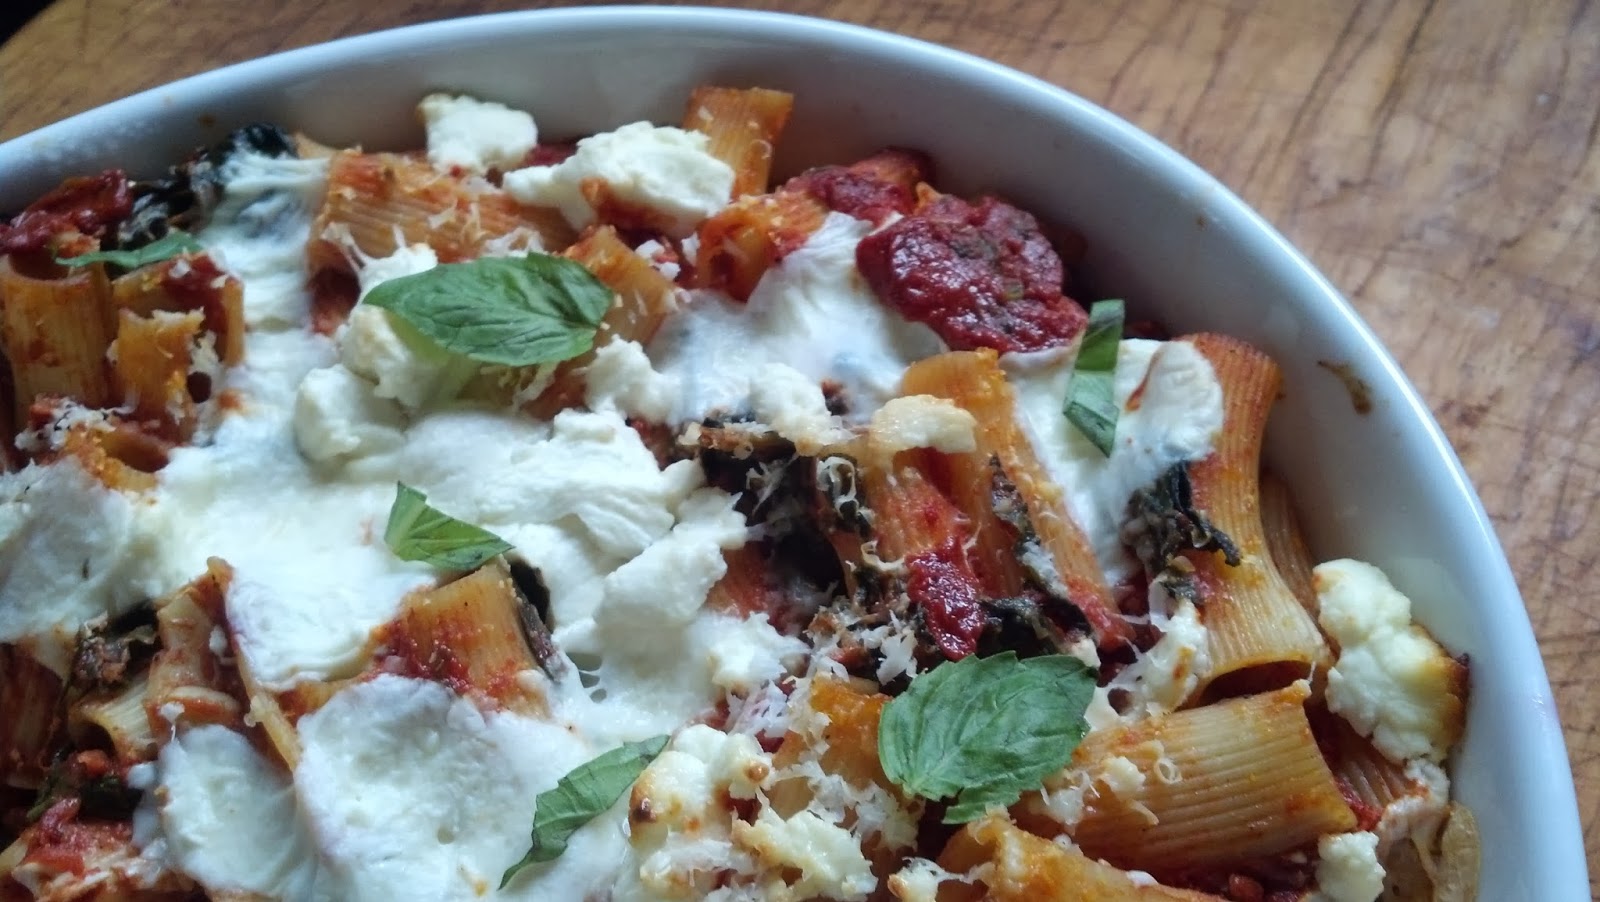
Setting this Baked Rigatoni apart from all other baked pasta dishes (other than the fresh basil in the garlic tomato sauce) are the cheeses: fresh mozzarella, Parmigiano-Reggiano, and goat cheese. While goat cheese may be something not usually associated with a pasta dish, it is a cheese that takes it to a completely different level of joy and jubilation on your palate. And if you are someone who gets perverse pleasure from having friends and family take seconds, the Three Cheese Baked Rigatoni with Spinach will definitely feed that addiction of yours. It is one of those pasta dishes you just want to keep eating.

This is also a pasta dish some of you might think has a bit of garlic in it. So how much garlic is in it exactly? Between the tomato sauce and the sautéing of the spinach you will use 10 cloves. If some of you are thinking this is 'too much', I can only say 'oh, the incredible flavor from those 10 cloves'.


The base of the Baked Rigatoni is the Garlic Tomato Sauce. Two tablespoons of extra-virgin olive oil are heated over medium-low heat in a large saucepan before 8 cloves of thinly sliced garlic are added. The garlic is sautéed until they turn golden (this will take about a minute or two). You then add a 28 ounce can of Tomato Puree and a 28 ounce can of Crushed Tomatoes (preferably San Marzano). The combination of the puree and crusted tomatoes makes for a great sauce, not just for this dish, but for any pasta dish. The garlic and tomatoes are simmered until thickened (approximately 15 minutes). I simmered for the full 15 minutes.

Once the sauce is slightly thickened you will add in a quarter cup of chopped fresh basil, two teaspoons of Kosher salt and 1 teaspoon of black pepper. Stir, remove from the heat and set aside.

The next step in sautéing a finely chopped small Spanish (or yellow) onion and two cloves of chopped garlic in extra-virgin olive oil, before adding in the fresh spinach in batches. I used a 10 ounce bag of fresh spinach but next time will probably use a 16 ounce bag so that there will be spinach 'in almost every bite'. Once the spinach has been wilted, remove the pan from the heat and set aside.


You definitely want to use rigatoni in this dish (even though some of are thinking of making it with penne or fusilli) because there is just something about the way the sauce coats the rigatoni that allows you to taste both the sauce and the pasta. The rigatoni is cooked until al dente as it will continue to cook during the baking process. Drain the al dente rigatoni (do not rinse) and return it to the pan.


With your garlic tomato sauce, the spinach mixture and the rigatoni now made, you will combine all of them until the pasta is well coated. Before transferring the mixture to a 9 x 13 baking dish, stir in three quarters of the 1/2 inch cubed fresh mozzarella.


Top the dish with the remaining fresh mozzarella, two ounces of grated Parmigiano-Reggiano and four ounces of crumbled goat cheese. Place the dish in a preheated 350 degree oven and bake for 30 to 35 minutes (or the cheeses on top have melted and it is heated through). If you make the dish early in the day and refrigerate until ready to bake, remove from the refrigerator at least an hour before baking and increase baking time by 10 to 15 minutes. Allow the dish to rest for 5 minutes before serving.

Whether you are craving comfort food or the return of warmer weather or not, this is a pasta dish that could turn into your signature dish. It is a perfect dish for large gatherings (and we all know football playoffs, the Hollywood Award ceremonies, and the upcoming March Madness are just some excuses for a gathering). Make a great salad (tossed with a Champagne Vinaigrette), slice up some bread, pour the wine (like a Barolo, Cabernet Sauvignon or Merlot), and you have the makings of a memorable meal. 

It is also one of those dishes that would be a great welcome gift for neighbors or a get well, hope you feel better gift for friends. When you go to the grocery store to buy the ingredients, remember to buy more than one package of rigatoni. I think once you taste this, you are going to want to make it again soon rather than later. 

Recipe
Three Cheese Baked Rigatoni with Spinach

Ingredients
Sauce
2 Tablespoons extra-virgin olive oil
8 cloves of garlic, thinly sliced
1 can (28 ounces) Tomato Puree, preferably San Marzano
1 can (28 ounces) Crushed Tomatoes, preferably San Marzano
1/4 cup coarsely chopped fresh basil, plus more for serving
2 teaspoons Kosher salt
1 teaspoon ground black pepper

2 Tablespoons extra-virgin olive oil
1 small Spanish or yellow onion, finely chopped
2 cloves garlic, minced
10 -16 ounces fresh spinach, coarsely chopped

Pasta/Cheese
1 pound rigatoni pasta
1 pound fresh mozzarella cheese, cut into 1/2 inch cubes (divided)
4 ounces goat cheese, crumble
2 ounces freshly grated Parmigiano-Reggiano cheese, plus more for serving
Kosher salt and black pepper

Directions
Tomato Sauce
1. Heat 2 Tablespoons of extra-virgin olive oil in large saucepan over medium-low heat. Add garlic and stir until it turns golden brown (approximately 1 minute)
2. Add Tomato Puree and Crushed Tomatoes, simmer for approximately 15 minutes, or until sauce slightly thickens.
3. Add chopped basil, salt and pepper. Remove from heat and set aside.

Three Cheese Baked Rigatoni with Spinach
1. Preheat oven to 350 degrees.
2. Heat 2 Tablespoons of extra-virgin olive oil in large saucepan over medium-low heat. Add onion and cook until it has softened (approximately 3 minutes). Stir in garlic and cook for additional minute.
3. Stir in spinach in batches, allowing each batch to wilt before adding the next one. Remove from heat and set aside.
4. Bring a large pot of lightly salted water to a boil. Add the rigatoni and cook for approximately 9 minutes or until al dente.
5. Drain pasta.
6. Add spinach mixture and pasta to tomato sauce. Stir to combine. Add salt and pepper to taste.
7. Stir in three-quarters of the fresh mozzarella. Transfer to a 9 x 13 lightly oiled casserole dish.
8. Top with crumbled goat cheese, grated Parmigiano-Reggiano cheese, and remaining fresh mozzarella.
9. Bake until cheese is melted and top is beginning to brown (approximately 25-30 minutes).
10. Let stand for 5 minutes before serving. 
11. Top with freshly chopped basil.

I am one of those who can get inspired by quotes and who has often used them in speeches, presentations or newsletters to tie an idea or concept together. Sometimes I read a quote that seems to just capture my thoughts or feelings of the day and I take solace in those words (because it feels like their other kindred spirits out there). The other day I across a quote I don't ever recall seeing before. But that wasn't the only reason that it caught my attention. Reading the words 'When the words don't match the actions, trust the actions' was like having an epiphany, a much needed one actually. Not a 'scientific breakthrough, religious or philosophical discovery' kind of epiphany, but rather one that seemed to bring a deeper perspective to some things I have been mulling over for awhile now. On so many levels these words just rang true. A part of me wished I had came across this quote a long time ago to trigger this epiphany of mine. But then as they say, better late than never.

Sunday, January 12, 2014

Sea Salted Butterscotch Pots de Crème

When we were kids our favorite treat was chocolate pudding eaten warm (you know the kind, the boxed pudding mix that was made on the stove and ready in less than ten minutes). No one wanted to or could wait for the pudding to chill. It was amazing it even made it from the pan to the Pyrex custard cups. This boxed semi-instant pudding became one of those comfort foods that somehow made all of our childhood worries disappear (even for a while longer after we devoured the warm chocolately goodness). Yes, the chocolate instant pudding was what 'pudding heaven' felt like back then. Fortunately, the transformative powers of pudding have since been generalized to all things with a rich creamy texture. Fortunately I don't have a pudding or a crème brûlée or a panna cotta or a pot de crème every time I want to temporarily put my mind in a no worry place. Although the idea has crossed my mind a time or two.


As I was browsing through some of my cookbooks the other day looking for a French Onion Soup recipe, I was distracted by a recipe for Butterscotch Pots de Crème. But since I recently reaffirmed my commitment to getting on the treadmill daily (a new year's good intention that I need to sustain), the thought making the Pots de Crème made me think I might be sabotaging the impact the running on the treadmill was having (and supposed to have). I had been on the treadmill for six days in a row (feeling good while simultaneously whining), yet I could not get the thought of that creamy textured butterscotch flavored dessert out of my mind, especially one where the flavor was further enhanced with sea salt.


So what do most of us do when faced with such a dilemma? Well, we could show great will power and forget about it (I know at least person with such will power); we could decide it should be a reward for the sacrifices we are making (I know several people who live by this way of thinking); we could make it and spend a little more time at the health club (I know at least one other person with the stamina for this), or we could just make and enjoy it without any guilt or sacrifice (I also know a few people in the 'everything in moderation' category). I decided that the 'everything in moderation' plan was probably the best option. With the added benefit of having one's worries temporarily suspended, well that just pushed me over the edge. I was making a Sea Salted Butterscotch Pots de Crème and that was that. I will get around to making French Onion Soup soon, very soon.


I like to think that pudding is the American version of the French Pots de Crème. Both are 'pots of custard' and both are made with eggs, cream, and milk. The differences between the two are primarily in how they are made. The entire process for making puddings generally happens on top of the stove. while the process for making the Pots de Crème begins on top of the stove but ends in the oven (bake in a water bath). You can't wrong with either 'custard' but if you have never made Pots de Crème, you really should. Really.


The whipping cream, whole milk and dark brown sugar and combined in a saucepan. The mixture is cooked at medium heat until the sugar has melted (be careful not to let this mixture boil). Once the sugar is melted, remove the pan from the heat and set aside.


The color, as well as the butterscotch flavor, for this Sea Salted Butterscotch Pots de Crème comes from the caramel mixture. In a medium sized saucepan, the water and granulated sugar are cooked at high heat until the sugar is melted and the mixture is a deep golden color. Swirling the pan often it takes approximately 4 to 6 minutes to achieve this color. 

Remove the caramel mixture from the stove top while you slowly whisking in the milk cream mixture. It will splatter and the caramel will seize up, but not to worry and don't freak out. Return the pan to stove and on low heat, continue cooking until all of the caramel has melted and the mixture is smooth. Remove from the stove and set aside.

In a heat proof medium sized bowl whisk the six large egg yolks. Then very slowly whisk in the hot milk/cream/caramel mixture. You will want to add the hot mixture this very, very slowly so you do not cook the egg yolks. You will know you did this well if the mixture is smooth and free of any lumps. Whisk in the vanilla and 1/4 teaspoon of sea salt.

Sometimes when recipes call for straining I want to omit this step. Invariably I learned this can be a mistake. So using a fine mesh sieve, strain the mixture. You can strain into a large heatproof measuring cup or you can strain back into a pan and then pour back into the heat proof measuring cup. Having the mixture end up in a measuring cup makes it easier to pour into the ramekins without spilling or wasting the mixture. Remember it makes only six servings, every drop counts.

The mixture is poured into 6 (at least six ounce each) ramekins. You can use custard cups, canning jars (Weck's small jars would be fun), porcelain ramekins/cups or any other container that is heat proof. I used some vintage FireKing custard jars. The ramekins are placed in a roasting pan (I like to use a large, deep sauce pan) before you add the HOT water. Some recipes call for having the water come up to the half-way point of the ramekin, others call for ensuring there is at least 1/2 inch of water in the pan. I went with the 1/2 inch of HOT water.


They are baked for 35 to 50 minutes. Time will vary due to the type/depth of ramekin you used. The Sea Salted Butterscotch Pots de Crème are done when they have a jello-like consistency to them when you lightly shake them (the center will not be completely set). Remove the ramekins from the water bath, allow to cool, and then refrigerate for at least 2 hours (or up to overnight). When getting ready to serve, sprinkle with additional sea salt.

If I had to describe the taste of the Sea Salted Butterscotch Pots de Crème in just one word it would be OMG (if that's a word)! Seriously, the creaminess of the custard and the deliciousness of the butterscotch flavor along the sprinkle of sea salt on top makes it something that almost defies a worthy description (or at least one in a just a few words). If I had eaten this when I was a kid, I would definitely better appreciate the difference between immediate and slightly delayed satisfaction. There is nothing that will keep me from experiencing a bit of this 'Pots de Crème heaven'. And I won't even whine about having to spend more time on the treadmill (or at least not so anyone can hear me).

Recipe
Sea Salted Butterscotch Pots de Crème (recipe inspired by Butterscotch Pots de Crème created by Michael Northern)

Ingredients
2 cups heavy whipping cream
1 cup whole milk
1/4 cup dark brown sugar
3/4 cup granulated sugar
1/4 cup water
6 large egg yolks
1 teaspoon vanilla
1/4 teaspoon Maldon Sea Salt, plus additional for garnishing
Optional: Freshly whipped cream

Directions
1. Preheat oven to 325 degrees.
2. Combine whipping cream, milk, and brown sugar in a saucepan. On low heat, stir until sugar is dissolved. Remove from heat and set aside.
3. In a large saucepan, combine the water and granulated sugar. Cooking high heat until sugar dissolves. Continue cooking, swirling often, until the color of the mixture has darkened to a caramel color (about 4 to 6 minutes). 
4. Gradually whisk in the hot cream mixture (go very slowly at first as it will splatter). Continue cooking over low heat until the caramel dissolves completely (as the caramel mixture will seize up). Remove from heat.
5. Whisk egg yolks in a medium sized heatproof bowl. Gradually whisk in the hot cream mixture (so slowly at first so as to prevent cooking the eggs). 
6. Whisk in vanilla and sea salt.
7. Strain mixture into a large glass mixing cup using a fine mesh strainer. 
8. Pour custard mixture into 6 ramekins ensuring the mixture is evenly divided.
9. Place custard cups into a deep saucepan or roasting pan. Pour at least 1/2 inch very hot water into the roasting pan.
10. Carefully transfer pan to the oven. Bake for 35 to 50 minutes (time will vary depending on the type of ramekin you use). To determine doneness, the custards will have a jello-like consistency when you slightly shake them (the center will not be completely set).
11. Remove ramekins from water. Let cool completely.
12. Cover each ramekin with plastic wrap and refrigerate until completely chilled (at least 2 hours but can be chilled overnight).
13. Sprinkle the top of each ramekin with a pinch of Maldon Sea Salt.
14. Optional: Also serve with a dollop of freshly whipped cream or serve whipped cream on side.


Thursday, January 9, 2014

Sweet Potato Soup with Crème Fraiche and Lobster

At the New Year's Eve dinner with friends, one of the courses was a perfectly smooth and creamy parsnip soup. Considering the weather here on New Year's Eve was blizzard-like, nothing could have been more satisfying than having a bowl of soup that night (other than the martinis and champagne of course). Driving home I remembered I too had made a root vegetable based soup having a similar consistency to the parsnip soup for a large dinner party. Like the parsnip soup, the Sweet Potato soup was one having all of the appearances of a cream based soup, but without all of the calories usually contained in them (it's the new year, aren't we all a little more calorie conscious than usual?).


It had been awhile since I did the 'soup, salad, main course and dessert thing'. Being a bit of a glutton for punishment (in other words turning a simple dinner into the not so simple), I decided to make the Sweet Potato soup as a first course, but this time it would be for a smaller dinner party. With the weather being so cold (arctic frigid would be a better descriptor), beginning the meal with soup also sounded like a satisfying beginning to the meal. The soup on its' own is delicious, but topped with a dollop of homemade crème fraiche and a sautéed lobster medallion or just the creme fraiche, further ramps up its' deliciousness. But why stop there? Why not serve the Sweet Potato Soup with Crème fraiche and Lobster with a glass port too? If you have never had port as part of the soup course, particularly a root vegetable based soup course, you need to give yourself this experience.


We may have all had baked sweet potatoes, a sweet potato casserole, a sweet potato gratin, a sweet potato hash, and/or oh, my favorite sweet potato fries. But a sweet potato soup might be something you haven't had......yet. Maybe I can entice you into making it with or without the lobster medallions.


When I was in the grocery store gathering the ingredients for the soup, I think I spent more time in the produce section weighing sweet potatoes than it took to make the soup (okay a slight exaggeration). The recipe calls for 3 1/2 pounds of sweet potatoes and for some reason I was trying to eliminate having to weigh the sweet potatoes when I got home so I kept trying combinations of sweet potatoes to get to 3 1/2 pounds. After about eight (or maybe ten) different potato combinations, I thought 'well this is a futile endeavor'. No, if I am being honest, what I really thought was 'this is a (deleted expletive) colossal waste of time'. So I bagged up the 4 pounds of sweet potatoes and finished shopping.


The sweet potatoes are peeled and cut into half inch pieces (yes, I weighed them too), then added to a large saucepan having 4 Tablespoons of melted unsalted butter waiting to coat them. A tablespoon of light brown sugar is mixed in before the sweet potatoes are transferred to two parchment paper lined baking sheets and placed into a preheated 400 degree oven. The sweet potatoes are baked until tender and lightly browned which could take anywhere from 30 to 45 minutes. Don't clean the pan you sautéed the sweet potatoes in as you will be using it again!


While the sweet potatoes are roasting, the sliced leeks, the finely chopped celery and 1 1/2 teaspoons of grated fresh ginger are sautéed in 4 tablespoons of unsalted butter until softened and tender (or for approximately 20 minutes).


The roasted sweet potatoes are added back into the saucepan with the leek/celery mixture and sautéed for another two minutes. When you add the orange juice and low-salt chicken broth, hold back a little on the chicken broth as you will have another opportunity to add more. I used only 7 cups of the low-salt chicken stock along with all of the orange juice called for in the recipe. The entire mixture is brought to a boil and then simmered for another 10 minutes.

I previously shared I did not need another kitchen tool. Well, it seems that was a bit of a short-lived, impulsive thought. I have now convinced myself that I need, want, would like to have an immersion blender. After using a food processor to puree the sweet potato soup, I thought 'there has to be a better way to do this'. And I think the answer to that musing is 'an immersion blender'. But not to worry, a food processor will puree the soup, you just have to do it in several batches. It will be after you puree the soup that you will decide how much more broth to add. Depending on how thick you want this soup you might add anywhere from 1 to 3 cups of additional chicken broth. Make sure to salt and pepper the soup to taste.


Making the crème fraiche is really easy. Sour cream, whipping cream, the zest of an orange and 1 1/2 teaspoons of freshly grated ginger are mixed together and set out at room temperature for approximately 3 hours or until it thickens. Once thickened, cover and transfer to the refrigerator. When serving the hot soup, each bowl only needs to topped with a dollop of the creme fraiche. And while the lobster medallions make a wonderful addition to the soup eating experience, don't let that be a hurdle preventing you from making this soup. But definitely serve the soup with the crème fraiche.


January just happens to be National Soup month! It is a long month with plenty of days left to have soup. It happens to be one of those foods that isn't just one of the courses of a meal. No, soup is one of those those foods that can also be the main course. I hope your January is filled with many soup happy days. And hey, don't forget to have a glass or two of port.

Recipe
Sweet Potato Soup with Crème Fraiche
 and Lobster (slight adaptation to a recipe printed in Bon Appetit)

Ingredients
Crème fraiche
1 cup heavy whipping cream
1/2 cup sour cream
1 /2 teaspoons grated, peeled ginger (fresh)
1 1/2 teaspoons grated orange zest

Soup
10 Tablespoons unsalted butter, divided
3 1/2 pounds red skinned sweet potatoes (yams), peeled and cut into 1/2 inch pieces
1 Tablespoon light brown sugar
1 1/2 teaspoons grated, peeled ginger (fresh)
2 leeks, white and green parts only, thinly sliced crosswise
1 1/3 cups finely chopped celery
8 to 10 cups low salt chicken broth
1 1/3 cups orange juice
8-12 ounces cooked lobster tails, cut into 1/3 inch medallions
Kosher salt and pepper
Optional: 2 Tablespoons fresh flat leaf parsley chopped

Directions
Crème fraiche
1. Mix whipping cream, sour cream, 1 1/2 teaspoons grated ginger, and orange zest in a medium sized bowl.
2. Let mixture stand until thickened (approximately 3 hours).
3. Cover and refrigerate (can be made up to 2 days ahead).

Soup
1. Preheat oven to 400 degrees (F).
2. Melt 4 Tablespoons of unsalted butter in a large saucepan. Remove from heat and add sweet potatoes and brown sugar tossing until potatoes are coated.
3. Arrange sweet potatoes on two baking sheets. Roast until potatoes are very tender and beginning to brown (approximately 30 to 45 minutes). Remove from oven and set aside.
4. Melt 4 Tablespoons of unsalted butter in the same saucepan used to coat the sweet potatoes. Add sliced leeks, chopped celery and 1 1/2 teaspoons grated ginger. 
5. Sauté leek and celery mixture until they have softened and are very tender (approximately 15-20 minutes).
6. Add roasted sweet potatoes to the saucepan and sauté for approximately 2 minutes.
7. Add the orange juice and 8 cups of chicken broth. Bring mixture to a boil. Reduce heat and simmer for approximately 10 minutes.
8. Working in batches, puree soup in a food processor. Or use an immersion blender to puree mixture. Note: If the mixture is too thick, add in additional chicken broth.
9. Return soup to saucepan to keep hot. Season with salt and pepper.
10. Before serving, melt 2 Tablespoons unsalted butter in smal saucepan. Add lobster medallians and sauté until heated through (approximately 1 minute).
11. Ladle soup into bowls, spoon small dollops of Crème fraiche in center of soup bowl, and place a lobster medallion on top of the Crème fraiche
12. If desired, sprinkle chopped flat leaf parsley over soup before serving.


Early on in my 'professional life', I once worked for someone whose response to a request or an idea was often 'Let me think about, I will get back to you'. We all learned rather quickly that this meant our request or idea was one not immediately seen as doable or great. We also learned that the answer had a very high probability of being 'no'. Some of us remained persistent, so after a waiting period where there was no response, we would go back to see if he had made a decision. Sometimes this decision making process dragged out a little longer because he would ask us to get 'more information' or 'put the idea in writing'. Depending on how important the request or idea was to us, we complied (we all understood chain of command and thought nothing would ever curb our enthusiasm or affect our persistent spirits).

We affectionately and sometimes not so affectionately called his requests for more information as 'the hurdles'. There were times we really did need to think through our requests and ideas so 'the hurdles' served everyone well. But then there were also times when they didn't. It was in those instances (regardless if the answer was yes or no), the hurdles and wait time for a response took a bit of the joy out of our enthusiasm. At the time I never understood was why he couldn't really see the impact he was having on us, our spirit. In retrospect, I think maybe he could. There were many takeaways from this experience, life lessons in both our professional and personal lives. Beyond learning how to put together a comprehensive proposal and thinking through all of the potential impacts and outcomes of an idea, I learned if someone really matters to us, we don't intentionally put up unnecessary hurdles, regardless if our answer ends up being yes or no to a request or an idea, especially if we want to make certain we never curb their enthusiasm.

And oh, you really, really don't need an immersion blender to make this soup and you really, really don't need to serve it with lobster medallions. I just don't want there to be an any unnecessary hurdles to curb your enthusiasm in the making of this soup.

Tuesday, January 7, 2014

Edna's Houska


Everything I ate in the home of my childhood best friend's parents was incredibly delicious. And once I got over my hesitancy to try new foods, I was able to experience the full range of Italian and Polish dishes served in their home. Edna and Andy were as amazing as parents as they were cooks. This perspective (seen first through the eyes of a ten year old) was one that never changed. I may have been one of those kids who almost spent as much time at their dinner table as their children did. In retrospect, the genesis of my love of gathering friends and family around food began in their home. So each time I make one of Edna's recipes, it feels as if I am momentarily time traveling back to those carefree days of my youth. So the other day I decided to make Edna's Houska.

So what exactly is Houska? Well here is the simple answer. It is a rich, egg, slightly sweet yeast bread, one that almost every Eastern European culture (especially the Polish, Czech and Bohemian cultures) has a name for or version of. Typically the bread is braided, studded with golden raisins (although some versions omit the raisins) and contains candied fruit (or lemon zest). It is a bread traditionally associated with the Christmas, New Year or at Easter holidays. Around which holiday or holidays the Houska is served generally depends on traditions of the various Eastern European cultures where some version of the bread is made. Just like Challah (another sweet yeast bread) is eaten year round and traditions aside, I actually think it would be a shame to enjoy this incredibly flavorful, moist bread a few times a year. And getting a bit of a youthful jolt shouldn't have to be limited either.


When I first received this recipe from Edna, the mother of my childhood best friend, my initial reactions were 'maybe this is beyond my culinary capacity, maybe I will just to have to wait until I am invited for Easter dinner to experience it again, and why didn't I spend time watching her cook than I did eating hat she made'. These were just a few of my thought process I had (and remembered from) more than 30 years ago. Yes, this is how long I have had this recipe. Many things have changed over the course of the past 30 years, including how I view the making of this bread. It is actually not as complicated as my first impression lead me to believe. 

This is a bread recipe using cake yeast as opposed to granulated yeast. The cake yeast is usually found in the refrigerated dairy section of the grocery store. In addition to the yeast, eggs, milk, sugar, flour, Imperial margarine, golden raisins, lemon zest, vanilla and salt are all you need to make this sweet bread.

Sometimes when a recipe calls for the zest of a lemon we think of it as an optional ingredient. If that thought has ever crossed your mind before, this bread will have you make a permanent paradigm shift.


It all begins with scalding one cup of milk over medium-high heat in a medium sized saucepan. The milk is heated through enough to be considered scalded when small bubbles form around the edges of the pan. Once it reaches this state, remove from heat and add in the Imperial margarine, vanilla, lemon zest, sugar and salt. Stir until the butter and sugar have melted. The margarine will melt easier if you cut it up into tablespoons. The milk mixture should be lukewarm (you want to be certain not to cook the eggs) before you add the four lightly beaten eggs and the yeast/water mixture. After stirring and blending these ingredients, pour into the bowl of a standing mixer fitted with a dough hook.

Six cups of flour are added one at a time, each one being fully incorporated before adding the next one. After all of the flour is added, the golden raisins are mixed in for approximately one minute or until blended in the dough. You will think the dough needs more flour because it will be slightly sticky. Resist the temptation to add more flour as you will end up with a drier, less moist bread.


The dough is scraped onto a lightly floured surface and kneaded for several minutes (or until it is not longer sticky and has a smooth finish). The kneaded dough is placed in a large buttered bowl. Before covering the bowl with plastic wrap, turn the dough bowl over so all sides of the bread are coated in butter. Place the covered bowl in a warm place and allow the dough to rise for 1 hour to allow it to double in size.

After the dough has gone through the first rise, transfer the dough to a lightly floured surface. The dough is cut into 4 equal pieces. Each quarter is then cut in half (so you end up with 8 equal pieces).
Each piece is rolled into a log approximately 14-16 inches in length. The braids are formed by using two of the logs. When the logs are formed, tuck each end under and place on a parchment paper lined baking sheet. The finished braided logs are covered with a light towel (flour sack towels work best) and the dough goes through a second rising period of 1 hour. Because the logs will almost double in size, I use two baking sheets.


The beautiful golden finish on the Houska comes from the egg wash. Using the two remaining eggs, separate the eggs. Using only the yolks, add 2 teaspoons of water and stir until well blended. Brush each of the loaves so the entire surface of the dough is covered. Place baking sheet in a preheated 350 degree oven and bake for approximately 20 minutes. Remove baking sheets from the oven and transfer breads to a cooling rack. I generally bake my bread in the center of the oven, one baking sheet at a time. I envy those of you with double ovens.


Houska is delicious all on its' own, but when you schmear room temperature butter on it, it goes from simply delicious to additively delicious. Loaves of this bread will disappear before your eyes. Literally. It is also one of those breads perfect for making french toast or a bread pudding. That is, if you have any left after serving it. While eating this bread may not bring you back to your youth, it will bring you to a place you will want to return to again and again. Yes, life is too short to exercise restraint in making this bread for only one or two holidays a year. 

Recipe
Edna's Houska
Makes 2 very large or 4 perfect sized loaves

Ingredients
1 cup whole milk
1 cup (8 ounces/226g) margarine (recommend either Land O'Lakes or Imperial), cut into tablespoons
3/4 cup (150g) granulated sugar
1/2 teaspoon Kosher salt
Zest of one lemon
1 Tablespoon vanilla
2 ounces cake of yeast (dissolved in 1/2 cup of lukewarm water) See notes
6 large eggs, room temperature, divided
6 cups (768g) of all purpose flour, plus more as need and when kneading
15 ounces (425g) golden raisins

Directions
1. Scald milk. Add margarine, sugar, salt, zest of lemon and vanilla. Stir until margarine and sugar are melted. Remove from heat.
2. Lightly whisk 4 eggs until blended.
3. When milk mixture is lukewarm (95-105 degrees F), add lightly beaten eggs and yeast/water mixture. Stir until combined. Transfer to bowl of a standing mixer.'
4. Fit standing mixer with bread dough hook. Add flour 1 cup at a time, mixing until blended with each cup. Dough will be rather sticky. 
5. Add raisins and mix at medium speed until combined (less than 1 minute)
6.  Lightly flour a surface. Put all dough on floured surface and knead for several minutes (until dough is no longer sticky and comes together in a smooth ball). Kneading will take approximately 3-4 minutes. Note: Continue adding flour as needed while kneading. Dough should not stick to the surface before putting in the buttered bowl.
7. Place dough in a well buttered bowl. Turn dough over so all sides of the dough are covered in butter. Cover dough with plastic wrap, top with a light weight towel, and let rise in warm place for 1 hour or until the dough has doubled in size.
8. Lightly flour a surface. Remove dough from the bowl and place on lightly floured surface. Cut dough into 6 or 9 equal pieces. (6 pieces for 2 large loaves or 9 pieces for three perfect sized loaves).
9. Roll each piece into a log. Braid two logs (tucking ends under) and place on parchment paper lined baking sheet. Continue until you have 4 braided logs. Note: Alternately, cut each piece of dough into 3 pieces and braid accordingly.
10. Cover braided logs with a light weight towel (use flour sack towels if you have them). Let rise in a warm place for 1 hour.
11. Preheat oven to 350 degrees (F).
12. Make an egg wash using remaining 2 eggs but use the egg yolks only. Mix in 2 teaspoons of water (or milk) into 2 egg yolks and whisk until well blended. Brush wash on top of dough. Make sure the entire surface of bread is covered with egg wash. Note: Adding milk instead of water will create a more golden baked bread surface.
13. Bake for approximately 20 - 24 minutes (top will be beautifully browned).  When tapped, the bread will sound hollow.
14. Transfer bread to a cooling rack. Allow to cool to room temperature.
14. Using a serrated knife, slice and serve with softened butter.

Notes: (1) Recipe updated April 2020. (2) If you cannot find cake yeast in the refrigerated section of your grocery store use three 1/4 ounce packages of the granulated active yeast. (3) When measuring the flour I used a 128 per cup weight.


Over the course of my lifetime thus far my perspectives on a variety of things and people have either remained unchanged or have changed (nothing insightful about this observation, I mean really, what other options are there? Sometimes I can say the most ridiculous things. But bear with me, if you can stop laughing that is, this is going somewhere). Whether those perspectives are reaffirmed or altered is mostly dependent on how I choose to see them. I came across a quote the other day 'What we see mainly depends on what we look for.' The more I thought about it, the more I thought maybe there was wisdom in those words. The more time I spend looking for the positive, for the potential, or for goodness, the more I see. The more time I spend on finding reasons to not like something or someone, to focus on differences, or to pass judgment, the less I see (in them).

Had I never gotten over my reluctance to try new foods when I was younger, I may never have come to appreciate the wonderful foods served in the home of Andy and Edna or have had the opportunity to spend so much time at their dinner table or have learned early on how to make friends and family feel so welcomed, so special. I could go on with a million (maybe not a million, maybe hundreds) of examples of the outcomes associated with what I looked for in my experiences and in others. But regardless of how many of these I might share, I still come to the same conclusion. Yes, I really do believe the wisdom in the words 'what we see mainly depends on what we look for.' How we choose to see experiences or people really does affects our memories, relationships, and yes, maybe even our destinies.