Monday, February 10, 2014

Mocha White Russian

Several years ago we traveled to Telluride for a family ski trip. In spite of the fact that I was the only non-skier in the group, I was looking forward to spending time taking in views of the beautiful snow capped mountains against the deep blue Colorado sky. While everyone else went skiing on the slopes, I went on a snowshoe hike for the experience and to take photos. Unbeknownst to me the hike turned out to be more physically rigorous than skiing. The wind cutting into your face gondola ride should have been my first clue that this was going to be an adventure.

Having never hiked in snowshoes before as well as having spent less than 24 hours acclimating to the elevation, I thanked my lucky stars I was in a hiking group of one. I genuinely felt sorry for my guide as I made the hike longer (and probably more challenging) by stopping every few minutes to pull out my camera to capture the views. In actuality photographing the mesmerizing mountain images was just the excuse to enable me to catch my breath (I am certain my guide figured this out pretty quickly as this  was probably not the first time he had someone like me in his group) and keep the whining from becoming audible. Why I didn't just stay back, sit by a warm fire and enjoy a beverage or two instead of having what felt like a near death experience is anyone's guess. Every now and then I take a pretty good landscape photo but I am no Ansel Adams.


The White Russian and Blind Russian cocktails are all variations of the Black Russian. While not a Russian in origin cocktail, all versions of the Russian cocktail are made with vodka. If you believe everything you read on Wikipedia (the not written by scholars only internet version of the Encyclopedia Britannica) Vodka either originated in Poland or in Russia. While being primarily of Polish descent, I am happy someone had the wisdom to defer the name of this cocktail to the Russians. Even the Dude in The Big Lebowski may not have been so obsessed with a cocktail by any other name.


A White Russian is made with Vodka, Kahlua and either cream or half and half. It can be hard to resist the taste of cream and this may not be the time to cut out a few calories. Simply by adding a frozen coffee ice cube to the mixture, the White Russian is transformed into a Mocha White Russian.


What better way to use any leftover coffee than to make coffee ice cubes. And hey what better way to use coffee ice cubes than to make a Mocha White Russian. Any ice cube tray will do but these two inch square silicone ice cube trays (I found these at Williams-Sonoma) make the most prefect two-inch square ice cubes.


In an old-fashioned glass, add one coffee ice cube. Pour in 2 ounces of vodka followed by 2 ounces of Kahlua. Top the cocktail with 2 ounces of the cream or half and half. Before stirring this cocktail just take in how beautiful this cocktail looks. It sort of resembles a snowcapped mountain. Once stirred the black and white cocktail becomes one resembling fifty shades of brown.


So whether you are watching the Winter Olympics, sitting by a warm fire, or looking for that great after-dinner or end of the day cocktail, one sip of a Mocha White Russian will have you temporarily forgetting what seems like the most wicked, coldest, snowiest winter ever. And if you happen to be someone enjoying and living in a much warmer, sunnier climate (lucky you), this cocktail will remind you how wise you were for making the decision to live somewhere other than the frozen tundra.

Just the resist the urge to drink this quickly. It is definitely one of those sip slowly and savor cocktails.

Recipe
Mocha White Russian (inspired by Giada De Laurentiis's Black and White Italian Cocktail)

Ingredients
1 coffee ice cube
2 ounces Vodka
2 ounces Kahlua
2 ounces cream or half and half

Directions
1. Place a coffee ice cube in an old fashioned cocktail glass.
2. Add Vodka and Kahlua
3. Pour cream or half and half over. Enjoy the black/white visual before stirring.


Saturday, February 8, 2014

White Chocolate Raspberry Linzer Cookies

After making raspberry sauce last week I have been craving the taste of raspberries. Of course not in their healthy fruit form, but in their almost as healthy preserve form. To satisfy this craving I needed to bake something. I debated as to whether to make a Raspberry Linzer Torte or Raspberry Linzer cookies as traditionally each has a raspberry preserve filling. In looking at the 'have not been used in awhile' collection of both antique and new heart cookie cutters, there seemed to be little choice of what I would bake. Cookies it would be. But that wasn't the only reason I decided to make Linzer cookies. I have been wanting to make a recipe out of the recently published Napa Valley Model Bakery cookbook for some time now. Their Raspberry Linzer cookie seemed like the perfect one to make first. And with Valentine's Day less than a week away I thought I too would jump on the 'make something heart shaped confection' bandwagon.

I noticed the Raspberry Linzer cookie recipe in Model Bakery's cookbook was different than one they had apparently published several years ago (one I found online). The newer version used all-purpose flour and two teaspoons of vanilla while the older one used pastry flour and one tablespoon of vanilla. Decisions, decisions. The all-purpose flour version might create a firmer cookie but the pastry flour might create an ever so slightly tastier cookie. The pastry flour version won the debate I was having with myself. More vanilla is always a good thing, so why not stay with a tablespoon was my thinking.


Traditional Linzer cookies are dusted with confectionary sugar, however, I thought maybe it was time to mess with tradition just a bit (a moment of conservative rebellion). What better way to further enhance this classic cookie than by dipping the tops of the cookies in white chocolate. I only had to wonder how ambitious of an endeavor this change in tradition would be.


I channeled my inner Thomas Keller today when making these cookies. What this means is that I decided to measure out the ingredients using a scale.


The Linzer Torte has Austrian origins, however, the Linzer Cookie is a North American adaption of the  lattice topped pastry. Hazelnuts are the more traditional nut used in the torte, however, almonds and walnuts can also be used. With hazelnuts being one of those acquired taste nuts (in spite the recent surge in popularity of Nutella) this Linzer cookie would have almonds.

The almonds need to be ground into a fine meal. In a food processor fitted with a steel blade the almonds and one-half cup of the flour are processed together to get this desired consistency. The flour helps to prevent the almonds from turning into a paste. Using skins on sliced almonds give the dough and finished cookie a look that says 'there are nuts in here'.


This dough came together really well. Beginning with beating the butter until a light consistency, followed by gradually adding the granulated sugar, lemon zest and vanilla, you are almost done making the dough. The ground almond/flour mixture is then added in three batches and mixed until dough is smooth.


 The first step in deciding whether or not I like a cookie is tasting the dough. Good dough, good cookie, great dough, great cookie. This was great dough. Once the dough is divided in half, it is flattened to a disk and refrigerated for 2 hours or overnight. If the dough becomes too firm, allow to set out for 15 minutes before rolling out.

On a lightly floured surface, the dough is rolled out to about an 1/8-1/4 inch thickness. This dough rolled out perfectly. 


Using either a heart or round cookie cutter you cut out both the bottoms and tops for the cookies. Many use a crimped edge cookie cutter to make Linzer cookies, however, since I was using one of my antique cookie cutters (one without a crimped edge and one without a corresponding smaller crimped edge one) my cookies would be having a flat edge.

In a preheated 350 degree oven the cookies bake for 15-16 minutes. The parchment paper lined cookie sheet is placed in the upper third of the oven and rotated mid-way through the baking process. Allow the cookies to cool on the baking sheet for at least five minutes before transferring to a cooling rack to finish the cooling process. Whether you are coating these cookies in chocolate or not, they need to cool completely before the raspberry preserves are spread on them.

Before dipping the cookie tops in white chocolate, they need to cool completely. To be honest, the dipping process wasn't hard, just a little more time consuming than dusting with confectionary sugar. As long as you are careful, you won't break any cookie tops. After tasting the finished white chocolate dipped Raspberry Linzer Cookie, I would definitely dip them again and not just for the finished look. The flavors of the almonds, lemon zest, white chocolate and raspberry preserves were amazing together.

The confectionary sugar topped Raspberry Linzer cookies are equally delicious. If you are not a fan of white chocolate, make the confectionary sugar topped version. But regardless of your finished Linzer cookie top preference, this is a cookie so worth all of the time and love that goes into making them.  Just don't make them only for Valentine's Day or any other holiday because life is short to deny yourself such divine deliciousness.

Recipe
White Chocolate Raspberry Linzer Cookies (inspired by Model Bakery's Raspberry Linzer Cookie recipe)
Makes about 24 2 1/2-3 inch cookies

Ingredients
2 cups/230 g sliced almonds (with skins on)
2 1/4 cups/325 g pastry flour, plus additional flour for rolling out the dough
1 1/4 cups (2 1/2 sticks)/280 g unsalted butter, room temperature
2/3 cup/130 g granulated sugar
1 Tablespoon vanilla
Grated zest of one lemon
12-13 ounce jar of raspberry preserves (seeded or seedless)
1 1/2 cups white chocolate for dipping or confectionary sugar for dusting

Directions
1. In a food processor fitted with a steel blade, process the almonds and 1/2 cup of the flour until nuts are finely ground. Be careful not to process to much or a paste will form. Transfer ground almonds/flour mixture to the remaining flour. Set aside.
2. In a stand mixer fitted with a paddle blade, beat butter until smooth (about 1 minute).
3. Gradually add in granulated sugar and continue beating until light and fluffy (about 1-2 minutes).
4. Mix in vanilla and lemon zest.
5. Add flour mixture in three batches. Mix until smooth.
6. Divide dough in half, forming two disks. Wrap in plastic wrap and refrigerate until chilled (2 hours to 1 day). Note: If dough is too hard to roll out, let sit for approximately 15 minutes to soften slightly.
7. Preheat oven to 350 degrees. Line baking sheets with parchment paper. Set aside.
8. Lightly flour work surface and roll out one dough disk until 1/8 to 1/4 inch thick. Using a round or heart shaped cookie cutter, cut out shapes. Place half of cut dough on a cookie sheet.
9. With remaining half of cut dough, cut centers (this will form the tops of the cookie).
10. Bake cookies for 15-20 minutes or until cookies are lightly browned.
11. Remove cookies from oven and allow to cool on pan for 5 minutes before transferring to cooking racks. Cool completely.
12. Melt 1 cup of white chocolate over hot water. Carefully dip tops of cookies (cut in the center). Allow chocolate to set.
13. Spread raspberry preserves on each whole (uncut in the center) cookie.
14. Place chocolate covered cookie on top of each whole cookie. Press dough slightly to form cookie sandwich.
15. Store cookies in an airtight container at room temperature.
Note: If using confectionary sugar instead of white chocolate, dust confectionary sugar over cookie tops before finishing the cookie assembly.


As soon as February arrives there always seems to be an increase in the number of articles, stories and surveys related to relationships of all kinds. Most likely prompted by the holiday of month (Valentine's Day), the reminders and redundant messages that come from these sources are usually received differently, depending mostly on which side of the relationship world you live in as well as your level of skepticism over articles on relationships (particularly when they espouse ideas different than your own). For reasons too complicated to explain, I experience an endorphin rush when I read things with redundant ideas that resonate with some of the things I believe. Multiple sources of validation can sometimes make you feel less of an outlier.

Some say the secret to every relationship (every successful, satisfying relationship that is) is honesty. And that if honesty is a constant presence it can be so powerful it masks all of those little imperfections (our neurosis, fears, struggles with perfectionism). So if this is really true, don't you wonder why anyone would allow honesty to erode in a relationship they value? If for whatever reason(s) you are in a relationship where you can't be honest (and we aren't just talking lying here), the other person often may find it more difficult to talk to you because they won't know which 'who' they are talking to. Particularly if the who you are today and the who you were yesterday are not always the same person (we are talking selective memory here). If more time is being spent discussing imperfections, honesty might just be the underlying (sometimes unspoken) real issue causing havoc in the relationship. If you have ever been lucky enough to be in a relationship where honesty really mattered then you know those little imperfections (either yours or theirs) really didn't. And you didn't have to read that anywhere.

Sunday, February 2, 2014

Chocolate Mousse Cake with Raspberry Sauce

The bright spot of this 'the snow does not want to stop winter' weekend was the birthday dinner for my childhood best friend. What I love more than celebrating the birthday of a friend (not just because she happens to be seven months older than me) is being able to make the birthday dinner. Maybe it's because there is an intimacy to a celebratory dinner at home, the kind of intimacy that deepens, strengthens a friendship and the kind that can be a little more relaxing than dinner in a restaurant. Although we have been friends for decades (we met when we were 10 and in the fifth grade) I don't think either of us has ever stopped finding ways to nurture and grow this friendship. There are many qualities between us that are similar, but we are different, the kind of yin-yang different where seemingly opposite forces create an interconnectedness and interdependence not found in friendships dominated more by similarities than differences. Maybe this is why we have had such an enduring friendship.


While we usually ask one another for ideas for birthday or holiday presents (her request this year has made me a little anxious because I am so superstitious), birthday dinners are by their very nature supposed to have element of surprise to them. With the exception of revealing the main course and hinting that the dessert had something to do with chocolate, I didn't share any other part of the birthday dinner menu with her, particularly what the something to do with chocolate birthday 'dessert' would be. Because it has been (a rather long) while since I had made the Chocolate Mousse Cake with Raspberry Sauce it would be unexpected and what I hoped would be the perfect, memorable ending to her birthday dinner.


I haven't quite figured out how to take great photos at night yet. So the visual images I wanted to share with you, well I can't. If I was a little more organized and less busy I would have had the Chocolate Mousse Cake made the day before (in the light of day), I may have been able to take better photos. So please forgive me.

When shopping for the ingredients for the cake I almost decided to replace the Oreos with those Famous Chocolate Wafers. My ongoing struggle with homemade versus a semi-homemade recipes. Taking a deep breath, I decided to go with Oreos because sometimes every now and then semi-homemade isn't such a crime. Besides the Oreos make for a really delicious crust (and hey you end up with a few extra Oreos to munch on while you are making this cake). You can use either pecans or walnuts for the crust, just remember to toast them. I was in a pecan mood so pecans it was.


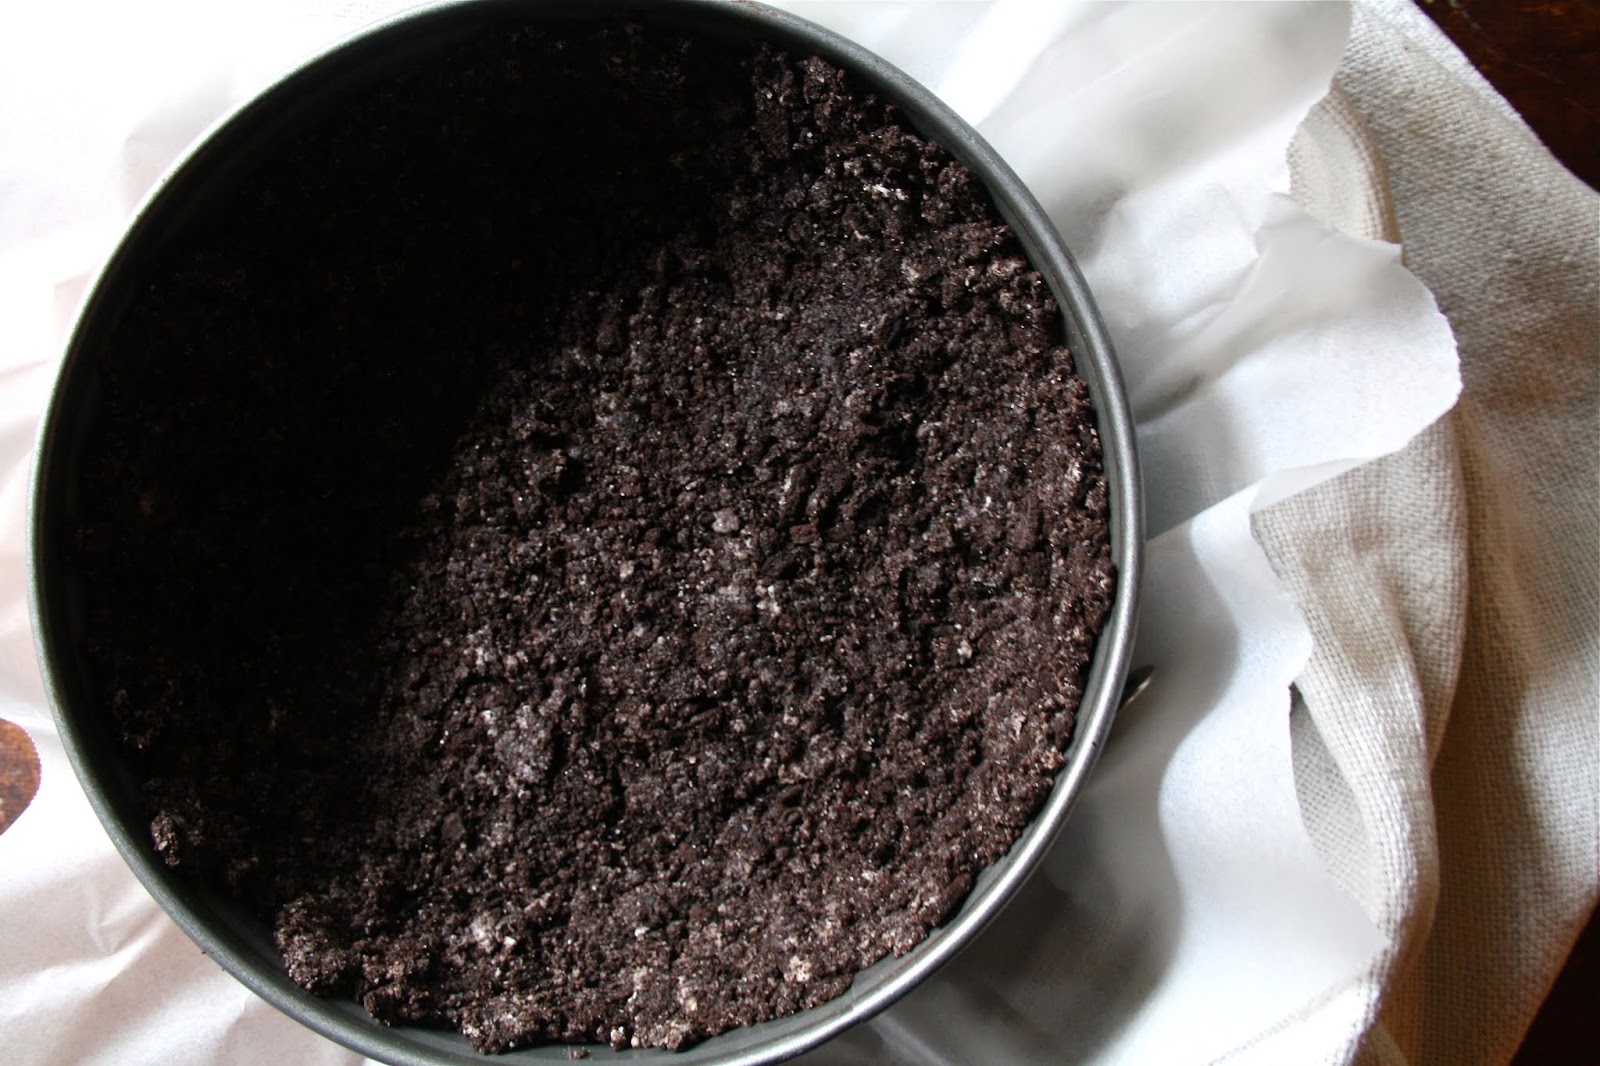
The Oreos, toasted nuts and the unsalted butter are put into a food processor fitted with a steel blade. The ingredients are processed until crumbly (meaning there should not be any recognizable chunks of Oreos left). In a 9 inch springform pan lined with parchment paper, press the crust into the pan. You will have enough to have the crust come up about an inch on the sides of the pan. After you finish the crust set aside.


When assembling the filling you will need to whip the cream until light peaks form and temper the chocolate. The chocolate can be tempered in a bowl over steaming water or in the microwave. If you choose the microwave method, you will microwave on high in 30 second intervals. After each 30 seconds give the chocolate a stir. It took me four 30 second intervals to melt this 1 1/4 cups of chocolate. In the final interval there were a few bits of morsels left, however, when continuing to stir the chocolate completely melts. Melting the chocolate before you begin combining ingredients in the mixer you will prevent the chocolate from clumping in the batter (if the chocolate is too hot or too cold it will not blend in well).

In a standing mixer fitted with a blade, cream the sugar and cream cheese together until light and fluffy (approximately 2-3 minutes). Add the eggs in one at a time and beat until each is fully incorporated.

Mix in the baking soda, salt, and vanilla, then blend in the melted chocolate. Remove mixing bowl from stand and gently fold in the lightly whipped cream until no white streaks remain.


After pouring the batter into the crust smooth the top using an off set spatula. Place in a preheated 325 degree oven and bake for 1 hour 20 minutes. My original recipe recommended 1 hour 15 minutes but the center of the cake jiggled more than I wanted it to, so I added 5 minutes to the baking time. This cake will have some play in it when finished baking. Don't worry, it will all set up when chilled.


After the cake comes out of the oven the top will fall. Again not to worry this is what is supposed to happen. Cool the cake to room temperature and then chill up to eight hours or overnight before removing from the pan and finishing with whipped cream. So unless you are baking very early in the morning, you might want to consider making the cake the night before you are serving it. It is easier to remove from the springform pan when it is completely chilled. Remember to run your knife along the edge of the pan and cake before unlatching the springform pan.


No one makes a better raspberry sauce than Ina Garten. Her recipe is raspberry sauce perfection. A half-pint of fresh raspberries, a half cup of granulated sugar and a quarter cup of water are added to a small saucepan. The mixture is brought to a boil and then simmered for four minutes. The raspberry mixture, 12 ounces of raspberry preserves (seeded or seedless) and 1 Tablespoon of Chambord are processed in a food processor fitted with a steel blade until the mixture is fully blended. Personally I like seeded raspberry preserves, but a seedless jam works well here too. When the sauce is finished, chill until ready to use.

The Chocolate Mousse Cake is rich, decadent and unbelievably delicious all on its' own. The raspberry sauce just takes it to a completely different level. Serving the sauce on the side gives everyone the choice of enjoying the cake with or without it.

The cake turned out to be a perfect ending to the birthday dinner. But how could chocolate, whipped cream and raspberries not be?

Recipe
Chocolate Mousse Cake with Raspberry Sauce (updated January 2019)

Ingredients
Crust
30 oreos
6 Tablespoons unsalted butter, room temperature
1/2 cup pecans (or walnuts), toasted

Filling
3 large eggs, room temperature
1 cup (200g) granulated sugar
8 ounces (226g) cream cheese, room temperature
8 ounces heavy whipping cream, whipped to light peaks
1/4 teaspoon baking soda
1/4 teaspoon Kosher salt
1 teaspoon vanilla
1 1/4 cups (8 1/4 oz/234g) chocolate chips up to 60% cocoa  - I used Ghiradelli 60% Bittersweet Cocoa

2 cups heavy whipping cream
1/2 cup (60g)confectionary sugar
4 Tablespoons sour cream
1 teaspoon vanilla
pinch of kosher salt

Raspberry Sauce (inspired by Ina Garten's Raspberry Sauce recipe)
1 half pint fresh raspberries
1/2 cup (100g)granulated sugar
1/4 cup water
12 ounces raspberry preserves or jam (seeded or seedless)
1 Tablespoon Chambord

Directions
Preheat oven to 325 degrees (F). Line a 9 inch springform pan with parchment paper. Set aside.

Crust
1. Place Oreos, toasted pecans and unsalted butter in a food processor. Process until crumbly and well mixed.
2. Press crust into prepared 9" springform pan. Set aside.

Filling
1. Melt chocolate chips and set aside.
2. Beat sugar and cream cheese in a stand mixer fitted with a paddle attachment. Beat until light and fluffy (about 3 minutes).
3. Add eggs in one at a time beating until well incorporated.
4. Mix in baking soda, vanilla, and kosher salt.
5. Blend in melted chocolate.
6. Fold in lightly whipped cream with a spatula until no white streaks remain.
7. Pour filling into pan prepared with the crust. Smooth top with an off set spatula.
8. Bake 1 hour 20 minutes. Remove from oven and allow to come to room temperature.
9. Chill chocolate mousse cake in refrigerator for at least 8 hours or overnight. Note: Center of cake will slightly collapse after it has chilled.
10. Unmold cake and place on platter or cake stand.
11. In a standing mixer fitted with a whisk attachment, beat whipping cream, confectionary sugar, sour cream, vanilla, and pinch of sea salt until stiff peaks form. Using a pastry bag, pipe design of choice onto the cake. If a pastry bag is unavailable, spread whipping cream over cake with a spoon or spatula. Return to refrigerator.
12. Remove cake from the refrigerator 15 to 30 minutes before serving. Cut into thin slivers as this is a very rich cake!

Raspberry Sauce
1. Place raspberries, sugar and water into small saucepan. Bring to a boil over high heat and then simmer for 4 minutes.
2. Place raspberry jam, Chambord and raspberry mixture into a food process fitted with a steel blade. Process until smooth.
3. Chill sauce until ready to serve.

Notes: (1) Alternately instead of serving with a fresh raspberry sauce, decorate top of the cake with freshly whipped cream and fresh berries. (2) In the event you want to avoid using nuts, make the Oreo crust with the 30 Oreos, 6 Tablespoons unsalted butter, and 2 Tablespoons of granulated sugar.


Have you ever met someone who is a little different than you? Differences that you find intriguing, maybe even endearing. But definitely differences that give you the opportunity to see the world through a different lens, where you experience the added benefit of growing personally and maybe even professionally from spending time with someone not exactly like you. This sort of chemistry can lead to great friendships, ones that endure over time, and quite possibly ones that are strengthened and continue to grow.

But every now and then, the differences versus the interconnectedness become the focus for one or both of you. And everything that was good, that was great about the friendship becomes not so good, no longer great. When this happens, how we are viewed or how we view, shifts not from the sum of our parts, but to our parts (the first clue that this is happening is that you or they start to list them out). And the yin-yang qualities that gave rise to great energy, great synergy are ones that no longer are seen as opposite but equal qualities, but as opposite and unequal qualities. If by chance, the pendulum swings in that direction you either take it in stride and move on or you work at finding ways for those complimentary forces to continue to make a difference in you, in the friendship. And if that doesn't work maybe you hope for some divine cosmic intervention or some higher power that gives you (or them) the proverbial wake-up call. Because who I am and the quality of my life today is due in part to those friends who have made an immeasurable difference to and in my life because they were different from me. 

Thursday, January 30, 2014

Oatmeal Currant Cookies

I go through periods where I like to eat the same foods several days a row and sometimes up to a week. This creature of habit of mine most likely goes back to my elementary school days. Kids who lived close enough to school weren't allowed to stay for lunch unless they brought a note with an explanation as to why they couldn't go home for lunch (those were the days when mothers who 'didn't work' were expected to be home to make their children lunches). But on those rare days when I was lucky enough to have lunch with my school friends my lunch sack always contained the same thing, a bologna sandwich on white bread (was there any other kind back then?) with a smear of yellow mustard. From elementary to high school, this remained my favorite, my only eat at school lunch with one exception. Once I discovered mayonnaise I no longer made these bologna sandwiches with mustard. This story from my past might help to explain in part my latest obsession with currants.


Everyone seems to have a preference about the taste and texture of oatmeal raisin cookies. Some like them crunchy and others like them soft. And still others like the combination of the two textures. I was beside myself with excitement when I came across a recipe that I thought would result in a cookie that was both crunchy and soft. And it was. The fact that it had currants in it made it all the more appealing. Because if given a choice between an oatmeal raisin and oatmeal currant cookie, I will always, always, no exceptions, choose the one with currants (remember I have some creature of habit tendencies). There is just something about the taste of these tiny morsels that I love, particularly in an oatmeal cookie. 


As much as I love the rustic look of a cookie, I also love when a cookie made at home looks as if it came from a bakery. This is one of those bakery perfect looking cookies. And I don't think I will ever try another oatmeal raisin, oatmeal currant cookie recipe as I have finally found cookie perfection. If only I could have had this cookie in my lunches back in elementary school I would have figured out a way to eat lunch at school every day.


The ingredients for the cookie included light brown sugar, however, I like a cookie having a bit of a molasses flavor, so I decided to used all dark brown sugar instead. I would definitely make these cookies using all dark brown sugar again, but they can easily be made with light brown sugar or a combination of the two sugars. While you too may have strong preferences for your oatmeal cookies, I encourage you to give the all dark brown sugar version a try.

And oh, there are three tablespoons of Saigon cinnamon in these cookies, this is not a typing error. Trust me it is not too much, it is just the right amount.


The protein in flours is related to how much gluten is formed which in turns creates the texture in baked goods. Less protein creates a more light and airy structure, more protein creates a denser, chewy structure. Pastry flour has a lower percentage of protein compared to other flours. So when I saw this cookie called for the use of pastry flour I immediately knew it was going to have that bakery like texture. The good news is that pastry flour is so much more accessible in grocery stores these days (my favorite brand is Bob's Red Mill) and not one requiring a trip to Whole Foods or a gourmet food store.


The process for making this oatmeal raisin cookie is the same as most other cookies. The pastry flour, cinnamon, salt and baking powder are sifted and set aside. The unsalted butter, dark brown and granulated sugars are beat in a standing mixer using a paddle attachment until light and fluffy, a process taking about five minutes. Don't rush this stage, set a timer on the stove if you need to but the butter and sugars will go through a few transformations until it gets to the light and fluffy stage.

The eggs are beat in one at a time until thoroughly mixed in before the vanilla gets mixed in. The sifted flour is added in batches versus all at once. I had cut the recipe in half so I added the flour in in four batches. If I had made the full recipe, I would have added the flour in in eight batches. 


Once the flour is mixed in, the oatmeal and currants are stirred in by hand. This is a very dense batter so use a wooden spoon. If you need to, you can finish up the mixing in the mixer, but start by working it in with a wooden spoon.


On a parchment paper lined baking sheet, the equivalent of two tablespoons of dough are formed. I like using an ice cream scoop to ensure that all of the cookies will be even. You will be able to get nine dough balls on a cookie sheet. Before putting into a preheated 350 degree oven, gently press down on the dough balls to very slightly flatten (just enough so the top is flattened).


The baking time on the cookies is 18 to 20 minutes. My baking time was 18 minutes and I might reduce it down to 17 minutes the next time. Halfway through the baking process rotate the baking sheet to ensure even baking.

If you want a crunchier cookie, allow the cookies to cool on the baking sheet. If you want your cookies to be crunchy on the outside and softer on the inside, transfer to a cooling rack. To keep the cookies fresh, store in a covered container. For those of you who have creature of habit tendencies, this could be the just cookie to cause a shift in your cookie eating preferences.

Recipe
Oatmeal Currant Cookies (adaptation to Corner Bakery's Oatmeal Currant Cookie recipe)
Yield: 4 dozen large cookies

Ingredients (Recipe can be halved)
3 1/2 cups pastry flour
4 teaspoons baking soda
3 Tablespoons Saigon cinnamon
1 1/2 teaspoons Kosher salt
3/4 pound (3 sticks) unsalted butter, room temperature
1 1/4 cup plus 1 teaspoon granulated sugar
2 1/3 cups dark brown sugar (can use light brown sugar or combination of the two sugars)
2 large eggs, room temperature
2 teaspoons vanilla
Scant 4 1/2 cups old fashioned rolled oats
1 heaping cup currants (or raisins)

Directions
1. Preheat oven to 350 degrees. Line several baking sheets with parchment paper and set aside.
2. Sift flour, baking soda, cinnamon and Kosher salt in a medium bowl. Set aside.
3. Using a paddle attachment, cream together the butter and sugars in a standing mixer. Beat until light and fluffy, about 5 minutes (don't rush this step).
4. Add eggs one at a time and beat in until fully incorporated. 
5. Beat in vanilla.
6. Add sifted flour mixture in 8 batches until just incorporated.
7. Fold in the oats and currants.
8. Using an ice cream scoop (about a 2 tablespoon equivalent), form balls and place on a parchment paper lined baking sheet. Flatten the dough balls slightly. About 9 cookies to a sheet.
9. Bake 17 to 20 minutes, rotating the baking sheet halfway through to ensure even baking.
10. Remove cookies from oven when golden and set.
11. For a crunchier cookie, allow the cookies to cool on the baking sheet. For a softer cookie, transfer cookies to a cooling rack.
12. Store cooled cookies in a covered container.

Monday, January 27, 2014

Currant Scones

We braved the wicked cold weather and drove into the city on Saturday to experience Eataly, a feast for the senses food emporium. My reluctance to leave the comfort of a warm house to expose my face to face slicing winds (for as long as it took to walk from the parking garage to Eataly) was all but forgotten once I walked into this food mecca. From the fresh produce, to the full array of almost every cheese ever made, to the Italian wines, to the breads made in wood burning ovens, to the selection of pastas, to the fresh seafood and meats, to the gelato, to the multiple restaurants, it was like nothing I had ever encountered.  A virtual day trip to Italy. There is so much to take in you could spend hours there (and we did) eating, drinking, tasting and shopping. You would have to have incredible self restraint to not walk out of there without bringing something home. Of course, I could not leave without taking home some wines, cheeses, pastas, an olive oil, bread, and honey. I have less restraint than most.


With the exception of the bread (which was consumed almost immediately), I had plans for everything I had purchased. First up was the Acacia honey, which I thought might be perfect drizzled over fresh baked currant scones. Some like butter, freshly whipped cream or jam on their scones but I prefer honey on mine. An Italian honey drizzled over a warm currant scone, could there any better way to begin a cold winter morning? Just try to get the image of Beyonce performing on the Grammy's out of your mind, or you will never eat another carbohydrate, let alone another scone again.


No planning ahead necessary when making scones. Meaning, the eggs, milk and margarine need to be cold, not room temperature. This is a recipe that calls for the use of margarine instead of butter. While this may be a slight departure from most scone recipes, these scones have such a great flavor, you might not even detect the butter's absence. I love currants but you could easily substitute dried cranberries or raisins.


All of the dry ingredients (flour, salt, sugar, and baking powder) are mixed together in a medium sized bowl until blended. The margarine is blended in with a pastry blender, fork or your hands. I started with a pastry blender and quickly moved to using my fingers. The margarine is blended in until it resembles coarse meal. Stir in the currants. After the milk and egg are blended, they are added to the dry ingredients. Stir in until the dry and wet ingredients are combined (the dough will be very crumbly, be careful not to overwork).


Transfer mixture to a lightly floured surface and knead lightly until the dough comes together (it will not be smooth like a pie crust or pizza dough). Using a rolling pin, roll into a 10-12 inch circle (the dough should be at least 1/2 inch and up to 3/4 thick).


Scones can be triangular or round in shape. If you want triangular scones, cut the dough into 8 wedges. Or using a round biscuit or cookie cutter, cut into 9 to 12 circles (about 2 1/2 to 3 inches in diameter). The number of scones you will get will be dependent on the thickness of the dough.


The scones are transferred to a parchment paper lined baking sheet. The tops are brushed with an egg yolk and milk wash. Granulated, turbinado, or sanding sugar is lightly sprinkled over the egg wash.

In a preheated 425 degree oven the scones are baked for 10 to 12 minutes or until they are light brown on both the top and bottom. The scones will be firm to the touch. This batch of scones took 11 minutes.  Remove from the oven, transfer to a platter and serve. Don't forget to have some butter, whipped cream, jams or honey to go with the currant scones.
Recipe
Currant Scones

Ingredients
Scones
2 cups all purpose flour plus additional for rolling out dough
5 teaspoons baking powder
1/4 cup granulated sugar
1/4 teaspoon Kosher salt
4 Tablespoons margarine (cold), cut into 1/4 inch cubes
7 Tablespoons whole milk
1 large egg
1/2 cup currants (or raisins or dried cranberries)

Glaze
1 egg yolk
1 Tablespoon milk
1-2 Tablespoons granulated sugar (can also use sanding or turbinado sugar)

Directions
1. Preheat oven to 425 degrees.
2. Mix together flour, baking powder, salt  and sugar in a medium-large bowl.
3. Cut in margarine until crumbly.
4. Stir in currants.
5. Beat together 1 egg and the milk. Add to flour mixture and mix to just to combine (mixture will be crumbly).
6. Turn out onto floured surface. Knead very lightly with hands until mixture has enough of a consistency enabling it to be rolled out or to be shaped into a circle.
7. Roll out dough. Using a round biscuit cutter, cut 9 to 12 scones. Or cut into 8 wedges.
8. Mix egg yolk and milk to make glaze. Lightly brush on top of scones with egg wash. Sprinkle tops of scones with sugar.
9. Bake 10 to 12 minutes or until the tops are browned and insides are fully baked. The scones will be firm to the touch and bottoms will be light to medium brown.
10. Serve with butter, jam, whipped cream or honey.

There were vegetables, beautiful vegetables, at Eataly that I had never seen before. I am certain it looked a little odd me taking photos in the produce section, but I had my sunglasses on so I felt I was incognito and unrecognizable. Actually I was so mesmerized by these gorgeous vegetables that I was in my own little world for awhile and slightly oblivious to the significant number of people around me who also braved the elements that day.

Beauty can be found in the most unusual and ordinary of places. It can be in your backyard. One need not travel to exotic places to find beauty. Sometimes all it takes is taking a step back to be able see how ordinary things can look so extraordinary. And oh, it also takes having the ability to ignore the reactions of those around you when you are taking photos in places like a market or grocery store. Next time (and there will definitely be a next time) I go to Eataly I am bringing my 'real' camera and a list of the ingredients for recipes I have longed to make. I can think of no better escape from this winter reality we are experiencing, especially because this escape is only thirty minutes from home.