Monday, June 23, 2014

Summer Salad with Creamy Dill Dressing

Living less than two miles from the ocean had more benefits than I had ever anticipated. Beyond being able to take in the sights and sounds on early morning or just before sunset walks on the beach (always better at low tide), there were the frequent, short late afternoon and early evening sun showers. Like the proverbial clouds with sliver linings, these brief rainstorms almost always led to the appearance of some rather beautiful rainbows. Sometimes the colors were vivid and intense, while other times they were more pastel-like. As often as I was able, I would grab my camera, and run as fast as I could to the open farm fields in an attempt to capture as many photos as possible. The day I saw my first double rainbow, I was awestruck and mesmerized by its' sheer, yet fleeting beauty.

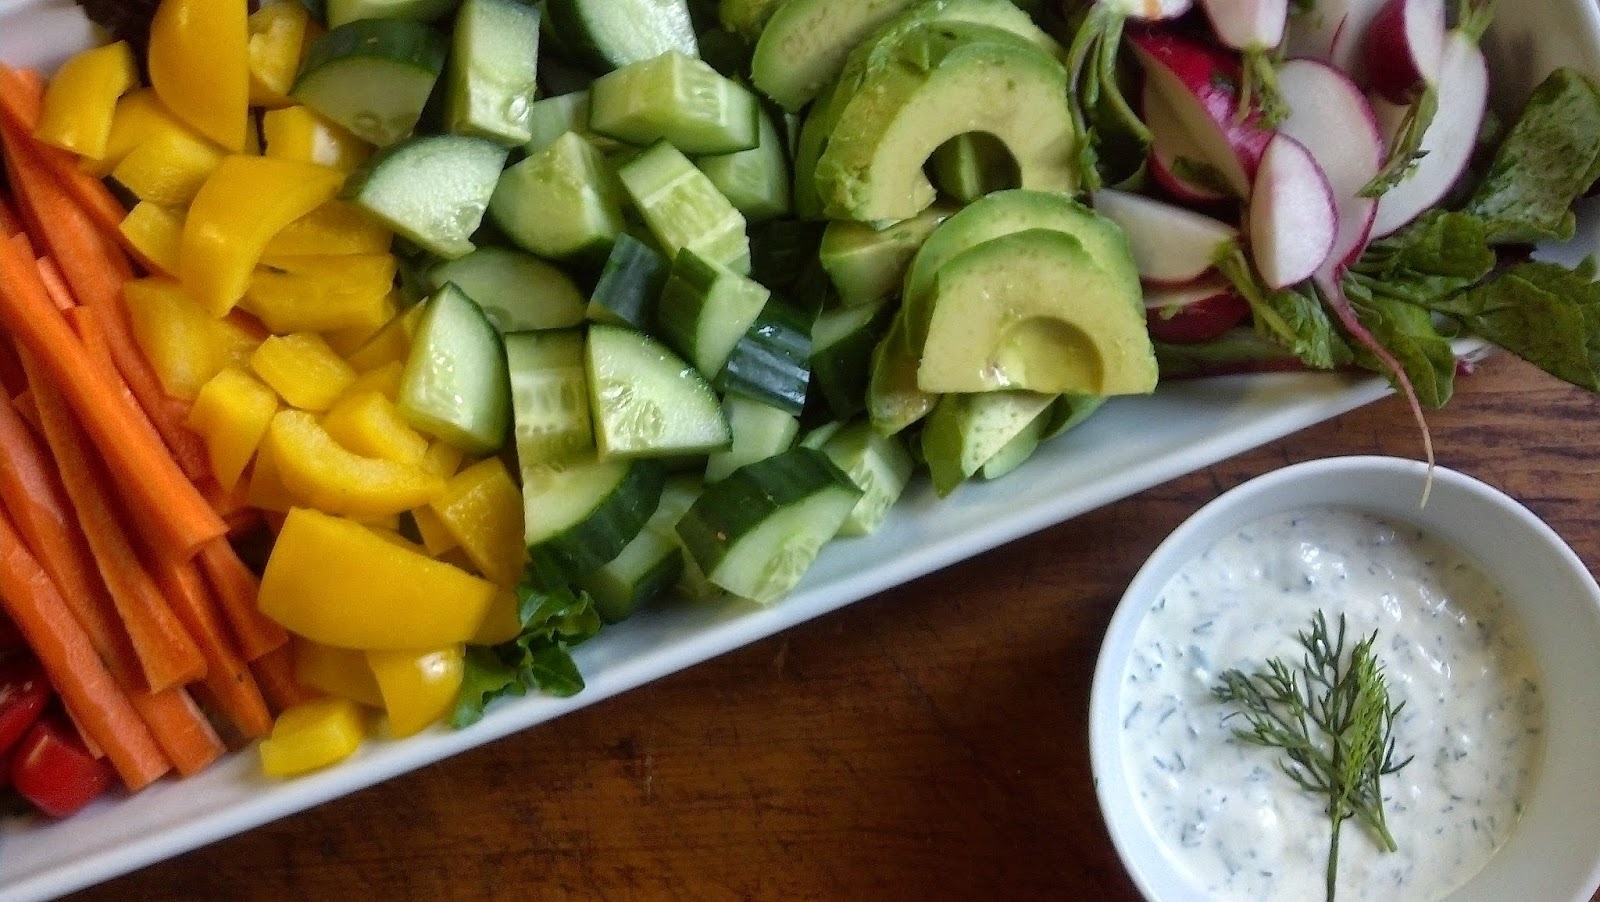
When walking through Farmer's Markets, I am usually drawn to those stands where the fruits and vegetables are artfully arranged, in a way mimicking a rainbow. Being someone with rather monochromatic tastes, I was inspired this weekend to shift from making the same old, same old (dominated by green) salad to making one having the characteristics of a rainbow. After putting this 'deconstructed' salad together, I was awestruck by how much more beautiful, how much more appetizing a salad could be. With some degree of certainty, this summer salad will have me going from one salad 'rut' to another.


In concept, I might be headed in a new salad 'rut' direction. However, this summer salad is one that doesn't necessarily have to be the same each time it is made. The choices for vegetables, while not endless, can change based on personal preference as well as what is in season. Whether I continue to replicate this salad using the same seven vegetables or not, one thing is for certain. My weekly trip to the Farmer's Market this summer has just gotten a little more exciting. 

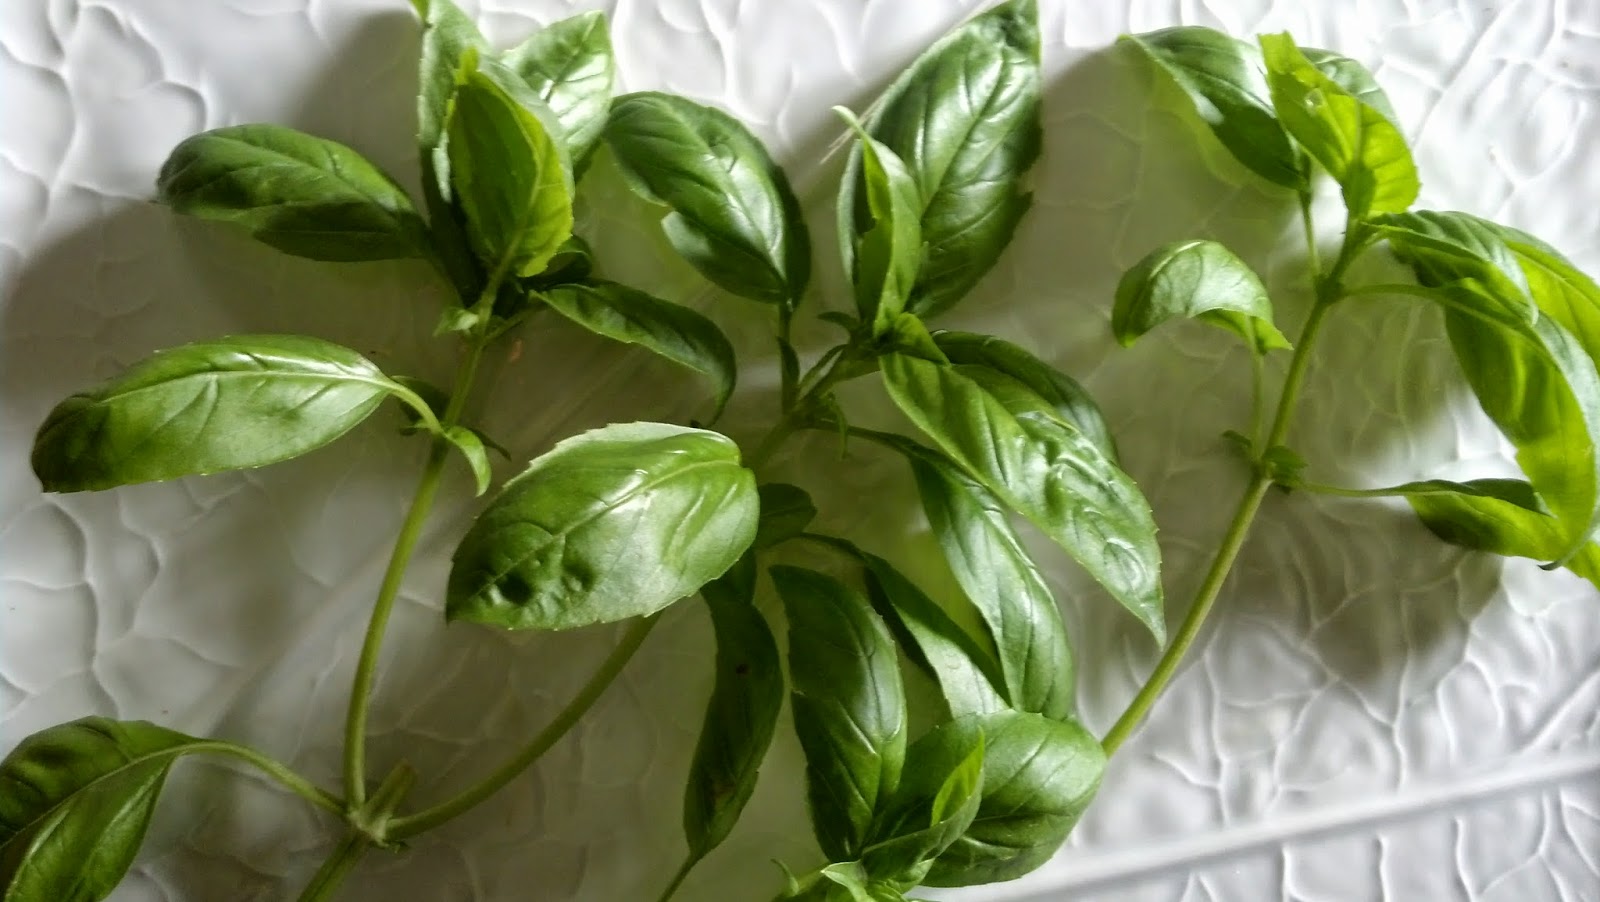
The greens base for this salad was a spring mix, but it could be arugula, spinach, romaine, or any combination of greens you like. Notice I haven't jumped on the kale bandwagon yet.


My first time making this summer salad, I choose cherry tomatoes, yellow bell peppers, carrots, english cucumbers, avocado and radishes. As long as I can find ripe avocados and english cucumbers, these will most likely be two things I will keep constant as they are my personal favorites.

But it is a salad that can include more than vegetables. If I was serving this salad as a main course for lunch or dinner, I might add a row of cooked shrimp, lobster meat or lump crab meat to it.

The creamy dill dressing on the side compliments this salad perfectly. Mayonnaise, sour cream, horseradish, fresh lemon juice, fresh dill, minced garlic, salt and pepper create a thick, creamy dressing. I think, no I know, my champagne vinaigrette 'rut' will be replaced by a creamy dill dressing one. Seriously, this dressing is insanely delicious. Already I am feeling anxious I will not be able to make this dressing year round as the fresh dill available in the summer isn't the same as what is sold here in the late fall, winter or spring. Maybe if I overdose on this creamy dill dressing this summer, I will need a reprieve for several months. 

There is nothing complicated or pretentious about this salad. Its' beauty and deliciousness are in its' simplicity, in its' rusticness. Fresh, raw vegetables and an easy to make creamy dill dressing create a feast for eyes salad even non-salad lovers will be drawn to. Be prepared to make this summer salad more than once as it may be the one salad everyone will be thrilled to see on the table when it makes repeated appearances. 

Recipe
Summer Salad with Creamy Dill Dressing (inspired by recipes created by chef Sylvia Fountaine)

Ingredients 
Lettuce (spring mix, arugula, spinach/spring mix)
1 yellow pepper, diced
1 avocado, sliced
1 cup cherry, baby heirloom or grape tomatoes, cut in half
1 - 2 cups english cucumber, cut into pieces
3-4 carrots, peeled and julienned 
1 bunch of radishes, cut in half or quarters or half and quarters
1/2 lemon

Some other salad ingredient options:
1 red or 1 orange pepper diced
Jicama, peeled and julienned
Cauliflower or broccoli
Or select your favorite other in-season fresh vegetables 
Note: Select a total of 6-7 fresh, raw, in-seaon fresh vegetables. If looking to make this salad a little more hearty, add a row of cooked shrimp, lobster meat or lump crab meat.

Dressing (Recommend doubling the recipes if serving 4 or more people)
1/2 cup mayonnaise (recommend Duke's or Hellman's)
1/3 cup sour cream
1/3 cup chopped fresh dill
1 clove garlic, minced
1 1/2 Tablespoons freshly squeezed lemon juice
1/2 teaspoon fresh horseradish (found in the refrigerated section of most grocery stores)
1/8 teaspoon Kosher salt
Fresh cracked pepper

Directions
Dressing
Whisk all of the ingredients together. Chill dressing for at least 30 minutes to allow the flavor to develop. 

Salad
1. Line a large rectangular or oval platter with greens.
2. Arrange cut vegetables in colorful pattern. Squeeze juice of 1/2 lemon over avocado (to prevent discoloration)
3. Serve with Creamy Dill Dressing on the side.

"We may run, walk, stumble, drive, or fly, but let us never lose sight of the reason for the journey, or miss a chance to see a rainbow on the way." 

One year while driving up to Rocky Mountain National Park (RMNP) in Colorado, I caught sight of a rainbow. From my vantage point on the road I knew I wasn't going to be able to capture it on my camera. (I am one of those drivers continuously pulling over to the side of the road to take photos.) Knowing the rainbow has a relatively 'short' life, I impulsively decided to turn off the highway and get onto an unfamiliar road. In spite of not knowing where this road would lead, for some unexplained reason I thought might get me to a place with a better photographic angle. The hiking trails in RMNP weren't going anywhere and would be there when I got there, this particular rainbow, on the other hand, wasn't going to last indefinitely. The road didn't get me a better view, but it did bring me to a trail I had not been on before. 

My plan for the day had been to hike in RMNP, a place familiar to me, a place I felt safe hiking in alone. I have a rather active imagination (wild animals and mass murderers showing up out of nowhere creep up in my thoughts every now and then), so deciding whether or not to get on a 'new, not well researched, unfamiliar' trail wasn't an easy decision. I found myself spending more time on coming up with reasons why going on this unknown trail wasn't such a bright idea. Besides I had made a plan for the day and while the trail I was intending on hiking was new to me, there was comfort in being in a familiar place. I would like to say I had some epiphany about life, about being open to possibility, facing real (and self-created) fears, or about myself that guided my decision about what to do. But I didn't. I simply decided to not over think the 'which trail to hike' decision. I ended up taking the different, unplanned hike that day. It turned out to be one with some spectacular views of mountains and meadows. In addition to taking some great photos, my other takeaway for the day was thinking about we often spend the same amount of time and energy taking an unplanned journey as we do maintaining or staying in a familiar 'rut'. However, the difference between these two paths of self-discovery is the impact each makes in and on us.

Saturday, June 21, 2014

Watermelon Martini

I have always believed, always felt there was something magical about the summer solstice, the longest day of the year marking the first day of astronomical summer. The magic associated with Midsummer's Eve and Midsummer's Day has been a part of Northern European celebrations, folklore, and legends as well as in literature for centuries. Three timeless pieces of literature standing the test of time (A Midsummer's Night Dream, The Tempest, and MacBeth) and written by 16th century poet and playwright Williams Shakespeare all had references to magic occurring on the night of the summer solstice. Yet, in spite of my (barely detectable) Swedish heritage and my exposure to the work of Shakespeare in my impressionable teenage years, I cannot seem to account for how, why or where this belief, these feelings of mine came from. However I find it reassuring to know there have been and continue to be so many summer solstice kindred spirits out there.

And speaking of spirits (the alcoholic in nature kind), what better way to celebrate the beginning of summer than with a Watermelon martini. Is this not what 'summer in a glass' was meant to be?


I love almost all of the fruits and vegetables of summer, but watermelon ranks as one of my favorites. And lately I have been eating more than my fair share of it. For me, watermelon has just the right amount of sweet and is just the right amount of refreshing, particularly on a hot, humid weather day. Botanicially watermelons are considered fruits (and are consumed as fruits), however, scientifically they are a member of the gourd family (which also makes them a vegetable). Hey, you never know when fruit/vegetable trivia may come in handy.

I didn't think it was possible to love this 'summer fruit, summer vegetable' more than I already do. Until the discovery of the juice of a watermelon combined with citron vodka, freshly squeezed lime juice, and Midori liqueur happened.


If watermelon is the ideal health food (it doesn't contain any fat or cholesterol, is high in fiber, Vitamins A and C, and a great source of potassium), should we give consideration to the possibility that the Watermelon Martini is the ideal 'healthy' martini? Okay, maybe it is a stretch to think anything containing alcohol is healthy, but in concept this sounds plausible. Doesn't it?


A seedless watermelon cut into chunks, pureed in a food processor, and then strained yields a most delicious watermelon juice. In the making of this martini, the cloudiness of the watermelon juice is greatly reduced if the pureed/strained juice is allowed to chill in the refrigerator for at least an hour before using. I was in too much of hurry to wait (patience was not a virtue today) so these photos show what a watermelon martini looks like without the wait time.


In addition to the watermelon juice, the martini's ingredients include ctiron vodka, Midori liqueur and freshly squeezed lime juice. If you have never had Midori before, it is a sweet, bright-green in color, muskmelon flavored liqueur. Some Watermelon Martini recipes call for the use of simple syrup (for added sweetness), but the Midori Liqueur adds more than a little sweetness, it adds a wonderful melon flavor to the martini. It compliments the flavor of the watermelon perfectly.

A small seedless watermelon will give you more than enough watermelon juice to make a batch of martinis for a small gathering. The basic Watermelon martini recipe calls for 3 ounces of watermelon juice, 2 ounces citron vodka, 1 ounce Midori Liqueur and 1/2 ounce freshly squeezed lime juice. All of the ingredients go into a martini shaker filled with ice. The shaken martini is poured into a martini glass rimmed with superfine sugar, then garnished with a wedge of watermelon (the wedge of watermelon is there to help give the impression of a healthy cocktail).

Celebrating the summer solstice was merely a convenient reason to make a Watermelon martini. But something this delicious doesn't need a reason to be made. Happy Summer.

Recipe
Watermelon Martini

Ingredients
3 ounces strained, chilled watermelon juice (made from a small seedless watermelon)
2 ounces citron vodka (Absolut Citron or Grey Goose Citron)
1 ounce Midori (melon) liqueur 
1/2 ounce freshly squeezed lime juice
Superfine sugar (for rim)
Slice of watermelon for garnish
Ice

Directions
1. Puree chunks of a small watermelon in a food processor. Pour mixture into a strainer. Chill watermelon juice for at least one hour before using (the chilling is not a deal breaker, it only changes the finished look of the martini). Discard the pulp left in the strainer.
2. In a martini shaker filled with ice, add 3 ounces watermelon juice, 2 ounces citron vodka, 1 ounce Midori liqueur and 1/2 ounce freshly squeezed lime juice. Shake vigorously.
3. Pour martini into a superfine sugar rimmed martini glass. Garnish with a thin slice of watermelon.


Thursday, June 19, 2014

Pasta a Picchi Pacchi

A few weeks ago one of my friends shared the menu for a luncheon she was having for her staff. She was looking for another side dish to serve so I had suggested she make a Tortellini Pasta Salad. Everyone loves pasta was my thinking. However, if it were possible for me to time travel backwards to that moment of pressure when she was 'making' me go through the recipe rolodex I store in my head, I would tell her, not suggest to her, to make the Pasta a Picchi Pacchi for the luncheon. Not that the Tortellini salad isn't delicious (it is, really), but this pasta dish is a different kind of feast for both the eyes and the stomach. If I had to guess, many of my friend's staff would never think she would serve them anything other than a homemade dish. Without any doubts, if she had made the Pasta a Picchi Pacchi this perception would have been solidified. And perception, as they say, is reality (I can't believe I just wrote one of my least favorite, most self-serving of all time colloquialisms.)

But a few weeks ago I didn't even know what Picchi Pacchi was, so I wasn't holding out on her (this time). I happened to be in Barnes and Noble last week and just had to walk through the cookbook section to take a closer look at a few of the new cookbooks I had been thinking about buying. When I saw that Gale Gand had a new cookbook (Lunch) and there was one autographed copy left on the shelf, I knew I had to buy it (without spending any time going through the book because what is not to trust or love about a Gale Gand recipe). And it was in her new cookbook, a book containing recipes making you rethink how to turn this mid-day meal into the 'new dinner', I learned what Pasta a Picchi Pacchi was. I also learned how to pronounce it (Pee-key Pah-key).


Picchi-Pacchi, a specialty from the island of Sicily, simply means a quickly made, fresh, raw or barely cooked sauce. Usually always including olive oil, tomatoes, garlic, fresh basil, some salt and pepper, a Pasta a Picchi-Pacchi often includes whatever else one might have on hand in the refrigerator (like Parmigiano-Reggiano, fresh mozzarella and/or anchovies). It is meant to be a very simple sauce. This Picchi-Pacchi is as simple as it gets.


I had served the Pasta a Picchi Pacchi as a side, but it is substantial enough to be served as the main dish for lunch along with some fresh bread. And oh, let's not forget the wine. The combination of the Pasta a Picchi Pacchi and the wine might actually be enough to make you think for a millisecond you have been transported to an outdoor cafe, the patio of a villa, or on a blanket sitting in a vineyard in Italy. If this feeling lasts longer than that, you probably had too much wine.


The wow factor of the Pasta a Picchi Pacchi is not only in the flavors of the fresh, raw tomato sauce but in the pasta. The variety of imported pastas at the grocery stores these days are enough to make your head spin (so many choices, which one to choose?). The Fusilli Lunghi (a long, thick, corkscrew shaped pasta) was so beautiful your eyes are immediately drawn to it (and the eyes never lie). If you can't find Fisilli Lunghi, you can use linguine regatta, fusilli lunghi bucati or even angel hair pasta (think long and lean when searching out pasta for this recipe).

I must not have been paying attention when I was reading the recipe because I made the entire one pound (500 g) package of the fusilli lunghi. If there was any mistake to be made in the making of this dish, this would be have been the one to make. I had not yet mixed in the Picchi Pacchi so I could have just divided the cooked pasta and tossed with the sauce. Instead I quickly put together another marinade and I was glad I did as a half-pound of the pasta would not have been enough to serve 4 people (as a main dish) for 6 people as the side dish to the muffalattas I had made for our concert picnic meal. So depending on how many people you are serving, consider doubling the recipe. You won't be sorry.


There are generally two kinds of fresh mozzarella balls: bocconcini and ciliegene. The difference between the two is generally in their size. The bocconcini is the size of a small egg while the ciliegene is closer to the size of a cherry tomato. Gale Gand's recipe called for the use of bocconcini, however, I thought their size was 'too' big, so instead I used the ciliegene mozzarella balls as I liked that their size was more consistent with the baby heirloom tomatoes.


Cherry tomatoes are flavorful year round but seem even sweeter, tastier in the summer. The sizes of cherry tomatoes can vary, especially the heirloom varieties. For this dish, the tomatoes are cut in quarters, halves or both quarters and halves (choose whichever cut will ensure the tomatoes will remain in tact when tossed with the pasta).

Anyone who says all extra-virgin olive oils are the same is someone who may have never tasted a really good olive oil. In other words, not all olive oils are created the same. Some are better for sautéing and others are better for sauces or just dipping warm bread in. Because of the simplicity of the sauce, use the best extra-virgin olive oil you can.


The Picchi Pacchi sauce marinates for thirty minutes before it is tossed with with the cooked pasta.


The pasta is cooked in accordance with the directions on the package. Once drained (and not rinsed) the pasta is immediately tossed with the tomato marinade, allowing it to better absorb of its' flavors. After stirring in the fresh mozzarella balls, the entire dish is topped with freshly grated Parmigiano-Reggiano. Buon appetito!
Recipe
Pasta a Picchi Pacchi (Pee-key Pah-key) (inspired by Gale Gand's Vita's Pasta a Picchi Pacchi recipe in her cookbook 'Lunch')

Ingredients
10-12 ounces cherry tomatoes (heirloom mixture or mixture of red and yellow), halved or quartered 
1 -2 cloves garlic, minced
10 -12  fresh basil leaves, julienned, plus additional whole leaves for finishing and presentation
1/3 cup extra virgin olive oil
1/2 pound fusilli lunghi (or linguini rigatti or angel hair pasta) 
1/2 to 3/4 pound ciliegene (fresh mozzarella balls, small cherry size), halved (or use bocconcini mozzarella balls)
Salt and pepper
Freshly grated Parmigiano-Reggiano cheese

Directions
1. In a large bowl, mix together the tomatoes, garlic, basil, salt and pepper (to taste), and olive oil. Allow to sit for 30 minutes.
2. Cook pasta according to package directions.
3. Drain cooked pasta and toss with tomato marinade.
4. Mix in ciliegene mozzarella balls.
5. Grate Parmigiano-Reggiano over top and serve.
Notes: 
Pasta a Picchi Pacchi can be stored covered in the refrigerator for up to 2 days. But it most likely will be devoured well before then.
Encourage you to double this recipe when serving at least four people for lunch or as a side for more than 6.

Tuesday, June 17, 2014

Peanut Butter Chocolate Chunk Cookies

Only I would choose to bake cookies on a 90 degree day (nothing like a rather melodramatic, martyr-like start to this blog posting). My sister, niece, two of her friends, and I are all headed to the One Republic (outdoor) concert at Ravinia this week and well, I thought Peanut Butter Chocolate Chunk Cookies should be in the picnic basket (along with the cheese/crackers, a baguette, grapes, guacamole, muffalettas, a caprese pasta salad, some wine (for the adults only of course), and whatever else will manage to find its way in the basket). Because if one had to choose between having homemade versus store bought cookies, even if one of the choices meant someone had to bake on a sweltering hot day, hands down homemade always prevails (or at least in my world it does).

The inspiration for these cookies came from the Magnolia Bakery Cookbook. Years ago I was of the thousands that stood in line for cupcakes at their New York bakery (it was time well spent). I have had their cookbook for years and thought the time had finally come for me to see if their cookies were as good as their cupcakes. Their Peanut Butter Cookie (with chocolate chunks added), one crunchy on the outside, soft on the inside, and a rich peanut flavor complimented by some chocolate, was definitely a cookie I would bake again on a 90 degree day and quite possibly just might stand in line for. More important, after eating just one of these cookies, I am not sure I will ever eat a peanut butter without chocolate in it again. Seriously.


What is it about the sweet/salty combination of peanut butter and chocolate that is so addictive, so satisfying? 


Others have made and shared their experiences making Magnolia Bakery's Peanut Butter Cookie. Some bloggers used a smooth (versus crunchy) peanut butter, some used an equal (versus disproportionate) amount of semi-sweet and peanut butter chips and some used peanut butter chips only. I had used a generous cup of semi-sweet chocolate chunks (instead of chips) and about 1/3 cup of Reese's peanut butter chips. Next time I will likely increase the amount of chocolate chunks to 1 1/2 cups but keep the peanut butter chips at 1/3 cup. And I will definitely continue to use chunky (versus smooth) peanut butter as a way to pay homage to Magnolia's original recipe.


Before shaping the dough into balls, I decided to chill the dough for about a half hour. Although chilling wasn't recommended, it was an added step I would repeat again. Using an ice cream scoop to form the balls of dough prevents the dough from 'melting' (as sometimes happens when hand rolling) has an added benefit of creating uniform size/shape cookies. My favorite ice cream scoop for making cookies is from Williams-Sonoma (1 1/4 inch in diameter size) and perfect for making these Peanut Butter Chocolate Chunk Cookies.

Sitting each cookie dough ball in a plate of sugar and spooning the sugar over the top/sides of the cookie (instead of rolling the dough ball in sugar) is yet another way to avoid having the dough 'melt' before baking.


Some peanut butter cookies are topped with a traditional criss cross pattern. For this cookie, lightly pressing a fork (only once) gives the cookie a finished look and lets everyone know 'this isn't your traditional peanut butter cookie'.


The baking time for these cookies is 10 to 12 minutes. My baking time was 12 minutes (not a second more). You may be tempted to bake the cookies longer, but in doing so, you risk over baking them. Once the cookies have baked, they remain on the cookie sheet for one minute before being transferred to a cooling rack. I promise, they will set up beautifully (provided your oven temperature is 350 degrees ). If your baking times vary significantly from any recipe you follow, having your oven checked and calibrated is well worth the time and cost (speaking from the experience of having overcooked and undercooked foods involving a significant investment of time and money).

I am going to go out a bit of a limb here and say I think this could be my absolute favorite peanut butter cookie. Definitely one of those what I call a 'throw-down worthy' cookie. It might even be the cookie my sister and I agree on. Wish me luck.

Recipe
Peanut Butter Chocolate Chunk Cookies (inspired by Magnolia Bakery's Peanut Butter Cookie recipe)
Makes 3 dozen cookies

Ingredients
1 1/4 cups all-purpose flour
3/4 teaspoon baking soda
1/2 teaspoon baking powder
1/4 teaspoon Kosher salt
1/2 cup unsalted butter, room temperature
1 cup chunky style peanut butter, room temperature
3/4 cup granulated sugar (plus more for sprinkling on cookies)
1/2 cup firmly packed light brown sugar
1 large egg, room temperature
1 Tablespoon whole milk
1 teaspoon vanilla
1 very generous cup of semi-sweet chocolate chunks (or chips)
1/3 cup peanut butter chips (recommend Reese's peanut butter chips)

Directions
1. Preheat oven to 350 degrees.
2. Sift the flour, baking soda, baking powder and salt. Set aside.
3. In a standing mixer fitted with a paddle attachment, mix the peanut butter and butter until fluffy.
4. Add the granulated and brown sugars, mixing until smooth.
5. Add egg, mixing well, before adding in the milk and vanilla.
6. Add flour mixture and mix thoroughly.
7. Stir in semi-sweet chocolate chunks and peanut butter chips.
8. Chill dough for 30 to 60 minutes (optional step)
9. Using a small ice cream (1 inch diameter) scoop, place cookie balls on plate of granulated sugar. Spoon sugar over the cookie ball until completely coated. Transfer each cookie ball to baking pan lined with parchment paper.
10. Bake cookies for 10-12 minutes (my make time was 12 minutes). Note: Cookies may look underdone, be careful not to over bake. 
11. Allow cookies to cool on cookie sheet for one minute before transferring to cooling rack.

Friday, June 13, 2014

Lemon Curd


I had bought more than enough lemons to make both Lemon Bars and Lemon Curd last week. I had every intention of making a Pavlova over the weekend, one being topped not only with some freshly whipped cream and blueberries, but also with a creamy, tart Lemon Curd. However, something happened to the Lemon Curd. That something was actually a someone, a someone who thought it was fair game and ate more than half of the jar. If I said I was disheartened upon discovering the half-empty jar of Lemon Curd, that might not adequately capture my initial reaction. My second reaction was thinking maybe I was going to have to resort to putting post-it notes on foods in the refrigerator. Note options ranging from 'pretty please, don't eat this' to 'there will be dire consequences if you eat this' swirled in my head. Somehow I managed to regroup, take a deep breath, and realize this was not the end of the world. Just a temporary delay in the making of a Pavlova.


The first Lemon Curd I had tasted came from a jar bought at the grocery store. Slathered on a thin ginger cookie, the tartness of the curd combined with the spiciness of the ginger was an experience leaving a permanent impression on my palate. Relatively expensive at the grocery store (and not nearly as good), I discovered making homemade lemon curd was relatively easy to make, much less expensive, and so much better tasting. And with lemons not being a seasonal fruit, Lemon Curd could be made year round. 


With what was left of the half-eaten jar of Lemon Curd, I decided to open a box of thin Triple Ginger Cookies from Trader Joe's and make a few sandwich cookies. With the making of the Pavlova 'delayed', I thought I might as well at least enjoy some of the Lemon Curd before it was completely gone. The taste of the chilled, creamy, tart Lemon Curd on the crispy, gingery cookie was the equivalent of a much needed 'Calgon take me away moment'. For those of you too young to have ever seen the Calgon commercials and for those of you who can still remember (either vaguely or vividly) this vintage commercial, it is just a click away.

Sugar, eggs, lemons, butter and a just a pinch of sea salt.


This is a curd flavored by both the juice of the lemon and the zest of three lemons (or the number of lemons you use to get a half cup of freshly squeezed lemon juice). This may seem like a lot of zest to you and you might even think you can omit it, but I would urge you to resist this thought until you first try it.

Making a Lemon Curd is similar to making a custard or a pudding. If you don't have a double boiler, you can make it using a glass bowl set over simmering water.

The butter, sugar, and pinch of sea salt all go in to the top of double boiler at once. As soon as the butter has melted, the lemon juice and zest are whisked in (this helps to slightly lower the temperature of the butter/sugar mixture). Immediately whisk in the three lightly beaten eggs and continue to gently whisk until the curd has thickened (approximately 20-25 minutes). Note: If your mixture is too hot before you add the eggs, if you do not quickly whisk in the eggs or if your water is boiling (not simmering), you will end up with bits of cooked and curdled egg. 

The reward for time spent slowly and continuously whisking will be a rich, thick, silky, smooth perfectly tart Lemon Curd. Once cooled and chilled, it is delicious spread on ginger cookies, shortbread, scones, English Muffins, as a filling for a cake, or mixed into your yogurt. And if you are able to keep it safe for several hours or even several days, it is (and will be) perfect on a Pavlova.

This may be the one thing that I really do have to put a post-it note on. Fair-game will be one of the options. For the moment, I will keep the other note options to myself.
Recipe
Lemon Curd (Lemon Curd inspired by a recipe in Bean Blossom Dreams: A City Family's Search for a Simple Country Life)

Ingredients
Lemon Curd
1/2 cup freshly squeezed lemon juice (3-4 lemons)
Zest from 3 lemons
1 1/4 cups superfine sugar
8 tablespoons unsalted butter (taken out of the refrigerator for at least an hour, just enough time to take the chill off it)
3 large eggs, room temperature, lightly beaten
pinch of sea salt

Directions
Lemon Curd
1. Place butter, sugar, and sea salt in the top of a double boiler with simmering water in lower portion of the pan. Stir until butter has just melted.
2. Stir in lemon juice and lemon juice. Immediately whisk in the lightly beaten eggs. 
3. Continue to whisk mixture over simmering water until the curd thickens (approximately 20-25 minutes).
4. Pour curd into a bowl or jar(s). Cover and allow to cool before placing in the refrigerator.
5. Curd will keep in the refrigerator for several weeks.