Thursday, December 26, 2019

Harissa-Rubbed Pork Shoulder with White Beans and Spinach


I have always believed cooking and/or baking for family and/or friends is the simplest, most sincere expression of love. For as long as I can remember, making family and friends feel welcomed and comfortable around the dinner table is something that matters to me. Over the years my list of takeaways from the Martha Stewart, in her earlier years, and Ina Garten, ever since I first discovered her, have contributed, in large part, to my own style of having people over. More often than not I tend to make recipes some would consider a little bit on the fussy side. Ones having lots of steps and long list of ingredients. Recipes that challenge me and most importantly satisfy everyone at the table bring me both angst and joy. Finding balance between those two emotions is a welcome challenge. So every now and then when I discover an unfussy recipe that delivers big on both flavor and presentation, I am ecstatic! Because in my world those two things are what really matters most. It's never one nor the other, it's always both. Don't ever let anyone tell you anything different. If by chance I experience more joy than angst in the cooking process, well I border on feeling delirious. To be honest, I don't seem to have a significant number of those 'unfussy' joyful recipes in my repertoire. However, it happens to be high on the list of the things I would like to see change with the beginning of the new decade. Dishes delivering big on flavor and presentation while simultaneously leaving me feeling like a happy energizer bunny. Maybe ending this decade with such a recipe, especially ones with new flavors and even techniques, would give this goal of mine some much desired momentum.

A recipe like this Harissa-Rubbed Pork Shoulder with White Beans and Spinach, an incredibly flavorful pork and beans dish.


If you have already scrolled down to the ingredient list, you might wonder how a dish made with harissa paste and preserved lemons would even qualify as being something unfussy. But it really is. Those two ingredients just happen to be going from slightly obscure to more accessible here in the states. I might go so far as to say harissa paste, a smoky-spicy condiment, is becoming more mainstream than obscure. Harissa paste, a North African condiment, is referred by some as the Sriracha of the Middle East, but having a more complex flavor profile. Made with smoked/roasted red peppers, a myriad of herbs and spices (garlic paste, caraway seeks, coriander seeds, cumin) and olive oil it essentially is a spicy, aromatic chile paste. Store bought harissa paste does have varying degrees of spiciness. Although being new to the world of harissa I was aware there was such a thing a mild one when I first made the Harissa-Rubbed Pork Shoulder with White Beans and Spinach. (See notes.)


What makes this recipe truly unfussy is it's ease of preparation. Searing the pork shoulder before roasting is not necessary. The high heat at the end of the cooking process will give it a nice crispy finish. With an initial roasting time of 3 to 3 1/2 hours, you are not tied to the kitchen. Other than finely chopping the garlic and ultimately slicing the preserved lemon into thin strips, there isn't a whole lot of chopping work going on here.  Sounds pretty easy, right? Well it is!

Using a boneless pork shoulder makes slicing the roasted pork much easier. But when I got home from the grocery store I discovered a bone-in pork shoulder rather than a boneless one was wrapped in the butcher paper. So I deboned it myself and tied up the pork shoulder with some kitchen string. So when buying or ordering a pork shoulder, make sure you ask for boneless! Or rather make sure they hear you ask for boneless! There is more than enough of the harissa mixture, even after liberally slathering all over the roast. After adding water to the pot, the lid goes on and the pot goes into a preheated 325 degree (F) oven. For the next 3 to 3 1/2 hours the magic starts to happen.


When the pork is nearly falling apart tender it's removed from the oven and the beans are added in. The oven temperature is increased to 425 degrees (F). The pot goes back into the oven (this time uncovered) and cooks for another 35 to 45 minutes. Just until the top of the pork is deeply golden brown and beans have soaked up the majority of the liquid.


When this happens, remove the pork from the pan and place on a cutting board to rest for about five minutes. The spinach and preserved lemon is added into the pot with the beans. When the spinach has wilted, the bean mixture is ready.


You can either serve the Harissa-Rubbed Pork Shoulder with White Beans and Spinach on a large platter or right out of the pot. Then get ready to savor every bite. This twist on pork and beans is insanely delicious.


If you are looking to have family and/or friends for a casual, yet incredibly delicious dinner you will definitely want to make this Harissa-Rubbed Pork Shoulder with White Beans and Spinach. Paired with a beautiful salad and some wine, you have all of the makings of a really great, memorable meal. Serve this dish on a cold night and no one will even notice there is a chill in the air.

Looking for a dish to serve on New Year's Eve or New Year's Day? Make this inviting, mouthwatering,  unfussy version of Pork and Beans. It may just be the most perfect end to the year or an even more perfect start to the new year.

Recipe
Harissa-Rubbed Pork Shoulder with White Beans and Spinach (a slight adaptation to Alison Roman's Harissa-Rubbed Pork Shoulder with White Beans and Chard recipe from her cookbook "Nothing Fancy")

Ingredients
4 pound boneless pork shoulder
Kosher salt and black pepper
1/2 cup harissa paste (See notes)
1/4 cup distilled white vinegar
3 Tablespoons tomato paste
3 Tablespoons light brown sugar
4 garlic cloves, finely chopped
1 1/2 cups water
2 cans (15.5 ounce size) small white beans, cannellini beans and/or great northern beans, drained and rinsed (Recommend 3 cans of small white beans)
1 large bunch of spinach, stems removed, leaves torn into bite-sized pieces (See Notes)
1 preserved lemon, seeds removed and thinly sliced
1/2 cup cilantro, tender leaves and stems, coarsely chopped
1 lemon, halved

Directions
1. Preheat oven to 325 degrees (F).
2. Season the pork with kosher salt and pepper in a large Dutch cast iron oven. 
3. In a medium sized bowl, combine the harissa paste, vinegar, tomato paste, brown sugar, and garlic. Smear he harissa mixture all over the pork, making certain to get in all the nooks and crannies. Keep the pork fat side up. Note: You may have some of the mixture leftover.
4. Add the water. Place the lid on the pot and roast until the pork is nearly falling apart tender (approximately 3 to 3 1/2 hours).
5. Remove the lid, add the beans and season with kosher salt. Increase the oven temperature to 425 degrees (F). Roast the pork and beans (uncovered) until the beans have soaked up the majority of liquid and the top of the pork is deeply golden brown (approximately 35-45 minutes).
6. Transfer the pork to a cutting board. Let sit for 5 minutes before cutting into 1/2 inch thick slices.
7. Add the spinach and preserved lemon. Stir until the spinach has wilted.
8. Spoon the beans and spinach mixture onto a large platter. Top with the sliced pork. Alternately keep the beans and spinach in the Dutch oven and place the cut pork on top, serving directly from the pot.
9. Scatter with chopped cilantro and serve a lemon alongside for squeezing over. Serve and swoon over.
10. Store any leftovers in the refrigerator. They heat up beautifully in the microwave.

Notes: (1) Instead of using spinach could also use chard. (2) Harissa paste can be found in some grocery stores and at Trader Joe's. This dish is on the spicy but not too spicy. If spiciness worries you, use 1/3 cup of the harissa paste. (3) I used a combination of small white beans and cannellini beans. I would recommend using 3 cans of small white beans next time. (4) Preserved lemons can also be found at some grocery stores and online, but also at places like World Market.

Saturday, December 21, 2019

Big Fat 7 Layer Bars


Almost seven years ago I shared a recipe called Decadent Magic 8 Ingredient Bars (Served Chilled) with you. It was a slightly ramped up version of the more familiar, traditional Seven Layer Bars recipe most of us grew up with. But I have something to tell you. I have been holding out on you as this hasn't been the recipe I have been making for the last several years. Yes, I know, this may move me to Santa's naughty list this year.  So I thought it was high time I got around to sharing the recipe for these Big Fat 7 Layer Bars aka the swoonworthy, truly decadent ones. I also wanted to redeem myself and potentially salvage my standing at the North Pole. More than a slightly ramped up Seven Layer Bars, I can honestly say these are better than good, they are incredibly great! Seriously wicked, uber scrumptious, ooh and aah worthy. They should be the only ones we should all be eating. Technically speaking they are more square than bar shaped, but shape isn't what matters most here. It's thickness.


Most bar recipes call for the use of 9" x 12" sized baking pan. This recipe calls for the use of 9" x 9" pan. The smaller pan helps to transform these bars into a chunkier, richer, mind-blowing bite. One earning the distinction as being Big Fat 7 Layer Bars. The bar version of the growing in popularity Big Fat Cookie.


In addition to changing the pan size, there were a number of changes to my earlier recipe. I reduced the amount of crushed graham crackers (the amount went from 3 cups to 2 1/2 cups), replaced unsalted butter with salted butter, mixed the butterscotch and semi-sweet chocolate chips together before adding them to the pan, added flaky sea to finish before baking, increased the amount of coconut, used toasted versus untoasted walnut halves, sprinkled on half of the coarsely chopped walnuts before topping with the sweetened condensed milk while using the other half as the final layer, and increased the baking time (from 35-45 minutes to 45-55 minutes). In other words, these underwent a major overhaul. And when all combined, these changes made for an even more epic 7 layer bar!

Unlike many other '7 layer bar' recipes, the graham cracker crust is pre-baked for 10 minutes in a pre-heated 300 degree (F) oven. Pre-baking deepens the flavor of the graham crackers and helps to ensure the bars stays intact when cut.


Toasting the walnuts before you add them to these bars adds even more flavor. Whatever you do, don't skip this step.


Before putting the bars into a preheated 325 degree (F) oven, top with small handful of semi-sweet chocolate and butterscotch chips and a light sprinkling of flaky sea salt. Baking time will range from 45-55 minutes or until the edges begin to turn a light brown. Note: My baking time was slightly more than 50 minutes.

The bars need to be well chilled in the refrigerator before they are cut. Once at room temperature, cover and chill them for at least 6 hours or overnight. 


Cutting them into 16 squares is akin to serving someone a king-sized candy bar. For some this might be too much, for others it will be just right. For a large gathering you might want to cut each 'large' square in half. I say might with a little hesitation as the more impressive presentation is serving them large!


You will definitely want to make these Big Fat 7 Layer Bars for the chocolate and coconut lovers in your life. They are the unfussiest thing can make, but the most impressive to serve. If you have room in your life for just one more confection to bake for the holidays, you might want to make room for this one. Or if you are teetering on being on the naughty or nice list, you definitely should make them. Although it's a toss up on which list you will end up on after everyone tastes them!
Recipe
Big Fat 7 Layer Bars
Makes 16 big fat bars or 32 half-fat bars (if you must)

Ingredients
Crust
2 1/2 cups (9 3/4 ounces or 275 g)crushed graham crackers (or boxed graham cracker crumbs)
1/2 cup or 8 Tablespoons salted butter, melted and slightly cooled (if not using salted butter, add 1/4 teaspoon kosher salt)
2 Tablespoons of granulated sugar

Filling
1 1/2 cups (271 g) semi-sweet chocolate or bittersweet (60% cocoa) chips, plus a small handful for the top
1 1/2 cups (271 g) butterscotch chips, plus a small handful for the top
2 1/4 cups (221g) shredded sweetened coconut
2 cans (14 ounce size) sweetened condensed milk
1 1/2 cups (5 1/2 ounces or 156 g), walnuts, toasted and coarsely chopped, and divided
Flaky sea salt for finishing

Directions
1.  Mix crust ingredients together.  Press firmly into a parchment paper lined 9" x 9" pan.
2.  Bake crust at 300 degrees for 10 minutes.  Remove and let cool.
3.  Combine the butterscotch chips and chocolate chips in a medium sized bowl. Pour over the graham cracker layer.
4. Sprinkle the coconut over the chips.
5. Sprinkle half of the chopped walnuts over the coconut.
6. Pour sweetened condensed milk evenly over the coconut.
7.  Top with remaining walnuts and the small handfuls of butterscotch and chocolate chips. Press lightly into the sweetened condensed milk. Lightly sprinkle with flaky sea salt.
8.  Increase oven to 325 degrees and bake for 45-55 minutes, or until the edges of the bar are lightly browned. My baking time was slightly above 50 minutes.
9.  Remove from oven and and let cool completely. Cover with plastic wrap and refrigerate until well chilled (at least 6 hours or overnight).
10.  Cut into squares or rectangles. Serve and enjoy. (Any leftover bars can be stored at room temperature or preferably in the refrigerator in a tightly covered container.)

Note: (1) Two sleeves of graham crackers will yield the two and half cups of crushed graham crackers needed for the recipe. Use only the original not honey graham crackers. I used Nabisco Grahams-Original. (2) I have never made these with cinnamon graham crackers but I think the addition of cinnamon to these bars would be seriously delicious. 

Wednesday, December 18, 2019

Pecan Toffee Shortbread


In keeping with my glutton for punishment personality, I created and baked yet another brand new shortbread cookie recipe after spending three consecutive twelve hour days knee deep in what I will call this year's Cookie Palooza. Otherwise known as my annual holiday candy making and cookie baking overly ambitious madness. The good news is it all got done. And twelve carefully packaged up holiday cookie boxes were entrusted to the post office to be delivered to both friends and in return for unexpected generous kindnesses received in the past year. The bad news is I only ruined and lost one pound of white chocolate in the process. However, I am not at all bemoaning this little disaster as I at least learned, or rather relearned a lesson in the process (i.e., never melt white chocolate in the microwave). In spite of having to clean up the huge mess made in my long galley kitchen, there is always a moment of euphoria experienced, along with a sigh of relief, after the boxes are dropped off to be shipped. I say moment, because now I have to hold my breath (figuratively speaking) for the three or yikes, four days it will take for these packages to arrive at their intended destinations. Because I once sent a box of holiday cookies to a wrong address (we won't talk about the angst this caused me), I still keep my fingers crossed I didn't inadvertently transpose numbers, use the wrong zip code, or use an old address. Funny how you can look at something at least three times and still not see the mistake. My eyes sometimes see what's in my head, not what I see on paper. Proofing is yet another one of my flaws. But enough of this self-depricating disclosure of my flaws, I would rather spend time talking about this incredibly scrumptious Pecan Toffee Shortbread.


In spite of the fact that you need to soften the butter in advance, roll out dough, use a cookie cutter, and use a piping bag, I would say this isn't at all a fussy cookie to make. From start to finish you can make three dozen of these tasty little beauties in just a couple of hours. And in the big picture of things, two hours is a blip on the time scale. You can even multi-task and be half-listening to a Hallmark Holiday movie because we all know they are the same fairy tale ending stories (which most of us all long to have at least once in our lives). And unless you live with cookie monsters who polish off a stack of these cookies in just a few bites, the other best thing about them is they are equally delicious on day one as they might be on day seven. Shortbread often improves slightly with age, so it also makes them one of the cookies you can send off to friends and be confident it won't become a cookie needing to be dunked in milk in order to make it edible. 

If you love a buttery shortbread cookie, especially one having a little bit of a crunch and sweetened with some chocolate, these Pecan Toffee Shortbreads will definitely spark joy in your life!


I used the butter, flour, sugar, salt, vanilla, and finely chopped nut ratios found in Amy's Shortbread Cookies to create this Pecan Toffee Shortbread. Just one cup of toffee bits and milk chocolate instead of white chocolate transformed that recipe base and created these mouthwatering, melt in mouth cookies.


The most difficult decision was deciding whether to make these cookies round, square, or holiday inspired shaped. As you can see, round won. Using a two inch round cookie yielded three dozen cookies rolled to 1/4 inch thickness. When rolling out shortbread err on the side of thicker rather than thinner. While the yield will be less and baking time slightly increased, rolling them out to 1/3" thickness would make for an even more decadent cookie.


Because I almost always finish my chocolate enhanced cookies by either dipping them or drizzling them with a fork, I decided these would have random stripes piped on using a pastry bag and small round pastry tip. These cookies are versatile enough you can finish them using any of these techniques. Choose simple or fussy, whichever one makes you happy. Note: If you decide to dip them, you will need to increase the amount of milk chocolate.

Topping each cookie with a toasted pecan half seemed like the perfect finishing touch.


If you are still looking for another cookie to add to your holiday baking madness, definitely opt for this Pecan Toffee Shortbread. But if you are holiday baking overload, SAVE this recipe! 

We don't always remember every gift we have received, but we often remember either those handmade, homemade gifts from the heart or those simple, yet incredibly thoughtful ones. Even though much time has passed, I can still remember how I felt receiving the gifts of a pen, a book, and a box of my favorite candy from a friend. The holidays can be a time to show and/or return kindness. Deciding who is on your list should be but isn't always easy, so make certain you are gifting someone because you want to and not because you feel you have to (an ongoing lesson for me). A gift given in guilt almost never gives you even a nano-second of gift giving euphoria. And you too deserve to experience some of that holiday joy and child-like glee! 

Recipe
Pecan Toffee Shortbread
Makes 36  two inch sized round cookies

Ingredients
2 cups (260 g) all purpose flour, plus more for dusting out the rolling surface
3/4 teaspoon Kosher salt
1 cup (2 sticks) unsalted butter, room temperature (Recommend using a European style butter)
1/2 cup (62 g) confectionary sugar
1 teaspoon of vanilla
1 cup (162 g) toffee chips (I used Heath English Toffee Bits)
1/2 cup (62 g) pecans, toasted and finely chopped
36 pecan halves, toasted
8 ounces of milk chopped and melted 

Directions
1. Preheat oven to 350 degrees (F).
2. Sift the flour.  Place the flour and salt in a bowl and set aside.
3. Place butter and confectionary sugar in a mixer.  Using a paddle attachment, mix until light and fluffy, about 2 minutes.
4.  Add vanilla and mix in.
5.  Add flour/salt mixture. Mix just until until dough begins sticks together.
6. Add in the toffee chips and finely chopped pecans. Mix until all ingredients are blended in and the dough starts to come together in a ball.
7. Divide dough in half.  On a floured surface roll out dough to at least 1/4 inch of thickness. Using a two inch round cookie cutter cut out and place cookies onto a parchment paper lined baking sheet.
8. Bake for 14-16 minutes or until lightly browned on the bottom. Rotate tray midway through the baking process. Let cookies cool on pan for 5 minutes before transferring to a cooling rack.
9.  All the cookies to cool to room temperature.
10.  Chop and melt milk chocolate on top of a double boiler and/or in the microwave.
11. Using a pastry bag fitted with a small round nozzle dip drizzle chocolate over the cookies. Alternately use a fork to drizzle the chocolate on top of the cooled cookies or dip half of the cookie in the chocolate.
12. Place a small dollop of melted milk chocolate in the center of the cookie and press on a pecan half down.
13.  Allow chocolate to completely set. 
14. Store cookies in a tightly sealed container.

Notes: (1) Use a good quality melting chocolate. Do not use chocolate chips. (2) To toast pecans, bake in a preheated 350 degree (F) oven for 9-11 minutes or until lightly toasted and fragrant. (3) Instead of rolling out the cookies to 1/4" thickness, roll out to a 1/3" thickness. Baking time will needed to be adjusted upward by several minutes.


Wilder Park Conservatory, December 2019


Monday, December 9, 2019

Peppermint Oreo Truffles


Christmas will be here in sixteen days, however, I have seven maybe eight days before all of my holiday cookie boxes need to readied for mailing. At the moment my list of what I would like to make has twenty-two confections on it. Clearly I have lost my mind (somewhat plausible), am having a severe case of indecisiveness (very plausible), or believe I can thrive on five hours a sleep a night for an extended period of time (serious deliriousness). At some point in the next couple of days I have to stop procrastinating and make some decisions on what to make as well make a baking plan to keep the chaos in the kitchen to a minimum (completely delusional). With a little more holiday shopping to finish, all the wrapping to do, and all of that holiday baking to get done, I really have no business making a new recipe. Especially one that can't be included in the holiday cookie boxes due to required refrigeration. But if there was ever a recipe where simplicity meets beautiful deliciousness it would be these Peppermint Oreo Truffles. So for all you who aren't overextending yourself in the kitchen this holiday season (wondering what that feels like) and are looking for a new, easy to make, certain to get oohs and aahs holiday confection to serve to your family and friends, you should definitely make these Peppermint Oreo Truffles. Really you should. These are insanely good!


If you Google Peppermint Oreo Truffles recipes, you will find a plethora of them. As much as I believe you should do your research before you try any new recipe, I am not at all suggesting you embark on that down the rabbit hole endeavor this time. But if you feel compelled to do so, I am pretty confident or maybe just very hopeful you will come back here to this recipe. And here's why.


Not all Peppermint Oreo Truffle recipes are the same. Some are made with the original Oreos and some are made with Peppermint Oreos. Because Peppermint Oreos aren't available year round, you need a Peppermint Oreo Truffle recipe you can make whenever your chocolate-peppermint truffle heart desires them. Some recipes call for melting chocolate chips and adding coconut oil and some call for using good quality chocolate designed for melting. This recipe calls for the later. I have never been a big fan of melting chocolate chips to coat candies or cookies. Some recipes call for crushing candy canes while others call for using peppermint extract. Not only are candy canes not available after the holidays, but who doesn't love a creamy versus crunchy truffle center? This recipe uses peppermint extract because you can control the amount of peppermint flavor, have a creamy center truffle, and still be able to make them year round. But oh, what about the peppermint sprinkles on top? How can that happen in June? Bags and/or jars of Crushed Peppermint Sprinkles have an incredibly long life expectancy. If you buy one now, I promise you will be able to make more than six batches of these truffles. Lastly, not all Peppermint Oreo Truffles call for the use of salt in the truffle mixture. A little bit of kosher salt always sends the flavor profile of these truffles over the edge. 

Okay, are you ready to make some or rather should I say these drool worthy Peppermint Oreo Truffles? Fingers crossed you are!


Using a food processor to turn the Oreos into fine crumbs is much quicker than crushing them in a bag using the rolling pin method, but either option works. And for the creamiest truffle filling, allow your cream cheese to soften before mixing it with the crushed Oreos (several hours out of the refrigerator will generally get the cream cheese to the desired consistency).


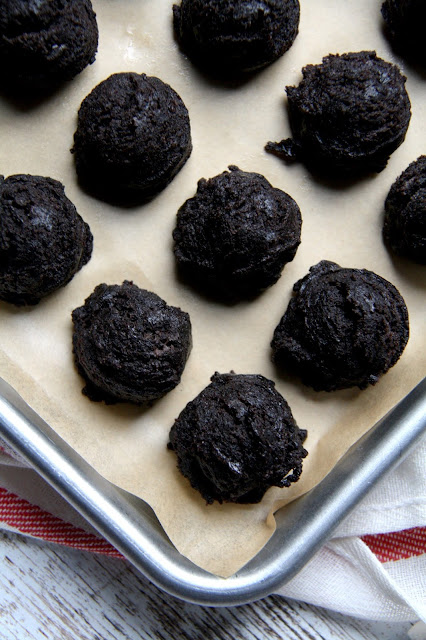
Using a small ice cream scoop (one about 1 inch in diameter) helps to create uniform shaped and sized balls. If you want a smooth, candy store look rather than a slightly rustic finish to your truffles, you can roll them in your hand after you scoop them. To ensure they don't fall apart when being dipped in the melted chocolate, refrigerate them (covered) for at least 90 minutes.


Dark or semi-sweet chocolate and peppermint pair incredibly well together. Lately I have been melting my chocolate in the microwave, but the double boiler method works well too. Use whatever method you have the most success with.


Using a fork to drizzle the melted chocolate over the dipped truffles gives them a nice finish. After the drizzling, work quickly to lightly sprinkle with the crushed peppermint sprinkles.

The peppermint sprinkles not only add just the right amount of crunch to these sprinkles but slightly enhance the peppermint flavor too!


As much as I love Peppermint Bark and Peppermint Creams at the holidays, sometimes I want the flavor of peppermint to come in a cookie/cake like form. Put these Peppermint Oreo Truffles out on a beautiful platter and watch them disappear fast! More than likely you and everyone else will find it easy to pop more than a couple in your mouth. This is the kind of recipe one wants to make when the goal is to keep entertaining to feel as stress-free as possible. While store bought might be the epitome of stress free, nothing says love more than something homemade. So here's to keeping your sanity and sharing as much holiday love as possible!

Recipe
Peppermint Oreo Truffles
Makes 40-42 one-inch truffles

Ingredients
46-48 Oreos (See Notes)
8 ounces (226 g) cream cheese, slightly softened
1/2 to 3/4 teaspoon peppermint extract (I used 1/2 teaspoon)
1/4 teaspoon kosher salt
18-20 ounces good quality dark or semi-sweet chocolate (See Notes)
2-3 Tablespoons crushed candy canes or peppermint crunch sprinkles

Directions
1. In the bowl of a food processor, pulse the Oreos until they have a fine crumb consistency.
2. In a medium sized bowl, beat the cream cheese, peppermint extract, and salt until light and creamy.
3. Add the Oreo crumbs to the cream cheese mixture. Using a spatula, mix thoroughly to blend. 
4. Using a small ice cream scoop (1" sized) make the truffle balls. Place on a baking sheet lined with parchment paper. Note: You can roll the scooped balls in your hand until smooth if you want a 'candy store' look. 
5. Place the pan of truffle balls in the refrigerator for at least 90 minutes.
6. Melt the chocolate using the microwave or double boiler method.
7. Dip the chilled truffle balls into the melted chocolate. Drizzle with additional chocolate using a pastry bag or top with crushed candy canes or peppermint crunch sprinkles.
8. Allow the chocolate to set completely before returning the truffles to the refrigerator.
9. Remove the truffles from the refrigerator 30 to 60 minutes before serving. 
10. Store any leftovers in the refrigerator.

Notes: (1) The Family size package of regular sized Oreos (1 lb. 3 oz or 541 g) is what I used to make these truffles. You may or may not end up with 2 to 4 extra Oreos. (2) I either buy my chocolate from a local candy store or use the Ghiradelli dark chocolate melting disks. There are many good quality chocolate options available at some specialty stores, Whole Foods, and on Amazon.


2019 Living Room Christmas Tree

Saturday, November 30, 2019

Chocolate Cinnamon Graham Cracker Toffee


With the Thanksgiving holiday now behind us, it's time to let the holiday cookie season commence! While the number of "shopping days" between Thanksgiving and Christmas varies from year to year, the number of baking days before Christmas remains the same. With a few exceptions, baking around here isn't spread out over the course of the twenty four days before Christmas, as I am not a big fan of baking then freezing cookies (chilling them, yes, but freezing them, no!). Instead of taking the long, slow, leisurely approach to holiday baking, it looks and feels much more like running a hilly, no medal at the finish ultra-ultra-marathon. For three consecutive days and for sometimes up to ten hours a day, I am baking and readying all the home baked holiday packages for shipping. At various times throughout this semi-exhausting marathon I vow to scale back 'next year'. Then the next year comes and, well, the baking seems to be scaled up instead. Trying to find balance between making the less and more time intensive confections continues to be one of my biggest, ongoing challenges. It seems some of my favorites tip the scales more toward the labor intensive side of holiday baking. So when I find or create recipes that come together relatively easily, are incredibly delicious, and look irresistible on a platter, I am beyond thrilled. The Vanilla Brown Sugar Shortbread Cookies, the Maple Cranberry Oatmeal Cookies, and this Chocolate Cinnamon Graham Cracker Toffee all meet that criteria. As an added bonus, I know they will be as delicious on the day they were baked as the day they arrive via the holiday pony express (otherwise known as the U.S. Postal Service). The rave reviews getting Milk Chocolate Oreo Truffles and Alfajores (the Dulce de Leche filled Sandwich Cookies) will only be making appearances on either my or locally hand delivered cookie platters as they aren't good minimum two night stay travelers.


I have had a recipe for Chocolate Cinnamon Graham Cracker Toffee for years, decades really. It was given to me by a friend. But this version is not only slightly different from the original, I think it might even be better! Changing how the toffee is topped with chocolate, increasing the amount of chocolate (yes, more is better here), and adding the finishing touches of sea salt and miniature chocolate chips has created an even more scrumptious and more addictively delicious confection. The Saltine version distant cousin, sometimes going by the name of Christmas Crack or Saltine Cracker Crack, pales in comparison due in large part to the base layer of Cinnamon Graham Crackers and the pound of melted dark chocolate!


Crispy, buttery, and reminiscent of flavors of a Pecan Praline, this Chocolate Cinnamon Graham Cracker Toffee is the absolute BEST and easiest to make toffee bark on the planet! One bite and you will be obsessed with this toffee. You might even be tempted not to share it with anyone.


Do you know what the difference between a good, even pretty good cookie and a great, even spectacular cookie is? The answer is simple. The ingredients.


Because this toffee is made with only a handful of ingredients, it calls for the use of a good quality unsalted butter and a good quality dark or semi-sweet chocolate. Lately I have become partial to using European quality butters in my baking, regardless if they are made domestically or imported.


Finding a pan to fit the 24 cinnamon graham cracker halves may be your biggest challenge to this recipe. A 10 1/2" x 15 1/2" inch rimmed pan fits the graham crackers to the perfect snugness. It is important the graham crackers lay flat before the hot butter/brown sugar toffee mixture is poured over them. If you don't already have one this size, I linked one below in the Notes.


Many similar recipes call for sprinkling chocolate chips over the hot out of the oven toffee. This one calls for melting the chocolate first (either over a double boiler or in the microwave) and then pouring and spreading it over the just barely out of the oven toffee. And because flaky sea salt intensifies the flavor of chocolate, this toffee has a flaky sea salt finish. The miniature chocolate chips add a bit more chocolate as well make for an even more visually beautiful presentation. Always remember the golden rule in cooking and baking "We always first taste with our eyes".


Chilling the cooled to room temperature Chocolate Cinnamon Graham Cracker Toffee for 30 to 60 minutes makes it easier to break the toffee bark into pieces. However, if you want uniform cut pieces, cut the toffee before it completely sets up. But you will need to chill it before breaking it apart.


Don't be tempted to replace the cinnamon graham crackers with any non-spiced graham crackers. The flavor combination of a hint of cinnamon, the sweetness of the cracker, the pecan praline like toffee, the rich chocolate, and flaky sea salt is nothing short of amazing.  And oh, add to that the crispy, buttery texture, you have a mind-blowing confection. This toffee is so addictive it should almost come with a warning label. And if you make the Chocolate Cinnamon Graham Cracker Toffee for family and friends, make sure to keep a couple of pieces for yourself. You will deeply regret this if you don't. 

Recipe
Chocolate Cinnamon Graham Cracker Toffee

Ingredients
24 cinnamon graham cracker squares (approximately 2 1/2" size)
1 cup (16 Tablespoons) unsalted butter (recommend a European quality butter) OR use a European quality salted butter
1 cup (200 g) light brown sugar
1 cup (126 g) pecan halves, toasted, and coarsely chopped
16 ounces (455 g) good quality dark or semi-sweet chocolate, melted
Flaky Sea Salt 
Optional, kind of, sort of: Miniature chocolate chips for finishing

Directions
1. Preheat oven to 350 degrees (F). Line a 10 1/2" x 15 1/2" rimmed baking pan with foil or parchment paper. Set aside.
2. Line the bottom of the baking pan with the graham crackers with top side facing down. Note: They should fit in snuggly. You may need to slightly trim some of the graham crackers in order to get them to fit perfectly snug, yet flat in the pan.
3. In a heavy bottomed saucepan, melt butter. Add the brown sugar, stirring until the sugar has melted. Bring to a boil over medium-high heat and continue cooking for 2-3 minutes, whisking constantly. Note: The mixture should be very thick but not pulling away from the pan. Start timing the mixture as soon as you begin to see a bubble. Note: My cooking time is usually about 2 1/2 minutes.
4. Pour the butter/sugar mixture evenly over the graham crackers. Use an offset spatula to ensure the crackers are evenly covered.
5. Evenly sprinkle on the toasted, coarsely chopped pecans.
6. Place the baking pan in oven and bake for 12-13 minutes watching it carefully as you don't want the edges to burn. Note: My baking time was 13 minutes.
7. Remove the pan from oven. Let sit one minute then pour over the melted chocolate. Use an offset spatula to evenly coat the top of the graham cracker toffee. Let sit for 2-3 minutes. Lightly sprinkle with flaky sea salt. Let sit for another 2-3 minutes but definitely before the chocolate sets up and sprinkle with the miniature chocolate chips. If you sprinkle on the miniature chocolate chips too soon they will melt.
8. Allow to cool completely. Place in the refrigerator for 30-60 minutes until chilled. Then break into pieces. Note: It is sometimes helpful to cut the toffee before it gets placed into the refrigerator for chilling.
9. Serve and enjoy. 
10. Store the Chocolate Cinnamon Graham Cracker Toffee in cellophane bags tied with ribbon or string or in a tightly sealed tin container. This toffee makes for a great hostess gift!

Notes: (1) I have had my jellyroll pan for awhile. But this one is currently available online. (2) I buy my chocolate from a local candy store, but good quality melting chocolate is available at some grocery stores, gourmet stores, or online. (3) I like to eat this toffee chilled, so I store mine in the refrigerator. (4) If cutting with a knife, use a very sharp cutting knife. It is helpful if you turn the toffee over and cut from the bottom side.