Tuesday, July 6, 2021

Grilled Stone Fruit, Blue Cheese and Honey


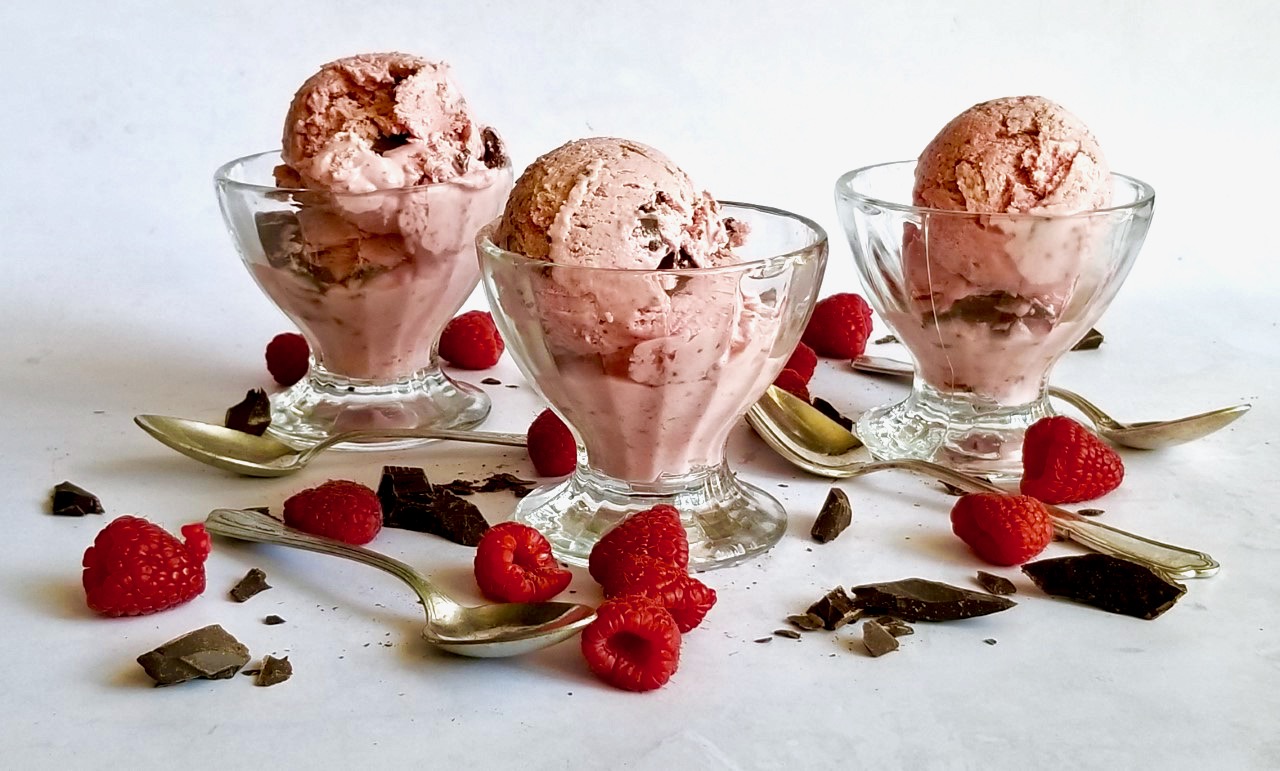
This year, the Fourth of July weekend felt even more celebratory as we finally had the long awaited return to the kind of freedoms we once took for granted. You know, things like the worry free freedom to have more than two people over for a meal, to run in an in-person race, and to actually hug friends.  All of those things brought me great joy over the holidays. From running in my hometown's return to the annual 4 on the 4th run (although this year it was 4 on the 3rd), to inviting my running friends over for a post race brunch, to hugging, this holiday was as memorable as the year spent watching fireworks in big sky country Montana.

And in all honestly, I was more a bit more anxious planning and preparing a meal for nine people than I was about running a four mile race on a really warm July morning. Other than forgetting to put the avocado on the bagel platter, my confidence in my attention to small details (with one exception that is), in my ability to entertain, and to make friends feel comfortably welcomed in my home was restored. I am already looking forward to the next planned gathering as well as the all of butterflies and pressure I put on myself that goes along with it.


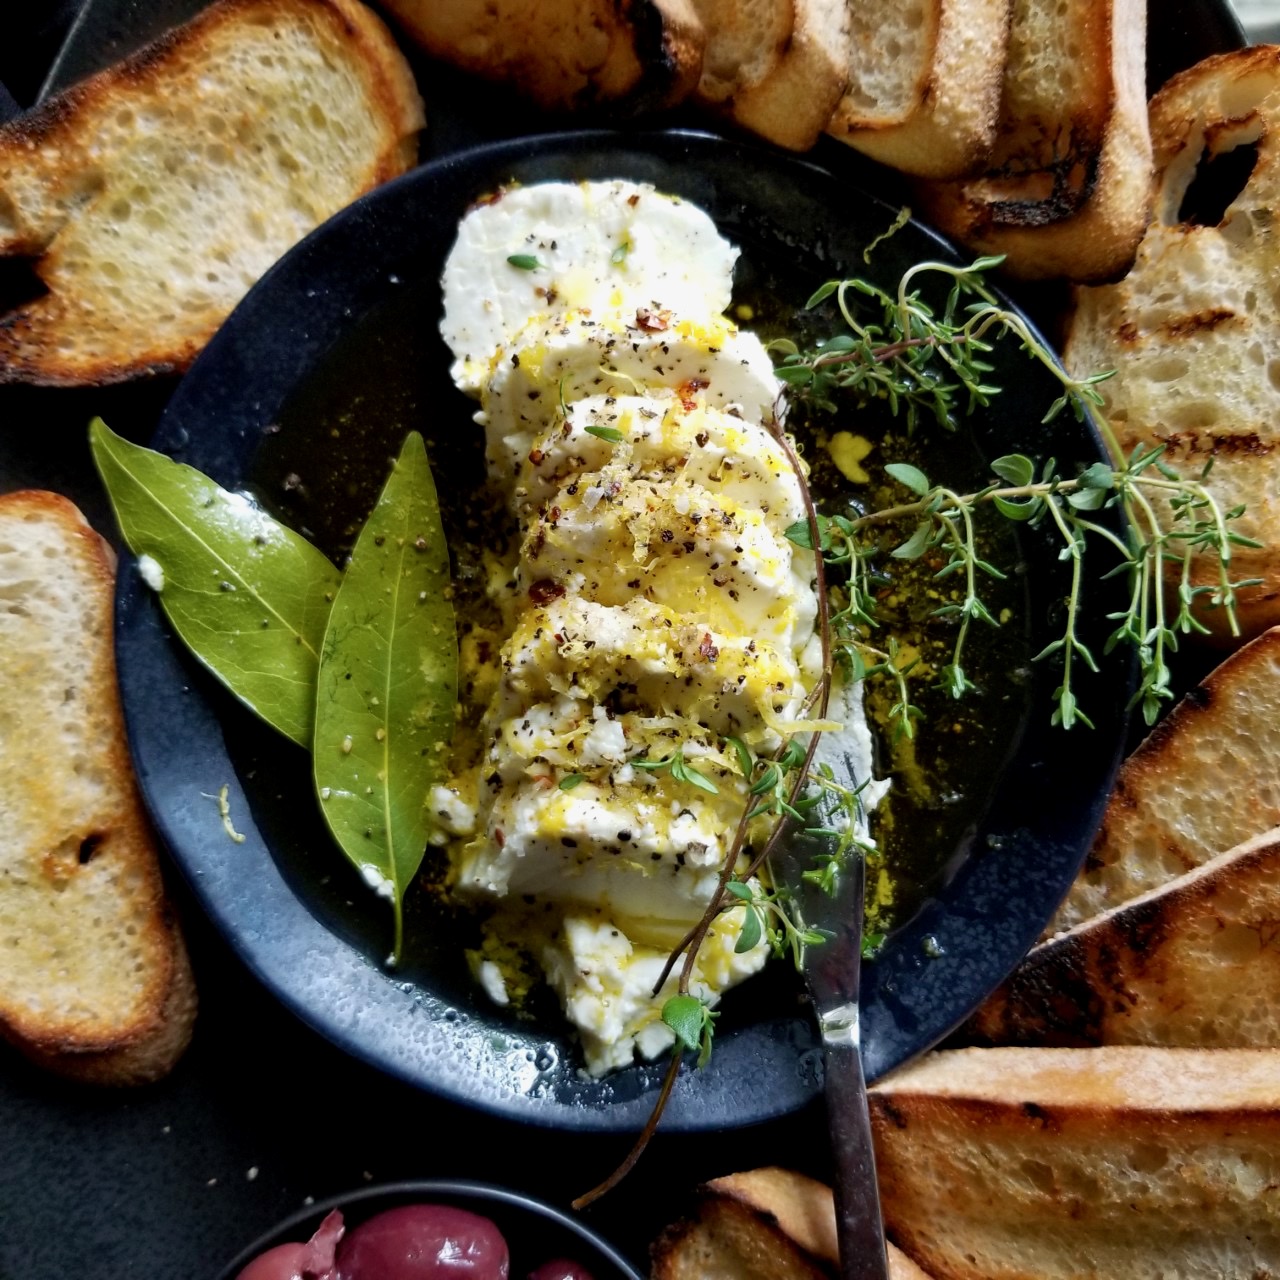
For those of you planning to entertain friends and/or family this summer, might I suggest you serving them this Grilled Stone Fruit, Blue Cheese and Honey dish at the end of the meal. It's a dessert, it's a cheese course, it's a sweet and savory end to any meal. Because, if by chance, you have never had grilled fruit before, you really have been missing out.


The juiciness and sweetness of peaches, plums, and apricots is not only intensified, but transformed into incredible melt in your mouth bites of deliciousness when grilled. When shopping for stone fruits, look for ones that are at the sweet spot of being not too ripe, but ripe enough for them to remain intact when cut in half and stones removed. 


Lightly brush or spray your cut fruit with either avocado oil or olive oil. Then lightly sprinkle the fruit with some flaky salt before placing the cut sides down on a hot grill. The stone fruit is cooked just until you get some good grill marks on the fruit (somewhere between 3 and 4 minutes). Once you have the grill marks, turn the fruit over and let cook on the grill for another 1-2 minutes. Then immediately transfer to your serving platter.


Look for a good quality blue cheese. Point Reyes Blue is one of my favorites, but if you can't find it, look for Maytag Blue cheese. If grilling only four stone fruits, you will need about 1/4 pound of blue cheese. If by chance you aren't a big fan of blue cheese, serve the grilled stone fruits with some honey whipped ricotta or honey whipped mascarpone.

 As the amount of stone fruits increases, so will your blue cheese. Top the grilled fruit with chunks of the blue cheese before drizzling over some good quality honey, some pieces of honeycomb (optional but really good), and basil leaves. 


It's almost hard to fathom how simple ingredients can create such mouthwatering, juicy deliciousness. But they do. The flavor explosion on your palate will have you wondering how it's possible for stone fruits to taste any better than they already do.


Grilled stone fruits paired with mellowed sharpness of blue cheese and lusciousness of honey may be an unexpected dessert choice, but it may be the ultimate finish to a summer meal. With stone fruits now in season, there may not be a more perfect time to make this Grilled Stone Fruit, Blue Cheese and Honey.

Recipe
Grilled Stone Fruit, Blue Cheese and Honey
 (inspired by the Grilled Stone Fruit, Blue Cheese and Honey recipe from Erin French in her cookbook "The Lost Kitchen: Recipes and A Good Life Found in Freedom Maine")
Serves 4-6

Ingredients
4-8 stone fruits, halved and/or quartered, and pitted (peaches, plums, apricots)
Avocado or olive oil
1 - 1 1/2 teaspoons flaky Maldon sea salt
1/4 to 1/3 pound of a good quality blue cheese (recommend Point Reyes Blue)
1/4-1/3 cup best quality honey 
Small fresh basil leaves and/or thyme leaves
Optional: Honeycomb

Directions
1. Fire up your grill.
2. Brush or spray the cut fruit with either (avocado or olive oil) oil or spray, then sprinkle with the flaky sea salt.
3. Place fruits cut side down and cook until grill marks appear (about 3-4 minutes). Turn fruit over and cook for additional 1-2 minutes. Note: Make certain to get grill marks on both sides of the quartered peaches. 
4. Transfer grilled fruit to a beautiful platter. Top with chunks of blue cheese, a generous drizzle of honey, some pieces of honeycomb (if using), and fresh basil leaves.
5. Serve immediately.

Notes: (1) Cut large peaches into quarters, cut smaller peaches in half. Cut the plums and apricots in half. (2) Highly recommend you using at least two if not three different stone fruits. (3) If you don't love blue cheese, serve the grilled stone fruit with dollops of Honey Whipped Ricotta or Honey Whipped Mascarpone. (4) I was lucky enough to have a sister who brought me back a jar of honey from Two Maples Farm and it was the perfect honey for this dessert.

Friday, June 25, 2021

Cherry Preserves and Mascarpone French Toast Casserole


How is it that we are already less than a week away from the midway point in the year? Why are your days flying by so quickly June? Growing up it felt as if summer days went on endlessly. But now that I am older most days feel as if they don't last longer than a hot minute. From feeling like no time has passed at all to time moving at the speed of light, isn't it funny how our perception of time makes such seismic shifts as we age? Just the other day I had lunch with a friend I met twenty five and half years ago in my doctoral cohort. Yet each time I see her, it feels as if no time has passed since both the first and last time we got together. Earlier this week I picked up a of of freshly baked, still warm Italian bread from my favorite little Italian deli with the intention of using it for grilled crostini topped with marinated goat cheese. Then suddenly it was two days old and getting a bit stale. While my best laid plans for an evening enjoying a great appetizer and sipping on Paper Planes went out the window, I found myself with the unplanned Plan B opportunity of making this incredibly luscious, sumptuous Cherry Preserves and Mascarpone French Toast Casserole. One which might better be described as a cross between a bread pudding and a cheesecake like french toast. As it turned out, this turned out to be one those rare times where procrastination was a blessing.


Had I not serendipitously seen a friend's Instagram post of her croissant french toast casserole topped with mascarpone I may have settled for making this casserole with cubes of cream cheese. Given the choice between the two, who wouldn't choose the richer, creamier, slightly buttery "Italian" cream cheese? Before you answer that (especially if you ever tasted mascarpone), let me put it t another way. From a flavor perspective, making the choice between butter and margarine or imitation vanilla and a Madagascar Bourbon Pure Vanilla Extract would pretty much the same kind of no-brainer decision. 


There is almost always a couple of jars cherry preserves or cherry jam in the cupboard. More importantly, there is always at least one jar hidden because someone here can inhale a jar faster than the speed of light. The jar of cherry preserves I bought in Colorado was long gone. And the jar of Cherry Preserves I picked up in Door County this past April was intended for another purpose. Fortunately there a jar of Stonewall Kitchen's Bada Bing Cherry Jam hidden from the cherry jam bandit. Between the mascarpone cheese, the cherry jam, and the custard like bites of bread, this epic french toast casserole is one destined to be one of the reasons you decide life is too short to let any more time pass before you spend some quality time with friends. 


Serve this Cherry Preserves and Mascarpone French Toast Casserole at a brunch and it's pretty much guaranteed it will be the one dish everyone can't stop raving or talking about. 

Soaking the cubes of bread overnight in a custard mixture made of half and half, whole milk, sugar, vanilla, cinnamon, and eggs (lots of eggs) is what helps give this casserole it's melt in your mouth bread pudding-like texture.


In addition to generously buttering the baking dish with room temperature butter, thin slices of cold butter are placed over the dollops of the lightly sweetened mascarpone and the cherry preserves/jam placed on top of the overnight custard soaked bread cubes.


The Cherry Preserves and Mascarpone French Toast Casserole bakes in.a 375 degree (F) preheated oven for 40-45 minutes or until it's golden and puffed up. Always, always put your baking dish on a baking pan. Not only will it catch any drippings, it will keep you from putting a cold out of the refrigerator baking dish on a hot rack.

Let the Cherry Preserves and Mascarpone French Toast Casserole rest for about 20 minutes before topping it with some Luxardo cherries. Once these decadent cherries are placed on top, it's ready to serve. For added sweetness, serve the french toast casserole with some sifted confectionary sugar. And for your cherry loving friends, serve with even more cherry preserves/jam. 


To say that I am currently obsessed with this Cherry Preserves and Mascarpone French Toast Casserole would be an understatement. I could go on endlessly singing its' praises, shamelessly encouraging (or badgering) you to make it, or describing how its' mouthwatering deliciousness will send you into a temporary state of time suspended euphoria. But, uncharacteristically, I shall restrain from doing all of those things. Instead I am hoping the photos of this cheesecake-like, bread pudding-like french toast casserole will cause you to make this droolworthy, epic dish for the people in your life that matter. Either the ones you see on a regular basis or the ones you haven't seen in what feels like a lifetime. 

Recipe
Cherry and Mascarpone French Toast Casserole
Serves 7 generously and up to 10 if served on a brunch buffet

Ingredients
16 ounce loaf of day old Italian Bread, French Bread, or Brioche, cut into 1" slices and then into 1" cubes
8 large eggs
2 cups half and half
1 cup whole milk
3 Tablespoons granulated sugar
2 teaspoons to 1 Tablespoon vanilla
1/2 teaspoon cinnamon
3/8 teaspoon Kosher salt
3 Tablespoons unsalted butter, room temperature

8 ounces (226g) mascarpone
3 Tablespoons confectionary sugar

10-12 ounces cherry jam or cherry preserves (see notes)

4 Tablespoons unsalted butter, chilled, thinly sliced

16-18 Luxardo cherries 
Confectionary sugar

Directions
1. With the three Tablespoons of the room temperature unsalted butter, generously butter a 9"x13" rectangular or oval baking dish. Set aside.
2. In a large bowl lightly beat the eggs. Add in the half and half, milk, granulated sugar, vanilla, cinnamon and Kosher salt. Whisk to blend.
3. Drop 6-8 bread cubes into the custard mixture. With a slotted spoon transfer to baking dish. Continue until all cubes of bread have been dipped. Then pour the remaining custard mixture over the bread. Cover with plastic wrap and refrigerate overnight.
4. Preheat oven to 375 degrees (F). Remove chilled casserole and place onto a large baking sheet.
5. In a medium sized bowl, whisk together the mascarpone and confectionary sugar.
6. Evenly drop spoonfuls of the cherry jam/preserves and sweetened mascarpone over the casserole.
7. Followed by evenly topping the casserole with the 4 Tablespoons of the thinly sliced chilled butter.
8. Bake for 40-45 minutes or until the casserole is golden and puffed.
9. Remove from the oven. Top with the Luxardo cherries. Let the french toast casserole rest for about 15-20 minutes before serving.
10. Serve in bowls lightly dusted with confectionary sugar and optionally some additional cherry jam/preserves.

Notes: (1) I used 10 ounces of the 12 ounce jar of Stonewall Kitchen's Bada Bing Cherry Jam. Served the remaining two ounces on the side with the baked french toast. If you can't find that jam, use another high quality jar of cherry jam/preserves. (2) Luxardo Cherries definitely take this Cherry Preserves and Mascarpone French Toast Casserole to a whole new level of scrumptiousness. You can find them in either some grocery stores or in most liquor stores. (3) I used an Italian Bread baguette (about 16 inches long) from my favorite Italian store for this casserole. Look for a freshly baked baguette from the grocery store and then let sit for at least a day before cutting up and using in this casserole. (4) If for some reason you don't love cherries, you can make this with a good quality blueberry jam, raspberry jam, or blackberry jam.

Wednesday, June 23, 2021

Strawberry Rhubarb Galette


A few weeks ago we went on an epic day long antique adventure. More time was spent in the car driving to a town in rural Ohio than was spent oogling and drooling over the early 19th century treasures on display. I was on the hunt for a small painted cupboard, but instead came home with a painted dough box as well as some pewter plates and bowls. In spite of not finding the cupboard (not to worry I found one at a favorite antique shop in Indiana), it turned out to be a good day for acquiring beautiful old things. Definitely worth being in the car for the ten hour round trip excursion as well seeing the end to the eighteen month antique show hiatus. While I sometimes forget all of the things on my 'mental' grocery store list, I can still remember (at least 95% of the time) when and where I bought the antiques collected over the last thirty something years. I also remember many of the things I 'passed on' for a myriad of reasons. Although I wish I could erase those things still haunting my memory! Especially a certain cupboard painted in an early blue. Just as much as I love collecting 'things' I love creating recipes destined to be collected. Particularly the timeless ones leaving a permanent imprint on one's senses. Like this swoonworthy Strawberry Rhubarb Galette for example. 


This Strawberry Rhubarb Galette brings my collection of galettes recipes to six. In joining the Blueberry Thyme Galette, Apple Galette, Blueberry Pecan Galette, Rustic Peach Galette, and Pear and Honeyed Goat Cheese Galette recipes, my love and affinity for the less refined, more rustic version of a fruit filled pie is further affirmed. There is something rather appealing about an odd shaped, sometimes even messy galette. With the same, maybe even better, buttery, flaky crust and luscious fruit filling, the galette has all of the deliciousness of a pie without as much of the work. When given the choice between making and serving a pie or a galette, the galette would prevail 99.9% of the time. And now with the abundance of fruits and berries being freshly harvested from farms, it could not be a more perfect time to be making galettes.


With the exception of the dough used in the making of the Pear and Honeyed Goat Cheese Galette, the dough for this Strawberry Rhubarb Galette may be my newest favorite. Not only is it really, really good, it creates the most tender, flaky, buttery, yet light crust to compliment the roasted fruit filling. And, if that wasn't enough to entice you, then let me tell you it may be the one of easiest doughs to roll out. 


A few weeks back one of my friends generously gave me enough rhubarb to last me for months. While I cut up and froze the majority of it to use in making compotes and sauces in the months ahead, I kept some of the stalks in my refrigerator to use in making spoon cakes, muffins, and galettes. Unlike other 'pie' recipes using rhubarb, this galette calls for cutting it into 'thin', slightly less than 1/4" thick slices. With a baking time of somewhere between 30-35 minutes, the rhubarb needs to be thinly cut so it can soften and sweeten up in the oven. Depending on the size of the strawberries, they will each be cut into 3 or 4 slices (or just slightly larger than 1/4" thickness). The slices of the less dense, more moisture filled strawberries need to be slightly thicker than the rhubarb as they will break down quicker in the 400 degree (F) oven. The amount of sugar used in the filling depends somewhat on the ripeness of your fruit. For less ripe strawberries you will use a little more sugar than the one-half cup recommended in the recipe below. Lemon zest and lemon juice serve to not only brighten the flavor of the strawberries and rhubarb, but they add the perfect amount of tartness to the filling. Cornstarch will help to bind the juices being released from the fruit during the baking process. However, if you don't have cornstarch, use all-purpose flour. 


Because this galette doesn't require you to laboriously lay out the fruit in a fancy, intricate design on the dough, all of the filling ingredients get mixed together in a large bowl. Being able to simply spoon the mixed fruit filling over the dough couldn't be more fun or easier.


Be sure to leave a border of 2" to 3" of dough when assembling the galette as you will need to bring up the sides of the dough to hem the fruit filling in. When bringing the dough over the fruit filling, make certain to press the edges together to help keep all of the baked filling from oozing out of the dough. Do not worry too much if some of it oozes out during the baking process (it will). It just adds to the rusticness of the finished galette. For an even more golden, sweeter crust, brush the dough with an egg wash and then liberally sprinkle with some sanding sugar of turbinado sugar (not regular granulated sugar).

The galette bakes for 35-40 minutes in a preheated 400 degree (F) oven. Once baked, transfer the galette (still on the parchment paper) to a cooling rack for at least twenty minutes before serving. The Strawberry Rhubarb Galette is delicious served either warm or at room temperature. If making it for a gathering, I would recommend not baking the galette up more than two hours before you intend on serving it. 


I love serving the parchment paper lined galette on a large antique cutting board. But any large cutting board would do. If you want to gussy your galette up a bit, transfer the galette to a beautiful platter. Definitely serve the Strawberry Rhubarb Galette with some vanilla ice cream or freshly whipped lightly sweetened heavy cream makes for the most perfect finishing touch. And last but certainly not least, add this recipe to your galette recipe collection. If, by chance you haven't yet started acquiring them, well today is your lucky day. Because this recipe is what I would call a 'find'!

Recipe
Strawberry Rhubarb Galette
Serves 8

Ingredients
Dough
1 1/4 cups (165g) all-purpose flour
1/4 teaspoon Kosher salt
1 Tablespoon sugar
1/2 cup (113g) unsalted butter, cold, cut into cubes
1/4 cup (60g) sour cream
3-4 Tablespoons ice cold water

1 large egg
1 teaspoon water or milk
Sparkling or Turbinado sugar

Galette
1 quart (1.5 pounds/682g) fresh strawberries, stemmed, cut into thirds or quarters depending on size
8 ounces (237g) or about 2 large stalks fresh rhubarb, cut into an almost 1/4" thickness
1/2 cup (100g) sugar (but can use up to 3/4 cup of sugar)
3 Tablespoons cornstarch (or all-purpose flour)
Zest for one half of a lemon
1 Tablespoon freshly squeezed lemon juice

Serving suggestions: Vanilla ice cream and/or freshly whipped, lightly sweetened whipped cream

Directions
Dough 
1. In the bowl of a food processor, add in the flour, salt and sugar. Pulse just to blend.
2. Add in the butter and pulse until butter is smaller than pea sized.
3. Add in the sour cream and 2 Tablespoon of ice cold water. Pulse to blend. If dough does not come together and pull away from the sides add water 1 Tablespoon at a time. 
4. Remove dough from bowl. Form into a disk and wrap with plastic wrap. Let chill in the refrigerator for at least one hour and up to two hours. Note: My dough was ready to roll out after an hour. 

Galette
1. In a large bowl combine the strawberries, rhubarb, sugar, cornstarch, lemon zest and lemon juice. 

Assembly
1. Preheat oven to 400 degrees (F). Line a large baking sheet with parchment paper.
2. On a lightly floured surface, roll out the dough to a roundish shape approximately 14" in diameter and about 1/8" to almost 1/4" thickness.
3. Transfer the rolled out dough to the baking sheet.
4. Spoon the strawberry rhubarb mixture onto the dough leaving a 2"-3" border. Fold and lightly pinch the edges of the dough over the fruit (top will be open with mounds of fruit). 
5. Whisk together the egg and water (or milk). Brush on the dough. Generously sprinkle the dough with some sparkling or turbinado sugar.
6. Bake for 35-40 minutes or until the dough is golden and the juices from the fruit are bubbling. Note: If you didn't crimp your dough well or if you have a hole in your dough, you will get some leakage. But don't worry.
7. Remove the galette from the oven, transfer to a wire rack and let it rest for at least 20 minutes before  serving.
8. The galette can be served warm or at room temperature. Serve with some vanilla ice cream or lightly sweetened whipped cream.
9. If you have any leftovers, cover with plastic wrap and store in the refrigerator. To take the chill off the refrigerated galette, reheat slices in the microwave or enjoy cold.

Notes: (1) Depending on the ripeness and sweetness of your fruit you may need to add more than 1/2 cup granulated sugar to the filling. You can go up to using 3/4 cup of sugar or just add 1-2 additional Tablespoons. (2) Instead of one large galette, divide the dough into thirds before forming into disks, wrapping in plastic wrap and chilling, to make mini-galettes. Baking time will still be somewhere around the 35 minute mark. (3) Do not use regular sugar to finish the dough before putting in the oven as it has a lower melting point than sparkling or turbinado sugar. (4) You can keep galette leftovers in the refrigerator for several days.

Thursday, June 17, 2021

No Churn Raspberry Chocolate Chunk Ice Cream


Here in the Midwest the onset of summer means the long awaited return of berry season. Beautiful fresh, ripe strawberries, raspberries, blackberries, and blueberries start becoming readily available at the grocery stores and Farmer's Markets. From jams, to preserves, to pies, to muffins, to sauces, to galettes, to crisps, to ice cream, fresh berries sweeten the summer by amplifying the flavor of everything made with them. Especially homemade ice cream.


In spite of resurrecting my ice cream maker last year, I am still a big fan of no-churn ice creams. You can find recipes for Peach Ice Cream, Espresso No Churn Chocolate Ice Cream, No Churn Peanut Butter Ice Cream, and No Churn Strawberry Cheesecake Ice Cream on the blog. And I am predicting there will be a few more no churn ice cream options created (and possibly updated) and shared with you in the weeks ahead!


The combination of raspberries and (dark) chocolate is a match made in heaven. The flavors of slightly tart berries and rich chocolate paired together are sinfully ambrosial. Which makes this No Churn Raspberry Chocolate Chunk Ice Cream craveworthy delicious.


So how do you like eating your ice cream? In a waffle cone, in a cake cone, in a sugar cone, in a waffle bowl, in a dish, and/or maybe just right out of the container? Are you an ice cream purist or do you like to top it with a sauce or some of that Magic Shell scrumptiousness? 


Some raspberry ice cream recipes have you straining your cooked raspberry mixture and discarding all of the seeds. Not this one! Remember that 'more is almost always better' mantra? It's definitely applicable here. To deepen the raspberry flavor in the ice cream, the cooked raspberries are processed in a food processor until only a few of the seeds are detected. Using all of those raspberries makes for an insanely delicious raspberry ice cream!


Instead of using chocolate chips, coarsely chop up a semi-sweet or dark chocolate bar. Not only do the various sizes of the shards of chocolate more evenly distribute in the ice cream mixture, finding a big piece of chocolate in a bite of ice cream is akin to discovering a hidden treasure!


While the raspberry puree cools down in the refrigerator, make the ice cream 'base' in the bowl of a standing mixer fitted with a food processor. Cream cheese, sweetened condensed milk, Kosher salt, vanilla, and heavy whipping cream are whipped together until the texture is similar to luscious whipped cream. 

The raspberry puree followed by the chopped chocolate are folded into the ice cream base mixture until well blended before it all goes into the freezer to chill overnight. Aka the place where the magic happens!


If you don't have a freezer safe ice cream container, line a 9" loaf pan with plastic wrap before spooning in the ice cream mixture. Then tightly wrap the pan with plastic wrap (and some aluminum foil for good measure) and place in the freezer overnight.


No churn ice cream has a slightly denser texture than the air whipped ice cream made in an ice cream maker. Because of that, no churn ice cream needs to be removed from the freezer for about 10 minutes before it's scooped into the container of your choice! This No Churn Raspberry Chocolate Chunk Ice Cream has all of the creaminess, lusciousness, richness, and deliciousness of one of those high end, small batch, high end pints of ice cream you find at the grocery store! And on a hot summer's day is there anything better than cooling off with some ice cream? If you love ice cream, raspberries, and chocolate, you are going to be smitten with this No Churn Raspberry Chocolate Chunk Ice Cream! 

Recipe
No Churn Raspberry Chocolate Chunk Ice Cream

Ingredients
1 pound 5 ounces (600g) fresh raspberries (this is about 4 cups)
1/4 cup (50g) granulated sugar
1/4 teaspoon Kosher salt

14 ounces (396g) sweetened condensed milk
2 teaspoons vanilla
1/4 teaspoon Kosher salt
4 ounces (114g) cream cheese, room temperature
2 cups heavy whipping cream

5-6 ounces (140-168g) semi-sweet or dark chocolate (72% cocao), coarsely chopped

Directions
Raspberry Puree
1. In a medium sized heavy bottomed saucepan, bring the raspberries, salt, and sugar to a simmer over medium-high heat. Continue cooking the mixture for 5-7 minutes, pressing down the berries with a back of a spoon, until it has thickened (or lightly coats the back of a spoon).
2. Remove from the heat and let cool down slightly.
3. Process the mixture in a food processor until almost smooth (there will still be some berry seeds visible).
4. Transfer to a bowl and let cool in the refrigerator for 30 minutes.

Ice Cream
1. In the bowl of a standing mixer fitted with a whisk attachment, beat the cream cheese and sweetened condensed milk until smooth and creamy (about 2 minutes).
2. Add in the whipping cream and vanilla. Beat mixture until it has the consistency of a slightly stiffened whipped cream (about 4-5 minutes).
3. Fold in the raspberry puree with a spatula until almost no streaks remain.
4. Add in the chopped chocolate and fold until ice cream is completely blended.
5. Spoon the ice cream into your ice cream container or a 9" loaf pan lined with plastic wrap.
6. Seal the container or wrap the loaf pan well with plastic wrap (and a finish wrap of aluminum foil) and place in the freezer overnight.
7. Remove from the freezer about 10 minutes before you are ready to scoop into your favorite ice cream cone or into a dish. 
8. Optional: If serving the ice cream in a dish, pour some chocolate sauce or Magic Shell sauce over it.

Notes: (1) Use a good quality chocolate. I used a couple of bars of Trader Joe's Swiss Dark Chocolate but next time would probably use 2 1/2 bars. (2) No churn ice creams are best enjoyed within a week of being made.

Saturday, June 12, 2021

Marinated Goat Cheese


"There's no such things as a small act of kindness. Every act creates a ripple with no logical end." Scott Adams. I have been the fortunate recipient of a string of kindnesses going back to my recent trip to Colorado. From being 'rescued' from my lake mishap, to being protected from what turned out not to be a mountain lion, to being guided across a treacherous part of a trail, to not being abandoned when experiencing the exhaustive and delusional effects of heat stroke after a long 'hike' on an extremely hot/humid day, three of those kindnesses came from strangers and one came from a friend. Consciously or unconsciously, I genuinely believe we are all affected by the gift of an unexpected kindness. Not just in the moment, but long afterwards. Over the course of my lifetime I have been the beneficiary of some life changing, even some life altering unselfish kindnesses. The kind you never forget. In retrospect, I believe my thinking as well as my beliefs about kindness were and continue to be largely shaped by those kinds of events. I wish I could find that young couple from Houston, Texas who helped me out of the lake and the older couple originally from the UK now living in Estes Park who turned out to be my guardian angels on a hike to repay them with more than my words of gratefulness. If I had learned even more about them I probably could. Instead, others will have to be the recipients of their goodwill so I can continue to do my part in keeping the possibilities of a kinder world infinitely endless.


I don't know about you, but on a really hot, humid day, I would much rather graze on small plates or appetizers than have a regular meal. There is something so satisfying and fun about nibbling on small delicious bites. Like this Marinated Goat Cheese with Grilled Bread, for example. 


To be able to take a simple log of plain goat cheese and baguette and turn them into something exceptional is incredibly gratifying. This Marinated Goat Cheese happens to be much less inexpensive to make (and I would say even tastier) than anything you might be able to buy from the grocery store or your favorite cheesemonger.

A marinade of olive oil, bay leaves, flaky sea salt, Aleppo pepper, coarsely ground black pepper, and lemon zest creates one of the most luscious, impressive goat cheese appetizers. Perfect for schmearing over slices of a grilled baguette and pairing with a chilled glass of Prosecco, Chardonnay, or sparkling water.


Made in either a bowl or a jar, the Marinated Goat Cheese needs only to marinate at least 60-75 minutes at room temperature before it is ready to serve. Okay, how easy is that?

Ever since grilling slices of my Rustic No Knead Bread and serving with some honey whipped ricotta, I have become a huge fan of the flavor of grilled bread paired with cheese. Brushed or sprayed lightly with olive oil, it takes only minutes to transform the simple baguette into something you would find at a really good restaurant. We happen to have a gas grill, so grilling bread can always happen at a moment's notice. However, if you don't have a gas grill, toasting it in the oven or using a cast iron grill pan on the stovetop are the next best options. Any of these bread options are preferable to just serving the Marinated Goat Cheese with a sliced baguette.


As much as I love the flavor of goat cheese, I was beyond smitten with this Marinated Goat Cheese in the first bite. From the richness of the olive oil, to the tartness of the lemon zest, to the wow factor of the spices all infused together, make the craveworthiness of goat cheese exponentially enhanced. Quite possibly those not on the high end of the goat cheese aficionado spectrum will shift in that direction. And you know me, don't be so quick to point out it's goat cheese before they taste it. As I firmly believe preconceived notions about food affect one's ability to honestly taste it.


With hot, humid days in the foreseeable future forecasts, we may be grazing more than dining in the weeks and months ahead. Considering how easy this Marinated Goat Cheese is to make, I am predicting it will be served on regular repeat around here. So, if you are looking for an easy, incredibly delicious, beautifully presented appetizer to serve to family and friends or a way to repay a kindness, look no further. Because here it is!

Recipe
Marinated Goat Cheese

Ingredients
5 ounces (142g) log of goat cheese
1/3 cup extra virgin olive oil
Grated zest of one medium sized lemon
2 bay leaves
1/2 teaspoon flaky sea salt
Pinch of Aleppo pepper (or crushed red pepper flakes)
Several grates (or to taste) of coarsely ground black pepper

Optional: Sprigs of fresh thyme (for garnish)
Small baguette, sliced and grilled (or toasted in the oven)
Small bowl of olives

Directions
1. Place the cheese log in either a sealable jar or small bowl.
2. Top with the olive oil, lemon zest, bay leaves, flaky sea salt, Aleppo pepper, and black pepper. Cover and let marinate at room temperature for at least 60-75 minutes. 
3. Transfer the marinated goat cheese log to a serving dish. Pour over all of olive oil mixture. Optional: Sprinkle with some fresh thyme leaves.
4. Place serving dish on a platter. Arrange grilled bread on platter. Place small bowl of olives on platter. 
5. Serve at room temperature with some grilled (or toasted) bread. Maybe a small bowl of olives and definitely a refreshing beverage.

(1) I like to buy the plain 5 ounce goat cheese logs from Trader Joe's. It's really good and inexpensive. (2) Make up jars of the Marinated Goat Cheese to bring on a picnic or to serve at a barbecue.

Human+Nature Exhibition, Daniel Popper (artist), Morton Arboretum (June 2021)