Friday, November 5, 2021

Cider Roasted Pork Tenderloins w/ Homemade Applesauce


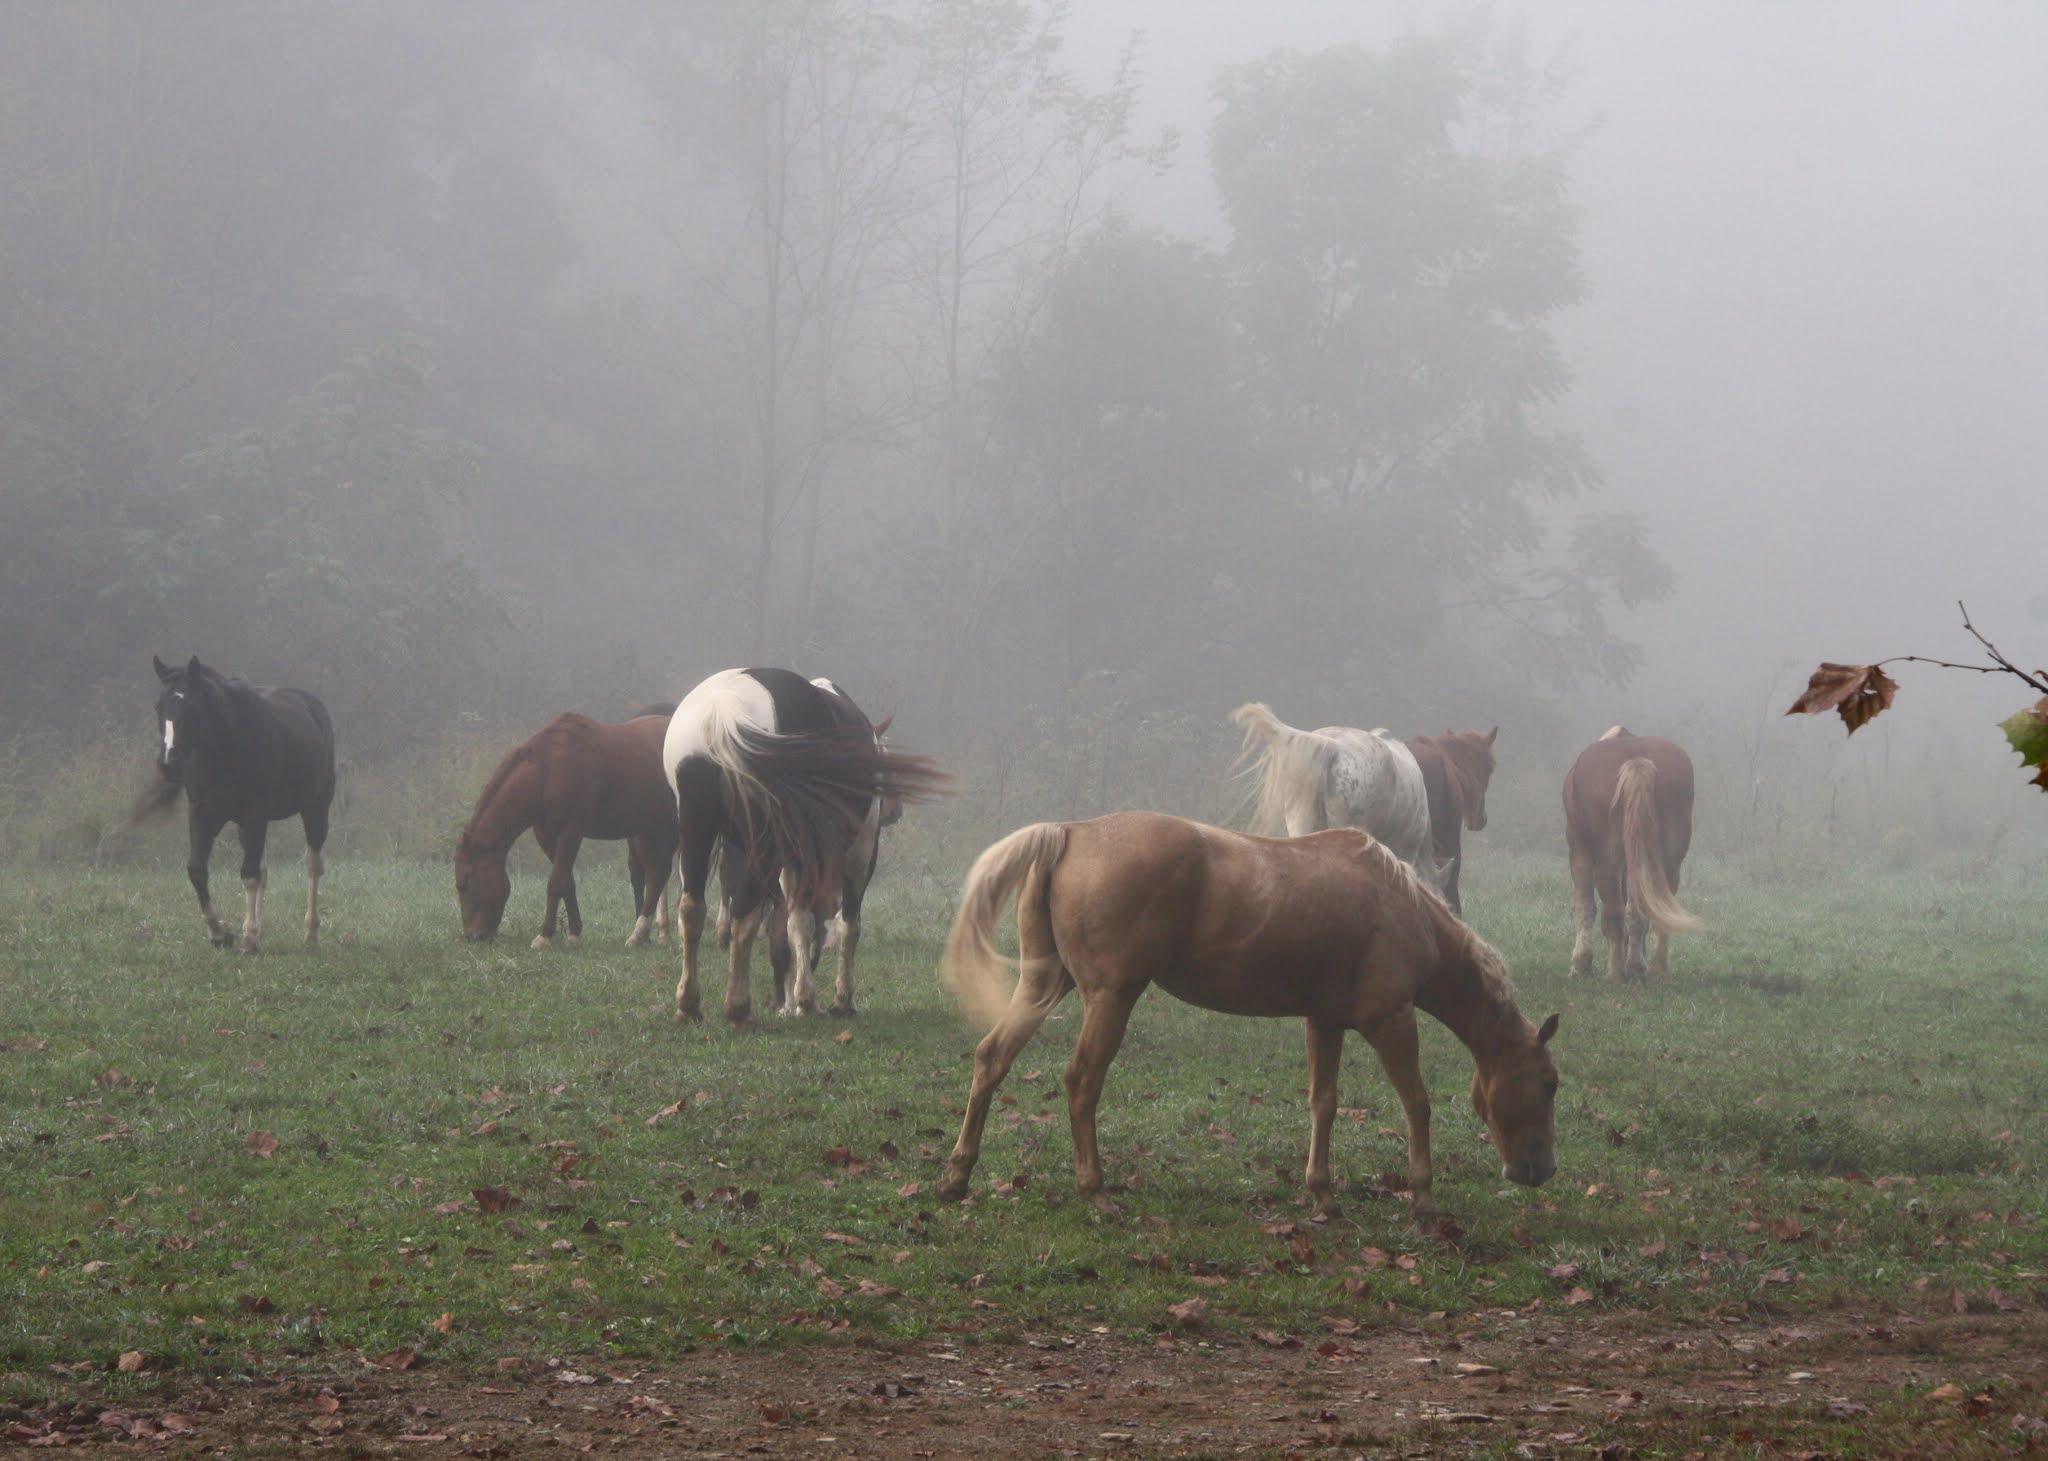
A few weeks back we traveled to and hiked in Smoky Mountain National Park with friends. As it turned out, the views from the deck of our stunning refined rustic VRBO were a prelude to the landscapes and wildlife waiting for us each day in the park.  Having only seen photos of the picturesque Smoky Mountains, seeing them in person exceeded even my romanticized versions of the early morning and nearing sunset mists engulfing the hollows, the mountains, and the restored cabins breathtaking views. My wish to see black bears (from a photographable distance) came true within two hours of arriving. Little did I know we would get glimpses of them each day. Like most first time visitors we spent a fair amount of time in Cades Cove, took the drive on Newfound Gap Road, hiked to Laurel and Abrams Falls, as well made the steep climb up to the top of Clingman's Dome. And, of course, did a couple of moonshine tastings in downtown Gatlinburg. Long days in the park called for relaxing in the hot tub with a glass (or two) of wine while watching the sunset or looking up at the stars. In spite of seeing a bear on the property, we sat around the fire in the firepit and made s'mores one night (for some odd reason no one was afraid). Because the house we stayed in had a movie theatre room, we even had a movie night. Lastly, no trip for me would be complete without a souvenir (or two). Several books and two pairs of cowboy boots were calling my name. 


During the day we enjoyed homemade sandwiches on our post hike picnics. For two nights we made dinner on the grill, had take-out barbecue one night, and ended the trip with dinner eating a fabulous meal at the incredible Appalachian Restaurant in Sevierville. If I had the chance to replan the dinner menus, I would have brought the fixins' for and made this Cider Roasted Pork Tenderloins with Homemade Applesauce. While we didn't get to enjoy this mouthwatering, delicious dish on this trip, I am going to make certain we do on the next one. And if by chance we had any leftovers, they would make for even more perfect lunches.


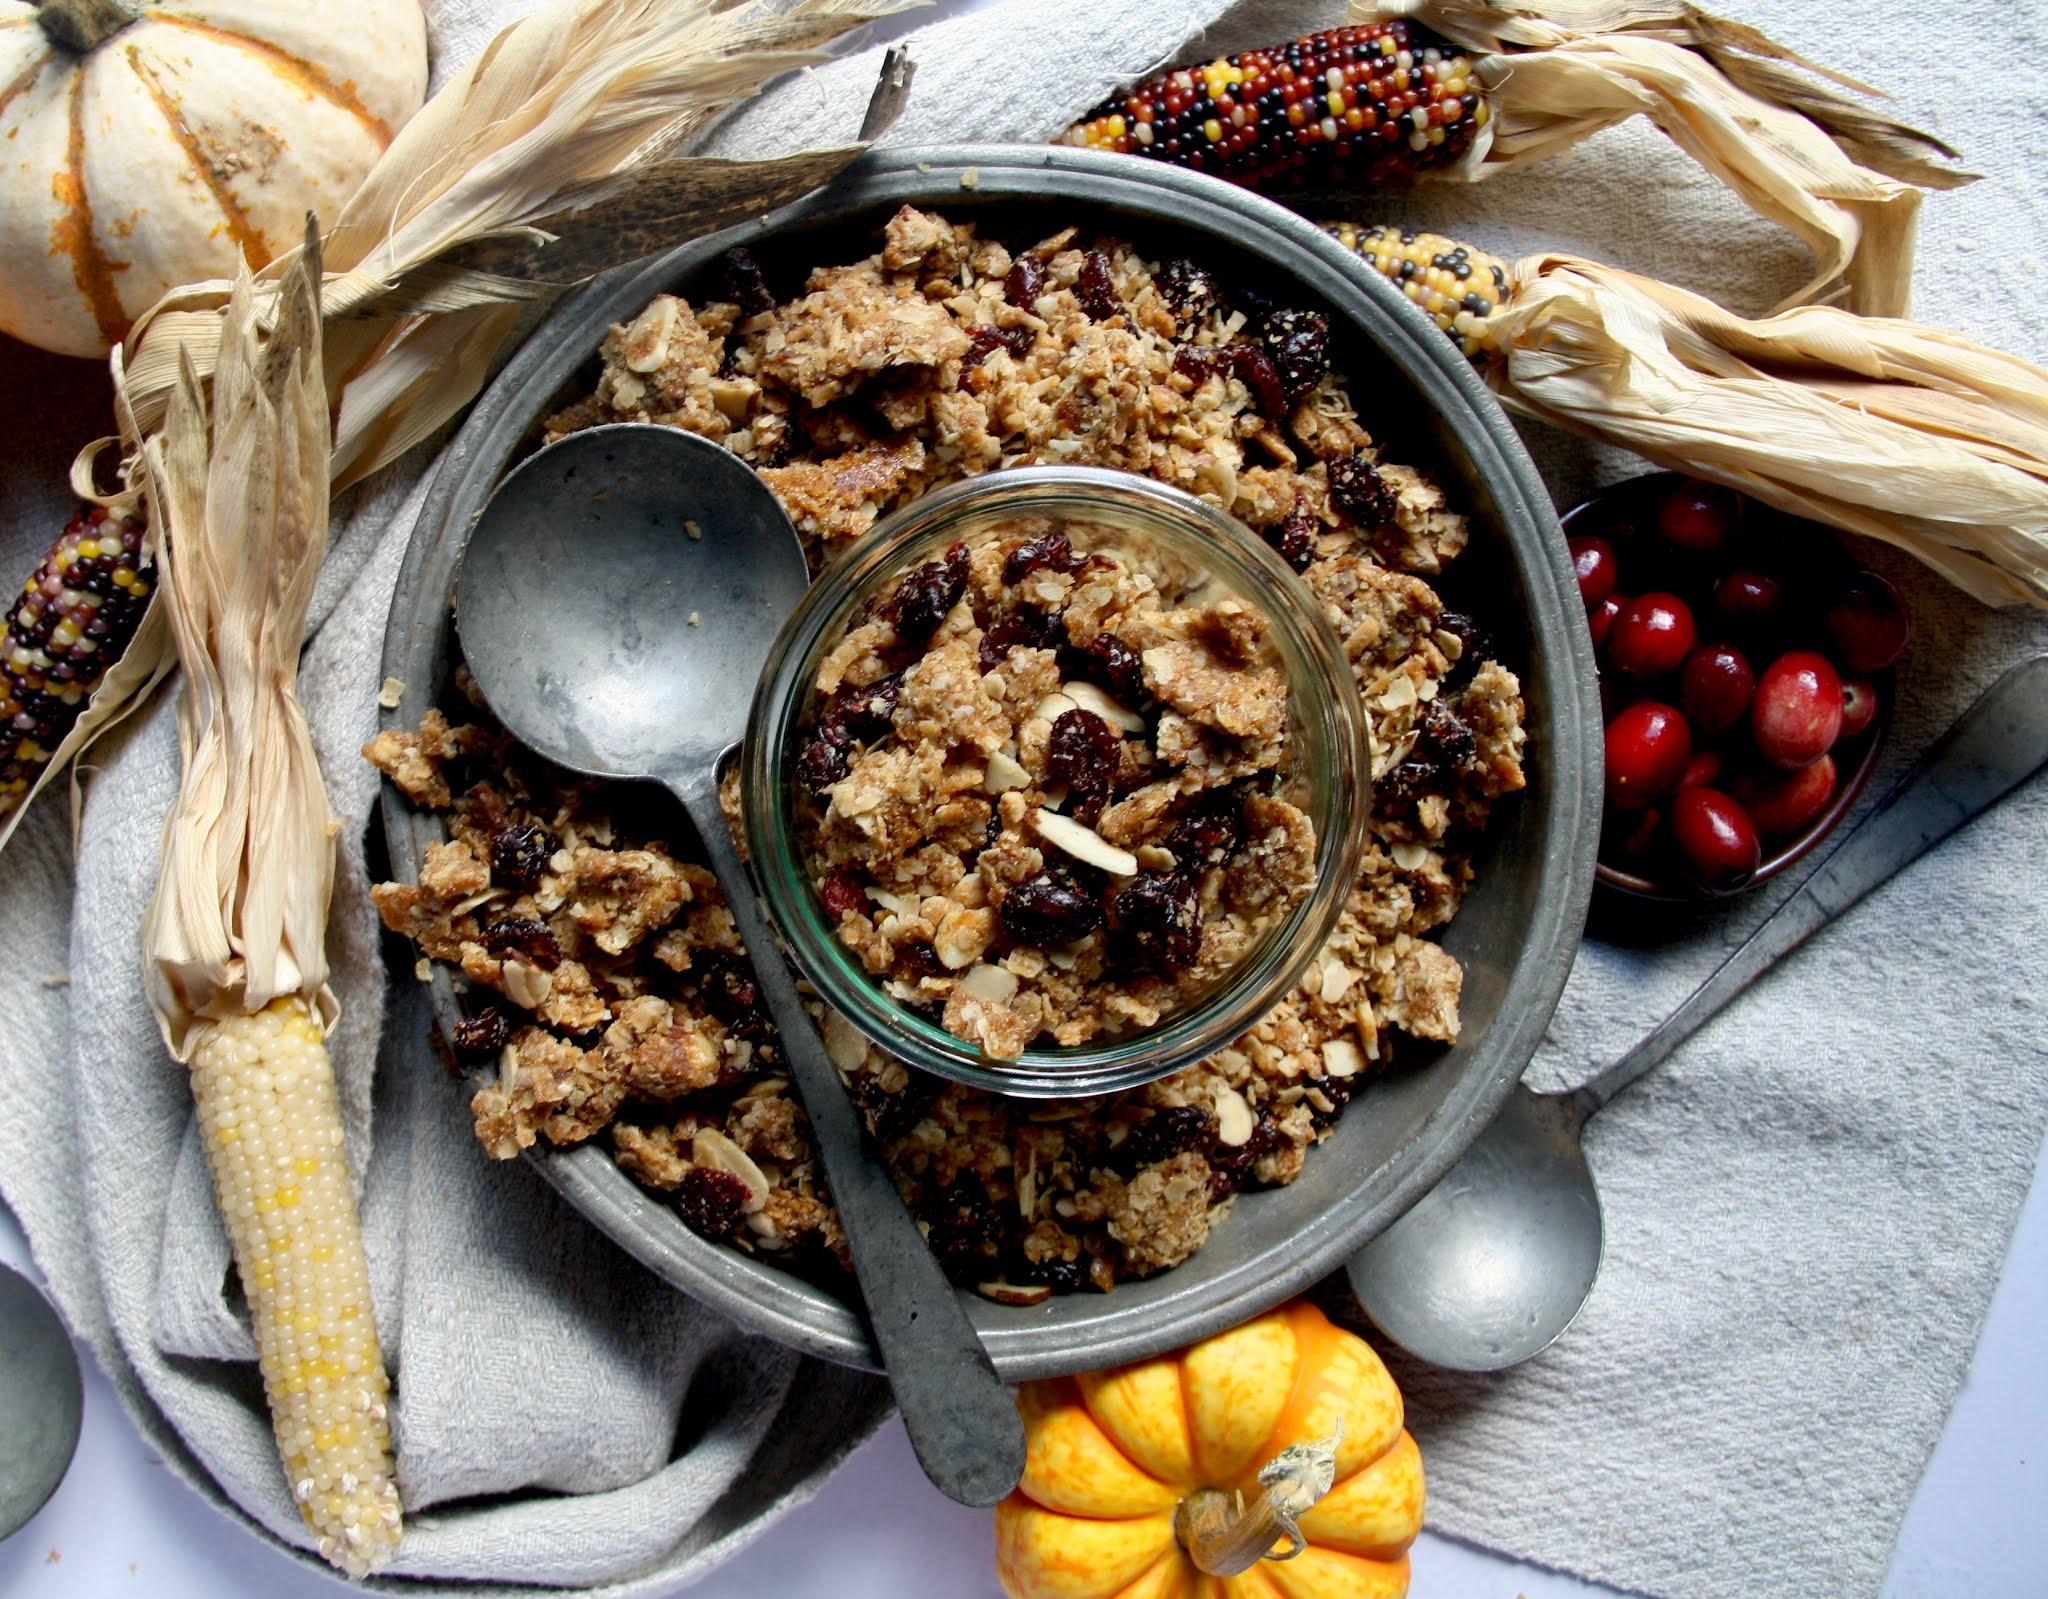
If there was ever a dish to impress family and friends on a fall or winter weeknight, at a casual or fancy dinner party, or even while traveling, this Cider Roasted Pork Tenderloins w/ Homemade Applesauce would be the one. The overnight cider and savory spiced marinade of the pork tenderloins makes them insanely flavorful. With roasting and resting times totaling about thirty minutes, it's one of those entrees that is nearly effortless. If you had to have only one pork tenderloin dish to be your signature pork dish, this just might be the one.


One of the things giving the pork tenderloins their deep savory flavor are the herbs and spices. Fresh ginger, coriander, cinnamon, black pepper, fennel, rosemary, and Kosher salt come together in the best of ways to awaken your palate. The (fresh) apple cider and maple syrup not only add a subtle hint of sweetness but contribute greatly to creating moist, succulent tenderloins. 


When you think of seasonings to flavor pork, you might not necessarily think of the ones used here. But trust me, once you taste this, your appreciation of a slightly untraditional spice and pork pairing will be altered forever.


If you don't have a mortar and pestle, use a ziplock bag and rolling pin to crush the spices. You don't need to pulverize the whole seeds, you just need to break them up enough to release their flavor.


The Homemade Applesauce can be made the day or even days before. Allowing the applesauce to rest in the refrigerator only enhances its' flavor. The best thing about making a homemade applesauce is you can process it to your desired consistency. Wherever you are on the smooth to chunky applesauce continuum, you get to decide. I happen to be somewhere in the middle.


The roasting time for the pork tenderloins ranges from 20-25 minutes (less if your tenderloins are on the smaller side). Key to keeping in all of the tenderloin's juices before slicing is letting them rest (tightly covered with aluminum foil) for 10 minutes. You definitely want to cut them on the diagonal into 1/2" slices. 

While many of us have been waiting a very long time to have dinner "out", these Cider Roasted Pork Tenderloins w/ Homemade Applesauce will make you happy you decided to have dinner "in". So invite over some of the friends you are grateful to have in your life. You know, the ones who are equally grateful you are in theirs. This seemingly complex dish is seriously simple, yet impressive in flavor and presentation. In keeping with the simple theme, put together an effortless appetizer (maybe like this one), make a good seasonal salad (like this one), and make an easy dessert (like this one). Serve your favorite beverages, sit back, and enjoy some uninterrupted, quality time with friends. 

Recipe
Cider Roasted Pork Tenderloins w/ Homemade Applesauce (slight adaptation to Ina Garten's Cider Roasted Pork Tenderloin recipe in her cooking "Cooking for Jeffrey")
Serves 6-8

Ingredients
Cider Roasted Pork Tenderloins
12 ounces fresh, organic or hard cider (found in the refrigerated section of the grocery store)
1/4 cup Grade A maple syrup
3 Tablespoons Kosher salt
1 teaspoon whole fennel seeds
1 teaspoon whole black peppercorns
1/2 teaspoon ground coriander or 1/2 teaspoon coriander seeds
1/2 teaspoon ground cinnamon
1 inch piece of fresh ginger, very thinly sliced
1 1/2 Tablespoons coarsely chopped fresh rosemary

2 pork tenderloins (1 1/2 - 2 1/2 pounds each) (See Notes)
Good quality olive oil
Kosher salt and black pepper for seasoning


Directions
Cider Roasted Pork Tenderloins
1. In a large measuring glass or bowl with a spout, whisk together the apple cider, maple syrup, and Kosher salt. 
2. Using a mortar and pestle, grind the fennel, peppercorns, coriander, and cinnamon together until partially ground. Add to the cider mixture.
3. Place the tenderloins in a large one gallon ziplock bag. Pour in the marinade. Add in the sliced ginger and rosemary. Remove as much air out of the bag as possible. Seal and refrigerate the tenderloins at least eight hours but preferably overnight.
4. Preheat oven to 450 degrees (F).
5. Remove the tenderloins from the marinade. Dry them with paper towels. Place on a sheet pan. Drizzle 1-2 Tablespoons of olive oil over the tenderloins. Season with 1 teaspoons of Kosher salt and 1/2 teaspoon black pepper.
6. Roast the tenderloins for 20-25 minutes or until a meat thermometer reads 130 degrees (F). Remove from the oven, cover tightly with aluminum foil and let rest for 10 minutes. SEE NOTES.
7. Cut the tenderloins diagonally into 1/2 inch pieces. Transfer to a serving platter. Pour the pan juices over the sliced tenderloins.
8. Serve with the Homemade Applesauce.


Notes: (1) I used two 2 1/2 pound pork tenderloins. (2) Use only fresh, bottled organic, or hard cider. With the possible exception of the hard cider, use only cider found in the refrigerated section of the grocery store. (3) If you are roasting tenderloins less than two pounds each, begin checking for doneness at the 15 minute mark. (4) Instead of homemade applesauce, you could also serve the pork tenderloins with a homemade or good quality plum chutney.


Smoky Mountain National Park, Gatlinburg, Tennessee (October 2021)


Monday, November 1, 2021

Apple Butter


In late September we went apple picking for Honey Crisp apples. This year we picked not one, but two bushels of apples as they are our favorites. Other than eating them, maybe baking an apple tart or two, adding them in salads, and making homemade applesauce with them, I thought these would be the only ways we would be reaping the benefits of our harvest this year. However, after having dinner at The Appalalacian Restaurant in Sevierveille, Tennessee during a recent trip to Smoky Mountain National Park, I knew I had to use some of those apples to make one more thing. Apple Butter. As I was inspired by the cheesecake topped with sautéed apples and placed on a bed of homemade apple butter dessert we had ordered. Little did I know how easy it actually was to make. Subsequently, I also discovered many of my friends loved apple butter. I mean really loved homemade apple butter.


After getting home from a perfect week in the Smoky Mountains, I channeled my inner pioneer spirit and went on the hunt for apple butter recipes. With my fingers crossed this pursuit would be more successful than finding a bottle of Blanton's Bourbon in Kentucky was, I made the deep dive down the apple butter recipe rabbit hole. Although along the way I learned a few things. Like the fact that apple butter doesn't contain any dairy or butter. Rather the word butter is used to describe its' butter-like thick, soft consistency. One achieved after a very long, slow cooking of the apples to the point where the apples are caramelized resulting in a deep brown, highly concentrated version of applesauce. With its' flavor enhanced by the warming spices, apple butter is damned delicious whether spread on grilled or toasted bread (cinnamon raisin is my favorite choice), used to garnish a dessert (like cheesecake), spooned over some vanilla ice cream, stirring into oatmeal or yogurt, added to marinades, used as an ingredient in a cake or pie, or used as glaze. In other words, apple butter has quite the versatility of uses.


One of the most significant differences between applesauce and apple butter is the time it takes to make each of them. The cooking time for applesauce is generally under an hour, while apple butter's cooking time can range from eleven to twelve hours. Yes, you read that correctly and that wasn't a typo. Eleven to twelve hours of cooking time in a slow cooker. The investment of time making apple butter is one you won't regret. And don't let it sway you away from making it as it's relatively easy to make. Scouts honor.


Discovering the type of apples used to make apple butter is a slightly contentional one amongst apple butter purists had me beginning to second guess my apple choice. Little did I know there were some rather strong opinions about which apples to use. Ranging from using tart apples to sweet apples to even dried apples, the varieties of apples most often recommended for making apple butter were Fugi, Golden Delicious, Cortland, Braeburn, MacIntosh, Gravenstein, Granny Smith, and (yes) Honey Crisp. My apple choices would be Honey Crisps and Granny Smiths, but with a higher ratio of Honey Crisps. To peel or not to peel was yet another decision to make. Because peels can add both flavor and texture, my recipe would include the peels. And as expected, the peels broke down completely in the long, slow cooking process. 


Many apple recipes use cinnamon as the primary spice ingredient. Some call for varying amounts of nutmeg, allspice, and cloves. This recipe used all of them with cinnamon being the star spice. Apple butter is made with both brown sugar and granulated sugar. To create an even deeper brown color and greater depth of flavor, I used equal parts of light and dark brown sugar along with the granulated sugar in making this apple butter. In addition to the apples, spices, and sugars, I used two other ingredients: maple syrup and vanilla. The maple syrup was added in at the start of the cooking process, however, the vanilla wasn't added until the apples were ready to be processed.

While most apple butters have a very smooth jam like consistency, the butter's texture is one heavily influenced by personal choice. Not as chunky as applesauce and not as smooth as jam, I processed the cooked apples to a texture somewhere in between the two. 


My favorite way to eat Apple Butter is slathering it on a thick piece of grilled or toasted Cinnamon Raisin Bread. But not before spreading on some soft cream cheese or room temperature butter. Pure bliss. It is also great swirled into a bowl of hot oatmeal or some vanilla yogurt, spread on an English Muffin, used as a topping for pancakes or waffles, poured over ice cream, and paired with a cheesecake topped with sautéed apples. 

As much as I am a fan of some good quality jams and preserves, no store-bought apple butter compares to  or rather I should say is as good as this rich, warmly spiced, gorgeous, deeply flavorful homemade version. And nothing harnesses the flavors and spirit of fall more than homemade apple butter.

Recipe
Apple Butter
Makes a little more than 3 pints 

Ingredients
6 pounds of apples, cored only (5 pounds of Honey Crisp apples and 1 pound of Granny Smith apples)
1/2 cup (105g) light brown sugar
1/2 cup (105g) dark brown sugar
3/4 cup (150g) granulated sugar
3 Tablespoons maple syrup
1 Tablespoon cinnamon
1/2 teaspoon Kosher salt
1/4 teaspoon nutmeg
1/8 teaspoon ground cloves
1/8 teaspoon allspice
1 1/2 teaspoons vanilla

Directions
1. In a medium sized bowl, mix together the brown sugars, granulated sugar, maple syrup, cinnamon, Kosher salt, nutmeg, cloves, and allspice until well blended. Set aside.
2. Cut the cored, unpeeled apples into 1/2 to 3/4 inch chunks. Add all of the apples to the slow cooker.
3. Add in the sugar/spice mixture to the apples and stir until the apples are coated.
4. Cook the apple mixture on low for 9 hours. Keep covered, but stir the apple mixture every couple of hours.
5. Remove the lid of the slow cooker and continue cooking the apples uncovered for two more hours, stirring occasionally. 
6. Stir in the vanilla and let the apple mixture rest for about 10 minutes before processing in a food processor to desired consistency. Note: You will do this in batches.
7. Spoon the apple butter into half-pint or pint jars. Cover tightly with a lid. Let cook slightly before storing in the refrigerator. If kept tightly sealed and chilled it will last up to two months in the refrigerator.

Notes: (1) Weigh your apples before you remove the cores. (2) I used a food processor for processing the cooked apples, but you could also use an immersion blender.

Scenes from a 17th century village in Plimoth Patuxet Museum, Plymouth, Massachusetts (October 2021)


Saturday, October 30, 2021

Pumpkin Muffins w/ Cream Cheese Icing


I would be remiss if I let October slip away without posting a pumpkin recipe! These slightly decadent, deeply spiced Pumpkin Muffins with Cream Cheese Icing are just one of the reasons why I harbor a soft spot for the official arrival of the fall pumpkin season. Although you won't find me ordering a pumpkin spiced latte. As I much prefer to get my pumpkin fix in something baked. Like pumpkin pie, pumpkin bread, pumpkin squares, pumpkin cupcakes, pumpkin cookies, pumpkin cheesecake, but especially pumpkin muffins. 


What I love about these Pumpkin Muffins w/ Cream Cheese Icing is their texture and flavor. Slightly denser but yet almost as light as a cupcake, these muffins are satisfying completely unadorned or heavily slathered in a luscious cream cheese icing. 


The use of a combination of all-purpose flour and whole wheat flour is what contributes to their slightly dense texture. Dark brown sugar, cinnamon, allspice, nutmeg, cloves, and ginger not only create the perfect balance of sweet and spicy, but they help create a richer tasting and looking muffin. 


Unlike a pumpkin cupcake which usually requires hauling out the kitchen aid mixer, pumpkin muffins require only a couple of bowls, a whisk, and a spatula. 


Wet and dry ingredients are blended separately before they are mixed together. 


Having a slightly thick texture, the muffin batter is scooped into a cupcake tin lined with cupcake papers. Because the muffins rise perfectly, you can fill the cupcake papers to the top. 


Placing the muffins in a preheated 425 degree (F) oven and baking for five minutes (before reducing the temperature down to 350 degrees), is what helps activate the baking powder and subsequent rise. Once the oven temperature is reduced, the muffins continue to bake for additional 20-24 minutes. 


You can wait until your muffins are cooling before you make the creamiest, dreamiest Cream Cheese Icing. And while you didn't need your standing or handheld mixer to make the muffins, you will need one of them to make this luscious icing. Personally I love a high icing to 'cake or muffin' ratio. This recipe makes enough (and then some) for this to happen. Remember to let your muffins cool completely before icing them (or your icing will slide off and/or melt slightly).

Once iced place the pumpkin muffins on a platter or tray and place in the refrigerator. Once the icing has set, you can carefully wrap with plastic wrap. 


Feel free to adorn the finished cupcakes with some sprinkles or serve them 'naked'. I have made them both ways and honestly can't decide which finish I like best.

I thought the flavor of these Pumpkin Muffins was incredible the day they were baked. And it was. But the flavor on day two was even better. 


For some slightly irrational decision, I might feel a tad guilty, for about a millisecond, eating a cupcake for breakfast, but I have no such thoughts when eating a muffin in the morning. Even one topped with an icing. Which makes love these Pumpkin Muffins w/ Cream Cheese Icing even more. And if there was ever a muffin you might to eat year round (especially if you are a pumpkin lover), this would be the one. So stock up now on canned pumpkin so you can enjoy them well after the 'pumpkin' season has ended.

Recipe
Pumpkin Muffins w/ Cream Cheese Icing
Makes 12 muffins

Ingredients
Pumpkin Muffins
2 large eggs, room temperature
1 1/4 cups (260g) dark brown sugar
3/4 cup plus 1 Tablespoon canola or vegetable oil
2 Tablespoons pure maple syrup
1 1/2 teaspoons vanilla
15 ounce (425g) can of pumpkin (not pumpkin pie filling)
1 1/2 cups (198g) all-purpose flour
1/2 cup (66g) whole wheat flour (see notes)
2 teaspoons baking powder
1 slightly rounded teaspoon baking soda
1 Tablespoon cinnamon
1 teaspoon nutmeg
1/2 teaspoon ground cloves
1/2 teaspoon ground ginger
1/2 teaspoon allspice
1/2 teaspoon Kosher salt

Cream Cheese Icing
12 ounces (339g) cream cheese, room temperature or slightly softened
1 cup (226g) unsalted butter, room temperature
5 cups (600g) confectionary sugar
1 1/2 teaspoons vanilla
1/4 teaspoon cinnamon
1/2 teaspoon Kosher salt

Optional: Sprinkles

Directions
Pumpkin Muffins
1. Preheat the oven to 425 degrees (F). Place cupcake papers in the cupcake pan. Set aside.
2. In a large bowl, whisk together the eggs, dark brown sugar, canola oil, maple syrup, vanilla, and pumpkin until blended. Set aside.
3. In a medium bowl, whisk together the all-purpose flour, whole wheat flour, baking powder, baking soda, cinnamon, nutmeg, cloves, ginger, allspice and Kosher salt.
4. Add the dry ingredients into the wet ingredients. Gently whisk until blended. Do not over beat.
5. Using a large ice cream scoop, scoop the muffin batter into the cupcake papers. You will fill them to the top.
6. Place the muffin pan on a large baking sheet and insert into the oven. Bake for 5 minutes at 425 degrees (F).
7. Immediately reduce the oven temperature to 350 degrees (F) and continue baking for 20-24 minutes or until a toothpick inserted into the muffin comes out clean or maybe with only one or two crumbs.
8. Remove from the oven and place muffin pan on a cooling rack. Let the muffins cool in the pan for 8-10 minutes before removing.
9. Place the muffins on a cooling rack. Let cool completely before icing.

Cream Cheese Icing
1. In the bowl of a standing mixer, beat the butter and cream cheese together until well blended and creamy (about 3 minutes).
2. Add in the vanilla, cinnamon, and salt. Mix in.
3. In 3 to 4 additions, add in the confectionary sugar. Beat the icing until thick and creamy.
4. Use a pastry bag fitted with your favorite tip to ice the muffins. Alternately top each cupcake with a generous amount of icing and use an offset spatula to spread. Optional: Sprinkle the top of the icing with some sprinkles.
5. Place the iced pumpkin muffins on a tray. Chill the muffins in the refrigerator to let the icing set up. Once the icing has set, loosely cover the muffins to they stay fresh.

Notes: (1) Instead of using a combination of all-purpose flour and whole wheat flour, you can use only all-purpose flour. The texture of muffins made with the two flours is slightly more dense and less cupcake like.

Friday, October 22, 2021

Honey Granola aka Sheila's Granola


To say that my friend Sheila spoiled me on my recent visit to Little Compton would be an understatement. Upon arriving in the cottage, I first notice the bouquet of hydrangeas (my favorite flower) from her garden on the antique chest in the living room. On the counter in the kitchen were fresh eggs from her chickens, a great bottle of Pinot Noir, a fresh loaf of ciabatta, fresh fruit, a jar of homemade Concord Grape Jam, and bag of homemade granola. In the refrigerator was a whole rotisserie chicken, fresh bagels, English muffins, cream cheese, milk, yogurt, and red velvet cupcakes (another of my favorites). Seriously there was enough food to sustain me for weeks. I would be staying there for only five nights. Having a friend who is both generous and incredibly thoughtful is a priceless, treasured gift. Lucky for me I have some of those friends in my life. And Sheila is one of them. Never mind that we live a thousand miles apart, see each other only once every couple of years, exchange sporadic texts and Christmas presents, and keep up with one another mostly through social media. I feel as close to her today as I did the first time I had met the 'neighbor, quick to become a friend' who lived just over the stone wall of the farmhouse I was living in. And each time I come back to Little Compton to visit, Sheila has the gift of making me simultaneously feel like a pampered guest and member of the family. 

It wasn't until my last full day there did I break open the granola. It was my sustenance as I drove around Cape Cod taking photographs. I had demolished the entire bag by the time I arrive at the airport for my flight home. I really love my Homemade Nutty Granola with Dried Cherries and Cranberries, but I am now completely OBSESSED with this Honey Granola aka Sheila's Granola. There is something rather addictive about it. Which if I think about it, maybe it has something to do with the honey.

Within a day after inhaling the whole bag of granola, I texted her asking for her recipe. Having a friend who is a great cook and one willing share to her recipes is just one of the many reasons why I treasure her friendship. I had every intention of making the Honey Granola aka Sheila's Granola before I left on my trip to Smoky Mountain National Park three days after I returned home, but time got away from me. In retrospect, I am rather glad I didn't make it until I got back home. I may or may not have wanted to share it with anyone. 


When Sheila makes this Honey Granola she makes a large, double batch (she has three teenagers and a husband to feed). I cut her recipe in half as there are only two of us here (below is the halved recipe). However, even with cutting the recipe in half, it makes enough to share (and bags of this granola have already been shipped off to another treasured friend). 


Instead of old-fashioned oats, this recipe uses quick oats. I would have never guessed that. Wheat germ, whole wheat flour, Kosher salt, sliced almonds, light brown sugar, and sweetened flaked coconut are the remaining dry ingredients. Canola oil and a good quality honey are the liquid ingredients binding it all together.

Long, slow, low temperature baking is key to creating this deeply golden, flavorful, crunchy granola. Baked in a preheated 250 degree (F) oven for 2 hours (tossing every thirty minutes), the granola continues to bake in a 300 degree (F) oven for 15-20 minutes or at 250 degrees (F) for an additional 20-30 minutes. Once out of the oven, it's critical to firmly press down the hot granola down with a spatula, meat pounder, or even the bottom of a can and then let it sit for 15-20 minutes (or even up to 30 minutes) in order to create 'chunks' of granola. Note: Not all of the granola will be in chunks and that is exactly as it should be.

I drove through cranberry country while driving on the Cape. Not only did I see a cranberry bog harvest for the first time, I stopped at Makepeace Farms in Wareham, Massachusetts to buy some sweetened dried cranberries and chocolate covered cranberries. I knew when I made this granola I wanted some 'east coast' dried cranberries in it so I could vicariously be transported back to one of my happy places. And if I have could have fit one more thing in my suitcases, backpack, and carry on bag (I don't travel lightly) I would have also brought home some freshly harvested cranberries too. 


Once the granola has cooled for at least 20 minutes and is broken into chunks, you can mix in your dried cranberries. Or dried cherries or a combination of both. Sheila doesn't dried fruit to her granola because her family prefers it plain. I can attest to the fact this Honey Granola is equally delicious and addictive plain or with dried fruit mixed in to it. Once you taste a golden, crunchy, honeyed, nutty homemade granola, you will be too spoiled to ever eat a boxed granola again. And if you ask me, we all deserve to be a little bit spoiled.


The cottage I stayed in is flanked by Sheila's farm. Each morning as I walked to the outdoor shower, there were friendly sheep, a pony that I thought was horse, a goat, and a cow mourning the loss of her calves greeting me. Whether or not Sheila went above and beyond filling the cottage with all of my favorite things because she is just that kind of friend. Or because she knew I would be listening to a cow 'crying' throughout the night, I may never know. Although I really think I do. So, if by chance you are looking to show some love to and spoil your family or friends, make them this Honey Granola aka Sheila's Granola. But don't blame me if you end up creating granola eating monsters!

Recipe
Honey Granola aka Sheila's Granola

Ingredients
1 lb. 2 oz. (510g) Quick 1-Minute Oats (see notes)
3 1/2 ounces (100g) sweetened flaked coconut 
3 1/2 ounces (100g) wheat germ
1 cup (200g) light brown sugar
1 cup (132 g) whole wheat flour
1 Tablespoon Kosher salt
4 ounces (112g) sliced almonds
3/4 cup good quality honey
3/4 cup canola oil
7 3/4 ounces (221g) dried sweetened cranberries (see notes) 

Serving options: Plain, with milk, with yogurt, or over ice cream.

Directions
1. Preheat oven to 250 degrees (F).
2. In a large bowl, combine the oats, coconut, wheat germ, brown sugar, whole wheat flour, Kosher salt, and almonds. Stir to combine.
3. Add in the honey and canola oil. Stir until well blended. Note: Once you get the mixture started, use your fingers to work in the honey and oil.
4. Pour the mixture out onto a large, rimmed baking sheet.
5. Bake for 2 hours at 250 degrees (F). Turn the mixture over every 30 minutes.
6. Increase the temperature to 300 degrees (F) and continue baking for an additional 15-20 minutes, turning every 5 minutes. Alternately continue baking at 250 degrees (F) for an additional 20-30 minutes.
7. Remove from the oven and press mixture down firmly with a spatula or can. Let cool for about 15-20 minutes (could let it cool as along as 30 minutes). Then break up the granola into chunks (it won't all be chunky). 
8. Stir in the dried cranberries or whatever dried fruit(s) you desire.
9. Let the granola cool completely before packaging in cellophane bags or sealed glass containers. The granola will remain fresh for 3-4 weeks, if it lasts that long.

Notes: (1) I used the entire net weight 18 ounce container of the Quaker Oats Quick 1-Minute Oats. The actual oatmeal yield is 1 pound and 2 ounces. (2) You can add in all dried cranberries, all dried cherries or a combination of both. Or you can omit the dried fruit completely if you like. Or you can add more than the amount listed above. (3) I can't stress enough the importance of using a good quality honey when making this granola. (4) To make this granola gluten-free replace the wheat germ with flax seed and replace the whole wheat flour with 1/2 cup almond flour and 1/2 cup buckwheat flour.


Little Compton, Rhode Island, October 2021


East Coast Hydrangea, October, 2021