Showing posts sorted by relevance for query paper plane. Sort by date Show all posts

Tuesday, February 16, 2021

Paper Plane Cocktail


For only the second time in the past eleven months we had two of our friends over for dinner on Valentine's Day. To say I was excited for a 'party of four' gathering would be an understatement. The anticipation of actually making and sharing a meal with friends was akin to awaiting the arrival of a favorite childhood holiday. For five glorious hours, the reality of the world we currently live in, was temporarily suspended as life actually felt normal. Next to spending a week in Colorado this past September, I don't think my spirit ever felt happier. Who would have ever imagined a simple dinner with friends could bring the same kind of joy felt while spending time in one's 'happy' place. If I have learned anything in the past year, it has been appreciating the seemingly simple things. Sharing a meal, going on a hike, being able to run, and/or enjoying an outdoor coffee with friends are the kinds of things I once took for granted. Now they are nothing less than treasured occasions. If only there could be more of them.


Ever since our dinner plans were confirmed, I had been planning everything from the table setting, to the flowers (orchids and tulips), to the menu, to the favors (it was Valentine's Day after all), to the wine (an insane bottle of 2015 Austin Hope Paso Robles), to the 'house' cocktail. The meticulous attention to detail for this Valentine's Day dinner would rival a NASA space mission, overseeing a $200 million dollar budget, or embarking on a multi-million dollar public building project. Let's just suffice to say this pandemic has, for better or worse, changed me. A year ago I would have never even thought to make a 'signature' cocktail when having friends for dinner. Now, I could't imagine not having one. Who knows when we will be able to have our next dinner party. But one thing is for certain. The 'signature house' cocktail is definitely going to be a Paper Plane. It seriously might be one of the best cocktails to have ever been created. Says the girl who in recent years has become a Bourbon lover with enough knowledge to make her dangerous.


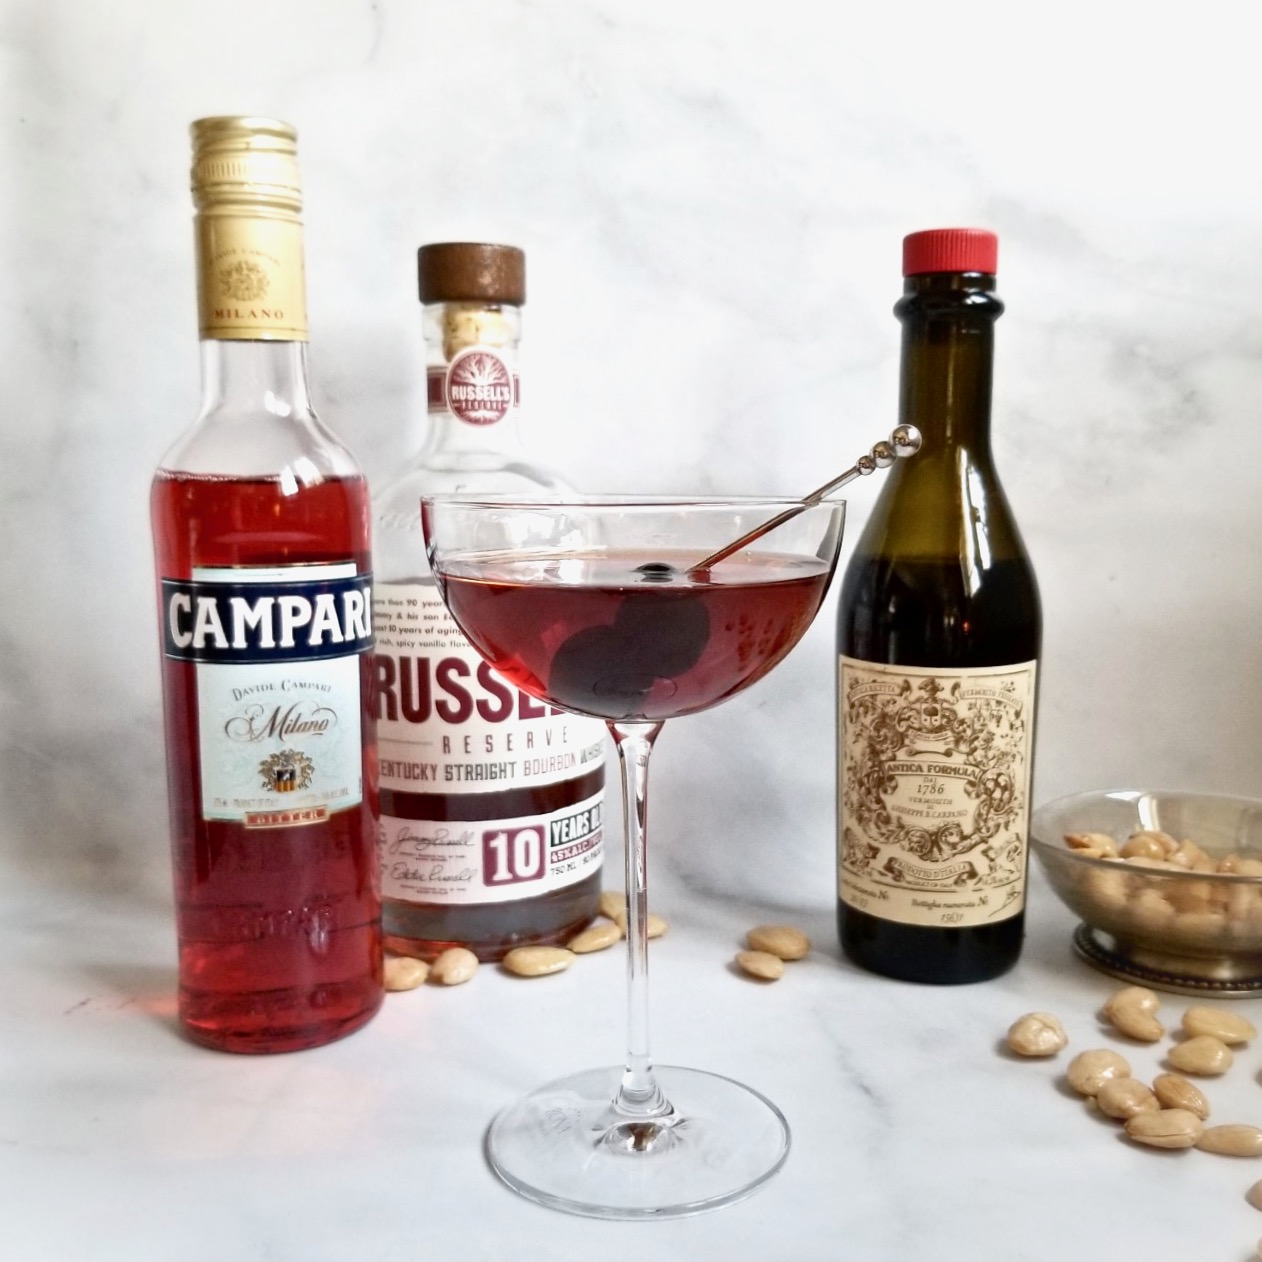
As far as cocktails go, the Paper Plane is a relative new one. First served in the Chicago bar "The Violet Hour", known for its' artisanal cocktail, it was created in either the summer of 2007 or sometime in 2008 by New York bartender Sam Ross. With a name inspired by the song "Paper Planes" by M.I.A., the Paper Plane is considered to be a slight riff on the pre-Prohibition cocktail "The Last Word" (made with equal parts cocktail made with gin, lime, maraschino liqueur and Chartreuse). The first rendition of this bright orange cocktail was made with equal parts freshly squeezed lemon juice (the citrus element), bourbon (the spirit), Amaro Nonino (the herbal element) and Campari. But the bitterness of the Campari was almost immediately replaced with the slightly sweeter Aperol. The result is a classic cocktail having a perfect balance of bitter, sour, sweet, and herbal notes. 


If have never heard of the Paper Plane cocktail before, it's possible you have not heard of the Italian liqueur Amaro Nonino either. Made from a base of grappa, Amaro Nonino includes notes of botanicals, alpine herbs, and orange peel. Flavorwise is has notes of sweet and burnt orange, cinnamon, and a hint of burnt caramel. When blended with equal parts of freshly squeezed lemon juice, bourbon, and Aperol, it is a cocktail that goes down really, really, really easy.

When making a Bourbon cocktail, save your top-shelf, sipping bourbons. Bourbons like Blanton's, Pappy Van Winkle, or Basil Hayden are best enjoyed when served neat or maybe over ice. For the Paper Plane you want to use a slightly higher proof, good quality bourbon. One with a 43-46% ABV range will add the kind of heft to this cocktail to give it the perfect amount of body. I used the 10 year old Russell's Reserve Bourbon Whiskey, a small batch bourbon distilled by Wild Turkey, to bring some caramel, spicy, slightly sweet flavor to the Paper Plane.    


Serve the Paper Plane ice cold. Add equal parts of freshly squeezed lemon juice, bourbon, amaro nonino, and aperol to a shaker. Add 10-12 ice cubes and shake energetically for just 15-20 seconds. You definitely don't want to over shake this cocktail or allow the ice to melt. Once shaken, immediately strain and pour into a coupe glass. The stemmed, shallow, broad-bowl coupe glasses are best for serving cocktails served without ice. Which makes it the best, most perfect, sexiest choice for Paper Planes. 

The originally created cocktail didn't have a garnish (unless you consider a homemade paper plane one). But adding a peel of orange ties all of the ingredients together in both a flavorful and symbolic kind of way. 


If you are looking for a delicious, refreshing Bourbon based cocktail having incredible flavor complexity, this Paper Plane is for you. If you are new to the Bourbon cocktail world or an Old-Fashioned aficionado, the Paper Plane may be the cocktail destined to open your world up to a whole new cocktail drinking experience. This quite possibly might replace the Pisco Sour and Mint Mojito as the house cocktail here. No, let's make that a definitely. Because this the Paper Plane is nothing short of cocktail perfection.

Recipe
Paper Plane Cocktail
Makes two 3 ounce cocktails or one perfect 6 ounce cocktail

Ingredients
1 1/2 ounces freshly squeezed lemon juice
1 1/2 ounces Amaro Nonino
1 1/2 ounces Aperol
1 1/2 ounces Bourbon (43-48% ABV) See Notes.
Optional garnish: Orange peel or slice of an orange

Directions
1. Add the equal amounts of lemon juice, Amaro Nonino, Aperol and Bourbon to a cocktail shaker.
2. Add in 10-15 ice cubes. Shake energetically for 15-20 seconds. Immediately strain and pour into a coupe glass.
3. Garnish with an orange peel, orange slice or homemade paper plane.
4. Sit back and savor a cocktail having incredible flavor complexity. 

Notes: (1) I used Russell's Reserve Bourbon Whiskey, (45% ALC/VOL, 90 Proof) as I am a big fan of small batch bourbons. But I would also recommend Breckinridge Bourbon Whiskey (43% ALC/VOL or 86 Proof), one having complex flavors that linger on your tongue. (2) You can find Amaro Nonino at any good quality liqueur store. A little expensive but it's worth every penny. (3) I bought these coupe glasses at Crate & Barrel.

Monday, March 22, 2021

The Boulevardier Cocktail


In times of duress I don't often say something like "I need a drink!". A piece of chocolate is often my go-to antidote to either dealing with stress or coping with disappointment. But watching March Madness basketball this weekend, specifically the Illinois vs Loyola game, I actually uttered those words. The classic, iconic Boulevardier Cocktail was supposed to the post-game celebratory drink. Instead it became the post-game recovering from shock and wallowing in defeat cocktail. For those of you have a fondness for Bourbon Whiskey, you know it has a way of putting a disappointment into perspective. So in spite of watching my Alma Mater lose, the Boulevardier Cocktail was a winner.


First invented and served during Prohibition at Harry's Bar in NYC, The Boulevardier is Bourbon's answer to the gin made Negroni. The original recipe was made with equal parts Bourbon Whiskey, Campari, and Sweet Vermouth, but over the years the ratios has been nuanced. In addition to increasing the amount Bourbon, the more traditional orange peel garnish is often replaced with a lemon twist, with a maraschino cherry or with the more decadent Luxardo cherries.


However, unlike the Paper Plane, my other favorite Bourbon based cocktail, The Boulevardier is a stirred not shaken cocktail. Unlike a shaken drink where water is often one of the added 'secret' ingredients, a stirred cocktail is the more gentler, perfect way to keep your cocktail Bourbon forward. 


Instead of the more common Martini and Rossi Sweet Vermouth, this cocktail was made with Antica Formula, the exquisite Italian Sweet Vermouth. Considered to be a standard in any highly respectable bar. In addition, to being the perfect ingredient for a refined cocktail, it has just the right amount of richness, vanilla notes, and spice to hold up to the Campari. Either an orange peel or Luxardo Cherries perfectly compliments the flavor profile of this sweet vermouth. And if you ask me, a cocktail made with Italian made Campari and Antica Formula Vermouth calls for a luxe Italian maraschino cherry as the garnish.

Serving The Boulevardier Cocktail in a coupe glass rather than a lowball glass isn't just a more elegant presentation. It encourages sipping. In other words, you don't want to rush the experience of savoring this classic cocktail.


Serve The Boulevadier with a bowl of Marcona Almonds or your favorite cocktail nuts. 


Soon we will again be able to host gatherings with family and/or friends. Which means it's time to up your Bourbon cocktail game. Boulevardier Cocktails or Paper Planes are both perfect beverages to welcome the return of a new, better normal. And speaking of game, the Boulevardier is a perfect cocktail whether your team advances in or loses during March Madness. Becausee Bourbon based cocktails make everything a little bit better. And given the choice between a piece of chocolate of a Boulevardier I think I would choose the latter.

Recipe
The Boulevardier Cocktail
Makes 1 cocktail

Ingredients
2 ounces Bourbon Whiskey (I have a fondness for Russell's Reserve.)
1 ounce Campari
1 ounce Sweet Vermouth (highly recommend the Italian Antica Formula Vermouth)
Ice Cubes
Luxardo Cherries or an Orange Twist

Optional: Marcona Almonds or your favorite mixed nuts

Directions
1. Pour the Bourbon, Campari, and Sweet Vermouth into a cocktail shaker.
2. Add a generous handful of ice cubes. Stir until the liquids are blended and chilled (no more than 30 seconds).
3. Strain into a coupe glass.
4. Garnish with either Luxardo Cherries or an Orange peel.
5. Sip and savor. And as always, drink responsibly.

Notes: (1) The original Boulevardier Cocktail was made with 1.5 ounces of Bourbon whiskey, 1.5 ounces Campari, and 1.5 ounces of Sweet Vermouth. Alternately it can be made with 3 parts Bourbon whisky, 2 parts, Campari, and 1part Sweet Vermouth. You can decide which version of The Boulevardier Cocktail is your favorite.

Wednesday, November 18, 2015

Honey and Butter Baked Pears with Cream


For those of you (like me) who don't rank pears up there as one of your favorite fruits or would rather go hungry than eat one, hang in here. But for those of you who love pears, consider this to be your lucky day. For those of you (like me) who have never understood how a bowl of fruit served at the end of a great meal comes even close to qualifying as a dessert, stay with me. But for those of you who discovered the sumptuousness of a fruit dessert years ago, add me to the list of those who envy your food genius.


Yes, I am fully aware we are entering the holiday season. Otherwise known as the weeks of overindulgence, a rationalized eating and drinking bender, and the over-consumption of all foods rich or sweet. So why in the midst of this seasonal food orgy would I even try to convince you to serve a fruit dessert at any one of the dinner parties you will be having in the weeks ahead?  No, contrary to the opinion of a few or for sure at least one, I have not yet lost my senses. Rather I have finally wised up. This newly found, better late than never, wisdom came after taking a single bite of these Honey and Butter Baked Pears with Cream.

This recipe came from one of Denmark's most respected chefs, restauranteurs, and cookbook authors Paul Cunningham. The simplicity of this baked pear dessert is rivaled only by the complexity of its' flavors. Butter, honey, fresh thyme, bay leaves, and some (sea or kosher) salt, and oh let's not forget the little more than a splash of heavy cream, turn anjou pears into a dessert worthy of going on my last meal list. 


Slow roasting the pears at a relatively high temperature caramelizes and causes them to become more deeply flavorful than you think is possible. They ascend to a level of flavorfulness reserved only for those best kind of unexpected surprises. 


There are at least ten kinds of pears, but for this dessert the anjou pear works best as it one holding up well in the baking or roasting process. I used a Green Anjou pear, however, you could also use its' red cousin, the Red Anjou even though there is a slight difference between the two of them. The Red Anjou has been described as being slightly sweeter, milder, and having with hints of sweet spice. However, the citrus notes in the Green Anjou may better compliment the thyme and bay leaves.

While shopping for the pears I came across a slightly smaller version of the Green Anjou Pear. Instead of using eight regular sized Anjou pears, I ended up using eleven of the smaller ones. Coring the pears after they have been peeled and halved lengthwise helps them to retain their beautiful shape. Using a melon baller makes this easier, but a small teaspoon would work as well.


After placing the pears on a baking sheet lined with parchment paper, each half is filled with butter, lightly seasoned with salt (I used sea salt), and sprinkled with fresh thyme leaves. Instead of using fresh bay leaves, I used dried ones. By keeping them whole and simply laying over the pear halves, the butter and honey will absorb their flavor.

Drizzle all of the pears with the honey before placing them in a preheated 400 degree (F) oven. The recipe called for a half-cup of honey, however, 1/3 cup seemed to work well. To compliment the citrus notes of the Green Anjou pears I used an Orange Blossom Honey. 


Pure magic happens in the hour these pears roast in the oven. The subtle flavors of the thyme, bay leaves, and honey are infused into the pears as they caramelize. Turning the pears every fifteen (15) minutes helps to ensure their even caramelization. The baking time for the smaller sized pears was an hour exactly. Which means it may take slightly longer for regular sized pears to become tender. 


The sheer beauty of this dessert is merely a prelude to what your palate will experience. Meant to be served as soon as or shortly after the pears come out of the oven, the taste of the warm pears served with heavy cream is nothing short of pure bliss, a most elegant end to any meal. My perception of fruit desserts has now (or should I say finally) undergone a significant paradigm shift. And all it took was a bite of these Honey and Butter Baked Pears with Cream.

I am feeling compelled to get on a plane to Amsterdam and personally thank Paul Cunningham for generously sharing this recipe. But then I would give some of you cause to believe I truly have taken leave of my senses. Deliriousness has a way of fostering impulsive, irrational thoughts.

With pears now in season, it could not be the more perfect time of the year to make this dessert. As hectic as the holidays can sometimes be (at least in my world), a relatively simple to make dessert may be the best gift you can give to yourself. And if you are looking for a perfect end to a dinner with friends, the Honey and Butter Baked Pears with Cream should make it memorable.

Recipe
Honey and Butter Baked Pears with Cream (inspired by chef Paul Cunningham's recipe as shared in the December 2015 issue of Saveur magazine)

Ingredients
11 small or 8 regular sized (green or red) Anjou pears, peeled, halved and cored
8 Tablespoons unsalted butter, cut into cubes to evenly distribute amongst pear halves
Sea salt or kosher salt
5 sprigs of thyme, plus more for garnishing
2 bay leaves (dried or fresh)
1/3 - 1/2 cup Orange Blossom Honey (recommend Savannah Bee's Orange Blossom Honey)
Heavy whipping cream (18-19% fat content), chilled creme fraiche, or double cream

Directions
1. Preheat oven to 400 degrees (F). Line a large 12'x17' or 12'x18' rimmed baking sheet with parchment paper and set aside.
2. Arrange pears cut-side up in a single layer. Top each pear half with butter and season lightly with salt.
3. Scatter thyme leaves evenly over the pear halves. Lay the bay leaves over the pears. 
4. Drizzle pears with honey.
5. Bake pears, turning every 15 minutes to coat in butter and honey. Bake until pears are tender and have caramelized (approximately 1 hour for the smaller pears. Baking time for regular sized pears may be slightly longer.)
6. Transfer baked pears to serving dish and/or place 3-4 pours in small bowls. Pour about a tablespoon of cream in each bowl. Garnish with a small spring of thyme. Serve immediately.
Notes: (1) This dessert is recommended to be served hot out of the oven. However, if there are any leftover pears, you can reheat in the microwave before serving again. (2) When lining the baking pan with parchment paper, ensure paper comes up along sides of pan as the butter and honey will seep under the paper. Not only will you lose some of that deliciousness, but it makes for a messier clean-up.


"Gratitude is the inward feeling of kindness received. Thankfulness is the natural impulse to express that feeling. Thanksgiving is the following of that impulse." Henry Van Dyke

Wednesday, May 24, 2023

Aperol Lemon Drop


I go through these phases where giving something the designation of a signature meal, a signature dessert, and/or a signature cocktail makes for an even more fun reason to invite friends over for a gathering. While they change with the seasons, the underlying intent of having these 'signature' foods and beverages is my sincerest attempt at making everyone who walks through my front (or side) door feel special, feel loved. With all my heart I believe creating beautiful, delicious meals for others is the simplest, yet most powerful gesture of unconditional love. Food and beverages have been and will always be my love language. 

So when I discover and/or create a new dish and/or new cocktail, I get giddy with excitement over the anticipation of sharing them with my favorite people. Preferably in person, but virtually too! My level of giddiness over this refreshing Aperol Lemon Drop is almost undefinable. And as much as I love an Aperol Spritz and swoon over a Paper Plane, this Aperol Lemon Drop is going to give them both a run for their money. If I had to describe it, I would say it's part Cosmopolitan, part adult slightly tart lemonade, and part irresistible. Whether you call it an Aperol Lemon Drop or Aperol Cosmopolitan, you might easily want to immediately start calling it your summer signature cocktail.

Other than having some ice cold vodka, freshly squeezed lemon juice, and Aperol, you will need some simple syrup. Make it the night before or early in the morning so it has time to chill. Homemade simple syrup is easy to make and so much better than any store bought bottled simple syrup (see notes below for directions).

In addition to how incredibly delicious it is, the Aperol Lemon Drop is one of those cocktails you can make in a big batch. Just quadruple the ingredients, pour into a pitcher, and keep chilled in the refrigerator. When your guests arrive, you are ready to hand them a glass filled with some ice of your 'signature' cocktail within minutes of their arrival! You might only need to ask if they like their 'lemon drops' sugared or unsugared. 

Cheers to getting your summer entertaining season off to a fabulous start!

Recipe
Aperol Lemon Drop
Makes 1 refreshing cocktail

Ingredients
2 ounces ice cold vodka
1 ounce freshly squeezed lemon juice
1/2 ounce Aperol
1/2 ounce simple syrup
Slice of a lemon peel

Directions
1. In a cocktail shaker, add in the vodka, lemon juice, Aperol, simple syrup and 10-12 ice cubes. Shake vigorously for 18-20 seconds.
2. Strain and pour into a coupe or martini glass. Add in 5-6 ice cubes and a slice of lemon.
3. Sip, savor, and swoon.

Notes: (1) Make the simple syrup in advance as it needs time to cool and chill. To make simple syrup add in 1 cup of water and 1 cup of granulated sugar. Cook over medium heat until the sugar dissolves. Transfer to a heatproof jar (preferably one with a tight fitting lid). Cool to room temperature and then place in the refrigerator. The simple syrup will be good for 2-3 weeks. (2) You can rim the coupe or martini glass in sugar for those who like a sugared 'lemon drop' rim.

Wednesday, October 8, 2014

Sea Salted Chocolate Dipped Macadamia Nuts


If the benefits of traveling (for pleasure) weren't so incredible, the process of unpacking and regrouping would be a fate worse than having a root canal (coming from someone who has had one). Being able to extend the zen-like benefits of a vacation stay upon returning back home is the only reward for enduring any or all of the travel hiccups that happen along the way. You know the ones, the flight delays, the sneezing passenger, the flight delays, the reclining their seat passenger sitting in front of you, and oh, did I say the flight delays? Being able to fly home first class on this recent trip (was the lucky recipient of someone's frequent flyer miles), seemed to make those hiccups almost disappear. Am still wondering how the guy sitting next to me managed to walk off the plane after having six, maybe seven gin and tonics. At least all of that alcohol stopped him from sneezing.

Some new cookbooks arrived (yippee) while I was away for a few days, giving me a plausible reason to delay unpacking my overpacked, overweight suitcase. Whether the books arrived or not, I am pretty certain I would find another reason to delay the inevitable unpacking.


Before I left for a trip to visit a very close friend in warm, sunny Arizona, I had made some Sea Salted Chocolate Dipped Macadamia Nuts. Normally dipping nuts in chocolate isn't such a big deal, possibly not even blog posting worthy. But double dipping macadamia nuts in chocolate and sprinkling them ever so lightly with sea salt just seemed to take them from being ordinary to being extraordinary chocolate dipped nuts. Thus making them blog worthy, not only for inspiration but for staying connected.


When dipping anything in chocolate, use real chocolate. When dipping macadamia nuts in chocolate, use real chocolate. There is a reason why I am being a little redundant (redundancy is usually, almost always a good thing) about real chocolate. There is what I call 'real' and 'fake' chocolates out there. There are many 'real' chocolate options: Ghirardelli (US), Callebaut (Belgium), Valrhona (France), Scharffenberger (US), and Guittard (US). And then sometimes even local chocolatiers will sell the 'real' chocolate they use. Then there are the 'fake' chocolate options, sometimes called 'candy' melts. Besides taste (and cost), there is also a difference between the two are in its' ingredients. 'Real' chocolate contains cocoa butter while the 'fake' chocolate contains vegetable fat. What I am trying to say here is that when buying chocolate to melt for dipping nuts or making candy, be a chocolate snob (the best and only kind of snob there is) and use the 'real' stuff.

Microwaving is probably the easiest way to melt chocolate (power level set on high and microwaving in 1 minute bursts, checking at each interval). The other option is melt in a bowl over a pan of simmering water, making sure the bowl doesn't touch the water. In both options, you need to have some patience. Wait until the chocolate has fully melted before stirring until smooth. 


Using a fork, single (whole) or small clusters of the macadamia nuts are dipped in the melted chocolate.


After the nuts have been dipped once, allow the chocolate to set before dipping a second time. You might think a single dipping is enough. But once you taste them double dipped, your definition of 'enough' will shift. Trust me, it will.


In order for the fine sea salt to adhere to the chocolate, work in batches. After double dipping 10 to 12 macadamia nuts or nut clusters, sprinkle on some fine sea salt, ever so lightly.

Waiting for the chocolate to set is the hardest part of making these Sea Salted Chocolate Dipped Macadamia Nuts. They could not be easier to make and could not be more decadent. Perfect for serving after dinner, perfect for giving as a gift, and perfect for rewarding yourself for any reason (like unpacking your bags). 
Recipe
Sea Salted Chocolate Dipped Macadamia Nuts

Ingredients
2 1/4 cups roasted and lightly salted macadamia nuts
1 1/4 pounds of milk chocolate discs, divided (used the milk chocolate discs from Graham's, a local chocolatier)
fine sea salt

Directions
1. Line a long baking sheet or cutting board with parchment paper. Set aside.
2. Melt 3/4 pound of milk chocolate discs (in microwave or over simmering water, either method works).
3. Dip macadamia nuts in melted chocolate and place on parchment paper. Note: Dip nuts individually or in small clusters (2-3 nuts).
4. Allow dipped nuts to dry.
5. Melt remaining 1/2 pound of milk chocolate discs (in microwave or over simmering water, either method works).
6. Dip dried macadamia nuts for a second time. 
7. Sprinkle ever so lightly with fine sea salt while nuts are still 'wet'. Note: After the second dipping of 10-12 macadamia nuts, sprinkle with sea salt. Repeat.

To work off some of the liquid calories consumed on this trip, we went on several early morning hikes. As warm as the southern Arizona sun was, the lack of humidity made hiking in 80 to 90 degree weather bearable. Stopping to take photos along the way (really so I could catch my breath), made it easier to hike in an elevation higher than the one I live in. There is something simultaneously energizing and calming about hiking in the outdoors, particularly when the views are so spectacular as well as so different than the ones I see everyday. How anyone could ever get 'enough' of taking in views of the mountains, of water, or of the desert, I could not even begin to imagine.

No matter how many times I walk or hike a trail one thing is for certain. It may retain its' familiarity but it never looks or feels the same. Sometimes the changes are as subtle as the depth of color of the sky. Sometimes they are significant as changes to the seasonal landscape. And depending on where my head is on any given day, things missed in both the landscape and in my life are often seen with such clarity I sometimes wonder out loud 'how could I have missed this?'. John Muir, the 'patron saint of the American wilderness' once said 'I only went out for a walk and finally concluded to stay out till sundown, for going out, I found, was really going in.' And I couldn't agree with him more.

Sunday, June 30, 2019

Sea Salted Rosemary Shortbread


Long before there was Coldplay, David Gray, the Dave Matthews Band, the Lumineers, Mumford and Sons, Dan and Shay, and Ed Sheeran, there were the Beatles. I was nine years old when they first landed in the states and ten years old when they flew into Chicago. In what was a rather out of the ordinary detour home after an afternoon at the home of some relatives, my father pulled into Midway Airport and parked the car. We all got out and joined the throngs of people standing at the fence waiting for a plane to arrive (those were the days before TSA and any sort of security) . How my father knew the Beatles were landing that afternoon I have no idea. Quite possibly he heard it on the radio. Why he actually dragged us all out of the car to get a glimpse of them getting off the plane is an even bigger mystery. Yet, this slightly surreal day has been permanently etched into my memory. For my tenth birthday, my cousin Billy, took me to see the Beatles movie "Help". In retrospect, I can't help but wonder if he was the only boy in the theatre as all I remember were the hundreds of other girls standing and screaming throughout the entire movie. This is not an exaggeration. To this day, all I can recall about the movie is the screaming. Whatever possessed young girls like me to scream at a movie screen is yet another one of life's mysteries. Apparently all of the screaming got out of my system by the time I went to my first real concert at age fifteen. No, it wasn't the Beatles, it was a Carole King and James Taylor concert. And that was yet another surreal experience, but I will save that story for another time.


This past weekend we went to see the movie "Yesterday". For those of you who haven't yet seen it or even read about it, all I will say about it is the music of the Beatles is a major theme (no spoilers here). But if you love the music of the Beatles, love a feel good movie, and/or are a hopeless romantic, you absolutely have to see this movie. It's been more than forty-eight hours since I left the theatre and I still can't stop smiling every time I think about it. 


There were few other things bringing a smile to my face this past weekend. One of those being this insanely delicious Sea Salted Rosemary Shortbread. Admittedly I am partial to the flavor and texture of most shortbreads. However, when I came across this recipe I hesitated in making them. Thank goodness that hesitation didn't turn into a permanent hold. Because when I tasted them, I screamed. Seems that youthful screaming at the movie theatre has been replaced with screaming when tasting something amazing. This melt in your mouth Sea Salted Rosemary Shortbread is buttery, salty, and herby. While these are technically a shortbread (due in part to the absence of eggs), I would put them into the 'cracker' category as they would send any cheese board over the top! (See notes below for other pairing suggestions.) 


The sweet, salty Sea Salted Rosemary Shortbread is made with only six ingredients. Confectionary sugar, kosher salt, flaky sea salt, all-purpose (unbleached) flour, finely minced fresh rosemary, and unsalted butter. Using a European butter made a huge difference in the shortbread's flavor and texture. In other words, these shortbread will only be scream worthy if you use an unsalted European butter. 


The dough comes together easily when using a standing mixer fitted with a paddle attachment. The texture of this dough had very similar qualities to the dough for Amy's Shortbread Cookies. It was a soft, supple, very easy to roll out dough. The original recipe called for chilling the dough for 40 minutes in the refrigerator, however, I found I could roll out the dough immediately after it all come together in the mixer. If for any reason your dough seems to soft or sticky to roll out, then wrap it in plastic wrap to give it a quick chill. 


With the Fourth of July holiday right around the corner, I decided to cut the rolled out dough into stars rather than squares. Because stars have a rather timeless quality to them, all future batches may end up staying star shaped. Use any 2" to 2 1/2" cookie cutter shape you have when rolling out the cookies to 1/4" thickness. A fluted edge cookie cutter would make for a nice finishing touch, an almost store bought look. As important as the shape of the shortbread might be, their flaky sea salt finish is even more so. One bite of this incredibly flavorful shortbread and you might find it hard not to say 'Wow'!


The shortbread bakes up in 16-18 minutes in a preheated 350 degree (F) oven. Rotating your baking sheet halfway through the baking process helps to ensure the shortbread bakes evenly. When done, the edges of the shortbread will be a beautiful light golden brown.


Seriously, this Sea Salted Rosemary Shortbread is unlike any shortbread or cracker you could buy from a bakery or grocery store. If you love the flavor of rosemary, you absolutely have to make them. Your world without this shortbread would like a world without the Beatles.


Once baked, the shortbread will be good for up to a week if stored in a tightly sealed container. Although I doubt they will last that long.


Ever since making the English Oat Crackers, I have become a big fan of homemade 'crackers' on a cheese platter. Not even the high end expensive packages of crackers come close to ones homemade. The Sea Salted Rosemary Shortbread are destined to become a cheese board necessity around here. And even though I have been told not to bring anything up to the lake this week (but who listens), I am bringing up a tin of them, along with some homemade Cherry Tomato Jam, and the fixings for the Jarlsberg Cheese Spread. Our Fourth of July pre-fireworks wine and cheese course is going to be memorably EPIC! Now I just have to decide which wine to bring to my sister the wine connoisseur. Oh, the pressure makes me just want to shout

Recipe
Sea Salted Rosemary Shortbread (an ever so slight alteration to the Salted Rosemary Shortbread recipe from Lisa Ludwinski's "Sister Pie" cookbook)

Ingredients
2 cups (260 g) unbleached all-purpose flour
1/2 teaspoon kosher salt
1 cup (2 sticks) unsalted European style butter, room temperature
1/2 cup confectionary sugar
2 scant Tablespoons finely minced fresh rosemary
Flaky Sea Salt, for finishing (I use Maldon Sea Salt)

Directions
1. Preheat oven to 350 degrees (F). Line two baking sheets with parchment paper and set aside.
2. In a medium sized bowl, whisk together the flour and salt. Set aside.
3. In the bowl of a standing mixer fitted with a paddle attachment, cream the butter, confectionary sugar, and rosemary (approximately 2-3 minutes. Use a spatula to scrape the bottom and sides of the bowl to ensure the mixture is fully blended.
4. Add in the flour mixture. Mix until combined and dough begins to come together.
5. Divide the dough in half. Place one half of the dough in the refrigerator while you roll out the other half.
6. On a lightly floured surface, roll out the dough to a 1/4" thickness. Cut into 2" shapes using a cookie cutter of choice. Sprinkle with a flaky sea salt.
7. Transfer cookie cutouts to a baking sheet. Bake for 16-18 minutes rotating the pan midway through the baking process. Shortbread is done when the edges are slightly golden. Note: Begin checking for doneness as early as 15 minutes.
8. Remove baking pan from oven. Let cookies rest on the pan for 5 minutes before transferring to a cooling rack.
9. Roll out and bake remaining dough. Cut into shapes, sprinkles with flaky sea salt and bake.
10. Store shortbread in an airtight container at room temperature for up to one week.

Notes: (1) For the best flavor and texture use an unsalted European butter. I used Kerrygold. (2) Serve shortbread on a cheese board; with some Cherry Tomato Jam and Jarlsberg Cheese Spread, or just enjoy them all by themselves. (3) The original recipe recommended wrapping the dough in plastic wrap and chilling for 40 minutes before rolling out. My dough was ready to roll out immediately. I refrigerated half of the dough while I worked with the other half.