Showing posts with label Cookies. Show all posts

Friday, March 25, 2016

Chocolate Chip Skillet Cookie


After a week of a couple of 'all my fault' driving mishaps, I was in serious need of some therapy. The unanticipated expense of a new tire took retail therapy off the table. So the next best therapeutic option had to involve dark chocolate. What was it going to take to soothe my distressed soul? One of those sold only once a year dark chocolate coconut cream eggs I had been resisting for the past month or a warm, gooey Chocolate Chip Skillet Cookie, a la mode, of course. My first thought was 'why choose, why not have both?'. Uncharacteristically I decided my crisis intervention option meant choosing only one of them. I can only attribute this significant decision-making departure to being in a cross-training delirious-induced state. Who knew cross-training could have this added benefit?

The final decision all came down to: 'Store-bought or homemade?' Homemade won. It usually does.


A million years ago I tasted a Chocolate Chip Skillet Cookie that left a permanent impression on my warm, gooey chocolate chip cookie loving palate. I managed to get the recipe but it somehow vanished from my disorganized stack of handwritten recipes. Over the years I had tried a few other recipes, but none of them were 'anything to write home about'. Not willing to give up (perseverance is my middle name), I thought it was time to go on the hunt for another one.

While embarking on another Chocolate Chip Skillet Cookie research project, I discovered none of the dozens of recipes I came across had a common butter to flour to sugar ratio. Which meant I had to choose one that seemed closest to the recipe I sort of remembered. Ultimately I went with one fully assembled and baked in a cast iron skillet. Will share my takeaways on that baking process ahead. The initial (and permanent) change I made to this untested recipe was using a combination of both dark and light brown sugars. The post cookie making change will be to slightly reduce the amount of all-purpose flour (either using a scant 1 1/2 cups or reducing it all the way down to 1 1/4 cups) to create an even gooey-er cookie.


After making Tara's Chocolate Chip Cookies, I have been forever converted into a chopped chocolate versus chocolate chip cookie fan. And at the moment Trader Joe's Pound Plus Dark Chocolate is my favorite chocolate bar to chop up. I used somewhere between 7 and 8 ounces of chopped chocolate in this skillet cookie.

So let's talk about the cookie assembly process. The inspiration recipe called for melting the butter in the cast iron skillet followed by mixing in the granulated sugar, brown sugar, and vanilla and a brief (5 minute) cooling off period before the egg was added. I waited almost 10 minutes and worked furiously to prevent the incorporated the egg from scrambling. After a sigh of it all worked out relief, I added in the dry ingredients. The batter was very, very thick (and didn't resemble at all the recipe blogger's photo). Again, I worried mixing too much would toughen the cookie dough and/or would be too thick to fully incorporate the chopped chocolate. That shouldn't have been my worry. When adding the chocolate to the batter (which was still rather warm from being in the cast iron skillet), some of the chards of chocolate began to melt. While having some of the chocolate melt is not necessarily a bad thing, having it all melt would have defeated the chocolate chip look to the cookie.


So while I think I have now found (and tweaked) a Chocolate Chip Skillet Cookie as good as or maybe even better than the one I remember, I will make a change to the assembly process. Once the butter is melted, I will pour it into a medium sized bowl before mixing in the sugars and vanilla. Mixing the butter and sugars together in a bowl versus the pan should not only help to cool the mixture down faster but should eliminate any other issues caused by the residual heat of the pan. From there, I will mix in the egg, add the dry ingredients, stir in the chopped dark chocolate, and then transfer to the more than likely still warm cast iron pan. Before placing the pan in a preheated 350 degree oven, I will lightly sprinkle the top with sea salt.


The baking time on the skillet ranges from 20-25 minutes if baking in a 10 inch (if measured across the top) cast iron baking pan. If using an 8 inch cast iron baking pan the baking time could be slightly longer. Any pan bigger than 10 inches would make for a large, crispy, not likely to be gooey cookie. And the added deliciousness factor to this cookie is its' gooeyness.


I loved the idea of having Chocolate Chip Skillet Cookie right out of the pan served communally, with everyone being able to gather round and dig in. If your family and friends aren't into that kind of dessert eating fun, well then just let them scoop their warm, gooey cookie into a bowl. Regardless of how you decide to serve it, the vanilla ice cream is a must! But for what it's worth, I would be remiss if I didn't tell you there is something incredibly magical about eating and sharing a warm chocolate chip cookie topped with melting vanilla ice cream right out of the pan with friends.


Not because this Chocolate Chip Skillet Cookie had high therapeutic value or that it was really easy to make will I make it again (my version), but because it was really, really, really delicious. So delicious, that maybe I won't be too upset if the Easter Bunny doesn't drop off one of those dark chocolate coconut eggs this year. Just to be on the safe side, I better not drive that day.

Recipe
Chocolate Chip Skillet Cookie (slight adaptation to Tasty Kitchen's Dark Chocolate Chunk Skillet Cookie)

Ingredients
1/2 cup (1 stick) unsalted butter
1/2 cup granulated sugar
1/2 cup brown sugar (equal parts of dark and light brown sugars)
2 teaspoons vanilla
1 large egg, room temperature
A scant 1 1/2 cups all-purpose flour (or consider reducing flour to 1 1/4 cups for a more gooey cookie)
1/2 teaspoon baking soda
1/2 teaspoon kosher salt
7-8 ounces of dark or semi-sweet chocolate coarsely chopped (recommend Trader Joe's Pound Plus Dark Chocolate) Note: If you don't have a scale, use a generously filled cup of chopped chocolate.
Sea Salt
Vanilla Ice Cream (Ben and Jerry's Vanilla is my favorite) and for added decadence caramel sauce

Directions
1. Preheat oven to 350 degrees (F).
2. In a 10 inch cast iron skillet, melt the butter. Pour the butter into a medium sized bowl and mix in the granulated sugar, brown sugars, and vanilla until the sugars have completely melted. Allow to cool for at least 8-10 minutes.
3. Add the egg and mix until it is fully incorporated. Note: You could use either a whisk or hand held mixer.
4. Stir in dry ingredients until fully incorporated.
5. Add chopped chocolate.
6. Transfer batter to the cast iron skillet, pressing down lightly to ensure the batter covers the entire bottom of the pan and has the same relative thickness. Sprinkle lightly with sea salt.
7. Bake for 20-25 minutes or until the top of the cookie is golden on the edges and top but still soft in the center. 
8. Scoop and serve warm in bowls with slightly softened vanilla ice cream or top with several scoops of vanilla ice cream and hand out spoons.

Notes: (1) I used Lodge's 10 inch skillet (Top dimension: 10 inches, Bottom dimension: 8 inches) in the making of this Chocolate Chip Skillet Cookie and (2) the inspiration recipe is linked in this posting, just in case you want to try your hand at making and baking the cookie all in one pan.


Scenes from the Tucson landscape.


Saturday, February 6, 2016

Peanut Butter Oatmeal Sandwich Cookies


The plan for this year's Valentine's Day, weather permitting, is to run a five mile race with some of my running group friends. It has been fourteen years since I last ran this winter road race and up until recently, thirteen years since I ran that distance. Needless to say I am not anywhere near as 'fast' (relatively speaking) as I was back then. After searching out what my finish time was all those years ago (big mistake, really big mistake), I wondered if those results belonged to a doppleganger. One not only looking like me, but also having my name. Isn't it funny how your perspective shifts as you age? Back then I considered myself a 'slow' runner. Yet, if I could run that pace again today, well I wouldn't exactly be a speed demon, but I definitely wouldn't be 'slow'. Since it is not possible to get back to that pace in a week (heck I may not get there in a year), I need to take a deep breath and remind myself or rather convince myself 'slow and steady' isn't such a bad thing. And if that doesn't work, search for a doppleganger who runs 'fast', relatively speaking.


I am now going to launch into one of those glowing, so over the top you might become a little skeptical, reviews of these Peanut Butter Oatmeal Sandwich Cookies. This cookie is worthy of so many accolades, ranging from 'the best cookie in the universe as we know it today' to 'you haven't lived a complete life until you have eaten this cookie' to 'if cookies were awarded an Oscar, it would win in every category it was nominated', I don't know which one to pick. Seriously, yes seriously, these cookies are phenomenally, insanely delicious. They are cookie perfection. And they now fall into a group of cookie recipes posted to this blog likely to lead someone into thinking they have died and gone to cookie heaven: Viennese Finger BiscuitsTara's Chocolate Chip CookiesChocolate WhoppersSugar Saucers, and Amy's Shortbread Cookies. I know, you have come across other blogs where the blogger endlessly gushes about every recipe they post or okay, maybe every other recipe.


As a result of all of this (almost) too hard to believe hype (sort of the inverse of a wolf crying one too many times), you are reluctant to drop everything and/or rush to the grocery store to make what often contains the word 'best-ever' in the recipe's narrative. If, by any chance, you are reading this blog in the middle of the night, I only hope you have a grocery store open 24/7 within 20 miles of where you reside. Because these are the real deal, the drop everything, really must make cookies. After you taste them, I am willing to bet you will never make another Peanut Butter cookie recipe again. Okay, that's enough cookie fanfare for now.


The good news is that with the exception of the Roasted Honey Peanuts, you may already have everything you need in your pantry and refrigerator to make these cookies. If by some chance you have all of the ingredients, you will only need to wait until the eggs and butter come to room temperature.

Whenever I make anything requiring room temperature eggs or butter, I always take them out of the refrigeratore the night before. While some claim there is a negligible difference in the taste/texture of cookies and/or some cakes made with room temperature egg or those made with cold eggs, there are others who disagree. I happen to agree with those advocating for room temperature eggs. Why? Because the whites and yolks of room temperature eggs combine easier and more evenly into the batter. Resultling in a much better texture (especially for cakes as room temperature eggs are better able to trap air creating a lighter texture).

The room temperature unsalted butter, light brown sugar, and granulated sugar are beaten together until light and fluffy (approximately 2-3 minutes). If using a stand mixer, use the paddle attachment. Once the butter and sugars are fully mixed together, the peanut butter and vanilla are beaten in until combined. Then those room temperature eggs are added in one at a time.


Not grinding the oats further helps to give the finished cookie a great texture. After whisking the dry ingredients together (no sifting required), they are added slowly the batter. As soon as the flour mixture is incorporated, one and a half cups of roughly chopped honey roasted peanuts are mixed in.


The dough needs to be chilled for at least two hours (or overnight) before the cookies are baked. Like Tara's Chocolate Chip Cookies, I have found forming the cookies into balls and then refrigerating them ensures that all of the cookies bake evenly. Additionally, you are not struggling to form a dough ball with hardened, chilled dough. I chilled the balls of dough for a little more than 2 hours, taking out only enough of them to put on the baking pan before putting in the oven. Note: Before placing the balls of dough in the refrigerator, press down lightly using a meat tenderizer (or you can criss-cross with a fork if you would like) and lightly sprinkle with sea salt. Tightly wrap the tray with plastic wrap before putting in the refrigerator to chill.


Further elevating these Peanut Butter Oatmeal Sandwich Cookies on the taste/texture deliciousness scale is the filling. This creamy Oreo-like filling provides the perfect contrast to the crisp, salty, peanut butter cookie.


How much filling you spread on these cookies depends on whether you are a regular or double-stuff kind of Oreo cookie eater. Using the same ice cream scoop used to form the dough balls will give you the perfect cookie to filling ratio (double-stuff style). Use a smaller ice cream scoop to create a thinner layer of filling.

There is enough batter and filling to make 25-27 sandwich cookies or 50-54 cookies. As much as I love this cookie sandwich, the cookies by themselves are so incredible, even those who don't list peanut butter cookies amongst their favorites will become converts.


The peanut butter cookie is crispy on the outside and tender on the inside. The addition of flaky sea salt, aka a cookie game changer, sprinkled on top of the cookie before they are baked further ramps up their flavor.


If ever there was such a thing as Genius Peanut Butter Oatmeal Sandwich Cookie recipe, this would be it. Think I will be making this cookies again next weekend. Not just because it is Valentine's Day and they would make a great gift, but in all likelihood I am going to need something to soothe my ego after the race.
Recipe
Peanut Butter Oatmeal Sandwich Cookies (Slight adaptation to Jose Bowen's Oatmeal Peanut Butter Cookie, Gourmet 1996 as well as to Sally's Baking Addiction Oreo Cookie Filling
Makes 25-27 sandwich cookies

Ingredients
Cookie Dough
1 1/2 cups old-fashioned oatmeal (not quick cook oats)
2 cups all-purpose flour
1 teaspoon baking powder
1 teaspoon baking soda
1 teaspoon kosher salt
1 cup unsalted butter, room temperature
1 cup light brown sugar, firmly packed
1 cup granulated sugar
1 Tablespoon vanilla
3/4 cup smooth peanut butter (recommend JIF)
2 large eggs, room temperature
1 1/2 cups honey roasted peanuts, roughly chopped in a food processor (recommend Fisher Honey Roasted Peanuts)
Flaky sea salt for finishing (recommend Maldon)

Filling
1/2 cup unsalted butter, room temperature
1/2 cup solid shortening
3 1/2 cups confectionary sugar, sifted
1 Tablespoon vanilla
1/4 teaspoon kosher salt

Directions
Cookies
1. In a large bowl, combine oatmeal, flour, baking powder, baking soda, and kosher salt. Stir to combine and set aside.
2. In a standing mixer fitted with a paddle attachment cream unsalted butter, light brown sugar, and granulated sugar until light and fluffy (approximately 2-3 minutes).
3. Beat in vanilla and peanut butter.
4. Add eggs, one at a time, beating well after each addition.
5. Gradually add oatmeal-flour mixture, mixing just until combined.
6. Mix in chopped peanuts.
7. Using an ice cream scoop, form cookie dough balls and place on a large sheet pan. Press balls down slightly using a meat tenderizer to create divots and sprinkle lightly with sea salt. Note: Can criss-cross top of the cookies using a fork instead of creating divots with the meat tenderizer.
8. Cover tightly with plastic wrap and chill for at least 2 hours or overnight.
9. Preheat oven to 325 degrees (F). Line baking sheets with parchment paper or a silpat. 
10. Place 12 cookies on a baking sheet, spacing 2 inches apart. Bake for 15-16 minutes or until just pale golden. Cool cookies on baking sheet for 5 minutes, then transfer to a rack to cool completely.

Filling
1. In a large bowl, beat butter and shortening until well blended.
2. Add salt, vanilla, and sifted confectionary sugar. Beat until smooth, thick, and creamy. Set aside. Note: Filling should be room temperature when assembling cookies. Filling can be made ahead, but remember to bring to room temperature.

Assembling
1. Using an ice cream scoop, place a dollop of the filling on the flat side of a cookie. Top with another cookie to make a sandwich.
2. Serve immediately.
Note: Cookies can be kept in a sealed container at room temperature. To extend the life of the cookie, store in the refrigerator. Cookies taste equally delicious when chilled.

Friday, December 18, 2015

Chocolate Crinkle Cookies


This week, time has gotten completely away from me. As the holidays get closer, I am absolutely convinced time is more of an illusionary concept than the absolute one described in Isaac Newton's first law of space and time. Somewhere in the recesses of my high school physics memory lie the concepts associated with Einstein's theory of relativity. But rather than getting myself tripped up explaining the technical aspects of this theory (high school was a lifetime ago) just know it asserts time happens differently depending on who we are and what we are experiencing at any given moment (e.g., time moves more quickly as we age). In years past, all of the shopping got done, presents got wrapped, packages were sent, baking kind of-sort of was finished, and the holiday meal was made and served. However, at the moment I am seriously beginning to wonder if everything on my long list will get checked off in the whirlwind week ahead. I just need time to slow down. If only that was possible.


It wasn't in my plan this week to make a 'new' cookie, let alone try to attempt to as artfully as possible capture the beginning to end baking process (just in case a rich brownie like cookie made with three kinds of chocolate, rolled in two different sugars, and finished with a sprinkling of sea salt isn't enticing enough for you). This may partially explain why I can't seem to get anything done around here. Some distractions are harder to resist than others. And these Chocolate Crinkle Cookies are the kind of distractions we should all recklessly abandon our will power and control over our time for.


Of course, the making of any new cookie means comparing multiple, similar recipes all claiming to be the BEST ever, the prettiest, the most chocolatey, and the most scrumptious. After investing even more time into the making of a new cookie (there is no such thing as doing things simply), I narrowed my options down to two. One shared by "Baked' fame cookbook authors and pastry chefs Matt Lewis and Renato Poliafito and one by Cook's Illustrated. As luck would have it, there would be some fundamental differences in the ingredients and the baking process between two recipes for a Chocolate Crinkle-like Cookie. There seemed to be some room to merge various aspects of the two of them and possibly make a nuanced contribution of my own.


The idea of using only dark brown sugar to give the cookie a 'more complex, tempered sweetness with a bitter molasses edge' to compliment the chocolate appealed to me. So instead of going with a granulated sugar/brown sugar combination in the cookie dough, I decided to go with Cook's Illustrated dark brown sugar only recommendation. The amount of espresso powder used ranged significantly between the two recipes (1 teaspoon to 4 teaspoons). I could have split the difference between the two amounts, but 1 1/2 teaspoons just made the most sense and would be enough to deepen the chocolate flavor. Both recipes used unsweetened cocoa, but one used a dark semi-sweet (60-72% cocoa) and the other used unsweetened chocolate. With several bars of Scharffen Berger 62% semi-sweet chocolate siting in the cupboard, the decision seemed to be predetermined. There were a few more ingredient differences I needed to reconcile before deciding on the assembling and baking process. Once the number of eggs to be used, how much baking powder and kosher salt to use, and whether or not to use baking soda decisions were made I was (almost) ready to start baking.


After first melting the coarsely chopped semi-sweet chocolate and butter and before combining with the espresso powder, the mixture is removed from its' heat source, mixed until the chocolate is smooth, and allowed to cool. Measuring out the remaining ingredients and getting your standing mixer ready is more than enough chocolate cooling time. Once the eggs and dark brown sugar are thoroughly mixed and the vanilla is blended in, the slightly cooled chocolate mixture is added. The sifted dry ingredients are added all at once. Adding a half cup of miniature chocolate chips to the batter was a last minute decision. While these are a somewhat optional ingredient, I will add them with rather than after the sifted flour ingredients are added to the batter as this is a very thick dough (one you don't want to dry out with over mixing). Cook's Illustrated recommended the batter simply rest for 10 minutes, whereas the Lewis/Poliafito recipe called for chilling the dough for at least 2 but up to 24 hours. The density of dough didn't seemed to call for a 2 hour chill time. Thirty (30) minutes seemed long enough as the dough had completely set up and was still able to scooped without difficulty.


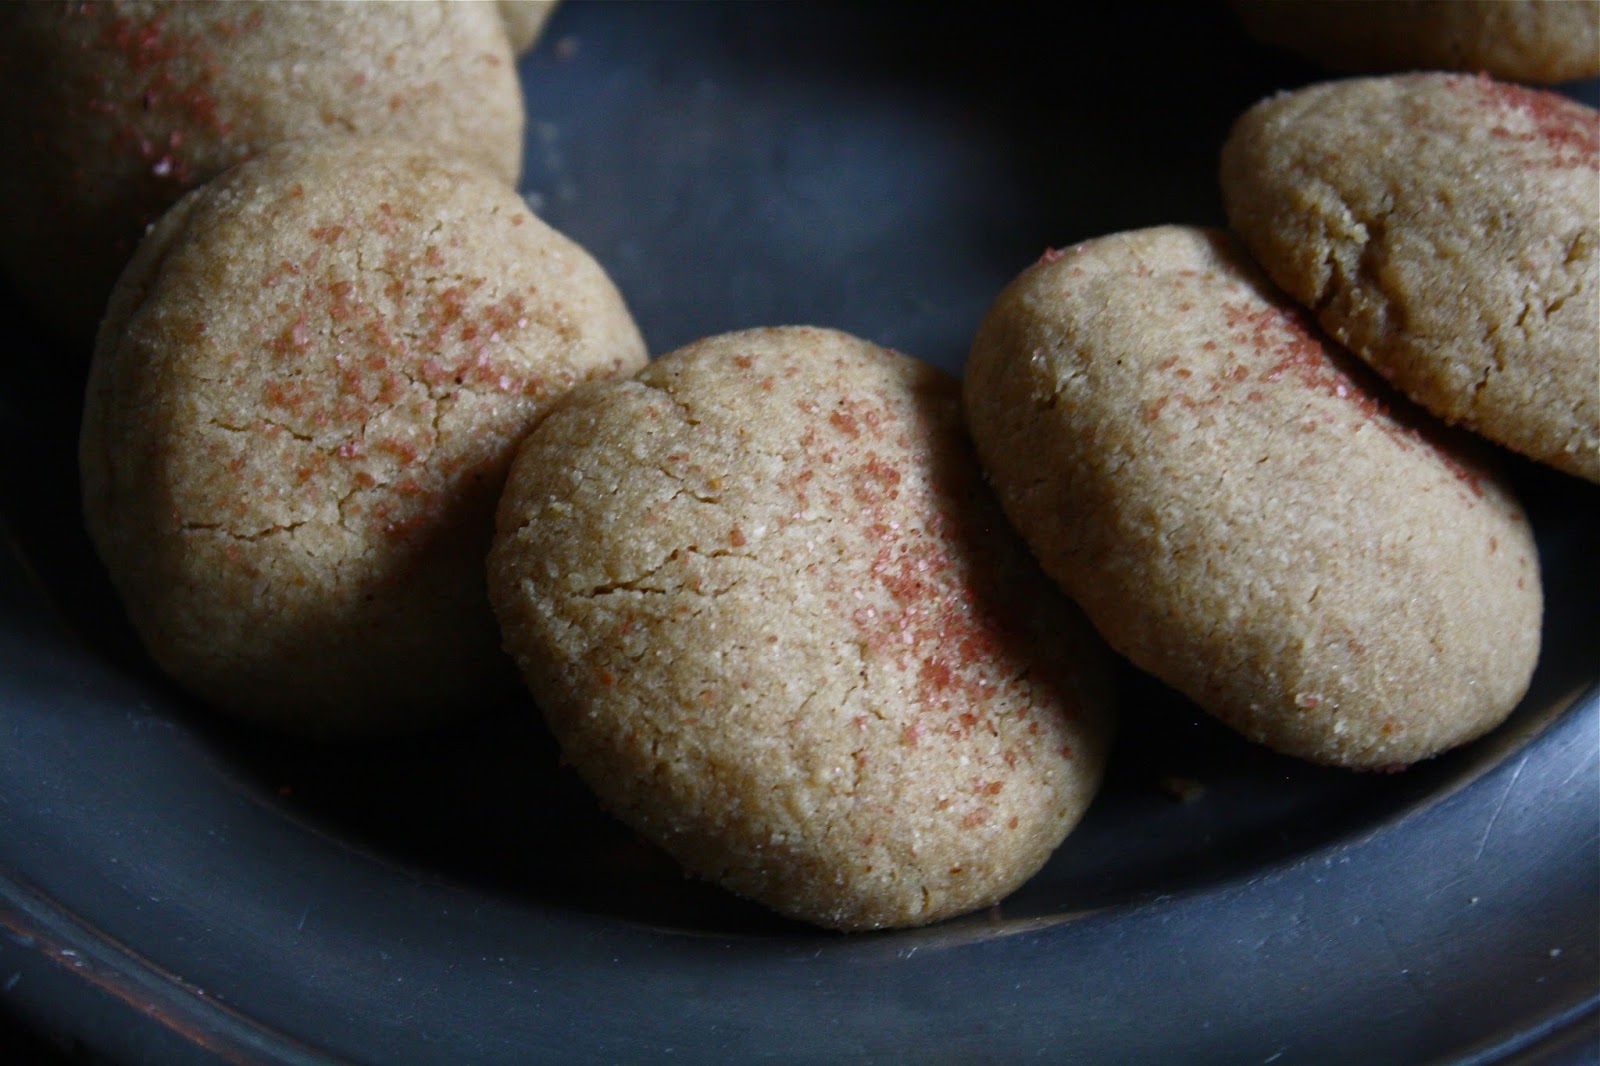
Not only did I want a cookie that tasted insanely delicious, I wanted one that if put in a Miss Cookie Universe pageant it would have the best chance of being crowned the winner. Rolling the cookies first granulated sugar and then in confectionary sugar gave these Chocolate Crinkle Cookies an almost perfect crackly finish (thank you Cook's Illustrated for this recommendation).


If there is one thing you should hope to find under the tree this year, consider asking for a set of some really good ice cream scoops (if you don't have them) as they are almost one of those must-have kitchen tools. Especially if you want your cookies uniform and don't want a pan of cookies in various stages of baked doneness.

Dough balls that are 1 to 1 1/4 inch in diameter will yield anywhere between 22 and 24 cookies. Because the cookies spread, no more than 11 or 12 cookies (spaced apart by at least 1 inch) should be put on the baking pan before going into a preheated 325 degree (F) oven.


Baking time for cookies ranges from to 12 minutes (my baking time was 12 minutes). The baking pan is rotated midway through the baking process. Testing 'dark' cookies for doneness is always a bit of a challenge. To test for this cookie's doneness, you are looking for their edges to start firming up but will still have a slightly soft center.  Because the cookies remain on the baking pan for 5 minutes after being removed from the oven, the cookie will continue to 'bake', so it is important to not over bake them.


After the Chocolate Crinkle Cookies rest on the baking sheet for 5 minutes, they are transferred to a cooling rack. Allow them to cool to room temperature before plating or putting into a container. If not eaten shortly after they are cooled, store the cookies in a tightly sealed container (they will be at their best for up to 2 days after baking). Adding a light sprinkling of sea salt is another optional recommendation. Although once you taste them with and without salt, I am pretty certain you won't see the sea salt as optional. Just be sure to sprinkle on the sea salt when you remove the baked cookies from the oven.


If you have room in your holiday baking schedule to add another cookie, add this one. If you don't have time, figure out a way to make some (sleep is over-rated). These Chocolate Crinkle Cookies are decadent, addictive, and immensely satisfying. They are also Miss Cookie Universe winning worthy as they are beautiful both the inside and out. They have also just become my new favorite cookie.


'The glory of friendship is not the outstretched hand, not the kindly smile, nor the joy of companionship; it is the spiritual inspiration that comes to one when you discover that someone else believes in you and is willing to trust you with a friendship." Ralph Waldo Emerson Of the thousands of quotes on friendship, there are some that truly speak to the significance of those relationships grounded in the enduring mutual love and respect shared between two people. This quote by Emerson is one of them. These are the words you want to share with someone you value and hope will always remain as a close friend. They are not meant to put distance or limits on a friendship, but rather serve to validate how deeply a friendship has touched not only one's heart, but one's soul. Whether you are the giver or receiver of words having such a profoundly beautiful sentiment to them, they are neither time nor situation bound. So as you think about what gifts to give to your most treasured friends this year, think about gifting them with Emerson's words as the holidays seem to lend themselves to bringing the purest of joys to those whose unselfish gift of friendship has shaped you in innumerable ways. These seemingly simple words could make this the most glorious Christmas for both of you.

Recipe
Chocolate Crinkle Cookies (inspired by the recipe for Exceedingly Chocolaty Cookies shared by Matt Lewis and Renato Poliafito)
Makes 22-24 cookies

Ingredients
1 1/4 cups (163g) all-purpose flour
2 Tablespoons (18g) unsweetened cocoa powder
7/8 teaspoon baking powder
1/4 teaspoon baking soda
1/2 teaspoon kosher salt
6 ounces (170g) dark chocolate (60-72% cacao), coarsely chopped (recommend Scharffen Berger Semi-Sweet 62% Chocolate, however use any semi-sweet or dark chocolate containing 60-72% cocao)
4 Tablespoons (57g) unsalted butter, slightly softened, cut into chunks
2 large eggs, room temperature
1 1/2 teaspoons instant espresso powder (recommend King Arthur's Espresso Powder, but most instant expresso powders should work)
3/4 cup (150g) dark brown sugar, firmly packed
2 teaspoons vanilla
1/2 cup miniature chocolate chips (optional but good)

1/2 cup confectionary sugar
1/2 cup granulated sugar
Optional: Sea salt for finishing

Directions
1. Preheat oven to 325 degrees (F). Line two baking sheets with parchment paper and set aside.
2. In a medium sized bowl, sift together flour, cocoa powder, baking powder, baking soda, and salt. Set aside. 
3. Melt butter and coarsely chopped chocolate in a heatproof bowl set over a pan of simmering water. Stir occasionally until almost completely melted and combined. Stir in espresso powder. Remove from heat and continue stirring until chocolate has completely melted. Allow to cool.
4. In the bowl of a standing mixer fitted with a paddle attachment, beat eggs and dark brown sugar together on medium speed until smooth (approximately 3-4 minutes).
5. Add vanilla and beat again until incorporated.
6. Scrape chocolate mixture into the bowl and beat until combined. Scrape down sides and bottom of the bowl.
7. Add flour mixture. Beat on low speed until flour is just incorporated but some streaks remain. Add miniature chocolate chips and finish mixing until flour is incorporated (do not overmix). Note: The miniature chocolate chips are optional, however, because this is a very thick batter, add them in with the sifted flour mixture if using.
8. Cover bowl and place in the refrigerator for 30 minutes.
9. Put granulated sugar and confectionary sugar into two separate bowl.
10. Using an ice cream scoop, form the dough into balls approximately 1 - 1 1/4 inch in diameter. 
11. Roll dough balls first in granulated sugar, then in confectionary sugar. Place on prepared baking sheet (11-12 cookies per sheet).
12. Bake, rotating baking sheets halfway through the baking time, until cookies begin to firm up along the edges (approximately 9-12 minutes). Note: Cookies will still be slightly soft in the center, giving them a moist brownie-like texture).
13. After removing cookies from the oven, lightly sprinkle with sea salt.
14. Allow cookies to rest on baking sheet for 5 minutes before transferring to a cooling rack. Allow to cool to room temperature.
15. Store cookies in a tightly sealed container. Note: Cookies are at the best if eaten within 2 days of baking.


Some of the ornaments hung on one of the Christmas trees this year.

Monday, November 30, 2015

Brown Butter Sea Salted Cookies


As much as I would have loved to host the Thanksgiving family dinner this year, I have always longed to be able to run the Turkey Trot in the town where I live. Not that running a 5k was going to mitigate all of the holiday meal calories consumed (more than likely it would take an Ironman Triathlon for that), but a fresh air, running for a good cause start to the day felt good. Really, really good. Not even having to navigate around all of the strollers, walkers, dogs on leashes, groups walking 5 across, or the threat of an overcast, waiting to rain sky could spoil this Thanksgiving first. Already I am thinking ahead to next year, trying to figure out how to manage the possibility of hosting my favorite holiday meal and running this race. Because of course, I don't want to have to choose between the two.

And for the first time in years or I should say decades, I didn't succumb to the lure of all of those Black Friday sales or the endless number of emails offering all of those savings over the Thanksgiving weekend. That too felt good, surprisingly good actually. Over the years, but even more so recently, I have come to realize there is something to be said for savoring all of the sentiments of Thanksgiving for as long as possible. At least for a couple of days more.


Earlier this fall one of my best friends texted to tell me she had just tasted the ultimate, absolute best, most incredible cookie ever. The discovery of 'the' cookies sold by the Brown Butter Cookie Company occurred while she was on vacation in California. While she was savoring every bite of these cookies, I was left wondering 'so what does such a cookie taste like?' Not that I doubted her (okay maybe I did just a teeny tiny bit), but this was a rather significant claim. Fast forward to this past week when an unexpected, most generous gift of these cookies arrived. It took me all of ten seconds to tear open the box and taste one of these cookies. In a single bite, I learned what the ultimate, absolute best, most incredible ever cookie tasted like. After devouring one of the brown butter sea salted shortbread cookies, I thought 'okay now I need to find the recipe for cookies thousands are willing to drive hours to buy and many more thousands are willing to pay $1.00 per cookie for'. So I embarked on the search for this buttery, sweet, salty shortbread cookie. The looming holiday cookie season was an added incentive.


What I found on this search were a myriad of recipes all claiming to taste just like the ones sold at the Brown Butter Cookie Company. Ha! Like most shortbread cookie recipes the most significant difference amongst them is in the flour to butter ratio. These copycat recipes were no different. To make this slightly more challenging, this cookie had a tenderness to it I didn't think could be achieved by simply using only the recommended all-purpose flour. So I had a few decisions to make before attempting to replicate them. Or rather to get as close to them as possible.


For some unscientific, unable to explain from a culinary perspective reason, 6 ounces of unsalted butter and 12 ounces of flour made sense to me. Less butter or more flour just didn't seem right. But the browning of the unsalted butter would be key to the success of this cookie. Too light and the browning flavor would get lost, too dark and it would overpower the sweetness of the cookie. After listening to the which flour to use debate going on in my head, I decided to use a whole wheat pastry flour. If it didn't work, I would have wasted a stick and half of unsalted butter, 1/2 cup of light brown sugar, a teaspoon and a half of vanilla, some sea salt, some fine red Hawaiian sea salt, and 1 1/2 cups of the whole wheat pastry flour. Hardly the end of the world in terms of ingredient cost. Culinary ego and self-esteem were a completely different matter. Okay, yes I know, this is only a cookie.


This is a two bowl cookie recipe. The flour (the whole wheat pastry flour), the sea salt, and the baking soda are mixed together in one bowl. The browned butter, light brown sugar, and vanilla are mixed in another. And then the still warm browned butter mixture is stirred into the flour mixture just until combined. At this point you want the cookie to rest for anywhere from 15 to 30 minutes (I waited 20 minutes but a 30 minute wait would not be too long) to enable the flour to fully absorb into the butter as well as to allow the dough to cool slightly. As a side note, whole wheat pastry flour is not as fine as all-purpose flour, thus it is slower to absorb the liquid (the browned butter/brown sugar mixture) due primarily to the fiber it contains.


There are two benefits to using an ice cream scoop to form the cookies. In addition to creating uniformed sized cookies, it prevents the dough from being overworked and toughened. After removing the dough from the ice cream scoop, it is quickly rolled into a ball, placed on the baking sheet, and pressed down ever so slightly before being dusted with a very light sprinkling of fine Hawaiian red sea salt. Hint: A little of this salt goes a long way.


On a silpat or parchment paper lined baking sheet, the cookies are baked fro 13-15 minutes in a preheated 325 degree (F) oven (my baking time was 15 minutes). After transferring the baked cookies to a cooling rack, allow to completely cool before eating and/or packaging. Remember wait time is all relative. 

The cookie baking stars were aligned on the day I made these Brown Butter Sea Salted Cookies. These were definitely the dense, buttery, salty, melt in your mouth balls of deliciousness I hoped they would be. If the brown butter sea salted cookies from the Brown Butter Cookie Company can sell for $1.00 a cookie, these would be worthy of a 95 cents each price tag. Seriously.


These Brown Butter Sea Salted Cookies will definitely be making an appearance on all of my Christmas cookie platters. However, don't think of them as just another holiday cookie. No, these are kind of cookie you will want to bake year round. Once you taste them you will understand why they shouldn't be relegated to a single month a year. When the cookie connoisseurs in your circle of family and friends first see this rather simple, unassuming cookie, they may look at you and wonder what all of the fuss is about. But trust me, one bite and they will find them hard to resist. This is one incredibly delectable, decadent shortbread cookie. If you haven't noticed, browned butter is one of my favorite things. Fine red Hawaiian sea salt is now added to that list.

Recipe
Brown Butter Sea Salted Cookies (inspired by a recipe shared by Jason Hill)
Makes 15 cookies

Ingredients
12 Tablespoons (6 ounces) unsalted butter
1/2 cup light brown sugar, firmly packed 
1 1/2 teaspoons vanilla
1 1/2 cups whole wheat pastry flour (recommend Bob's Red Mill Whole Wheat Pastry Flour)
1 teaspoon baking soda
1/8 teaspoon sea salt
Hawaiian red sea salt, finely ground

Directions
1. Preheat oven to 325 degrees (F). Line a 12"x18" baking pan with silpat or parchment paper.
2. In a small saucepan, melt butter over low-medium heat. Continue cooking, stirring frequently until the melted butter is a deep golden color (approximately 8-10 minutes).  Remove from stove and pour into small-medium sized bowl.
3. Add light brown sugar and vanilla, stirring until brown sugar dissolves and is fully incorporated into the browned butter. Set aside.
4. In a medium sized bowl, whisk together flour, baking soda, and sea salt.
5. Pour butter/brown sugar mixture into the dry ingredients. Fold until combined, being careful not to overmix. 
6. Allow the dough to cool slightly and rest for 15-30 minutes before shaping into balls.
7. Using an ice cream scoop first and then your hands to make one inch bowls. Place on prepared baking sheet. Press down on each cookie ever so slightly. Very lightly sprinkle with red Hawaiian sea salt.
8. Bake for 13-15 minutes. Be careful not to over bake.
8. Transfer cookies to cooling rack. Allow to cool completely before eating or packaging.