Sunday, September 29, 2013

Banana Bread

Making banana bread is a lesson in patience, unless of course you are able to find overly ripe bananas at the grocery store. No such luck when I went looking for bananas last week. The only ones I could find were my favorite eating bananas, the ones with peels still a little green. It was all I could not to eat  those bananas this past week and needed to keep reminding myself I was waiting for them to ripen. And the wait was almost 8 eight days. In my world, that is kind of long wait, for making banana bread that is. But as the old adage goes 'some things are worth the wait' (and of course wait time is all relative depending on what it is you desire) and this banana bread was definitely wait worthy.


I had been wanting to make Joanne Chang's famous banana bread recipe ever since I bought her first cookbook, Flour: Spectacular Recipes from Boston's Flour Bakery and Cafe. There was just something about the ingredients in her banana bread recipe that seemed like it would be one that was both dense and delicious. While I don't have a real gift for clairvoyance, my prediction on this banana bread was pretty accurate. Flavored with just hint of cinnamon and containing toasted walnuts, this turned out to be a moist, delicious, dense banana bread. The kind that would hold up to butter or cream cheese lathered over it. Yet, regardless if you are a banana bread purist or not, this banana bread will definitely appeal to all taste preferences.


Give me a fresh banana or a piece of great banana bread and I would be happy. For some reason those are the only two ways I will or can consume 'bananas' as I have never liked anything else containing or flavored with bananas. I would rather starve to death than eat a piece of banana cream pie, bananas foster, or banana candy. On the other hand, who knows what I would do for a fresh banana or piece of banana bread.


In almost every banana bread recipe I looked at, they called for the use of 3 to 4 ripe bananas. However, not all bananas are the same size, so there can be quite a difference in the amount of banana one is adding to a recipe. Joanne Chang was the first one to further elaborate on the quantity of bananas used in the recipe. In addition to listing 3 1/2 ripe bananas, she provided a weight measurement (340 grams) as well as the American weight conversion amount (or 1 1/2 cups mashed). From this point forward when making this banana bread, I may allow 3 to 4 bananas to ripen but I will add 1 1/2 cups mashed bananas to the batter.

In going with the 1 1/2 cups option, it ironically turned out to be 3 1/2 of the sized ripened bananas. Whether or not this was a coincidence, I am sticking with cup measurement option. Remember, the riper the bananas the easier it is to mash them. A day or two more of a wait for them to ripen will make a difference. More ripe is better than less ripe.

The dry ingredients are sifted and set aside while the wet ingredients are combined. After the sugar and eggs are mixed together in standing mixer, the canola oil is slowly added (another lesson in patience) so as not to deflate the air incorporated into the egg and sugar mixture. The mashed bananas, vanilla and some creme fraiche are added in for even more flavor.


It surprises me that not all recipes calling for nuts advise they be toasted. But whether or not they do, I always do. Toasting walnuts at 325 degrees for 10 minutes will transform the taste and flavor of the nuts as well as transform whatever it is you baking.


The dry ingredients and toasted walnuts are folded in with a spatula until the flour is fully blended in or said differently, you should not see any streaks of flour in the batter.

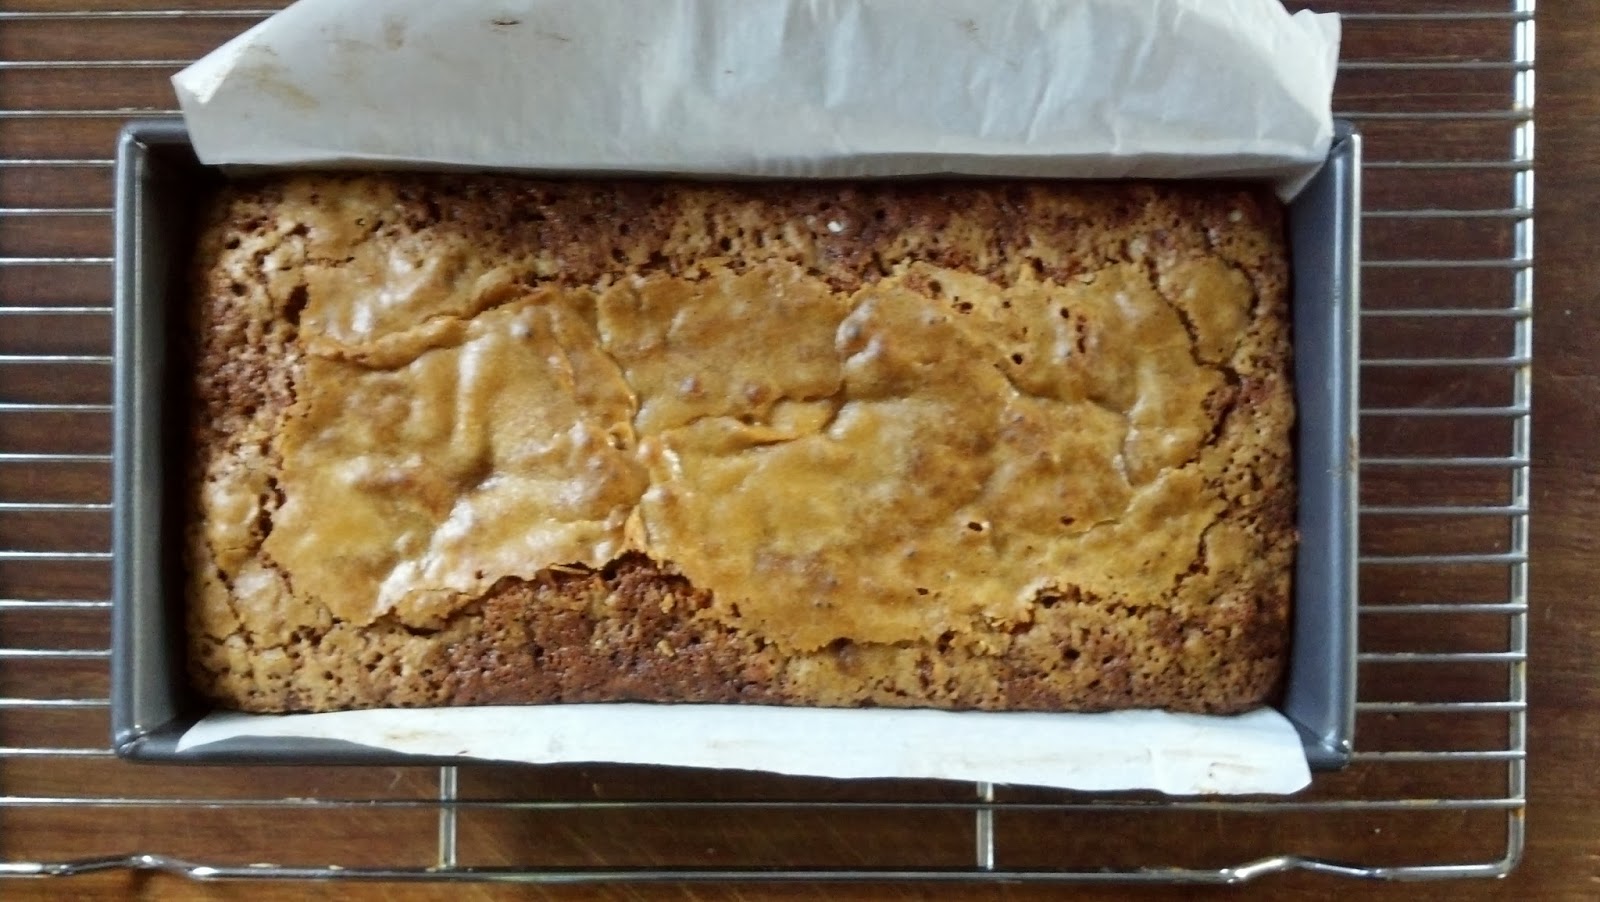
On a recent trip up to New Hampshire I bought a new loaf pan, a 10" x 5" one. The pan was christened with this banana bread recipe. Even though it was a non-stick pan, I lined it with parchment paper. The banana bread bakes for almost 75 minutes in a 325 degree oven. I began checking for doneness at 60 minutes, but knew then it needed another 15 minutes. In spite of the long baking time, this is a really moist bread. I just might use this recipe to have a banana bread throw down with my sister. We will definitely need to find some impartial judges for this throw down.


Recipe
Banana Bread (slight adaption of Flour's Famous Banana Bread recipe created by Joanne Chang)
Ingredients
1 1/2 cups all purpose flour
1 teaspoon baking soda
1/4 heaping teaspoon of Saigon cinnamon
1/2 teaspoon Kosher salt
1 cup plus 2 Tablespoons granulated sugar
2 eggs, room temperature
1/2 cup canola oil
3 1/2 very ripe bananas (or 1 1/2 cups of ripe bananas mashed)
2 Tablespoons of creme fraiche (or you could substitute sour cream)
1 teaspoon vanilla
3/4 cups walnuts, toasted and chopped

Directions
1. Preheat oven to 325 degrees.
2. Sift flour, baking soda, cinnamon and salt and set aside.
3. Using a whisk attachment in a stand mixer, beat sugar and eggs until light and fluffy (about 5 minutes).
4. Slowly add canola oil (don't pour in all at once).
5. Add mashed bananas, creme fraiche and vanilla, mixing until combined.
6. Fold in flour mixture and toasted walnuts until thoroughly combined.
7. Pour batter into prepared 10x5 inch parchment paper lined loaf pan.
8. Bake 60 to 75 minutes (check at 60 minutes, but it will most likely take the full 75 minutes). 
9. Remove from oven and cool on wire rack for 30 minutes before unmolding.
10. Wrapped in plastic wrap the bread will be good for up to 3 days (if it lasts that long) or it can be frozen for up to 2 weeks.


This past weekend I drove up to New Hampshire to meet up with my friend Anne, someone I had not seen in a very, very long time. But neither time or distance has ever affected our ability to just 'pick up where we left off'. She is also one of those rare friends where I feel incredibly comfortable talking about anything and everything with her, even things I may kept only to myself. Whether our lives intersected at some point in another lifetime (yes, I lean toward believing in past lives) or whether we share an unexplainable connection to one another, I have grown and benefited from her friendship, wisdom and insights over the years. 

There are people that come into our lives for a short time and then there are the ones who stay. For me those that remain in my life are those that I consider my true friends, the ones I trust most and the ones I am not afraid to share my thinking with (even when this thinking isn't always rational). The people who come into my life and never leave are the ones I love and care for the most, regardless of the quantity of interactions I have with them. Everyone else in my life is just an acquaintance. 

Regardless of the reason or when someone came into my life, it is longevity in a friendship that I value most. For me it can be (and has been) incredibly painful when friendships are only context dependent. I have had my share of what I call 'false friends' over the course of my lifetime, those who seek to have only their needs met in the friendship, those who become your friend because of the position you hold, or even those who take more than they give. The most significant difference between a real friend and a false friend from my perspective? Well, I guess I believe that in times of conflict or misunderstandings, the real friend is someone who works to resolve and forgive while the false friend is someone who seeks to find fault or uses the conflict to take breaks from the friendship. If I have learned anything over the course of my lifetime, it has been the realization (and reaffirmation) that honesty and trust are the most important qualities in a genuine, in it for the long run friendship. A friendship may not always be about the quantity of interactions, but it is always about the quality of them.


Wednesday, September 25, 2013

Pumpkin Loaf aka a close Starbuck's version

There are many benefits to what I call living in God's country. Two lane highways; no stop lights; no street lights so one can see the stars perfectly at night; beautiful beaches; a lighthouse; farm and roadside stands selling fresh produce, eggs, and flowers; miles of stone walls surrounding homes and farms; blue hydrangeas dominating the summer landscape; a blueberry farm; an apple orchard; two Christmas tree farms, okay you get the picture. While it is a most picturesque environment, there are a few things that are at least a 20 to 30 minute drive away. The movie theatre; the grocery store; the bookstore; and yes, Starbucks. And even though I live in Dunkin' Donuts country, the closest one is also a 20 minute drive away. Not that 20 minutes is long, but a 40 minute round trip for an iced coffee and piece of pumpkin loaf is pushing it, even for me (little miss willing to drive long distances without packing a lunch).


Not having access to Starbucks would have been no big deal a couple of years ago because I was not a coffee drinker. Probably one of a handful of people in the universe who aren't. But then I discovered iced coffee and what a memorable day that was. Such deliciousness finally came into my life. As an added benefit, my daily caffeine intake changed from the drinking of diet soda to the drinking of iced coffee. In my quest to find the best iced coffee, I tried the ones from Starbucks, Dunkin' Donuts and my local coffee shop Coastal Roasters. I liked them all but if I had to choose a favorite, I would first choose the iced coffee from Starbucks, then the one from Coastal Roasters, and last but not least, the iced coffee from Dunkin' Donuts. Living on the east coast in DD country, I would be probably be considered a heretic for this opinion.


In spite of my iced coffee preferences, no one else but Starbucks sells slices of pumpkin loaf. If I was ever to indulge myself in something 'sweet' when ordering an iced coffee, I would always order a slice of the pumpkin loaf. Their pumpkin loaf is moist, not too sweet, and just one piece is enough to satisfy my craving for pumpkin. It is probably a good thing that the closest Starbucks is a 20 minute drive away because I have been able to severely limit my intake of their pumpkin loaf. Until now that is. No, there is not a Starbucks coming closer to where I live. But I recently found (on the internet of all places) a recipe that closely resembles the Starbuck's pumpkin loaf. It isn't exactly the same, but it is pretty gosh darn close as well as pretty gosh darn delicious.


Before making this recipe I must have looked at dozens and dozens of pumpkin bread and pumpkin loaf recipes. Expectedly the proportions of ingredients varied amongst the recipes, however, it was the type and combination of spices that were the most different. Some recipes called for only cinnamon, some included nutmeg, some had a combination of several spices, and some even said they left out spices when the making the bread (yikes). But it was the combination of cinnamon, ginger, cloves, and allspice in the Starbuck's like pumpkin loaf version that appealed to my taste preferences. After making this pumpkin loaf for the first time, I loved this spice combination but might even experiment with slightly increasing the amount of spices next time. Maybe.


All of the dry ingredients are blended together in a medium sized bowl and set aside. No sifting is required, but the use of a whisk helps to evenly distribute the dry ingredients.

This pumpkin loaf only takes 3/4 of a cup of pumpkin puree. I didn't think this was going to give it enough pumpkin flavor, but after tasting it, 3/4 of cup was the perfect amount. There is more granulated sugar than brown sugar in this recipe, but it is important to note that the recipe calls for dark brown sugar which adds an ever so slight molasses flavor to the bread.


The moistness for this loaf comes from two ingredients: eggs and vegetable oil. Four large eggs and 3/4 cup of vegetable oil are two of the wet ingredients. The eggs are combined with the sugars and vanilla before the dry ingredients are added. The vegetable oil and pumpkin puree are mixed in last.


This recipe makes one 9x5 inch pumpkin loaf. Even though recipes always say to prepare a loaf pan with butter/flour, I always, always use parchment paper. It makes one's baking life so much easier. My variation to the recipe was adding the sugar and the optional pumpkin seeds to the top of the loaf for added crunch as well as doubling the amount of vanilla. The loaf bakes in a pre-heated 350 degree oven for 65-70 minutes. It is a dense loaf and checking for doneness is really, really important. If it takes longer than 70 minutes in your oven, don't worry as it is a really moist loaf. And you definitely don't want an undone moist center.

Recipe
Pumpkin Loaf aka a close Starbuck's version (slight variation to a Starbuck's like version of the recipe found on the internet)

Ingredients
1 1/2 cups all purpose flour
1 teaspoon baking soda
1/2 teaspoon baking powder
3/4 teaspoon Saigon cinnamon 
1/2 teaspoon ground ginger
1/4 teaspoon ground cloves
1/4 teaspoon ground allspice
1/2 teaspoon Kosher salt
4 large eggs, room temperature
1 teaspoon vanilla
1 cup granulated sugar plus additional for sprinkling top of loaf
1/4 cup dark brown sugar firmly packed
3/4 cup canned pumpkin puree
3/4 cup vegetable oil (I used Crisco)
Optional: about a 1/4 cup pumpkin seeds

Directions
1. Preheat oven to 350 degrees.
2. In a medium sized bowl, combine flour, baking soda, baking powder, spices, and salt using a whisk. Set aside.
3. Beat eggs, sugars and vanilla on high speed in a standing mixer (or in a bowl using a hand mixer) for at least 30 seconds.
4. Add dry ingredients to the eggs/sugar mixture and mix until combined.
5. Add pumpkin puree and vegetable oil. Mix until combined.
6. Pour batter into a parchment paper lined 9x5 loaf pan. Bake for 65 to 70+ minutes or until top of loaf is brown and a cake tester is crumb or batter free.
7. Allow the bread to cool.
8. Cut into slices using a serrated knife and enjoy.


I love the taste of pumpkin year round, not only in the fall. Because it is a little harder to find pumpkin puree in the grocery stores in the spring and summer, I have a tendency to stock up on a few cans so I make pumpkin muffins, pumpkin pie or even pumpkin bread whenever I have a pumpkin craving. Thankfully the expiration date on the canned pumpkin is about a year out from the date of purchase. I have been known to put canned goods in places where I don't always look so I have thrown out more than my share of pumpkin puree over the years. That's what happens when you sometimes buy 'too' much of any one thing. Or when you can't remember if you did or did not have some in the house. But then in my very active imagination I sometimes think there will be a run on pumpkin puree at the holiday time and if I don't buy a few more cans than I need, well I might be forced to drive 40 minutes round trip to satisfy an off season pumpkin craving.


Monday, September 23, 2013

Deviled Ham

I am feeling a little guilty. Guilty for many things, but this blog isn't going to turn into a personal confessional anytime soon. No, what I am feeling guilty about is that I have not shared any recipes other than baked goods this month. We all know that one cannot live on or serve only baked goods alone. Well maybe for a short period of time one can, but not without consequences (particularly on one's waist and thighs). So I thought that with so many opportunities for entertaining and even tailgating in the weeks ahead, maybe I would share the new Deviled Ham recipe I found and tried this past weekend. It was OMG wickedly delicious and definitely a nice change of pace to the usual suspect appetizers served during the cocktail hour.


So what exactly is deviled ham and how is it different from ham salad? The simple answer is that deviled ham is flavored with spices, like mustard, hot sauce and even cayenne pepper. Ham salad is generally flavored with pickles and can be a little sweeter. In other words, one is the evil and the other is the good version of a finely chopped ham spread. As much as I like them both, for me the sweeter ham salad works better on a sandwich for lunch while the deviled ham is a better prelude to dinner, a perfect pairing with a platter of cheeses, and goes perfect with either beer or wine. It might be fair to say that deviled ham is the trifecta of ham spreads! And if that isn't enough it is sinfully addictive (okay you knew that was coming at some point).


In spite of adding one tablespoon of hot sauce, the deviled ham really wasn't that 'hot'. The hot sauce added just the right amount of complexity and combined with the whole grain dijon mustard made for more hearty ham spread.


This is a perfect recipe to make with leftover ham, however, there is no need to worry because it can easily be made with a wedge of a fully cooked ham found in the grocery store. And it that isn't available, then you could use a high quality ham found in the deli (like Boar's Head).


The recipe in Bon Appetit called for the use of a cured, smoked and aged country ham. Because that was not available, I use a fully cooked ham (Leily's Boneless Ham) found in meat section of the grocery store where you find ham steaks and Canadian bacon. This recipe calls for ham that has already been cooked, so look carefully at the labels when you deciding on which ham to buy. Remember, you want a fully cooked ham for this recipe.

Once the ham is coarsely chopped, it is pulsed in a food processor until finely chopped. You will still be able to see small pieces of ham. Remember, don't over process as you do not want a ham paste.


The finely chopped ham is transferred to a medium sized bowl. The cream cheese, mayonnaise, mustard and hot sauce and mixed until well blended.


A freshly chopped scallion (aka green onion) and two tablespoons of freshly chopped parsley are then folded in. For me the right amount of seasoning was 3/8 teaspoon of Kosher salt and 1/8 teaspoon of finely ground pepper.


I served the Deviled Ham with sliced baguettes, however, you can use rye bread, pumpernickel, crackers, or lightly toasted baquettes. It will not matter what you decide to use because your family and friends won't remember what they put it on, they will only remember how it tasted. I am thinking that this Deviled Ham will become one of the new go-to recipes when having company as it is so easy to put together, different enough from the usual cocktail hour fare, and perfect to wet everyone's appetites for dinner.

Recipe
Deviled Ham (slight adapation of the Deviled Ham recipe printed in the October 2013 Bon Appetit)

Ingredients
8 ounces of fully cooked ham (used Leidy's Boneless Ham), coarsely chopped (if a cured, smoked Country Ham is available, recommend using)
4 ounces cream cheese, room temperature
1/4 cup mayonnaise (recommend Hellman's mayonnaise)
1 Tablespoon hot sauce (used and recommend Cholula Hot Sauce)
2 teaspoons whole grain Dijon mustard (used Maille)
1 scallion thinly sliced
2 Tablespoons fresh flat leaf parsley chopped
3/8 teaspoon Kosher salt
1/8 teaspoon finely ground pepper
Baguettes, rye bread, pumpernickel or crackers for serving

Directions
1. Place coarsely chopped ham in food processor and pulse until finely chopped (you will still see small pieces of the ham).
2. Transfer finely chopped ham to a medium sized bowl and stirlin cream cheese, hot sauce, and whole grain mustard. Mix until well combined.
3. Fold in chopped scallion and parsley.
4. Stir in salt and pepper.
5. Serve immediately or chill for several hours or overnight. Serve with freshly sliced baguettes or rye bread or on lightly grilled baguettes.

I wish there was a law that until Thanksgiving there would not be any sign of Christmas decorations in the stores. The fall seems like such a short season anyway, I so dislike having it shortened with the distraction of holiday ornaments in the stores. I just want to take in and savor the beauty, foods and decorations of autumn for as long as possible. And if that means not changing out the window boxes and urns planted with kale and pumpkins until two weeks before Christmas then so be it. Actually I wouldn't mind if Christmas was skipped one year and we just had two Thanksgivings instead.

There is something about Thanksgiving that makes it my favorite holiday. The ability to just gather with family and friends around food that makes the day so much more relaxing and comfortable (in spite of the hours spent on cooking and the early morning wake up to put the turkey in oven). Yes, it relaxing as long as everyone you invite to Thanksgiving dinner gets along with one another and no one starts talking about Christmas.

Because with Thanksgiving there is no pressure for gifts and presents (or more to the point getting the perfect gifts or presents); no feeling guilt over forgetting a gift for someone; and no mess to clean up other than the dishes. Last Thanksgiving we spent the holiday in Colorado. My sister and I managed to put together a complete meal using the utensils found in the house we rented (well I did pack my knives in my checked suitcase) and shopping in stores unfamiliar to us. If you asked everyone in my family, I think they would say this little more laid back Thanksgiving was one of their favorites. This year with a nephew in college in Colorado and a niece in college in Boston we all won't be together (collegiate swimming conflicts) as a family. But regardless of how or where we spend Thanksgiving this year, I am certain of two things. It will be memorable and there will be Deviled Ham as one of the appetizers (unless of course everyone is on Deviled Ham overload by then).

Friday, September 20, 2013

Sea Salted White Chocolate and Macadamia Nut Blondies

There seems to be a pattern to this month's blog postings. Rather than say there is a proliferation of baked good recipes, I would say there is an absence of main dishes, side dishes, appetizers and even cocktails. For those you who regularly read this blog (wishful thinking on my part), bear with me for a few weeks as the postings may still be dominated by more desserts as there have been so many things I have wanted to make with fall arriving that the making of those things appealing more to one's sweet tooth has turned into a sort of obsession (admittedly a narrow one at that). But I promise that by mid-October you will begin to wonder "when is she going to post dessert recipes?".  Finding balance has always been something I have had to work on personally and in the kitchen.

My preference for brownies has always been for the really rich dark chocolate ones which means I have often overlooked the blondee brownies (and you would think that being a blonde myself would have me leaning toward the white chocolate end of the brownie continuum). But making a shift in brownie preferences sometimes comes in the form of a push, one experienced either literally or figuratively. As soon as I opened up the new Beekman 1802 Heirloom Dessert Cookbook this week, I felt the proverbial push when I read their recipe for Blondies with White Chocolate and Macadamias. There was just something about the recipe that had me making it the morning after I bought the book. Maybe it is the browning of the butter or the use of dark brown sugar that caught my attention. Or maybe it was just the simplicity of the recipe. Whatever the reason, I am glad I was paying attention!


Because whatever the reason, these blondies were amazing. So much so I thought 'where have they been all my life?' (sort of sounds like a terrible but still makes you laugh pick-up line, doesn't it?). Of course I had to tweak this recipe just a bit. Toasting the macadamia nuts and lightly sprinkling sea salt on the top of the brownies were the only changes I made. The proportions and ingredients remained unchanged.


Don't you love when you find a recipe and you have all of the ingredients in your cabinets and refrigerator? And if you are anything like me, macadamia nuts and white chocolate chips are two of the staples in my cabinets.


Dark brown sugar adds just the slightest taste of molasses to cookies and adding to the depth of flavor. The browning of the butter too transforms the taste of these blondies. I used to not think browning the butter mattered when a recipe called for it, but you really can taste the difference between only melted and browned butter in a recipe, especially in these blondies. As soon as the butter is browned, the dark brown sugar is whisked in. Once mixed, the large egg and vanilla are whisked in.

In a separate bowl, combine the flour, baking soda and Kosher salt until blended. Add the flour mixture to the butter/sugar mixture and stir until combined. The chocolate chips and chopped macadamia nuts are stirred in resulting in a very thick batter.


Using a spatula, scrape mixture into the prepared pan. Using an offset spatula, even out the batter. Lightly sprinkle the top with sea salt. I know I am sea salt obsessed lately. But it is such a flavor booster with chocolate, I just can't resist adding it.


The blondies are baked at 350 degrees for at least 25 minutes or until set around the edges. When testing with a toothpick (in the center), moist crumbs may be attached. Recommend you check for doneness at 20 minutes.


Allow the blondies to cool and then cut into the size bars of your liking. I cut mine into 2x3 inch rectangles. The 7x10 pan yielded 9 blondies. An 8x8 pan will yield up to 12 blondies.

Recipe
Sea Salted White Chocolate and Macadamia Nut Blondies (slightly adapted recipe from The Beekman 1802 Heirloom Dessert Cookbook written by Brent Ridge and Josh Kilmer-Purcell and Sandy Gluck)

Ingredients
8 Tablespoons room temperature unsalted butter
3/4 cup dark brown sugar, firmly packed
1 large egg, room temperature
1 teaspoon vanilla extract (recommend Nielsen-Massey Madagascar Bourbon Pure Vanilla Extract)
1 cup all purpose flour
1/2 teaspoon baking soda
1/2 teaspoon Kosher salt
1/2 cup macadamia nuts, toasted and coarsely chopped)
1/2 cup white chocolate chips (used Ghiradelli)
Sea salt

Directions
1. Preheat oven to 300 degrees. Arrange macadamia nuts on a rimmed baking sheet and place in oven 7-10 minutes or until lightly browned. Remove from oven, cool, chop and set aside.
2. Increase oven temperature to 350 degrees.
3. Prepare an 8x8 inch baking pan (I used a 7x10) by lining with parchment paper and lightly buttering and flouring the paper and sides of pan.
4. In a small pan (skillet), melt butter over medium heat. Cook until butter gets foamy, foam subsides leaving the butter brown in spots (about 2-3 minutes).
5. Pour butter into a bowl and immediately add brown sugar. Stir until sugar is melted.
6. Whisk in the large egg and vanilla.
7. After mixing the flour, baking soda and salt in a separate bowl, add to the butter/sugar mixture and stir.
8. Fold in nuts and chocolate chips.
9. Pour batter in prepared pan. Using an offset spatula even out the batter. Lightly sprinkle with sea salt.
10. Bake for 25 minutes or until set around the edges. When testing with a toothpick, there will be some moist crumbs attached.
11. Cool in pan. Cut into 9 to 12 pieces, depending on which sized pan you are using. Or feel free to cut into smaller bites.


Most of us all have celebrations and events that we hold sacred in our lives. Holidays, anniversaries, significant milestone dates and birthdays are just a few of them. Whether these events are significant to us or to those important to us, so many memories come out of these celebrations. Sometimes they are really good memories (the ones you still talk about years, even decades later) and sometimes they aren't (the ones you would like to forget, but still remember years, even decades later). And with all of the social media options available to us today, it makes it so easy these days to give a quick important day shout out to let someone know you are thinking about them. You know how good it feels when you meet someone and they remember your name, well can you imagine how good you make someone feel when you remember an important day or event?

I think no matter how old we get, a card, a phone call, an email, a tweet, an instagram, or a Facebook message from a friend on our birthday always seems to add to the joyfulness and memorableness of the day. There is something about being remembered that just feels really, really good. And whether you are spending the day alone or surrounded by family and friends, being remembered matters. Sometimes its' even better than receiving a tangible gift (and yes those can be nice too). But there is something about being forgotten by a friend (or someone who you thought was a friend) that feels, well, not so good. Not end of the world not so good, but just a simple not so good. We all get just one day a year to celebrate who we are, what we give to others, and what we hope to give in the year ahead. If remembering strengthens connections and friendships (and even trust), what does belated remembering do? Guess it all depends on if the friendship matters.


Tuesday, September 17, 2013

Plum and Raspberry Cobbler

The month of September is moving too fast for me. Between having a dear friend visit for several days, taking a drive to the Berkshires, and visiting my niece at college, my days and nights have been busy. While I have been cooking, I am now having to learn how to adjust the light for photos as the changes in the light coming into through the windows is causing havoc on my photos. As a result, I haven't been posting everything I have been making. So forgive me now as this posting does not contain as many photos, including what I think is sometimes a good final photo. I am hoping that rather than eating with your eyes this time, you might be inspired to eat after reading words. Okay, self-imposed pressure is on.


Speaking of eating words, I am going to have to eat some of the words I shared with you before. I went on and on how adamant I was about only liking crisps, not cobblers. Well I must now share (or actually confess) that I was wrong in thinking that a crisp topping would never compare to a cobbler topping. Because after eating this plum and raspberry cobbler I have become a cobbler convert. While I still love crisps, I now love cobblers. Or at least I love this cobbler so much so, that I think I might turn the blueberry crisp into a blueberry cobbler as the topping of this cobbler is, as they say out east, wicked awesome. Maybe I was so strong in my opinion (here comes the rationalization) because I had not found a cobbler topping that I liked. Whatever the reason for my narrow view of baked fruit desserts, I am happy to say that my liking repertoire is now permanently expanded.


Before making this plum and raspberry cobbler, I don't recall ever eating a fruit dessert with this combination of fruits before. Amazingly, these two fruits go incredibly well together. The tartness of the raspberries and the sweetness of the plums are an absolutely perfect combination.


The filling in this cobbler is dominated by fruit. Seven plums (I used black plums) and one pint of raspberries are combined with only 1/4 cup of granulated sugar and 2 Tablespoons of unsalted butter along with kosher salt and cinnamon. The plums are cut into 1/4 inch thick wedges, skins left on.


The filling mixture is cooked for about 6 to 8 minutes or until the plums are tender and begin to release some of their juices. The raspberries melt into the mixture resulting in a beautiful red purple fruit mixture. The cooked fruit can be set aside or put into the prepared ceramic baking dish (ramekins or baking dish) of your choice. The first time I made the cobbler I used ramekins which made them perfect for individual servings. The second time I used a baking dish as I was going to a gathering of 8 people.  Either way you make this cobbler the presentation is really beautiful.


I have now made this cobbler twice. The first time I made the topping in the food processor, the second time I used both the food processor and a wooden spoon. The next time I make it, I will stay with the use of both the food processor and the wooden spoon as the texture of the dough is so much better when I mix in the whipping cream with a wooden spoon. Depending on the humidity you may use as little as one cup of whipping cream or a little more than 1 1/4 cups of whipping cream. The topping should be moistened with clumps. If you stir until smooth, you have taken the dough too far.

Once the topping is made, you top with tablespoons of the dough until the entire surface is covered. Sprinkle the top with granulated sugar (used about 1 Tablespoon of sugar). The cobbler is baked in a hot 425 degree pre-heated oven for 25 to 35 minutes. Check your cobbler after 25 minutes. The top should be golden brown the fruit filling will be bubbling. Important Note: Whether using a baking dish or ramekins, place on a baking sheet or you will have fruit filling spilling onto your oven (this would be mess avoidance advice).

Served with vanilla ice cream this is a perfect end of summer, fall or even winter dessert. The flavor of the topping combined with the fruit filling is comfort food at its' best. And if you need any further convincing this a dessert worth making, I had brought this cobbler to a dinner party and everyone was scraping their bowls with their spoons (a sure sign that it satisfied, even those who might even have been crisp preferrers!).

Recipe
Plum and Raspberry Cobbler (slight adjustment to recipe shared by Kate Jennings in Yankee Magazine)

Ingredients
For the filling:
7 large, ripe black or red plums cut into 1/4 inch thick wedges
1 pint fresh raspberries
1/4 cup granulated sugar
2 Tablespoons unsalted butter
1/2 teaspoon ground cinnamon
1/4 teaspoon Kosher salt

For the topping:
1 1/2 cups all purpose flour
1/2 cup fine to medium white cornmeal (recommend Kenyon's Grist Mill cornmeal) 
1/3 cup granulated sugar, plus additional for sprinkling on top before baking
1 Tablespoon baking powder
1/2 teaspoon baking soda
1 teaspoon Kosher salt
1/2 heaping teaspoon ground cinnamon (recommend Saigon cinnamon)
1/2 teaspoon ground ginger
4 Tablespoons, cold unsalted butter cut into cubes
1 to 1/4 cups heavy whipping cream

Directions
1. Preheat oven to 425 degrees F. Prepare either a 9" x 12" baking dish or 6 to 8 ramekins (6 to 8 ounce size)
2. In a medium sized heavy saucepan, stir together fruit, sugar, butter, cinnamon and salt until the plums are tender and releasing their juices, about 6 to 8 minutes. Set aside.
3. In a food processor, combine flour, cornmeal, sugar, baking powder, baking sosa, salt, cinnamon and ginger. Mix to combined.
4. Add butter and process until mostly blended with some pea sized pieces still remaining. Transfer to a large bowl.
5. Add in 1 cup of heavy whipping cream and stir with wooden spoon until evenly moistened, lumps will remain.
6. Pour fruit into baking dish or prepared ramekins. Top generously with dough and sprinkle with granulated sugar before putting in oven.
7. Bake 25 to 35 minutes or until topping is golden brown and fruit is bubbling.
8. Allow to sit for at least 10 minutes before serving. Serve with softened vanilla ice-cream.


In the last week I have been to Newport, Maine (Kennebunkport), Martha's Vineyard and the Berkshires (Lenox, Stockbridge and Great Barrington). Of all of those places, I had never before been to the Berkshires. And having gone just once, I wondered why I waited so long to go. Even without seeing the burst of fall colors in the landscape, I fell in love with the Berkshires from the moment I saw the simple sign on the highway that said "The Berkshire". It certainly helped that the day I was there the sky was an incredible blue, it was sunny and in the 60's. My first stop was The Mount, the home and gardens of Edith Wharton. Because I wanted to take in as much of the Berkshires as a day trip would allow, I only spent 90 minutes at The Mount. I could have stayed hours walking the gardens, going through the house, and taking photos.

For a mansion, the house feels so welcoming and so much less 'pretentious' than the mansions in Newport. Don't get me wrong, I love the mansions in Newport, but The Mount, well it is a house that felt like a 'home'. As beautiful as the home is, it was the gardens that were absolutely spectacular. It would be an understatement to say that I found them mesmerizing. And in spite of the formality and grandeur of the gardens, there was such a sense of peace and inspiration in them. While I know that sounds like an oxymoron, but somehow the sense of design, proportion and elegance all worked in harmony with one another.

There was barely a wisp of change to the color of the leaves in the Berskshires, so in the next several weeks I will venture out there again. This time I will allow myself several hours in the gardens so I can attempt to capture its' beauty with my camera. And if either a cobbler or the Berkshires were not on your bucket list, you should seriously consider adding them. And sooner rather than later. Both are comfort 'foods' for the soul.