Sunday, February 9, 2020

Garlic Thyme Roasted Smashed Potatoes


In spite of these sumptuous Garlic Thyme Roasted Smashed Potatoes qualifying as one of those non-recipes, you will find a plethora of recipes for roasted smashed potatoes by simply doing a Google search. But hang on for a second and stay here for awhile. You may have just landed on the recipe for the most perfect roasted smashed potatoes. But if, after reading through the recipe you feel compelled to go out on a down the rabbit hole hunt, then so be it. I have a feeling you might find yourself returning back to the place where you started. Here! A couple of weeks ago I had a similar experience of going on a different kind of search. One for a VRBO in Vancouver. In August one of my friends and I are running the Seawheeze half-marathon. The list of the things we were seeking in a rental was, what you might say, on the 'rather long' side.  But definitely not to be confused with on the high-maintenance side. We wanted a property with two bedrooms, two bathrooms, a balcony, comfy looking furniture, a view, access to a pool and whirlpool, a great location/neighborhood, even better property ratings, and reasonably priced. We weren't asking for much, right? It didn't take long for us to learn there was no such thing as 'reasonably priced' in Vancouver. Whatever that is supposed to mean these days. We had quickly dismissed the first property we looked at. It had everything on our list but we thought it's rental cost fell into the 'too much' category. So we kept searching. Not surprisingly, we ended up ultimately returning to and booking the first place we had looked at as it turned out to be THE 'best option'. It had everything we had hoped to find wth the exception of that 'reasonable price' expectation. Funny how one's opinions shift with a bit of a reality 'price' check education. The other lesson learned. Sometimes time spent on searching leads you back to where you started.


If it means I have to go on a diet of potatoes for the next six months to pay for this once in a lifetime chance to run a Lululemon race (because who knows how many more half-marathons this aging body can endure), then let it be these Garlic Thyme Roasted Smashed Potatoes. With or without the sour cream and ketchup.

If you have never tasted roasted smashed potatoes before, you have been missing out on a head spinning experience of fluffy, crispy bites of deliciousness. They happen to be SO much better than a baked potato. And even better they are so much healthier than french fries. 


In part because they are so much more versatile than either of those potato options. Garlic Thyme Roasted Smashed Potatoes would make for a great, hearty appetizer, work as a perfect side dish to any number of entrees, or could be your lunch or dinner. 


One of the keys to the swoonworthiness of this dish are the potatoes. Baby Yukon Gold potatoes will create the most tender, creamiest, crispiest roasted smashed potatoes. First cooked in a pot of water until tender, the roasting process then transforms these simple potatoes into the most heavenly bites of deliciousness. We are talking borderline addicting here.


Brushing olive oil onto the smashed potatoes is what helps them to crisp up roasting in a preheated 450 degree (F) oven. Adding finely minced garlic to the oil and topping them with some fresh thyme adds another layer of flavor. If you want an even more herb-y roasted smashed potato, mix some finely chopped rosemary into the olive oil along with the garlic and then top with the fresh sprigs of thyme.


Liberally brushing olive oil on your baking sheet will help to crisp up the bottoms of the potatoes as well as prevent them from sticking to the pan. 


The smashed potatoes roast in the oven for 25-30 minutes or until they are golden brown and crispy around the edges. And oh, the aroma these Garlic Thyme Roasted Smashed Potatoes created in your kitchen is beyond intoxicating.


Serve them on a large platter with sides of sour cream and ketchup, then sit back and watch them disappear.


Once you taste these mouthwatering, scrumptious Garlic Thyme Roasted Smashed Potatoes, they are destined to become your new favorite way to make, eat, and enjoy potatoes.

For those of you who are following a Whole 30 diet, the good news is these Garlic Thyme Roasted Smashed Potatoes are allowed! For those of you who love french fries but are trying to avoid or limit your intake of fried foods, you may never eat another one after you taste these! And for those of you who like to splurge on vacations or destination races without breaking your discretionary fund budgets, add these Garlic Thyme Roasted Smashed Potatoes to your life! Both your taste buds and pocketbook will thank you. But for those of you who just love to serve beautiful, delicious food to your family and friends, you absolutely have to make these potatoes. 

Recipe
Garlic Thyme Roasted Smashed Potatoes
Serves 4-6

Ingredients
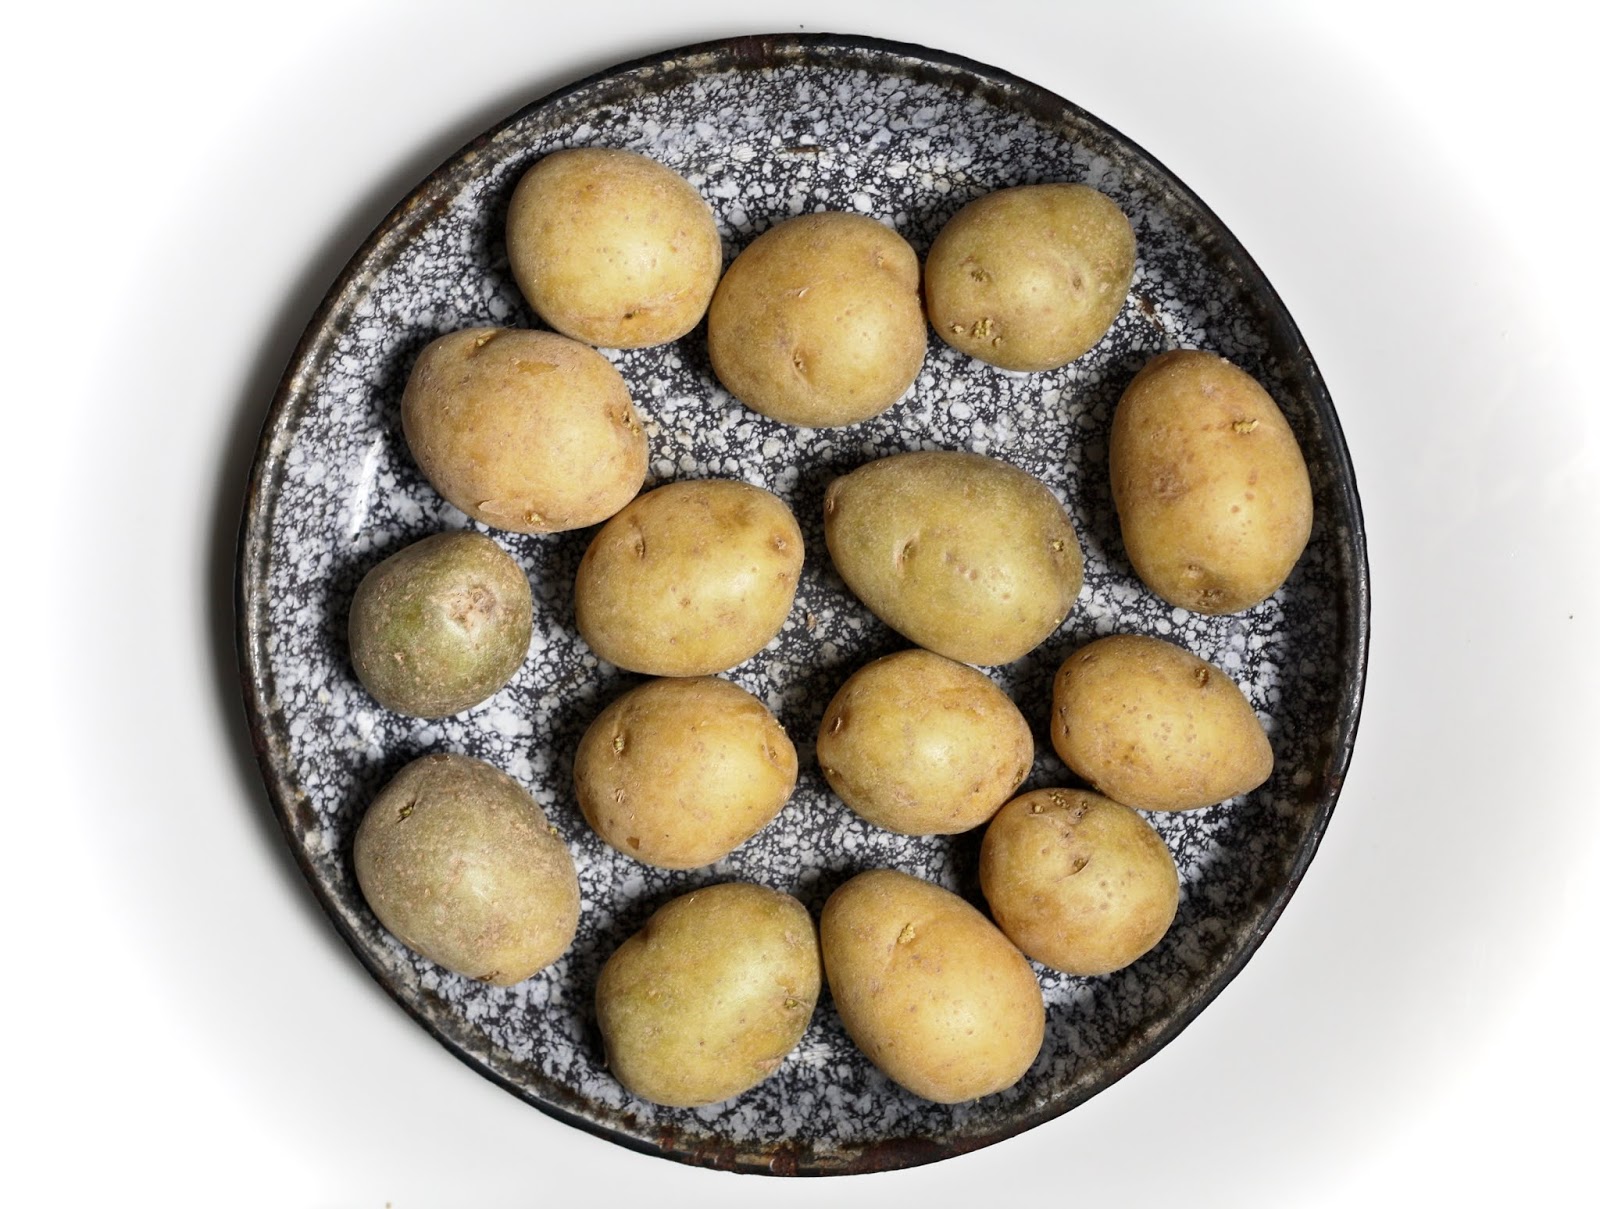
1 1/2 pounds (680 g) baby Yukon Gold potatoes (about 15-16 potatoes)
2 teaspoons kosher salt
1/3 cup plus 2 Tablespoons extra-virgin olive oil, divided
2-3 large cloves of garlic, finely minced
Flaky Sea Salt
Freshly ground black pepper
Sprigs of fresh thyme
Sour cream and/or ketchup

Optional: Freshly chopped fresh rosemary

Directions
1. In a medium sized pot filled with water and two teaspoons of kosher salt, add the potatoes. Over high heat bring the water to a boil, then reduce the heat to low-simmer and continue cooking the potatoes until knife tender. Approximately 20-25 minutes of cooking time. Note: Be careful to not under or overcook the potatoes.
2. Drain and dry the potatoes. Allow to cool for 5 minutes.
3. Preheat the oven to 450 degrees (F) while the potatoes are cooking. Brush 2 Tablespoons of olive oil on a large rimmed baking sheet and set aside.
4. In a small bowl, combine the 1/3 cup of olive oil and minced garlic together.
5. Place the slightly cooled potatoes on the baking sheet. Using a potato masher or bottom of heavy glass and carefully press down to smash them while still keeping them intact.
6. Spoon over the olive oil/garlic mixture over each potato. Use a pastry brush to brush the oil over the entire potato. Sprinkle with flaky sea salt and fresh ground black pepper. Top each potato with a small sprig of thyme.
7. Roast the potatoes for 25-30 minutes or until golden brown and crispy around the edges. Note: Begin checking your potatoes for doneness at 20 minutes.
8. Remove the roasted potatoes from the oven and transfer to a serving platter.
9. Serve with bowls of sour cream and/or ketchup and enjoy!

Notes: (1) The potatoes can be made ahead to the point up to 6 hours before they go into the oven. Tightly cover the baking sheet with plastic wrap and refrigerate. Take out of the refrigerator at least 15 minutes before roasting. (2) If garlic happens to be one of those things that doesn't 'agree with you, mix in a Tablespoon of freshly chopped rosemary into the olive oil. Or alternately don't add anything to your olive oil before brushing it onto the smashed potatoes.

Winter at Morton Arboretum (February 2020)

Tuesday, February 4, 2020

Cognac Chicken Liver Pate


You might be surprised to learn I don't spend all of my time in the kitchen. I spend a fair amount of my discretionary time reading. Mostly fiction, but sometimes non-fiction, and every now and then, a biography or autobiography. In addition to the story, I am usually drawn to a book by the writing. Some of my most favorite books had hard to take themes but what I thought had brilliant writing. There is always a stack of 'books in waiting' on my nightstand as I don't like ever being without something to read. With a few exceptions, I don't often read all of the books lining the shelves in the room we call the library more than once. So technically, I am really never without a book. A few weeks ago I ordered the book "American Dirt" by Jeanine Cummins. After I read some good early reviews, before Oprah made it her next book club selection, and before all of the backlash began. Subsequently I have read there are some bookstores refusing to sell the book. Which, from my perspective, constitutes a book ban. More than likely we have all read some of the books banned for controversial religious or moral themes, obscenity, and politics at some point in our lives. Books now considered the most beloved and well-respected books in the 20th century. "To Kill a Mockingbird" by Harper Lee published in 1960 continues to be a book being challenged today for placement in some school libraries for its' use of racial slurs. If you have read the book, you know the overarching message of the book is anti-racist. I suddenly find myself being concerned over the silencing of controversial works. Yet, simultaneously I continue to respect the voices of those who see this book from a lens completely different than mine. While I do not choose my friends (or end my friendships) with those whose political views or opinions differ from mine, I hope I don't start losing friends over my book choices. Even as I wrote this blog post, even my usually optimistic self couldn't help but wonder how many would stop making the recipe I have shared. Or worse, think I am someone who views fiction as non-fiction or forms my religious or political views from works of fiction. But there is one caveat to all of this. I really want to believe fairy tale endings can happen, do happen.


So how I do possibly now segway and start talking about this Cognac Chicken Liver Pate? Well I am not creative enough (today) to create a smooth transition. Although this is a deliciously smooth pate. 


There happens to be three other pate recipes in the archives on my blog: Chicken Liver Pate Crostini (Crostini di Fegatini), Chicken Liver Pate with Pickled Shallots, and Rustic Chicken Liver Pate. So why would I possibly share yet another one? Because this Cognac Chicken Liver Pate is different from the others. Actually the others each differ from one another as well. But this one could end up being your favorite pate version. Especially if you love one having a very creamy consistency. From the ingredients to the preparation, it may actually be the simplest of them all to make. And lately I am all about embracing simple. 

I happen to be someone who loves pate. So much so I have been known to eat it for breakfast. As far as foods to accompany the cocktail hour, serving pate sets a tone hovering somewhere between rustic and classy. Which is one of the other reasons why I love it.


Compared to all of the other pate recipes previously shared, the Cognac Chicken Liver Pate is made with the least amount of ingredients. Additionally, it is the only pate recipe where the chicken livers are cooked in chicken stock rather than being sautéed in butter (or rendered chicken fat). 


The only ingredient sautéed in butter is the minced onions. 


The chicken livers are cooked until they are firm and barely pink inside. But instead of discarding the cooking liquid when draining them, it is reserved. The cooked livers, the hard-boiled eggs, the  sautéed onions, the cognac, kosher salt, and pepper and 1/4 cup of the liver cooking liquid are placed in a food processor. Process the mixture until it is as smooth as possible.


Unlike some of the other pate recipes, this one is intended to be served chilled. If it's made the day you intend to serve it, allow for at least four to six hours of chilling time in the refrigerator.

Typically pate is surrounded with bread, crostini, or toast points. But it also goes incredibly well with lavosh crackers. So feel free to serve with any one or all of these options.

The Cognac Chicken Liver Pate would be a great prelude to your Valentine's or Galentine's Day dinner. If, by chance you are hosting an Oscar party this year, you will definitely want to serve pate. But you don't need a holiday or television event to make and serve it. It's a great start to a casual or fancy dinner party, an informal gathering of your friends, or yes, even a book club discussion. 

Recipe
Cognac Chicken Liver Pate (a variation on Saveur's Chicken Liver Pate recipe, Winter 2019-2020 issue)

Ingredients
1 pound chicken livers, cleaned
4 cups chicken stock (1/4 cup of cooking liquid reserved)
4 Tablespoons unsalted butter
1 large yellow onion, minced
2 Tablespoons and 1 teaspoon Cognac or Brandy
4 large hard-boiled eggs
1 teaspoon kosher salt, plus more to taste
1/2 teaspoon black pepper, plus more to taste
Flaky Sea Salt for finishing
Optional: Extra-virgin olive oil for finishing
Optional: Finely chopped fresh chives for finishing

Lavosh crackers, crostini, or toasted bread points (e.g., rye, pumpernickel or a sturdy white bread)

Directions
1. Bring the livers and the chicken stock to a boil in a medium-sized pot. Immediately lower the heat to simmer and continue cooking until the livers are firm, but still faintly pink in their centers (approximately 6-8 minutes).
2. Drain the livers reserving the cooking liquid. Transfer the livers to a food processor. Set aside.
3. In a large skillet, melt the butter. Add the onion and cook until they are translucent and just beginning to brown (approximately 6-8 minutes).
4. Transfer the onions to the food processor.
5. Add in 1/4 cup of the cooking liquid, the Cognac, the hard boiled eggs, salt and pepper. Process until smooth and creamy. Check for seasoning. Add more salt and/or pepper if needed.
6. Transfer pate to a serving bowl. Cover and chill for at least 4-6 hours before serving. 
7. Before serving lightly drizzle with extra-virgin olive oil, finely minced chives and flaky sea salt. Serve with lavosh crackers, fresh bread, grilled bread, and/or toast points.

Notes: (1) Pate pairs especially well with white wine, prosecco, or champagne. (2) Covered and refrigerated, the pate will be good for up to a week. 


Fresh snowfall at Morton Arboretum, January 2020

Thursday, January 30, 2020

Linguine al Limone


For someone who claims to have a fondness for Italian food along with ranking Italian restaurants as amongst my most favorite, it's hard to believe I have never tasted the classic Linguine al Limone before. Seriously, what kind of sheltered or myopic life have I been living? Is it time for me reluctantly admit that I am more of a creature of habit and a less adventuresome Italian food lover? That would be one of those hard to swallow realizations! And considering the number of Italian cookbooks I own, make having a lemon pasta void in my life even more unfathomable. Fortunately for me, and now maybe for you, my life now includes this simple, creamy, silky, citrusy Linguine al Limone. 


A year ago we were coping the polar vortex. This year is a different story. The weather has been relatively mild here in the Midwest, but we haven't had any sunshine or even a hint of a blue sky here for what seems like an eternity around here. Although in reality we have had eight consecutive days of gray gloominess. Could this be what living in parts of the Pacific Northwest feels like during the winter months? Or is that one of the myths people from Oregon and Washington want us to believe so they can keep their idyllic landscapes a secret from the masses. If there were ever a dish to bring some virtual sunshine into your life it would be a platter of this Linguine al Limone. Even if you live in the south or southwest this pasta dish will make your already good sunny days even better ones. In just one bite I noticed a considerable shift in my mood.


My brief search on the exact origin of Pasta al Limone revealed it may have first been created in the Campania region of Italy. As the southern west coast side of Italy is known for it's abundance of lemons (i.e., Amalfi, Sorrento, Sicily). Recipes for Pasta al Limone fall into two main versions but with variations: uncooked and cooked. Other than preparation, the differences between the two generally center on ingredients. Both versions are made with lemon, pasta, parmesan, salt, and pepper. Uncooked versions are made with oil, while many cooked versions are made with butter and often heavy cream. Some recipes include the addition of garlic, herbs (usually basil), and/or shallots. The recipe for this Linguine al Limone is a cooked version. Almost any sauce made with butter, heavy cream, and Parmigiano-Reggiano falls in the seductive, irresistible category for me.


And this Linguine al Limone is luxurious.


From what I have read, it seems spaghetti is the pasta used most often in this classic Italian dish. However, it can be made with any long pasta, like linguine or fettuccini. I happen to be partial to linguine. Most pasta comes in one pound packages, but his recipe calls for only twelve ounces. Which means you will need to weigh out your pasta to ensure your finished dish has the right pasta to sauce ratio.


I am not a big fan of prepackaged grated parmesan cheese even if the packages are labeled Parmigiano-Reggiano. Not only because I feel they 'lose their flavor', but more importantly, every recipe calls for a different kind of grated cheese. Depending on how you measure grated parmesan cheese, the amounts or pre-grated versus freshly grated cheese will vary widely. Weighing out your grated cheese will prevent you from either not having enough or from having too much. This one calls a finely grated, fluffy-like Parmigiano-Reggiano cheese in order to create the silkiest of sauces. 


The lemon is used three ways in this recipe. In thinly sliced strips of the lemon zest, as finely grated lemon zest, and with freshly squeezed lemon juice. In order for this dish to have the right amount of that bright lemon flavor, buy a really large lemon.


The entire dish comes together in less thirty minutes inclusive of preparation time. Making it perfect for weeknight dinners as well as for casual, impromptu weekend entertaining. Putting a well salted pot of water on the stove and having all of your ingredients prepped before you begin is essential as this dish requires some timing. The sauce can begin to be made during the 6 to 7 minutes it takes for the pasta to get to the 'al dente' stage. 


While it's recommended you reserve 1 1/2 cups of the pasta cooking liquid, only three-quarters of a cup will initially be added into the sauce. In the event your sauce is too thick, you will have enough left over if you need some additional liquid to achieve a creamy consistency. Immediately after the pasta liquid is quickly whisked together, in goes the drained pasta. Adding the finely grated cheese in batches enables it to completely melt into the sauce (about 2-3 minutes of cooking time). Lastly the lemon juice along with some kosher salt to taste is blended in. The mixture should have the creamiest texture and be well-seasoned.

This cooked version of Linguine al Limone is meant to be eaten as soon as it is finished cooking. Once transferred to a large platter it is topped with the reserved thin slices of lemon peel and freshly grated black pepper. A light sprinkling of Italian Herbed Sea Salt is optional but makes for an even more delicious finish to this simple, yet incredibly luscious dish.

Serve it as the pasta course or as the main dish. Pair it with a beautiful salad and/or some grilled fish/shrimp (or even a roasted chicken) or just make the Linguine al Limone the only course. Don't forget to open up a really good chilled white wine to complete the meal. A bowl of this classic Mediterranean pasta and a glass of wine will definitely brighten up your mood regardless of the weather outside or if you happen to be having one of those life gives you lemons kind of days.
Recipe
Linguine al Limone (a slight adaptation to Bon Appetit's Pasta al Limone recipe)
Serves 4-6

Ingredients
1 large lemon 
12 ounces (341 g) linguini or other long pasta (spaghetti, fettuccini, or pappardelle)
3/4 cup heavy whipping cream
6 Tablespoons unsalted butter, cut into tablespoons
3 ounces (85g) Parmigiano-Reggiano cheese, freshly grated
3/4 cup pasta water, plus additional as needed
Kosher salt
Freshly cracked black pepper
Optional: Italian Herbed Sea Salt for finishing
Optional: Additional freshly grated Parmigiano-Reggiano cheese for serving

Directions
1. Using a vegetable peeler, remove two 2" long strips of lemon zest. Very thinly slice each strip lengthwise and set aside (for serving). Finely grate the remaining zest into a large Dutch oven. Cut the lemon in half and squeeze out enough juice to yield 2 Tablespoons into a small bowl and set aside.
2. Cook linguine in a large pot of boiling, salted water, stirring occasionally, until very al dente (my cooking time for linguine was about 6 1/2 minutes). Remove pasta from the pot but reserve at least 1 1/2 cups of the pasta water.
3. As soon as the linguine is put into the water add the heavy cream to the lemon zest and cook over medium heat, whisking often, until the liquid begins to come to a simmer (about 2 minutes). Reduce heat to medium-low and whisk in the butter 1 Tablespoon at a time until melted and the sauce is creamy and emulsified. Remove from heat (if your pasta is not yet finished cooking).
4. As soon as the pasta is al dente, return the pot with the sauce to medium heat and add in 3/4 cup of the hot pasta cooking liquid. Whisk to combine. Immediately transfer the drained linguine into the sauce. Cook, tossing often and adding in the Parmigiano-Reggiano cheese little by little until the cheese is melted and the sauce is creamy (about 2-3 minutes).  Note: If the sauce is too thick add in a little more of the reserved pasta liquid a Tablespoon at a time.
5. Stir in the reserved lemon juice and season with kosher salt.
6. Transfer pasta to a large bowl. Season with cracked pepper, Italian Herbed Sea Salt (if using), and the reserved thinly sliced lemon zest strips.
7. Serve immediately with a great bottle of white wine and additional Parmigiano-Reggiano cheese (if using).

Notes: (1) The recipe calls for only 12 ounces of pasta. Most pasta comes in one pound (16 ounces) packages. Be certain to measure your pasta out before starting this dish. (2) In the event you have any leftovers, keep the remaining 3/4 cup of pasta cooking liquid. You can reheat the pasta on low in the microwave adding in some hot liquid if necessary.

Monday, January 27, 2020

Maple Blueberry Scones


Sometimes it takes the loss of someone beloved, someone famous, someone so very young, someone who served as a role-model, someone who inspired others, or someone we have admired from afar to remind us that life can change in an instant. The words 'life is short' resonate with us on a deeper, more personal level when this happens. To the point where we temporarily hold our breath while we gather the courage to own up to our mistakes or hurtful actions, reconnect with the person(s) in our lives we once treasured, express how we feel, or commit to being our best self. Sometimes it takes a tragic loss to cause us to experience an emotional earthquake. The passing of Kobe Bryant, a basketball legend and humanitarian, this weekend may be one of those singular, sorrowful moments regardless of how old we are or whether we were a fan or not to lean into. One never knows or even anticipates all of the legacies they will leave behind. Being reminded how much our words and actions matter may be just one of the many Kobe Bryant left behind.


Baking for me has always been therapeutic, a time for me to process the million thoughts and feelings running through my head. When I started making these Maple Blueberry Scones Sunday morning, I never anticipated how much I needed or what would put the focus on my frequent dose of self-reflective therapy. Suddenly, one of the conversations in my head shifted from beating myself up over not meeting a race goal to accepting I may not have put it all out there. Seeing a post of the words "When we are saying this cannot be accomplished, this cannot be done, then we are short-changing ourselves...." once shared by Kobe Bryant reverberated through me. To the point where I acknowledged for the first time out loud that my running 'head game' is not always what it should be, more importantly, what it can be. Saying it out loud set off a different kind earthquake in me. Not so much of an emotional one, but a kind of a galvanizing one. Changing my head game is going to take some work (it's hard to override the negative messages one gives to themselves), but 'life is short' and someday isn't coming.

I have made Current Scones and Mixed Berry Scones before, but never Maple Blueberry Scones. Which is a bit odd since I love everything maple and blueberry. Unlike my other two scone recipes, these are made with both whole wheat and all-purpose flours, are sweetened with maple syrup instead of sugar, use buttermilk instead of whole milk or heavy cream, are made in a standing mixer rather than mixed by hand, and lastly, formed with an ice cream scoop rather than being rolled out and cut. All of which I have to believe contribute to the most flavorful, flakiest scone I have ever eaten. If there was ever a scone that didn't need to be slathered with clotted cream, butter, or jam, this would be the one. Yes, it's that delicious!


For those of you who are serious scone bakers, the somewhat non-traditional technique used to make these Maple Blueberry Scones may go against everything you believe. But trust me when I say this scone recipe is a game-changer. I have been transformed from someone who likes scones to someone who now loves scones.

With the possible exception of the creme fraiche, all of ingredients in the Maple Blueberry Scones recipe are ones easily found in almost every grocery store. Creme fraiche, a thicker, richer, less tangy version of sour cream, is starting to become more accessible. But if you can't find it (but try as hard as you can to and see notes below) there are a number of recipes available online (having not made a homemade version of creme fraiche, I am reluctant to tell you which one is the best). You can gain a good understanding of the differences between sour cream and creme fraiche by reading this article. Note: For these scones I used an European-style unsalted butter and really good quality maple syrup.


The butter is added into the dry ingredient mixture in two additions. Half of the butter (cut only into large tablespoon sized pieces) is added first. After being mixed in for 2-3 minutes, the other half of the butter (cut into 1/4" or 1/2" pieces) is pulsed in 4-5 times so it gets coated but remains pea sized. These pieces of butter contribute the scone's flakiness. All of the wet ingredients including the blueberries are added in all at once, but mixed only long enough (or rather short enough) for the liquid to begin to absorb some of the dry ingredients. Your hands are used to finish the blending process.


Once the dough comes together you have three choices after forming the dough into large balls using a large ice cream scoop. (1) You can place them on a baking sheet and bake in preheated 350 degree oven; (2) you can wrap them and refrigerate them for at least an hour or overnight; or (3) you can place them on a small baking tray insert into a plastic freezer bag and freeze (for up 5-7 days). These Maple Blueberry Scones were baked immediately. Although after I tasted one, I wish I had saved a few to freeze for later as they are best enjoyed the first day (but still really good on day 2). Lesson learned.


The maple glaze can be made while the scones are baking or just before they come out of the oven as it gets poured (or brushed) on immediately after the scones come out of the oven.

The maple glaze should have a thick but pourable, spreadable consistency.

 
You are supposed to wait 30 minutes after the scones come out of the oven to serve them. And you should. Although it may feel like the longest 30 minutes of your life. From their finished look to their flavor, texture, and taste I cannot even begin to give these Maple Blueberry Scones all of the accolades they deserve. The maple syrup adds great flavor without being overpowering along with the right amount of sweetness. The fresh blueberries remain relatively intact resulting in pockets of sweet blueberry deliciousness momentarily transporting you back to summer. Although slightly more cakey in texture than most scones, they have the right amount of sturdiest to them without having the quality of a hockey puck. If there is any downside to these Maple Blueberry Scones is that it's hard to eat only one in spite of how generously sized they are. It's been awhile since I put anything on the proverbial last meal list. These are definitely going on it. However, since we never know what tomorrow will bring, they will be now making regular appearances around here.

Recipe
Maple Blueberry Scones (slight adaption to Joanne Chang's Whole Wheat Maple Blueberry Scones from her cookbook "Pastry Love" A Baker's Journal of Favorite Recipes".)
Makes 10 scones

Ingredients
Maple Blueberry Scones
1 2/3 cups (240 g) whole wheat flour
1 cup (140 g) all-purpose flour
1 1/2 teaspoons baking powder
1/2 teaspoon baking soda
1/2 teaspoon kosher salt
3/4 cup (1 1/2 sticks, 170 g) European-style unsalted butter, cold and divided (cut half into tablespoons, cut the other half into 1/4" to 1/2" pieces)
1/2 cup (120 g) creme fraiche
1/2 cup (170 g) good quality maple syrup
1/3 cup (80 g) buttermilk
1 large egg yolk
1 1/2 cups (188 g) fresh blueberries

Maple Glaze
1 cup (120 g) confectionary sugar
5-6 Tablespoons good quality maple syrup
Generous pinch of Kosher salt

Directions
Maple Blueberry Scones
1. Preheat oven to 350 degrees (F). Line a large baking sheet with parchment paper. Set aside.
2. In the bowl of a standing mixer fitted with a paddle attachment, add in the both flours, baking powder, baking soda, and kosher salt. Mix on low speed just until combined.
3. Add in half the butter (the pieces cut in Tablespoons) to the flour mixture. Mix on low-medium speed for 2-3 minutes or until the butter is fully mixed into the flour.
4. Add in the remaining butter (the small cut pieces). Pulse 4-5 times just to blend in. They will remain pea sized.
5. In a medium sized bowl, whisk together the creme fraiche, maple syrup, buttermilk, and egg yolk until blended. Stir in the blueberries.
6. Pour the mixture into the flour/butter mixture. Mix only for 10-12 seconds only to get some of the liquid into the dry ingredients. Mix the rest of the loose flour into the flour using your hands. Gather and lift the dough with your hands and turn it over several ties until all of the loose flour is mixed in.
7. Using a large ice cream scoop (2 1/2 inches in diameter), scoop out mounds of the dough and place on prepared baking sheet, leaving at least 2 inches of space between each ball of dough.
8. Place in oven and bake for 35-40 minutes, rotating the baking sheet midway, until they are evenly golden and slightly firm when you press them.
9. Remove from oven and immediately pour and/or brush with the maple glaze while scones are still on the baking sheet.

Maple Glaze and Assembly (make while the scones are baking)
1. In a medium sized bowl, whisk together the confectionary sugar, maple syrup and kosher salt until smooth and creamy, thick, but having a pourable/spreadable texture. Re-whisk just before using.
2. Pour and/or brush the glaze over the baked scones as soon as they come out of the oven. 
3. Let scones cool 20-30 minutes before serving.

Notes: (1) I used a European-style butter for these scones. (2) The scones were baked in the oven immediately after the dough was scooped onto the baking sheet. Alternately, place and tightly cover the unbaked scones in the refrigerator for at least one hour (or overnight) to allow the flour to become absorbed. (3) The scones are best the day they are baked, but if stored at room temperature in a tightly sealed container they will be good for 2-3 days. You can refresh them in a preheated 300 degree (F) oven for 4-5 minutes. (4) The scones can be made ahead. After forming the dough into balls, set on small baking sheet then place in a plastic freezer bag before placing in the freezer. Scones can be frozen for up to 5-7 days. Baking time for frozen scones will increase by 5-10 minutes. (5) I used Vermont Creamery's Creme Fraiche regularly carried at Whole Foods.

Thursday, January 23, 2020

Fruit and Nut Bark


Ever since tasting my first mendiants, a chocolate disk shaped confection studded with dried fruits and nuts, on a long ago trip to the Cotswalds, I have had a fondness for confections bearing any resemblance to the taste of them. Was funny how a mendiant gave me a new appreciation for those Chunky candy squares I used to make a face at as a kid. Historically mendiants were made with the four traditional toppings of almonds, raisins, hazelnuts, and dried figs. However, today the number and combination of fruit and nut toppings vary greatly. In other words, they can be made with whatever fruit and nut amalgamations appeal to you. Rather than making perfect, evenly sized chocolate circles, I prefer making a bark version of this fruit and nut confection. For the simple reason being bark is much easier to make without there being any sacrifice in flavor. But there is another benefit of making a fruit and nut confection in bark form. It is much easier to control the thickness of the chocolate. I, for one, prefer to have the thicker candy bar-like confections eating experience. 

It would be safe to say mendiants served as the inspiration for this Fruit and Nut Bark as there are several differences between the two of them. When making bark you aren't bound to a 4 fruit-nut combination. This bark uses only one fruit and one nut (see notes below for some of my other favorite combinations). In addition, nuts are not just randomly placed on top of the melted chocolate, they are mixed in to the (semi-sweet) chocolate as well. Lastly, this Fruit and Nut Bark gets a sprinkling of flaky sea salt finishing touch.


To give this Fruit and Nut Bark a bit of a Valentine's Day look a small amount of pink food coloring gel was added to some of the melted white chocolate. 


Just enough gel to give a subtle, pale pink touch to the finished bark. A little goes a long way. 


Use a good quality melting chocolate when making this bark. Whatever you do, don't use those 'melting' wafers often found in craft stores (it's not chocolate) or chocolate chips.

To melt the chocolate I used both the microwave method (for the semi-sweet chocolate) and the double-boiler method (for the white chocolate). The pink food coloring gel was added to about 1/3 of the melted white chocolate.


One of best tools for swirling the chocolates together is a chop stick. If you don't have one laying around, use a skewer or even the tip of a knife. Even a straw would work. 

Use your imagination when making the swirling design. This one would fall into the random swirly category. 


The bottom layer of the bark should be the darker (or semi-sweet) chocolate mixed with 7 ounces of the roasted whole almonds (the remaining 3 ounces will be sprinkled on top). The White and/or Pink colored white chocolate should be poured on top. Be careful not to let the bottom layer begin to set up or you won't be able to swirl the two chocolates together. Additionally, the top layer should still be 'wet' when sprinkling on the dried cranberries, remaining roasted almonds, and flaky sea salt.

Let the Fruit and Nut Bark set up before cutting with a knife or breaking up into random sized pieces. In cooler temperature months it sets up pretty quickly (no need to put the tray in the refrigerator). Serve the Fruit and Nut Bark on a large platter, put some pieces on a charcuterie board, and/or place a few pieces in cellophane bags tied with ribbon if you are gifting friends or making party favors. I should warn you, this Fruit and Nut Bark has an addictive quality to it. 
Recipe
Fruit and Nut Bark
Makes about 2 1/2 pounds of bark

Ingredients
16 ounces/454 g good quality dark or semi-sweet chocolate, chopped
16 ounces/454 g good quality white chocolate, chopped
4 ounces/112 g dried cranberries 
10 ounces/273g whole roasted almonds, divided (See notes)
Flaky Sea Salt for finishing
Optional: Pink Gel Food Coloring, one or two drops

Directions
1. Line a large rimmed baking sheet with parchment paper and set aside.
2. Simultaneously melt the semi-sweet (or dark) and white chocolate using either the microwave or double boiler method. Note: White chocolate is best melted using the double boiler method.
3. Pour about 1/3 of the white chocolate into a small bowl. Add one or two drops of food coloring gel if using.
4. Mix in 7 ounces of the roasted almonds into the semi-sweet (or dark) chocolate. Spread onto the prepared tray. Do not spread too thinly.
5. Pour the white and pink colored melted white chocolates on top. Use a chopstick (or other swirling tool) to swirl the chocolates together.
6. Sprinkle the remaining 3 ounces of the roasted almonds and the dried cranberries on top. Tap the baking sheet on the counter to ensure the nuts and fruits sink into the chocolate. While the chocolate is still wet, lightly sprinkle with flaky sea salt.
7. Let the Fruit and Nut Bark come to room temperature (approximately 45 minutes). When cooled completely the bark can be cut with a knife or broken up by hand.
8. Serve on a platter or store in a sealed container. The bark will be good for up to two weeks.

Notes: (1) The number of Fruit and Nut Bark combinations are almost endless. Here are some of my other favorites: Cashews, Dried Cherries, Pistachios, and Apricots; Cashews, Almonds, Dried Cranberries; Pistachios, Dried Cherries, Almonds; Cashews, diced Dried Oranges or Orange Peels, Cranberries, and Almonds. (2) I used both semi-sweet and white chocolate to make this Fruit and Nut Bark, but you could also use milk-chocolate or semi-sweet chocolate only. (3) You can find packages of whole Roasted Almonds in most grocery stores and/or at Trader Joe's.