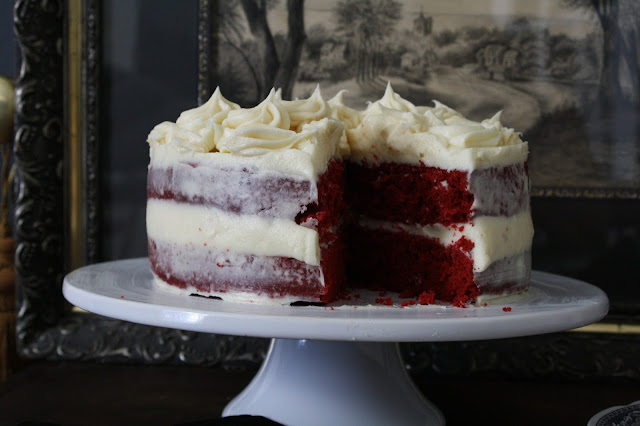
The original version of the cake was made with a French-style butter icing (ermine) versus a cream cheese frosting. The availability of red food coloring in the early part of the 21st century became the replacement for boiled beet and/or raspberry juices used in some of the early published recipes for this cake. In searching out recipes for this cake, I discovered there were multiple variations and conflicting ingredient recommendations. Ultimately I went with the one published in The Best of America's Test Kitchen (2008) cookbook because, well, just because.
In a preheated 350 degree (F) oven, two nine inch cake pans bake for 25-30 minutes or until a cake tester inserted in the center of the cake comes out clean (my baking time was 30 minutes). Measuring the weight of the batter in each of the cake pans and rotating the pans halfway through the baking process helps to ensure you have two perfectly sized, evenly baked layers. After cooling for 10-15 minutes, the cake layers are removed from the pans and placed on a cooling rack for approximately one hour. The cake needs to be room temperature (or slightly chilled) before it is iced.
Recipe
Red Velvet Cake (mostly inspired by America's Test Kitchen's Red Velvet Cake recipe shared in The Best of America's Test Kitchen (2008) cookbook, icing recipe comes from a compilation of sources)
Ingredients
Cake
12 T unsalted butter, room temperature
2 1/4 cups (11 1/4 ounces) all-purpose flour
1 1/2 teaspoons baking soda
pinch of sea salt
1 cup buttermilk
1 Tablespoon white vinegar
1 teaspoon vanilla
2 large eggs, room temperature
2 Tablespoons natural cocoa powder (do not use Dutch Process cocoa)
1 ounce bottle (2 Tablespoons) red food coloring
1 1/2 cups granulated sugar
Icing
20 ounces cream cheese, room temperature
2 1/2 sticks (20 T) unsalted butter, room temperature
4 cups confectionary sugar, sifted
1 1/2 teaspoons vanilla
generous pinch of sea salt
Directions
Cake
1. Preheat oven to 350 degrees (F). Grease and flour two 9 inch cake pans, line with parchment paper, and set aside.
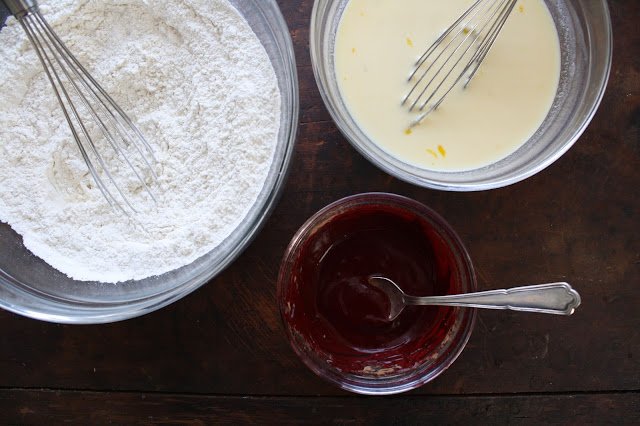
2. In a medium sized bowl, whisk to combine the flour, baking soda, and pinch of sea salt. Set aside.
3. In another medium sized bowl, whisk together the buttermilk, white vinegar, vanilla, and eggs. Set aside.
4. In a small bowl mix the cocoa and red food coloring together until a paste is formed. Set aside.
5. In a standing mixer fitted with a paddle attachment, beat the butter and granulated sugar at high speed until light and fluffy (approximately 3 minutes).
6. Add 1/3 of the flour mixture and beat on medium-low speed until just incorporated (30 seconds); Add half of the buttermilk mixture on low speed until combined (30 seconds); Repeat, ending with the flour mixture. Note: Scrape down the sides of the bowl during each addition.
7. On medium speed add cocoa mixture until completely incorporated (30-40 seconds). Using a rubber spatula, give the batter a final stir to ensure there are no streaks of white batter.
8. Divide the batter equally between the prepared cake pans, smoothing the top with an offset spatula. Note: Use of a measuring scale helps to ensure the evenness of the layer.
9. Bake for25-30 minutes, rotating the pans halfway through the baking process, until a tester inserted in the center comes out clean.
10. Allow the cakes for cool for 10-15 minutes, then turn out on a wire rack to cool completely (approximately 1 hour).
Icing
1. In a standing mixer fitted with a paddle attachment, beat the room temperature butter and cream cheese until well blended.
2. Add sifted confectionary sugar and continue to beat until icing is light and fluffy. Scrape down the sides of the bowl as needed.
3. Beat in vanilla.
4. Refrigerate until ready to use.
Note: There is enough icing to completely cover the cake with naked sides and piped decorated top. Increase the amount of icing if the desired finished cake is evenly iced on sides and top of cake.
Assembly
1. Place one cake layer, bottom side up, on platter or cake stand. Generously spread icing using a spatula to spread evenly over the cake layer.
2. Using a serrated knife, cut the dome off of the second layer (reserve crumbs). Place second layer of cake, top-cut side down, on layer of icing.
3. Spread remaining frosting over sides and top of the cake.
4. Serve immediately and/or chill in the refrigerator to serve later. Store cake in the refrigerator.
Notes: Cake can be made in 3 eight inch cake or 3 six inch cake pans. Adjust baking times accordingly.


