Wednesday, July 3, 2013

Strawberries Romanoff

Native strawberries are still available at the farm stands and roadside tables here. Wouldn't it be great if these were available all summer long and strawberry season lasted well into September? As I passed one of the roadside tables on my to the grocery store yesterday I thought I would pick up a pint or two of strawberries on my way back home. But the quick trip to the grocery store turned out to be not so quick (decided to make a few other stops along the way). Not surprisingly, the roadside stand had sold out of their strawberries for the day (yes, the early bird does get the worm or, in this case, the strawberries). But today was a new day and after an early morning walk on the beach, I headed to the roadside table to pick up some strawberries. I was in luck, or rather I was there early enough to pick up some beautifully ripe (not overripe) native strawberries.


As a kid I would never eat strawberry ice cream so I find it odd how much I now like the taste of strawberry (or actually the taste of fresh strawberries). For me strawberries are great all on their own, strawberries with whipped cream and a little sugar are great as well, strawberries with sour cream can be pretty darn great, but strawberries with whipped cream, sour cream, sugar, a little mint and some Kirsch, well this would be taking greatness to a new level. But actually, this is an old level, an 1820's level as these would be the ingredients for Strawberries Romanoff. Why was I so surprised to learn that such deliciousness was created more than 190 years ago for Czar Alexander I (of the House of Romanoff) and is a recipe (a rather simple one) that continues to bring joy to our palates today? Considering so many recipes are actually centuries years old, I guess I shouldn't have been.


I have been known to buy many kitchen tools, but the strawberry huller is one that I have not been lulled into buying as I think a knife works perfectly. When hulling strawberries, I like to make a V-cut near the stem of the strawberry. Once the stems are removed, larger berries are then cut into thirds and smaller berries cut in half. 


A quarter cup of Kirsch is poured over the strawberries and then very lightly mashed (I would call it more of a pressing lightly than actually mashing) with the back of a wooden spoon to help to release their juices. You can keep the berries whole, however, I think cutting them makes the eating of this dessert so much easier when you are able to take in bite sized pieces of the berries. A quarter cup of organic cane sugar and a small handful of fresh mint leaves (I used about 12-14 leaves) are then mixed into the berries. I didn't have Demerara sugar so I used organic cane sugar instead, and I was very happy with the results.

After the Kirsch, sugar and mint are all mixed with the strawberries, set aside to mascerate for 20 to 30 minutes (this is done at room temperature).


One cup of whipping cream, one tablespoon of white sugar and one third cup of sour cream are mixed in medium sized bowl using either a hand mixer or whisk and whipped until light, soft peaks form. 


After the berries have been allowed to mascerate for 20-30 minutes and the whipped cream mixture is ready, you begin to layer them in clear glasses or in a glass bowl. The layers are so beautiful that you will definitely want to serve the Strawberries Romanoff in clear glass, to serve in a bowl you can't see through would be like having to eat with your eyes closed.


Recipe
Strawberries Romanoff (inspired by the recipe created by The Canal House)

Ingredients
1 generous quart of fresh strawberries (for a yield of 4 cups of strawberries)
1/ 4 cup of Kirsch or Kirschwasser
1/4 cup of Organic Cane or Demerara sugar
Handful of fresh mint leaves (12-14 leaves)
1 cup heavy whipping cream
1 Tablespoon sugar
1/3 cup sour cream

Directions
1. Hull strawberries. Cut larger ones in thirds and smaller ones in half.
2. Pour 1/4 cup of Kirsch over berries and very gently mash to release juices (you still want the berries to retain their shape).
3. Mix in 1/4 cup Organic Cane or Demerara sugar and handful of mint leaves. Allow berries to mascerate for 20-30 minutes.
4. In a medium sized mixing bowl, begin whipping the cream until slightly thickened. Add the sugar and sour cream and continue mixing until soft peaks form.
5. Beginning with the berries and some of their juices, layer the berries and cream in glasses or in a bowl. Each glass should have two layers of each. Top with fresh mint leaves.
6. Chill covered or serve immediately.


It is hard to believe that we have entered the seventh month of the year. Time moves much to quickly or at least my perception of the rate of the movement of time has changed significantly as I have gotten older. As a kid, waiting for a friend to finish eating dinner seemed like an eternity (the actual wait when I was ten was about 20 minutes). And now as an adult, days feel like hours sometimes and the years, well the years feel like they went into warp speed years ago. 

The concept of savoring time is not one I have a great deal of experience with. My mind is usually racing and filled with all sorts of random, tangential thoughts (although for me they really aren't tangential because I can make connections between all of them). I have always found it a challenge to just chill and 'do nothing' for an hour or even several hours without feeling guilty that I should be doing something. 'Do nothing' for me means just laying on the beach without reading a book, just wandering around a bookstore browsing (not reading), giving myself permission to stay in bed on the weekends looking through magazines or cookbooks or just giving myself think time. But the time has come (no pun intended) for me give myself permission to just see relaxing as a good thing, a reenergizing thing. If relaxing for me can be just reading a book for a few hours without checking email/texts/Facebook/Twitter, then this would be monumental progress in how I use time. Who knows, maybe the days will feel just a little bit longer if I don't rush through them.

Sunday, June 30, 2013

Donna's Eggplant Parmesan

With the exception of my father's coleslaw and turkey stuffing and my scrambled eggs and tuna salad unwritten recipes, I am generally someone who has always baked and cooked using a recipe, a written recipe that is. I rarely commit recipes to memory, even ones I make over and over again. Rather I commit to memory where I found the recipe (which has become more challenging over the years, not because my memory is going, but because I have too many cookbooks and cooking magazines to keep visually sorted in my head). So I am a little envious, more than a little actually, of those who cook without a recipe (unless of course I just think they are cooking without a recipe, when in fact, they have spent their time memorizing recipes making us all think they are cooking on the fly). But sometimes there are those family recipes, like my father's coleslaw and turkey stuffing, that don't have a recipe, and yet are made over and over again without anyone taking the time to write them down.


My best friend's Eggplant Parmesan recipe would be one of those family and not written down recipes. I am pretty certain I had never watched her make it, although I have listened to describe how she makes it and have eaten my share of it over the years. But making something you have only heard about and consumed is not the same as making it with a recipe. So I thought it might be time to take what I have learned about Eggplant Parmesan from her and convert it from a verbal to a written recipe. Now she wasn't here with me on the East coast when I made it, so I had to rely on palate to determine just how close I came in replicating her unwritten, family recipe. If I could be so bold (but not hubris), I think I came pretty darn close, not throw down ready close, but really close to (re)creating her Eggplant Parmesan recipe.


There has been a myth about eggplants perpetuated over the years, the myth being there are male and female eggplants. As this myth goes, male eggplants are less seedy, less bitter in their taste and have a round indentation (like an belly-button innie) on the bottom, while female eggplants have more seeds, are slightly bitter, and have a deeper line indentation on the bottom. Even though the myth is not technically true, there is a difference between eggplants. While I won't spend time going into the scientific explanation (interesting as it may be), you do want to look for the eggplants with the belly button innie bottoms when making Eggplant Parmesan. Very seedy eggplants will not hold up well to the frying process.


The eggplants are peeled and then thinly sliced. I started out using my mandoline to cut the eggplant, but because I had purchased the larger (and not the smaller Italian eggplants), I resorted to thinly slicing them with a knife. The thickness of the slices should be about an 1/8th inch. Once you have sliced all of eggplant, place on a platter lined with a paper towel and then cover with a slightly dampened paper towel while you getting ready to fry them.


This is a recipe where there is a fair amount of advance preparation. The marinara sauce needs to be made, the eggplant needs to be sliced, the eggs need to be lightly beaten, cheeses need to be grated, the flour lightly salted and peppered, and a paper bag needs to laid out on a large cutting board or counter. You make this labor (of love) process go so much easier if you do all of this preparation.


Remember this mantra "Flour first, egg second" as this is the process for getting the eggplant slices ready for frying. Each eggplant slice is dipped in the flour (both sides) and then shaken to remove the excess. Once dipped in flour, it is dipped in the lightly beaten eggs and also shaken to remove the excess before placed in the heated Crisco oil. For those of you wondering why Crisco instead of extra-virgin olive oil was used (the non-use of extra-virgin olive oil could be considered as some sort of Italian heresy), well it is because you don't want the flavor of the oil to overpower the flavor of the eggplant, the cheeses and the marinara sauce. And Crisco is a pretty flavorless oil that makes perfect lightly golden browned slices of eggplant.


Four pounds of eggplant sliced and fried turned out to be the perfect amount of eggplant for this recipe. There were enough slices (slightly overlapped) for creating five layers in this Eggplant Parmesan.


I used the whole milk mozzarella by Sargento, and of course, my favorite, Parmigiano-Regianno cheese for this recipe. The mozzarella would have been easier to grate if I would have just put it in the freezer for a little while, but there were so many decisions to made around the making of this recipe that I forgot to do this. So it took me a little while longer to grate the mozzarella. But hey, what's a few more minutes when you are investing this much time into the making of this Eggplant Parmesan (okay breathe and don't stop reading, if you remember yet another mantra 'all good things don't come easy, and most things easy aren't that good', then you too can be on your way to making this incredible dish for your family and friends).


You can make the marinara sauce the day before or the morning of, the choice is yours. I did it all in one day and it all worked, but the next time I will make the marinara sauce the day before to let its' flavor more fully develop.


In a 9" by 13" inch ceramic dish, place a thin layer of marinara sauce on the bottom of the pan. Then layer with the eggplant, the cheeses and another layer of marinara sauce. Repeat until you have created 4 to 5 layers. 


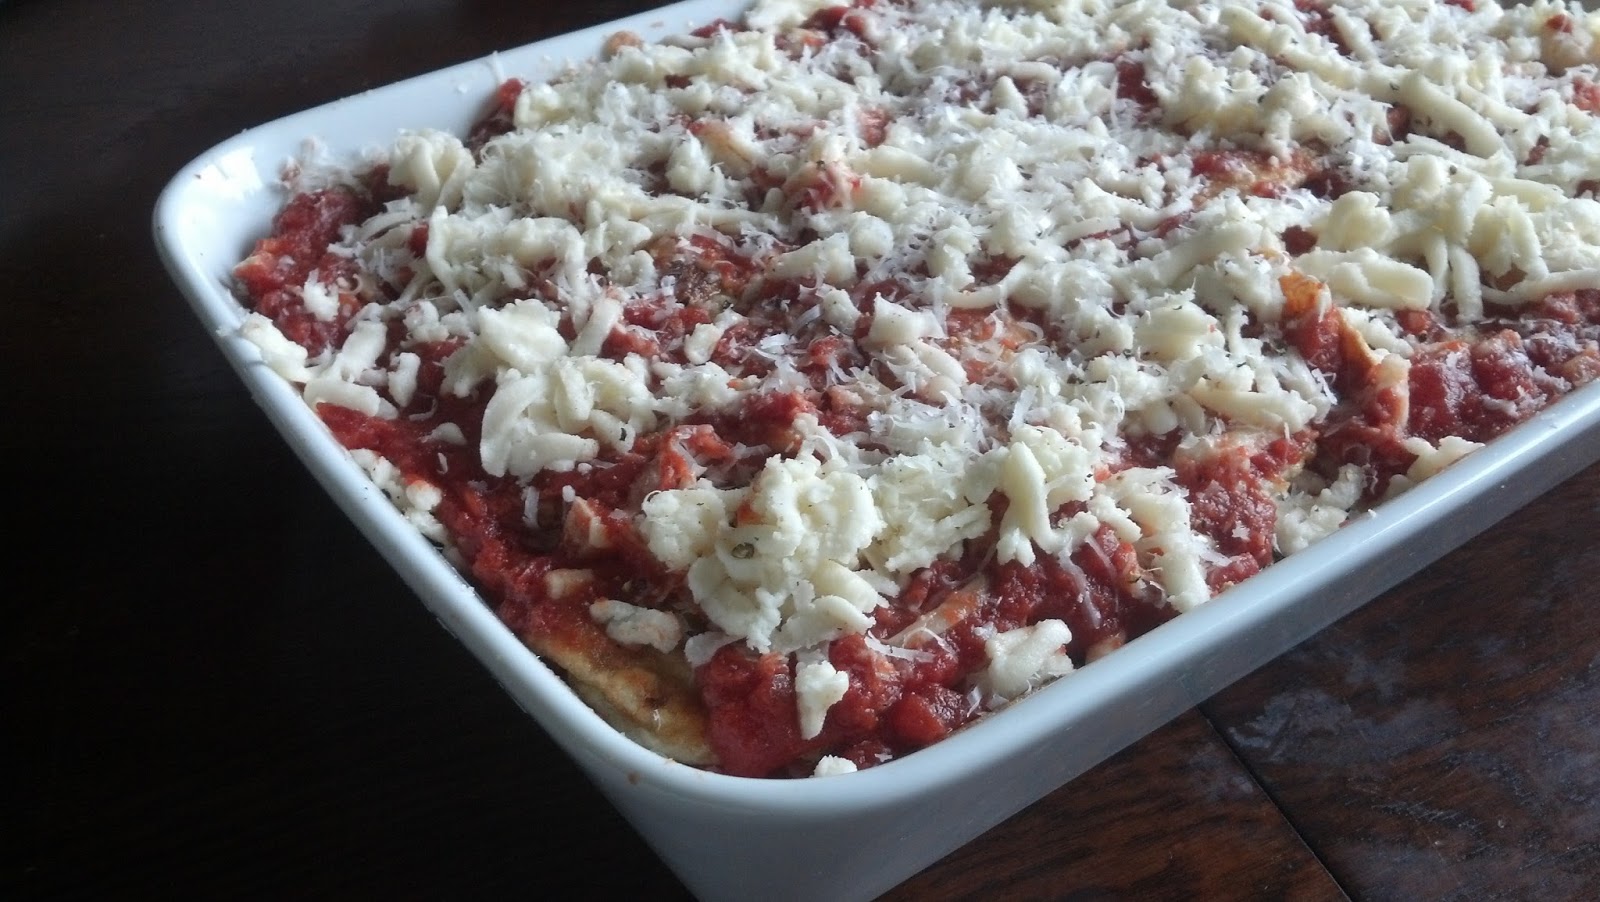
You will top with a final layer of the marinara sauce and then the cheeses. At this point you can cover and refrigerate until you are ready to bake. The Eggplant Parmesan can be made the day of or the day before (which I would strongly suggest so you can spend your time on other things on the day of your dinner party or family dinner).

If you bake the Eggplant Parmesan right away, it will bake for about 45 minutes in a pre-heated 350 degree oven. If you bake it after it has been refrigerated, I would recommend baking for approximately 60 minutes in a pre-heated 350 degree oven or until the top is lightly browned and the Eggplant Parmesan is heated through. Whenever I refrigerate a pre-made dish, I usually take it out of the refrigerator for at least 30 minutes before putting it in the oven.  When finished baking, lightly covered with aluminum foil and let rest for at least 10 minutes before cutting into squares. 

The Eggplant Parmesan can be a meal all by itself (with a salad and dessert of course) or it can be part of a meal or buffet (it is a great accompaniment to a roasted chicken). Whichever way you decide to serve it, I hope I haven't said anything (yet) to make you not want to make this absolutely delicious Eggplant Parmesan. I will let you know if I am ever brave enough to suggest to my best friend that we have a Eggplant Parmesan thrown down. She's been making this recipe for decades, so I think the throw down is more of a fantasy than of any in the foreseeable future reality as I think I am a little too competitive to lose (especially to my best friend).

Recipe
Eggplant Parmesan (inspired by my friend's Donna recipe)
Ingredients
4 pounds of eggplant (round bottom belly button innies), peeled and very thinly sliced or about 1/8 inch  thick
1 1/2 cups all-purpose flour
7 large eggs, lightly beaten
Crisco oil (for sautéing)
salt and pepper
1 pound whole milk mozzarella cheese, grated (not the freshly made cheese)
1 1/2 cups freshly grated Parmigiano-Reggiano cheese


Directions
1. Line a large cutting board or counter with a large brown paper bag.
2. Add a thin layer of Crisco oil to a large heavy frying pan. At a medium temperature (on an electric stove) or medium flame (on a gas stove), heat oil.
3. Dip each slice of thinly sliced eggplant into flour (lightly seasoned with salt and pepper), shake off excess flour, dip in egg ensuring the slice is fully coated shaking off excess egg. Place eggplant slice in heated oil. Working quickly, add five or more slices of coated/dipped eggplant into the pan. 
4. When eggplant is lightly golden brown on one side (more than 30 seconds, less than a minute), turn and cook for approximately the same amount of time (or until the bottom is lightly browned).
5. Remove cooked eggplant and place on prepared brown paper bag to drain. (I gently placed a paper towel over the cooked eggplant to remove any excess oil.)
6. Continue frying until all eggplant slices are cooked.
7. On the bottom of a 9 by 13 baking pan, add a thin layer of marinara sauce. Layer a row of eggplant slices (slightly overlapping) followed by a sprinkling of the grated mozzarella and Parmigiano-Reggiano cheeses and topped with another thin layer of marinara sauce. Repeat layering process until you have 4 to 5 layers. Top layer should be the marinara sauce and grated cheeses.
8. In a pre-heated 350 degree oven, bake Eggplant Parmesan for approximately 45 minutes or until lightly browned and cooked through in the center. If assembling early in the day or the day before, bake the refrigerated Eggplant Parmesan for approximately 60 minutes or until lightly browned and cooked through in the center.
9. Cover lightly with aluminum foil and let rest for at least 10 minutes before cutting into squares.
10. Optional: Serve with additional freshly grated Parmigiano-Reggiano cheese and/or extra marinara sauce.


Today is the six month anniversary of the creation of this food blog. Not only has this been a bit of a risk-taking journey for me, it has been a learning one too. And probably, I have come to see saltedsugaredspiced as something more akin to a marathon than a sprint experience. For those of you who have run a marathon, you know how incredibly satisfying and exhilarating running 26.2 miles can be. And it doesn't matter whether you finish in less than four hours or more than five, the medal you get at the end is the same for everyone. What is not the same is that everyone's journey to the marathon experience is different. The motivation is different, the training process is sometimes different, the head games that run through your head might be the most different (and for me, running was more of a head game), and the pace can be different.

Figuring out the concept of pacing is probably my life's longest journey to date. Slow can be really good or it can be not so good. Fast too can be really good or it can be not so good. For me, my life needs to have both kinds of pacing in it (although I getting much to old to ever think that my running pace would ever, could ever be fast). As I look at the concept of pacing as it applies to all of the friendships and relationships in my life, many began sprint-like while most have evolved into something very marathon-like satisfying. So my pacing journey has been two-fold: in trying to figure out which pace(s) to be at (when and with who) as well as in finding the balance between my pace and that of others in my life. And when I have gotten it right, it feels almost the same as that incredibly euphoric zen-like state of 'running in the zone'. And what happens when you go off course and it's not right?  Well, that would depend on what or who it is. More importantly, it depends on if you are in it for the long run.

Friday, June 28, 2013

Roasted Artichoke Dip with Feta and Oregano

It's time for a culinary confession or two. I have had a limited repertoire of dip recipes made with artichokes. Yes, that is my confession. What were you expecting, something a little more revealing? Actually until now, I had only one go to artichoke dip recipe. You know the one, goat cheese, parmesan cheese, mayonnaise, and artichoke hearts all mixed together and baked. While I love that artichoke recipe, it is one that requires turning on the oven and is really best eaten warm out of the oven. More importantly, it is one that you can pack up and take to the beach or on a picnic or just set out as an appetizer for everyone to graze on. So finding another artichoke dip recipe, one that could be served cold or at room temperature as well as being picnic, beach, and/or cocktail party worthy, was like finding the perfect white antique platter to add to a collection. So for now, my collection of artichoke dip recipes has been increased by one. I would call this incremental progress, forward momentum, and moving in the right direction.


This new recipe actually came out of the book More from Macrina: New Favorites from Seattle's Popular Neighborhood Bakery written by Leslie Mackie. It was a lifetime ago that I was in Seattle, but should I ever get back there someday, this is one bakery that will be on my must experience list. There isn't a recipe in this book that I would not want to try and the photos of the food, well they are beautiful enough to either want you to make the recipe or to get on a plane headed to Seattle.

The second confession would be that for some reason I have gotten on a feta kick. Maybe eating a great Greek salad at, of all places, the only pizza restaurant in town, that was responsible my craving for this cheese. First, it was the Tomato Crostini with Whipped Feta recipe and now it's the Roasted Artichoke Dip with Feta and Oregano. You must be wondering, is it the artichoke or feta recipe repertoire that is increasing? Well I suppose the answer would be yes and yes. Hearing the word yes multiple times consecutively (yes, yes, yes) brings a smile to face as it makes me recall a really great memory.


A can of artichoke hearts (in water, not oil) is mixed with two tablespoons of extra-virgin olive oil and some salt and pepper in a medium sized bowl.


Once mixed, the artichokes are spread on a parchment paper lined baking pan and placed in a 350 degree oven and roasted for about 25 to 30 minutes or until golden brown on the edges. Although my oven has been calibrated, I have been going to the longer baking/roasting times lately. Would suggest you check your artichokes after 20 minutes, just in case. When the artichokes are finished roasting, you will let them cool for at least 20 minutes.


What is not to love about cream cheese and feta cheese in the same recipe?  Both of the cheeses should be room temperature before placing them in a food processor fitted with a steel blade. After you combine the cheeses, you will slowly add 1/4 cup of extra virgin olive oil and process until smooth.


This recipe calls for the use of chopped fresh oregano. I love being able to walk out my back door and cut fresh herbs. The oregano in the herb garden came back beautifully this year, even though we had quite a wicked winter here out east (the winter I am now referring to as the "Little House on the Prairie" experience). You will add 1 Tablespoon and 1 teaspoon of chopped fresh oregano to the cheese mixture and process for about 30 seconds.


The cooled roasted artichokes are then added. Because I wanted the dip to be on the smoother side, I blended them in the food processor past the 'slightly chunky' stage. I added just a little more salt and pepper to taste before removing from the food processor and transferring to a bowl. Whether you choose the smoother or chunkier version, you will have a most amazingly delicious dip. And if you are like me and have a limited number of artichoke recipes, your friends and family will be very happy you have added to your collection.


The dip can be with bagel chips, crostini, fresh vegetables (carrots sliced on the diagonal would be perfect) or warm bread. If you make it early in the day, set it out for at least an hour as you want it to be spreadable. The recipe says it keeps well in the refrigerator for up to five days, but depending on the size of your gathering, it might not last the night.

Recipe
Roasted Artichoke Dip with Feta and Oregano (from the cookbook More from Macrina by Leslie Mackie)

Ingredients
1 (14 ounce) can of artichoke hearts in water, (if whole, cut in quarters and drained)
2 Tablespoons of extra-virgin olive oil
Kosher salt and freshly ground pepper
8 ounces of cream cheese, at room temperature
6 ounces or 1 1/3 cups crumbled feta cheese, at room temperature
1/4 cup extra-virgin olive oil
1 Tablespoon plus 1 teaspoon chopped fresh oregano

Directions
1. Preheat oven to 350 degrees. Line a small baking sheet with parchment paper and set aside.
2. Toss the drained artichokes with the 2 Tablespoons of olive oil. Sprinkle with salt and pepper to taste.
3. Place the artichoke mixture on the prepared baking sheet and roast for 25 to 30 minutes (or until the artichokes are golden brown on the edges).  Remove from oven and let cool for at least 20 minutes.
4. Place cream cheese and feta cheese in a food processor fitted with a steel blade. Process until combined.
5. With the food processor running, slowing add the 1/4 cup extra virgin olive oil and process until mixture is very smooth.
6. Add in chopped oregano and pulse for approximately 30 seconds.
7. Add in cooled roasted artichokes and incorporate until smooth or slightly chunky. Add more salt and pepper to taste.
8. Serve or cover and chill in refrigerator. If refrigerated, allow to sit for at least one hour so that it is spreadable.
9. Serve with the breads, crackers or vegetables of your choice.


At some point in my life I became a collector. My collections range from dishes to glassware to cookbooks to art to antique cookie cutters to kitchen tools, okay I will stop there, as the collection list is shamefully long. In other words, this would mean that it would be fair to say that I have more than my share of collections. And so two weeks ago when I bought a medium-sized Cuisinart food processor, my collection of food processors grew from two to three. However, in using the concept from the "Goldilocks and the Three Bears" childhood fairy tale, I have discovered that the medium-sized one (versus the baby one) is the one that is 'just right'. Yes I know, this is at least one too many food processors for anyone to have, but didn't we all learn way back in science class in middle and high school the importance of hypothesis testing?  I can hear some of you (or at least one of you) saying 'shesh' (a word that brings a frown and not a smile to my face) as I share my rationalization of this recent purchase.

In two weeks, my best childhood friend is coming out east to spend a few days with me. Last year when she came for a visit, we got up one morning at 5 am to drive two hours to get on the ferry in Hyannis and then headed to Nantucket. This year when she comes, one morning we will get up at 5 am and drive more than three hours to Brimfield as it will be antiques week there. Instead of riding bikes (which was an incredibly hilarious adventure, although if my friend told you her version of the story the word hilarious would not be used), we will be walking  (endlessly) through the fields in search of a treasure. Like Nantucket's beauty is beyond breathtaking, the fields of Brimfield can also make one's heart race, but for completely different reasons. And I anticipate that there will be experiences on this trip that will be added to the collection of memories of our adventures together (which go all the way back to when we were in junior high). What has made this friendship so great and so enduring is that we have continued to create memories with one another. And isn't the creation of memories one of the things that strengthens connections between two people? The simple answer to that question would be 'yes, yes, yes'.

Wednesday, June 26, 2013

Chocolate Whoppers

When you hear the phrase 'death by chocolate' are you someone who becomes giddy at the prospect of learning of a chocolate concoction that just might come close to the 'too much' end of the chocolate dessert eating continuum?  If you are on this giddy end of this continuum, I think I have just the cookie for you. And for those of you who don't often venture into the intense chocolate end of the continuum, maybe you would consider giving yourself permission to go there, just this once. Just to feel the experience of what this end of the chocolate continuum tastes like.


The first Maida Haetter cookbook I purchased was the "Book of Great American Desserts". It published way back in 1985 (frightening to think I have been buying cookbooks for almost 30 years). I had read about her in one of my cooking magazine so, of course, I had to get her book. Although everyone was singing her culinary praises, the cookbook cover (a photographic array of beautifully made desserts) was the visual nudge I needed to buy it (and to this day I still buy some books based on their covers). But once I opened the book, there were no photos, only pencil drawings. Imagine a cookbook without photos! But then again, cookbooks thirty years ago didn't contain the beautiful photos they do today (how spoiled we/I have become).


So without photos next to each recipe, it was a cookbook where you had to use your imagination to figure out what the dessert would look like or you had to, in the spirit of 'where's Waldo', search to see if what you wanted to make was on the cover.  I honestly can't remember if her recipe for Chocolate Whoppers was on the cover, but it was after looking at the list of ingredients and reading her description, I could almost taste this cookie. What would not be compelling about a cookie rich with chocolate, loaded with nuts, and containing very little flour. It didn't take me long to learn that Maida Haetter was, and still is, a gifted creator and writer of recipes.

So what exactly is a 'whopper'?  The best description for this insanely delicious confection is that it is a cross between a cookie and a brownie, shiny on the outside yet moist and nutty on the inside, incredibly chocolately, and definitely worthy of fitting into the 'death by chocolate' category.


Not all chocolate used in a recipe yields the same results.  I promise you will never be disappointed when using a better quality chocolate for this cookie recipe or for any baked good recipe. Although I will have to say, the readily accessible Baker's chocolate (both the unsweetened and semi-sweet) works well with this cookie recipe. I never seem to have success with melting chocolate in the microwave so I always melt my chocolate on the stove in a glass bowl over a pan of steaming water. While it might take a little longer at least I feel in control of the outcome (if you detect subtle issues of control in my personality, you would be perceptive).

I didn't believe that lightly toasting nuts made a difference as it just seemed like one more step to take. So one day just for the heck of it, I decided to just do a little taste test comparing a raw nut with a lightly toasted nut.  The difference was more than subtle for walnuts, pecans and macadamias.  From that point on, if a recipe called for lightly toasting the nuts before combining with the rest of the ingredients, I found that the additional step and time was well worth the effort. This recipe calls for 2 cups of nuts. You can use all walnuts, all pecans or a combination of both. I went with the all walnuts this time. Because I had a bag of chopped nuts, I toasted them in a 350 degree oven for about 7 minutes and then let them cool.


Over the years I have tweaked this recipe, slightly increasing both the flour and baking powder and reducing the oven temperature (down from 350 to 325 degrees). The flour is first sifted and then measured. Once measured, the flour, baking powder and Kosher salt are sifted again and set aside.


In the bowl of a standing mixer with a whisk attachment, the room temperature (large) eggs, 2 teaspoons of vanilla extract, 2 teaspoons of instant espresso powder and 3/4 cup of sugar are all added. At high speed these ingredients are mixed until well blended (approximately 1 to 2 minutes).


The slightly cooled melted chocolate is then added to the batter. Once mixed in, the dry ingredients are added. At this point, I generally remove the mixing bowl and stir in the flour with a whisk until blended. Too much blending is not necessarily a good thing here. 


Using a spatula, the 2 cups of toasted nuts and 1 cup of semi-sweet chocolate chips are folded in.


Whoever invented the ice cream scoop could not have known how versatile this invention would become. For me it's a must have when making cookies and even cupcakes. I used a 2 1/4 inch ice cream scoop (equivalent to somewhere between a quarter and a third of a cup of cookie dough) to measure out the cookies. If using this sized ice cream scoop, you should be able to place 6 cookies per sheet (spaced about 2 inches apart). 


The cookies are baked at 325 degrees for 12-14 minutes. (If you use a smaller ice cream scoop, your baking time will be reduced to 10-12 minutes.) The cookies will be shiny, slightly cracked on the outside, yet still moist on the inside. Be careful not to over bake them.  The baked cookies should be transferred from the baking sheet to a cooling rack.


This is one rich, decadent cookie, where just one can satisfy your need for, craving of, or obsession with chocolate.  It is substantial in terms of its taste and in its size (unless of course, you make them a little smaller and then two will be just enough to satisfy your craving for chocolate.)  Served with a tall glass of milk, I promise your concept of milk and cookies will never be the same.

Recipe
Chocolate Whoppers (inspired by Maida Haetter's Chocolate Whoppers recipe)
Makes about 15-16 cookies 

Ingredients
6 ounces of semisweet chocolate (coarsely chopped) (Recommend Scharffenberger Semi-sweet chocolate, but if not available, use Baker's)
2 ounces of unsweetened chocolate (coarsely chopped) (Recommend using Baker's)
6 Tablespoons of unsalted butter
1/3 cups (sifted before measuring) all-purpose flour
1 teaspoon baking powder
1/2 teaspoon Kosher salt
2 teaspoons instant espresso powder 
2 large eggs, room temperature
3/4 cup (150g) sugar
2 teaspoons vanilla extract
6 ounces semi-sweet chocolate chips (equivalent to 1 cup) (I used Ghiradelli chocolate chips)
2 cups toasted and coarsely chopped nuts (walnuts or a combination of pecans and walnuts)

Directions
1. Preheat oven to 325 degrees (F). Line several baking sheets with parchment paper.
2. Place the coarsely chopped semi-sweet and unsweetened chocolate and butter into a bowl placed on top of simmering water until melted. Remove from heat and let cool slightly.
3. Sift the dry ingredients (pre-sifted flour, salt and baking powder) and set aside.
4. Beat eggs, espresso, vanilla and sugar at high speed until light and fluffy (approximately 1 to 2 minutes).
5. Add the melted chocolate and whisk slowly to blend.
6. Add the dry ingredients until incorporated.  Be careful to not over mix.
7. Stir in chocolate chips and toasted nuts.
8. Using a 1/3 cup ice cream scoop, measure dough and drop onto prepared baking sheet (about 5 to 6 cookies per baking sheet set about 2 inches apart)
9. Place baking sheet in upper and middle racks of the oven and bake for approximately 12 to 14 minutes or until the top of the cookies are dry and shiny. 
10. Remove cookies and place on a cooling rack.


I recently discovered the book Daring Greatly by Brene Brown. Reading it has led me to engage in a great deal of reflecting about myself and the relationships (both the functional and dysfunctional ones) in my life in the last few weeks. Recently I shared with a friend I wished I had read this book ten years ago (only it would not have been available) as it contains some valuable insights and should I dare say much food for thought? I am of the belief that books (like people) come into your life for a reason and it is possible I would not have appreciated this book (had it been available) years ago as much as I am appreciating it now. The themes of resiliency, vulnerability, trust, perfectionism, scarcity and 'good enough' are some that spoke to me (loudest). Beyond these themes, the book also reaffirmed for me the importance the role communication has in the nurturing relationships/friendships. Ongoing, open, and honest communication almost always creates the opportunity for two people to be fully present, fully engaged with one another while simultaneously aiding in adding the metaphorical marbles to the jar.

On some level, I think this book is giving me both the voice and strength I need to begin to make some choices, not only in what I value in (and what I need to change about) myself, but in understanding what it really is that I value in (and want from) others.

There is quote in Brene Brown's book, that for me, captures the definition of connection perfectly. She defines connection 'as the energy that exists between people when they feel seen, heard, and valued; when they can give and receive without judgment; and when they derive sustenance and strength from the relationship". When people come into your life and you feel this connection, it is beyond energizing, it is life changing, life enhancing.  And if they disengage, well this too is life changing. So of all of the takeaways from this book (and there were many of them), was the reminder to not let anyone, including myself, ever make you feel not 'good enough'.