Tuesday, October 2, 2018

Homemade Applesauce


Raise your hand if you are someone who formed unwaivering opinions about certain foods first experienced in our youth? Now raise you hand if your adult tastebuds doesn't want to accept your childhood ones could have possibly gotten it wrong. Consider yourself an anomaly if you didn't raise your hand. Because there are many of us who even when cajoled into giving that 'sorry I don't like that food' another try we silently hold steadfast, emphatically protest, or begrudgingly take a teeny-tiny taste while simultaneously making a face. More often than not those early opinions were based on canned/jarred, not well prepared, imitation, or inexpensive varieties of certain foods. For me, the list of those 'thanks but no thanks' foods were asparagus, salmon, and applesauce. Today, I love all three of these. When my taste buds experienced the 'fresh' versions of each of them, so did my opinions. This reversal of fortune was akin to tasting something for the first time. 


Since applesauce first made it's appearance in the mid-1700s, sauce prepared with apples dates back to medieval times in Europe. According to the Oxford English dictionary, credit for the first use of the word applesauce in print is given to Eliza Smith's Compleat Housewife, 9th edition, in 1769. Going back to the 1700s was the recommendation to serve 'some good applesauce' alongside roast pork. More than three centuries later, applesauce and pork continue to be thought of as a traditional pairing.

Many of us grew up on jarred applesauce. And I don't mean jars of lovingly made homemade applesauce. I mean the off-the-shelf ones found at the grocery store. It's not bad applesauce, but it's not great. 


After stealing a taste of the applesauce off the plate of the person who shall remain nameless's pork chop lunch, I had a sudden urge to make some. The only problem was I didn't have a favorite applesauce recipe. In other words, I needed to find or create one. So I started going through some of my cookbooks. My theory of finding some in those compilation of recipes from home cooks cookbooks proved to be wrong. After going through another 30 or so cookbooks, I decided to search for one on the web. Within mili-seconds a plethora of homemade applesauce recipes appeared. So I started to read through them. Immediately I saw some consistent and inconsistent themes running through them: (1) The chunky or smooth texture was a personal preference.(2) Cooking options varied. It could be made on the stovetop, in a slow cooker, in an instant pot, and even in the oven. (3) Brown sugar was the most common sweetener used, although honey or maple syrup were top contenders. (4) Adding liquid to the cooking apples ranged from a couple of tablespoons to 2 cups. Apple cider was recommended more often than either apple juice or water. (5) Freshly squeezed lemon juice was used more often than not in the recipes reviewed. (6) Cinnamon was the one spice used consistently. Nutmeg, cloves, and allspice less frequently. 


The thing making my head spin were the recommended choices or mix of tart and sweet apples needed to create a richly flavored applesauce. Yet, in spite of the applesauce decisions needing to be made, I kept thinking was 'given the chance between eating something not too bad or great, which one would I want?'. One of the many no-brainer questions I often ask myself.

I stopped looking at applesauce recipes when the number of apple varieties and combinations reached a dozen. Twelve was the arbitrarily chosen number for the day. Some of the apple options included: Honey Crisp only; Granny Smith only; Granny Smith and Gala;  Golden Delicious and Gala; Granny Smith and Golden Delicious; Honey Crisp and McIntosh; McIntosh and Gala; McIntosh and Golden Delicious; Gala, Honey Crisp and Golden Delicious; and, lastly Honey Crisp and Gala. Clearly, I was going to have to decide for myself which apples to use.


My choice: Honey Crisp and Gala Apples. Three pounds of each of them. Apple cider, freshly squeezed lemon juice, light brown sugar, cinnamon, nutmeg, and ground cloves rounded out the list of ingredients. Note: Instead of Gala Apples could also use Cortland apples.


Some applesauce recipes recommended keeping the skin on for added flavor. I opted to peel the apples as I didn't want one having a 'pinkish' color to it. 


To cut into wedges or in slices, that too had to be decided. Wedges won. Each peeled and cored apple was cut into eight (8) wedges.


I didn't want to wait four or six hours for the apples to cook down in a slow cooker, so I went with the stove top cooking method using a large, cast iron Dutch oven. After the apple cider and melted sugar come to a boil, the heat was reduced to medium-low. Stirring the apples frequently so they cooked evenly, the apples were knife tender after 35 minutes.


After letting the cooked apples cool for approximately 10 minutes, they were transferred in batches (four batches to be exact) to the food processor. When pureeing the apples, transfer only the apples to the food processor. So what happens to all of the remaining flavorful liquid? It's cooked over medium-high heat until thickened and reduced by almost half. This extra step helps not only to further intensify the applesauce's flavor but when it's mixed into the pureed apples it ensures your applesauce has a thick (versus) runny texture. Note: If you use an immersion blender to puree the apples drain the liquid into a medium sized saucepan.

We like our applesauce a little on the chunkier side. 


Homemade applesauce isn't just a side dish served cold or slightly warmed with pork. It can be a dessert when warmed and served over vanilla ice cream; added into a bowl of cooked oatmeal for an even more satisfying meal; served with potato pancakes, waffles, or pancakes; used to make muffins or cakes; or simply eaten out of a bowl. In other words, applesauce is really one the most versatile things you can make!

This Homemade Applesauce was highly flavorful. Warmed by savory spices it was both tart and sweet. After pairing the Honey Crisp and Gala apples together I am slightly reluctant to try other apple pairings. Maybe I will, maybe I won't, but this applesauce was seriously amazing! With apple season now in full swing, you absolutely have to make it. Especially for any of your friends or family who don't hold applesauce in high regard. This homemade applesauce has the power to change long held 'not so favorable' perceptions. It is really that incredibly delicious. 

Recipe
Homemade Applesauce (inspired by multiple sources)
Makes about 6-7 cups of applesauce
Serves 8-12
Updated November 2021

Ingredients
6 pounds of apples (3 pounds Honey Crisp, 3 pounds Gala or Cortland), peeled, cored, and cut into 8 wedges each (I often add one Granny Smith apple in for added tartness)
1 1/2 teaspoons cinnamon
1/2 teaspoon nutmeg
generous pinch of cloves
1 cup fresh apple cider
2 Tablespoons freshly squeezed lemon juice 
1/2 cup (110g) firmly packed light brown sugar (Note: I sometimes use 1/4 cup dark brown sugar and 1/4 cup light brown sugar)
A generous pinch of Kosher salt

Directions
1. Put apples, cinnamon, nutmeg, cloves, apple cider, lemon juice, salt, and brown sugar in a large Dutch oven, preferably a cast iron one.
2. Bring mixture to a boil, then reduce heat to medium-low, place cover on pot and continue cooking, stirring frequently, for 45-60 minutes or until the apples are knife tender. 
3. Remove pan from heat and allow to cool for 10 minutes.
4. Using a large bowl food processor, puree the apples only (leaving the liquid in the pan) in batches to desired consistency. Transfer applesauce to a large bowl. Note: I processed the apples in four batches.
5. Return pan with applesauce liquid to stove top. On medium-high heat, cook mixture until it is thickened and reduced (approximately 3-8 minutes). Pour and/or scrape the reduced liquid to the pureed apples. Stir to blend. 
6. Store the applesauce in a tightly covered bowl or transfer to mason jars with lids. 
7. Store in the refrigerator. Applesauce will last for up to 2-3 weeks stored a tightly sealed containers in the refrigerator.

Notes: (1) Depending on their size, three pounds of Honey Crisp apples might be 4-5 apples and three pounds of Gala (or Cortland) apples might also be 4-5 apples. (2) Half of a large lemon should yield two tablespoons of freshly squeezed lemon juice. (3) I used fresh apple cider when making this applesauce. I am reluctant to recommend the use of water as a substitute. The cider added a layer of flavor water can not. (4) If you are looking for pork recipes to pair with this Homemade Applesauce, you might want to try these: Porchetta-Style Pork Roast, Slow Roasted Pork Roast, or Herbed Pork Sliders with Bacon Onion Jam.

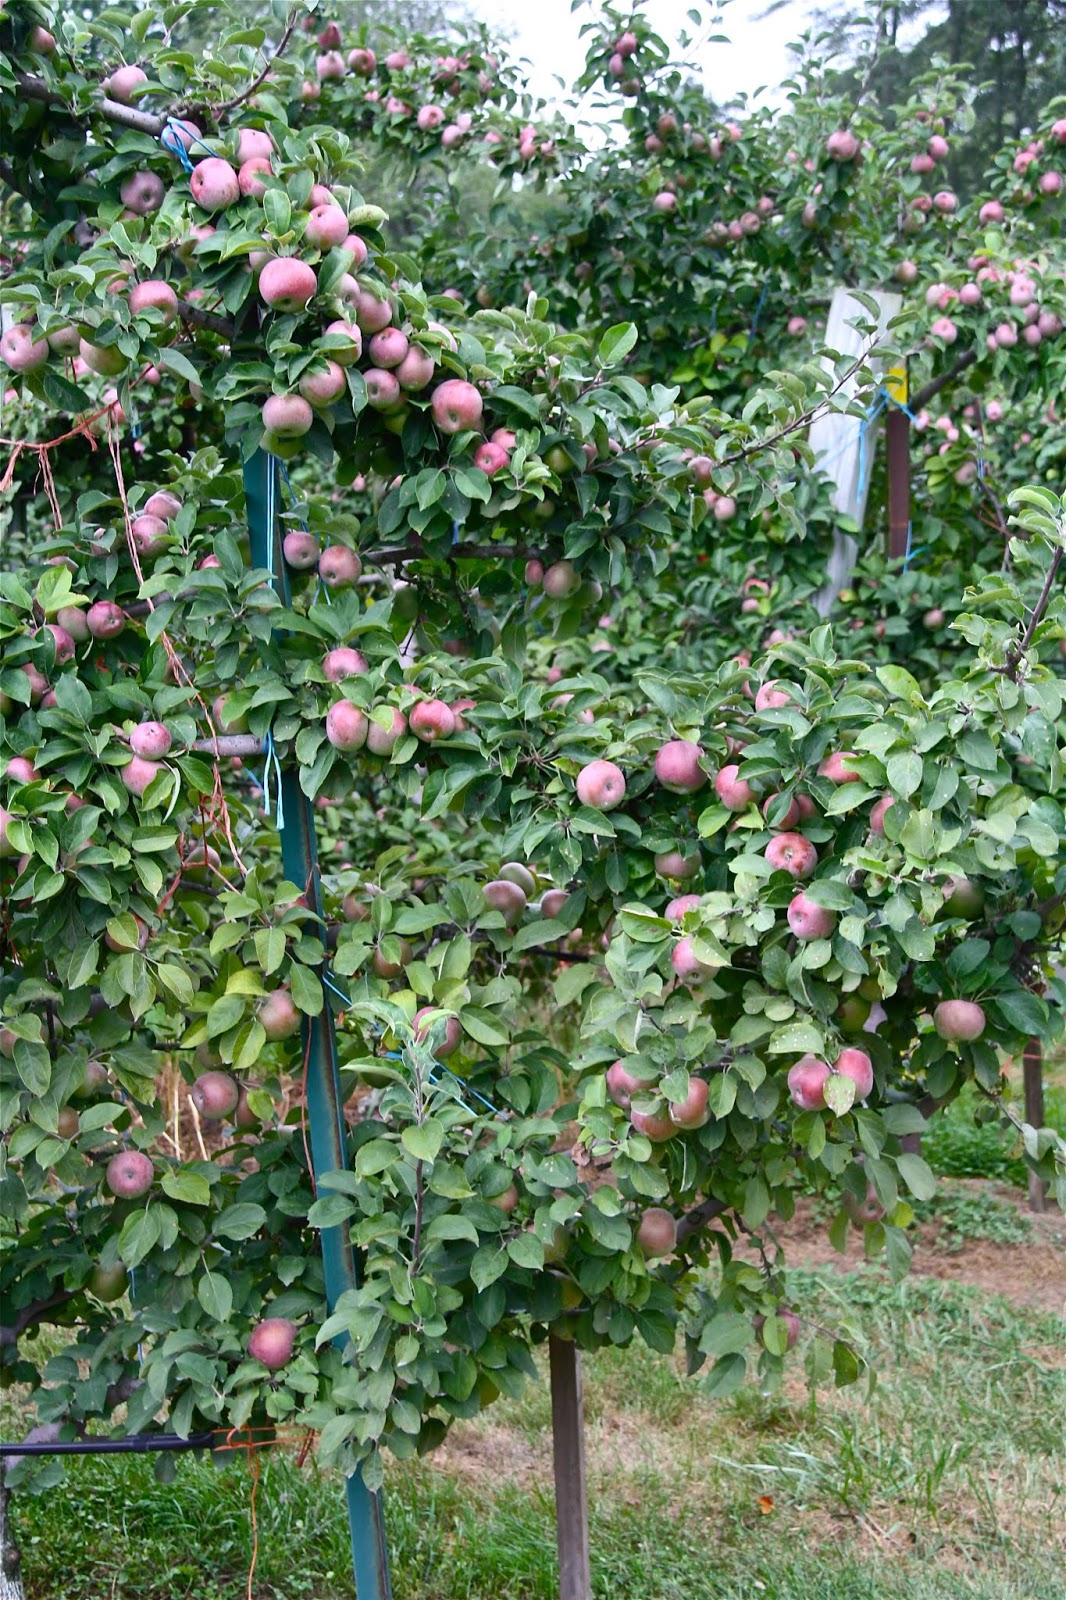
Apple Orchard, Little Compton, RI (September 2018)


Monday, October 1, 2018

Pumpkin Spice Bars with Cream Cheese Icing


For a multitude of reasons September is one of my favorite months of the year. And it's not just because it's my birthday month. Although that alone would make it reason enough, especially considering how great this birthday was. It wasn't evan one of those significant birthdays, you know the ones. The ones where you enter your teenage years (that was a lifetime ago), the ones entitling you to privileges (driving, voting, drinking), those marking the start of a new decade, or the ones putting me in a new running age group. No, this was a birthday without any new entitlements or ending in a zero. Yet, in spite of this, a group of some valued women in my life, affectionately known as the posse, made this birthday memorable. In addition to the 'feeding my Lululemon addiction' gift card, they bought me a gift causing me to weep in public. There have been only a handful of times in my life when I was brought to tears over receiving a gift I considered to be beyond generous, thoughtful, or a complete surprise. And this gift was all of those and more. Drum roll please.....I am now the happy, proud, over the moon owner of the domain name saltedsugaredspiced.com!!!! While the address saltedsugaredspiced.blogspot.com still exists, the blog is now a .com! Even now as I am writing this, I can still feel my emotions bubbling up to the surface and a compelling urge to do backflips. At the moment you can still find the blog either address. But if you typed in saltedsugaredspiced.com (I can't stop saying it) in your browser this labor of love, ever evolving blog would come up! So cool.


Inhaling all things pumpkin spice officially starts here as September ends and October begins. There are no shortage of pumpkin flavored desserts on the blog. There's the Maple Glazed Mini-Pumpkin Doughnuts, the Pumpkin Bread with Maple Glaze and Pepitas, the Pumpkin Loaf aka a Close Starbuck's Version, the Brown Butter Pumpkin Spice Cake, the Bruleed Pumpkin Pie with Caramel Swirl, the Pumpkin Pie, the Spiced Pumpkin Layer Cake with Cream Cheese Frosting, and the Pumpkin Squares. But when I saw Rebecca Firth's recipe for Pumpkin Spice Bars with Toasted Meringue in her cookbook "The Cookie Book" I knew I had to make them even though my ecipe for the Pumpkin Squares is pretty gosh darn great. We can blame or give credit to the posse for encouraging me to make them with a Cream Cheese Icing instead of the Toasted Meringue.


Described as 'light and spiced', I couldn't help but wonder about the taste and texture of these Pumpkin Spice Bars. 


After tasting them, I think only a throw down would determine whether these bars or these Pumpkin Squares is best. Personally, I am not sure I could choose.


The spiciness in these Pumpkin Spice Bars with Cream Cheese Icing comes from five, yes, five different spices. Cinnamon, allspice, ground ginger, cloves, and nutmeg, all in varying amounts, combine to create balanced flavorfulness in the bars. Unlike the recently posted Ginger Cream Squares, these are not heavily spiced. In fact, I would describe them as being perfectly spiced.  The spices alone had my interest, however, when I saw the recipe called only for one cup pumpkin puree, I worried it wouldn't be pumpkin-y enough. Seems I worried needlessly.


In addition to the spices and pumpkin puree, there are no unusual or hard to find ingredients used in these Pumpkin Spice Bars. More than likely you have all of them in your refrigerator or cupboard. Note: The recipe calls for three eggs. One of the eggs I used had a double yolk!

Two bowls and two whisks are all you need to create the batter for the pumpkin spice bars. To quote the Barefoot Contessa 'how easy is that?'. 


Using a 7" x 12" or 8" x 11" baking pan, the bars bake in a pre-heated 375 degree (F) oven for approximately 30 minutes (original recipe had a recommended 35-40 minute range). Using a 7" x 12" baking pan, these bars baked to height of almost 1.5 inches. Which means if you use a slightly larger pan, your bars will be shorter in height (aka thinner) and your baking time might be altered. 


Allow your Pumpkin Spice Bars to cool completely before topping them with the cream cheese icing. Simply slater the cream cheese icing and create swirls using an offset spatula or the back of a spoon or use a pastry bag or bags fitted with various tips to create your desired finishing touch. Note: The cream cheese icing recipe below yields about a cup more of icing than you need. Store unused icing in a covered container. It keeps well in the refrigerator. Or cut the recipe below in half if you like more pumpkin bar than icing.


Most of my friends and family like a generous amount of cream cheese icing on their baked goods. These Pumpkin Spice Bars with Cream Cheese Icing had a rather healthy bar to icing ratio!

If I were to do one thing differently the next time I make these bars (and there will be a next time) it would be to chill them for at least four hours before cutting them into squares or rectangles. I may even have to give the Toasted Meringue topping a try!


If you love all or some things pumpkin spiced, you will absolutely fall in love these Pumpkin Spice Bars with Cream Cheese Icing! They are light, moist, perfectly spiced, and borderline addictive. Does it get any better than that?

Let the pumpkin puree buying and pumpkin baking season begin!

Recipe
Pumpkin Spice Bars with Cream Cheese Icing (inspired by Rebecca Firth's Pumpkin Spice Bars with Toasted Meringue recipe from her cookbook "The Cookie Book: Decadent Bites for Every Occasion")

Ingredients
Pumpkin Spice Bars
12 Tablespoons (172 g) unsalted butter, melted and slightly cooled
1 cup pumpkin puree
1 cup (200 g) light brown sugar, firmly packed
1/2 cup (100 g) granulated sugar
1/2 cup water
3 large eggs, room temperature
2 teaspoons vanilla
1 3/4 cups (231 g) all-purpose flour
2 teaspoons (5 g) cinnamon
1 1/2 teaspoons (6 g) baking powder
1 teaspoon baking soda
1 teaspoon kosher or sea salt
1/2 teaspoon allspice
1/2 teaspoon nutmeg
1/4 teaspoon ground ginger
1/4 teaspoon cloves

Cream Cheese Icing
16 ounces cream cheese, room temperature
1 cup unsalted butter, room temperature (or combination of unsalted butter and margarine)
6 cups confectionary sugar, sifted
2 teaspoons vanilla
Generous pinch of sea salt

Directions
Pumpkin Spice Bars
1. Preheat oven to 375 degree (F). Line a 7" x 12" or 8" x 11"baking pan with parchment paper. Lightly butter bottom of the parchment paper. Set aside.
2. In a medium sized bowl, whisk together the flour, cinnamon, baking powder, baking soda, salt, allspice, nutmeg, ginger, and cloves. Set aside.
3. In a large bowl, whisk together the melted butter, pumpkin puree, brown sugar, granulated sugar, water, eggs, and vanilla until well combined.
4. Pour the flour mixture into the pumpkin mixture and stir until just combined. 
5. Spoon the batter into the prepared baking sheet. Smooth top with an offset spatula or back of a spoon.
6. Bake for 35-40 minutes on the center rack. Begin checking for doneness at 30 minutes (as this was my baking time). Let cool completely in the pan.

Cream Cheese Icing and Assembly
1. In the bowl of a standing mixer fitted with a paddle attachment, beat the butter and cream cheese until light and fluffy (approximately 3 minutes).
2. Mix in the vanilla and salt.
3. Blend in the sifted confectionary sugar, two cups at a time. Beat until icing is smooth, creamy, and fluffy. 
4. Remove cooled pumpkin squares from the pan and place on a large flat platter or cutting board. 
5. Spread cream cheese icing over the cooled pumpkin spice bars or use a pastry bag to pipe icing onto the bars.
6. Place iced Pumpkin Spice Bars in the refrigerator for approximately 3-4 hours before cutting into squares.
7. Swoon, serve and enjoy. Store bars lightly covered in the refrigerator.

Notes: (1) The gram measurement for the flour is based on 132 g per cup of flour. The gram measurement for both the brown sugar and granulated is based on 200 g per cup. (2) Use pumpkin puree, not pumpkin pie filling. (3) The Pumpkin Spice Bars are even more delicious when chilled. (4) I used Kerrygold Butter for the bars and the icing. 


Farm Stand in Westport, Massachusetts (September 2018)


Sunday, September 23, 2018

Ginger Cream Squares


There is either an overabundance of baking ingredients in my cupboards or there are empty or expired bottles and jars. If there was an apocalypse tomorrow I would be able to supply the remaining inhabitants of the world with cinnamon. Apparently every time I go shopping for a recipe using cinnamon, I throw in a jar in my shopping cart for good measure. Just in case it is one of those spices I hadn't used in awhile. Conversely there are other ingredients on my grocery list I decide not to buy because I am convinced I have them. Sometimes my memory serves me well and sometimes it doesn't. I would like to believe I am still operating with a relatively high degree of recall. Because in my world I don't think it's possible for anyone to keep a mental inventory of all of the food in their house. Particularly items not used on a regular or daily basis. When I discover I am out of a necessary ingredient, that one then goes on the second guess myself 'over buy' list. Thus explaining why I currently have an overstock of cinnamon. 


When I looked at the list of ingredients needed for these Ginger Cream Squares, I had a slight panic attack when I saw molasses was on it. My first thought, 'oh boy, I either have a half dozen jars or none.' My second thought was 'if I have a jar of unexpired molasses I was meant to make this gingery version of a spice cake recipe." Whether it was luck from the head-up penny the day before or not, there was a new unopened jar of molasses in the cupboard. Which meant on the first day of fall, there would not only be cake, but the aroma filling the house would be better than having a mulled spiced cider candle burning.

I came across the recipe for these Ginger Cream Squares in the fall baking issue of the Taste of Home magazine. One that called for a tablespoon each of cinnamon, ginger, and cloves. As much as I like the flavor of cloves, the idea of using one full tablespoon had be worried the flavors of the cinnamon and ginger would be overpowered. So I backed it down to one teaspoon (and I am not sorry I did). Instead of using a 10" x 15" pan (to create thinner bars), I used a 10" x 8" pan (to have squares). I used my go-to luscious cream cheese icing recipe as I always prefer to have a generous amount of icing slathered on confection calling for it. 

If you like a spiced cake, you will love these Ginger Cream Squares. They are moist, perfectly spiced and the flavor combination of the cool, creamy icing with the spicy, tender cake is deliriously delicious.


This cake portion of these Ginger Cream Squares comes together quickly and easily using a stand mixer fitted with a paddle attachment. Alternately it could be made in a large bowl using a hand held mixer. Based on the assembly directions listed below, there is one thing I need to warn about. After you add the slightly cooled coffee to the mixture, it will look a little curdled and very thin. Don't worry, it all comes together into a smooth, creamy, thick batter after you add the sifted dry ingredients. 


In a preheated 350 degree (F) oven, the cake bakes for 40-45 minutes or until it springs back lightly when pressed or a toothpick comes out clean when inserted into the center of the cake. Be careful not to over bake this cake as you want a moist finished cake. Waiting for the cake to cool is the hardest part of the recipe. To speed up the cooling process, you can put it in the refrigerator after it comes out of the oven for at least 45 minutes.


Make the icing while the cake is cooling. Using the recipe below, the amount of cream cheese icing gives the Ginger Cream Squares an almost perfect icing to cake ratio.

I cut the cake into squares, but feel free to cut it into bars or triangles. Sprinkling the cake with lightly toasted hazelnuts would give it another depth of flavor.

If there was ever a dessert to give autumn a warm welcome, it would be this one. Bring this cake to your office, serve it to your book club, or make it for a weekend gathering and watch it disappear. 


There is something crave worthy these deeply flavored Ginger Cream Squares. So just in case you overdose on all things pumpkin spice this season but still want to have your palate tingling with the flavors of spices, consider making this autumnal spice cake. Between the cake's intoxicating aroma and it's flavor, they are destined to become a beloved, requested favorite.

Recipe
Ginger Cream Squares (several adaptations to the Ginger-Cream Bars recipe in Taste of Home Fall Baking, Fall 2018)
Yield: 18 squares

Ingredients
Ginger Cake
1 cup unsalted butter, room temperature
1 cup (200 g) granulated sugar
2 cups (264 g) all-purpose flour
1 teaspoon kosher salt
2 teaspoons baking soda
1 Tablespoon cinnamon
1 Tablespoon ground ginger
1 teaspoon ground cloves
2 large eggs, room temperature
1/2 cup molasses
1 teaspoon of instant expresso and 1 cup boiling water (or 1 cup brewed coffee), slightly cooled

Icing
8 Tablespoons unsalted butter, room temperature
8 ounces cream cheese, room temperature
3/4 pound confectionary sugar, sifted
1 teaspoon vanilla
pinch of sea salt

Directions
Ginger Cake
1. Preheat oven to 350 degrees (F). Line a 13" x 8" or !2" x 9" baking pan with parchment paper. Lightly butter the paper. Set aside.
2. Sift together the flour, salt, baking soda, cinnamon, ginger and cloves. Set aside.
3. Mix the instant expresso with the boiling water. Set aside and allow to cool slightly. Note: Alternately pour a cup of coffee and set aside to cool slightly.
4. In the bowl of a standing mixer fitted with a paddle attachment, cream the butter and sugar until light and fluffy (approximately 3-4 minutes).
5. Add in eggs one at a time, beating well after each addition.
6. Blend in the molasses until well incorporated.
7. Mix in the expresso and/or coffee. Note: The mixture will look a little funky but not to worry it all comes together when you add in the dry ingredients.
8. Add the dry ingredients to the mixture. Beat until fully incorporated.
9. Bake 40-45 minutes or until the cake springs back when lightly touched or a toothpick comes out clean when inserted in the center.
10. Remove from oven. Allow to cool completely.

Icing and Assembly
1. In the bowl of a standing mixer fitted with a whisk attachment, the beat the butter and cream cheese until smooth and creamy.
2. Beat in vanilla.
3. Add sifted confectionary and beat until light and fluffy.
4. Spread evenly over the cooled ginger cake. Swirl to your hearts content.
5. Cut into squares and serve. Enjoy!
6. Store cake (covered) in the refrigerator.

Notes: (1) These Ginger Cream Squares are delicious room temperature and chilled! But I think I love them more chilled. (2) If you use a larger baking pan (e.g., 15"x 10") your Ginger-Cream Squares will become Ginger-Cream Bars. Baking time should be adjusted downward (approximately 20-25 minutes or until done). (3) I adjusted the amount of ground cloves from 1 Tablespoon to 1 teaspoon as I thought the flavor of the cloves would be overwhelming. (4) Optional: Sprinkle chopped toasted hazelnuts over the top.


Dairy Farm in Westport, Massachusetts (September 2018)


Thursday, September 20, 2018

Roasted Butternut Squash and Pear Soup


In spite of the risk of repeating myself for the umpteenth time, I have to say (again) I can hardly wait for the arrival of my favorite season. In just a couple of days the seasons will change and finally after what seemed like the most humid, hottest summer on record, autumn makes its' annual return appearance. From the changes in the landscape, to the shift in temperatures, to the seasonal fruits and vegetables, to my favorite holidays, I love everything about the fall season. 

Last week while I was on the east coast, I stayed in a cottage owned by one of my dear friends. She never fails to make me feel so welcomed. More importantly, I am spoiled by her thoughtfulness and kindness. Although my stay was a short three days, she filled the cottage with a bouquet of fresh flowers as well as some of my favorite foods. Farm fresh eggs, Portuguese rolls, and the sweetest cherry tomatoes freshly picked from her garden were waiting for me. In addition to putting a pre-birthday piece of Red Velvet cake (another favorite) in the refrigerator, she also brought over a bowl of silky smooth homemade Butternut Squash and Pear Soup. One spoonful of the soup and I never wanted to leave. I dreamt about the soup for days before sending her a text asking if she would share the recipe. In less than an hour I had the recipe in hand and I couldn't get to the grocery store quick enough to get the ingredients. Then life got in the way preventing me from the experiencing instant gratification. 


In the time between getting the ingredients and making this soup, I debated as to whether or not I should tinker with the recipe. I knew what the soup tasted like prepared in accordance with the recipe (unless Sheila was holding out on me), but I didn't know what it would taste like make with roasted butternut versus non-roasted butternut squash. Could deeply browned, slightly caramelized butternut squash turn an already incredibly delicious soup into one with deeper, more intense flavor? I really needed to know. And because fruits and vegetables don't come with small, medium or large sized labels on them, I listed all the recommended weight measurement ranges for them in the recipe below.


There are at least two methods of roasting squash. Roasting is a method designed specifically to bring out the best possible flavor. One is cutting the squash in half, drizzling with olive oil, lightly seasoning and roasting at a high temperature anywhere from 40-60 minutes. The other is cutting the peeled, seeded squash into one inch chunks, tossing in a couple of tablespoons of olive oil, lightly seasoning and roasting at a high temperature for 40-45 minutes. I decided to go with the roasting squash chunks as I felt it had the better chance of ramping up the squash's flavor.


The butternut squash roasts for 40-45 minutes on a large baking sheet in a pre-heated 425 degree (F) oven. Tossed in olive oil and seasoned with kosher salt, the squash is turned over at least twice during the baking process to ensure the chunks are browned on several sides. 


The most difficult part of the roasting process is restraining yourself from eating the butternut squash when it comes out of the oven. 


The soups deep flavor not only comes from the roasted butternut squash but the onions sautéed in butter until lightly golden and slightly translucent. Sautéing the onions brings out a kind of nuttiness as well as enhances their sweetness.

After the chunks of roasted squash and chunks of the pears are added to the sautéed onions, four and half cups of low-sodium chicken broth and a teaspoon of kosher salt are added to the pan. Bring the mixture to a quick boil over medium-high heat, then lower the heat to a simmer. Continue to cook until the pears are knife tender (approximately 10-15 minutes).


I used a large food processor rather than an immersion blender to puree the soup mixture. Why? Because I don't have an immersion blender. After processing the soup mixture in batches, the pureed soup was returned to the pan. You want to process the soup to the creamiest texture possible. To slightly thin out the thick, rich soup, I added the grated nutmeg, black pepper, and another 3/4 cup of the low-sodium chicken broth and reheated the soup to serving temperature. Depending on how thick or thin you like your soup, you might add less or slightly more broth. Note: Add more kosher salt to taste.


The drizzle of heavy cream on top of the soup is the only dairy in this Roasted Butternut Squash and Pear Soup. Sage leaves cooked briefly in butter until lightly crisp were this soup's optional finishing touch. 


So was this Roasted Butternut Squash and Pear Soup better than first bowl of (non-roasted) Butternut Squash and Pear Soup? It is almost impossible to compare the first bowl of made with love soup with my slightly changed version. 


This is the one of the creamiest, most velvety, deeply flavored Roasted Butternut Squash and Pear Soups you will ever have. It's the most decadent of comfort foods without being made with heavy cream (the drizzle on top doesn't count!). If it was possible to fall madly in love with a soup, this would be the one.

As hard as it may be to believe but the flavor of this soup was even better the second day! (Maybe that explains why Sheila's bowl of soup made me swoon!). With the weather turning colder soon (fingers-crossed), soup season arrives too! But I wouldn't wait until the temperatures drop to make this Roasted Butternut Squash and Pear Soup. If I were you, I would get to the store as soon as possible. 

Recipe
Roasted Butternut Squash and Pear Soup (slight adaptation to a recipe Sheila Brady shared with me)
Serves 6-8 as a main course, serves 8 as a first course
Updated January 2022

Ingredients
4 Tablespoons unsalted butter
2 small or 1 medium-large yellow onion (approximately 3/4 to 1 pound), diced
2 medium-sized or 1 large butternut squash (approximately 2 3/4 to 3 pounds), peeled, seeded and cut into 1" chunks (weigh after cutting into cubes)
2 Tablespoons olive oil
4 Bosc pears (approximately 1 3/4 to 2 pounds), peeled, seeded and cut into 1" chunks
4 1/2 cups plus up to 2+ additional cups low-sodium chicken broth
Generous pinch of freshly grated nutmeg (or nutmeg spice)
1 1/2 teaspoons Kosher salt, plus more for seasoning to taste
3/4 teaspoon white or black pepper
1/2 to 3/4 cup whipping cream
Optional: Sautéed fresh sage leaves

Directions
1. Preheat oven to 425 degrees (F). 
2. Place the cut butternut squash on a large baking sheet. Drizzle and toss with 2 Tablespoons of olive oil. Lightly season with kosher salt.
3. Roast butternut squash for 40-45 minutes, turning at least twice during the baking process.
4. In a large dutch oven or deep saucepan, melt 4 Tablespoons of butter. Add in diced onions. SautĂ© until softened, lightly golden, and semi-translucent. 
5. Add roasted butternut squash and cubed pears into the pan. Pour in 4 1/2 cups of the chicken broth. Bring to a quick boil over medium-high heat, then simmer for 10-15 minutes or until the pears are knife tender.
6. Season with 1 1/2 teaspoons kosher salt, 3/4 teaspoon black pepper, and generous pinch of freshly grated nutmeg. Stir until blended.
7. Working in batches, process the soup mixture in a large food processor until smooth. Return pureed mixture back it the pan. Add in the whipping cream and add up to 2+ cups of additional chicken broth. Add the broth in half cup increments until the soup reaches your desired consistency. Note: The soup will thicken as it cools or if it's refrigerated. To get back to your preferred consistency, add more chicken broth.
8. Reheat soup over low heat. Season to taste, if more is necessary.
9. Ladle soup into soup bowls. Drizzle with heavy cream and/or garnish with sautéed fresh sage leaves.
10. Store any leftover soup in the refrigerator. Will keep for up to 3-4 days. It's even better the second day.

Notes: (1) I used Bosc pears to make this soup. (2) To sauté the sage leaves, melt 2 Tablespoons of butter until foamy. Add in sage leaves, stirring for approximately 15-20 seconds. Using a slotted spoon transfer sage leaves to a paper towel until ready to use. (3) Instead of using a food processor, could use an immersion blender. (4) The only difference between the original recipe and this version was in the roasting of the butternut squash. If you go the route of the non-roasted version, you will simmer the chunks of squash and chunks of pears with the sautéed onions and chicken broth for 15-18 minutes (or until knife tender). All other ingredients remain and assembly directions remain the same.


Pears growing in the apple orchard in Little Compton, RI (September 2018)